The Stadium Game at the Air Force Academy – The Av’s vs The Kings

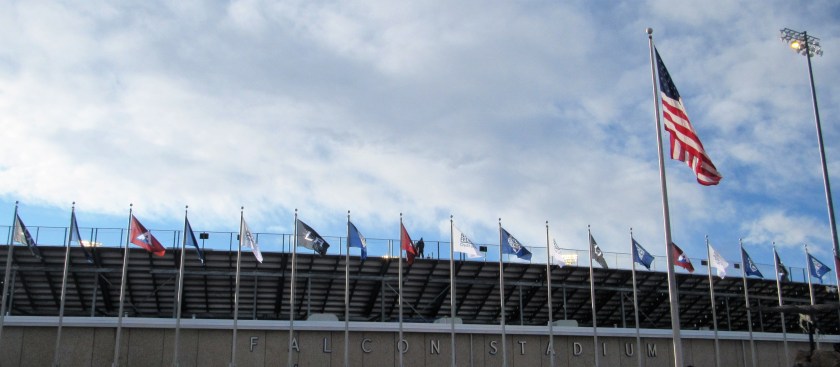
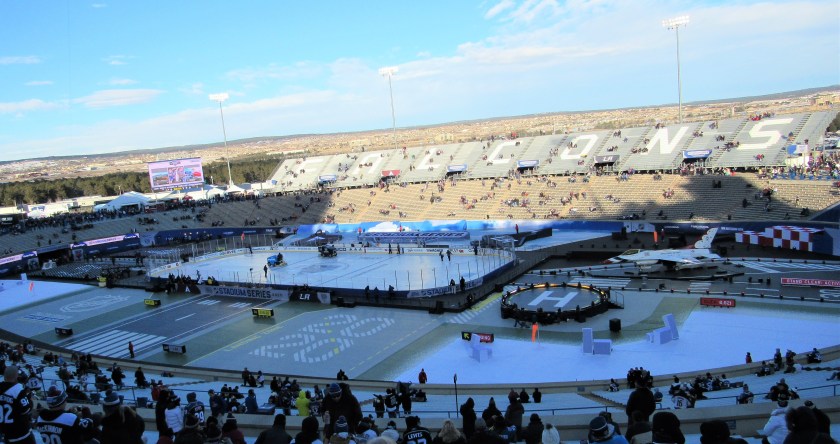
Hockey is BIG in our house.  Larry is a huge hockey fan, and he still plays too.  We go to a lot of Avalanche games.  We proudly support the burgundy and blue rainbow.  Normally we go to the games at the Pepsi Center, home of the Av’s, but this time, the Av’s were playing an outside game at the Air Force Academy, down in Colorado Springs.  We had never been there before.  It was a beautiful stadium.  It was also nice to support our Air Force and to see all the love they got and so deserve.

Colorado Springs is about 1 1/2  hours south of us. It is usually a nice pleasant drive.  There is a lot of construction on the freeway at the moment, so the drive down took us a little longer than it normally would, but that’s OK.  We didn’t mind.  It was still a pleasant drive.  We stopped for lunch at Red Robin first, then picked up our friends Brian and Peter so we all could carpool together.

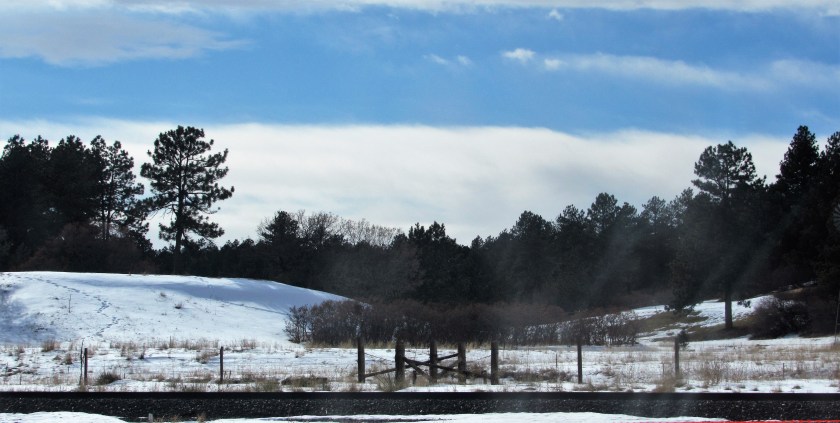
The drive down to the Springs.

IMG_0642

IMG_0643

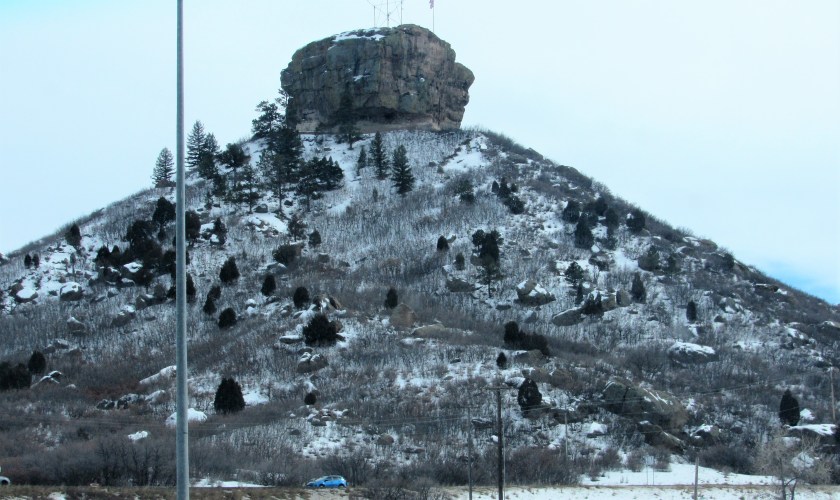
The Air Force Academy.  It was such a beautiful sight and a gorgeous location.

Image result for pictures of the air force academy

Image result for pictures of the air force academy

IMG_0649

IMG_0663

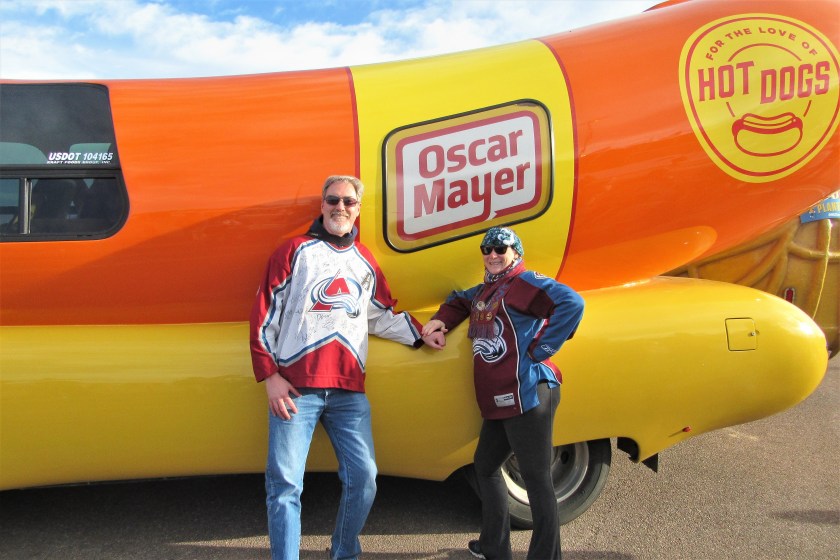
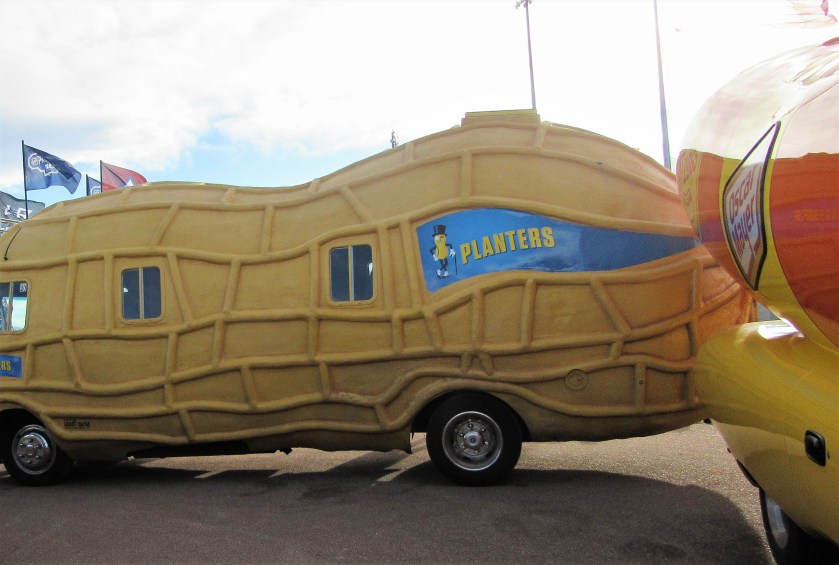
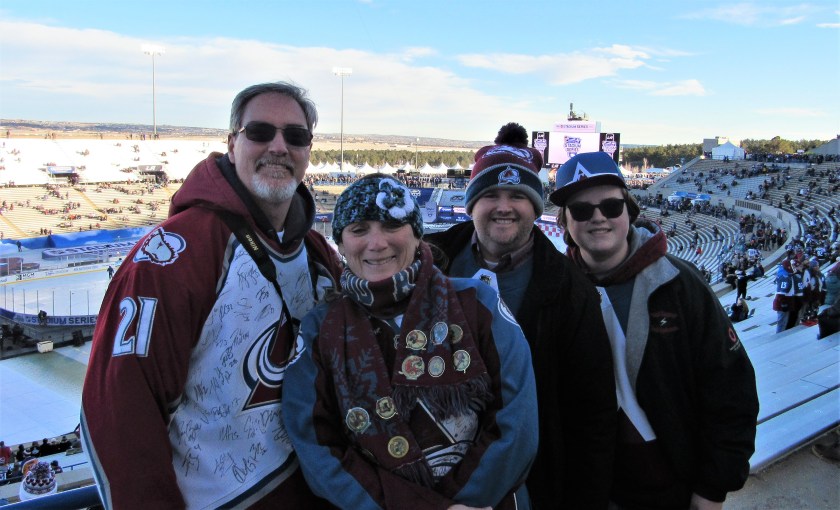
Before the game started, there were some fun fan appreciation things to see.  You can’t see all our signatures on our jerseys, but we each have about 50.  We are loyal Av’s fans.  The Oscar Meyer Weinermobile and the Planter’s Peanutmobile were both on hand so we had to pose with them.

IMG_0658

IMG_0652

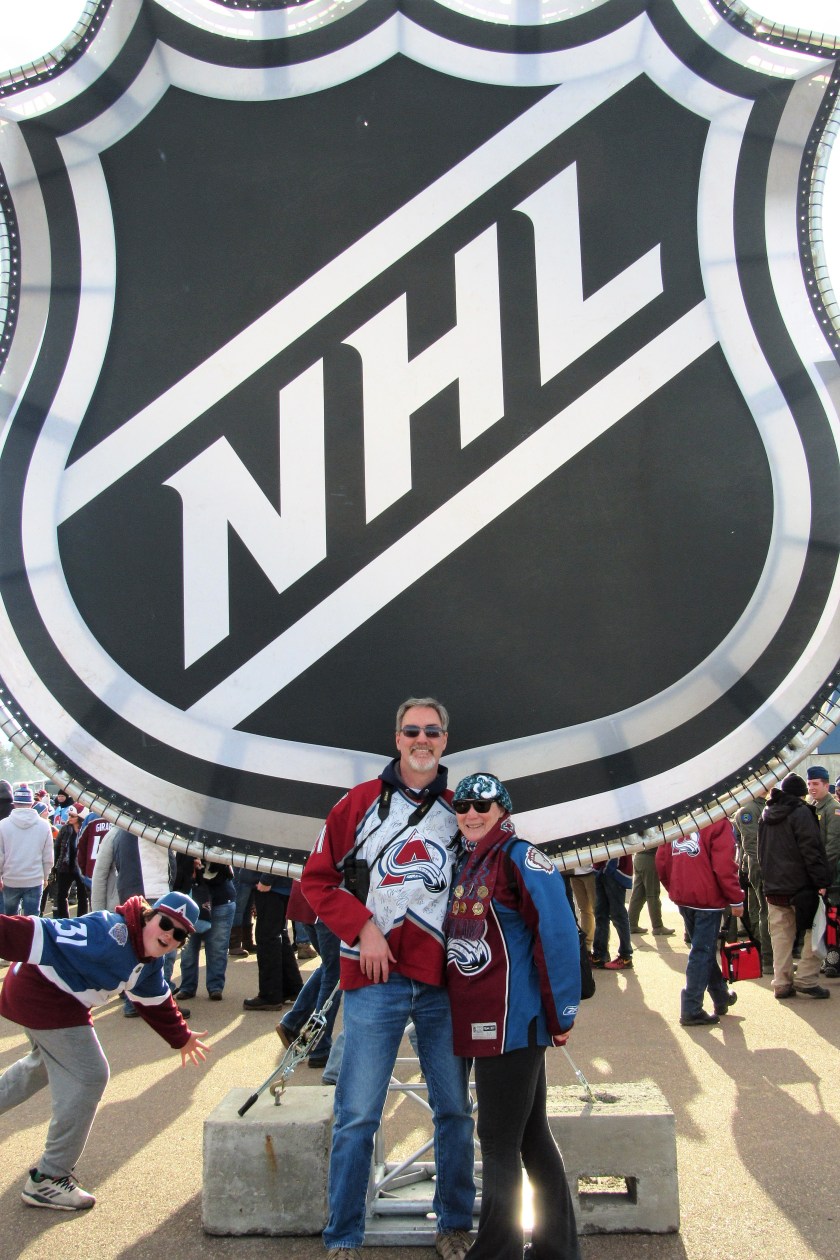
Peter photo bombing us.

IMG_0670

IMG_0673

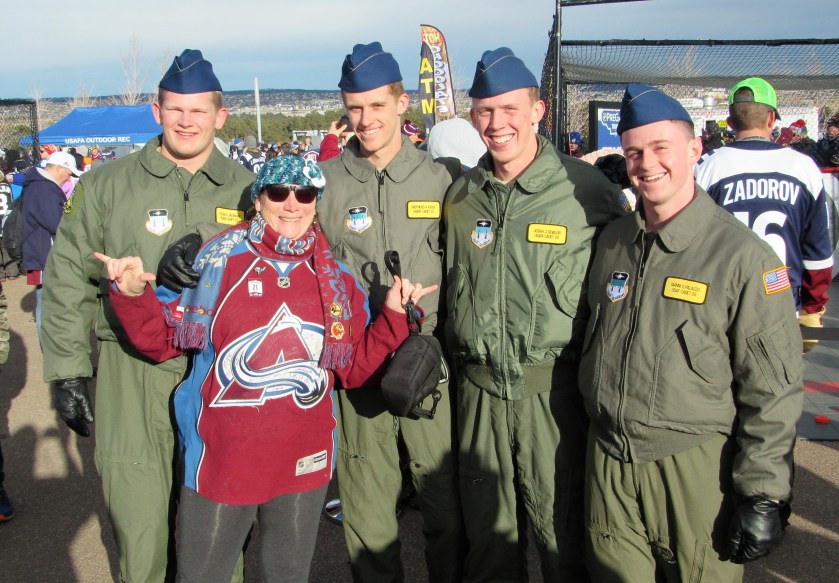
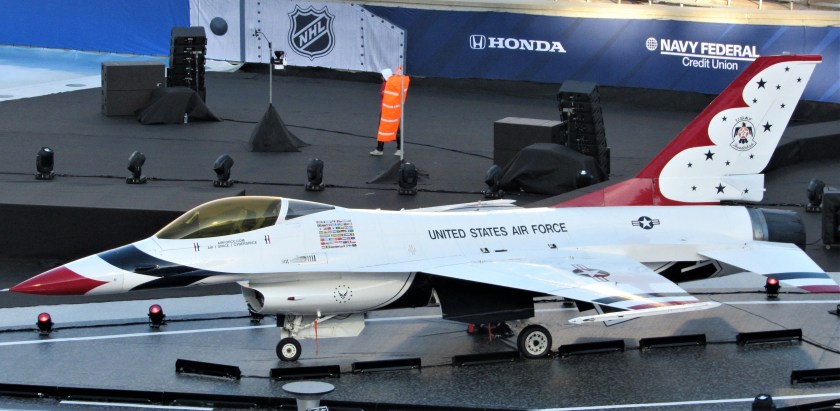
And the real stars of the game, our Fly Boys, our American heroes.

IMG_0659

IMG_0662

After all the fan appreciation activities, it was time to head down to the rink.

IMG_0706

IMG_0677

IMG_0678

As you can see, we were all bundled up.  It was pretty darn cold, and only got colder as the night fell.  We all had heavy jackets, gloves, hats, AND blankets and we were still cold.  My feet were blocks of ice..

IMG_0682

IMG_0700

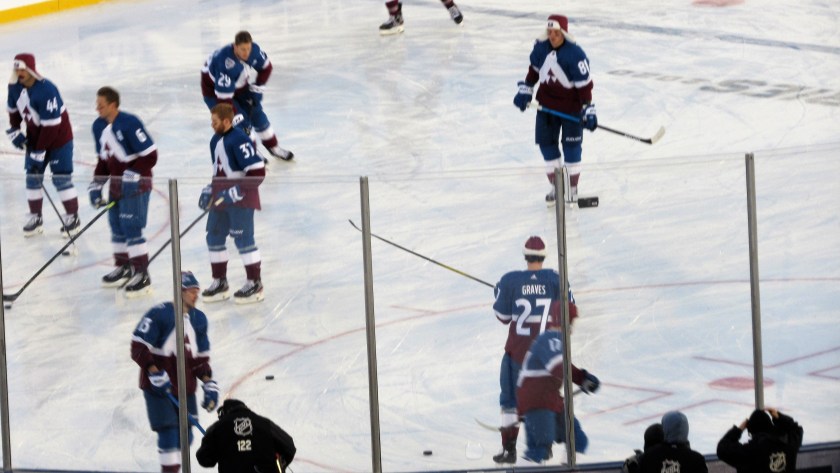
Let the game begin.  The good guys – The Colorado Avalanche

IMG_0702

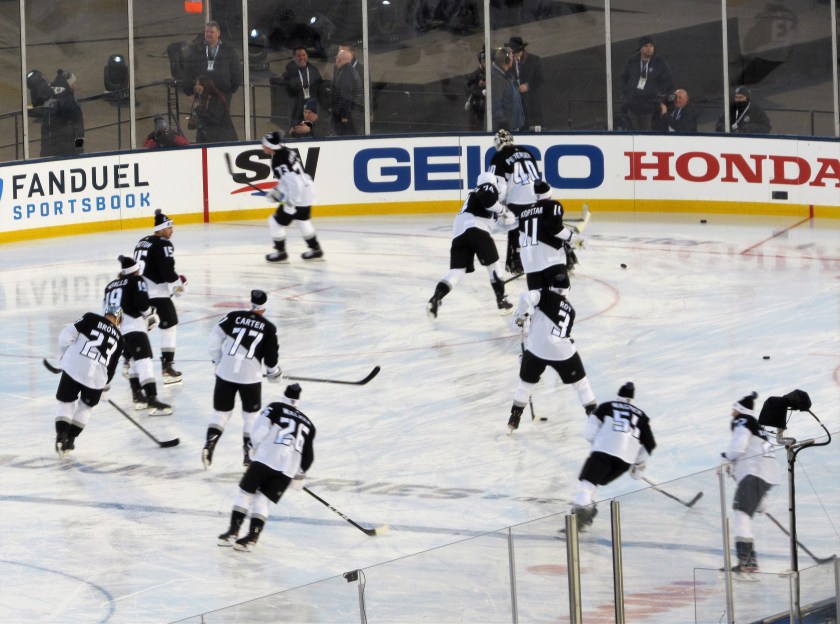
The bad guys – The L.A. Kings.  It was a good game, but the bad guys won, 3-1.

IMG_0703

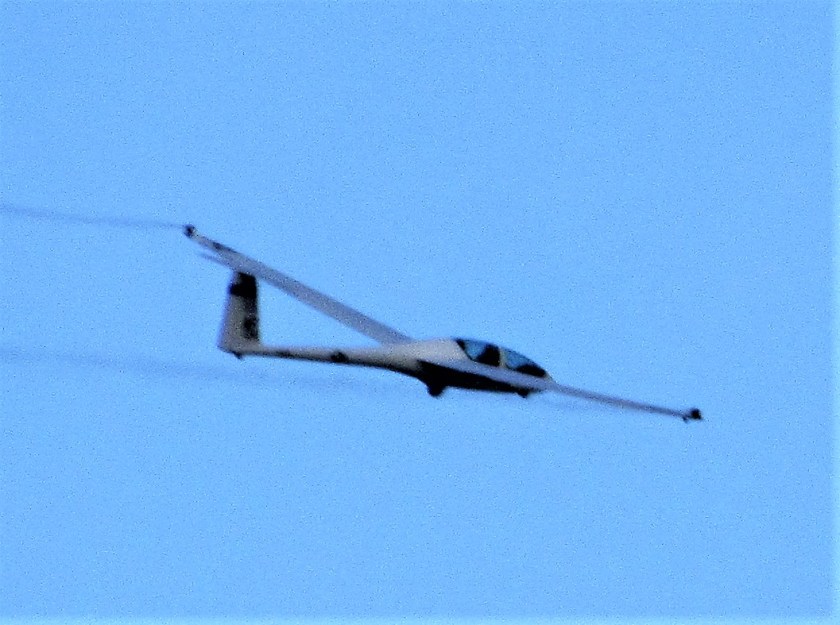
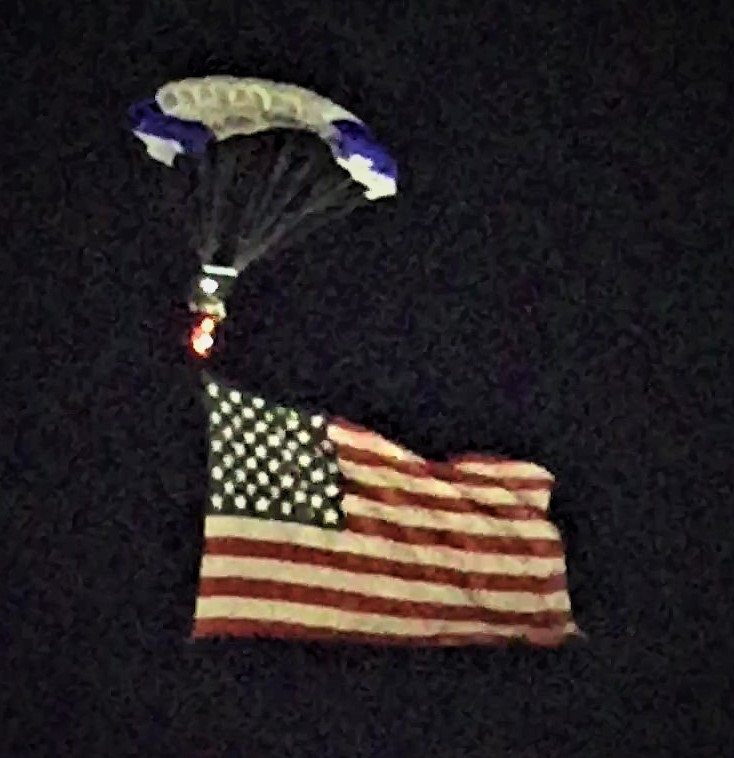
This was SOOOOOOOO cool!!  A skydiver landing in the stadium carrying the flag all the way.  Sorry for the poor quality.  He was jumping out of a plane and was probably about 1000 feet up at this point.  God bless the USA!  May this flag forever wave.

IMG_0787_Moment

Another adventure after the game was finding our car.  We searched the parking lot for about 20-30 minutes before finally finding our car.   Once we found it, we sat motionless for at least another 30 minutes before being able to inch our way out of the parking lot.  We left the house about 12:30 PM and did not get home until about midnight.  It was a long, but fun day, even if our boys in burgundy and blue lost.


A Valentine’s Dinner

I hope you all had a very good Valentine’s Day with the one or ones you love.  We tend to stay home and celebrate at home rather than go out and do the traditional Valentine celebrations.  I don’t buy or get flowers on Valentine’s Day because my birthday is literally just the week before and the flowers are 1/2 the price if I get them on the 7th rather than on the 14th.  I don’t need chocolates, I am already way too fat as it is.  And I can cook just about everything we would get in a restaurant, and usually better.  So, we stay home and I cook something special for us here at home.  Or sweetheart meal was Moroccan spiced roasted chicken over couscous and roasted vegetables.  It was warm and exotic, with a slightly spicy accent, that was loaded with deliciousness.    Because this was a tomato and spiced sauce, I served it with a smooth red which made them perfect dinner companions.

IMG_0633

Moroccan Spiced Roasted Chicken and Vegetables

IMG_0627

1 chicken cut into parts, or  4 Cornish game hens cut in 1/2

1 1/2 TBSP salt

2 TBSP garlic

1/4 honey

1/4 cup lemon juice

2-3 TBSP olive oil

2 TBSP paprika

4 tsp cumin

2 tsp ginger

1 1/2 tsp cinnamon

1/2 tsp cayenne pepper

1 TBSP za’taar – optional

1 tsp black pepper

2 zucchini, sliced

1 yellow squash or crookneck, sliced

1 parsnip, peeled and sliced

1 onion, medium dice

1 red or orange bell pepper, medium dice

4 medium tomatoes, medium dice – I used heirlooms this time.  I just love heirloom tomatoes.

1 can chicken broth

2 TBSP each, fresh mint, fresh parsley, and fresh cilantro, chopped fine


Preheat the oven to 425*F.

Line a deep roasting pan with aluminum foil.

Mix all the spices, honey, lemon juice and olive oil together.  Toss the vegetables in with the spice mixture, then remove them from the sauce and spread them evenly over the bottom of the roasting pan.

IMG_0629

Coat the chicken with the sauce and place the chicken pieces over the vegetables and pour the remaining sauce over the chicken and vegetables.  Cover the pan tightly with aluminum foil and place in the oven to roast for one hour.  Remove the foil covering, and baste the chicken with the liquid.  Place the pan back into the oven, uncovered, and continue to roast for another 30 minutes or until the chicken is browned and the vegetables are tender.  Baste again as needed.

IMG_0630

IMG_0631

While the chicken is cooking during the 2nd phase, cook some couscous and heat up either some naan bread or pitas.  When the chicken is done, serve it over the couscous and top with the vegetables and juice.  Garnish with the chopped herbs.  The end result …. pure heaven.  The chicken is so moist and tender and the vegetables just melt in your mouth.  This is one sweetheart of a meal to share with all those you love.

IMG_0634


Happy Valentine’s Day

February 14 is the designated day of love around the world, and has been since the Middle Ages.  Valentine’s Day has its roots as far back as the Ancient Romans, with their Lupercalia festival, which was a fertility festival that celebrated the coming of Spring.  There were fertility rites and men and women were paired together through a type of lottery.  All this changed though at the end of the 5th century BC, when Pope Gelasius replaced the pagan fertility festival with the Christian version of St. Valentine’s Day and Feast, which was always held around the middle of February.

Who was St. Valentine and why is he celebrated by lovers around the world?  Well, no one really knows.  There are different theories of who St. Valentine really was, since there were a quite few priests with similar names and various backgrounds at that time.  The most romantic theory of who Valentine was and why he is celebrated for and by lovers is that he was a Catholic priest who served in the 3rd century BC.  During this time, Claudius II was the Emperor of the Ancient Romans, and he believed that young single men made better soldiers and warriors than married men, so he outlawed it for young men to get married.  Valentine was against this ruling and secretly married young lovers anyway, despite the Emperor’s decree.  Eventually, Claudius found out what Valentine was doing and sentenced him to death.  Sadly, all the other Valentines and variations of that name, were sentenced to death by Claudius II as well, only making the namesake and the reasons behind the canonization of Valentine even more mysterious.

Valentine greetings have been around ever since, and were very popular among young lovers as far back as the Middle Ages, although the written verses were not popular until the 17th or 18th century.  So wherever you are, celebrate the day of love with all those you hold dear.  Today is the day of love.  How you celebrate is as individual as you are.  Make it special, no matter how you celebrate your love or who you celebrate with.

Image result for valentines day images

Here are some fun ways I like to share the love.

With my fur babies.

IMG_0456

With friends and family and of course WINE.

Image result for valentines day quotes kiss the cook

Kissing a scuba diver, especially when he is my scuba diver.

86796461_2506105112981487_8763109537390526464_n


DCIM100MEDIA

However you celebrate, and whomever you celebrate with, Happy Valentine’s Day.

Southern Fried Chicken and the Fixin’s – Part 2

The fixin’s are just as much a part of what makes a meal as the mains are.  The fixin’s I served with my fried chicken were baked beans Baked Beans for the BBQ and some roasted parsnips and carrots.   Everything went together very well to make for a complete Southern meal.  YUM, YUM!

Parnsips are root vegetables and are in the same family as all other root vegetables, like yams, beets, turnips, carrots, rutabagas, onions, garlic, daikon, radishes, ginger, jicama and Jerusalem artichokes.  They are called root vegetables because they grow underground and get their nutrients from the soil.  Parsnips look like white carrots, and though they are similar and are cousins, they are from different families.  Carrots are sweet, and are often eaten raw, whereas parsnips are spicy, with a flavor that is reminiscent of both cinnamon and nutmeg.   Parsnips are not really eaten raw, though I suppose they can be, as long as you are prepared for a very strong spicy flavor and chewy texture.

Parsnips are often used either with carrots or potatoes, but can often be used interchangeably with either carrots or potatoes as well.   I mixed my parsnips with carrots, pearl onions, garlic and herbs then roasted them to perfection.

IMG_0605

Herb Roasted Parsnips and Carrots

1 large parsnip, peeled and cut Asian style or at an angle

2 carrots, peeled and cut Asian style

1 tsp each fresh thyme, fresh oregano and rosemary, chopped fine

salt & pepper to taste

1 TBSP garlic

1/2 cup peeled pearl onions

1/4 cup water

2 TBSP butter

olive oil

IMG_0611

Preheat the oven to 325* F.

Line a baking sheet with aluminum foil.

Mix all the ingredients together, except the water, then pour out on the the foil in a single layer.  Add the water, pouring it evenly over the vegetables.  Cut the butter and randomly place on top of the vegetables.  Then cover tightly with another piece of aluminum foil.

IMG_0612

IMG_0613

Bake for about 30 minutes, then remove the foil and let set for about 5 minutes before serving.  All these flavors combined makes for one DELICIOUS meal.  Sweet, with just a hint of spice and everything is very nice.

IMG_0622


Southern Fried Chicken and the Fixin’s – Part 1

My mother was a horrible cook.  She hated cooking and burned almost everything she ever tried to cook, with one exception.  She could really make good fried chicken.  After all, she grew up on good fried chicken.  She was from Southeast Texas.  I rarely make fried chicken, although I certainly know how, but why when I can get some very tasty fried chicken from Safeway.   Larry decided he wanted me to make some fried chicken instead of buying this time around, so he bought some drumsticks, and drumsticks only.  Why he only bought drumsticks is beyond me, but that’s what he bought.  That’s one reason why he is RARELY allowed to do the shopping.  There are plenty more, but ll save those for another time.  🙂

The South is famous for its fried chicken, so I wanted to make some Southern “fixin’s” to go with the chicken as well.  All in all, it was a pretty easy menu to make, especially since I had some baked beans in the freezer that I pulled out and added to the meal.  All I really cooked was the chicken and the vegetables.  For the baked beans, I just added some more sauce and reheated them in the oven.  Easy-peasy. Baked Beans for the BBQ  NO, my beans had not been in the freezer for all this time.   I made a new batch, but this was the recipe I used.  I served it with a dry white blend, because it was chicken, but any type of wine would work very well with this meal.

IMG_0624

Southern Fried Chicken

This recipe is enough for 12 pieces of chicken.

IMG_0617

The Wet Soak for the Chicken


3 cups butter milk – I use the dry buttermilk mixed with milk

2 tsp salt

1 tsp pepper


Mix everything together and soak your chicken pieces for about 4 hours in the refrigerator before coating and frying.  Rotate the chicken a few times to make sure the pieces are completely saturated with the liquid mixture.  When the chicken is ready to coat, make your dredging mixture and coat the chicken thoroughly before frying.

IMG_0618

Dredging Mixture

3 cups flour

1/2 cup cornstarch

1 TBSP salt

1 TBSP paprika

2 tsp onion powder or dried onion

2 tsp dry roasted garlic

1 tsp each dried oregano, basil,

1 tsp white pepper

1 tsp cayenne pepper

vegetable oil for frying – about 3/4 of a quart


Mix all the ingredients together thoroughly and add the chicken pieces.  Make sure to completely coat the chicken pieces.

Heat the oil in either a deep skillet or a deep fryer to 350* F.  Slowly and carefully add the chicken pieces to the hot oil.  Do not over crowd the chicken.  You may have to cook  it in batches if you do not have a large enough skillet or deep fryer.  If you are frying the chicken in a skillet, cook it for about 14 minutes, rotating it about every 2 minutes to ensure it cooks evenly and does not burn.  If you are using a deep fryer, make sure it is completely covered by the hot oil and cook for about 8-10 minutes.  Under cooked chicken is not a good thing, and can make you very sick, so make sure the chicken is completely cooked, and the internal temperature is 165* F before eating.

IMG_0619

Once the chicken is completely cooked, remove it from the hot oil and place it on a plate with a paper towel to absorb the grease.  Let it set for about 10 minutes before enjoying it.

IMG_0623


How to Build a Pita

Pita breads are traditional Arabic and Middle Eastern flatbreads that have been around for about 14,500 years.  They have been around since the Stone Age, and were originally created by the Natufian people from the land that is now known as Jordan.  They are simple leavened breads and the basic ingredients are flour, salt, yeast and water.  There are two types of pita breads.  The first one is the pocket style pita, which is formed by laying a thin piece of dough on a convex sheet on an open flame.  The dough inflates because of the high heat, creating two layers of dough, and thus creating a pocket.  When the dough is cooked and is cooled, the dough deflates.  These are the pitas that are used for sandwiches, gyros and falafels.  The second type of pita is the thicker Greek style.  These are used to make chips out of and are also used for spooning dips or sauces.  Pitas can also be used as substitutes for eating utensils when none are available.

The leftovers were piling up in my fridge and we were running out of space and storage containiers, so it was time to clean out the fridge and use up some of those leftovers.  Usually Larry takes them in to work for his lunch, but sometimes, they start to pile up.  So you know what that means … it was time for the Queen to pay a visit.   We used up all kinds of good things and totally repurposed them from how they were originally cooked.  I had some leftover steak and some leftover Spanish pepper and parsley sauce that were just perfect for pitas.  I added some lettuce, tomatoes, red onions, and voila, pitas were made.

IMG_0600

I mixed the Spanish pepper and parsley sauce with some mayonnaise for my spread for the pitas, and sliced the steak very thin.  With a little lettuce,  some sliced tomatoes and redo onions, I had everything I needed to make a great tasting pita sandwich.  All that was left to do was to heat everything up and build my pita.

IMG_0602

IMG_0603

Since I was using up leftovers and cleaning out the fridge, why not use up more stuff.  I had a some leftover couscous that was a perfect accompaniment to the meal, but it still just wasn’t enough.  It needed something else too.  I added the rest of my shrimp and corn bisque too.  No Grilling Today!  That completed the meal, especially since there was not enough to make it a meal on its own.

IMG_0604

From just a bunch of random leftovers, I created a yummy, healthy meal.  I also freed up some space in my refrigerator, which will allow me to create … more leftovers.  🙂


I Just Felt Like Painting Today

I took another trip to Pinot’s Palette today.  This time, it was just me.  I do this fairly often.  I like it when it is just me sometimes.  Today was one of those days.  More and more I am painting pictures with no guidance and no instructions at all; just me eyeballing it.  I certainly have my limitations on what I can and cannot paint.  I mostly choose easy stuff, although I am choosing more challenging things lately too.  I paint a lot of flowers.  As you all have noticed, I love flowers.  Plus, flowers are pretty easy to paint too.   There were a lot of layers in this picture.  Even if i say so myself, I think it came out pretty alright.  🙂

IMG_0599

Herbed Potato Wedges

I love potatoes and could eat them everyday.  They are universal and there is no limit to the possibilities of how to cook and prepare them.  Plus, they are relatively healthy for you too.  They are loaded with many different nutrients, and when not fried or loaded with butter, or cheese or bacon or sour cream, or whatever else you want to load them with, they are actually very good for you.  But it’s all that other stuff that really makes them taste so good too.  I have to admit, the Aussie in me could easily live on good crispy chips and I would be a very happy camper, but that would not be the healthiest or smartest way to eat my potatoes, and I especially could not do so everyday.  Baking them in olive oil is a good alternative to frying them.    Mixing them with a bunch of garlic and herbs is even better.

These herbed potato wedges are super simple to make and are very tasty too.  They can be partnered with any dish you like, and would be perfect, either dressed up or down.  I served them with a mile high quiche,  Mile High Crab Quiche but they would also pair nicely with a thick, juicy steak too.  I did not make a crab quiche this time though.  I made a ham, spinach and mushroom quiche.  The technique is the same, just a different filling.


IMG_0595

IMG_0594

Herbed Potato Wedges

IMG_0590

Potoates, cleaned, peeled and cut into thick wedges

salt and pepper to taste

dry roasted garlic

dried herbs of  your choice – this time, I used marjoram, sage, oregano, basil and parsley

olive oil


Preheat oven to 475* F or 240* C.

I purposely did not add amounts to this recipe because you can make it for one person, or 100 people just by varying the herbs and the amounts you use.  This is a very simple and very accommodating recipe.

Once your potatoes are cut into wedges, mix them together with all the herbs and olive oil,  making sure the potato wedges are thoroughly coated.

IMG_0591

Line the potato wedges on a baking sheet, spreading them out in a single layer.  Then bake for about 20 minutes, or until they are golden brown and crisp.  Turn them over after about 10 minutes, to make sure the cook evenly.  You can also lower the temperature and increase the cooking time.  Since I cooked both the quiche and the potato wedges at the same time, I had the oven set for the temperature I needed for the quiche and cooked the potatoes for longer.

IMG_0592

Once they are golden brown and roasted to perfection, it is time to dish them up and enjoy.  Some people like to dip them in a little mayonnaise, some people like them with ketchup, and some people (me), like them just as they are.


IMG_0598


Another Birthday in the Books

Well, all good things must come to an end, and that includes all my birthday festivities for this year.  It was yet another successful birthday that is now forever in the books.  It was full of fun celebrations with friends and family, and lots of good food.  But if I don’t stop celebrating, my waistline is just going to continue to grow and grow and grow.  Believe me, it is already way to big as it is, and the older I get, the more it seems to grow.

My last birthday celebration for 2020 was at Barcelona Wine & Tapas Bar, in the RiNo area of North Denver.  Birthday Celebrations – Part 2 – Barcelona  It seemed like both the wine and the tapas were flowing all evening.  We all had ate too much, perhaps drank a bit more than we should have, and we all had a great time.  Maybe it is just meant to be, but every time we have dined at Barcelona, we have had our same waiter, Milo.  He takes such good care of us.  I brought the orange and almond cake to the restaurant with us, since after all, it was from their cookbook, Another Celebration, Another Cake and both he and the chef were impressed.  They said “it was the bomb”.  They both got to help us celebrate as well, and shared the cake with us too.

IMG_0583

IMG_0584

IMG_0586

Many thanks to everyone who helped celebrate all the good times.

IMG_0588

Another Celebration, Another Cake

I should be winding up all the birthday celebrations today, but before calling all the celebrations off until next time, we have one more.  A bunch of us are going to Barcelona, the Wine and Tapas Bar in No Denver for one more party and one more celebration.  Birthday Celebrations – Part 2 – Barcelona

I decided since we were going back to Barcelona, the Tapas Bar, that a dessert from my Barcelona Cookbook would be the perfect thing to make.  I made my version of their Orange and Almond Cake, also known as the classica torta de Santiago,which originally comes from Galacia.  Galacia is in the Northwestern part of Spain, North of Portugal.  It faces the Atlantic Ocean.  This cake is often used a cake to honor Saint James, the Patron Saint of Spain, whose remains are held in Santiago de Compostela in Galicia.

IMG_0582

Orange and Almond Cake

This is a simple cake to make with basic ingredients.  This is true for many European cakes.  Simple is my favorite too.

IMG_0566

1 cup sugar

7 eggs, separated

1 tsp grated orange peel

1 3/4 cup ground almond meal or flour

1/2 cup flour, optional

1 tsp orange extract

1.4 cup vegetable oil

1/4 cup applesauce

5 apples, peeled and diced small

2 TBSP honey

whipped cream


Use 2 8-8 1/2 inch cakes pans.  Spray them with cooking spray and line the bottom with parchment paper.  Preheat the oven to 350* F.

IMG_0567

Mix the sugar, orange zest, oil, applesauce and egg yolks together in a mixer with the whisk attachment for about 6 minutes.  In a separate bowl, beat the egg whites at a high speed until they become light and fluffy and form stiff peaks, or about 7 minutes.

IMG_0568

When the egg yolk mixture is thoroughly mixed together, add the ground almonds and the orange extract and mix again.  Then gently fold in the egg whites until everything is mixed together well.  Evenly divide the batter into the two prepared cake pans and spread the batter out.  Bake for about 45 minutes or until the cakes are golden brown and an inserted toothpick comes out clean.

IMG_0570

While the cakes are baking, make your apples.  Peel them and slice them, then cut them into a small dice.  Cook them in butter and/or honey butter, and add the additional honey.  Cook the apples until they are tender, but not caramelized.

IMG_0571

IMG_0573

When the apples are tender, mash them with a potato masher, keeping some chunks.  Let the apples cool a bit, then mix them with whipped cream.  Spread the apple and whipped cream mixture on the top of one cake.

IMG_0580

Add the other cake and top with more of the apple and whipped cream mixture.  I had some plain whipped cream leftover and I spread it on the sides of the cake.  I also added some chocolate orange bits onto the top of the cake as well as some of the chocolate shavings and some more orange zest.  Keep the cake refrigerated until ready to eat.

I also want to share that even I have my mishaps.  For some strange reason, my egg whites did not fluff up the way they were supposed to.  I whipped them for longer than necessary, but they never formed into stiff peaks.  I even added a little cream of tartar, and still no peaks.  The cake still came out fine, but it did not rise up the way it was supposed to, and is a little flatter than it should be.  Oh well, these things happen, even to me.  The moral of the story is that these things happen.  Don’t give up and don’t get frustrated.  As my idol, Julia Child, once said, “never apologize if the recipe didn’t turn out the way you wanted it too”.  Just enjoy it as is, and try to do better next time.  🙂  Let them eat cake.

IMG_0583