Leftovers Indian Style

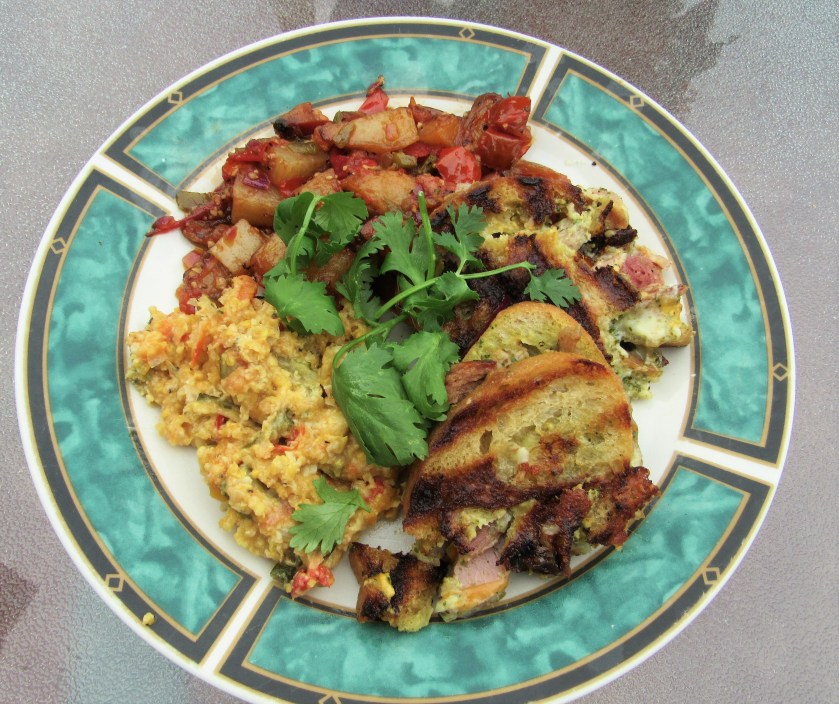
It seems like my friends and I trade foods a lot.  We had some curry in the freezer that someone had given us in exchange for something I made so it was time to have a curry dinner.  We weren’t really sure what type it was, since it was only labeled curry.  That’s OK.  I just added a few extra touches to it and made it my own.  I served it over some lemon rice with some naan bread, and made a delicious Indian dinner, although Larry and I both agreed we needed to spice it up a bit more.

IMG_4497

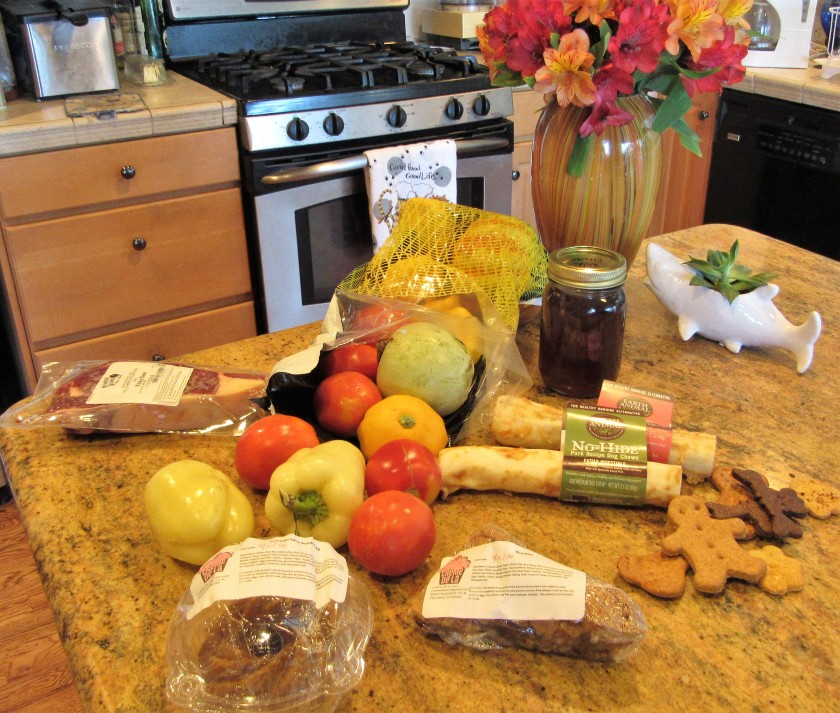
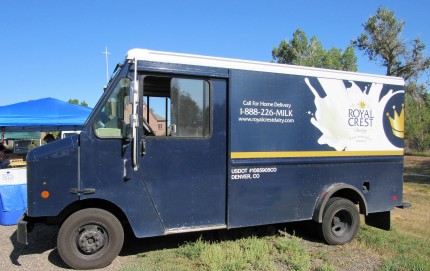
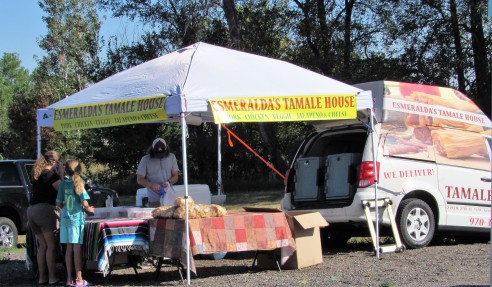
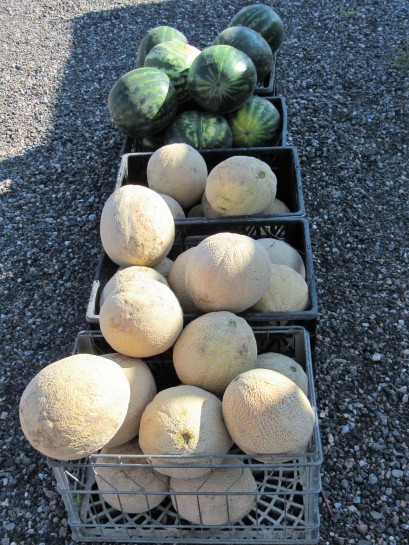
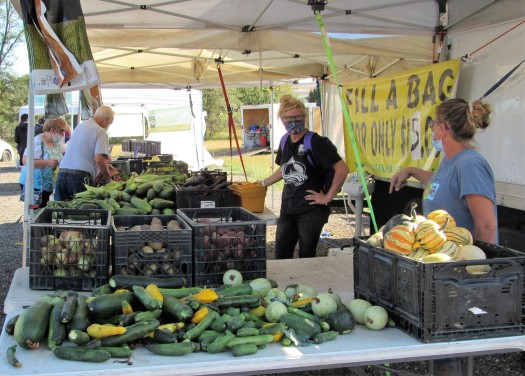
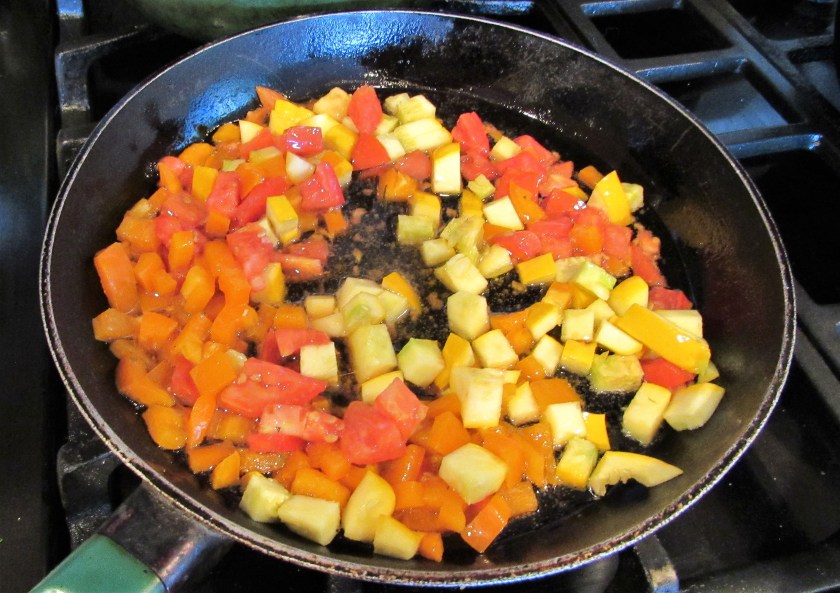
The curry was already made up and we had no idea what was in it.  I cut up some leftover Costco rotisserie chicken and added that along with some bell peppers, tomatoes and one of the sunburst squashes that I purchased from the Farmer’s Market.  The Farmer’s Market

I sauteed the bell pepper and squash together in olive oil for about 5 minutes.

IMG_4492

Then added the curry, chicken and tomatoes.  Once everything was mixed together thoroughly, I brought it to a boil, then reduced the heat to a simmer and continued to cook for about 10 minutes, stirring frequently.  Right before serving, I mixed in some chopped cilantro.

IMG_4496

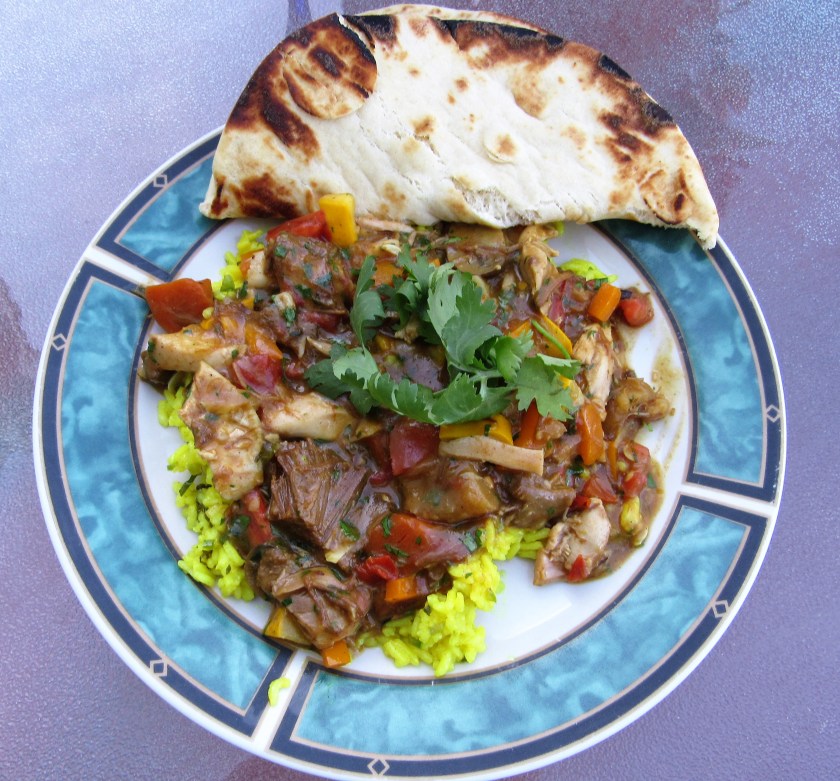
I served the curry over lemon rice, which I think really enhanced the whole dish and made all the flavors just pop.

Lemon Rice

1 cup rice

2 cups water

1 tsp salt

2 TBSP olive oil

1/2 tsp turmeric

1 jalapeno, diced fine

1/4 cup lemon juice

2 TBSP lemon verbena, basil or curry leaves, chiffonade fine


Cook the rice in the water and turmeric until it is completely cooked and the liquid has all evaporated.  When the rice is cooked, add in the lemon verbena, basil or curry leaves and mix together well.

IMG_4486

Cutting the lemon verbena.

IMG_4488

Saute the jalapeno in olive oil in a separate skillet for about 1-2 minutes, then add the rice and mix everything together thoroughly and continue to cook for about 5 minutes, stirring constantly.

IMG_4495

Serve the curry over the rice along with some naan bread and a glass or two of either a Riesling or a light white wine on the side, and it is now ready to enjoy.

IMG_4498

 Stay safe and stay well Everyone.  ‘Til next time.


The Farmer’s Market – Part 2 Lucie and Vinnie Enjoying Their Treats

I can talk dogs with anyone.  There are only a few things that just brighten my day as much as talking about or being with or giving love to dogs (and our cats and all other fur babies too).  When I was at the Farmer’s Market, The Farmer’s Market, of course I was talking dogs to the owner of Wag N’Wash, Mike Schreinber,  where I bought the doggie treats for Lucie and Vinnie.   He had all kinds of homemade, fresh treats for dogs.  I told Mike I would share pictures of Lucie and Vinnie enjoying their treats.

IMG_4472

It was hard to get a clear shot of them because they were so excited.  They were wiggling and jiggling all over the place, impatiently waiting for their new treats.  I bought them a salmon chew, a pork chew, and a variety of cookies.  They had their chews this time.

IMG_4476

Vinnie just couldn’t get to his salmon chew fast enough.  I think he liked it, but I am only guessing.

IMG_4478

Lucie was so excited, she dropped hers, but before I could blink an eye, she had swiped it over and was quickly devouring her pork chew.


IMG_4480

IMG_4481

I am going out on a limb here, but I think it is safe to say Lucie and Vinnie both thoroughly enjoyed their treats.  🙂

Wag N’ Wash natural food & bakery is owned and operated by Mike Schreiber.  It is located at 1100 US Highway 287 in Broomfield, CO,  80020.  You can contact them online at WAGNWASH.com or by phone at (720) 739-9274.  It is where  “you can wash em, feed’em, spoil ’em all in one cool place”.  I am sure there will be plenty of tails wagging once you do too.


Stay safe and stay well Everyone.  ‘Til next time.

The Farmer’s Market

I love going to the local farmer’s markets, but more so than not, I forget about them.  When I went over to Priscilla’s the other day, she reminded me about our local Farmer’s Market.   Making It Up As We Go  This season was a short season to begin with, and now there are only two more weeks left, but at least I finally made it.

IMG_4462

The Holy Comforter Episcopal Church in Broomfield has been home to the Broomfield Farmer’s Market for many years.

IMG_4456

There was a little something for everyone, all brought in from local farmers and ranchers and local businesses.

IMG_4453

IMG_4469


There was milk from Royal Crest Dairy.


There were food trucks just in case you got hungry while shopping.

IMG_4471

IMG_4465


A tamale truck  selling fresh, homemade tamales.  I have had these tamales too and they are so good.

Another stand was selling fire roasted hatch chilies.  YUM!

IMG_4467

There was a stand selling bison products.  I bought a big bison ribeye for later.  Her freezers were full of all kinds of delicious bison products.

IMG_4458

IMG_4457

There was homemade honey.

IMG_4459

There were dog treats,

IMG_4455

as well as treats for humans too, with homemade doughnuts

IMG_4466


and gluten free baked goods made by my friends Bree and Mike Kimbrough, called Creme De La.

IMG_4449


IMG_4448

IMG_4468

I used to coach their daughter Sydney.  Aside from all the fabulous goodies, one of the main reasons I went to the Farmer’s Market was to see Bree, Mike and Sydney, although I missed Sydney this time.


And of course there were plenty of fruits and vegetables too.

IMG_4464

IMG_4461


I bought a little bit of everything and brought home something for everyone.  Here is the bounty I brought home.  I had a good, healthy day at the Farmer’s Market.  I just love helping out the locals.  It is always a win/win for everyone in the community, plus it is almost always fresher and healthier too.

IMG_4472

Stay safe and stay well Everyone.  ‘Til next time.


Video #7 – Cooking in Priscilla’s Kitchen

Priscilla and I got the techno bugs worked out and here is my latest video “Cooking in Priscilla’s Kitchen”.  Making It Up As We Go  We always have so much fun together and we have had a life time, and counting, to perfect it.  Priscilla went to the farmer’s market and came back with a bunch of fresh vegetables that we turned into a quick, impromptu vegetable salad.  We used corn on the cob, cucumbers, carrots, red onions and cherry tomatoes fresh out of Priscilla’s garden.  It was so yummy and cool and refreshing.  It was a perfect accompaniment to pizza and made for a real quick and easy dinner.

IMG_7090

And here is our fun, impromptu video.  Priscilla was my videographer this time.  She did a great job.  She deserves a big round of applause.  🙂

Hope you enjoyed our fun time in Priscilla’s kitchen today.

Stay safe and stay well Everyone.  ‘Til next time.

Making It Up As We Go

Yesterday was all about improvisation and spontaneity.  There were no plans.  We just went with the flow, as we do quite often.  And as usual, we ended up having a great day that we enjoyed with Jonathan and Priscilla.  The boys were listening to the hockey game, since both of them are big Avalanche fans and it is playoff time.  After the game, we decided on pizza.  While the boys were out picking up the pizza, Priscilla and I were playing in the kitchen with some fresh vegetables she had just purchased from the farmer’s market and created a vegetable medley to go along with the pizza.  We did not take pictures, but we did make a video.  Sadly, we are having some technical difficulties getting the video from Priscilla’s phone to my computer though.  As soon as we can work out all the bugs, I will send you the video of our fun, impromptu cooking class in Priscilla’s kitchen.  🙂

We were not making our caramels yesterday, although that fun time of year is once again coming up soon.  🙂

IMG_9641

Stay safe and stay well Everyone.  ‘Til next time.


Did You Know – More Fun Wine Facts

Did You Know – UNESCO has labeled 1,052 World Heritage sites around the world.  Did you know that 32 of these sites are vineyards?  That’s right.  There are 32 vineyards, mostly in France, but also scattered throughout various parts of Europe, that have met the UNESCO selection criteria to be deemed as World Heritage sites.  Those sites include the vineyards of Champagne, Burgundy, the Loire Valley, Tokaj-Hegyalja and Piedmont.  To be included in the list of World Heritage sites, those sites need to be of outstanding universal value and meet at least 1 of 10 selection criteria.  One of those daunting criteria is “to represent a masterpiece of human creative genius”.  WOW!  My favorite adult beverage meets the stiff standards to be eligible for the UNESCO World Heritage sites.  Life is good!  I think I just might need to raise a glass or two in honor of some of the masterpieces of human creative genius!


A Wine Lover's Guide to Visiting Champagne France • Winetraveler

Champagne makers may destroy record amounts of grapes to save industry from  pandemic losses | WETM - MyTwinTiers.com


Did You Know –  In the Northern Hemisphere, the main “season” for the grapes to go from the bud stage, also known as the “hang time”, to harvesting is only about 120-130 days.  It is of course, dependent upon the weather, as well as other varying factors, but the usual grape and wine season is from April-August or September.  When the buds on the vine first begin to break and the flowering starts, it is known as the end of the dormancy period.  This usually starts in April.  The grapes are then left on the vines until they mature, which is either August or September, depending on the weather and geography, among other factors that help determine the amount of time it takes for the grapes to mature.  In a hot year, it will only take about 100 days.  In a cooler year, it will take about 130 days for the grapes to mature.


Did You Know – There is definitely something to be said about the gifts of “wisdom” that come with age.  This is just as true in the world of wine as it is for the world in general.  Most of the newer, younger vines are all about quantity and are not so focused on quality.  This too is true for both humans and wines.  The older vines, usually those that are 40 years old or more, focus their energies on adapting to their environment and producing fewer clusters of grapes that are of higher quality rather than on a lot of unnecessary leaves, shoots and grapes, that won’t have a lot of quality.  Often times, some of the older wines proudly display their age on their labels.  Terms to look for that show the age of the vines from the “old countries” of Europe:

  • Vielles Vignes – France
  • Alte Reben – Germany
  • Vinhas Velhas – Portugal
  • Vinas Viejas – Spain
  • Antico Vitigno – Italy

So drink up and enjoy the gifts of the vines, whether they be old or new, whether from near or afar.

Some of the best things about wine, no matter where you drink them or where they are from, is they are always best when shared with good friends and good food.  Salud!  A Votre Sante!  Slainte!  Cheers!


Stay safe and stay well Everyone.  ‘Til next time.

The Cubano

The Cubano is a very popular Cuban style sandwich that was first created by early Cuban immigrants who came to the Tampa, Florida area, as a variation of what was popular in Cuba.  It is traditionally made with a hard, crusty bread, ham, pork, mustard, mojo sauce and sweet pickles.  The medianoche, or midnight sandwich, is a close cousin to the Cubano, but instead of being made on a hard crusty bread, it is made on a softer, sweeter egg bread.

We had some left over ham and smoked pork, so I thought making a Cubano sandwich was a great way to use them.  I made some patatas bravas Patatas Bravas  as well, and served it with my leftover vegetable souffle Argentine Style Humita con Sofrito to make the meal complete and very South and Central American in nature.  Esta muy delicioso!

IMG_4445

Before making your Cubano, you need to make your mojo.  This particular mojo is like a Cuban pesto sauce made with cilantro.

Mojo Sauce

IMG_4434

I bunch of cilantro

1 tsp salt

1-1 1/2 tsp black pepper

2 TBSP lime juice

1 TBSP garlic

1/3 cup olive oil


Mix everything together in a food processor.

IMG_4436

The Cubano

hard crusty bread, sliced

mojo sauce

Swiss, cheddar, or jalapeno jack cheese, or a combination

pulled pork

cooked ham

sweet pickles, sliced

red onions, sliced very thin

mustard

butter


IMG_4437

Spread the mojo on both pieces of the bread, then add a slice of cheese to each slice.  Add the sliced ham, pork, pickle slices and onions.  I did not add the pickles until later because I am not a pickle fan and though Larry loves pickles, he does not like hot pickles.  I also used the dill pickles that Larry’s mom made instead of sweet pickles.

IMG_4438

Put your sandwich slices together and butter the outside of the bread on both sides.  Grill the sandwiches on either a hot grill or put them in a panini maker to grill them up.  Press them firmly onto the grill, so everything kind of melts together.  Grill them for about 3 minutes or until the bread is browned and crispy, then flip them over to grill on the other side and repeat.

IMG_4443

Slice them in half and enjoy.  You can add a little extra mojo sauce on the side to be used as a dipping sauce if you like.  You can use any kind of mustard you want too; a sweet mustard, a hot mustard, Dijon, honey mustard; it doesn’t matter.  Mix it up and play with it however you like.

IMG_4446

I had extra mojo sauce that I later used as a dressing for a Cuban pork salad.  I added shredded pork, sliced red onions, lettuce, corn & tomato salad Video #6 – Making Empanadas from Leftovers and avocados.  !Que Bueno!

Stay safe and stay well Everyone.  ‘Til next time.


Teaching Kids How to Cook

I might have mentioned this a while ago, but another idea I have been thinking a lot about lately, is to take “A Jeanne in the Kitchen” out on the road to teach cooking lessons.  My friend Toni just asked me if I would like to teach her kids, whom she homeschools, cooking lessons.  I am all over this idea.  I think it would be loads of fun, and is a valuable skill everyone needs to learn.  Toni asked me to make up flyers so she could spread the word around to her fellow homeschoolers.  How much should I charge?  Toni and her kids are free, because I have known Toni and her husband Shane for a long time, and she would be doing me a huge favor by spreading the word.  I am also open to teaching others how to cook as well.  I am not limited to just working with kids.

Resorts That Teach Your Kids to Cook

Cooking Classes For Kids Indianapolis

Best Cooking Classes for Kids - Chicago Parent

 Please let me know your thoughts and ideas.

Stay safe and stay well Everyone.  ‘Til Next time.

Chocolate Pecan Tart

I have to admit I have a huge sweet tooth, and I am really trying my best NOT to give in to it as much as I would like.  But when I have company over, then that’s a completely different story.  When Tim and Leslie were visiting, and I made a delicious Colorado themed dinner with tender elk steaks, I just had to have  the perfect dessert to go along with the dinner too.  Colorado in the Kitchen  Sticking with my Colorado theme, I had to have a Colorado dessert as well.  I made a chocolate pecan tart, which made for a perfect ending to a perfect evening with friends who are really family.

IMG_4329

Chocolate Pecan Tart

You can use either pecans or walnuts for this tart.  I prefer pecans to walnuts any day, but both are just fine to use.  This tart, is super easy to make and only requires a few simple, basic ingredients.  Because I had a lot of my chocolate pecan caramels leftover, I melted those down and used them for my chocolate.  The Tradition Continues The caramel filling was so rich and full of flavor.

IMG_4322

The Crust

1 1/2 cups flour

6 TBSP cold butter, cubed

2-3 TBSP powdered sugar

1 tsp salt

1 egg

5-6 TBSP heavy whipping cream


This is my basic pate sucre dough.  Blend the flour, butter, salt and powdered sugar in a food processor until in resembles a fine sand.  If you saw my latest video, I made reference to this dough.  Video #6 – Making Empanadas from Leftovers  Then add the egg and the cream and continue to blend until the dough forms into a ball.  Wrap the dough in plastic wrap and refrigerate for at least 30 minutes before rolling out.


Preheat the oven to 375* F or about 190* C


On a lightly floured surface, roll out the dough and place into a 10 inch tart pan.  Firmly press the dough into the pan and remove the excess dough.


The Filling

1 cup heavy whipping cream

1 1/3 cups sugar

1/3 cup water

1 egg

1 egg yolk

1 1/2 tsp vanilla

1/2 stick butter

2 cups pecans, divided

1 cup semi-sweet chocolate


Chop about 1 2/3 cups of the pecans and line the bottom of the tart with the nuts.

IMG_4323

Mix the cream, sugar, butter, water and chocolate into a sauce pan and melt completely while stirring constantly over a medium high heat.

IMG_4325

Bring to a rapid boil and boil until the temperature reaches about 230*F or about 115-120* C.  Let cool for a few minutes before adding the egg mixture.

IMG_4326

Combine the egg, egg yolk and vanilla together, then add to caramel mixture.

IMG_4324

Pour the egg and caramel mixture evenly over the nuts.  If you like, you can add some of the whole nuts around the edges of the tart too.  I like doing this because it finishes the tart and makes for a prettier presentation.  Carefully place the tart into the hot oven to bake.

IMG_4328

Bake the tart uncovered for about 45-60 minutes, or until the filling is set and the dough is browned.  If the dough is browning too much, but the tart still needs more time, cover with aluminum foil and continue to bake until the center is firm.  Remove from the oven and cool completely before removing the tart from the pan and cutting.  I usually go around the edges with a butter knife after the tart has cooled, just to unstick the dough from the edges.

IMG_4331

You can eat this as is or warmed up and topped with some ice cream.  Either way, I guarantee you’re going to love it.


Stay safe and stay well Everyone.  ‘Til next time.


Parmagiano Sesame Biscuits

Biscuits, as we in America know them, came to the New world and to North America around the late 16th and early 17th century.  They are kissing cousins to the British scones.  Biscuits in the UK and its British counterparts around the world, are what we as Americans call cookies.  Biscuits were a major food staple to sailors and soldiers for centuries, because originally, they were hard flat cakes that could easily travel and lasted for a fairly long time.  They were packed in tins and then were later removed and reheated before being eaten.  This is how they get their name too.  The word biscuit is a combination of two French words, bis meaning twice and cuit meaning cooked.  Put the two words together and they mean twice baked.  In the days of Louis XIV, biscuits were also known as stone breads.

Biscuits are part of the American culture, particularly in certain regions of the country.  They are many variations but the basic biscuit dough is pretty much the same everywhere you go.  The keys to making good, fluffy biscuits is to use COLD butter that is cubed, chill the biscuits for at least a 1/2 hour before putting them into a HOT oven to bake, and not to over work the dough.  If you follow these simple rules, your biscuits will come out light and fluffy every time.

Biscuits are a part of the Colorado tradition as well.  I made some Parmagiano sesame biscuits when I made my Colorado meal for our friends Tim and Leslie.  Colorado in the Kitchen  They were a big, delicious hit.  We had them for dinner, and then reheated them for breakfast the next morning.

IMG_4358

Parmagiano Sesame Biscuits

IMG_4349

2 cups flour

1 TBSP baking powder

1/4 tsp cayenne pepper

2 TBSP cold butter, cubed

1 1 /2 cups grated Parmagiano cheese

1 1/4 cups buttermilk

1 TBSP sesame seeds, black or natural colored


Preheat the oven to 425* F or about 200* C.

Spray a baking sheet with cooking spray.


Mix the flour, cayenne pepper, baking powder, butter and cheese together either by hand or in a food processor until it resembles fine sand.

Add the buttermilk and mix gently into the dough.  Knead the dough a few times on a lightly floured surface then roll out to about 1/2  inch in thickness and cut with a biscuit cutter.

IMG_4350

Once the biscuits are cut and placed on the baking sheet, top them with sesame seeds.  I used black sesame seeds, but you can use regular sesame seeds too.  Press the sesame seeds lightly into the dough and bake for about 15 minutes or until they are are lightly browned.

IMG_4351

Serve them warm with wither butter or honey butter.  They are           D-E-L-I-C-I-O-U-S!  We liked them so much we had them for breakfast again the next morning.

IMG_4352

Stay safe and stay well Everyone.  ‘Til next time.