May We Never Forget

Eighteen years ago, America suffered the worst tragedy of modern times.  It was Pearl Harbor all over again.  So many innocent people lost their lives because of the most horrible act we’ve ever seen.  Say a prayer for all those who lost their lives on this horrible day in history.  Say a prayer for those of us who survived.  Say a prayer so this may never happen again.  God Bless those who didn’t make it and God Bless those of us who did.

maxresdefault

85c6fd28ad6b1b0575d919ae60f90923--american-flag-wallpaper-wallpapers-for-desktop


From Tapas to Pasta

Apparently I am still in a Spanish frame of mine, and am still loving all the Spanish influences in my cooking.  And as you are all aware,  I also hate throwing food away if I don’t have to.  This being said, I had yet another visit from La Reina de la Cocina, the Queen of Leftovers herself, and she and I once again huddled together to be creative.  I had some of my artichokes and ham tapas leftover as well as some cooked chicken.  Those were the only things I had in my refrigerator that were not frozen, plus they needed to be used.   Even combined, they needed something else as well.  Originally the plan was to serve them over potatoes, like a potatas bravas con pollo, which I definitely did, but it still wasn’t enough to actually turn this into a meal.  So all were thrown together and served with spicy tomato sauce over pasta.  Normally, I do not serve potatoes and pasta together, although it is not completely out of order.  I do it every now and then.  It was definitely a hit and probably something I would do again, or as I like to say, a “do-over”.

I went from this ….

IMG_8859

to this in about 30 minutes time.

IMG_8867

I  love to cook simple rustic things, with basic ingredients.  Don’t get me wrong, I love to prepare fancy dishes too, but those usually aren’t everyday dishes.  But for everyday, simple is usually best for us.

Jeanne’s Spanish Tapas Inspired Pasta

2 cups cooked chicken strips (I sauteed them in garlic and olive oil with some red pepper flakes)

1 cup artichoke hearts stuffed with Spanish cheese and Serrano ham Tapas in Spain/Tapas at Home – Part 2 – Tapas from Madrid

1 lb red potatoes, rinsed and quartered

1 large shallot, sliced very thin

1 TBSP garlic

olive oil

salt & pepper to taste

red pepper flakes to taste

2 TBSP red wine

1 tomato, diced

3/4 jar of pasta sauce

5-7 sprigs of fresh thyme, stems removed

1 TBSP fresh basil, chiffonade into thin strips

Parmigiano or Spanish cheese, optional for topping


Pan fry the potatoes in enough olive oil to get them slightly crispy.  Just as the potatoes start to brown, add the shallots and garlic and saute for about 2 minutes, or until the shallots are soft and tender.

IMG_8860

IMG_8861

Once the potatoes have browned and the shallots are soft and tender, add the wine.  Make sure to really gather up all the drippings from the bottom and incorporate them well and cook for about 1-2 minutes or until most of the liquid evaporates.

IMG_8863

Add the chicken and artichoke hearts, combine well, then add the pasta sauce and mix thoroughly.  Mix in the salt, pepper and red pepper flakes too.

IMG_8865

Bring everything to a boil, then reduce the heat to a simmer and continue to cook for about 10 minutes at a low heat.  Right before serving, add the fresh herbs and incorporate into the sauce.

IMG_8866

When the sauce is finished, you can serve it over either rice or pasta.  I served it over pasta.  Top with more of the basil and cheese if you like, add a little bread and the same wine you used to cook with and the meal is complete.  Desfruitas!

IMG_8869


Are They for Breakfast or Dessert?

I get my ideas and my inspiration from numerous sources all the time. Some of those sources are from other foodies, like a lot of you.  I got this idea from fellow food blogger and friend, Gail, from snapshotsincursive.  Gail has many fantastic ideas and she always presents them so beautifully too.  Gail had posted her recipe for her nutmeg and cinnamon popovers and the recipe just spoke to me.  I knew I had to make them right away.

I love popovers of all kinds, and we both love foods with cinnamon and nutmeg too.  I make popovers all the time.  For this recipe, I followed Gail’s recipe to the tee (mostly), which is very unusual for me, but my popovers, though still very tasty, did not turn out as pretty as Gail’s did.  The first thing Larry said when I took them out of the oven and finished them was “they don’t look like they do in the picture”.  Thanks Larry.  Really.  They did at first, but then they sank a bit, which tends to happen with a lot of delicate rising breads and pate a chouxs here in Colorado, at higher altitudes.   I should have listened to my instincts, but instead I chose to follow the recipe.  So, for those of you who live in higher altitudes like me, the things to remember are to use slightly more flour, a little less sugar, turn the oven temperature up a bit more and cook a little longer.  I simply did not follow my own rules of advice here.  I guess I was just to excited about following Gail’s recipe to think properly.  🙂  “These things, they do happen”, to quote Carlotta from Phantom of the Opera.

IMG_8855

Once we got past the fact that my popovers were not as pretty as Gail’s, we had to give them a test try.  As expected, they were light and fluffy and delicious, despite the fact that they sank a bit after taking them out of the oven.  We enjoyed them for breakfast, just out of the oven, before I had to run off to work.  Then we enjoyed them in a slightly different way later, for dessert.

Cinnamon and Nutmeg Popovers

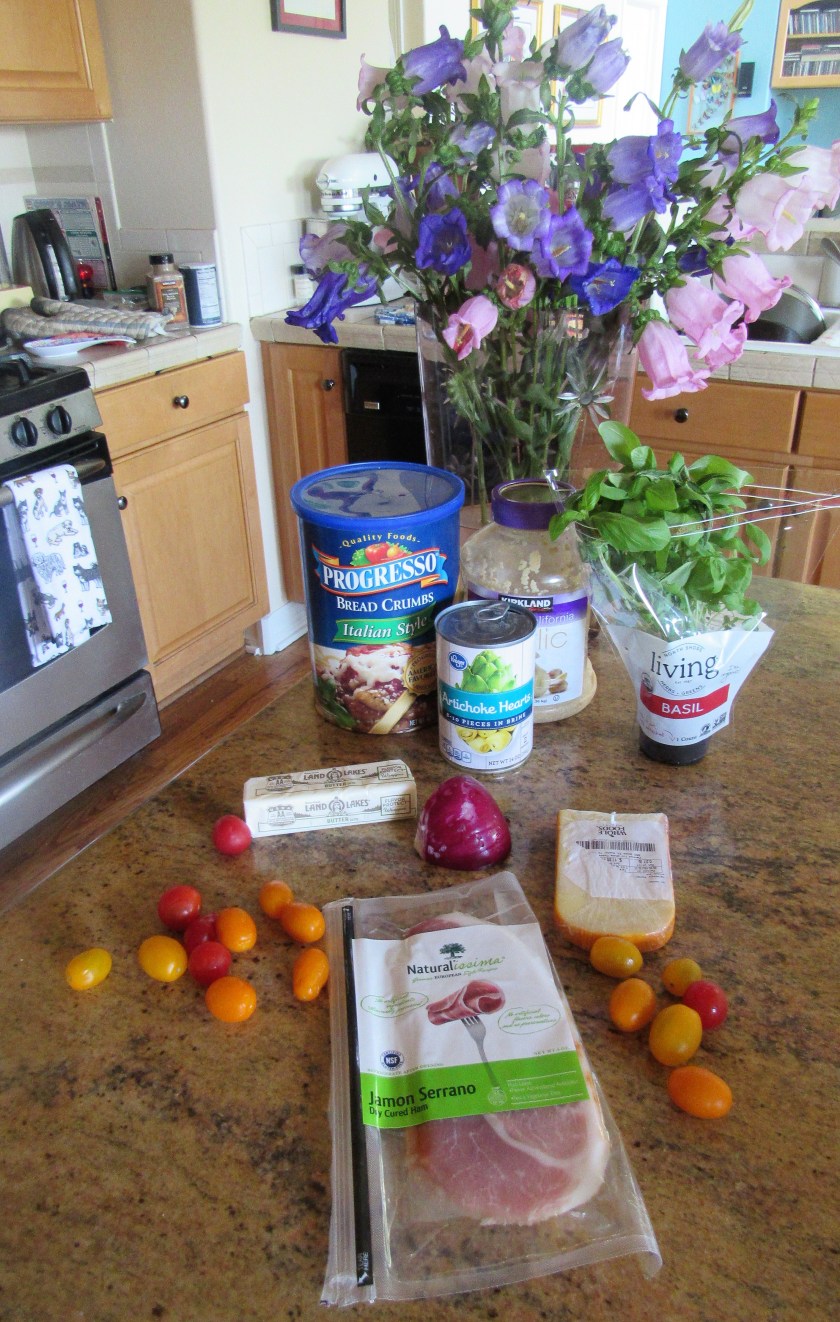
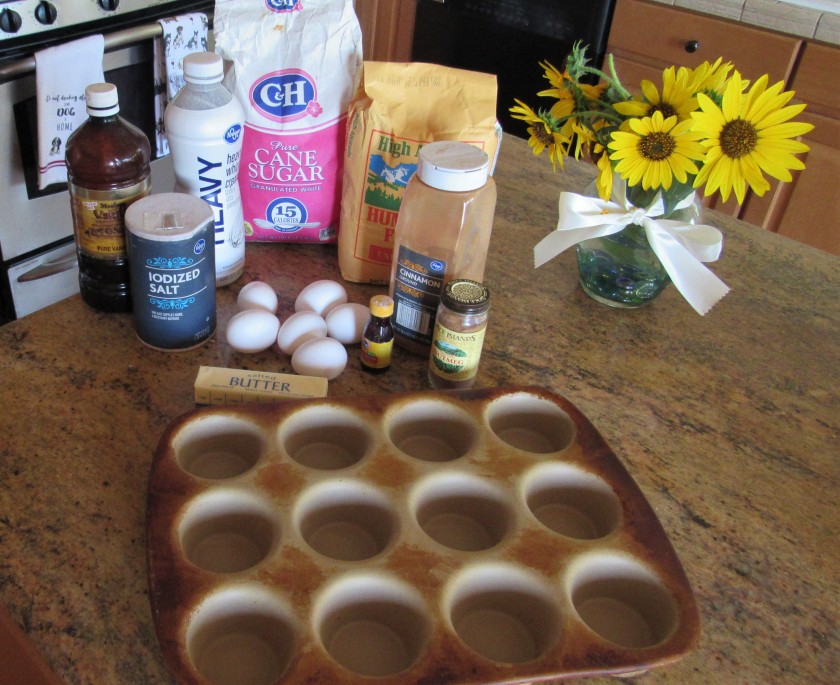
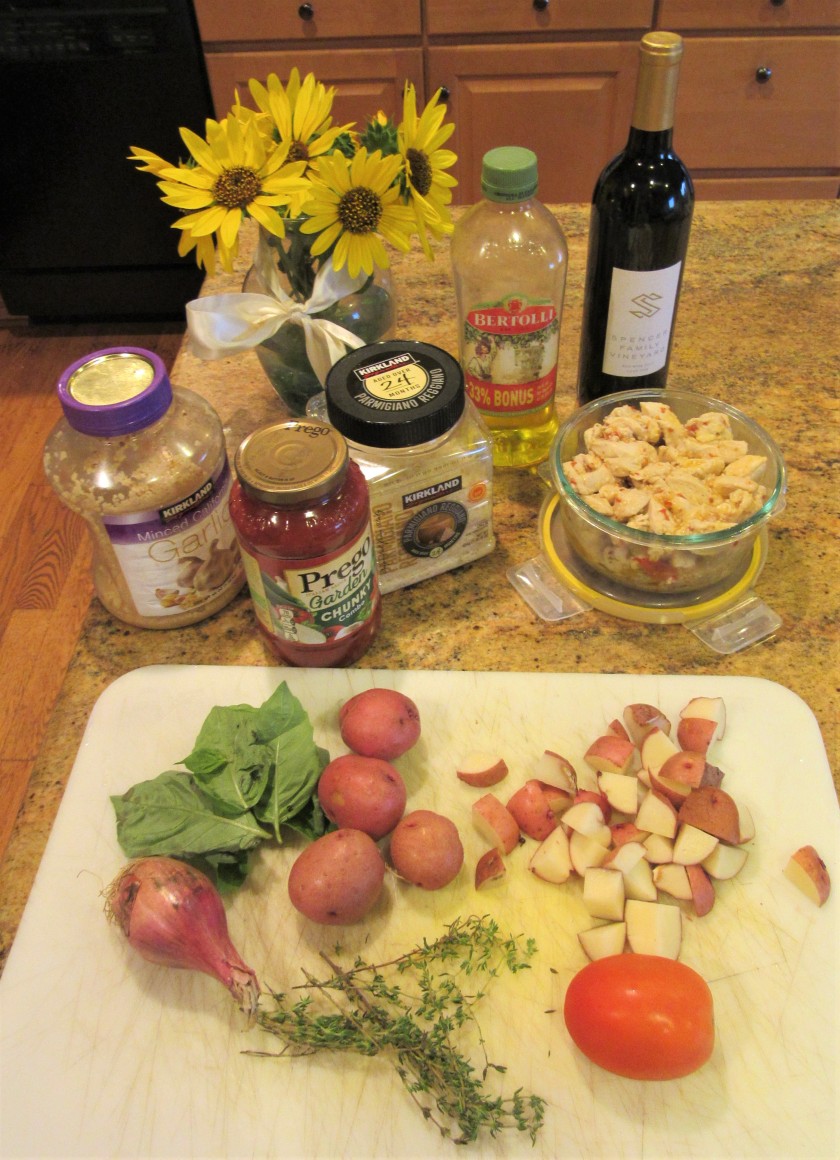
Again, this recipe only calls for a few simple, everyday items that most of us have on hand at any time.

IMG_8845

Preheat the oven to 400* F or 200* C, unless you live in higher altitudes, then preheat the oven to 425* F.

Spray a muffin pan with cooking spray.


The Popovers

6 eggs

2 cups cream, I used heavy cream, but you can also make it a little lighter, by mixing 1 cup of heavy cream with 1 cup of milk

1/4 cup butter, melted

2 tsp almond extract

2 tsp vanilla

1 tsp salt

3 TBSP sugar – 2 TBSP in higher altitude

2 cups flour – because I live in a higher altitude, I always use a high altitude flour.  Also use about 2 1/4 -2 1/2 cups of flour if at a higher altitude too.


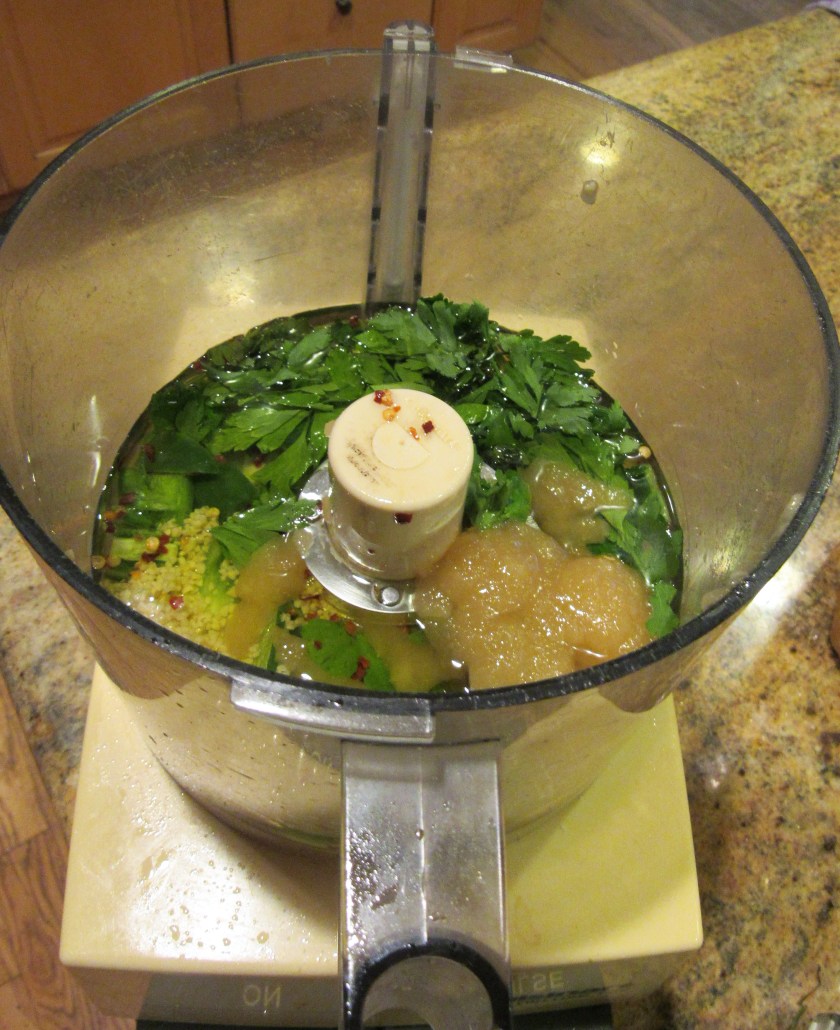
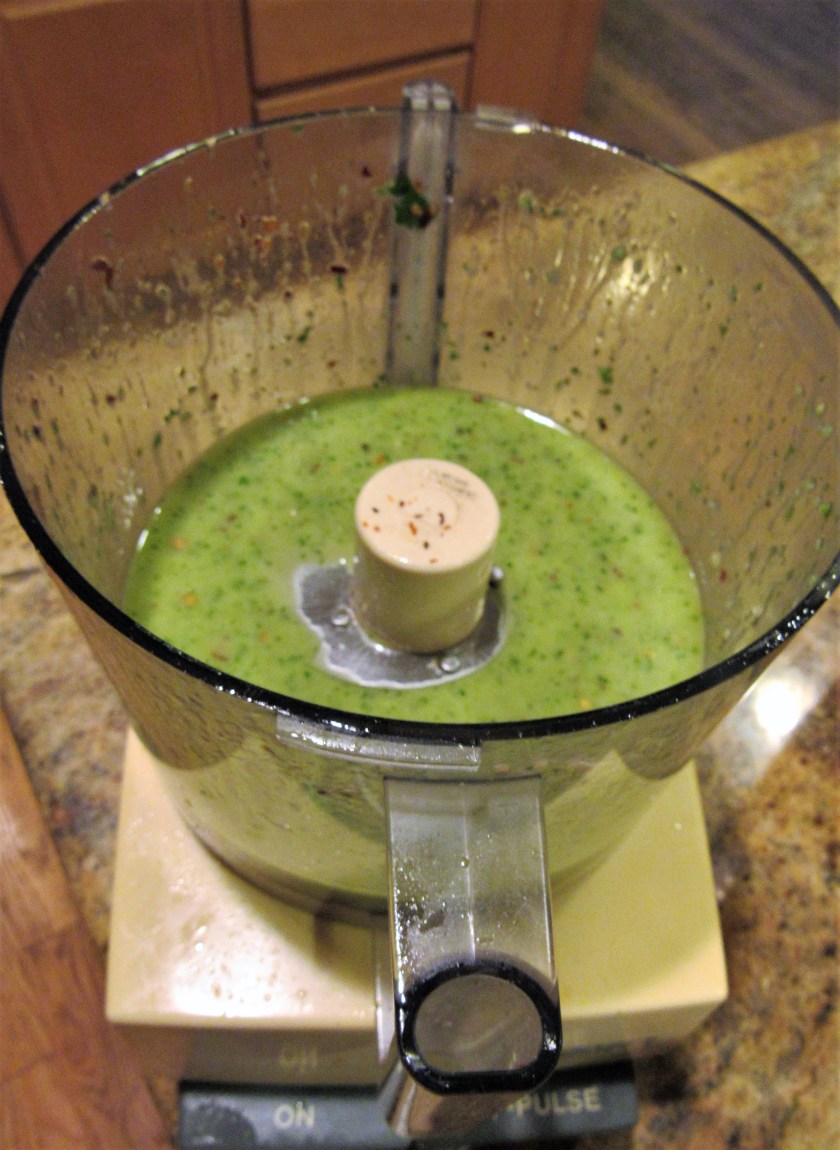
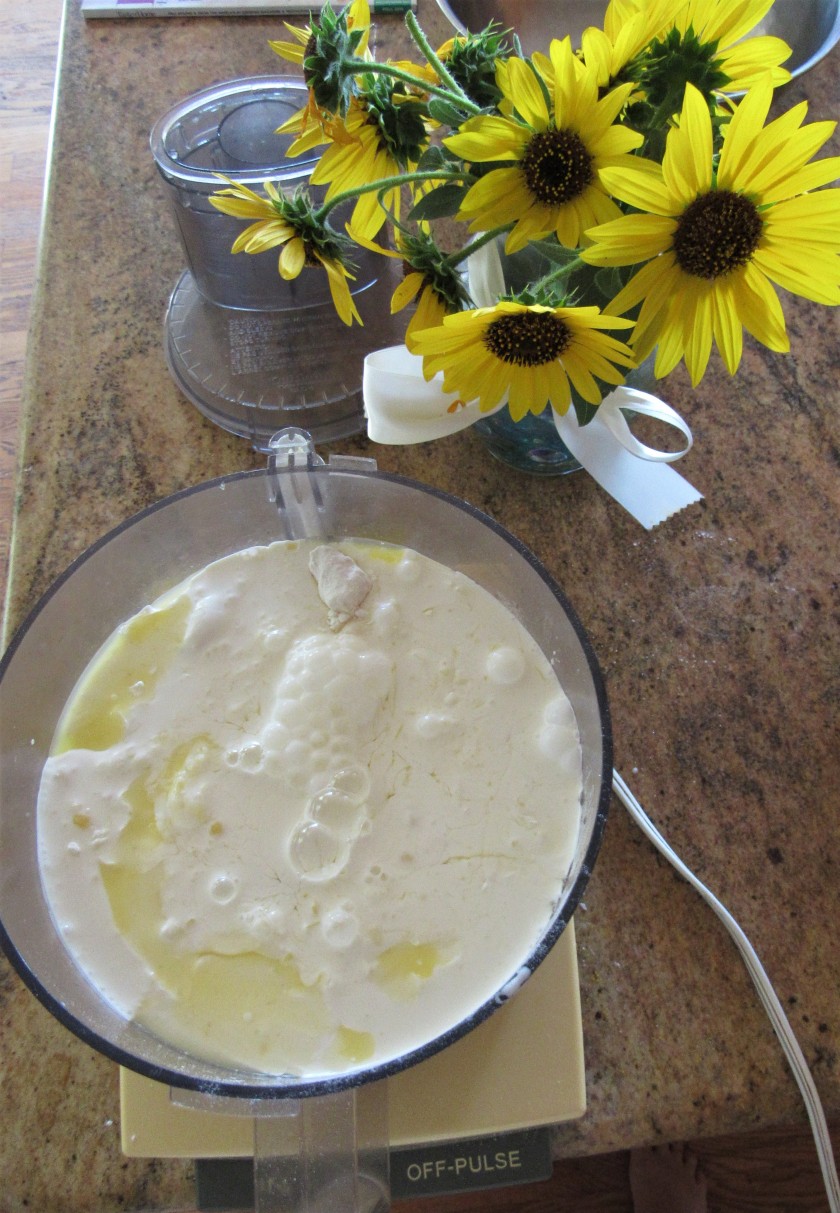
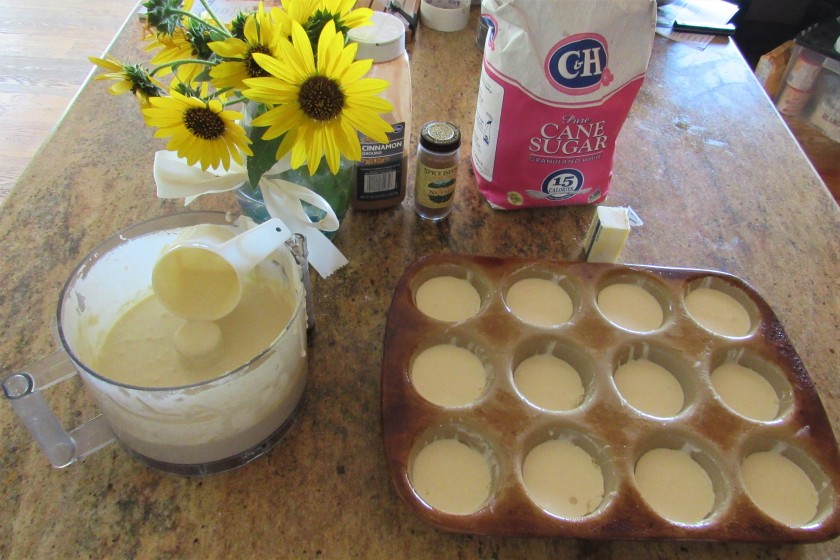
Gail mixed everything together in the food processor, which I did too this time, but usually, I mix the dry ingredients together first, then mix the wet ingredients together and add them separately.  Both methods work just fine.  Mix just until all the ingredients are well blended and there are no lumps in the mix.

IMG_8847

Then pour the batter into the prepared muffin pan, filling each cup only about 2/3 full.

IMG_8848

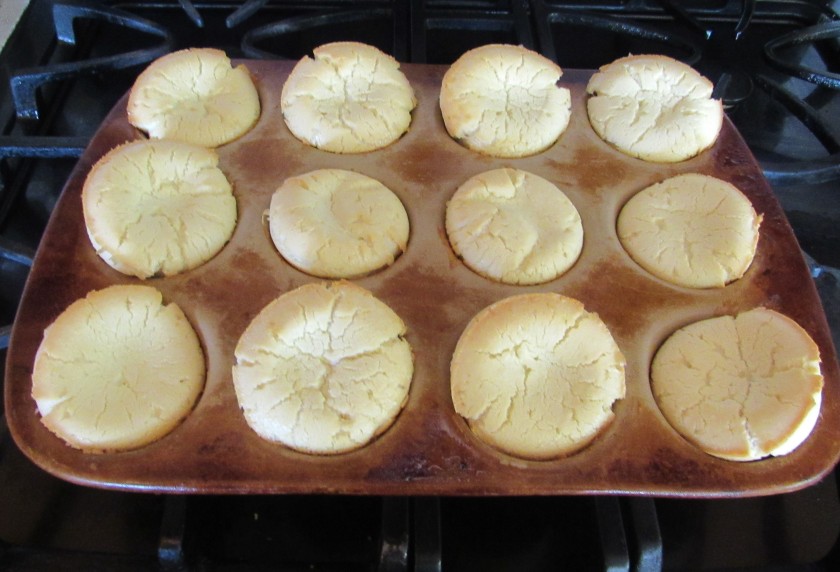
If you live in lower altitude areas, bake the popovers for about 30 minutes, and if you live in higher altitudes, bake them for about 40 minutes or until they are golden brown.  DO NOT open the oven door while there are baking.  This will also make them sink and deflate.  Once they are done, remove them from the oven and let them cool for about 2 minutes, then top them with the butter, cinnamon and nutmeg topping.  The tops were still a little bland here, but the bottoms were golden to perfection.

IMG_8851

The Topping

2 TBSP melted butter

1 TBSP cinnamon

1/2 tsp nutmeg


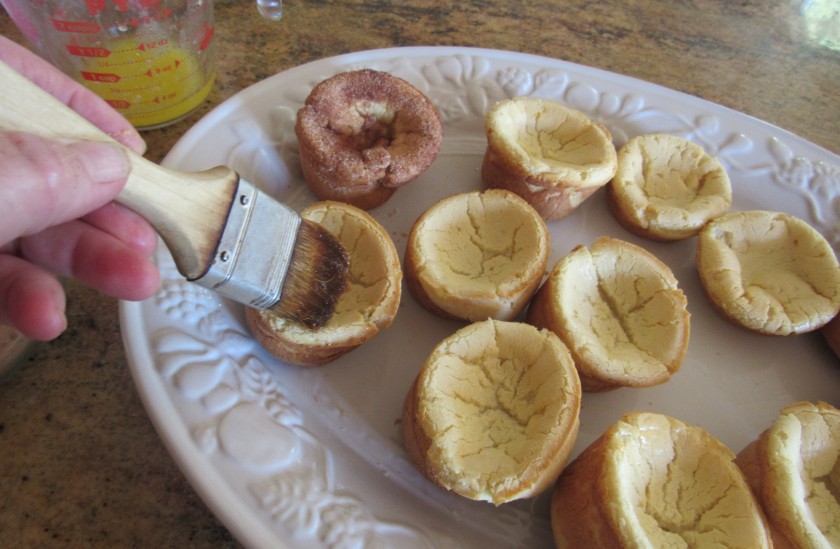
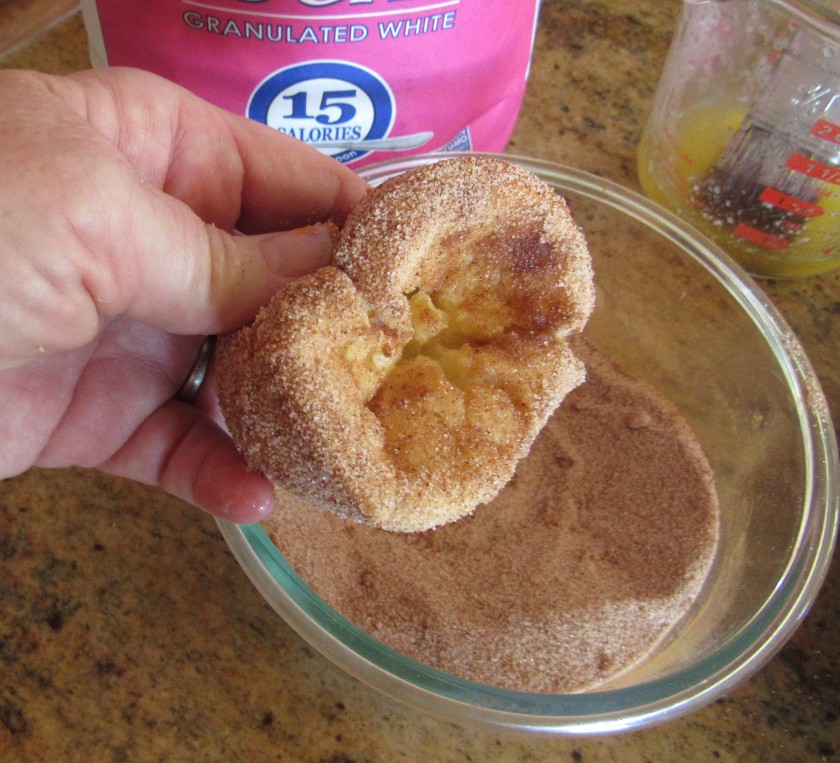
Mix the cinnamon and nutmeg together in a separate dish.  Brush the popovers with the melted butter then roll them in the cinnamon-nutmeg mixture and completely cover the popovers with the topping.

IMG_8852

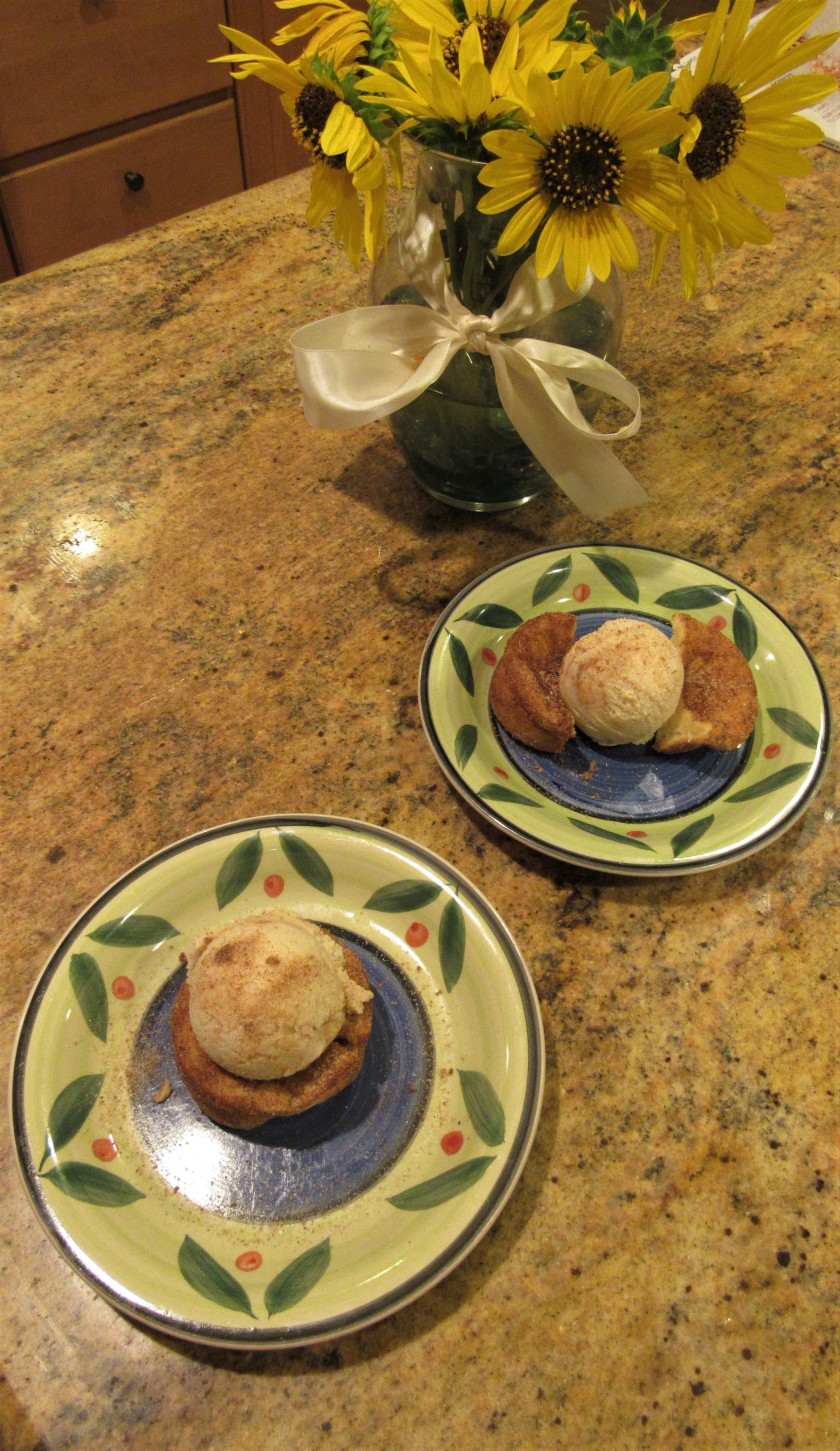
These wonderful popovers are delicious as is or …..

IMG_8853

You can heat them up a bit and serve them with ice cream and a little extra cinnamon nutmeg topping later.  Either way, they just melt in your mouth.

IMG_8856

Please stop by snapshotsincursive too and see Gail’s beautiful cinnamon-nutmeg popovers too.  Thanks Gail for this fabulous recipe, even if mine “did not look like yours”.


Lemon Herb Ahi Tuna

Ahi tuna is one of my favorite types of seafood.  I just love a good, thick ahi tuna steak, seared to perfection.  We eat this quite a bit.  For whatever reason though, I tend to do something with an Asian theme more so than not when I cook ahi tuna.  I don’t know why I do this because there are so many wonderful tuna recipes available, but I’ve noticed this is a trend of mine.  This time, however, I did not cook my tuna with an Asian theme.  I went more Mediterranean instead, and opted for a lemon herb sauce for my tuna.  I’m glad I did.  It came out very, very good.  As you all should know by now, I love to cook and eat all kinds of foods, in many different and various ways.  I hate getting stuck in a rut, and love to walk on the wild side and be as creative as I can.  This sauce was super simple to make and only consisted of a few everyday items that are part of my normal pantry.

IMG_8840

Lemon Herb Ahi Tuna

IMG_8838

You can use any kind of herbs you like.  This time I used fresh thyme, basil and some lemon verbena from our ever-growing, endless supply in my backyard.  I meant to put in some oregano as well, but the store did not have any at the time, and as usual, I was pressed for time, so I did not get any.

1  Ahi tuna steak – any size

1 TBSP garlic

1/3 cup lemon juice

1/3 cup olive oil

1-2 tsp lemon pepper

2 tsp black pepper

1 TBSP each fresh herbs of your choice, chopped fine or chiffonade into thin strips

4 oz butter


Mix all the ingredients together and pour about 1/2 of the sauce over the tuna as a marinade.  Let it marinate for at least 30 minutes before cooking, but no more than an hour, since them lemon juice will “cook” the fish.  Once the tuna is ready to cook, place it on a hot grill and cook for about 7 minutes per side.  If you like the middle cooked more, cook it for a little longer.  I love it nice and pink on the inside and just seared on the outside.

IMG_8839

With the remainder of the sauce, cook it down in a hot skillet until most of the liquid has evaporated.  Once most of the lemon juice has evaporated, turn off the heat, add the butter, and swirl it around until it is completely incorporated into the sauce.

IMG_8841

IMG_8842
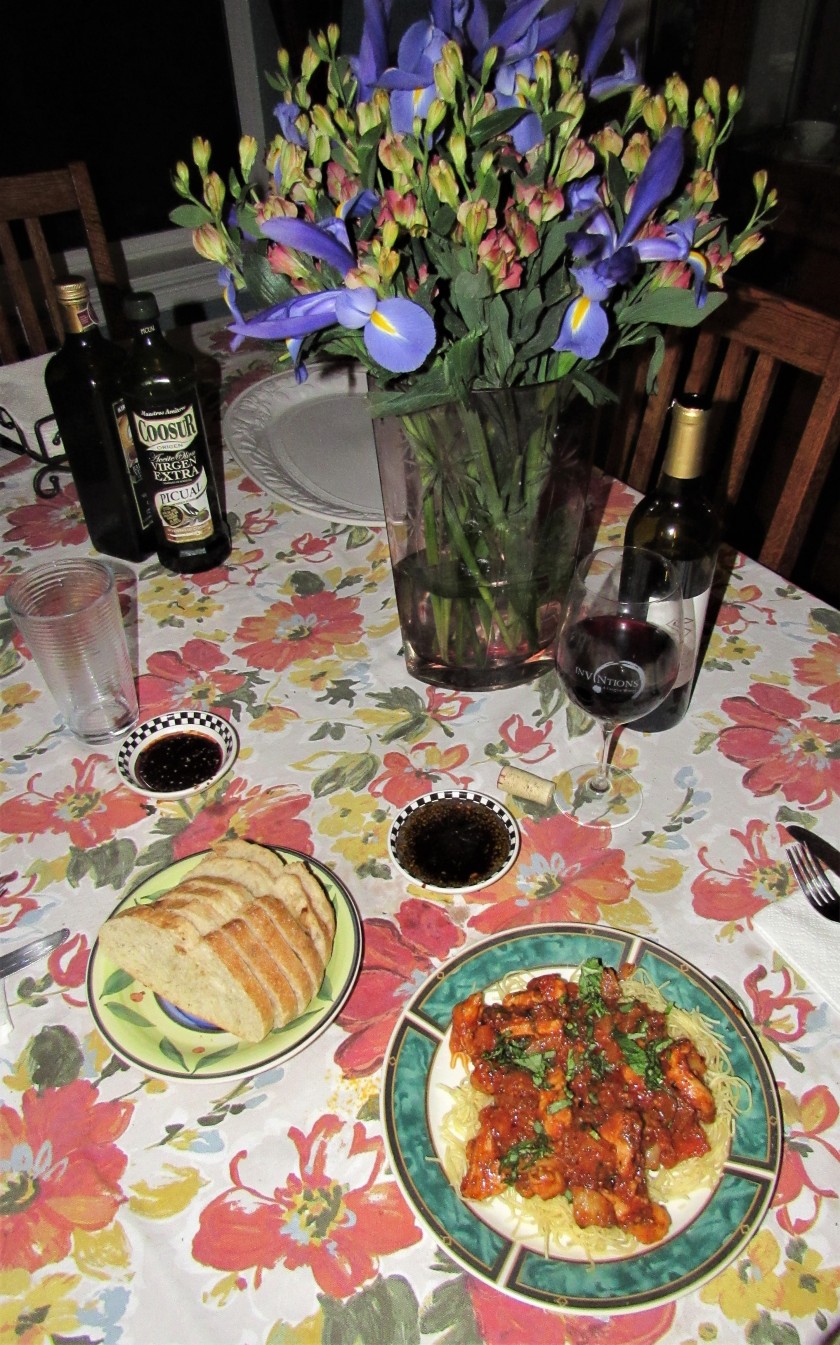
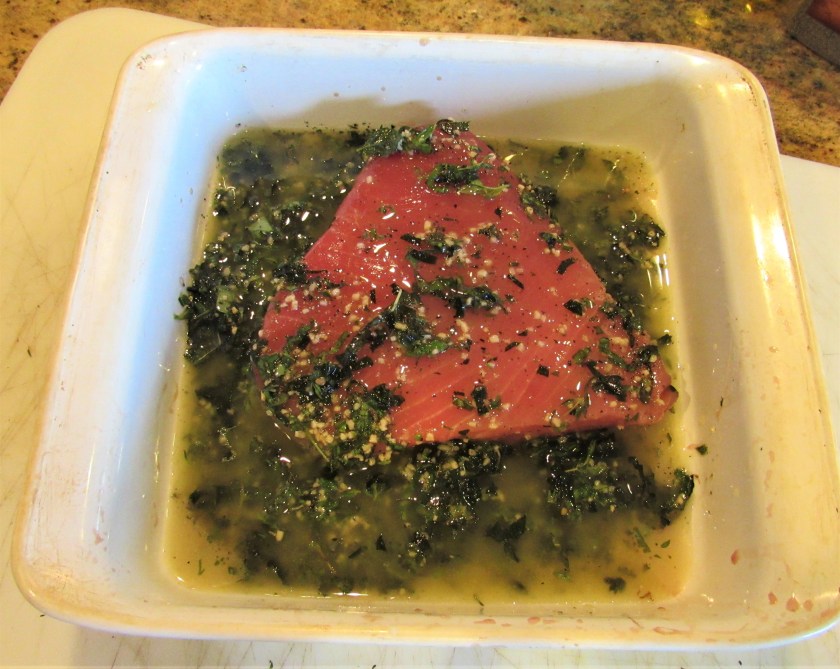
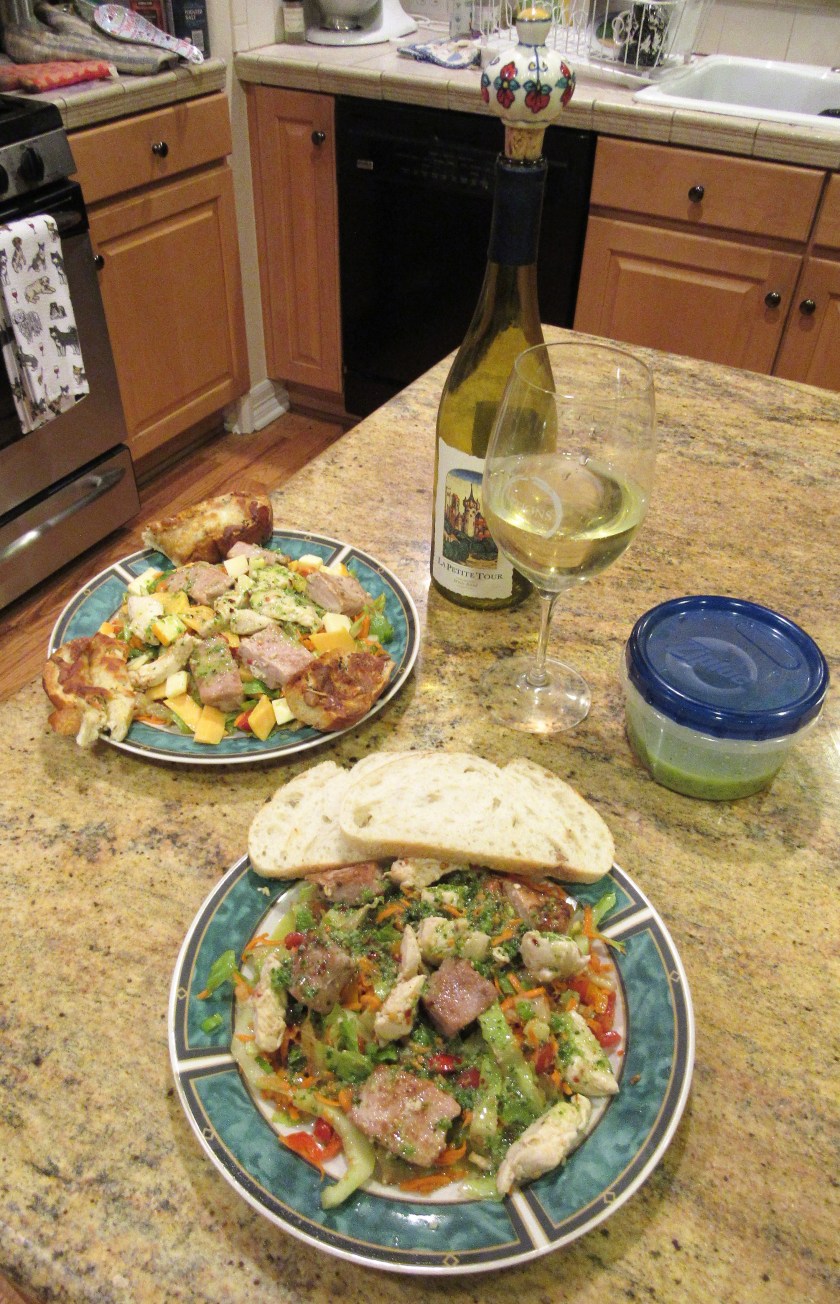
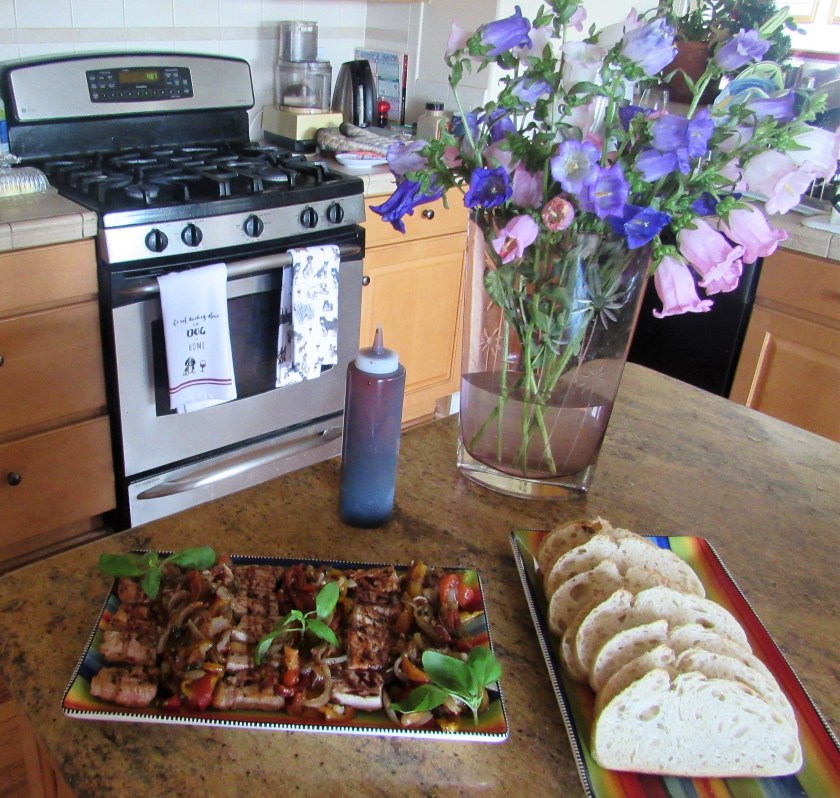
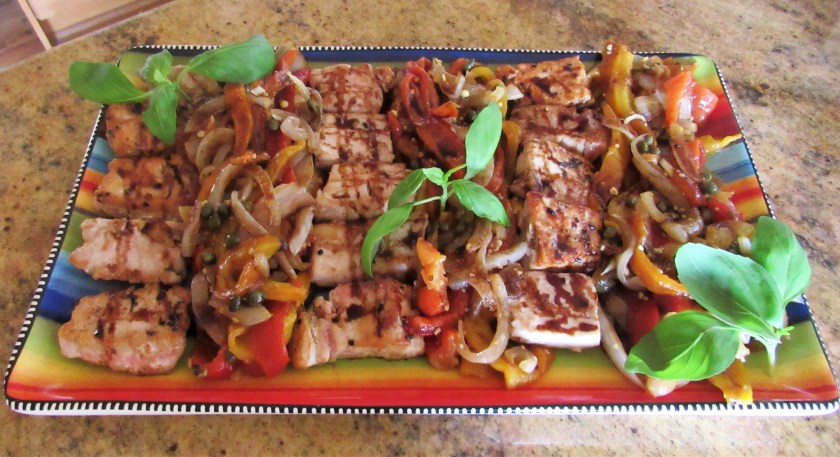
Once the tuna is cooked to perfection and the sauce is ready to go, serve it up and eat.  I served ours over wild rice with green beans topped with mushrooms, garlic, onions and tomatoes, some warmed bread with an olive oil dipping sauce, and a light, crispy citrus sauvignon blanc that had hints of lavender in it as well.  The wine is locally grown, from our grapes and vines out in Palisades, Colorado, which is on the Western Slope, about 4-4 1/2 hours away from us.  The Fruits of Palisade

IMG_8843

The whole meal was a perfect meal for a late summer day, enjoyed out on our deck.  Delicious!

IMG_8844


Rozina’s Green Spinach Cake

It is a new month, and that means we have a new guest chef.  This lovely lady is Rozina.  Rozina is originally from Iran but now lives in Scotland.  Rozina lives a very busy and interesting life.  She is a photographer, a cooking teacher and is very interested to introduce Persian and Azerbaijani meals, desserts and beverages to people from different cultures.  She loves to try food from all over the world.  She also loves photography or as she calls them, “hunting moments”,  so she and her camera are very close friends. I like that phrase.  I would say I am very close friends with my camera as well.

Rozina loves to cook and is very passionate about cooking for her family and friends; friends who come from all over the world.  She says every meal has a story behind it and she loves to share these stories with her guests about her food and her cooking.  I would love to have dinner with her and hear all her stories.  That would be so fascinating.

Rozina has presented us with this beautiful and exotic looking Iranian cake. She has submitted quite a few really delicious looking and sounding recipes, but this one, for her green spinach cake, was the most fascinating to me.  Part of it’s appeal is that it is so different and exotic.  I mean after all, who would think of a “cake” with spinach.

Rozina’s Green Spinach Cake

Ingredients

  • 320 g all purpose flour
  • 250 g fresh spinach leaves, steamed and drained
  • 250 g white sugar
  • 200 ml sunflower oil
  • 50 ml double cream
  • 3 eggs
  • 1 tbsp vanilla extract
  • 16 g baking powder
  • pinch of salt

Ingredients for filling

  • 500 ml whipped cream
  • 75 g icing sugar
  • 4-5 bananas, sliced lengthwise
  • 3 tbsp chopped walnuts (optional)

Instructions

  • Preheat the oven to 180*C degree.

    Add, cooked spinach leaves, cream and oil to the mixer and make it smooth and purée.

Next, add eggs and sugar to the blender and blend them until light.

Add eggs mixture, vanilla extract, baking powder and flour to the spinach purée.

Blend all ingredients on a low setting, until well combined and you have a smooth batter.

Line a baking tray with parchment paper. Then pour in the batter. Bake it for 15-20 minutes.

While the cake is baking, prepare the cream. Using a mixer and combine whipping cream with icing sugar until fluffy.
When the cake is done, remove it from the oven and let cool. Pour in 3 tbsp cold milk all over the cake. It will give the cake a very moist texture.
Cut and trim four sides of the cake and crumble it and set aside.
Place the cake in a platter. Cover top of the cake with half of the prepared whipped cream.
Sprinkle chopped walnuts on the cream.  Next, place lengthwise cut bananas on the cream.
Cover the bananas with the remaining whipped cream.
Finally for the topping, sprinkle pieces of the crumbled cake on top of the cream.  Then add some beautiful, brightly colored pomegranate seeds on top for decoration and extra pizzazz.
And voila!  The cake is ready to eat and enjoy.  In Rozina’s own words, “🍰 This cake is just stunning. You have to try and will know what I am talking about”.
Rozina even provided all the instructions in her native language, Persian, as well.
کیک اسفناج

سلام دوستان – آیا از رنگ سبز خوشتون میاد؟؟ مثلن بین نوشیدنی ها چای سبز – یا پسته نظرتون در باره کیک سبز چیه؟؟ منظورم کیک موچا چای سبزییا کیک پسته نیست – بااینکه این کیک ها هم خیلی خوشمزه هستند ولی نظرتون در مورد کیک اسفناج چیه؟؟ بله درست شنیدید کیک اسفناج

یک کیک زیبا و خوشمزه ی سبزرنگ و کاملن متفاوت با کیک هایی که قبلن امتحان کردید –

حالا قبل از اینکه طرز تهیه رو توضیح بدم یک خاطره بامزه بگمدر کشورهای اروپایی به کتلت ماهی یا

هر کتلتی گاهی از کلمه کیک استفاده میکنن و میگن کیک

ماهی یا یا کیک قارچ برای همین یکبار در رستوران وقتی در بین لیست غذاها دیدم نوشته کیک ماهی خیلی تعجب کردم – تو دلم گفتم اه اه کیک ماهی دیگه چیه ولی بعد متوجه شدم که همون کتلت هست.

حالا در مورد کیک اسفناج هم این کیکی که من درست کردم واقعن کیک کیک هست پر از شیرینی و خامه و با کیک اسفناج که غذا هست فرق داره.

طعم بسیاررررررررررر خوشمزه و بینظیری داره.

مواد لازم

سیصدوبیست گرم آرد

دویست پنجاه گرم اسفناج تازه – آبپزو آبکش شده

دویست و پنجاه گرم شکر سفید

دویست میلی لیتر روغن مایع

پنجاه میلی لیتر خامه سنگین

سه عدد تخم مرغ

یک ق غ عصاره وانیل

شانزده گرم بیکینگ پودر

کمی نمک

مواد لازم برای میانه کیک

پانصد میلی لیتر ویپینگ کریم

هفتادوپنج گرم پودر قند

چهارپنج عدد موز

سه ق غ گردوی خرد شده

طرز تهیه

فر را روی ۱۸۰ درجه سانتیگراد گرم می کنیم

داخل یک‌کاسه اسفناج آبپز شده – خامه و روغن مایع را ریخته و با مخلوط کن به صورت پوره ی یک‌دست در می آوریمتخم مرغ ها و شکرا را هم با همزن برقی مخلوط میکنیم تا به صورت یک مایه روشن در آیدسپس مخلوط تخم مرغ ها – عصاره وانیل– بیکینگ پودر– و آرد را به مخلوط اسفناج افزوده و همه ی مواد را هم می‌زنیم تا کاملن با هم مخلوط شوند.

داخل سینی فر را با کاغذ روغنی می پوشانیممایه کیک را داخل سینی ریخته و در فر قرار می‌دهیم تا به مدت ۲۰۱۵ دقیقه بپزددر زمانیکه کیک در حال پخت می‌باشد مواد میانی کیک را آماده می کنیمابتدا وینپینگ کریم را با پودر قند همزده تا به صورت خامه فرم گرفته در آید.

وقتی کیک آماده شد از داخل فر خارج کرده و سه ق غ شیر سرد را روی تمام سطح کیک می‌ریزیم تا بافت کیک مرطوب باشدچهار گوشه کیک را مطابق تصاویر زیر برش داده و آن‌ها را به صورت پودر در آورده و کنار میگذاریم برای مرحله آخر.

کیک را داخل ظرف مورد نظرمان قرار می دهیمنصف خامه آماده شده را روی سطح کیک پخش کرده و روی خامه را با گردوی خرد شده می پوشانیمسپس موز ها را به صورت طولی برش داده و روی سطح خامه چیده وبا باقیمانده خامه روی موزها را می پوشانیمدر مرحله آخر با پودر کیک روی خامه را پوشش می دهیم.


You can find this recipe, and many more of Rozina’s dishes on her website and blog at https://rozinaspersiankitchen.com.  Thank you Rozina, for this fabulous recipe and beautiful dish.  I am looking forward to many more interesting and fabulous dishes yet to come.


It’s a Great Day for a Salad

Sometimes I just crave a good, healthy salad, particularly when it is super hot outside.  Our summer started off late and slow, and was very cool in the beginning, but when it hit, it hit HARD and HOT.  We just broke 2 heat records for September, and today is ONLY the 6th.  Salads are also quick and easy to make when I am pressed for time, which has been quite frequently lately.  This one was especially quick and easy, because I used up a lot of my leftovers, added a few more vegetables and then tossed everything together.  I also made a delicious honey-lime-cilantro dressing to top the salad.  The sweet-hot combination just brought everything to life.

The beauty of making salads is that anything goes.  You can use whatever you have on hand, no matter how little the quantity, and use whatever you like.  There are no rules when it comes to making salads.  I already had some lettuce and tomatoes cut up, but I added a few more tomatoes, a shredded carrot, sliced cucumbers, green onions and some sweet roasted peppers and tossed it all together.

IMG_8829

IMG_8830

My salad needed a good, flavorful dressing, so I threw a few things together in the food processor and, voila, my honey-lime-cilantro dressing was created.

IMG_8826

Honey-Lime-Cilantro Dressing

1/2 cup olive oil

1/3 cup lime juice

1 TBSP garlic

1 jalapeno, rough cut and seeded

2 TBSP fresh cilantro, stems removed

1 TBSP honey

red pepper flakes to taste


Put everything together in a food processor and blend until it is all mixed together.  Pour over your favorite salad.

IMG_8827

IMG_8828

To top our salads and to add our much needed protein, I used up the rest of our ahi tuna Tapas in Spain/Tapas at Home – Part 3 – Tapas in Sevilla and some leftover chicken.  Larry had some leftover cheese bread with his, as well as cheese on top of his salad, and I opted for some warmed ciabiatta with a olive oil and balsamic dipping sauce instead, and of course a good chardonnay on the side.  Dinner was delicious, and done in about 10 minutes.  Nothing goes to waste in our house.  I am always recreating with my leftovers.  I have earned my title as “The Queen of Leftovers”.  🙂

IMG_8831

IMG_8832


It’s Another Beautiful Day in the Neighborhood

I just love life in Colorado.  I am so lucky that I have such a beautiful state to call “home”.  Everywhere you go, there is so much to see, and so much natural beauty all around.  We love taking in the sights of our beautiful state as much as we can too.  For Labor Day, since we both had the day off, we decided to take yet another one of our little get-away drives.  This time, we ventured Northwest and toured around the Cache le Poudre area and through Red Feather Lakes, not far from the Wyoming border and Cheyenne.  We are only slightly over an hour away from Cheyenne too, so this really is still part of “our neighborhood”, in a general sense.  We talked about packing a picnic lunch, but somehow we forgot to actually pack a lunch, so that didn’t happen.  So instead, we did one of our driving tours and stopped for a late lunch/early dinner on the way home.

IMG_8781

IMG_8788

IMG_8794

IMG_8797

IMG_8803

IMG_8813

This house was built in 1889.

IMG_8808

Yes, we even had a Bigfoot sighting, in plain daylight too.

IMG_8811

IMG_8817

IMG_8819

After our driving tour, we stopped at The Pumphouse in Longmont for a late lunch/ early dinner.  Even though it was yet another scorcher of a day, it felt very cool and comfortable to be outside in the shade, with the misters spraying us with cool water.  “The Pumphouse opened in May of 1996 as an independently-owned, single-unit brewpub.

The Pumphouse Brewery is housed in the original “William Lugg Building”. William Lugg was a prominent businessman in Longmont during the early 1900’s. The building was erected on the corner of 6th & Main Street over what was previously a wood & coal storage and sales yard. The Lugg Building was initially used as a garage & repair shop, and was known as the Ford Garage. In subsequent years, the building changed hands a couple of times, and was renamed Power Motor Company & Cleland Motor Company, in turn. In the late 1920’s, Mrs. Ollie R. Boggs leased the building & opened a “high class, up-to-date roller skating rink” named Fairyland. This use lasted only a short while, as Standard Oil of Indiana took over the building in 1930 & remodeled it for a service station. It was a large station in its day & was referred to as “Standard Super Service Station” (S.S.S.S.). Mr. Lugg operated the business himself.

J.W. Rankin purchased the building in 1935, and built his business – Rankin Chevrolet – into the largest dealership in a 6-state region. Six years later, it became Troxell Chevrolet under new ownership, & then again changed hands 10 years later to become Wills & Hajek Chevrolet in 1951. They added an Oldsmobile dealership under the same roof a few years later, and after a few additional expansions, they built a new building for their business, selling the Lugg Building to Firestone Tire Company. Firestone sold tires & serviced cars until 1991, and then leased the building to a real estate office & western wear store. In 1995, the 4 original Pumphouse partners bought the building with big plans in mind.

To become a functional restaurant & brewery, the building had to be transformed radically, though much of the original architecture was left intact to preserve the Historical Landmark status of the building. Renovating a building of this nature – one not originally designed for restaurant use – leads to a somewhat quirky layout, but there is no doubt that the atmosphere is that much more charming & intriguing because of this”.

IMG_8821

IMG_8822

IMG_8823

Larry had a Cubano Sandwich with shredded pork and I had a pecan-crusted chicken salad with spinach, strawberries and mandarin oranges.  Both were very good and seemed to just hit the spot perfectly.

IMG_8825

IMG_8824

Below is the contact information for The Pumphouse.  It is a fun, lively place to hang out, get refreshed and sit back and watch the world go by.

  • 540 Main Street
  • Longmont, CO 80501


Tapas in Spain/Tapas at Home – Part 3 – Tapas in Sevilla

Without ever knowing the reasons or traditions behind the tapeo, this is how I have always enjoyed my foods.  I have always said good food is always made better when shared with good friends and good wine.   I love the socialization that enhances the culinary experiences, and this is what the art of the tapeo is all about; good food, good wine, and good company.  Tapas in Spain/Tapas at Home – Part 1

When we were in Sevilla, we had yet another delicious tapas meal that included a dish made with ahi tuna and a roasted pepper and onion salad, served with bread.  This was a pintxos variety of tapas.  My version is very, very similar to the one we had in Sevilla.  It got rave reviews both here and there, and is now one of my new favorites.

This was the Ahi tuni and roasted pepper and onion salad we enjoyed in Sevilla.

img_8506

And this is my version of the same salad.  This is a very simple and easy meal to make, but it is so colorful and tasty.

IMG_8769

Ahi Tuna, Roasted Pepper and Onion Salad

IMG_8762

8 oz ahi tuna cut into squares and seared

1 each red, yellow and orange pepper, roasted, peeled and cut into strips

1 yellow onion, peeled, sliced very thin and caramelized

2-3 TBSP olive oil for cooking

dash of sugar

dash of balsamic vinegar

1 heaping TBSP garlic

1 TBSP capers

salt & pepper to taste

balsamic glaze


Roast the peppers on an open flame or in the oven, though I usually do mine on an open flame. Roasting Peppers

IMG_8764

Caramelize the onion slices and the garlic together in a hot skillet with the olive oil, a dash of sugar and a dash of balsamic vinegar.  You want the onions to be soft and translucent, but not to brown.  They are ready just as they start to turn color.

IMG_8765

IMG_8767

Once the onions and the peppers have cooled, toss them together along with the capers and the salt and pepper. If you can find the large Spanish capers, even better, but I could not find those, so I used the smaller ones.

Cut the tuna into squares and saute in the same pan and same juices as the onions.  Cook just until the tuna is browned on all sides, but still a bit pink on the inside.

IMG_8766

IMG_8768

When everything is cooked, plate it all up, top with a balsamic glaze and serve with warm bread and wine of your choice.   Enjoy with good friends and/ or family.


Balsamic Glaze

I got this very simple and delicious recipe from fellow food blogger, T and Conversations! Chai with Preethi!  You can find it at chaiwithpreethi.com.   It only has 3 ingredients and it is just perfect.  It can be served on just about anything.  Be creative and use your imagination.

IMG_8736

1 cup balsamic vinegar

1 TBSP honey or maple syrup (this time I used honey)

1 tsp brown sugar


Bring the balsamic vinegar to a full, rapid boil, then reduce the heat to a simmer, and continue to cook for at least 15-20 minutes, or until the liquid reduces by about 1/2.  Then add the honey or maple syrup and the brown sugar and continue to cook for another 10 or so minutes.  Let it cool completely.  It will thicken as it cools.  Poor into a container that will allow you to drizzle it over your food and refrigerate until ready to use, then drizzle on your favorite dishes to add some extra texture and pizzazz.

IMG_8753

You can eat this salad as is, but I thought it really came to life when served over warmed bread.  it would be really good as a crostini too.

IMG_8770


Tapas in Spain/Tapas at Home – Part 2 – Tapas from Madrid

Our first real introduction to Spanish tapas was in Madrid.  There were so many good tapas and good foods, but the one that left the biggest impression on me at the time was the one with the artichokes and Serrano ham, from The Taste Gallery.  Madrid – Part 3- Los Comidas de MadridAll the tapas we ate there were fabulous, and some I had already made and enjoyed here at home, long before even going to Spain.  This one was new for me though and I thoroughly enjoyed it.

Since I did not have the exact recipe (not that I would really follow it anyway), and I could not find all the ingredients, I made my own version.  Larry and I were the only ones that could vouch for the Spanish version, and how good it was, but we all agreed that my version was very tasty as well.

IMG_7832

I could not find the large artichokes that they used in Madrid, so I used canned artichoke hearts instead.  These are my artichokes and Serrano ham tapas before I baked them in the oven.  Since I was recreating a Spanish dish, I wanted all the ingredients to be from Spain as much as possible.  I used Mitica Mahon cheese, which is a soft Spanish cheese and Serrano ham, also from Spain. Serrano ham is a type of ham that comes from the Serrano white pigs that are bred, raised and processed entirely in Spain.  Only this type of white pigs are used if they want to be called Serrano hams.  These pigs have innate genetic traits that give them a distinct texture and therefore a distinct taste that identifies them as Serrano.  Once they are processed, they are then cured for about 2 years to add an even more unique quality to them, which allows for an outstanding taste and texture.  Next time I make these, and believe me, there will definitely be a next time,  I will be a lot more generous with the ham.  I used it sparingly this time, and I decided we needed more.


IMG_8761

Jeanne’s Artichoke and Serrano Ham Tapas

IMG_8757

2 cans artichoke hearts, drained and rinsed

1 quarter red onion, diced fine

1 heaping TBSP garlic

2 TBSP butter

1 cup seasoned bread crumbs

1 package Serrano ham

5-6 oz Spanish soft cheese, cubed

salt & pepper to taste

2 tomatoes, diced fine – any kind of tomatoes are fine – I used a variety of small tomatoes

olive oil


Mix the breadcrumbs, onions, garlic and salt & pepper together and saute in butter for about 5 minutes or until the onions are cooked, and are soft and translucent.

IMG_8758

Preheat oven to 350* F or 180* C.

Spray a baking dish with cooking spray, then evenly distribute the cooked breadcrumb mixture on the bottom of the baking dish.  Slice the bottoms off the artichoke hearts to make them even so they can stand upright on the bottom. Place the artichoke hearts in the baking dish.

Cut the cheese into small cubes and place a small cube on the top of each artichoke heart. Spread the tomato pieces around through the dish.  Add some of the Serrano ham on top of each artichoke.  Drizzle olive oil over the dish, making sure to cover each piece.  Bake for about 15 minutes or until all the cheese is melted.  Do NOT over bake or the delicate ham will burn.

IMG_8760

!Desfruitas! Enjoy as part of your tapas menu, with a glass or two of your favorite wine and with friends or family.  If you are going to enjoy tapas, then you have to do it proper fashion and embrace the art of the tapeo.  Tapas in Spain/Tapas at Home – Part 1

IMG_8761

Tapas in Spain/Tapas at Home – Part 1

I fell in love with all the foods in Spain, just I like I did everything else in Spain. One of my favorite food types was the tapas, or small plates, with a glass or two of delicious wine.  But what are tapas?  Tapas are known as small plates of food served with wine or alcohol in between meals.  Tapas are very rarely served without wine or alcohol of some sorts.  The Spanish have made dining on tapas an art form and they call it tapeo. It is not only a gastronomic adventure, but is also a way to socialize and gather with friends while enjoying these small bites of food and wine.  Originally, tapas were not meant to be a meal in and of themselves, but they have evolved into that today.   There is no specific type of food that falls into the tapas category, but rather they are small amounts of a variety of foods that are almost always accompanied with wine.  Some forms use toothpicks and are called pinchos (pinchar means to prick) and the foods are served with a toothpick.  The toothpicks are left on the plate as you finish them and the server/bartender counts up the number of toothpicks on the plate in order to determine the cost of the tapas plate.  There are also pintxos, which almost always come with bread.  Another category of tapas is called cosas de picar, meaning things to nibble, like olives or almonds.  There are also croquettes or fried foods that are served in cazuelas or small earthenware casseroles.   The possibilities are endless.

There are a few different theories as to how the tapas tradition originated.  Some say it was started in the Andalusia region, where small pieces of ham or cheese were used to cover the wine or sherry to keep the flies and the dust out of the wine.  The word tapas comes from the word tapar, which means to cover.  People ate and drink in small quantities throughout the day rather than consuming larger, heavier meals due to the heat and the need to replenish themselves throughout the day.  Another theory is that during the 13th century, tapas were created when King Alfonso X was ill and could only consume small amounts of food followed by small amounts of wine.  Once he recovered, he then decreed that inns could not serve wine without serving food along with the wine.  Some say the reason behind this decree was to enable the peasants to be able to get some much needed nutrition into their bodies rather than only drink, since they could not afford to purchase both food AND drink.  All of these theories have merit to them, and no one really knows for sure how the tapas tradition really started, but eating and enjoying tapas has become legendary in the Spanish traditions and heritage, and now are known throughout the world.  Everyone, in most countries, has their own  “version” of tapas, but no one can really do it like the Spanish, unless they have learned the Spanish customs and ways that encompass the art of the tapas or the tapeo.

Our friends Priscilla and Jonathon were excited to hear about all our Spanish adventures, and so we decided to “gather and socialize” over our own tapas, that were influenced by those we enjoyed in Spain.  As usual, we both made parts of the meal and combined our efforts and then enjoyed great food and great company to make the perfect summer evening.

Priscilla made the delicious gazpacho from yellow tomatoes and marinated shrimp along with the sauteed fingerling potatoes, as well as a scrumptious date and sticky toffee cake for dessert.  Her gazpacho was MUCH better than what we had as out last meal in Madrid, but then that was at the hotel, and the food was OK but not phenomenal like it was everywhere else.  I made my own version of artichokes with Serrano ham, which would fall into the pinchos category and the ahi tuna and roasted pepper and onion salad topped with a balsamic glaze served with warmed ciabiatta bread, which would be the pinxtos variety of tapas.  And of course, there was wine.  We brought a delicious fruity Spanish red that we brought back from Spain.

IMG_0727

I will give you the recipes for my tapas contributions later.  I want you to savor the flavors for now, to entice you for later.  There is definitely more to come, so don’t go away.  Ciao for now!