National Cat Day

Today is National Cat Day here in the United States. Who knew? I have had cats my whole life and never knew such a day existed, but now we know.  This day was created by Pet Lifestyle Expert and Animal Welfare Advocate, Colleen Paige, in 2005 “to help galvanize the public to recognize the number of cats that need to be rescued each year and also to encourage cat lovers to celebrate the cat(s) in their life for the unconditional love and companionship they bestow upon us.”  Since its inception, it has helped save the lives of more than one million cats. Canada celebrates National Cat Day as well, but they celebrate it on August 8th.

Here are some things you can do to help celebrate your feline friends and to honor the day:

  1. Adopt a cat or kitten
  2. Volunteer at a local animal shelter
  3. Donate to a local animal shelter
  4. Watch cat or kitten videos
  5. Make your own cat video
  6. Stock up on catnip and kitty treats
  7. Give your kitties a new toy
  8. Dine with your kitties
  9. If you cat likes to go for a walk, walk the cat instead of walking the dog
  10. Pamper your cat.

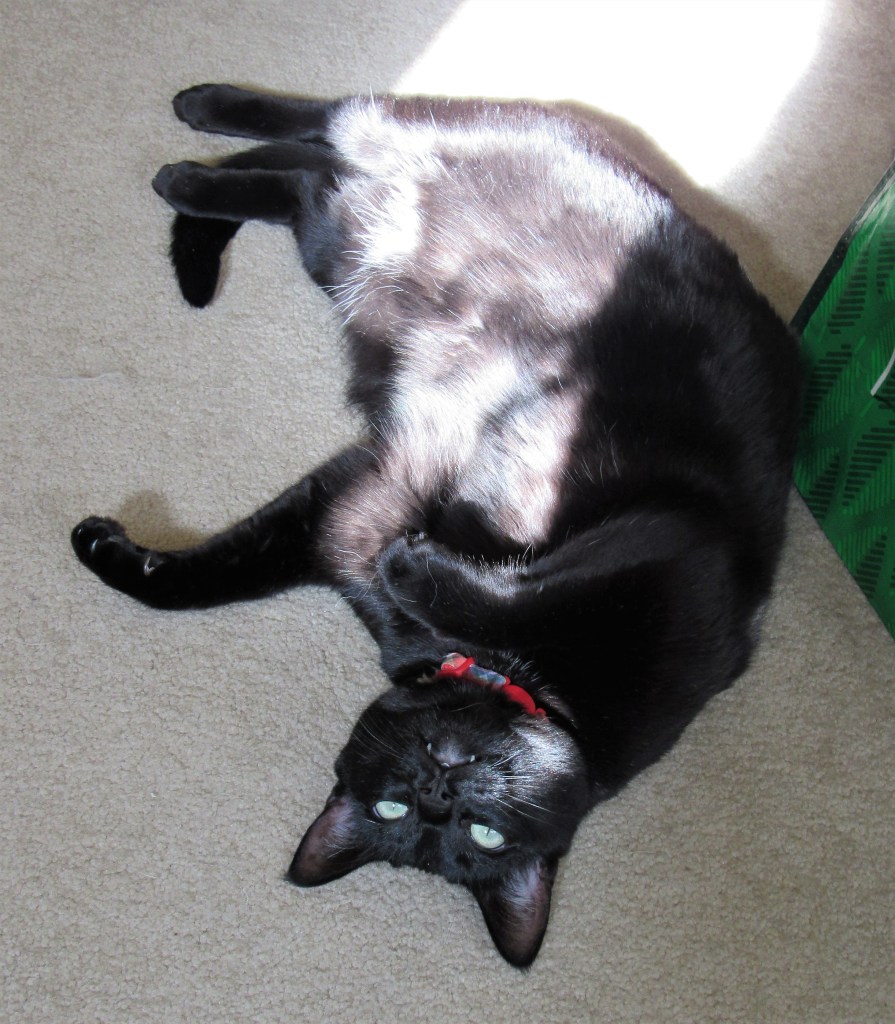
But my best way to celebrate our favorite felines is to give them lots and lots of love and attention. Showering them with lots of love is always the purrfect way to show them how special they are. Otis and Nicodemus know they are well loved, and like Vinnie, they have complete rule of the house. Larry and I are just lucky enough to be able to share their house with them; and the bed.

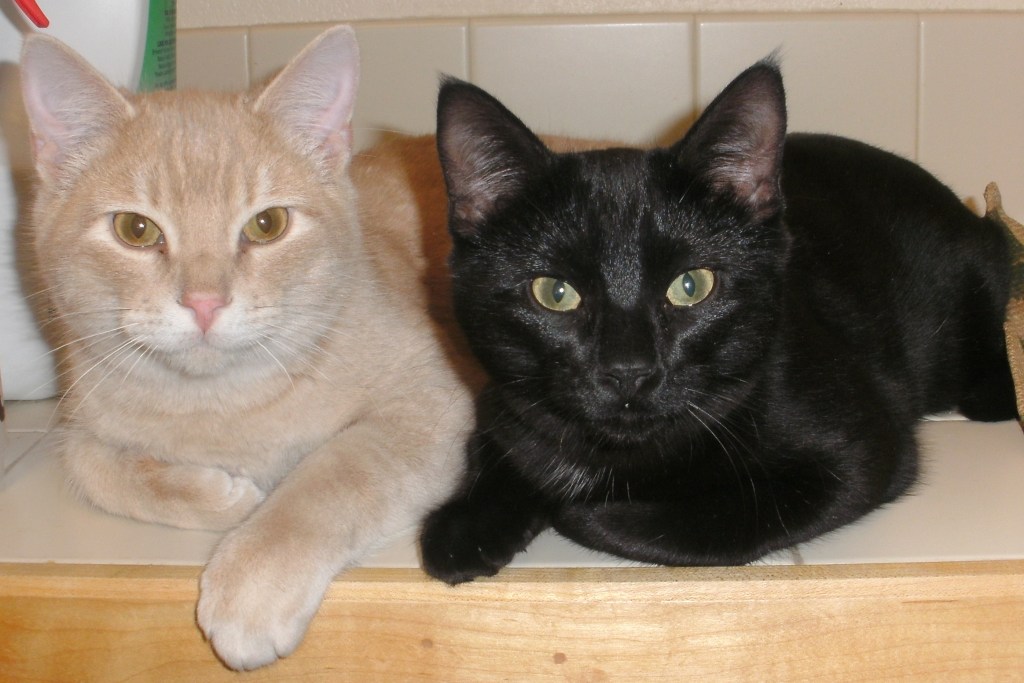
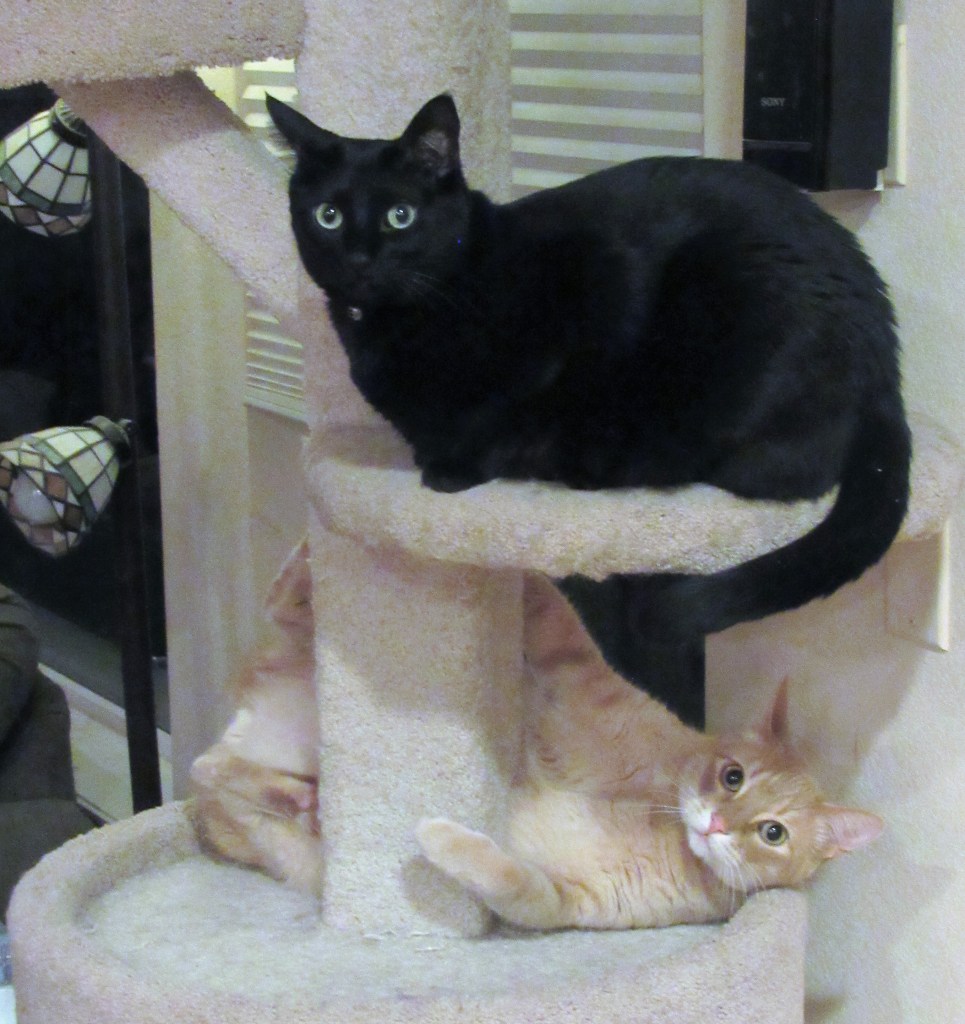
Otis and Nicodemus are litter mates, and have always been together. This is when we first brought them home, back in 2016. They were only about 6 months old here.

DIGITAL CAMERA

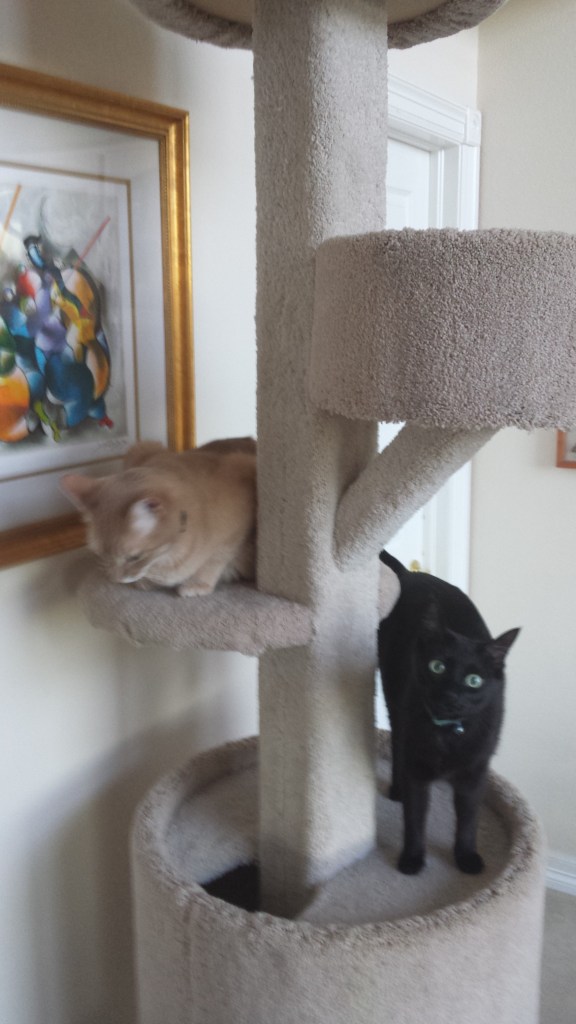
They LOVE their tree house.

Purrfect bookends.

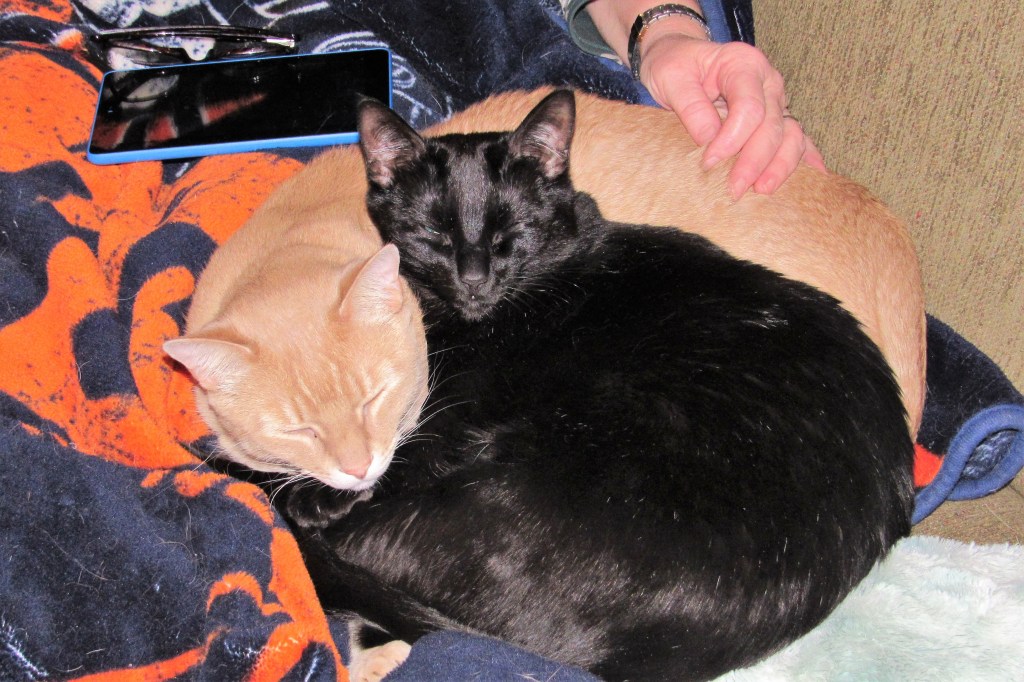
They love to cuddle with each other.
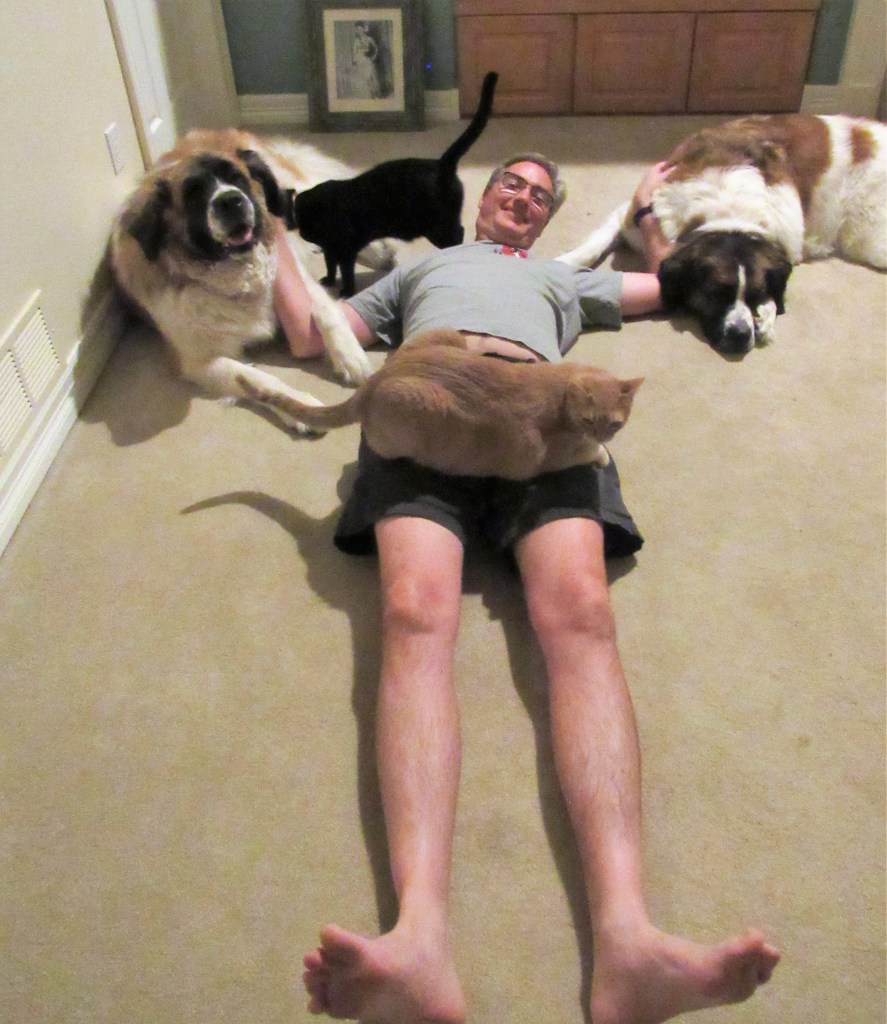
Daddy and the kids.

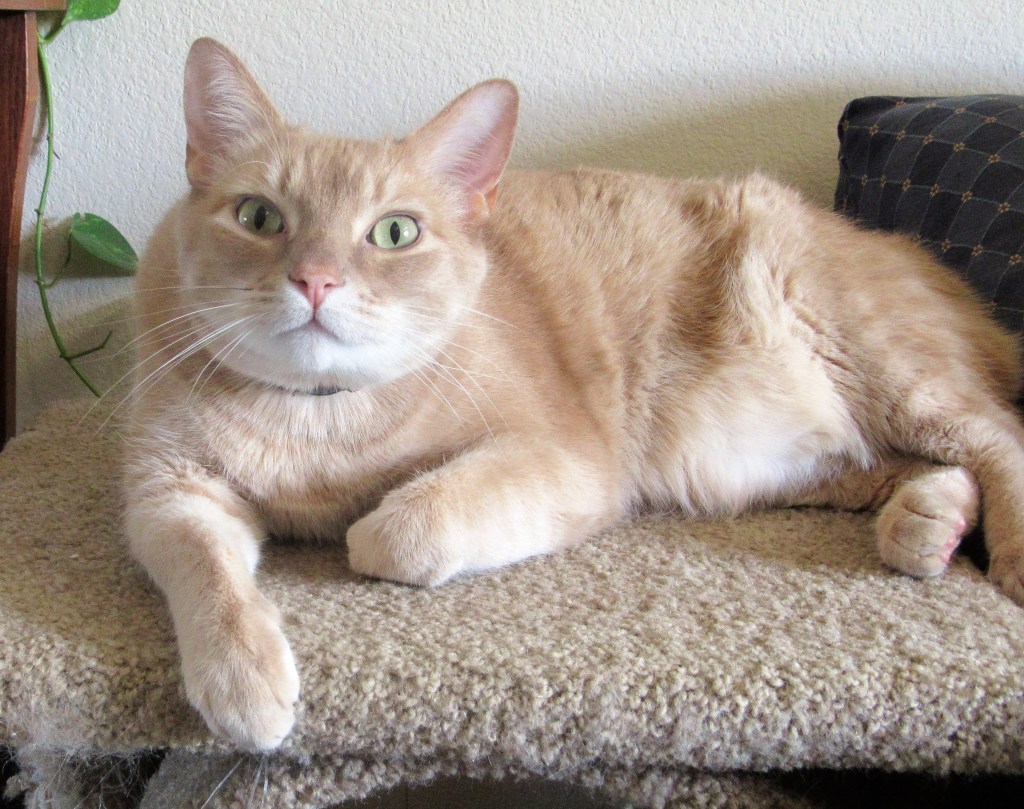
Otis is caught off guard.

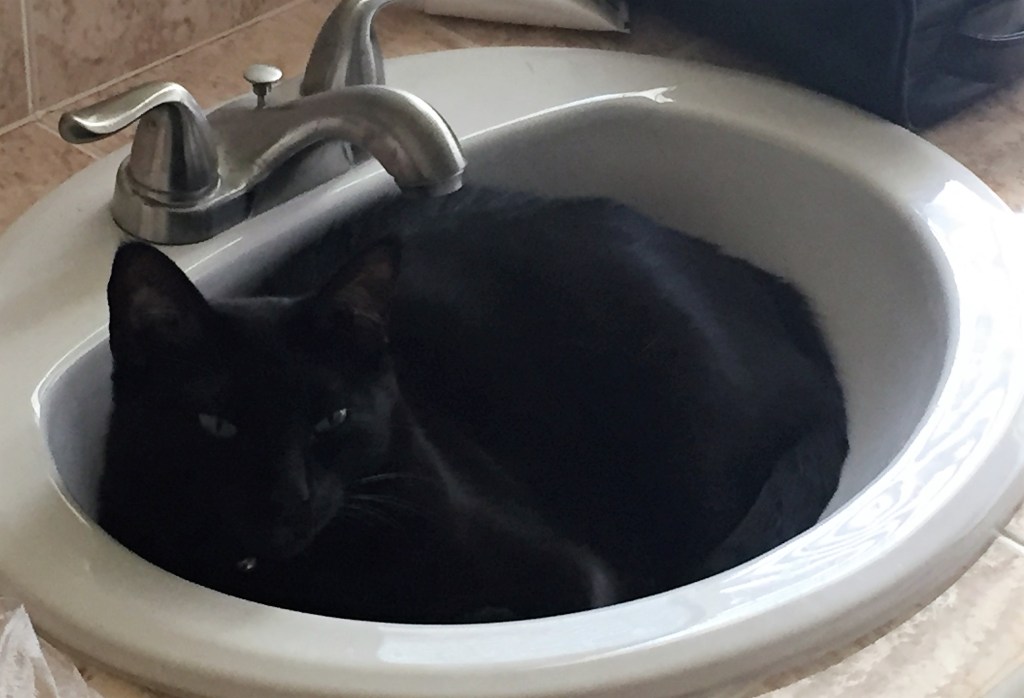
Nicky is cooling off in the sink.

Enough with the pictures already Mom. We need to get our beauty rest now.

It is always a purrfect day when you have kitties to love.

Italian Style Short Ribs

Normally when I think of ribs, I think BBQ. Silly me though. Pork is one of the most widely eaten meats in the world, so WHY would ribs only be something eaten as BBQ, and only in the United States. The pigs in Italy tend to be very large and very flavorful, so they are most often cooked with a minimal amount of seasonings, which highlights their natural goodness and flavors.

I found this recipe for Tuscan style short ribs that I just had to try, and I am really glad I did too. The ribs were full of flavor and were so tender they literally just fell off the bone. I served them with wild rice and lentils, steamed vegetables and my stuffed brioche, Stuffing the Brioche with a red blend to complete the meal. It was very good comfort food that just seemed to hit the spot.

Italian Style Short Ribs

2-2 1/2 lbs short ribs

1 TBPS salt

2 tsp black pepper

1 tsp red pepper flakes

2 tsp dried sage or 1 TBSP fresh sage, chopped fine

1 1/2 TBSP fennel

1 TBSP dried rosemary or 2 TBSP fresh rosemary, chopped fine

2 tsp paprika

3 TBSP olive oil

2 cups water

2 TBSP balsamic vinegar

Coat the ribs with a light coating of olive oil.

Mix all the herbs and seasonings together to make a rub, then coat the ribs on both sides with the rub. Cover them and let them stand at room temperature for about 2 hours or you can refrigerate them overnight.

Once the ribs are ready to cook, spray a baking dish with cooking spray and preheat the oven to 300* F or about 160* C. Pour the water over the ribs and tightly cover the pan with aluminum foil. Slow cook the ribs for 1 1/2 hours.

After the slow cook, turn the oven to 375* F or 190*C and continue to cook the ribs uncovered for an additional 30 minutes or until the ribs are tender and the meat just pulls away from the bone.

Brush the ribs with the balsamic vinegar and continue to cook for about another 5-10 minutes. The ribs are now ready to eat. They are going to melt in your mouth with goodness.

When you are ready to eat these, top them with a little bit of their juice to really make their flavors pop and stand out. !Mangia!

You can also use this same rub for chicken or steak too. The cooking times will be different, but they key to the good flavors is in the timing. Let them marinate for a minimum of 2 hours before cooking for the flavors to really kick in and the meat to tenderize.

Stay safe and stay well Everyone. ‘Til next time.

Nature Walks – Our Winter Friends

One of the best things about Colorado, at least in the lower foothills, is that when we do get snow, which is fairly often, it melts very quickly. Sunday we got 5 inches of snow and it literally snowed the whole entire day. Monday, everything was blanketed beneath a thick white covering, but the sun was out. Yesterday, the temperature was considerably warmer and we had blue skies above. Today, most of the snow has already melted and the sun is once again shining brightly. It was a perfect day for a walk around the lakes; not to hot, not to cold, but just perfect.

One lake had a thin layer of ice on it. Another lake still had a turtle swimming around. I tried to get a picture of him, but he must have realized he is supposed to be hibernating right about now, and went down for a long over due nap.

I did get pictures of some of some of our winter birds though.

There was a robin sitting in the snowy tree branches. This was through my office window.

Of course there were our Canadian geese. We always have them around.

Our resident mallards swimming side by side.

We had one lone redhead out on the lakes today.

And a few more hooded mergansers that are now calling our lakes home.

And just as I was walking up my driveway, I had a bunny waiting for his picture too.

But one of my favorite animals of them all, winter, spring, summer or fall, is my very own “panther” Nicodemus (Nicky), who was laying in the sun.

Live for the moment and take it all in. Enjoy the beauty all around.

Stuffing the Brioche

Brioche is a type of bread found all over Europe, with its origins from many different European countries. It can be traced back as far as 1404 from the Normans when they settled in France. But some have also called it Viennese or Roman, and some even say it is Romanian because of its similarity to the Romanian sweet bread made for holidays. The word brioche is a combination of the French words brier and broyer, which mean to knead and the German word brehhan meaning to break.

Brioche is richer than most breads, which makes it almost like a pastry. It is a yeast dough that is enriched with butter and eggs. One of the reasons why people think it may be from the early Normans is because they were some of the first Europeans to master the art of churning butter, and butter is a key ingredient for making brioche. Often brioche breads are fruit filled. Filling breads and cakes with fruit is a European tradition found all over the continent, with many, many different variations. Filling breads and cakes with fruit is a time honored tradition that has been carried out through the centuries, particularly during the Holiday season.

I made my own version of a fruit stuffed brioche. I filled it with some leftover cranberry-fruit relish that has been in my freezer for awhile. But you can fill this brioche with apricots, apples, raisins, or any other hearty fruits or fruit preserves too. You need time and patience to make this brioche bread. This bread cannot be rushed. It needs time, and lots of it, for it rise and set properly.

Fruit Stuffed Brioche

2 1/2 cups white bread flour

1/4 cup superfine sugar

1 TBSP yeast

1 tsp salt

1/3 cup milk

3 eggs

1 1/2 sticks of soft butter

1 cup dried fruit that has been softened and/or reconstituted

Combine the flour, sugar, yeast, salt, milk and eggs in a food processor and processor abut 5 minutes or until you have a smooth dough. You can also mix this by hand, which will take about 8 minutes. Then add the butter, and process again for another 5 minutes, or 10 minutes if mixing by hand.

Once your dough is made, place it in a large bowl and cover it. Let it rise in the refrigerator overnight.

The dough will double and will be a stiff dough, which will make it easier to work with and to shape.

When the dough is ready, divide into 3 fairly equal sections, then divide it into 30 small balls. Flatten out the balls. Spray 3 loaf pans with cooking spray.

When the dough balls have been flattened out, fill them with about 1 tsp of fruit filling and form them into a ball. I find if I roll them on to a lightly floured surface, it helps to seal the dough.

Place the filled fruit balls into the loaf pans 2-1,2-1 until the pan is completely filled. You should be able to get about 10-11 balls per pan.

At this point, the dough needs to rise again, for about 2 hours.

Preheat the oven t 400* F or 200* C.

Brush an egg wash over the top and bake for about 20 minutes, or until golden brown.

Cool the breads completely before slicing. Then enjoy this fruited delight. It could very easily be a meal all by itself.

As Marie Antoinette once famously said, “Qu’ils mangent de la brioche” en Francais, or “Let them eat cake” as we know it in English.

Stay safe and stay well Everyone. ‘Til next time.

Chilly, Chili

It is more than a bit chilly outside. Our latest snow storm blanketed us with about 5 inches of snow here in the foothills. The mountains got dumped upon.

This is what the mountains look like right now.

Snow at Last | Mountain Photographer : a journal by Jack Brauer

And this is what we look like right now.

Our highs have been between 15-19* F or about -6* C for the past couple of days. Today, we should start warming up a bit though. We are expecting the temperature to get up to about 38* F, and then warmer again in the next few days.

When it is this cold outside, we need something to keep us warm on the inside. I can’t think of anything better than some hot, spicy Texas style chili to help warm us up, and warm us up it did too.

There is no right or wrong way to make chili. There are endless possibilities. I make chili different all the time. I make many, many different styles and variations constantly. This particular variation was full of beef and full of heat. The best way to make chili is to throw in all kinds of good things, mix them all together, and just see what comes out. It is always good.

Texas Style Chili

3-4 lbs beef roast, cubed

flour

salt & pepper to taste

Coat the beef cubes with the flour, salt and pepper and brown completely in canola or vegetable oil.

1 green pepper, medium dice

1 onion, medium dice

3-5 roasted Hatch chilies, medium dice, or to taste

1 1/2 cups corn

2 TBSP garlic

1 can stewed tomatoes, with the juice

1 can kidney beans, with the juice

2 cans beef broth

1-2 tsp cumin

1 TBSP chili powder

salt & pepper to taste

1 tsp cayenne pepper

1 tsp yellow ajo chili powder, optional

1 tsp chocolate chili powder, optional

cheese for topping

sour cream for topping

chopped onions for topping

Once the beef is browned, put it into a slow cooker and start adding the rest of the ingredients. I like to mix all my vegetables, spices and beef broth together first, before adding it to the beef, to make sure it is all blended together and equally distributed.

Put everything into the slow cooker, turn the heat up to a medium heat, and forget about it for about 5 or so hours. All you need to do in between is to stir it every so often. When the meat and vegetables are cooked and tender, and the sauce has thickened up, it’s time to sit back and enjoy. If you like, you can top it with extra cheese, sour cream, and/or onions. Or not. I like to add either Fritos or fried tortilla strips to mine. I guess that is just a Texas thing. And you just have to serve it with some kind of cornbread on the side too. Usually I make my corn bread but Larry bought this one. I really wished he had let me make it instead though. Neither one of us liked this cornbread much. Oh well. Live and learn right?!

When it’s chilly outside, make some chili for the inside. It will definitely warm you up from the inside out.

Stay safe and stay well Everyone. ‘Til next time.

Video #14 – Coconut Tartlets

It was a perfect day to stay indoors and in the kitchen all day. Winter came and hit us with a vengeance. Our temperature high was 15-19* F or about -6* C. BRRRRR!!!!! It was COLD, COLD! The skies dumped about 5 inches of snow on us. But that’s OK! I was inside, in the kitchen for a good part of the day, so I was actually pretty warm. I made a batch of spicy Texas style chili to help warm us up from the inside out and some tasty coconut tartlets to sweeten things up. It was also video day.

My latest video shows how to make some coconut tartlets out of coconut almond balls that melted together when we were in Texas last week. Larry wanted to just throw them away, but why do that?! I can ALWAYS find a way to repurpose foods. 🙂 And this was definitely a delicious way to do so too. Enjoy!

As always, if you like what you are seeing, please subscribe to my YouTube page and share it with your family and friends.

Stay safe and stay well Everyone. ‘Til next time.

More Fun Food Facts

In just a few minutes, the kitchen is going to be a very busy place, as usual. It’s snowing outside, and staying busy in the kitchen is a good way to help stay warm. Plus, another video will soon be coming your way. I will be in production mode in just a bit. 🙂 I thought I would keep you entertained with some more fun food facts while your are awaiting my next production. 🙂

  1. To baste something means to “bathe” the food in its own juices. Basting comes in many different forms and flavors. Sometimes we call it brushing; sometimes we call it basting, but what we are really doing is keeping the food moist while it cooks.
Master the Art of Basting - Bon Appétit | Bon Appétit
The Truth About Basting | Kitchn

2"W Nylon Bristle Pastry/Basting Brush

2. Brining is the process of soaking foods, particularly meats, in a salt and water base for a period of time before cooking. Pickling is similar, although, brining is usually for meats while pickling is most often used for vegetables.

My Favorite Turkey Brine Recipe | Ree Drummond | Food Network

How To Preserve Food With Brine

3. Gluten is a protein found in wheat, barley and rye. These grains are used most often in breads and pastas. Today, there are many people who cannot process these glutens properly and have developed a gluten intolerance.

Gluten, What is Gluten and Why is it so Bad?

4. Rolling lemons, limes and oranges on a hard surface before cutting into them will help the juices come out better.

5. If you freeze an onion for a bit before cutting into it, it will help cut down on the tears, or at least theoretically. I cry no matter what when cutting onions.

Hopefully these helpful hints will safe you a lot of time and frustrations the next time you are in the kitchen cooking.

Stay safe and stay well Everyone. ‘Til next time.

Nature Walks – Before the Snow Falls

Once it again, the seasons are changing. This time we are transitioning from fall to winter. The once colorful and abundant leaves have fallen from the trees. The trees are now barren for the most part, with the leaves now blanketing the grounds. Most of the summer animals are gone for the winter. The temperatures are dropping and tomorrow, there will be snow.

The gazebo stands alone.

There are still ducks and geese around the lakes.

And even a pair of hooded mergansers out for a swim.

There was a playful squirrel up high in the tree.

And a bunny in the bush.

Today we had sunshine. Tomorrow we’ll have snow. Life is always different from one day to the next.

Stay safe and stay well Everyone. ‘Til next time.

Fried Green Tomatoes

Just like you, I learn new things about foods all the time too. I always considered fried green tomatoes to be a Southern dish, but they did not really become a popular dish in the South until around the mid 1940’s. And they really took off in the South after the movie “Fried Green Tomatoes” by Fannie Flagg, in the 1990’s. Today, they are second in popularity, with grits being the most popular Southern recipe and dish. Fried green tomatoes actually originated in both the Midwest and the Northeastern parts of the United States, most likely by Jewish immigrants and the Pennsylvania Dutch. Recipes for fried green tomatoes are found in Jewish cookbooks dating back to 1889.

Green tomatoes are tomatoes that have not fully ripened before being picked from the vines. They are green and are firmer than red tomatoes. Because of their consistency, they are breaded and fried, whereas the red tomatoes get too mushy when fried. In the Southern regions, they are most often breaded with cornmeal and in the Midwest and Northern regions, they are most often breaded with white flour. Green tomatoes have a slightly sour or tangy taste to them, which goes very well with being breaded and pan fried. The keys to making them perfectly crisp and not soggy or mushy are: 1) to cut them in slices about 1/4 inch in thickness; 2) use green tomatoes with no hints or red or orange; and 3) use very HOT oil with a bit of bacon grease. They are a popular dish at any time of day. They are best when fresh and from local areas, where they do not have to travel very far too.

When I made my fried green tomatoes, I served them with my Southwestern steak The Secret is in the Sauce and some smashed red potatoes. Smashed Red Potatoes. Everything went together just perfectly. It was a simple, downhome, just plain good meal.

Fried Green Tomatoes

2 eggs

1/2 cup buttermilk (I use the dried buttermilk that I mix with milk)

1 1/2 cups cornmeal

salt & pepper to taste

1/4-1/2 tsp cayenne pepper, optional

5 medium green tomatoes, sliced about 1/4″ thick

vegetable or canola oil for frying

2 TBSP bacon grease, optional

Mix the cornmeal with the salt, pepper and cayenne pepper in a shallow dish. And set aside

Mix the eggs and buttermilk together in a separate dish.

Pat the tomato slices dry with a paper towel, then dip into the egg mixture and completely coat the tomato slices, shaking off the excess liquid. Then dip into the cornmeal mixture and completely coat, once again shaking off the excess coating.

Once the tomato slices are all coated, place them on a baking sheet lined with parchment paper and refrigerate for about 30 minutes before cooking them. When the are ready, get about 1/2 inch of very hot oil and bacon grease (if using) very hot. You want the oil to be about 365*F. Carefully place the tomato slices into the hot oil. Do not overcrowd the pan. Repeat until all the tomato slices are cooked.

Cook them for about 2 minutes per side, or until they are golden brown and crispy. Drain them on a paper towel for just a bit, to remove the excess grease. I should have cooked these just a smidge more, to make them a bit more golden and crunchy, but we were hungry. Next time. 🙂

Serve them hot! “They ain’t good any other way but hot”.

Stay safe and stay well Everyone. ‘Til next time.

The Secret is in the Sauce

I love a good steak. I love steak just about any way you can fix it too. Some people like a steak just plain with nothing on it. That’s fine. To each his own. But I think a good sauce will make a good steak a GREAT steak. I say, the secret is in the sauce. Since we were just down in Texas, which is part of the Southwest region of the United States, I thought a good Southwestern steak sauce was in order. Although we were in the Southeast part of Texas, closer to Louisiana, so we were really more in Cajun/Creole country, but it’s all good. Texas is so large, it is basically a region all unto itself. Sticking to the Texas/ Southwestern theme, I served my Southwestern steak with some smashed potatoes Smashed Red Potatoes, sauteed onions and peppers and fried green tomatoes, with a velvety red blend on the side. !Esta muy delicioso!

I used a T-Bone steak this time, but you can use it with whatever kind of steak you like. You can also use this sauce on chicken or pork as well. As usual, this sauce was easy-peasy and only required a few basic items. Cooking made simple; just the way I like it!

Southwestern Steak Sauce

1/4 cup olive oil

1/4 cup cilantro

1 1/2 TBSP garlic

salt & pepper to taste

1/4 red onion

1 tsp cumin

1 tsp coriander

1 tsp cayenne pepper

1 tsp ajo garlic pepper, optional

Just throw everything together in either a blender or a food processor and process until it is thoroughly blended together. Then marinate your meat in it.

The longer you marinate your meat, the more flavorful and tender it will be. We like to grill our steaks, to a beautiful, very pink medium rare, and that is how we cook them most often, but you can cook your steak any way you like. Once the steak is done, add a bit more sauce to the top and your favorite side dishes and enjoy.

Stay safe and stay well Everyone. ‘Til next time.