Maize a la Mexicana

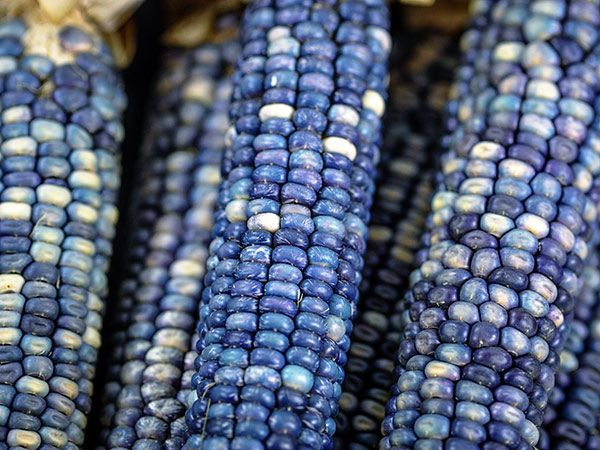
It is believed that corn was first cultivated in Mexico around 7000 years ago. It morphed into the corn of of today from a wild grass known as teosinte. It was then brought up to North America and has been a staple in the lives of Native Americans ever since. To the Native Americans, corn is known as maize. Corn comes in all colors of the rainbow. Each variation has a slightly different taste and subtly different characteristics, but in the end, they are all good.

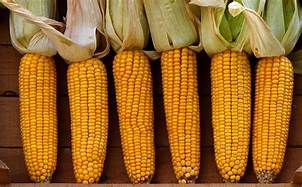
In many parts of the world, corn is used as grain for stock animals’ food. It is also used to produce ethanol fuel. It is also used to make starch, sweeteners, corn oil, beverages and industrial alcohol. And believe it or not, it is loved and enjoyed by most Americans, whether they are are from North America, Central America or South America, just for the pure, delicious, goodness of this sweet grain. We love and eat a lot of corn, prepared in many different ways, though I have to admit, one of my absolute favorite ways to enjoy it is POPCORN!

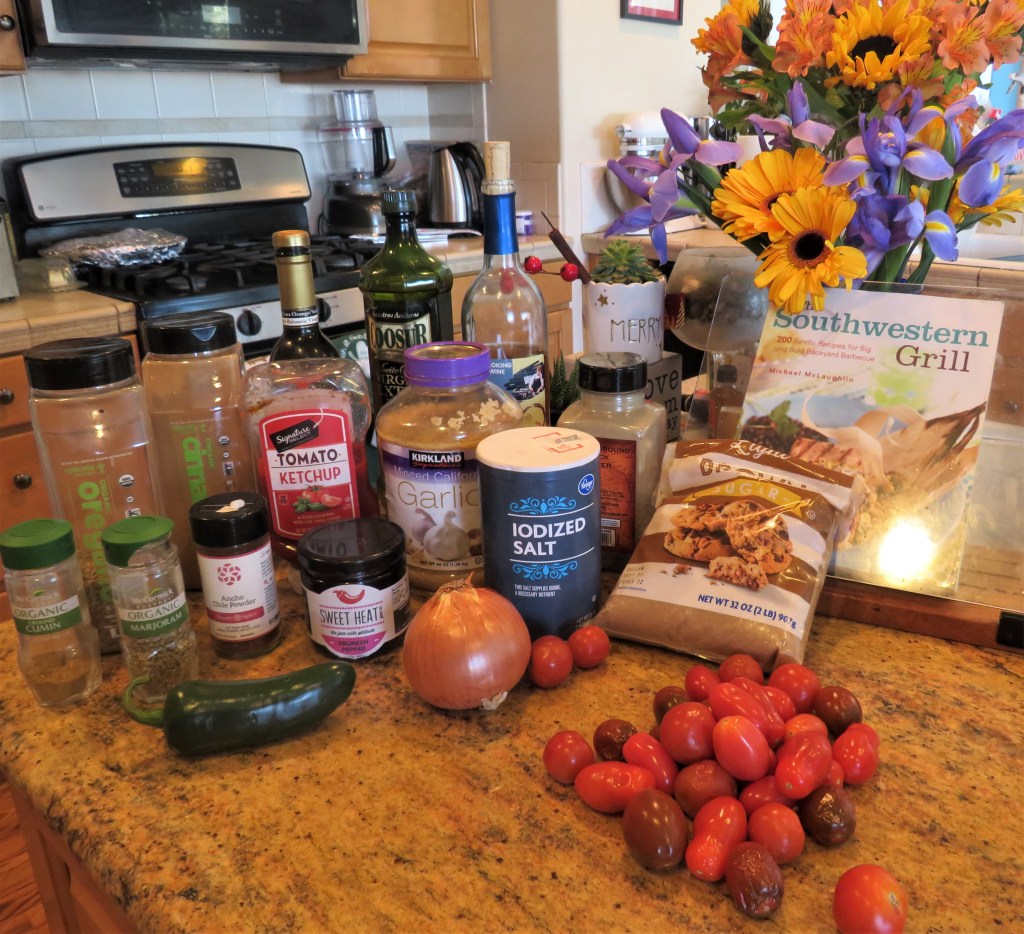
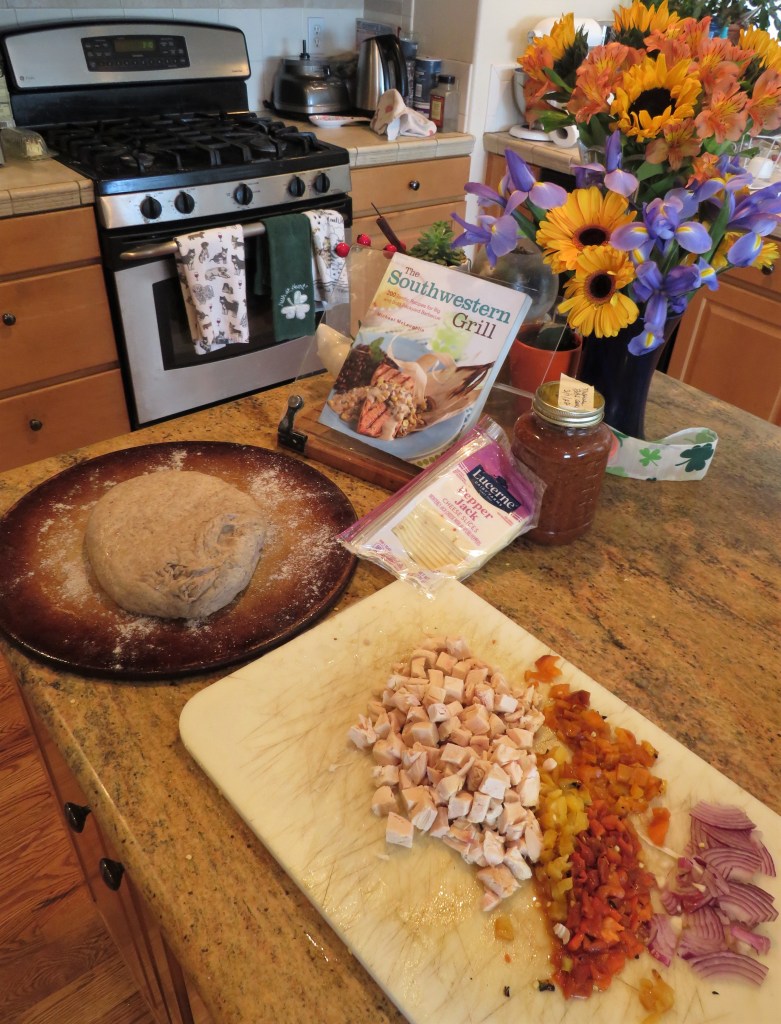
When I made my Southwestern BBQ Chicken pizza Southwestern BBQ Chicken Pizza with Blue Corn Crust I had a lot of the sauce leftover. I used it as a marinade for some chicken breasts. I wanted something with a Southwestern or Spanish personality to go along with it as a side dish, so I made some wild rice and my maize a la Mexicana to serve with my chicken. It was a quick, easy-peasy, delicious meal that was full of color and full of flavor.

I was making up my maize a la Mexicana as I went along and didn’t think about taking pictures until later. I boiled the corn or maize and lima beans or habas together until they were cooked. While they were cooking I started preparing the spice mixture.

Maize a la Mexicana

2 cups frozen corn

1 cup frozen lima beans

1 shallot, diced fine

1 TBSP garlic

1 tsp dried thyme

1 tsp dried orgeano

1 tsp chili powder or specialty chili powder – I think I used adobo chili

1 jalapeno diced fine

salt & pepper to taste

a dash of cayenne pepper

butter

olive oil and/or lime infused olive oil

toasted pecan pieces, optional

crumbled cotija cheese, optional

Combine the corn, lima beans and enough water to completely cover the corn. Bring to a rapid boil on high heat, then turn the heat down to a medium heat and continue to cook for about about 10-15 minutes, or until they are done. When the are cooked, drain the liquid off and set aside.

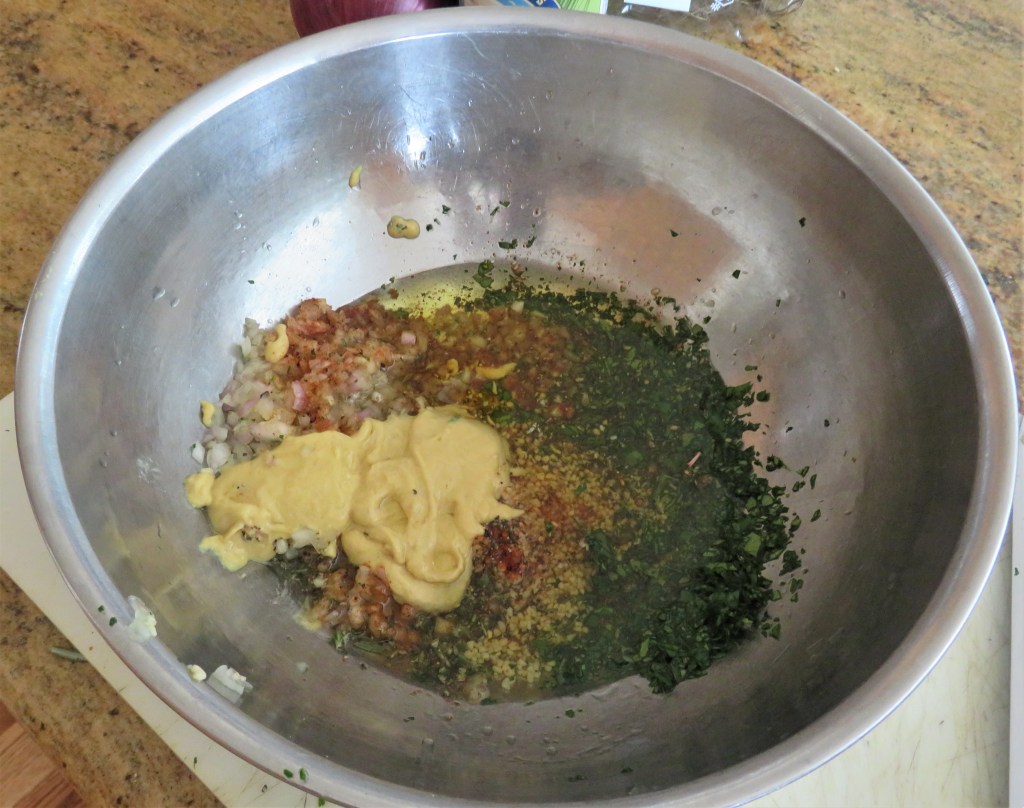
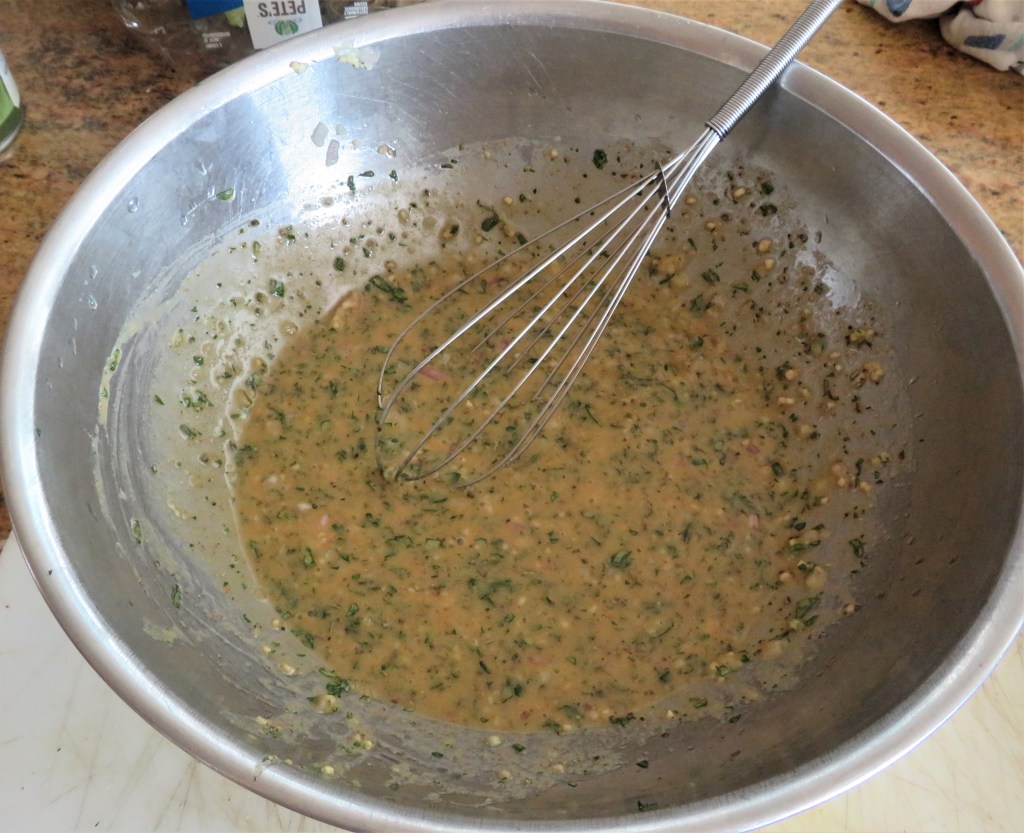
While the corn and beans are cooking, in a separate pan, start the spice mixture. Get the pan very hot then add the butter and oil. Combine all the rest of the ingredients into the pan and saute for about 5 minutes, stirring constantly.

Once the spices are cooked and the onions and peppers are softened, add the whole mixture to the corn and mix together thoroughly. You can also use red bell peppers, but I didn’t have any at the time. Once everything was done, I added some toasted pecan pieces as a topping too.

Serve alongside your favorite main dish and a tasty dinner is served.

I like color and I like texture so I am always mixing and matching things until I get them just right. As I always say, don’t be afraid to play with your food. You just never know what you’ll create. 🙂

Stay safe and stay well Everyone. ‘Til next time.

Cherry Almond Bites

Cherries and almonds make a great flavor combination that has been enjoyed around the world for many centuries. They still are. I love cherry anything and almonds are some of my favorite nuts, so for me, combining them is just a given. To borrow a phrase, it is “two great tastes that taste great together”. This time I combined them to make little cherry and almond bites. It was very similar to a cherry frangipane, which is like a cherry cake. They were part of this week’s feature for the coffee cart, along with some toffee scones and festive cupcakes decorated in green, purple and white for St. Patrick’s Day.

Cherry Almond Bites

I started with a pate sucre, or a sweet pastry dough. Once the dough was set, I lined a 9×13 baking pan sprayed with cooking spray and a sprinkling of almond flour on the bottom then formed the pate sucre on the bottom and sides of the pan.

Sweet Pastry Dough

1 1/2 cups flour

1/2 cup almond flour

6 TBSP cold butter, cubed

2 TBSP powdered sugar

dash of salt

1 egg

5-6 TBSP heavy whipping cream

Place the flour, butter, salt and powdered sugar in the food processor (you can also mix it together by hand or with a pastry cutter too) and pulse until it all resembles a course sand. Then add the egg and flour and mix again until it forms into a ball. Wrap the dough ball in plastic and refrigerate for at least 30 minutes before using. When the dough is ready, shape it how you like.

The Filling

1 cup pitted cherries, quartered

1/3 cup orange juice or orange balsamic vinegar

2/3 cups + 2 TBSP sugar, divided

1 1/2 cups almond slivers, divided

2 eggs

1 stick softened butter, cut into TBSP portions

1/2 tsp vanilla

1/4 tsp almond extract

1 TBSP flour

While the dough is setting, cut and pit the cherries and mix them with either 1/3 cup orange juice or Cara-Cara orange balsamic vinaigrette. Heat in the microwave for about 1 minute, mix everything together once again, then let rest before using.

Preheat the oven to 350*F or 190* C.

Place 1 cup of the almonds and everything else in the food processor, except the cherries, and pulse until the mixture resembles coarse sand.

Add the cherries and the liquid and pulse again. I also added the additional sugar at this point too.

Once everything is combined well, pour it into the pasty shell and evenly spread it out to fill the shell.

Top the filling with the remainder of the almond slivers.

Bake for about 40-50 minutes or until the dough is golden brown and the center is set.

Allow to cool completely before adding the glaze and cutting into bite-sized squares.

The Glaze

1/2 cup powdered sugar

2 TBSP heavy whipping cream

1/4 tsp almond extract

Combine everything together and drizzle over the pastry. Then cut into squares.

If you like the cherry and almond combination like I do, you are going to love this. Once again, it was a big hit. Everyone loved it. This was absolutely cherrilicious.

Stay well and stay safe Everyone. ‘Til next time.

Time to Celebrate!!!!

Boy, time sure does fly when you’re having fun. Can you believe it was 4 years ago today that “A Jeanne in the Kitchen” was created? I can’t either. I actually thought it was five, but WordPress sent me something today saying it was 4. Either way, it has just flown by and I have had such a blast. So it is time to celebrate!

In these past 4 years, “A Jeanne in the Kitchen” has grown a lot. There have been 1,789 posts, 40K comments, and we are at 8,762 followers and counting. These are all great accomplishments, and we’re just getting started. Stay tuned. There is still so much more to come.

I am hoping for at least another 4 more years, and then some. These past years have been filled with lots of fun cooking, delicious recipes and lots of fun travel experiences, and I have met so many wonderful people in our blogosphere, with plenty more adventures and delicious dishes still yet to come. None of this would be possible without all of you. So thank you all. Let’s all celebrate together. Crack open some bubbly and laissez le bontemps roulez. WHOOOOO HOOOOOOO!!!!!

Loaded Cheesy Baked Potatoes

It was another fun day with my two mini sous chefs, Micah and Asher. We always have a lot of fun together. In fact, their mom said they look forward to all our cooking days, and our cooking classes are some of their favorite things to study. 🙂 We already have a couple of recipes in store for our next few sessions, but this time we made some loaded baked potatoes.

The boys love cheese, so we made these potatoes nice and cheesy. Then we added a lot of broccoli, tomatoes and bacon too. These potatoes were definitely loaded potatoes. They were a meal all by themselves. No need for anything else here.

The first thing we did was to clean the potatoes, then rubbed them with some olive oil and salt and pepper. Once they were ready, they went into the oven at 350* F or 190* C for an hour. Our sessions are only for an hour, though sometimes they get extended a bit, because often times things may need to cook a bit longer, but we often run out of time long before the fun is over. My point is, your potatoes may need a little additional cooking time. So keep them in the oven until they are soft.

Once the potatoes were in the oven, we prepared everything else. They boys were busy cutting up the broccoli into small florets, dicing the tomatoes, cooking the bacon and making the cheese sauce.

Asher is cutting the bacon, making sure it is just right.

Micah is having way to much fun stirring the cheese sauce.

Loaded Cheesy Baked Potatoes

5-6 russet potatoes or more as needed, cleaned

salt & pepper

3-4 TBSP olive oil

The Sauce

1/4 cup butter

1/4 cup flour

2 cups milk

1/8 tsp nutmeg

1/8 tsp cayenne pepper

1/2 tsp thyme

8 oz cheddar cheese

salt & pepper to taste

3 cups cooked broccoli florets

5-6 strips bacon, cooked and crumbled

2 tomatoes, diced – we used a couple of different kinds of tomaotes, including some orange sunburst tomatoes

Rub the cleaned potatoes with the salt, pepper and olive oil then place on a baking sheet and bake for at least an hour, or until they are soft.

While the potatoes are cooking, prepare everything else.

Cut the broccoli into small florets and add to a bowl that is safe for the microwave. Add 2 TBSP of water to the broccoli. Microwave at high for about 4-6 minutes, uncovered. Then remove and set aside.

Combine the butter, milk, flour and spices in a pot and cook at a medium/high heat until the butter is all melted and the sauce thickens. Stir constantly. Once the sauce has thickened to your desired thickness, fold in about half the broccoli.

When the potatoes are cooked, let them cool for at least about five minutes, then cut them in half and fluff them up a bit by squishing them together from the sides. Add your toppings and enjoy. Micha and Asher loaded them up with more broccoli, tomatoes and bacon. YUM!

You can use this same exact sauce, with or without all the additional toppings for mac ‘n cheese as well. All you need to do is substitute the potatoes for cooked pasta, and voila.

My camera just loves these two. They are both so full of personality. They become more and more animated with each session. We always have a lot of fun in the kitchen. 🙂

Always do your best to have fun in the kitchen, as well as out of the kitchen. Life is what you make it, so make it fun. 🙂 Stay safe and stay well Everyone. ‘Til next time.

Korean BBQ in K-Town

As most of you know, I am always open to trying new things, new restaurants and new dishes. This time, my new dining experience was in K-Town (Korea Town) for some delicious Korean style BBQ with my friend Su Yeun. When trying new places like this, it is always way more fun to experience them with a native to the culture and the traditions. This way, you get the best experiences, which are the most fun. Our Korean adventure began when went to Seoul Hot Pot and BBQ in Aurora for lunch.

We were seated by a seating robot that took us to our table. Sometimes “she” is used as a food server too, though not this time. Those of us who were not used to this were completely awed. She is moving from place to place here. Our server was Young, and she was fantastic. She took such good care of us.

Seoul Hot Pot is like two different restaurants in one. One side of the restaurant is designed for the hotpots. You choose what you want from their vast selection of fresh vegetables and meats and then you cook them right at your own table. Every table has its own set of individual hot pot stoves.

We chose the other side of the restaurant this time though. The other side is set up for Korean style BBQ, where again, each table is set up with its own little grill and everything is cooked to order at your table.

Since I was clueless on how this works, I sat back and let Su Yeun order our lunch. She ordered two kinds of pork short ribs. We had some that were marinated and some that were not. Both were so tender and full of flavor.

There was a wide array of traditional Korean side dishes that came with the meat too. Of course I had to sample everything, and everything was delicious. Everything is brought to you on a cart and then beautifully displayed around the grill.

Can you believe we ate almost everything too? And it was just the two of us. I don’t know about Su, but I didn’t eat anything else for the rest of the day. I was so full.

We had a very fun lunch and a very nice visit. After lunch we went to some of the Korean shops around the area too. I had an excellent tour guide and learned some Korean history as well. Maeu gamsahabnida Su, or for those of us who don’t speak Korean, thank you very much for a fabulous day and fun experience.

If you are looking for a fun and delicious new dining experience, this is definitely worth trying. The food and service were amazing, plus it was loaded with new adventures for me. I highly recommend Seoul Korean Hot Pot & BBQ, which is located at 2080 S Havana St, Aurora, CO 80014. They open at 11:00 AM and are open for both lunch and dinner. You can make reservations or just stop in. You can give them a call at (303) 632-7576. There is another Seoul Korean Hot Pot & BBQ located in Northglenn, but they are only open for dinner.

Rosemary Breadsticks

It was another cold, snowy, blustery day. It literally snowed all day long, but we did not get a lot of accumulation due to the winds. More snow means more soup. This time it was a split pea soup kind of day. I love split pea soup. I was attempting to make rosemary focaccia to go with the soup, but my kitchen had other plans and decided NOT to cooperate, again.

I think I have some gremlins hiding in my kitchen. This is twice in a week that I have tried to make things that didn’t come out the way the were supposed to. Fortunately, I have learned how to cover up my mistakes and I can recreate foods and give them a good result, but still, this is becoming frustrating too. My latest mishap in the kitchen was when I was making some rosemary focaccia that turned into rosemary flat breadsticks instead. I know it is not my yeast, since I literally just used it a couple of days ago to make my Blue Corn Pizza Southwestern BBQ Chicken Pizza with Blue Corn Crust. It all turned out OK though. I mean they still tasted very good, but that was NOT my desired result. I just knew how to save the recipe and NOT throw it all away; a very useful skill I seemed to have mastered over the years. All I can do about it is to roll with the punches and take it all in stride. 🙂

Rosemary Flatsticks

1 1/4 cups water

3 TBSP rosemary, divided

1 TBSP honey

1 TBSP dry active yeast

1 tsp salt

4 TBSP olive oil

2 1/2-3 cups flour

egg wash

coarse salt for topping

Chop the rosemary fine. Boil the water and add 1 TBSP of the chopped rosemary to the boiling water. Let it seep for a few minutes. Then add the honey and the yeast to the rosemary water, then add the olive oil and whisk it all together. Let it all set for a few minutes until it becomes frothy.

Start with about 2 1/2 cups of the flour and add more as needed. Combine the flour and salt, then make a well in the center and add the yeast and rosemary mixture to the flour. You will have a very soft dough. Turn the dough onto a lightly floured surface and knead for an additional 5-7 minutes until it forms into a ball. Lightly oil a large bowl and place the dough into the prepared bowl. Cover and set aside to rise for about 1 hour or until it doubles in size.

Lightly oil a 14×12 baking sheet and place the dough onto prepared baking pan.

Evenly spread the remaining chopped rosemary and the coarse salt onto the dough. Mix the egg with 1 TBSP of olive oil and carefully brush the dough’s surface with the egg wash. Let the dough rise again for an additional 45-60 minutes.

Preheat the oven to 350* F or 190* C and place the focaccia in the hot oven to bake for about 30-40 minutes, or until it rises and is golden brown. Or in my case, until it is golden brown. Because my dough never rose the way it was supposed to, mine became flat breadsticks instead. Either way, it still tastes good, it was just a different presentation that what I was expecting. 🙂

I share my mistakes with you because I want you all to feel confident in the kitchen. We all make mistakes, no matter how long we have been cooking, or what our level of expertise is. We will ALL have those days when nothing seems to work right. The point is sometimes we have to fail in order to succeed. NEVER stop trying. When you stop trying the only result will be failure.

Stay safe and stay well Everyone. ‘Til next time.

Nature Walks – Building Their Nests

Looking out my window at the moment, you would NOT think Spring is anywhere near. It has been snowing consistently since about 5 AM. It’s not coming down hard, but we are getting a bit of accumulation all the same. Spring is close though. I saw plenty of evidence of that yesterday, when the sun was shining and the temperatures were considerably warmer. I saw birds, ducks and geese all pairing up and lots of nests in the making.

Ringnecks

Mallards

American Wigeons

Canadian Geese

And the birds and their nests high up in the trees. Some House Finches way up high.

I think this nest needs a bit more insulation before it is ready.

There is even a nest in the rafters of my front porch.

Spring is all around. It won’t be to much longer now. Soon spring will be sprung.

Southwestern BBQ Chicken Pizza with Blue Corn Crust

Once again, the Queen paid me a visit and we were discussing what to do with the leftover Costco rotisserie chicken. We thought about it and thought about it, then ventured upstairs to the culinary library and decided upon a Southwestern BBQ chicken pizza with a blue corn crust. It was a deliciously good choice too.

Blue corn meal is a cousin to the yellow corn meal we use all the time, but it is made from the blue corn that is grown in the American Southwest regions. Blue corn meal is a corn meal that is ground from whole blue corn and has a sweet flavor. It was originally developed by the Hopi, the Pueblo Indians of the Rio Grande in New Mexico, and several Southeastern Tribes, including the Cherokee. It remains an essential part of Hopi dishes like piki bread. Blue corn is nuttier, coarser and sweeter than a lot of the other types of corn. It naturally grows blue. It is not chemically enhancds or modified in any way, and has been cultivated by the Native American People for hundreds of years.

Since the dough for the pizza had to rise for about two hours, I made the dough first.

The Dough

The only difference with this dough and other bread or yeast doughs is the addition of the blue corn meal.

1 1/2 cups lukewarm water

2 1/4 tsp dry active yeast

2 tsp salt

5 TBSP olive oil – I used a combination of regular olive oil and lime infused olive oil

3/4 cup blue corn meal

about 3 cups flour

Mix the water and the yeast together and let set for about 5-10 minutes, or until it turns frothy.

Combine the flour, blue corn meal and salt together and set aside. Start with 2 1/2 cups of flour, and add more as needed.

Mix the olive oil into the yeast mixture, then add to the flour mixture and combine just until it is all mixed together. Then turn the dough onto a lightly floured surface and knead for about 5-7 minutes, or until it forms into a ball. Lightly oil a large bowl and place the dough in the bowl. Cover and set in a warm place to let it rise and double in size, for about 2 hours.

While the dough is rising, make your Mexican BBQ sauce, also known as Adobo sauce. Larry asked what made this sauce different than a regular BBQ sauce. As we all know, there are many different variations of everything. This sauce is not as sweet or as tangy as most BBQ sauces, and has a smoky, softer taste. It is really good too. You can use any kind of tomatoes you like. Play with the varieties. Each one will give a slightly different taste. I used what I had on hand.

Mexican BBQ Sauce

1-1 1/2 TBSP garlic

1/3 cup dry sherry or white wine

1 TBSP olive oil

about 12 oz of tomatoes, roasted

1 1/2 cups of pepper puree or pepper jam – I used a hot pepper jam

3 TBSP packe brown sugar

2 chipotle peppers with sauce, minced

1 TBSP salt

1 1/4 tsp dried oregano

1/2 tsp dried thyme and/or marjoram

1/2 cup ketchup

1 tsp ajo chili power or regular chili powder

1/2 tsp cinnamon

1/2 tsp cumin

pepper to taste

1-2 roasted jalapenos, peeled and seeded

Start off by roasting the tomatoes for about 30 minutes at 400* F or 200* C.

Once the tomatoes are ready, place everything in a food processor and blend together until it is a nice smooth sauce. This recipe makes a lot and it freezes well, so unless you are making A LOT of pizza, you will have plenty leftover for other things.

Preheat the oven to 375* F or 190* C.

When your dough is ready, it is time to make your pizza. Spray a pizza stone with cooking spray then scatter a light dusting of blue corn meal on the stone. Place your dough onto the stone and spread it out to fill the pan. I like to turn up the edges of the dough too.

Add a layer of your sauce, then cheese and your toppings. I used jalapeno jack cheese, but you can use whatever type of cheese you like. For my topping, I roasted and diced some bell peppers, orange, yellow and red, and added red onions sliced very thin and diced chicken.

I drizzled a bit more sauce on top of the chicken and added another layer of cheese then put the pizza in the oven to bake. Bake the pizza for 45-60 minutes, or until the dough is golden and the center of the pizza is cooked through.

When the pizza was ready, I made a Mexican salad to go with it. For the salad, I used some red leaf lettuce, orange slices, avocado, red onion, my leftover rosemary vinaigrette, A Salad from Barcelona and topped it with some toasted pecans. !Esta muy delicioso!

Be bold. Be adventurous. Step outside of your comfort zone and walk on the wild side. Once you do, you’ll never go back to the old boring ways ever again. 🙂

Stay warm, stay safe and stay well Everyone. ‘Til next time.

Nature Walks – The Bunny

Spring is definitely in the air. The birds are out singing and busy making nests, and the bunnies are out hopping around, looking for gardens to destroy. This bunny looked like he loved the camera, and was ready to become famous. His wish is about to come true. Right here and now, he will get the equivalent of his 15 minutes of fame. 🙂

Caught in the act, munching on the newly arriving grass.

He has discovered his secret is now out, and he is trying to look innocent. What grass? I wasn’t eating any grass.

Now is just posing, and looking cute.

Do you like my head shots?

A Salad from Barcelona

We were invited to dinner at some friends’ house the other day, and I decided to bring a salad that was a bit different (I know, how out of character of me to do something different and unexpected). I chose to make a delicious roasted pepper salad from Barcelona. You might be asking is this salad from Barcelona, Spain or from Barcelona the Restaurant? Both Actually. The recipes from the restaurant in the RiNo district of Denver (River North) Dining in the RiNo, are all authentic recipes from Barcelona Spain. The restaurant specializes in traditional Spanish recipes and tapas. Birthday Celebrations – Part 2 – Barcelona, Another Birthday in the Books, A Taste of Barcelona in My Kitchen Barcelona, the restaurant, is actually one of my favorite restaurants around, but unfortunately, we do not get a chance to go very often. So, I bought the book and brought the recipes home with me. I can bring the tastes of Barcelona into my kitchen anytime I like. 🙂

I pretty much love all things Spanish. I absolutely fell in love with Spain when we went a few years ago, and especially loved the food. The food and culture in Spain were so rich and full of layers, and just amazing and magical.

This salad is very easy to make, and it is bright and colorful and oh so good. In fact, I liked it so much, Noah and I are going to do a slightly different version of this salad today in our cooking class. When I made this salad to bring to our friends’ house, I made it as a side salad. Today, Noah and I are going to make it as a main meal by adding chicken and avocados.

One of the ingredients used in this salad is hearts of palm, which are very Spanish. Hearts of palm are a white vegetable that comes from the core of certain kinds of palm trees. Also called palm hearts, palm cabbage, palmito, chonta, and swamp cabbage. Hearts of palm are grown in humid and tropical areas like Costa Rica and the Amazon. Hearts of palm were originally foods of the Mayans, but were brought back to Spain by the early Spanish explorers, and have been a key ingredient to Spanish cooking ever since.

Part of the reason I decided upon this salad is because it is a good winter salad, and it was most definitely a cold, wintery day when I made it. I also chose it because I love the combination and it is just a very tasty salad. This salad is a good salad to serve on cold winter days because of the warm roasted peppers. This salad is meant to be served warm or at room temperature.

Roasted Pepper and Hearts of Palm Salad

I started off by roasting the peppers on an open fire. I used red, yellow and orange bell peppers. As the pepper were roasting, I made the rosemary shallot vinaigrette. Roast the peppers until they are completely blackened and then sweat them in a plastic bag for about 20-30 minutes. The blackened skin will easily peel right off in your fingers. Remove the seeds and give them a good rinse, and then slice them into thin strips.

Rosemary Shallot Vinaigrette

1 shallot, minced

1 1/4 cups olive oil

1 tsp paprika

dash cayenne pepper

1/4 cup white balsamic vinegar

3 TBSP Dijon mustard

salt & pepper to taste

1 TBSP garlic

1 TBSP fresh rosemary, minced

Whisk everything together and set aside. I like lots of texture in my foods, so I rarely emulsify my dressings and vinaigrettes, but if you prefer them a bit more smooth, put everything into the food processor and blend thoroughly.

The Salad

4 bell peppers, orange, yellow and red, roasted, peeled and seeded, then cut into thin strips

2 ripe avocados, sliced or cubed (I left out the avocados this time, since Larry is not a fan)

1 can hearts of palm, drained, rinsed and sliced into rings

red leaf or green leaf or butter lettuce

Lay the lettuce leaves on your serving platter, then add a layer of pepper strips, followed by the avocadoes, then the hearts of palm. Drizzle the dressing on top and serve. This salad is a warm salad and is best at room temperature.

!Esta ensalada es excelente or this salad is excellent. It is different, delicious and slightly exotic all at the same time. I promise, you’re going to love it. it’s colorful. It’s tasty. It’s very easy to make. And, it is very healthy too.

Stay safe and stay well Everyone. ‘Til next time.