Soup It Up

Fall is here.  As I look out my window right now, I am seeing all the beautiful colors of the fall season.  The trees and bushes are all various stages of greens, golds, oranges, and reds.  It is just so beautiful and colorful.   The fall season has also brought a dramatic drop in the temperature as well.  These last few days, we have had highs in the high 30’s and low 40’s.  I LOVE it!!!!  I say bring it on!  When the weather starts to get cold outside, there is nothing better than a nice hot soup to warm you up from the inside out.  It is most definitely soup weather, so I made a delicious fall soup with sausage, Northern white beans, pumpkin, and lots of fall vegetables.  As my dad would have said, “it warmed the cockles of my heart”.

IMG_3478

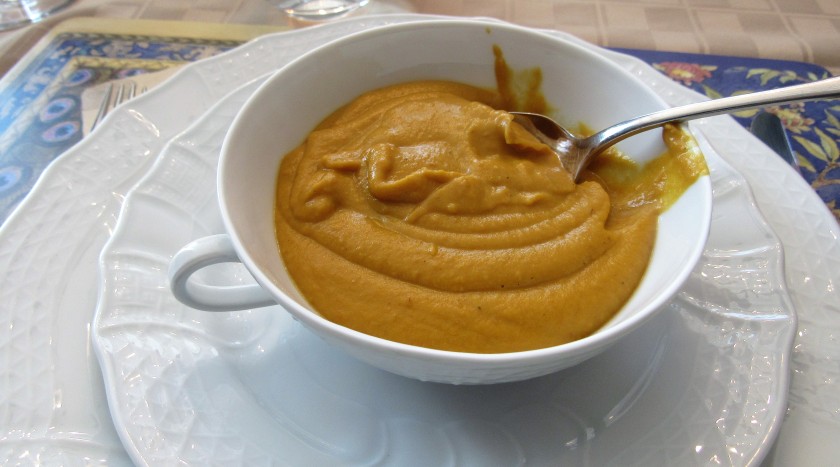
Let’s get this soup started.  I used fresh spinach, kobaishi squash (AKA pumpkin), Anaheim chilies, jalapeno, garlic, onions, and tomatoes, along with  spicy Kielbasa sausage and Northern white beans.  To kick it up even a bit more, I added cinnamon and allspice too, and I simmered it all in chicken broth for about 2-3 hours, and Voila!  It was time for soup.

IMG_3455

Sausage, White Beans and Fall Vegetable Soup

2 lbs cooked sausage of your choice, diced small

1 lb bag of uncooked Northern white beans (cook according to directions on the package) or 2 cans of beans, drained and rinsed

2 cups pumpkin or hard squash of your choice, medium cube

2 Anaheim peppers, diced, small

1 jalapeno pepper, diced fine

1 medium onion, diced fine

1-2 heaping TBSP garlic

4 cups fresh spinach, stemmed and chopped in a rough cut

2-3 tomatoes, diced small

about 8 cups of chicken broth – in the picture I show Swanson’s chicken broth, but I actually made my own and used that instead

1 TBSP cinnamon

1-2 tsp allspice

salt & pepper to taste

olive oil


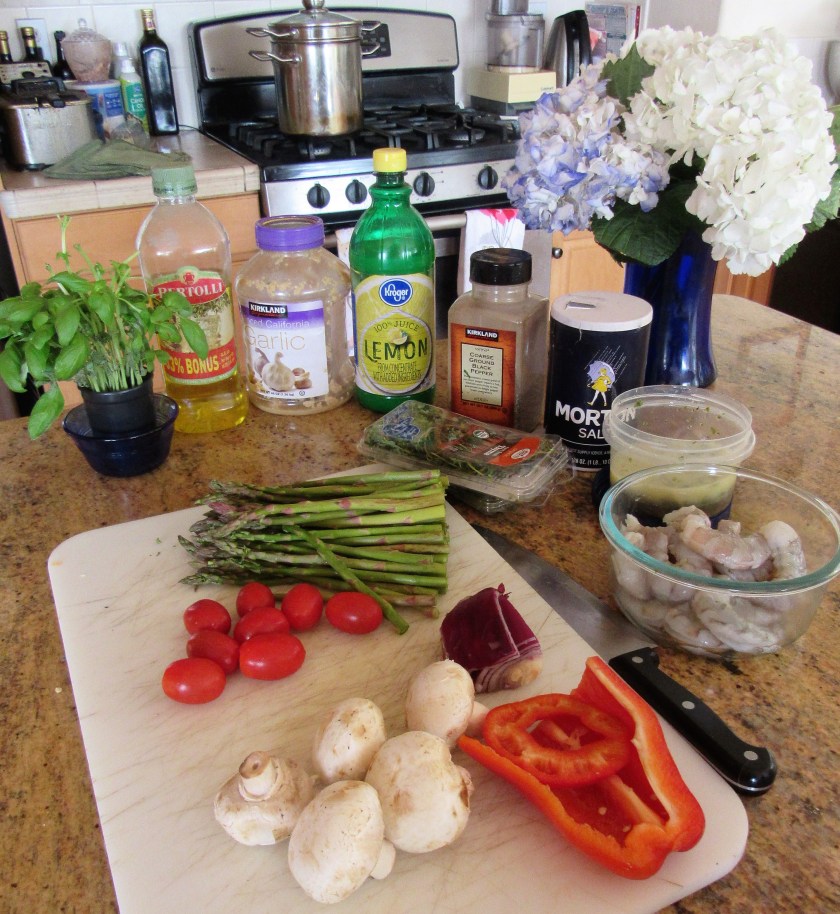
Saute the heartier vegetables in olive oil until the onions are translucent and the pumpkin is semi-tender.  Add the sausage and continue to cook until the sausage is cooked completely.
IMG_3460

IMG_3463

IMG_3465

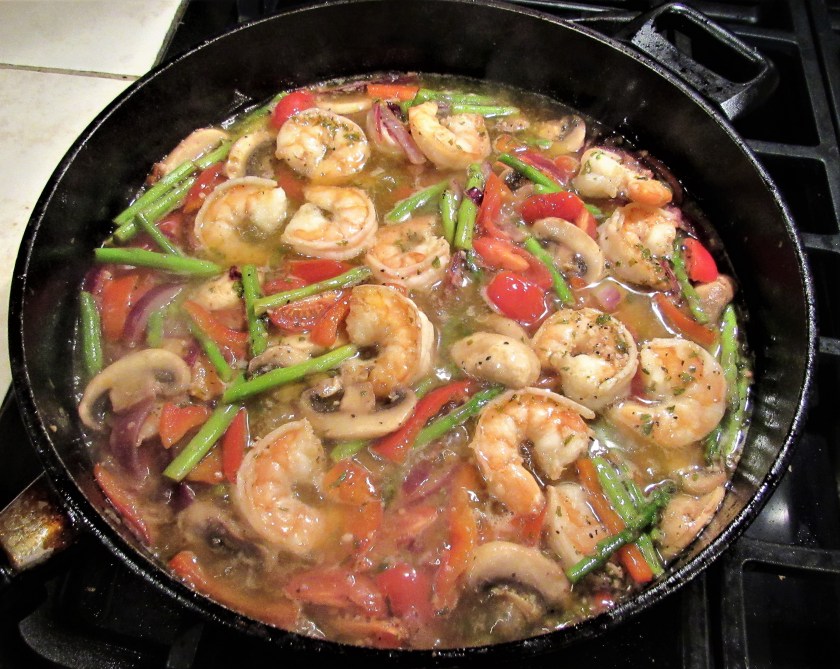
Once the sausage and vegetables were cooked, I added the beans, the chicken broth, cinnamon, allspice and salt & pepper, as well as the additional sausage and peppers I had.  I brought it up to a boil, then reduced the heat to a simmer, and let simmer for 2-3 hours, stirring occasionally.
IMG_3468

Add the spinach and tomatoes right at the end, and let it cook for just a few minutes more.  Then serve it up.

IMG_3478

This is one of my recipes that the more stuff I have, the better it gets.  No real recipe, but, again, as I always say, use what you have and use what you like.  I love all kinds of vegetables, so for me, that’s easy.   I always have a ton of different vegetables on hand.  I just put in a little of this and a little of that, stir my magic wooden spoon, and magic in the kitchen just happens.  I had some leftover sausage with mushrooms, peppers and onions in a spicy marinara sauce, so I added that to my soup as well.  I figured, I was already adding tomatoes and sausage, so why not add a bit more.  It made the soup really hearty.  I just might have to do that again, the next time I make this soup.
Time for soup.  I served it with a couple of slices of warmed rosemary bread and a very smooth, full bodied zinfandel with lots hints of black cherry.  The fruitiness of the wine accompanied the spice of the soup just perfectly.   Bon Appetit!

IMG_3479


Pumpkin Biscotti

I know, yesterday I said I did not need to bake any more sweets, but I just had to make these.  Not so much to satisfy my sweet tooth, although that is certainly true, but I had some leftover white chocolate ganache from when I made my lemon-thyme truffles White Chocolate Lemon-Thyme Truffles that I just had to use before it went bad.  It was eating away at me.  I had to find a use for it.  And I did.  I made pumpkin biscotti.

It’s pumpkin season, and I just love pumpkin.  I love it every which way it can be cooked.  Today, pumpkin biscotti, and tomorrow it will be pumpkin in a different way.

IMG_3473

All you need to make pumpkin biscotti.

IMG_3450

Pumpkin Biscotti

3 1/2 cups flour

2 tsp baking powder

1/2 tsp salt

2 1/4 tsp pumpkin pie spice or 1 tsp cinnamon, 1/2 tsp nutmeg, 1/2 tsp ginger, 1/4 tsp allspice

2 eggs

1 1/2 cups firmly packed brown sugar

1/2 cup pumpkin puree

1 TBSP vanilla

1 1/4 cups toasted pecans, chopped fine

cranberries (optional)

1 cup white chocolate, melted for dipping

1/2 cup heavy whipping cream or more as needed


Preheat the oven to 350* F

Line two baking sheets with parchment paper


Mix all the dry ingredients, except the nuts, together and set aside.

Mix the eggs, brown sugar, vanilla and pumpkin together in a mixer.  Add 1/2 of the flour and mix, then add the rest of the flour and mix.  Once everything is well combined, gently fold in the nuts and/or cranberries.  Divide the dough in half.

IMG_3451

On a lightly floured surface, shape the dough into two logs, about 3×10 and place on the baking sheets.  Bake for about 35 minutes, then remove from the oven and let cool for 5-10 minutes.

IMG_3452

Reduce the oven tempeperature to 325* F.  Slice the biscotti logs into slices about 1/2″ thick with a serrated knife, and place back on the baking sheets and return to the oven for about 20-30 more minutes, or until the biscotti is nice and crispy.  After about 10-15 minutes, flip the cookies over onto the other side and return to the oven to continue baking.

IMG_3456

IMG_3458

Once the biscotti has cooled completely, melt your white chocolate and cream together  to make your white chocolate ganache.   White Chocolate Lemon-Thyme Truffles

Dip half the cookie into the ganache and shake off the excess.  Repeat until all the cookies are done.  If the ganache gets too cool and becomes difficult to work with, just re-heat it until it becomes liquid again and continue.

IMG_3471

As with any other type of biscotti, these are best when served and/or dipped into a nice cup of coffee, tea or a steaming hot cappuccino.

IMG_3476


***I did not think of using cranberries until I already had them in the oven.  Oh well.  Next time.


Blogger Recognition Award

Wow!!!!!!   …… So far, October is turning out to be a great month for me and “A Jeanne in the Kitchen”.  I am so honored.  Thank you all so much.  I was nominated for the Blogger Recognition Award by Stay At Home Mom.  I am honored to be in the company of so many other wonderful bloggers.  May the best blogger win.

img_5741(1)

How my blog started

My blog “A Jeanne in the Kitchen” actually started by a dear friend of mine who was so impressed by the way I cook from the heart telling me that I needed to get my name out there and create something that would help other people cook with ease and to feel more comfortable in the kitchen.  I grew up in the “waste not want not” years, and everything was re-purposed as best as it could be.  That’s how I cook.  I am a trained, certified chef, and yes I can cook very fancy foods and meals when I want to, or when I need to, however I much prefer cooking from my heart, and cooking rustic, everyday foods.  Those are the foods I enjoy eating, and those are the foods I enjoy cooking.  So after my dear friend’s encouragement, here I am, and “A Jeanne in the Kitchen” was created.  You can find me at ajeanneinthekitchen.com.  Please stop by and say hi.  If you like what you see, come and stay awhile, and invite your friends too.


Advice for new bloggers

Blog about something you know about.

Blog about something your are passionate about.

Your readers will know if something is fake or phony.  They will know when you are sincere and your blog is coming from the heart or of it is contrived and you really don’t know much about the subject matter you are writing about.

Be real.


My nominees

Gosh, there are so many great blogs out there.  How do I choose just a few who I think are worthy?  I am still new to the world of blogging, and so far, I have discovered so many wonderful blogs that I never knew about.  A whole new world was opened up to me that I never knew existed before.  If I have not nominated you, it is only because I was limited to the number from which I could choose.

  1.  trkingmomoe
  2.   floatinggold
  3.   PlantsandBeyond
  4.   A Voice from Iran
  5.   MiddleMe
  6.   SoundEagle 🦅ೋღஜஇ
  7.   BallesWorld
  8.   Pacific Paratrooper
  9.   sasegirls.wordpress.com
  10.   Bitchin’ in the Kitchen
  11.   koolkosherkitchen
  12.   Ella @ thewackyspoon.com
  13.   oladewalaura
  14.   Rad Gamer
  15.   indianeskitchen

You are all so deserving as are so many more.  In my eyes, we are all winners, regardless of awards.  Keep doing what you are doing, and enjoy what you do.  I know I sure enjoy what you all do.

Rules

  • Thank the blogger that nominated you and give a link to their site.
  • Do a post to show your award.
  • Give a summary of how your blog started.
  • Give two pieces of advice for any new bloggers.
  • Select at least 15 other bloggers for this award.
  • Let each nominee know you’ve nominated them and give a link to your post.


Healthy Doggie Treats

As most of you know, my fur babies are my children.  I have two cats, Otis and Nicodemus, and two Saint Bernards, Lucie and Vinnie.  I don’t dare cook for my cats since that is more a of pain in the neck and a giant nuisance than it is worth.  But I do cook for my dogs all the time.  They are not picky eaters, and can eat most everything we can, so it is much easier to cook for them, and they actually appreciate what I make for them too.  I actually make their wet food about once a week.  But every now and then, I also make them treats as well.  After all, I want them to eat healthy treats too.  I have had both dogs and cats all my life, and they have all have lived long, healthy lives.  One of  the best things to help give them a long, healthy life is to feed them human quality foods, and when making their food, I make it out of the exact same ingredients I would use for my husband and myself.  Dogs in general need a lot of lean proteins and very little fats.  Lucie is on a diet, and needs even less fat.  She weighs about 150 lbs.  She is a very curvy girl with big hips.  Vinnie is all lean muscle, but he still weighs about 140 lbs.  Because big dogs are prone to hip dysplasia, we have to really watch their weight.  We want them healthy, and to have some meat on their bones, but we do not want them fat or over weight.  Sometimes, it is a fine line, but we try our best.  It was a very good day for baking today, since the weather was very cool and overcast.  I do not need any more sweets or treats in the house at the moment, so I baked doggie treats instead.  Mommy and her special assistant Fritzie, made the kids some yummy, healthy peanut butter and banana treats today.   They gobbled them up, so I am going to take that as a good sign that they were delicious; although sometimes that is not the best way of determining if something is good or not, since they have been known to eat poo too.  We made enough treats for Lucie and Vinnie to share with some of their doggie friends too.


Fritzie guarding her treats.

IMG_3436

Peanut Butter and Banana Dog Treats

2 bananas, peeled and mashed

2 cups oat flour

1 1/3 cups rolled oats

3/4 cup dried parsley

1/4 cup dried mint (optional.  You can use only parsley if you wish, just make it 1 full cup)

6 heaping TBSP peanut butter, either creamy or chunky

2 eggs


Preheat the oven to 300* F

Line your baking pans with parchment paper.


Mix all the ingredients together.  Then let rest for about 5 minutes.  Once everything is mixed well and has sat, make 2×2″ balls then press them down to about 1/4″ in thickness, and cut into your desired shapes.  I used a dog bone cookie cutter dipped in flour.   Place the cookies on the baking sheets and bake for about 55 minutes or until dried and hard.  You want them crunchy.

If your dogs can handle crunchy foods, it is better for their teeth.  It also helps to clean their teeth too.  Before giving them to your dogs, make sure they cool completely.  My dog Lucie cannot handle things when they are still warm.  It upsets her tummy something terrible.  Both the parsley and the mint are breath fresheners, both for humans and for dogs, but all of us who are dog lovers know that our dogs don’t always have the freshest breath, so every little bit helps.  Depending on the size of the treats, on average, each treat is about 45 calories.


This is all it takes to make these healthy doggie treats.  Your dogs will absolutely love them.  Lucie and Vinnie sure did.

IMG_3423

Mash the bananas with a potato masher until they almost become a liquid.

IMG_3424

After the bananas are mashed, add the rest of the ingredients and mix together well.  The dough will be a stiff dough.

IMG_3428

The dough is easy to handle and to work with.  Grab a chunk and press it down to about 1/4″ in thickness then cut into your desired shape.  I used a dog bone cookie cutter dipped in flour before each cut.  My dough made enough for about 50 cookies that were about 2-2 1/2″ long.

IMG_3433

Bake the cookies at 300*F for about 55 minutes, or until they are crunchy.

IMG_3434

Lucie and Vinnie eagerly awaiting to sample the goods.

IMG_3438

They ate their treats so fast that I could not get a picture of them eating them.  So instead, i got pictures of them with dinner, made with lean ground beef, carrots, potatoes, peas and yogurt.  We mix it in with their dry food every night.

IMG_3442

IMG_3444

I think they liked it.  Lucie is saying “more please”.

IMG_3449


This is All Possible Because of All of You

Thanks to all of you, ” A Jeanne in the Kitchen” is growing.  I now have joined the 200+ club and that is all because of you and your support.  So I thank each and every one of you.  This would not have been possible without you.  I am looking forward to the next part of this fun journey.  I hope you all come along, and bring your friends too.


20170930_162615

White Chocolate Lemon-Thyme Truffles

Ever since I first saw the recipes for the lavender truffles and the lemon-thyme truffles, I was eager to make them both.  I made the lavender truffles a couple of weeks ago Time for Truffles but only just got around to making the lemon-thyme truffles.  The original recipe called for dark chocolate, but that combination just did not seem to appealing to me.  So instead of using dark chocolate, I chose to make them with white chocolate.  I think white chocolate is a better choice for the lemon-thyme flavor combination.

When white chocolate was actually invented is still a mystery, however it is readily accepted that it was created in Switzerland, by the Nestle Chocolate Company in the 1930’s, probably around the same time milk chocolate was invented.  Their ingredients are almost identical, with the exception of cocoa beans and the chocolate liquor (the chocolate tabs used to make chocolate).  Because there is no chocolate liquor or cocoa solids used when making white chocolate, there is very little caffeine or theobromine found in white chocolate.  But don’t be fooled into thinking white chocolate is healthier for you.  It contains a lot of sugar and fat.  In 2004, The U.S. government regulations required that white chocolate contain at least 20% cocoa butter, 14% total milk solids, 3.5% milk fat, and no more than 55% sugar or sweeteners.  The European standards are very similar, although they do not have the regulations on the sugars or sweeteners.  It is believed that both milk chocolate and white chocolate were created as a way to use the excess coca butter that was extracted when making cocoa powder.  Europeans do not consider white chocolate as a real chocolate, although here in the United States, we do.  The difference between dark chocolate and white chocolate is in the process of how it is made.  Dark and milk chocolates are made from cocoa beans, whereas white chocolate is not.   Cocoa beans are composed of 54% cocoa butter, and that is a naturally occurring fat that is produced as a by-product when making cocoa powder.

IMG_3410

White Chocolate Lemon-Thyme Truffles

1 cup heavy whipping cream + more as needed to make the white chocolate ganache coating

4-5 fresh thyme sprigs

12 oz white chocolate

3 TBSP lemon juice

1 tsp lemon zest

IMG_3395

The procedure for making these is the same as it was for making the lavender truffles.  Time for Truffles Combine the heavy whipping cream and the thyme and bring to a simmer, then let steep for 15 minutes.  Then strain the whipping cream and discard the thyme sprigs.

IMG_3396

Add the lemon juice and lemon zest to the cream, and bring back up to a simmer once again, and add 1/2 the chocolate.  Cook until all the chocolate is melted and everything is well incorporated together.  Then pour the mixture onto a baking sheet lined with parchment paper and evenly spread it out.  Chill for at least 3 hours.

IMG_3402

Once the chocolate has set, use a spoon and spoon up roughly 1/2 tsp of the chocolate and roll into a ball with your hands.  Wear gloves when rolling the chocolate so the heat of your hands does not melt the chocolate.

IMG_3404

Once all the chocolate has been rolled into balls about 1/2 ” in diameter, place them back in the refrigerator to chill and set again.  You can also place them in the freezer too.  I found the white chocolate was much softer than the dark chocolate, so I had a harder time getting it to set.  I placed them in the freezer for about 1 hour and it was much easier to work with.

IMG_3406

Melt the remainder of the chocolate, adding cream as needed to make a smoother consistency.  The cream also will make for a shinier coating, which makes for a much nicer presentation.  Right before dipping them into the white chocolate ganache, I rolled them again to make them more round and evenly shaped.  With a toothpick, pick up the truffle centers and roll into the melted chocolate until completely covered and set onto a parchment paper lined baking sheet once again.  I added colored sprinkles again, and this is the time to add them.  Put the truffles back into the refrigerator to set once more.

IMG_3408

Once the truffles have set again, they are ready to gently remove from the parchment paper and place in mini paper holders.  I love the combination of the white chocolate and lemon-thyme.  It is so refreshing.  Keep these chilled until ready to serve or eat.  They are very soft and melt very quickly.  Then savor the flavors.

IMG_3410


Apple, Bell Pepper and Chicken Salad

Our Colorado weather is the weirdest weather around.  We have a saying that “if you don’t like the weather, wait 5 minutes and it will change”.  And believe me, this is so true, especially at this time of the year.  We had cold weather in August, which is supposed to be the dog days of Summer. And we are having warm days now in October, but with cooler evenings and crisp mornings.  Monday it is supposed to snow.  Who knows what’s going on.  It’s hard to stay on top of things and it can be challenging when it comes to cooking.  Pizza and pot pies on some days, Pizza with Pesto, Sausages and Vegetables , Chicken Pot Pie , and salad on other days.  All I can say is that it is good to be flexible.  Creativity helps a lot too.

Yesterday was one of those salad days.  I made a delicious apple, bell pepper and chicken salad.  I had gone to lunch with some friends and bought some pumpkin spice muffins, that I served along side my salad.  Because they were pumpkin spice, it made it seem a bit more like fall than summer, even if only in my mind.  I completed the meal with a cool crisp viognier.

IMG_3394


IMG_3385

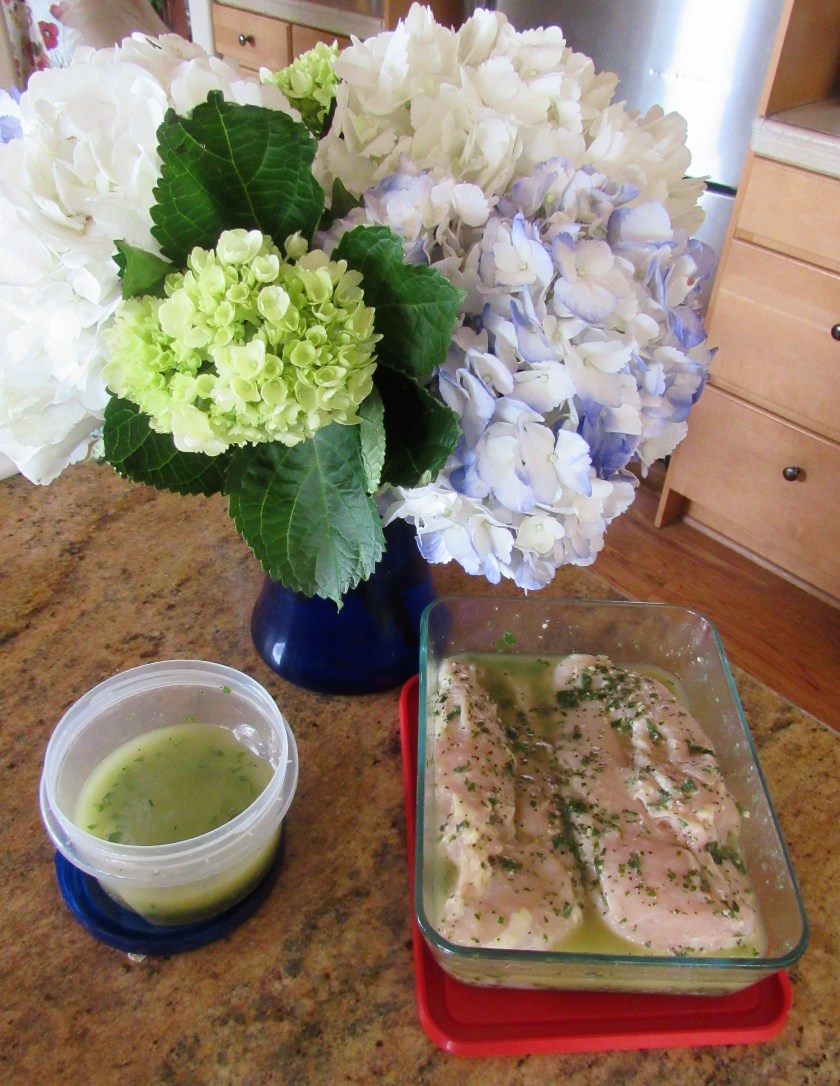
I used the apple vinaigrette as both the marinade for the chicken as well as the dressing for the apples, bell peppers and onions.

IMG_3386

I assembled the salad ahead of time,  and chilled it in the refrigerator until  I was ready to eat it.   I grilled the chicken and added that later, along with more of the apple, pepper mixture and some candied pecans on top.

IMG_3389

These candied pecans were so easy to make.  All I used was a little bit of honey and a dash of salt mixed with the pecans and cooked them up in the skillet for about 5-7 minutes.  After they were cooked, I separated them and let them set until I was ready to use them on top of my salad.  They came out so good.  I could have easily eaten them all in one sitting, but I had to refrain, since I made them for the salad after all.

IMG_3391

IMG_3392

When I got home from work, all I had to do was to finish assembling the salad, and dinner was served.

IMG_3393

Apple, Red Pepper Salad

3/4 cup toasted pecans or walnuts

4 TBSP honey

1/4 tsp salt + a pinch

1/4 cup apple cider vinegar

1/3 cup olive oil

1 TBSP Dijon mustard

1 TBSP garlic

1 tsp each fresh basil, thyme and oregano, chopped fine

2 heaping tsp black pepper

red, yellow and orange bell peppers, cut into matchsticks

2 apples, peeled and cored, and cut into matchsticks

1/2 cup of green beans, par cooked for about 5 minutes, cut into 1-1 1/2 inches

1/4 red onion, sliced very thin

lettuce, your choice or Belgian endive if you prefer something a little more bitter with the sweeter dressing and vegetable mixture


Mix the apple cider vinegar, olive oil, mustard, herbs, garlic, salt and pepper together.  Toss the apples, green beans, bell peppers and onion into the dressing and chill until ready to serve.

If using the dressing as a marinade for either chicken or pork, make enough dressing to use as both the marinade for the meat and the dressing for the salad.

Mix the honey, salt and nuts together and just heat in a hot skillet for about 5-7 minutes.  Immediately remove from the skillet and spread them out on parchment paper until they set.  Once they have cooled, chop them and top your salad with them.


**** I did not have green beans in this salad only because I ran out.  This is a very colorful, tasty salad that can easily be served on its own, or with chicken or pork.  It would also probably be good with shrimp too.

*** * I do not like walnuts, but I love pecans.  I always change pecans out for walnuts, but if you prefer walnuts, then feel free to use them instead.  In my mind, they are pretty interchangeable.


Pizza with Pesto, Sausages and Vegetables

I think I could eat pizza everyday.  I love pizza, as does most of the rest of the world.  There are so many different varieties and versions of pizza, topped with anything and everything, and so many types of sauces that can be used as well.  Some people like their pizza with a thin crust; others prefer it with a thick crust (I am a thick, doughy bread crust person).  The possibilities are endless.

Pizza originated in Naples, Italy. Naples was originally founded in 600 B.C. as a Greek settlement for the wealthy, upper class people of the times.  But the workers who lived there could not afford to eat the foods of the wealthy, nor could they spare the time to prepare a lot of different, labor intensive foods, so pizza was created as a quick and easy food for the working class people.  It was an inexpensive food that could be consumed quickly.  Pizza is a flatbread that is served with sauce and various toppings.  At the time, it was made with foods that were easily and readily available to the workers, but today, anything goes.

With the large number of immigrants coming to the United States in the 19th and 20th centuries, the various foods and cultures also came to the United States as well.  Pizza being an “immigrant” too, was introduced to Americans officially in 1905, when the first American pizzaria was created.  That first American pizzaria was G. (Gennaro) Lombardi’s, in Manhattan, New York, and is still in business today, with the original pizza oven.  Once pizza was introduced to the States, it took it by storm and was a huge hit here in the States long before it was really popular in it’s native country of Italy.  At that time in Italy, pizza was known as food for the working class.   Today, it is popular all over the world and is probably one of the most loved foods anywhere you go.  Everyone loves pizza.

I made pizza with pesto sauce, Italian sausage and sauteed vegetables.  Usually I make my own pesto, and I bought enough basil to make it again today, but I discovered I already some store bought pesto that I already had and needed to used.    My husband added some cheddar cheese to half of the pizza, whereas I only had mozzarella.

IMG_3380

I like a thick, bread-like dough, so I used some yeast to make it rise.

IMG_3365

Thick Pizza Dough

2 packages of dry active yeast or 4 1/2 tsp

3 tsp sugar

1/2 cup warm water

1/2 cup milk

1 egg

2 TBSP olive oil

3 1/2 cups flour+ plus extra to knead the dough

2 tsp salt


Mix the yeast  with 1/2 tsp of sugar and 1/4 cup of warm water.   Let it proof or set for about 10 minutes or until it becomes thick and frothy.

Whisk the egg, milk and olive oil together before adding it to the dry mixture and yeast.

Combine the flour with rest of the sugar and salt and mix well.

IMG_3366

Once the yeast mixture is thick and frothy, and has sat for about 10 minutes, add it to the flour mixture and along with the egg and milk mixture.  Add the rest of the water as needed and combine everything together.  You want to the dough to be soft.  Then sprinkle a little flour on your working surface and start kneading the dough on the floured surface with the heel of your hand until it all forms into a soft ball.

IMG_3367

Use the rest of the olive oil to coat a large bowl and the dough, then cover and let it proof and rise for about 1 hour, or until it has doubled in size.

IMG_3368

As the dough is rising, prepare your toppings.  I love all kinds of pizza, and have different toppings and sauces all the time, so make what you like.  This time, I used Italian sausage that I cooked and cut into chunks and sauteed vegetables.  I added a lot of different vegetables too.  I used red, yellow and orange bell peppers, mushrooms, red onions, artichoke hearts and tomatoes.  I sauteed the onions, mushrooms and bell peppers, and added the artichoke hearts and tomatoes at the end.

IMG_3370

IMG_3373

Once the dough is ready, press or roll it out onto your pizza stone.  Again, I prefer to gently press it with my hands, but you can roll it too, and that is just fine.  Once the dough has filled the pizza stone, it is ready for your sauce and the toppings.  I added my pesto sauce first and covered the dough, leaving about an inch at the end as a border, which I rolled and twisted.  Then I added my cheese and covered the sauce.  Next were my sausage and vegetables, followed by just a little bit of sauce and more cheese.

IMG_3374

IMG_3375

It’s now ready to bake.  Preheat he oven to 375* F and bake for about 40-45 minutes or until the crust is done and is lightly golden.  The more loaded your pizza, and as you can see, I like mine loaded, the longer it will take to bake, making sure the center is done.  If the outer crust is done and the center still needs more time, you can always cover the pizza with aluminum foil and cook longer as needed.

IMG_3377

Time for pizza and wine.  Just like with your sauce and your toppings, drink what you like.   My wine of choice tonight was a light, citrusy viognier (one of our local wineries close to my house, Turquoise Mesa Winery) to go with the pesto.  I try to match the wines with the sauce.  Mangia!

IMG_3382

To Busy to be Creative

This week is starting out as a very busy, very hectic week.  Believe it or not, I actually love being busy and I love a little creative and constructive chaos.  Sometimes though, my plate gets too full and I just can’t do everything I want to do when I want to get things done (pardon the pun).  Today is one of those days.  So, I apologize, but the chef is to busy with other things at the moment to be creative, so the kitchen is temporarily closed.  It will be open and back in business again tomorrow, and it will be business as usual.  I already have something yummy in the works.   Until then, you’ll just have to have a little patience.  I promise, you won’t be disappointed.  Sometimes, life just happens, and all you can do is to to go with the flow.