This is All Possible Because of All of You

Thanks to all of you, ” A Jeanne in the Kitchen” is growing.  I now have joined the 200+ club and that is all because of you and your support.  So I thank each and every one of you.  This would not have been possible without you.  I am looking forward to the next part of this fun journey.  I hope you all come along, and bring your friends too.


20170930_162615

White Chocolate Lemon-Thyme Truffles

Ever since I first saw the recipes for the lavender truffles and the lemon-thyme truffles, I was eager to make them both.  I made the lavender truffles a couple of weeks ago Time for Truffles but only just got around to making the lemon-thyme truffles.  The original recipe called for dark chocolate, but that combination just did not seem to appealing to me.  So instead of using dark chocolate, I chose to make them with white chocolate.  I think white chocolate is a better choice for the lemon-thyme flavor combination.

When white chocolate was actually invented is still a mystery, however it is readily accepted that it was created in Switzerland, by the Nestle Chocolate Company in the 1930’s, probably around the same time milk chocolate was invented.  Their ingredients are almost identical, with the exception of cocoa beans and the chocolate liquor (the chocolate tabs used to make chocolate).  Because there is no chocolate liquor or cocoa solids used when making white chocolate, there is very little caffeine or theobromine found in white chocolate.  But don’t be fooled into thinking white chocolate is healthier for you.  It contains a lot of sugar and fat.  In 2004, The U.S. government regulations required that white chocolate contain at least 20% cocoa butter, 14% total milk solids, 3.5% milk fat, and no more than 55% sugar or sweeteners.  The European standards are very similar, although they do not have the regulations on the sugars or sweeteners.  It is believed that both milk chocolate and white chocolate were created as a way to use the excess coca butter that was extracted when making cocoa powder.  Europeans do not consider white chocolate as a real chocolate, although here in the United States, we do.  The difference between dark chocolate and white chocolate is in the process of how it is made.  Dark and milk chocolates are made from cocoa beans, whereas white chocolate is not.   Cocoa beans are composed of 54% cocoa butter, and that is a naturally occurring fat that is produced as a by-product when making cocoa powder.

IMG_3410

White Chocolate Lemon-Thyme Truffles

1 cup heavy whipping cream + more as needed to make the white chocolate ganache coating

4-5 fresh thyme sprigs

12 oz white chocolate

3 TBSP lemon juice

1 tsp lemon zest

IMG_3395

The procedure for making these is the same as it was for making the lavender truffles.  Time for Truffles Combine the heavy whipping cream and the thyme and bring to a simmer, then let steep for 15 minutes.  Then strain the whipping cream and discard the thyme sprigs.

IMG_3396

Add the lemon juice and lemon zest to the cream, and bring back up to a simmer once again, and add 1/2 the chocolate.  Cook until all the chocolate is melted and everything is well incorporated together.  Then pour the mixture onto a baking sheet lined with parchment paper and evenly spread it out.  Chill for at least 3 hours.

IMG_3402

Once the chocolate has set, use a spoon and spoon up roughly 1/2 tsp of the chocolate and roll into a ball with your hands.  Wear gloves when rolling the chocolate so the heat of your hands does not melt the chocolate.

IMG_3404

Once all the chocolate has been rolled into balls about 1/2 ” in diameter, place them back in the refrigerator to chill and set again.  You can also place them in the freezer too.  I found the white chocolate was much softer than the dark chocolate, so I had a harder time getting it to set.  I placed them in the freezer for about 1 hour and it was much easier to work with.

IMG_3406

Melt the remainder of the chocolate, adding cream as needed to make a smoother consistency.  The cream also will make for a shinier coating, which makes for a much nicer presentation.  Right before dipping them into the white chocolate ganache, I rolled them again to make them more round and evenly shaped.  With a toothpick, pick up the truffle centers and roll into the melted chocolate until completely covered and set onto a parchment paper lined baking sheet once again.  I added colored sprinkles again, and this is the time to add them.  Put the truffles back into the refrigerator to set once more.

IMG_3408

Once the truffles have set again, they are ready to gently remove from the parchment paper and place in mini paper holders.  I love the combination of the white chocolate and lemon-thyme.  It is so refreshing.  Keep these chilled until ready to serve or eat.  They are very soft and melt very quickly.  Then savor the flavors.

IMG_3410


Apple, Bell Pepper and Chicken Salad

Our Colorado weather is the weirdest weather around.  We have a saying that “if you don’t like the weather, wait 5 minutes and it will change”.  And believe me, this is so true, especially at this time of the year.  We had cold weather in August, which is supposed to be the dog days of Summer. And we are having warm days now in October, but with cooler evenings and crisp mornings.  Monday it is supposed to snow.  Who knows what’s going on.  It’s hard to stay on top of things and it can be challenging when it comes to cooking.  Pizza and pot pies on some days, Pizza with Pesto, Sausages and Vegetables , Chicken Pot Pie , and salad on other days.  All I can say is that it is good to be flexible.  Creativity helps a lot too.

Yesterday was one of those salad days.  I made a delicious apple, bell pepper and chicken salad.  I had gone to lunch with some friends and bought some pumpkin spice muffins, that I served along side my salad.  Because they were pumpkin spice, it made it seem a bit more like fall than summer, even if only in my mind.  I completed the meal with a cool crisp viognier.

IMG_3394


IMG_3385

I used the apple vinaigrette as both the marinade for the chicken as well as the dressing for the apples, bell peppers and onions.

IMG_3386

I assembled the salad ahead of time,  and chilled it in the refrigerator until  I was ready to eat it.   I grilled the chicken and added that later, along with more of the apple, pepper mixture and some candied pecans on top.

IMG_3389

These candied pecans were so easy to make.  All I used was a little bit of honey and a dash of salt mixed with the pecans and cooked them up in the skillet for about 5-7 minutes.  After they were cooked, I separated them and let them set until I was ready to use them on top of my salad.  They came out so good.  I could have easily eaten them all in one sitting, but I had to refrain, since I made them for the salad after all.

IMG_3391

IMG_3392

When I got home from work, all I had to do was to finish assembling the salad, and dinner was served.

IMG_3393

Apple, Red Pepper Salad

3/4 cup toasted pecans or walnuts

4 TBSP honey

1/4 tsp salt + a pinch

1/4 cup apple cider vinegar

1/3 cup olive oil

1 TBSP Dijon mustard

1 TBSP garlic

1 tsp each fresh basil, thyme and oregano, chopped fine

2 heaping tsp black pepper

red, yellow and orange bell peppers, cut into matchsticks

2 apples, peeled and cored, and cut into matchsticks

1/2 cup of green beans, par cooked for about 5 minutes, cut into 1-1 1/2 inches

1/4 red onion, sliced very thin

lettuce, your choice or Belgian endive if you prefer something a little more bitter with the sweeter dressing and vegetable mixture


Mix the apple cider vinegar, olive oil, mustard, herbs, garlic, salt and pepper together.  Toss the apples, green beans, bell peppers and onion into the dressing and chill until ready to serve.

If using the dressing as a marinade for either chicken or pork, make enough dressing to use as both the marinade for the meat and the dressing for the salad.

Mix the honey, salt and nuts together and just heat in a hot skillet for about 5-7 minutes.  Immediately remove from the skillet and spread them out on parchment paper until they set.  Once they have cooled, chop them and top your salad with them.


**** I did not have green beans in this salad only because I ran out.  This is a very colorful, tasty salad that can easily be served on its own, or with chicken or pork.  It would also probably be good with shrimp too.

*** * I do not like walnuts, but I love pecans.  I always change pecans out for walnuts, but if you prefer walnuts, then feel free to use them instead.  In my mind, they are pretty interchangeable.


Pizza with Pesto, Sausages and Vegetables

I think I could eat pizza everyday.  I love pizza, as does most of the rest of the world.  There are so many different varieties and versions of pizza, topped with anything and everything, and so many types of sauces that can be used as well.  Some people like their pizza with a thin crust; others prefer it with a thick crust (I am a thick, doughy bread crust person).  The possibilities are endless.

Pizza originated in Naples, Italy. Naples was originally founded in 600 B.C. as a Greek settlement for the wealthy, upper class people of the times.  But the workers who lived there could not afford to eat the foods of the wealthy, nor could they spare the time to prepare a lot of different, labor intensive foods, so pizza was created as a quick and easy food for the working class people.  It was an inexpensive food that could be consumed quickly.  Pizza is a flatbread that is served with sauce and various toppings.  At the time, it was made with foods that were easily and readily available to the workers, but today, anything goes.

With the large number of immigrants coming to the United States in the 19th and 20th centuries, the various foods and cultures also came to the United States as well.  Pizza being an “immigrant” too, was introduced to Americans officially in 1905, when the first American pizzaria was created.  That first American pizzaria was G. (Gennaro) Lombardi’s, in Manhattan, New York, and is still in business today, with the original pizza oven.  Once pizza was introduced to the States, it took it by storm and was a huge hit here in the States long before it was really popular in it’s native country of Italy.  At that time in Italy, pizza was known as food for the working class.   Today, it is popular all over the world and is probably one of the most loved foods anywhere you go.  Everyone loves pizza.

I made pizza with pesto sauce, Italian sausage and sauteed vegetables.  Usually I make my own pesto, and I bought enough basil to make it again today, but I discovered I already some store bought pesto that I already had and needed to used.    My husband added some cheddar cheese to half of the pizza, whereas I only had mozzarella.

IMG_3380

I like a thick, bread-like dough, so I used some yeast to make it rise.

IMG_3365

Thick Pizza Dough

2 packages of dry active yeast or 4 1/2 tsp

3 tsp sugar

1/2 cup warm water

1/2 cup milk

1 egg

2 TBSP olive oil

3 1/2 cups flour+ plus extra to knead the dough

2 tsp salt


Mix the yeast  with 1/2 tsp of sugar and 1/4 cup of warm water.   Let it proof or set for about 10 minutes or until it becomes thick and frothy.

Whisk the egg, milk and olive oil together before adding it to the dry mixture and yeast.

Combine the flour with rest of the sugar and salt and mix well.

IMG_3366

Once the yeast mixture is thick and frothy, and has sat for about 10 minutes, add it to the flour mixture and along with the egg and milk mixture.  Add the rest of the water as needed and combine everything together.  You want to the dough to be soft.  Then sprinkle a little flour on your working surface and start kneading the dough on the floured surface with the heel of your hand until it all forms into a soft ball.

IMG_3367

Use the rest of the olive oil to coat a large bowl and the dough, then cover and let it proof and rise for about 1 hour, or until it has doubled in size.

IMG_3368

As the dough is rising, prepare your toppings.  I love all kinds of pizza, and have different toppings and sauces all the time, so make what you like.  This time, I used Italian sausage that I cooked and cut into chunks and sauteed vegetables.  I added a lot of different vegetables too.  I used red, yellow and orange bell peppers, mushrooms, red onions, artichoke hearts and tomatoes.  I sauteed the onions, mushrooms and bell peppers, and added the artichoke hearts and tomatoes at the end.

IMG_3370

IMG_3373

Once the dough is ready, press or roll it out onto your pizza stone.  Again, I prefer to gently press it with my hands, but you can roll it too, and that is just fine.  Once the dough has filled the pizza stone, it is ready for your sauce and the toppings.  I added my pesto sauce first and covered the dough, leaving about an inch at the end as a border, which I rolled and twisted.  Then I added my cheese and covered the sauce.  Next were my sausage and vegetables, followed by just a little bit of sauce and more cheese.

IMG_3374

IMG_3375

It’s now ready to bake.  Preheat he oven to 375* F and bake for about 40-45 minutes or until the crust is done and is lightly golden.  The more loaded your pizza, and as you can see, I like mine loaded, the longer it will take to bake, making sure the center is done.  If the outer crust is done and the center still needs more time, you can always cover the pizza with aluminum foil and cook longer as needed.

IMG_3377

Time for pizza and wine.  Just like with your sauce and your toppings, drink what you like.   My wine of choice tonight was a light, citrusy viognier (one of our local wineries close to my house, Turquoise Mesa Winery) to go with the pesto.  I try to match the wines with the sauce.  Mangia!

IMG_3382

To Busy to be Creative

This week is starting out as a very busy, very hectic week.  Believe it or not, I actually love being busy and I love a little creative and constructive chaos.  Sometimes though, my plate gets too full and I just can’t do everything I want to do when I want to get things done (pardon the pun).  Today is one of those days.  So, I apologize, but the chef is to busy with other things at the moment to be creative, so the kitchen is temporarily closed.  It will be open and back in business again tomorrow, and it will be business as usual.  I already have something yummy in the works.   Until then, you’ll just have to have a little patience.  I promise, you won’t be disappointed.  Sometimes, life just happens, and all you can do is to to go with the flow.

A Quick Trip to Estes Park

Estes Park is about 1 1/2 hours north west of us.  It is such a beautiful area, and people flock there from all over, both tourists and locals alike.   Estes Park is in the heart of the  Rocky Mountains, here in Colorado and The Stanley Hotel is nestled right at the bottom of the foothills in Estes Park.   It is beautiful any time you go, but it is especially beautiful in the fall, as all the colors are changing and the elk are out in force.  Fall is also elk season up in Estes Park, and the elk are all over town, doing whatever they please.  Seeing the elk is always a big highlight.  I never get tired of seeing them.  They are big animals, and the big bull males can be very dangerous if you get too close, so I definitely advise seeing them at a safe distance.  Estes Park is a destination we take all our visitors when they come out, so we have been there quite often, but we had never stayed the night before until now.  Estes Park is also home to the world famous Stanley Hotel.  Larry had booked a night for us to stay at the Stanley as our main anniversary celebration months ago.

Pictures of the Rocky Mountains changing into their fall colors.

IMG_3253

IMG_3252

IMG_3263

Elk making themselves at home right as you enter Estes Park, right at the start of the Downtown area.

IMG_3289

Elk on the golf course.

IMG_3285

Elk making themselves right at home at someone else’s home, in their front yard.  We could hear them bugeling all night.  They were out in force.

IMG_3359

IMG_3362

The Stanley Hotel, Estes Park, Colorado.

IMG_3294

IMG_3303

Enjoying a glass of wine out on the veranda before dinner.

IMG_3307

The Stanley Hotel has been a landmark in Estes Park and Colorado forever.  It was built in 1909 by Freelan Stanley, the same Stanley who made his fame and fortune from the Stanley Steamer automobiles.  It was the first grand, luxury hotel west of the Mississippi, and has been apart of Colorado’s history ever since.  It is indeed very grand and very luxurious, with no detail left untouched.  In its beginning, it was where all the rich and famous people of the day stayed and played.  Usually they would come and stay for the whole summer, since it was only a seasonal hotel up until 1984.  But the Stanley Hotel is also famous because a lot of movies have been inspired by the hotel, and some have featured the hotel as well.  The most famous movie inspired by this beautiful hotel was The Shining, by Stephen King.  It is also famous because many have said it is one of the most haunted places in America, as well as in the world.  So many people, myself included, want to to stay for the ghosts.  We did do the ghost tour, but we did not have any encounters.  Maybe next time.

Aside from the ghost tour, we toured the beautiful grounds and dined in their restaurant, Cascades.  Our dinner was very, very good.  Larry had the wild game meatloaf, and I had elk medallions in a raspberry demi-glaze.  Everything was served ala carte, so we also ordered roasted potatoes and grilled asparagus.  I ordered a very smooth, fruity pinot noir that paired prefectly with my elk medallions.  Those were cooked to perfection.  They were so tender and moist, and not gamely at all.  The meal also came with a rosemary-parmagian cheese bread and butter.   We finished the meal with a creme brulee, topped with berries.  Then we waited until dark and took our ghost tour.

IMG_3316

IMG_3315

We only stayed one night.  We had to come home to all our fur children and back to work and reality.  It’s nice to escape every now and then though, even if only for a short while.  Before leaving Estes Park, we stopped at a cute little breakfast cafe, called Claire’s.  We ended our stay with one more tasty meal before heading home.  Even though we were up in the mountains, at an elevation of about 8,600 feet, it was actually warmer up in the mountains than it is at home.  We breakfasted out on their deck, and had breakfast al fresco, with a gorgeous view of the mountains.  Larry ordered a chorizo omelette and I had a Cuban Benedict, with pulled pork, ham and poached eggs over an English muffin.  Both were served with seasoned home potatoes.  It was just a short little get-away, but it was very refreshing and beautiful.  Even though we were only gone for one night, all our fur-babies thought we had been gone a lifetime, and are following closely by my side today, making sure I am not going to leave them again and go anywhere without them anytime soon.  They get well cared for when we travel.  We have a friend who stays with them and spoils them rotten (even more than they already are), so you would think they would actually like it when Mommy and Daddy go away.  But they prefer it when both Mommy and daddy are home with them.

IMG_3348


Wining, Dining and Dancing

We are still celebrating our anniversary, but we were also celebrating my friend Janet’s birthday as well.  But then, we really don’t need too many reasons to celebrate.  Life, after all is a celebration, and I will always find a way to celebrate all the good things life has to offer.  We started off by going to our favorite winery, InVINtions, A Creative Winery, InVINtionsWine.com, where we were tasting and sampling some of our favorite wines.

IMG_0221

After we had finished with our wine tasting, we ventured across the parking lot to a really good Middle Eastern/Moroccan restaurant, Sahara, Sahararestaurant.net, where we had a complete Moroccan experience with great food and belly dancing.  Janet and I got up to try our belly dancing skills as well, but I will leave that to the real dancer who was there.  She was very good.   My belly dancing skills still leave much to be desired, and there is WAY to much belly on me, so I will leave the belly dancing to the professionals at the moment.  I really enjoyed her veil dance.

IMG_0230

IMG_0231

IMG_0235

IMG_0236_Moment(5)

IMG_0236_Moment(7)

We started our dinner off with some delicious hummus and warmed pita bread.

IMG_0228

Then the main courses came.  When we go to exotic or different places, we tend to order a variety of plates then share, so we can all get a sampling of the different flavors.  We ordered a beef, chicken and a lamb dish.  All came with saffron rice and vegetables.  We all had our favorites, but all three of the dishes were delicious.

IMG_0239

IMG_0241

As always, when we get together with our friends Janet and Bob, we had a great time and a very entertaining evening.  As I have said many times, good friends and good food; life doesn’t get much better than that.


Apple Bread Pudding with a Rum Caramel Sauce

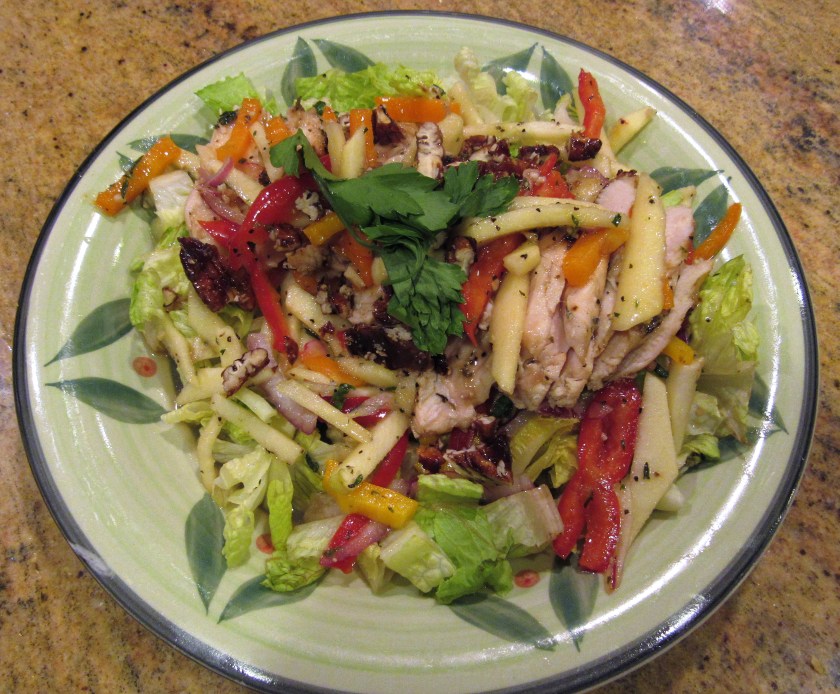
The South, and New Orleans in particular, are famous for their bread puddings.  Truth be told, I always thought that bread pudding originated in the Southern part of the United States, but in fact, it did not.  Though bread pudding has become a staple dessert in both New Orleans and the whole South,  it is has actually been a popular and beloved dessert eaten all over the world for centuries.  Some form of bread pudding actually goes back as early as the 11th century.  For the longest time, it was known as “a poor man’s dessert”, since it is made from stale bread, milk or cream and eggs.   However today, it is a trendy dessert found in some of the most upscale restaurants all around.  Some of the different names it goes by are pudin or budin; capriotata in Mexico; and a Nelson cake or Wet Nelly, in the UK.  It can be made either sweet or savory (stuffing is a savory bread pudding), and you can use any type of bread you like.  The possibilities of making bread pudding are endless.  You can add whatever you like to the filling, and different countries all add their own specific personality and unique ingredients to their mixture.  The most important ingredients in any bread pudding, whether sweet or savory, are stale bread, eggs and either milk or cream.  It is important to use stale bread rather than fresh, so the bread can really soak up and absorb the liquid ingredients and the flavors being used.  According to “The Bread Pudding Queen”, Portia Little, (nope, I am not the queen of bread pudding – surprise, surprise) it is really important to measure your bread cubes loosely rather than measuring them specifically with a measuring cup, to help keep the bread pliable and more able to soak up the liquids.  Ms. Little is known as the Queen of Bread Pudding because she has over 1,000 recipes just for bread pudding, and is still adding to her collection.

I love bread pudding; always have.  But I really made it because I had some bread that needed to be used before going bad, and I just though making bread pudding would be a delicious use of that bread.  I also added some apples cooked with a little sugar, butter and cinnamon.  I had no idea that by adding the apples and cinnamon I was making my bread pudding in the traditional Belgian way.  I only learned that through doing my research.  It just goes to show, you can learn something new everyday, and even those of us in the know, still have a lot to learn.

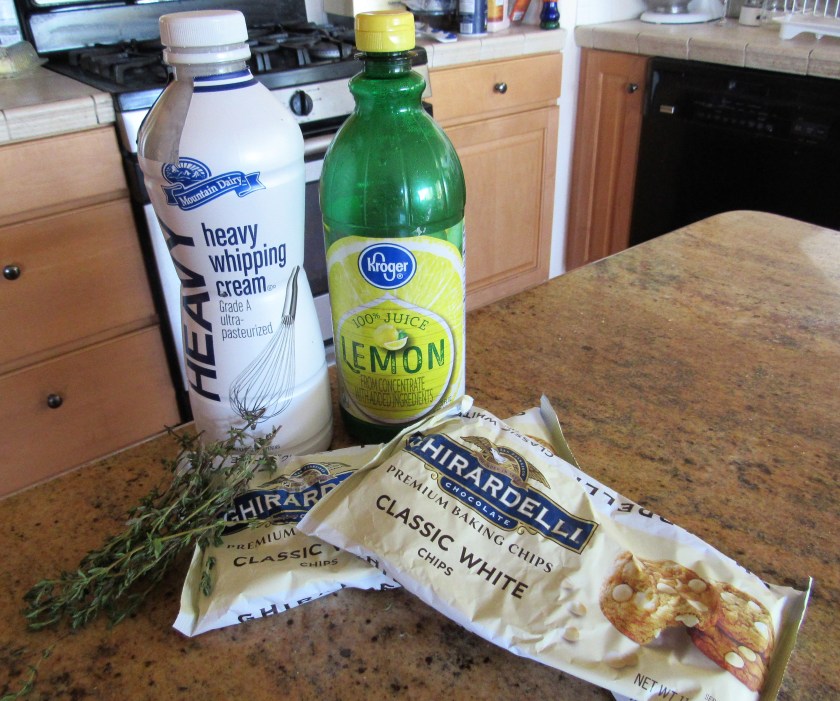
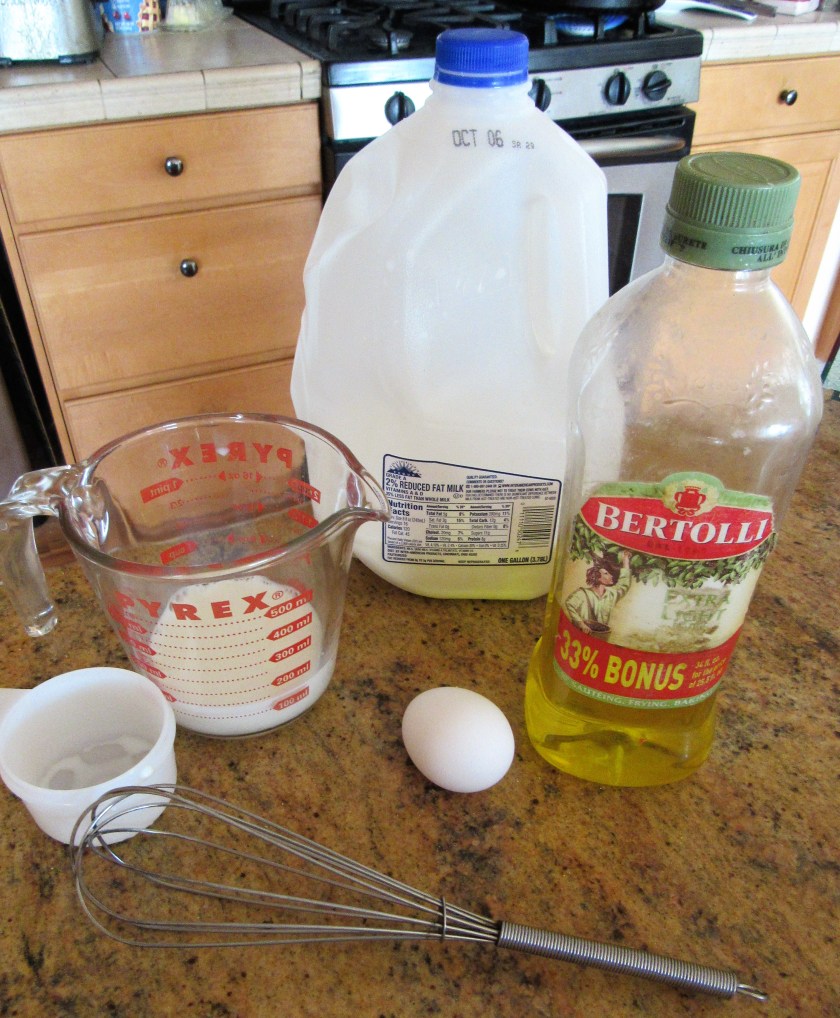
All you need to make bread pudding is just a few simple, everyday ingredients.  I used bread rolls, but any kind of bread will work just fine.

IMG_3185

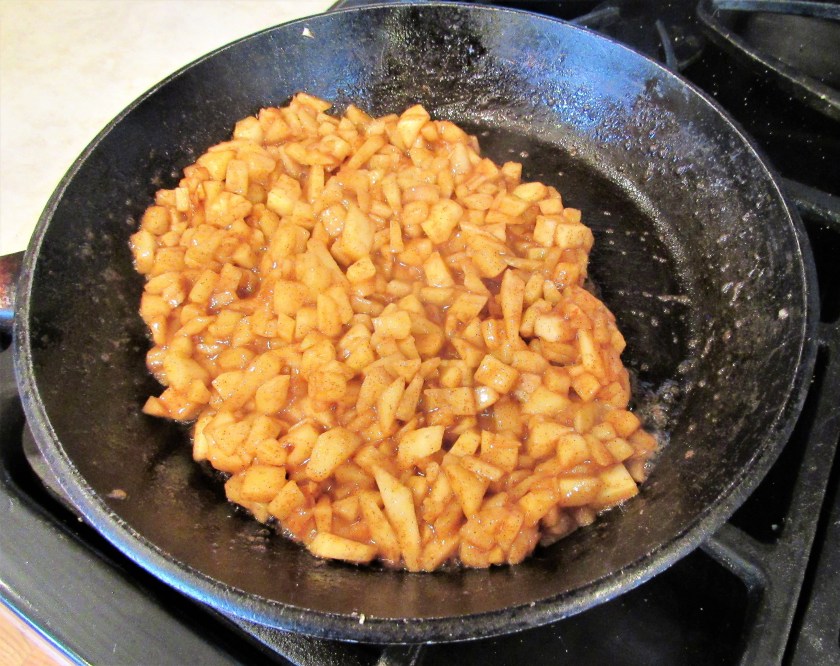
After peeling and dicing my apples, I cooked them in butter, with sugar and cinnamon until they were soft and tender, about 10 minutes.

IMG_3188

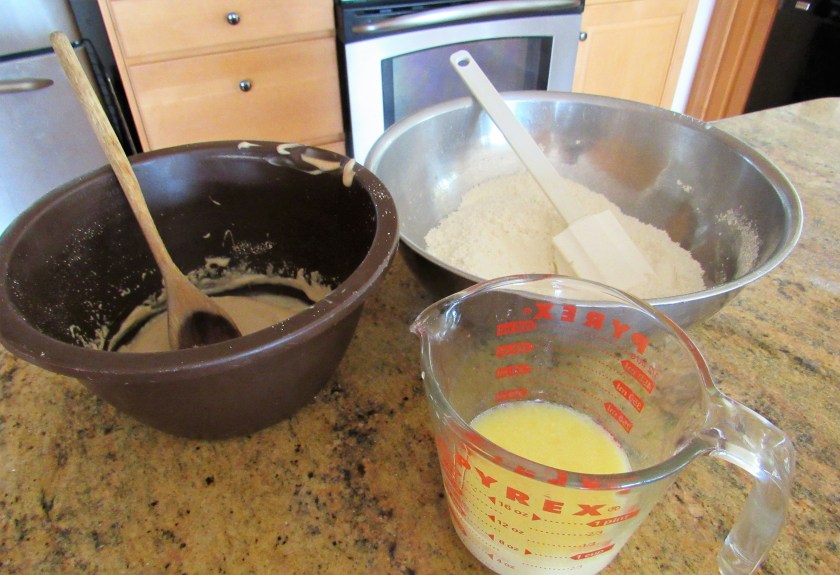
After the apples were cooked, I added them to my bread cubes and tossed everything together well.

IMG_3187

I whisked eggs, milk, sugar and vanilla together to make my liquid and poured it all into the bread and apple mixture.  Really press the bread into the liquid to make sure it absorbs it all and soaks it all up.  Then pour into a baking dish that has been sprayed with cooking spray.  Press again to make sure all the liquid is absorbed into the bread cubes.

IMG_3195

Once all the ingredients are in the baking pan, and firmly pressed together, cover the baking dish tightly with aluminum foil and bake at 350* F for about 1 hour or until the top has formed a light crust and the liquid has evaporated and cooked into the pudding.

IMG_3199

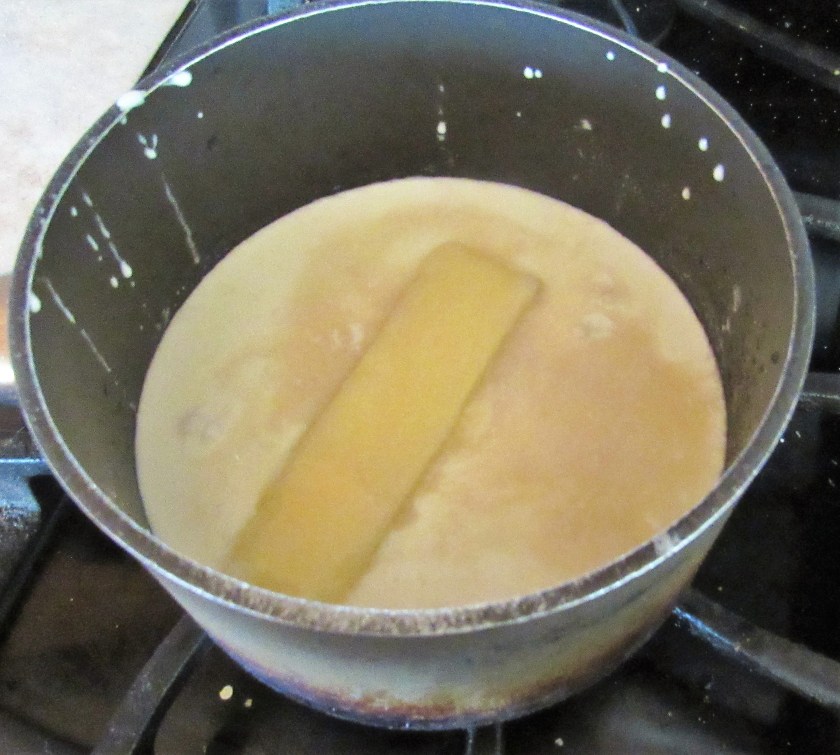
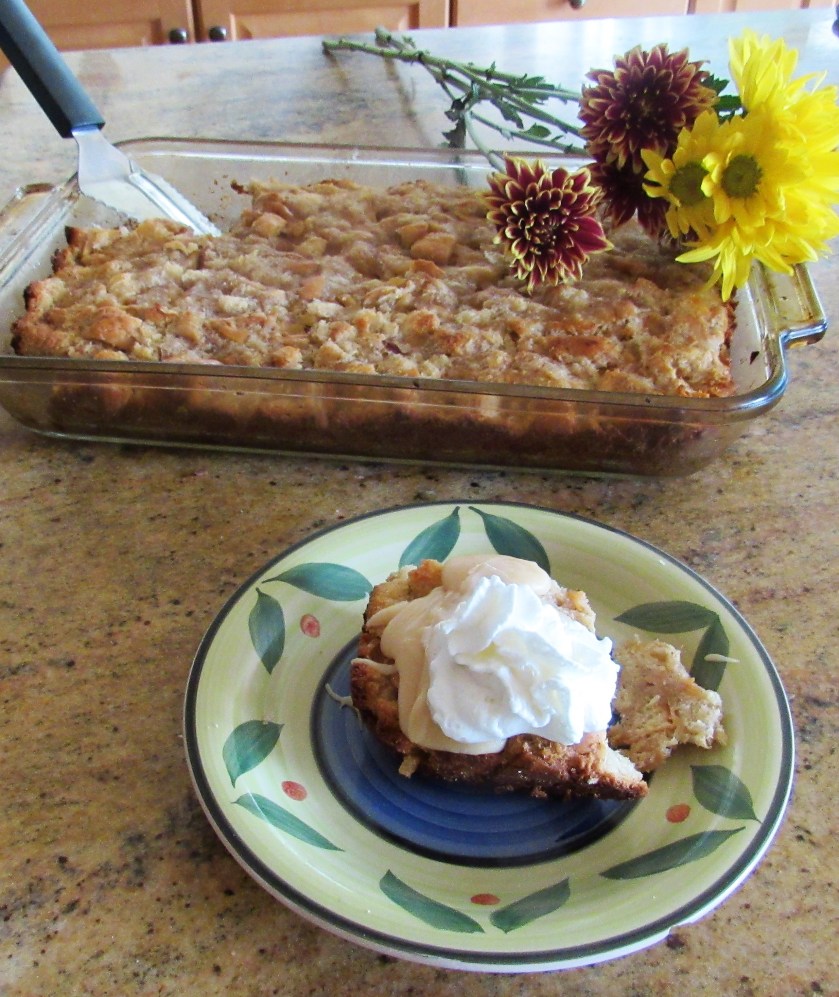
I always serve my bread pudding with a sauce, and usually it is a rum-caramel sauce.  Bread pudding is always best when served warm with a helping of sauce and whipped cream on top.  My sauce was made from butter, heavy whipping cream, sugar and rum.  I used Captain Morgan’s, but you can use whatever you like.  Rum, or other alcohol is optional, but I find it really makes for a rich and decadent sauce.

IMG_3201

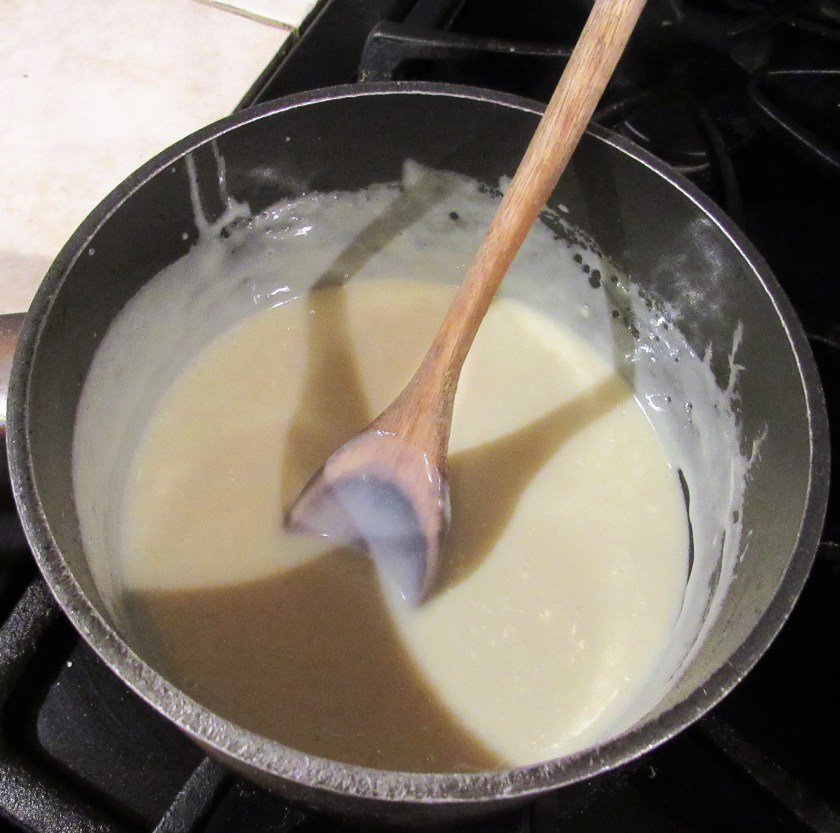
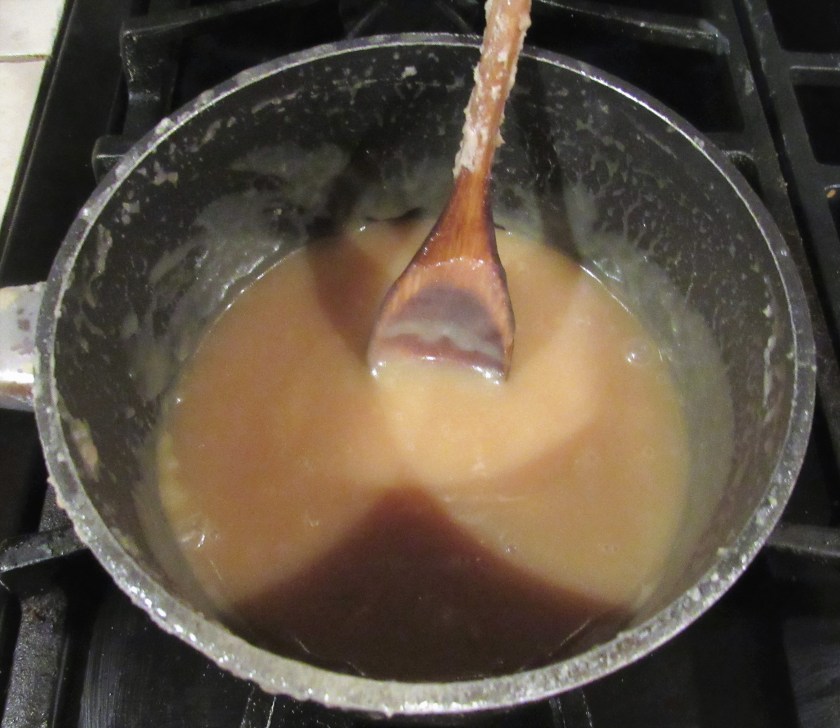
Your sauce is ready when it is a light caramel color and is thick and syrupy.  Once it starts to caramelize, it will burn very quickly if you are not careful.

IMG_3249

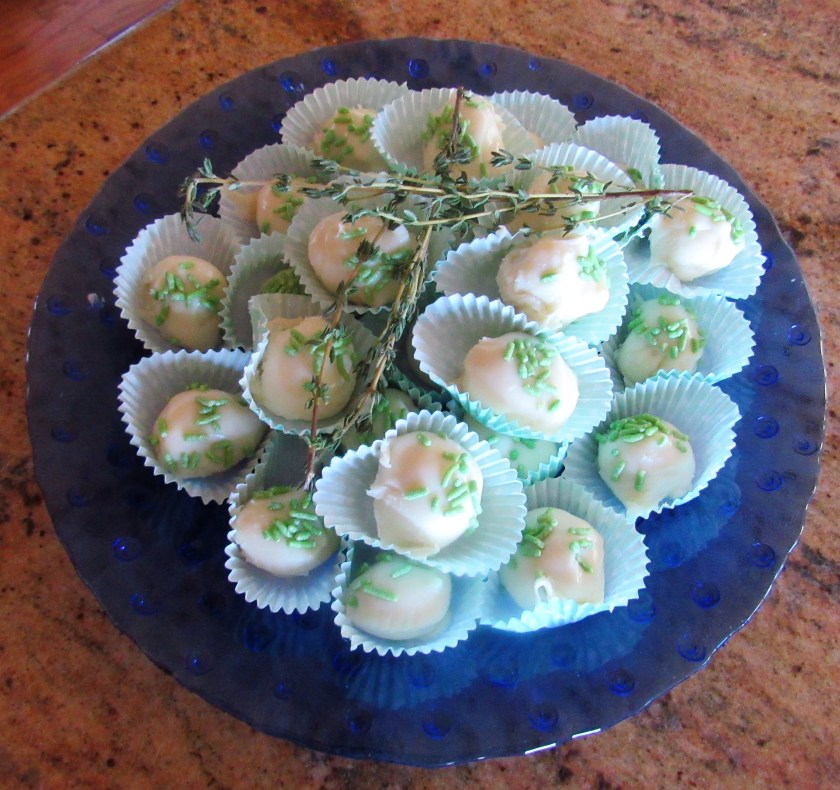
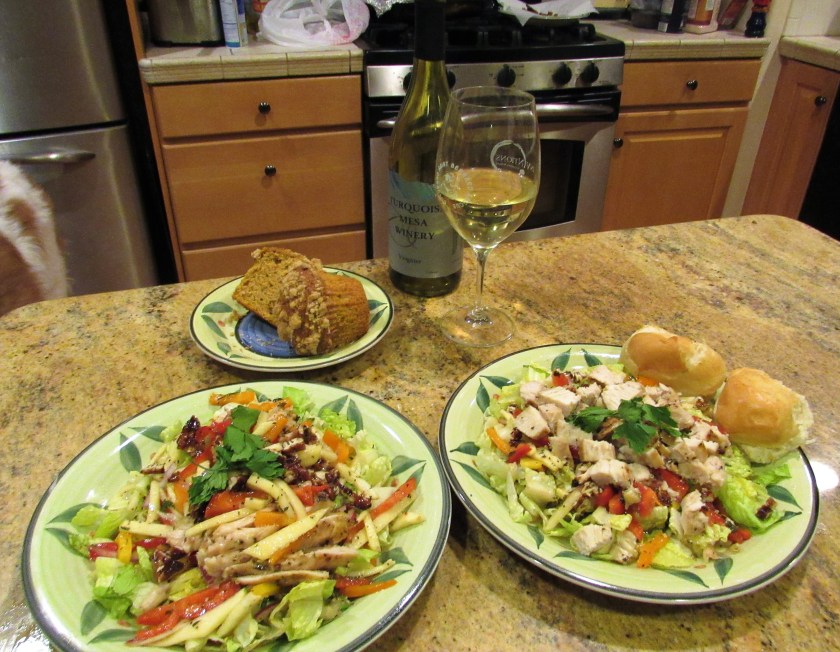
From left over, stale bread to a rich and decadent dessert.  YUMMY!  Laizzez le bontemps roulez!

IMG_3202

Jeanne’s Apple Bread Pudding with Rum-Caramel Sauce

4 or so cups stale bread, cubed and loosely measured

2-3 medium apples, peeled and diced

1 cup sugar + 2 TBSP for the apples

4-5 eggs

1-1/2 cups of milk or cream

1-2 tsp vanilla

1 TBSP cinnamon

2-3 TBSP butter


Preheat oven to 350*F

Spray your baking pan with cooking spray.


Cut the bread into cubes about 1-1 1/2 ” in size and set aside.

Dice the apples and cook with the cinnamon, 2 TBSP of sugar, cinnamon and butter until the apples are soft and tender, about 10 minutes.  Once the apples are cooked, add them to the bread cubes and mix well.

Whisk together the eggs, milk, vanilla and the rest of the sugar and pour over the bread and apple mixture.  Combine thoroughly and make sure the bread soaks up all the liquid, by pressing it all together.  Pour into the prepared baking pan and really firmly press the bread mixture into the pan again to make sure all the liquid is absorbed.  Cover tightly with aluminum foil and bake for about 1 hour or until a light crust has formed on the top and all the liquid is gone.  Do not over cook or the pudding will be dry and tough.  You want it to still be moist in the middle.


Rum-Caramel Sauce

1 stick of butter

1 cup sugar

1 1/2-2 cups of heavy whipping cream

1/2 cup of rum, or whiskey of your choice – optional


Cook the butter, sugar and cream in a sauce pan until the butter is melted and the sugar is completely dissolved into the cream.  Stir constantly in a figure 8 motion until the sauce is thick and a light caramel color.  This could take awhile.  So, be patient.  It is well worth the wait.  Add the rum or alcohol, if using, and mix well.  Once the sauce is done, add to the warmed bread pudding and top with whipped cream.  Enjoy this decadently delicious dessert, one slow, delicious bite at a time.


*** This is a recipe that calls for you to be creative and to add whatever you like in your filling.  Have fun.  Experiment.  There is no wright or wrong way to make a good bread pudding, unless you over cook it.