Mediterranean Mumtaz

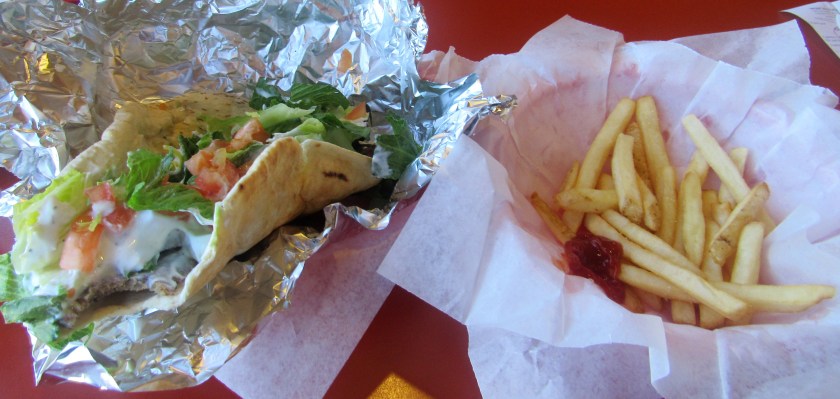
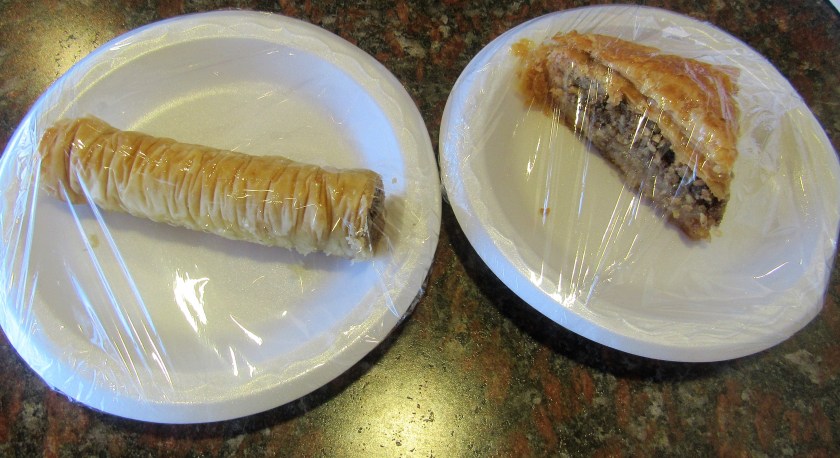
Years ago, I was introduced to a fabulous little family owned restaurant called Mumtaz,  located in Lafayette, Colorado.  I have been going there ever since, and it is most definitely one of my favorite restaurants around.  Mumtaz’ menu is all delicious Mediterranean food, with a Lebanese flair.  Everything is fresh and is made in house daily.   It is truly a family affiar, and everything is made with the most important ingredient that goes into any dish, LOVE.  The baklava is made fresh daily by Grandma, and is the best baklava I have ever tasted.  The owner and operator,  Hiam Jamell, or MO, as he prefers to go by,  is always at the helm, and is often on the grill cooking.  I do not get a chance to go to Mumtaz as often as I would like, however, every time I do get a chance to go, Mo is always there with a big friendly hello and a warm, welcoming smile.  All of the food at Mumtaz is fabulous, but my favorite is the gyro.  It is loaded with lots of fresh lettuce, tomatoes and tsaziki sauce, and a very generous amount of delicious gyro meat.  You can get it with or without feta cheese as well.  Aside from fantastic gyros, Mumtaz also offers homemade falafels, kefta, dolmas and mezza, among many other delectable dishes.

My dear friend Priscilla and I had a rare opportunity for a lunch get together yesterday, and I introduced her to the deliciousness of Mumtaz.  She too is now a fan, but then how could anyone not be.

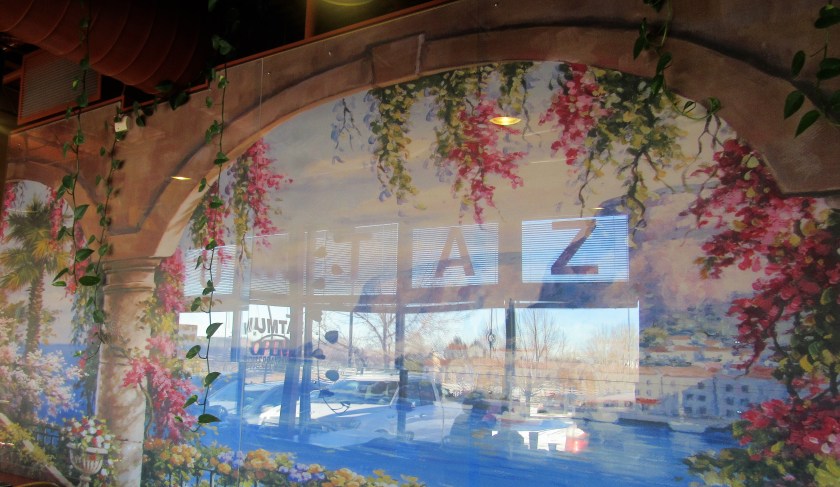
This beautiful mural makes you feel as though you are dining right on the Mediterranean Coast and takes you far, far away, even if only for a short little bit of time.

IMG_4889

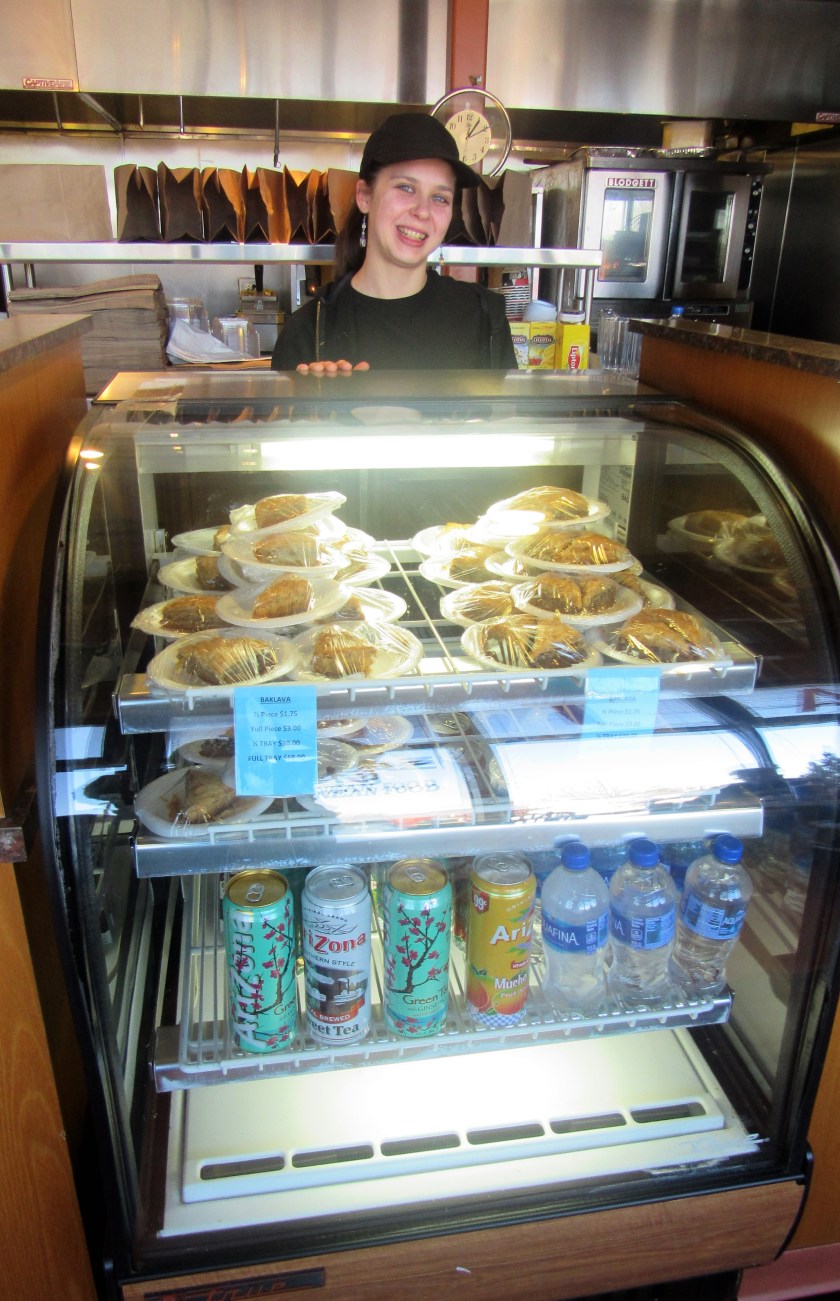
Felicia smiling in front of the dessert case, filled with the best baklava around.

IMG_4890

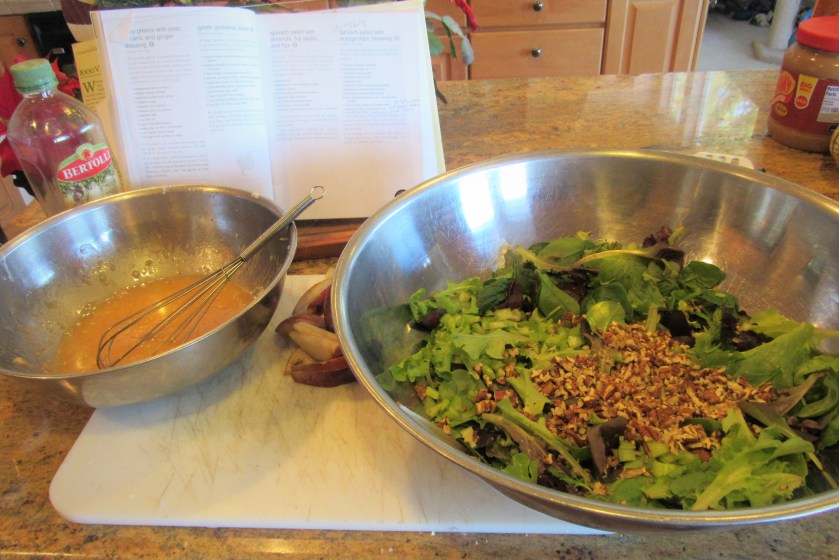
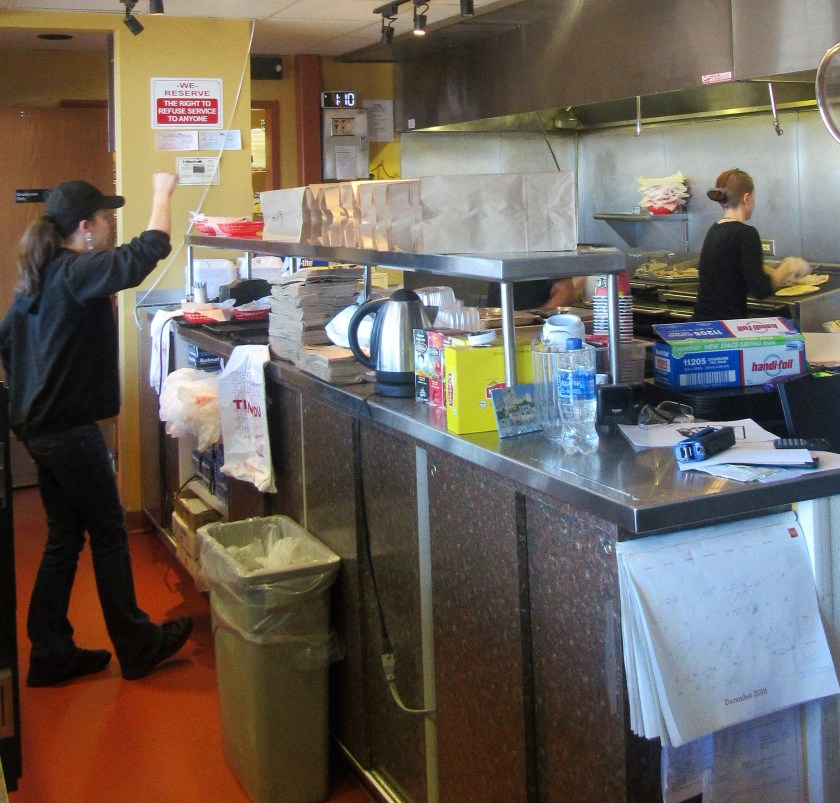
Making everything fresh and delicious.

IMG_4892

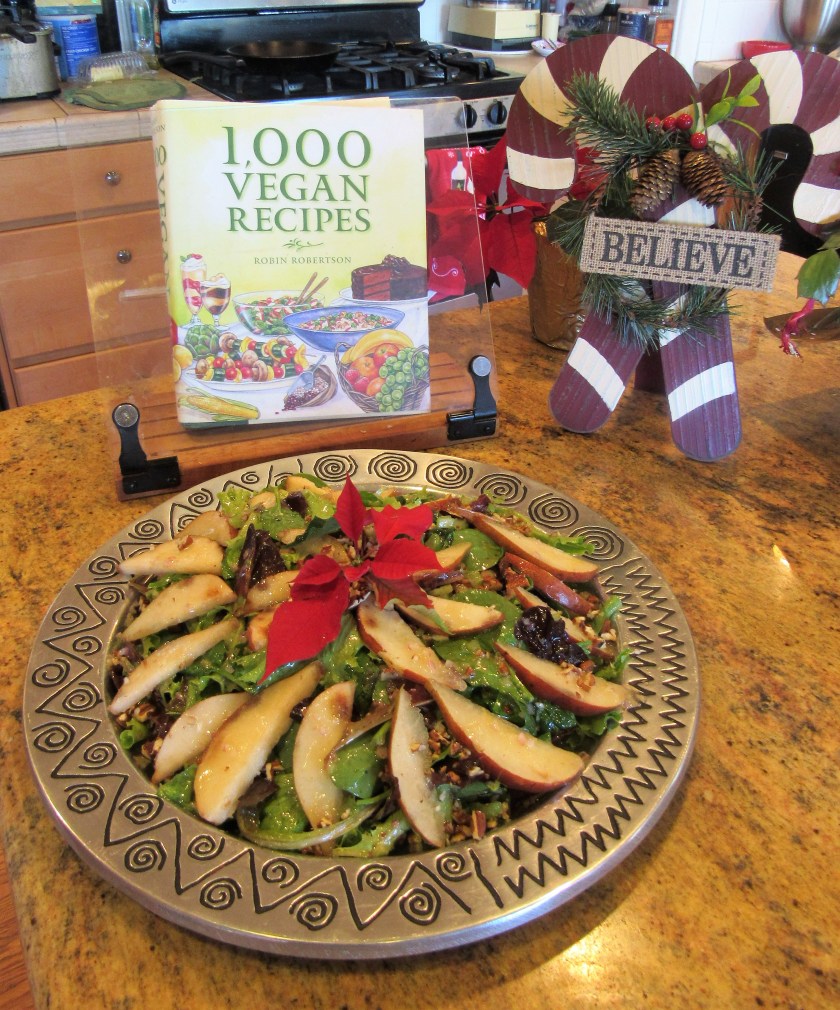
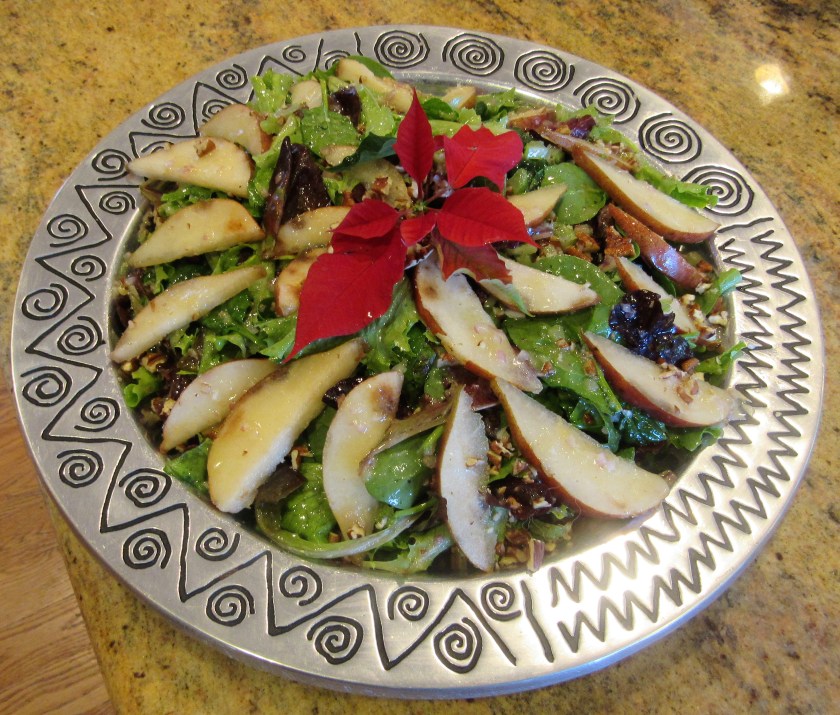
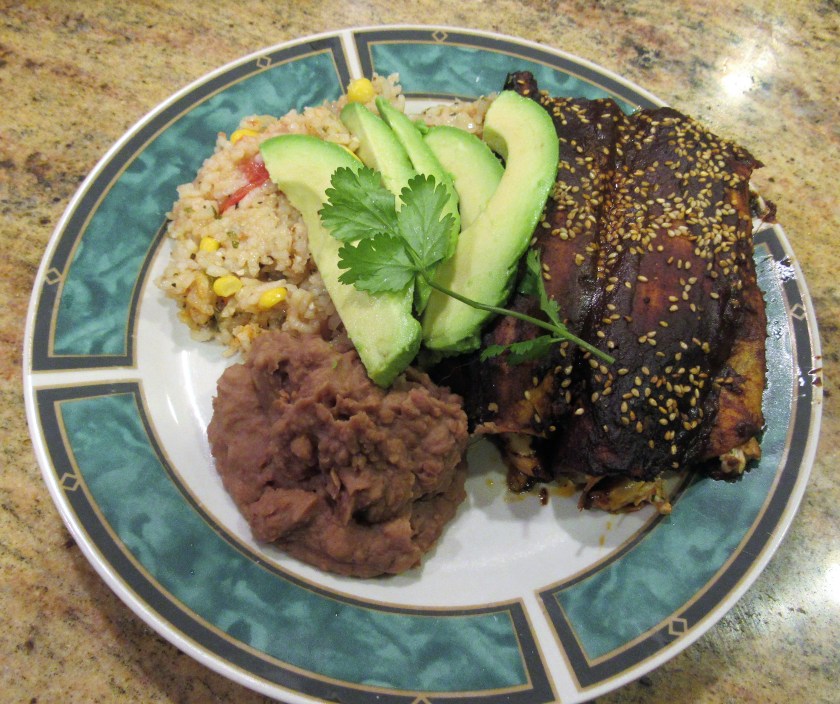
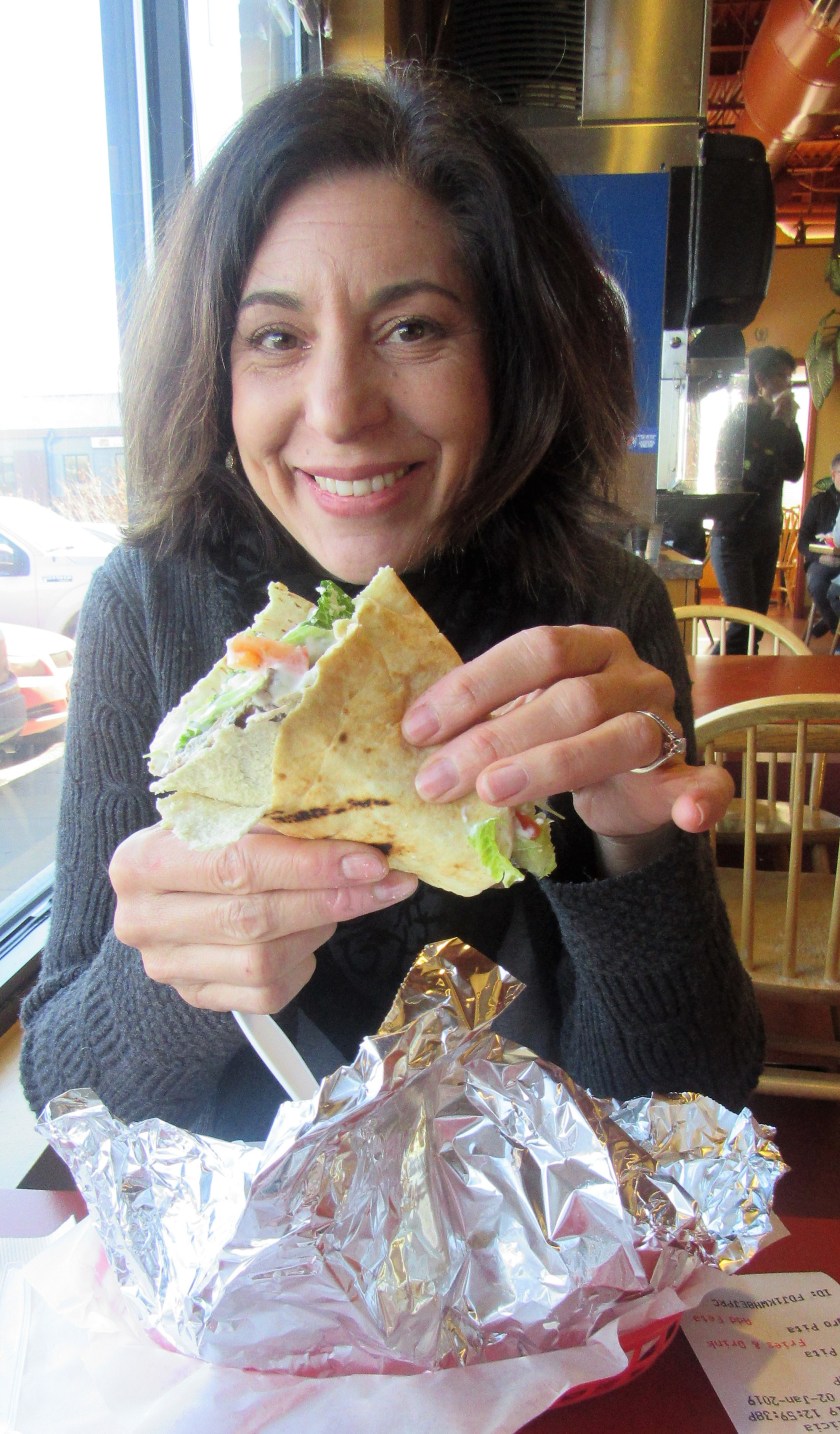
Enjoying the best gyro you can find.

IMG_4894


IMG_4897

Grandma’s baklava for dessert.

IMG_4891

As I have said many, many times, spending time with great friends and enjoying good food are the best things in life.  So enjoy!  Mangia!


*** Mumtaz is located at 588 N. US HWY 287, ste 100, Lafayette, CO.  You can contact them at (303) 926-1400 or check out their website at http://www.mumtazfood.com. 


The Price of Popularity

Hello out there.    This is by all means a good “problem” to have, and in no way am I complaining, however, “A Jeanne in the Kitchen” is quickly growing by leaps and bounds and I am getting overwhelmed.  Definitely, overwhelmed in a good way though.  With this growth spurt, it is becoming more and more challenging to keep up with all the e-mails and to catch up with all of you and your blogs.  So, please be patient with me.  I do my best to read as much as I can and to respond to as many of you as I can.  It’s just going to take me awhile to get through everything.  I have so many e-mails on a daily basis, that I am working my way from the bottom up in hopes of reading things on the FIFO, or first in, first out method.  Not only is “A Jeanne in the Kitchen” growing by leaps and bounds, but I have also taken on more aqua classes and I have been assigned more coaching shifts as well.  All of these are very good things, and I am always up to a challenge and do my best to rise to every challenge that presents itself.  Sometimes, it just takes a little more time than I expected or planned for though.  I guess all of these challenges are all part of  “the price of popularity”.  So please, please don’t stop sending me things, just know that I may not get back to you right away, unless it is something urgent and pressing.  It’s good that I like to be busy, and busy, I certainly am.  I have always said I do much better when busy then when I have idle time on my hands, but be careful what you ask for; you just may get it.  Thank you all for your support and your patience.  It is greatly appreciated.

20170930_162615

Babka with a Mediterranean Twist

Babka is a type of bread that is swirled and twisted, and is both dense and light at the same time, all in the same bite.  It is famous for it swirls of goodness that run through the bread loaf.  It’s origins are still a bit of a mystery, but it is a very popular type of bread all throughout Eastern Europe and areas with large Jewish populations and communities.  Some say it was originated in Poland or in the Ukraine, and others believe it came from Italy, as a “Russified” version of the Italian panetone bread.  Babka, also known as babcia, translates to mean little grandmother and this term is used in the Russian, Ukrainian, Eastern European and Yiddish languages.  Some say it is called “little grandmothers” because the pans it was first baked in were pleated and reminiscent of the pleats in an old woman’s skirt.  Others say it is called this because the older women or “little grandmothers” were the ones who most often made it.  Babka first came about in the early 1800’s when Jewish housewives would use the leftover scraps of challah and mixed it with either jam, cinnamon, almond paste or seeds and nuts and twisted them into the bread before baking it.   When the Jewish immigrants came to New York in the early 20th century, they started making it with chocolate as well.  By making it with chocolate, it supports the Italian theory of origin, because in the late 15th century, a lot of the Italian chocolatiers were Jewish.  Today, babka can be either sweet or savory, and is a delicious swirled and twisted bread to be enjoyed at anytime, as a compliment to the meal or served and eaten all on its own.

I made a Mediterreanean babka to go along with my black-eyed pea and ham soup for New Year’s Day. New Year’s Good Luck with Black-Eyed Peas and Ham Soup  This is definitely a bread I will be making again and again.  It is very time consuming to make, and is truly a labor of love, but definitely worth every minute and all the effort put into it.  Maybe it is called the “little grandmothers” because of all the love that goes into making it.

IMG_4887

Mediterranean Babka

3 cups flour

1/4 cup sugar

2 3/4 tsp yeast

2 tsp salt

3 large eggs

2 large egg yolks

2/3 cup warm milk

3/4 cup butter, softened (or olive oil if keeping parve)

1 large egg white

1 TBSP water

1 1/2 cups shredded Italian cheese

3/4 cup sun-dried tomatoes, chopped

3/4 cup of mixed olives, chopped rough and Spanish peppers (if you can find them)

1/3 cup fresh basil or 1/4 cup of dried basil

1 1/2 TBSP garlic


IMG_4859

Mix together the flour, sugar, yeast and salt and combine well.  Then add the eggs, and egg yolks and mix everything together in a mixer with the paddle attachment at a low speed.  Slowly add the warmed milk and continue to mix until the dough comes together.  Then increase the speed of the mixer to high and continue to mix for about 6-8 minutes or until the dough becomes thin and starts to pull away from the center and stretches out.  This is known as the “window pane” test.

IMG_4863

Once the dough is at the window pane stage, switch to the dough hook and add the butter in 3 separate stages, making sure to blend it thoroughly at each stage.  Mix the dough until it becomes elastic and starts to form into a ball and pulls away from the sides of the mixer.

IMG_4865

When the dough has formed into a ball, place it in a large bowl that has been oiled down with olive oil.  Cover it and and set it in a warm place to let it rise.  It needs to double in size, so let it rise for about 1 1/2-2 hours.

IMG_4866

When the dough has risen and doubled in size, wrap it in plastic and let it chill in the refrigerator for at least 30 minutes.  You can also leave it overnight as well.  The dough is a very soft, very sticky dough.  After it has chilled, roll it out onto a heavily floured surface to about 16×12″ in size.  Make the egg wash with the egg white and 1 TBSP of water, and brush the edges of the dough.  Add your cheese and olive mixture.  Then fold over the edges and wrap to make the dough into a rectangle.

IMG_4872

IMG_4875

Gently twist the dough and fold it to make it fit into a loaf pan that has been sprayed with cooking oil.

IMG_4878

Once again, cover it and let it rise in a warm spot for about an hour, or until it again doubles in size.  Once is has risen for the second rise, preheat the oven to 350* F or 180* C and brush the top with the egg wash.  Bake for 20-30 minutes uncovered, then cover it with aluminum foil and continue to bake for about another 45-50 minutes.  Let it cool completely before cutting.  Let there be bread.

IMG_4880

IMG_4883

New Year’s Good Luck with Black-Eyed Peas and Ham Soup

Happy New Year Everyone.  WOW!!!!  It’s 2019 already.  I hope everyone enjoyed their New Year’s Eve festivities.  We are big hockey fans, and our team is the Colorado Avalanche, so that’s where we celebrated last night.  It would have been more of a celebration had the Avalanche won, but it was still fun, even though they lost 2-3 in over time.  After the game, there was an indoor firework display which was pretty cool too.  Then we came home and just barely made it to midnight before crashing and saying good-bye to 2018.

As many of know, I have both Southern and Australian roots.  My mother was from South East Texas and my father was from Melbourne, Australia, then they moved out to Southern California, where I am originally from.  Now, I live in Colorado, and have been here or 19 years.  Colorado is where I call home, even though there is no ocean anywhere near-by.  Because of my mixed roots, I try to honor the traditions from all of these places as much as possible.  In the south, it is a New Year’s Tradition to eat black-eyed peas on New Year’s Day.  It is supposed to bring good luck and prosperity.  So, of course, I would like both and have to keep up with traditions.  It is not worth the risk of either bad luck or lack of prosperity to not follow the time-honored traditions of the South. This New Year’s Day, we are dining on black-eyed pea and ham soup with some Mediterranean Babka.  Cooking From A to Z.

IMG_4870

Black-Eyed Pea Soup with Ham

IMG_4844

1-1 1/2 lbs cooked ham, cubed

1 (1 lb bag of dried) black eyed-peas, or 3 cans

3 carrots, peeled and diced small

3 celery ribs, diced small

1 onion, diced small

1 TBSP garlic

8-10 cups of broth

1/2 cup tomatoes, halved

salt & pepper to taste

1 TBSP dried oregano

2 tsp of each dried thyme and dried marjoram

1-1 1/2 tsp allspice

olive oil


Cook the black-eyed peas according to the package directions.  I did a quick soak, then brought them to a boil in 8 cups of water and let them boil for 3 minutes.  After the 3 minute boil, I turned the heat off and let them rest for about 1-2 hours.

IMG_4845

The ham I used was the left over ham from Christmas Eve.  Happy Holidays .  I made my own ham stock from the bone and used the meat that was still on the bone, as well as the rest of the meat we had already separated from the bone earlier.  You can also use either beef, chicken or vegetable stock too.

IMG_4856

As the stock and the beans are cooking, dice your vegetables and ham.  Saute the vegetables in olive oil until the onions are translucent.

IMG_4846

IMG_4848

When the beans and vegetables are done, add the ham and the cooked beans to the vegetables and the seasonings into a large soup pot and mix together well.  Add the stock, bring to a boil, then reduce the heat and simmer for at least an hour or until the beans are tender, stirring occasionally.

IMG_4854

I added the tomatoes right at the end, just before serving.

IMG_4857

Let’s ring in the New Year right, and bring on the good luck and prosperity.  The soup is on!

IMG_4868


Happy New Year

Hey There Everyone.  The kitchen was closed for a couple of days.  We were out of town for our nephew’s wedding.  But we’re back, and the kitchen is once again open for business.

2018 is in it’s final hours, and soon it will be a whole new year filled with new possibilities and opportunities.   Let’s make the most of it!  Let’s make 2019 a GREAT year!  I wish everyone a Happy, Healthy New Year.

featured-image-new-years-eve-cruise

shutterstock_532280209.0


Pear and Pecan Salad with a Ginger Dressing

Pears and pecans just seem absolutely perfect for the holidays.  They are so festive and nutritious, and they are both sweet and crunchy too, giving your taste buds a real treat.  Both pears and pecans are loaded with vitamins and minerals, as are most fruits and nuts.  They are full of antioxidants and anti-inflammatories, and also contain a lot of fiber, which helps in weight loss.  They also help in fighting the effects of diabetes and help prevent cancer.  And bottom line, they just taste really, really good.

We enjoyed Christmas dinner with family and friends.  My “sister” and all her kids are all vegan, and a lot of the other guests are watching what they eat as well.  One of the dishes I brought was this delicious, festive pear and pecan salad with a ginger dressing.  It was very easy to make and it was a big hit.

IMG_4744

Pear and Pecan Salad with Ginger Dressing

5 cups of mixed baby greens, or salad greens of your choice

1 pear, sliced thin – I used Bosc, but you can use whatever type of pear you like

2 celery ribs, diced small

1/2 cup toasted pecans, chopped small

3 TBSP Champagne vinegar

1 medium shallot, minced

2 tsp ginger

1 tsp sugar

1/4 tsp dry mustard

1/4 tsp cayenne pepper

1/2 tsp salt

1/2 cup olive oil


IMG_4736

Combine the last 8 ingredients to make the dressing and mix together well.  Set aside.

Toss the chopped nuts and celery with the greens and add about 1/2 the dressing or less.  Toss and combine everything well.   You do not want to add too much dressing or it well make the greens soggy and heavy.  You want just a light coating of the dressing, and just enough to add flavor.  You can always add more later if you need it.  Also, don’t mix the dressing into the salad too early, or again, it will make the salad soggy.  Toss the dressing into the salad right before serving.

IMG_4740

When the salad is all tossed together, plate it up and arrange the pear slices on top of the greens.  I added a tiny bit more dressing to each pear slice to wake them up and bring them to life as well, but this is optional.  This is a totally vegan dish.  If you want to make it a main salad, just add some protein of your choice.  It would go very well with either tofu, or any other vegan “meat” as well as either chicken or shrimp to make it non-vegan.IMG_4745


Happy Holidays

I hope everyone had a good Christmas or a good holiday, celebrating the season however you enjoy celebrating it.  I love the Christmas season.  My only complaint is that I wish it would last longer.  I certainly wish all the good cheer and good will towards others lasted longer.   Christmas Eve was a very quiet one, with just the two of us.  It was too quiet for my tastes, but for Christmas Day we got together with friends and family and all had a good time.  We had quite the feast, with everyone contributing to the meal.   Everything was delicious too.  For me, the good will of the season continues, and I hope it does for all of you as well.

For Christmas Eve, even though it was just the two of us, I made a big ham, with an apple whiskey and brown sugar sauce.  I am sure there are a few more ham recipes and ideas in our very near future, since there was quite a bit leftover.  Don’t let the charred crusts fool you.  They were crispy and tasted just perfect with the sweet, apple whiskey and brown sugar sauce served on top.  YUMMY!

IMG_4727

 Brown Sugar Crusted ham with Apple Whiskey Sauce

7-10 lb bone-in ham, thawed

1 1/2 cups firmly packed brown sugar

1 tsp cloves

1 1/2 TBSP dry mustard

5-6 TBSP apple whiskey (or bourbon or whiskey of your choice)

3 1/2 cups apple cider or flavored cider

3 TBSP maple syrup

pinch of cayenne pepper

1 TBSP cornstarch

2 TBSP water


IMG_4713

Preheat the oven to 350* F

Pat dry the ham with a paper towel and place it on a rack in a large, deep baking dish.  Remove all the excess skin and fat from the ham and discard.

Mix the brown sugar, dry mustard and apple whiskey together until it forms a thick paste.  Then generously rub all over the ham.  Pour about 2 1/2/ cups of the cider into the pan, filling it to about 1/4 inch in depth, but not touching the bottom of the ham.

IMG_4716

IMG_4721

Once the ham is completely coated with the brown sugar mix, it is time to place it in the oven, uncovered.  Bake the ham for about 15 minutes per pound.   After the ham is cooked, cover it with aluminum foil and let it rest for about 20 minutes before starting to carve it.  This allows for the juices to distribute .

While the ham is resting, it is time to make the sauce.    Pour the juices from the pan into a saucepan and add the rest of the cider and the maple syrup and a dash more whiskey.  Bring to a boil, then add mix the cornstarch mixed with 2 TBSP of water and add to the sauce.  Bring to a boil again, stirring constantly, until the sauce thickens.  It is now ready to serve on top of the ham.  I served the ham alongside scalloped potatoes and green beans with garlic, mushrooms, shallots, and red pepper and biscuits.  I served a dry chardonnay with the meal to make it just perfect.  Happy Holidays everyone.

IMG_4730


A Healthy Holiday Bark

Candy barks are very popular all year round, but especially during the holidays.  They are usually chocolate with different kinds of fruits and nuts or peppermint, however there are no limits to them at all.  I made a healthy version with Greek yogurt, raspberries, pistachios and toasted almonds.  It is very colorful and very festive.  You can make it with any kinds of nuts and any kind of fruit, but this combination just looked very fitting for the season.   This bark is very easy to make.  It is not as sweet as most barks, but then it has no sugar and just a bit of honey.

I love all kinds of berries; raspberries, golden raspberries, blackberries, strawberries, blueberries, etc, but blackberries are my favorite.  On a nutritional scale though, raspberries are said to be the healthiest of all the berry varieties.  They are loaded with fiber, and contain 9 g per cup, more than any other berries.  They have a lower sugar content than other berries too, and are high in Vitamin C.  I actually have a few raspberry bushes in my yard, that produce very tiny, very sweet raspberries in the summer.  Sometimes I get a large yield and other years, I barely get anything.  But either way, they are delicious and I try my best to use them all up in as many dishes and recipes as I can.  The raspberries here are from the store.  My plants only produce berries in the summer.

IMG_4710

Raspberry Pistachio and Toasted Almond Yogurt Bark

2 cups Greek yogurt with honey

1 1/2 tsp lemon zest

3-4 TBSP honey

1 package of raspberries or 1 cup of frozen raspberries, drained

1/2 cup shelled pistachios

1/3 cup toasted almond slivers

IMG_4702

Mix the honey, lemon zest and yogurt together, then gently fold in the raspberries and nuts.

IMG_4705

IMG_4706

Once everything is mixed together, spread the mixture out onto a baking sheet lined with aluminum foil and freeze for at least 3 hours.

IMG_4708

When the bark has become solid, remove it from the freezer and break it into chunks.  It melts quickly, so unless you are planning on eating it right away, place it in the refrigerator to let it thaw, but to keep it solid, until you are ready to serve it.

IMG_4711

Enjoy.  Have a very Merry Christmas everyone.

Arroz a la Mexicana

In the days of old Mexico, rice dishes were actually considered a type of  “dry soup” or sopa seca.  It was an alternative to the standard liquid version of soup, as we know soup today.  However, the wealthy people would serve both versions of los sopas at their parties and events, both as part of the lavish food displays that were presented to their guests, rather than only offering one or the other.  The phrase a la Mexicana, when used to describe Mexican dishes, means foods that were prepared with onions and tomatoes.  Arroz a la Mexicana is rice that has been made with both onions and tomatoes, as well as other ingredients, and is a staple that can be found in any Mexican household or restaurant.  As with any popular foods, there are many different versions.

I served my arroz a la Mexicana along side my mole enchiladas or enmoladas. Dining Mexican Style.  I love rice dishes of all kinds, and serve a lot of variations of rice all the time.

IMG_4678

Arroz a la Mexicana

2 cups long-grain white rice

3 tomatoes, pureed

1 jalapeno, chopped fine

1/2 cup corn

1 cup green beans, cut small

1/3 onion, chopped fine

2 TBSP garlic

4 cups chicken stock or water

1 tsp each fresh parsley and cilantro, chopped fine

salt & pepper to taste

Tobasco sauce to taste

olive oil for cooking


IMG_4667

Soak the rice in warm water for about 5 minutes.  Add the olive oil to a hot skillet, then add the rice, onions, garlic, jalapeno, and green beans.  Cook until the onions are translucent.  You can add any kind of vegetables, and as many vegetables as you like.  Peas and carrots are often used as well.

IMG_4671

Puree the tomatoes in a food processor, then add to the rice and vegetable mixture.  Incorporate well into the rice.

IMG_4669

IMG_4673

Add the liquid, salt & pepper and parsley and cilantro mixture and mix together well.  Bring to a boil, then reduce the heat and let the mixture simmer for about 20 minutes or until all the liquid has been absorbed and the rice is cooked.  I used chicken broth because it gives the rice a richer flavor, but you can use vegetable broth or water which will make the dish vegetarian or vegan, if you prefer.  This is perfect side dish for whatever you are serving, whether it is a Mexican dish or not.

IMG_4675IMG_4678

Dining Mexican Style

Mole is a sauce found and used all over Mexico and Central America, but it is believed to have originated in Central Mexico, in the Oaxaca region.  It is a sauce made from a multitude of different spices and ingredients and there are many, many different varieties.  A traditional mole sauce has at least 20-30 different ingredients that are roasted and ground into either a paste or a fine powder.  In the past, the grinding and roasting processes were done by many different generations of the women in the family and would take a lot of time and effort to make.  Because the mole preparations were so laborious, mole was traditionally served only for special occasions and holidays, and was usually eaten over turkey.   Today, it is much easier to make mole, and it is now used in a variety of dishes.  Mole is NEVER eaten just by itself, and is ALWAYS served over something.  It is usually served over meats, including turkey, chicken, pork, lamb and other meats, but it is also served over tamales and enchiladas or enmoladas.  Each region, and many families, have their own unique versions and recipes for mole sauce, which have been passed down through the generations.  No matter what type of mole you serve, the two main ingredients are a variety of chili peppers and chocolate.  Mole poblano is the most popular and best known type of mole sauce.  It is usually a rich, dark reddish brown sauce that is served over meat, although it can really be any color.  Mole poblano has been ranked number 1 as being a typical Mexican dish and is also known as the national dish of Mexico.

Christmas is right around the corner, so it is only fitting that we had mole at this time of year.  Unbeknownst to me at the time, I made enmoladas with chicken and corn that I served with arroz ala Mexicana or Mexican rice and refried beans.  And of course, there just had to be a margarita especial to accompany the meal as well.  We had a traditional Mexican meal that is served for the holidays.  So …. Feliz Navidad y Desfruitas!

IMG_4697

Chicken and Corn Enmoladas

(This recipe calls far the store bought, prepared mole sauce, which is a great and tasty alternative to making it all by hand)

1 1/2 lbs cooked chicken, shredded

1/2 onion

1-1 1/2 cups corn

2 TBSP fresh cilantro and parsley, chopped

salt & pepper to taste

2 jars of prepared mole poblano sauce, such as Dona Maria or Rogelio Bueno

1/2 cup peanut butter

4 cups chicken stock

12 corn tortillas

cheese of your choice, but a Mexican queso blanco is best

2 TBSP toasted sesame seeds

creme fraiche or crema Mexicana, optional for topping

IMG_4680

Saute the corn, onions and salt & pepper in olive oil.  After they are cooked and the onions are translucent, mix in the fresh herbs, then combine with the shredded chicken and set aside.

IMG_4683

IMG_4685

To make the sauce, combine the mole sauce and the peanut butter in a sauce pan and cook until everything is well combined, then add the chicken stock and continue to cook until you have a medium thick, creamy sauce.  Make sure to stir frequently so the sauce does not burn and the ingredients are well incorporated together.  I used the Dona Maria sauce, which was a thick paste.

IMG_4687

IMG_4690

To assemble the enmoladas, heat the tortillas in either a little hot oil and cook just for a few seconds until they are soft and pliable or in the microwave for about 20 seconds.  I heated them up in the microwave.   Coat and spray a 9×13 baking dish, or a clay baking dish if you have one, and line the bottom of the pan with a little of the sauce.  Spread a little bit of sauce on both sides of the tortilla, then add your filling and cheese.  Roll loosely and place the stuffed tortillas side by side in the baking dish.  Repeat until the pan is filled.

IMG_4692

Once the pan is full, evenly spread more of the mole sauce over the enmoladas, and sprinkle the toasted sesame seeds over the top.  Cover loosely with aluminum foil and bake at 375* F for about 15-20 minutes.

IMG_4693

When the enmoladas are done, serve along side your favorite Mexican side dishes and desfruitas!   !Feliz Navidad!   My cookbook was an early Christmas gift from mi amiga, Delores.  Perfect Presents  

IMG_4699