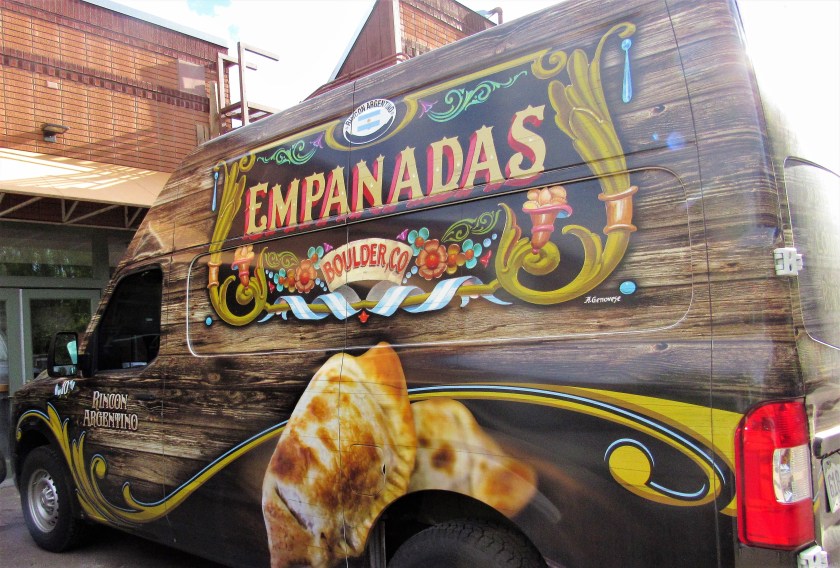
It’s funny how things work sometimes. We rarely go out to eat since I make most of our meals here at home, and it is even more rare for us to head into Boulder, CO, even though it is only 15 minutes away from us. However, we have ventured into Boulder twice now in the past two weeks, and we have tried two different restaurants while there. Last weekend, we went to Bookcliff Vineyards to pick up our latest wine club wines, with our friends Janet and Bob. From Bookcliff, we went to dinner at Rincon Argentino. Empanadas de Rincon Argentino This week we ventured into Boulder to hear our friends’ Priscilla and Jonathon’s daughter perform in her “Battle of the Bands” concert. Cynthia’s band, Pink Slip, did an awesome job and sounded great, as always. After the concert, the four of us went to the Zolo Grill. Once again, this was a first for Larry and I. The food and service both were fantastic.
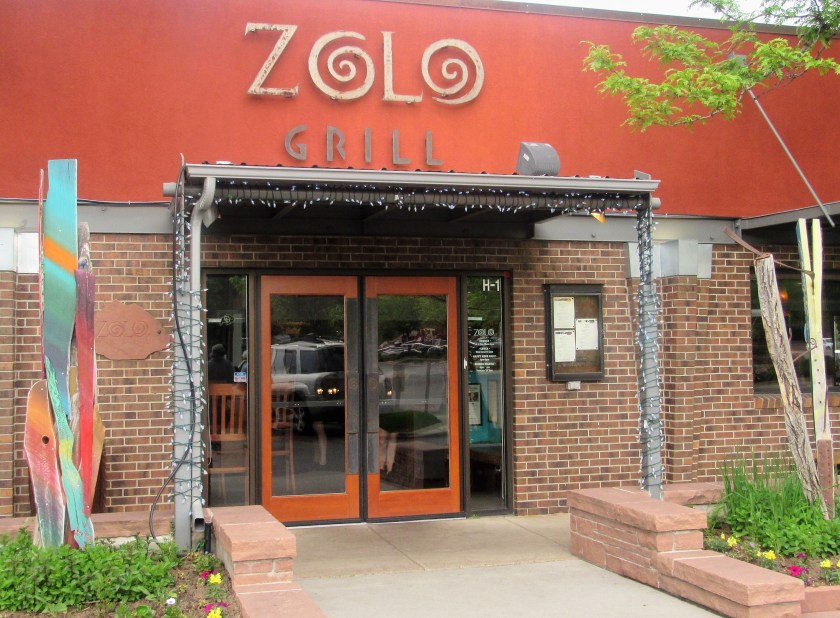
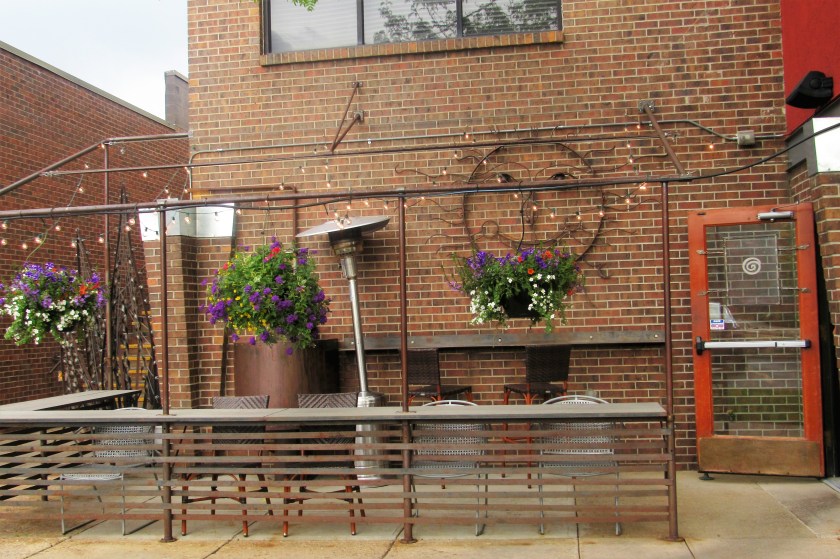
The decor was very warm and inviting.

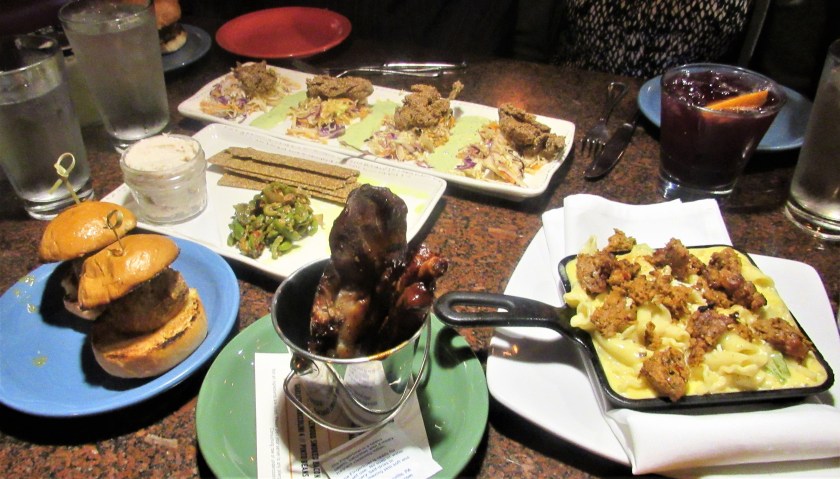
JT was our server for the evening. He was very, friendly, professional, and helpful. We chose to go with a variety of tapas as our meal. JT made recommendations to help us really enjoy our meal, and his recommendations were just perfect. Tapas are famous all over Spain. They are small savory dishes that are usually served with drinks. The boys both had margaritas and the girls both had sangrias. Tapas may be cold (such as mixed olives and cheese) or warm (such as chopitos, which are battered, fried baby squid). In select bars in Spain, tapas have evolved into an entire, and sometimes sophisticated, cuisine. Though similar in concept, tapas and appetizers are not the same. Tapas are tiny plates of food served in bars all over Spain, and various other parts of the world, to accompany drinks, and often times, the tapas are the meal themselves. The best way to make a meal out of tapas is to order a variety of tapas from the menu and to order two or three types per person. Priscilla being from Argentina, is very familiar with tapas and was more than happy to share her expertise and knowledge on these delicious treats. In the United States, we call the foods we eat before the meal an appetizer. Appetizers are a compliment to the meal and most of the time are not eaten as the meal.
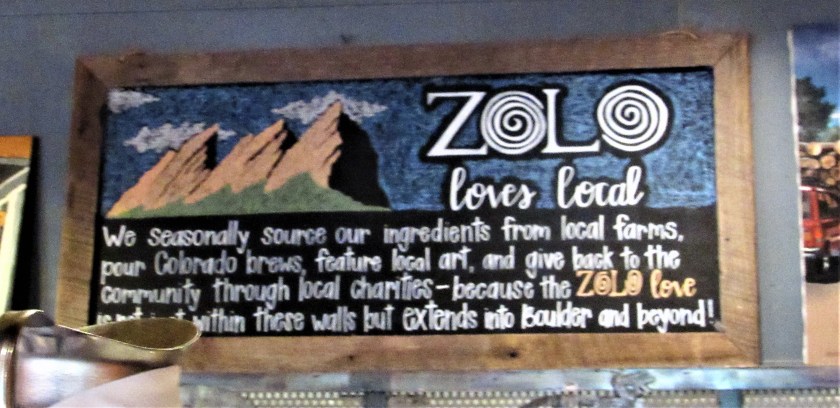
Zolo buys and serves local foods as much as possible. Below is their motto and motus operendi. It says ” We seasonally source our ingredients from local farms, pour Colorado brews, feature local art, and give back to the community through local charities – because the Zolo love is not just within our walls, but extends into Boulder and beyond”. This is a pretty darn good business plan. I wish more restaurants had this philosophy of buying and supporting local farmers, businesses and artists.
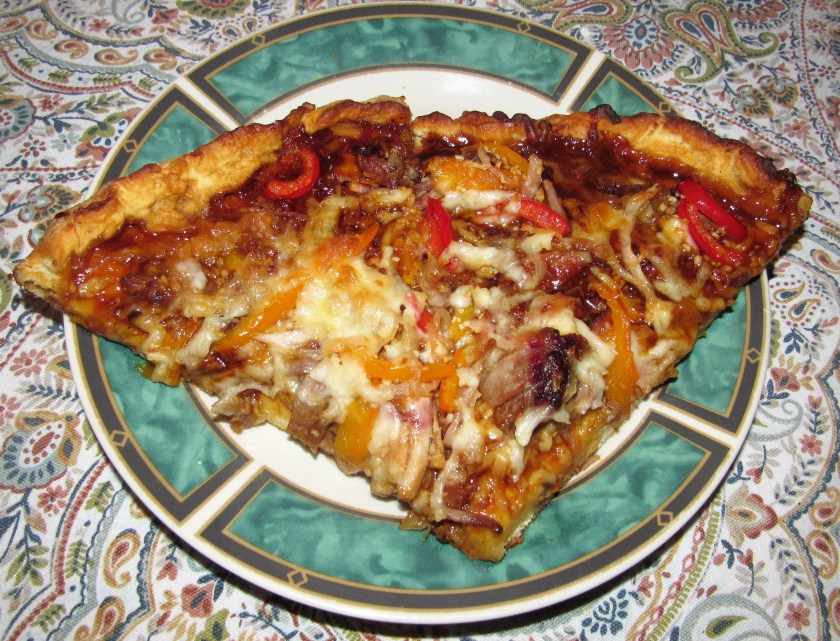
Our tapas dinner consisted of green chili and sausage albondigas (meatballs) sliders, smoked trout and white bean dip with homemade wafers and an olive tapenade, fried oysters with a spicy wasabi sauce and slaw, macaroni and cheese with chorizo and some BBQ ribs. All were delicious, including the oysters. I eat and enjoy most everything, but I have to admit, I have never been a fan of oysters at all, although, I have to say, these were very good. They just may have made a convert out of me.
Zolo Grill is located at 2525 Arapahoe Avenue, Boulder CO. Their facebook address is facebook.com/zologrill or you can also find them at zologrill.com or @zolobouder. Next time you are visiting Boulder, CO and want something delicious and unique, check out the Zolo Grill. You, your taste buds and tummies will be very happy you did.