I have created this site to help people have fun in the kitchen. I write about enjoying life both in and out of my kitchen. Life is short! Make the most of it and enjoy!
Larry and I love fresh seafood, but living in Denver, “fresh” seafood usually means frozen, which is fine too. We are known more for beef and wild game that for seafood. We’re landlocked, after all, located in the Rocky Mountains. So unless we are eating trout and bass, both of which are delicious by the way, then chances are, we are not really getting “fresh” seafood. But we still eat and enjoy our seafood no matter what.
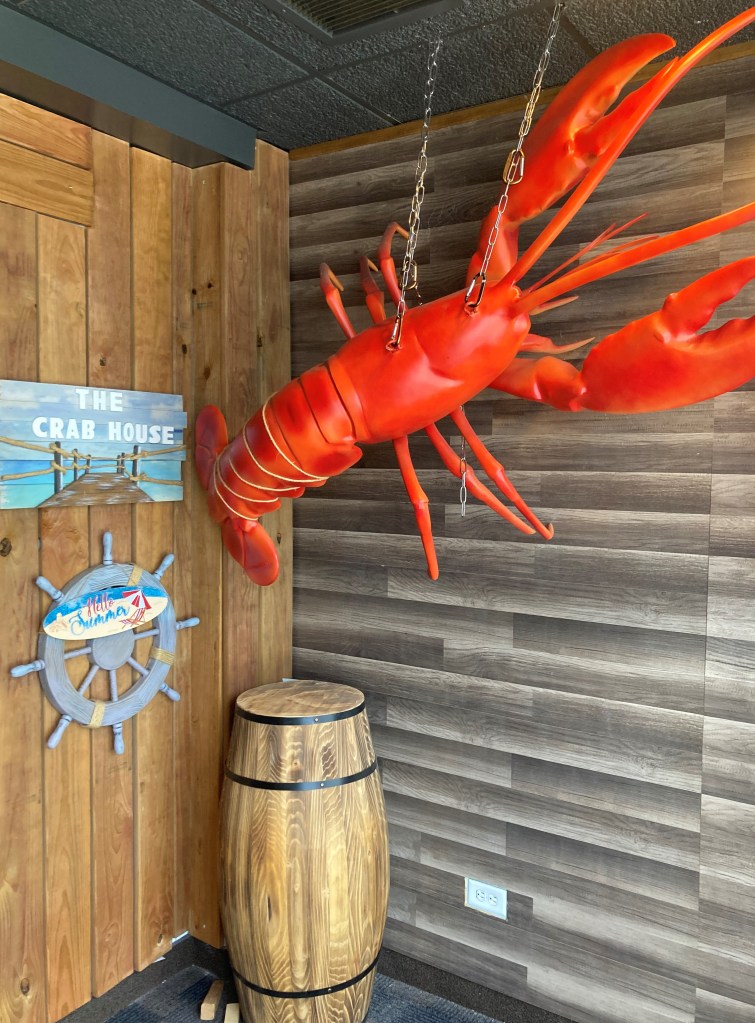
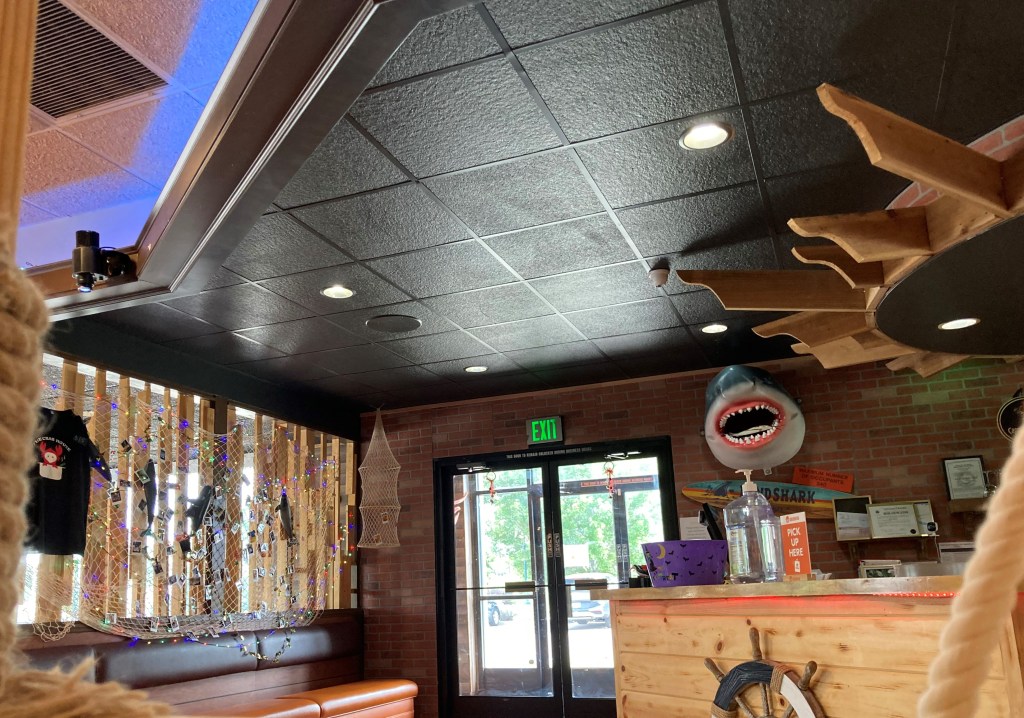
Last night, we were out running errands and opted for an early dinner and tried a new seafood restaurant near our house, called The Crab House.
We did what we normally do when trying out a new restaurant. We ordered a few different menu items to share. The food was good, but MESSY, which made it a little difficult to eat. We knew it was going to be messy when they gave us bibs, plastic gloves, and a bucket, plus there was butcher paper on the tables.
We started off with a bowl of clam chowder. It was good. We always add pepper to our New England clam chowder. We both like the pepper.
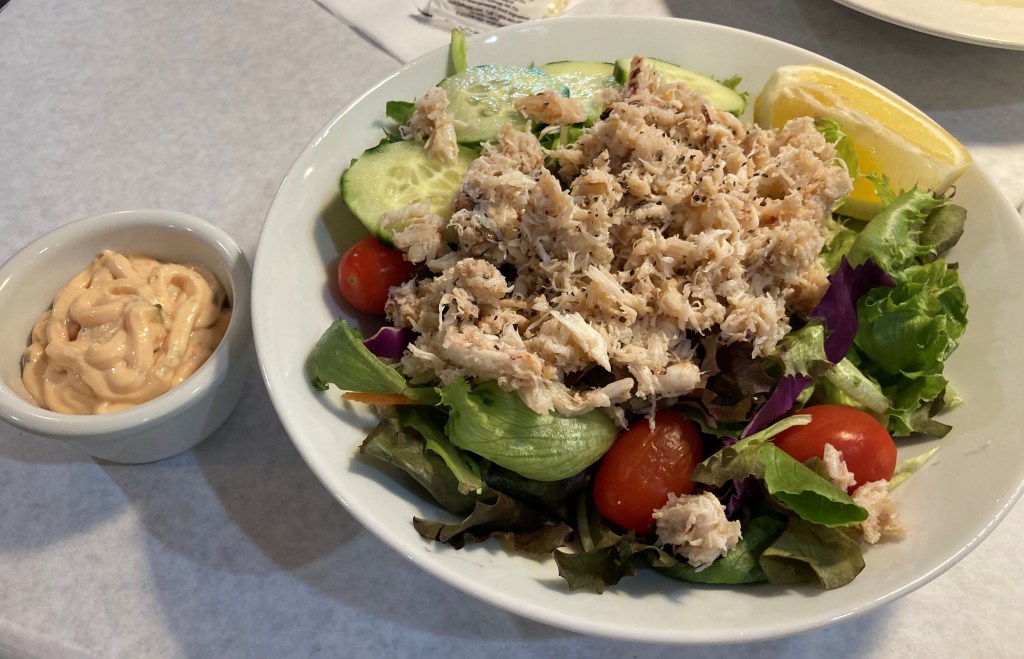
We also ordered a crab salad, which was delicious and was topped with a ton of crab meat.
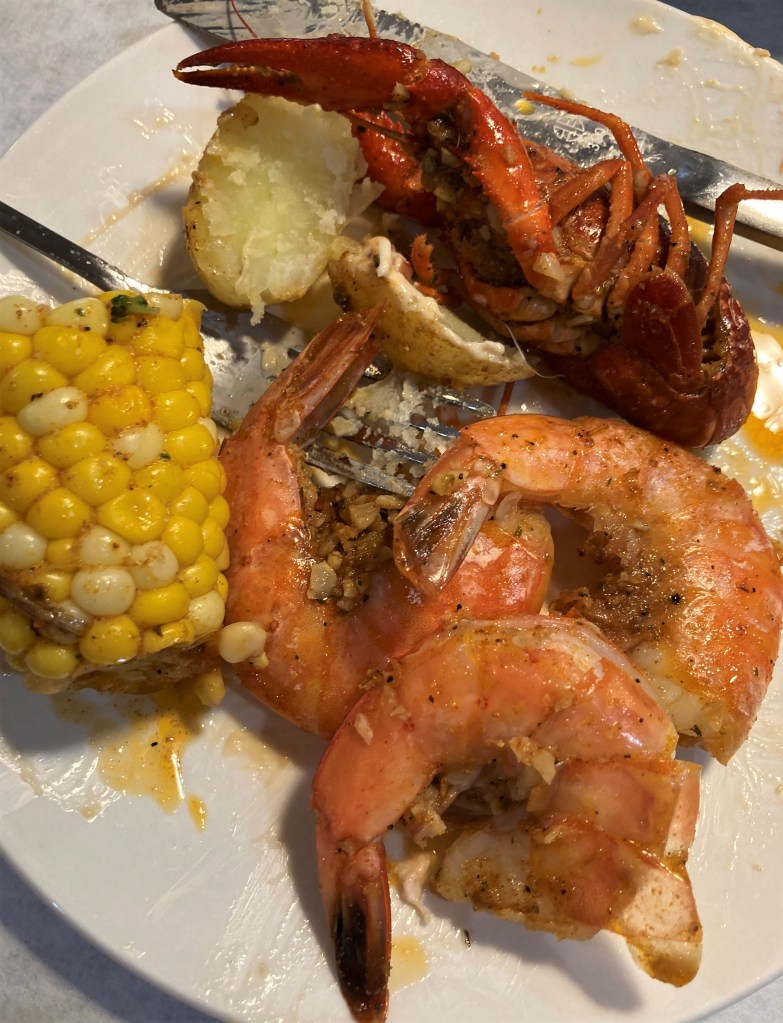
And then we ordered a Cajun shrimp and crawfish boil. It was loaded with large prawns/shrimp and crawfish, boiled together with corn and potatoes in a very flavorful spicy Cajun sauce.
Like I said, everything was delicious and full of flavor, and the staff was very pleasant and helpful, but it was MESSY! Messy often means it tastes really good too, which is certainly did in this case as well. Back in my waitress days, many, many moons ago, I used to tell people things always tasted better when they were messy. We enjoyed our messy meal and our evening.
The Crab House is located at 1190 1st Avenue, Broomfield CO. You can walk in like we did, or you can order it to go. Either way you’ll be in for a very tasty, but very messy Cajun meal. Laissez le bontemps roulez, or let the good times roll.
Have a great day and make everyday great. Life is an adventure. Be adventurous and get out of your comfort zone a bit. You never know what you’ll discover. And who knows, you just may enjoy yourself a bit. 🙂 ‘Til next time.
I see squirrels all over the place. They always look like they are having so much fun, and are always so playful and curious. I also see Magpies all the time too. I love their beautiful, vibrant colors. What I don’t usually see though, is them playing together. I also rarely see more than one magpie at a time. But this time, there were 4 magpies and one squirrel, and they were all together, in a parking lot of all places too, just scrounging for nibblies. Of course I only had my phone with me, since I was out running errands, so the quality of the pictures is not great at all. I also didn’t want to get to close to them and scare them away. I wish I had my real camera with me, but sometimes we have to just use what we can. Sometimes we just have to improvise and hope for the best.
Life is just full of surprises. You never know what you’re going to see or find. Be prepared for the unexpected. Make the most out of everyday. Life is good. 🙂
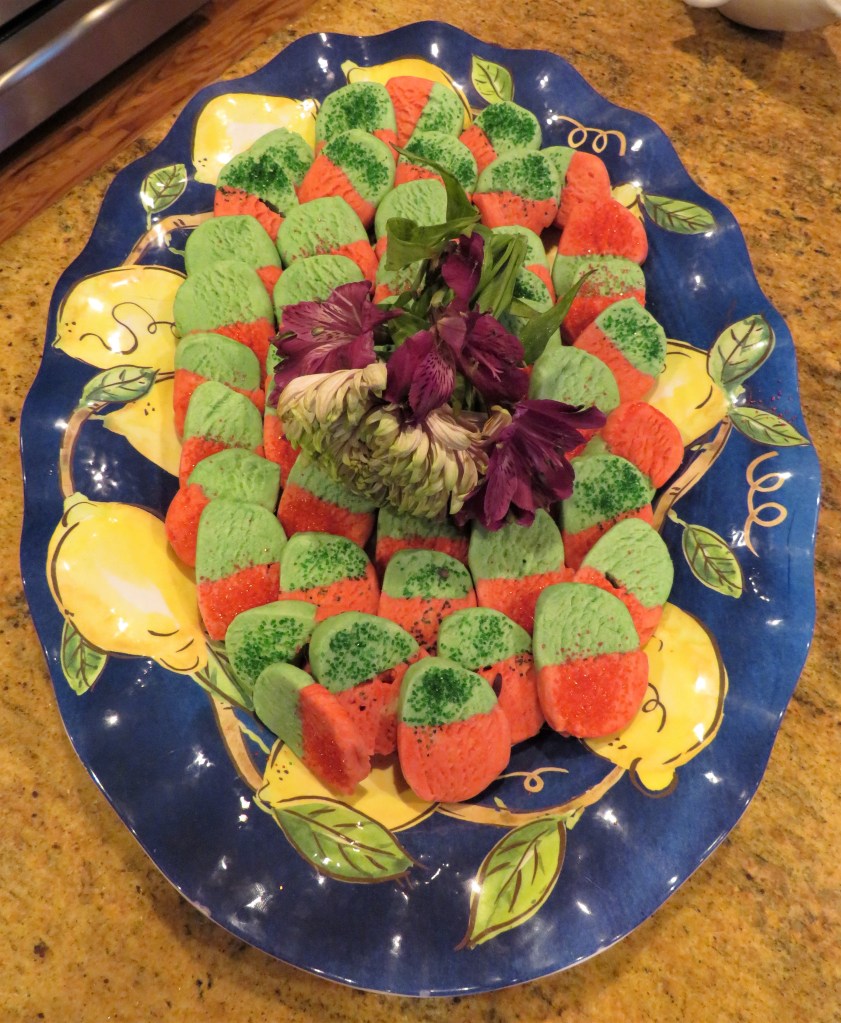
It’s that time of week once again. It’s cookie time. As you know, I am always trying to come up with something tasty yet different. I don’t like serving the same old, same old. After all, variety is the spice of life you know. 🙂 This time, I made some two-toned butter cookies.
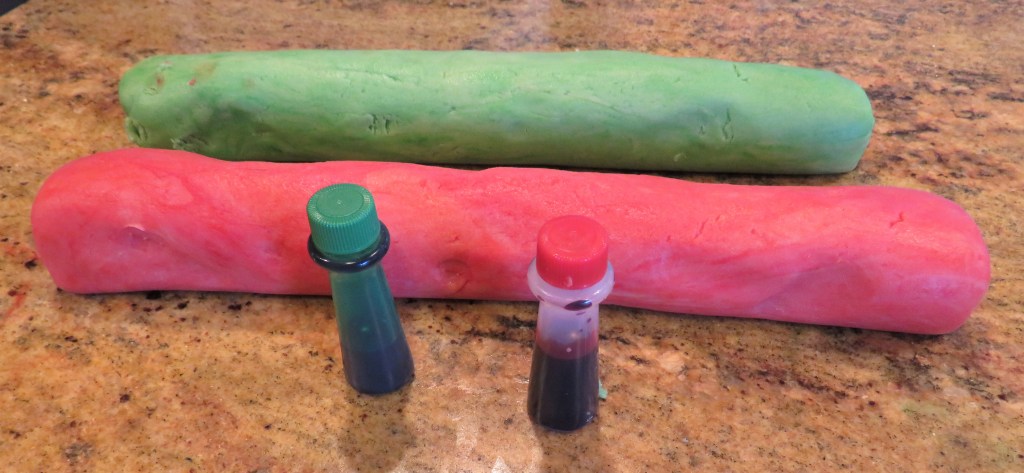
These cookies are very easy to make, but working with the food coloring, especially the red, well it looked like I had been part of crime scene. My hands were covered with red food coloring.
As usual, after following the recipe, I found it didn’t work and I needed to tweak it a bit. The original recipe did not call for an egg, but I had to add an egg since the dough was not binding together, no matter how much I worked with it. Once I added the egg it worked just fine. Also per usual, I did not get the yield I was hoping to get either, but that is typical. The recipe said I was supposed to get about 5 dozen, and I only got about 4 dozen. Oh well. I’m used to this. It happens all the time. I am always pleasantly surprised when I get the actual amount the recipe says I will get. This is a bonus. This is why I never give a yield amount. The yield will always be different for everyone.
Two-Toned Butter Cookies
1 cup or 2 sticks softened butter
1 egg
1 cup powdered sugar
1 tsp vanilla
2 cups flour
2 colors of food coloring
two colors of colored sugar
Mix the powdered sugar and butter together until smooth and creamy. Then add the egg and vanilla and mix again. Slowly add the flour and mix until it is all blended together.
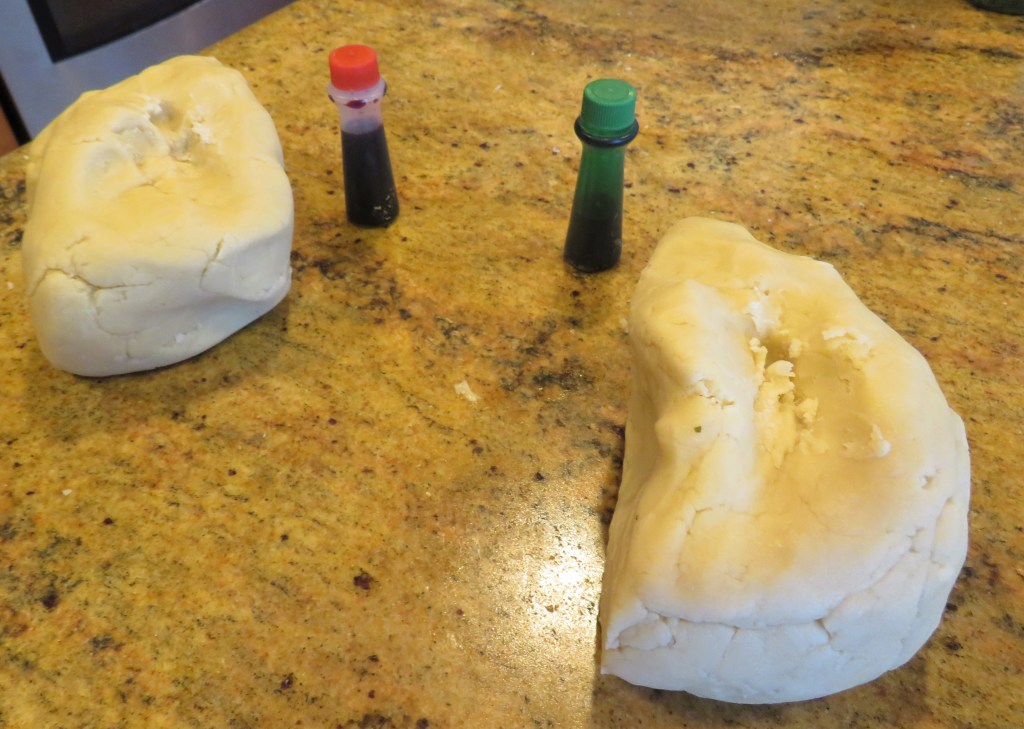
Split the dough in 1/2 and mix in one of the colors into one 1/2 and the other color into the other 1/2. Knead the doughs until the colors have thoroughly worked into the dough.
Roll the colored dough into logs about 8 inches long and wrap in plastic. Refrigerate for at least one hour before slicing.
Preheat the oven to 350* F or 190* C.
Line your baking sheets with parchment paper.
When the dough is ready, split each log in 1/2 then press the two colors together firmly and shape into a log again.
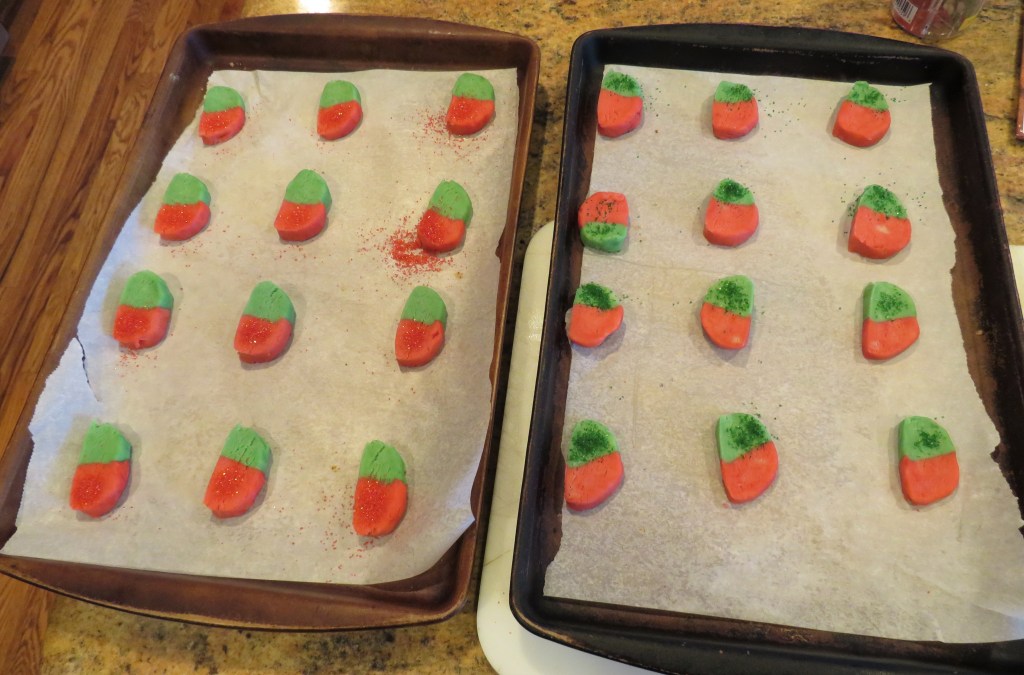
Let the dough stand for about 15 minutes, then slice into 1/4″ rounds and place on the baking sheets. Sprinkle a little of the colored sugar on 1/2 of the cookies. I alternated, using both red and gree sprinkles.
Bake for about 15 minutes or until the edges are lightly browned and the cookies are set. Let cool for about 5 minutes, then remove and place them on a baking rack to cool completely. Then plate them up and serve.
Have a great day and make everyday great, and colorful. Stay safe and stay well. ‘Til next time.
You all know how I love to feature guest chefs, though I haven’t had any in awhile. Hint, hint!!!!! But I am also up for sharing other great ideas about food or kitchens too.
Today I am giving you something a little different yet again. One of our very own bloggers, Erin Reynolds of diymama.net wrote a piece on how to best redesign your kitchen. She offers all kinds of advice about new goodies and gadgets that would help transform your everyday kitchen into a dream kitchen. I have a nice kitchen, and though I have a big kitchen, it is NEVER big enough. (Maybe I just have too much stuff 🙂 ) I would love to have a new kitchen like the ones Erin is talking about in her article. I will do my best to copy her article and show it to you here, however, you can also check it out on her link below as well or follow her to see what she’s up to.
Redesigning Your Kitchen with Meal-Prep in Mind: Where Function Meets Style
In today’s fast-paced world, meal preparation can often feel like an arduous task. However, with the right kitchen design, this necessary activity can be transformed into an enjoyable and productive experience. A meal-prep-friendly kitchen facilitates easy access to essential tools, offers ample workspace, and promotes efficient food preparation. By redesigning your kitchen to cater to these aspects, you not only ensure functionality but also introduce a significant degree of convenience into your daily routine. Here are some tips, courtesy of A Jeanne in the Kitchen.
Adding a Large Sink
One of the essential components of a meal-prep-friendly kitchen is a large sink. A spacious sink makes it easier to wash fruits, vegetables, and cookware, especially those large pots and pans that are integral to meal preparation. Moreover, it ensures your countertop remains clutter-free. When choosing a sink, opt for durable materials like stainless steel or granite composite. The style can range from under-mount for seamless countertop transition to apron-front for a touch of rustic charm.
Installing a Dishwasher Drawer
Incorporating a dishwasher drawer in your kitchen redesign can provide substantial space-saving and convenience benefits. This handy appliance makes cleaning up after meal prep a breeze and saves you time and effort. When choosing a dishwasher drawer, consider the size and configuration that best fits your kitchen layout. Opt for models that offer flexibility in wash cycles and capacity for efficient operation.
Creating a Prep Island
A prep island serves as a versatile addition to any kitchen, providing extra workspace for meal preparation and organization. With an adequately designed prep island, you can keep your ingredients and tools within reach, making the cooking process smoother. When incorporating a prep island into your kitchen, consider integrating storage solutions such as drawers and shelves. This allows for convenient storage and easy access to frequently used items, further enhancing your meal-prep experience.
Adding a Range Hood
Adding a range hood above your kitchen’s cook surface comes with a host of benefits. First and foremost, it improves ventilation. By removing smoke, steam, and odors, it keeps the air in your kitchen clean and helps prevent the buildup of grease and grime on your walls and cabinets. It also contributes to a cooler kitchen environment by venting out the heat produced during cooking. Moreover, a range hood enhances lighting over the cooktop, allowing you to see your food better and ensuring safer cooking. Lastly, it adds a touch of style and sophistication to your kitchen. With various designs available, from sleek contemporary models to classic vintage styles, a range hood can be a significant aesthetic upgrade for your kitchen.
Purchasing a Double Oven
For meal-prep enthusiasts and larger families, a double oven can be a game- changer. Having two separate ovens allows simultaneous cooking at different temperatures, thereby saving time and improving efficiency. However, a double oven can require substantial space. To integrate this feature into your kitchen, consider vertical stacking or placing them side-by-side under the countertop, depending on your kitchen’s layout and size.
Utilizing Deep Drawers
Deep drawers offer an excellent alternative to traditional cabinets for storing pots, pans, and larger cookware. These drawers provide ease of access, prevent clutter, and make organization effortless. To optimize drawer space, consider implementing dividers or adjustable inserts, which can help categorize utensils and cookware according to your preferences.
Renovating Your Kitchen for Functionality and Accessibility
When renovating your kitchen for meal-prep efficiency, you must personalize the design according to your unique cooking habits and requirements. By identifying features that will simplify your meal preparation and prioritizing functionality and accessibility, you create a more efficient kitchen. Always establish a well-defined budget before engaging contractors, ensuring that your renovation plan aligns with your financial expectations and doesn’t lead to overspending. Hiring a capable contractor will help to remove the guesswork out of remodeling your kitchen and making difficult decisions like where to place outlets.
Keeping Your Kitchen Clean
Keeping your kitchen clean can be made simple and cost-effective with DIY cleaners. Homemade cleaning solutions, often made from everyday household items like vinegar, baking soda, and lemon, can be just as effective as store- bought cleaners at tackling grime and grease. For instance, a mixture of vinegar and water serves as an excellent all-purpose cleaner, while baking soda mixed with a little water can act as a potent scrub for stubborn stains. Lemon juice is great for deodorizing and removing hard water stains. These DIY cleaners not only help keep your kitchen sparkling clean but are also environmentally friendly, reducing the number of chemicals introduced into your home environment.
Prepping For a Business
Meal prepping can be a fantastic stepping stone towards starting your own food-based business. As you master the art of meal prepping, you learn to plan menus, manage ingredients, and cook efficiently — all vital skills for running a food business. You also gain a deep understanding of nutrition, portion control, and food safety. Additionally, through meal prepping, you might discover unique recipes or healthy food combinations that could differentiate your business in the market.
Sharing your meal prep journey on social media can even help build a potential customer base who appreciates your cooking style and philosophy. Eventually, this passion and expertise can inspire and equip you to turn your love for food into a profitable venture. The journey to creating a meal-prep-friendly kitchen involves thoughtful design choices and careful consideration of your needs. By installing a large sink, incorporating a dishwasher drawer, adding a range hood, utilizing deep drawers, installing a double oven, and keeping your kitchen clean, you can greatly enhance your meal preparation process.
Remember, a well-designed or renovated kitchen isn’t just about aesthetics; it’s about creating a space that serves your needs and facilitates your lifestyle (and potentially your business). So, embark on your kitchen redesign journey with these tips in mind and create a space that brings joy to your daily meal preparation.
To discover or rediscover how to have fun in the kitchen, visit A Jeanne in the Kitchen today!
These are all fabulous ideas. Erin put a lot of effort into this article and she has great advice. She’s got me thinking it may be time for an upgrade myself. 🙂 Thank you Erin for all these fantastic kitchen ideas and hints. Great job!!!!
Again, if you want to see more about what Erin is up to and would like to follow her, you can reach her at Erin Reynolds of diymama.net. I’m sure she would love to hear from you.
Have a great day and make everyday great. Stay safe and stay well. ‘Til next time.
I just love seeing my little Red-Winged Blackbirds. Like with most birds, the males are always the ones that are more brightly colored and the females tend to be more muted. I see them all the time, but I never get tired of seeing them. They always brighten my day. This year, I have seem more than normal too. But I have seen a lot more birds, and different birds, in general this year too. I LOVE it!!!!
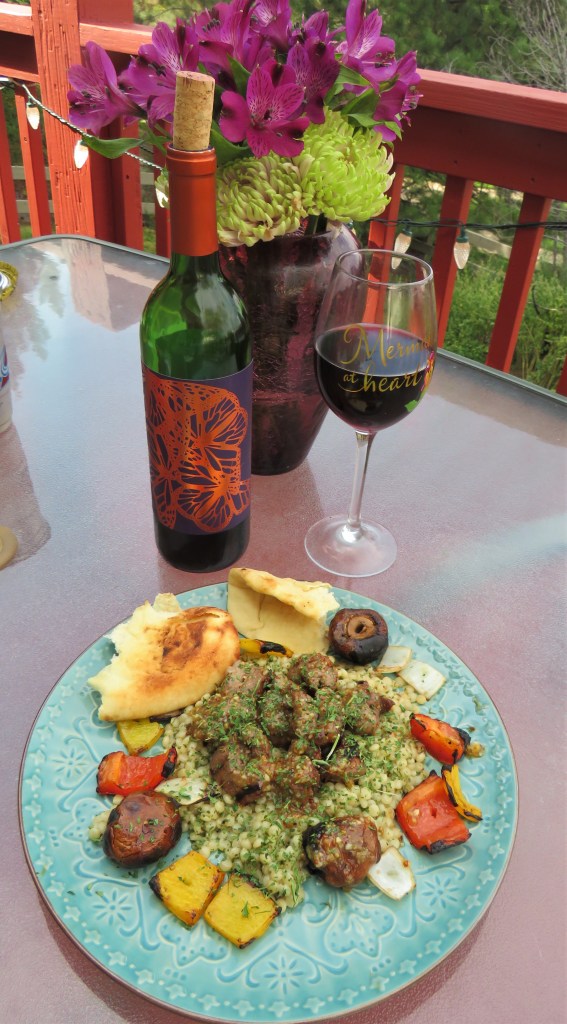
Since most of the meals I cook are for just the two of us, and we tend to buy our meats in bulk, you will often see the same meat cooked in a different way shortly after the first time around. Last time I made lamb, I made it as a Moroccan or Middle Eastern lamb tagine Lamb And Vegetable Tagine. But I still had lamb down that needed to be cooked, since we didn’t freeze it. This time I turned them into kebabs. I marinated my lamb cubes in a honey-mustard-tarragon sauce. They were so good and so tender. They just melted in our mouths. I served it over couscous with the grilled vegetables on the side, some warmed pita bread and a smooth, silky red blend. It was a perfect Mediterranean meal.
The word kebab means to roast. Kebabs have been around since at least the 14th century. It is believed they originated in Turkey, when soldiers used to grill chunks of freshly hunted animals skewed on swords on open field fires. However they are traditional all through North African and Middle Eastern Countries and many Asian countries as well. Kebabs or kabobs are the same thing, but depending on where they are coming from, they are spelled differently. Kebabs, with an “e” are usually from Arabic speaking countries whereas kababs with an “a” are usually from Armenia or Iran. I will eat them from wherever. I love them no matter where they come from or how they are spelled. 🙂
Lamb Kebabs with a Honey-Mustard-Tarragon Sauce
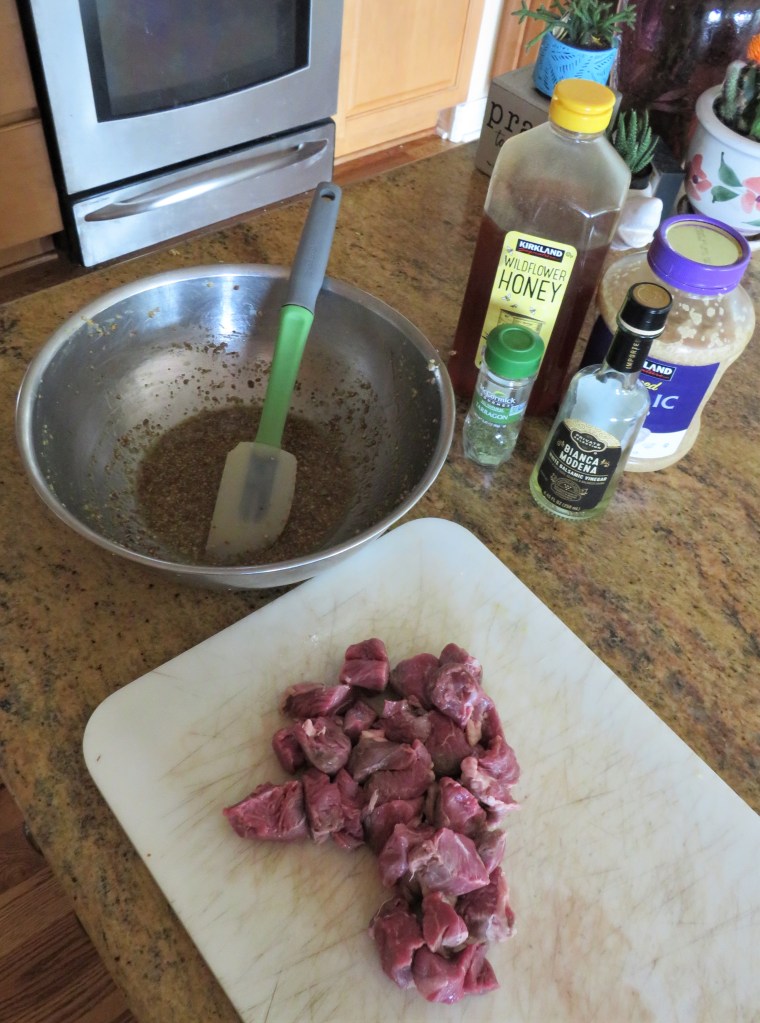
The meat is the base, but it is the sauce that makes the dish really special. This time I marinated my lamb in a honey-mustard-tarragon sauce, and boy, did it really give the lamb a great flavor.
1 1/-2 lbs lamb, cubed
3 TBSP Dijon mustard
2-3 TBSP honey
2-3 TBSP white balsamic vinegar
1-2 tsp dried tarragon or 1-2 TBSP fresh tarragon
1 TBSP garlic
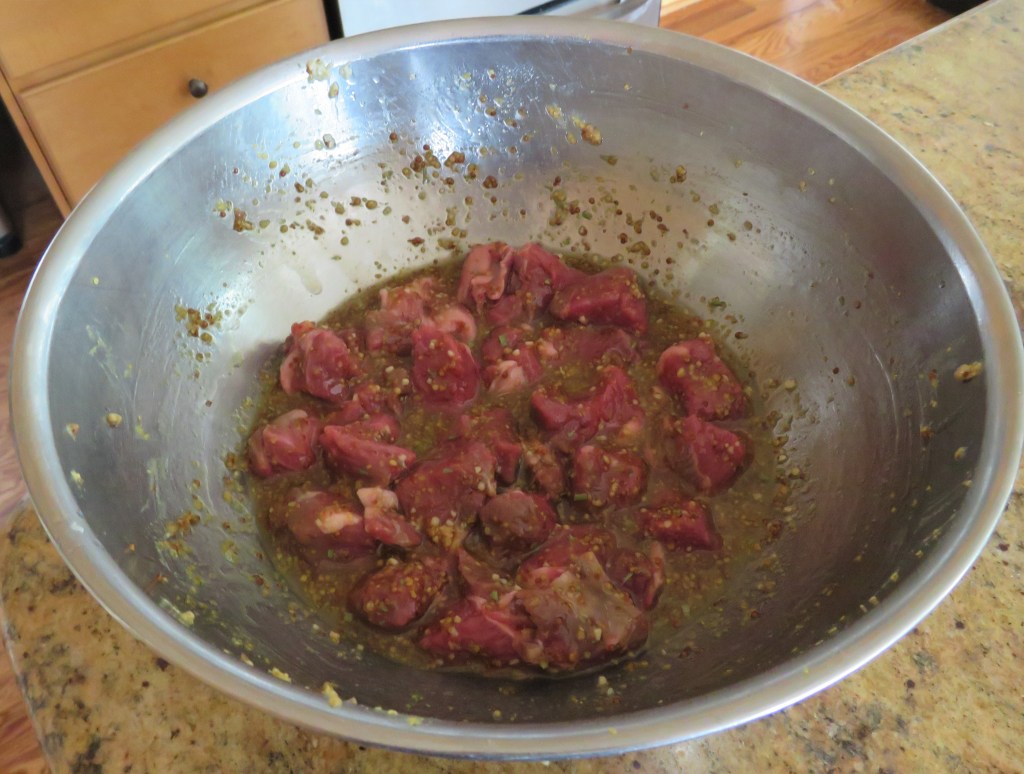
Mix everything together well, then add the lamb cubes and marinate in the refrigerator for at least 4 hours before cooking.
When the lamb is ready, skewer it, top with a little more of the marinade and grill it up for about 5-7 minutes then flip and continue to cook for an additional 5-7 minutes on a hot grill.
I also skewered up some peppers, mushrooms and onions and grilled them as well. I marinated the vegetables in a simple balsamic vinaigrette and placed them on the grill first. The vegetables take longer than the meat to cook.
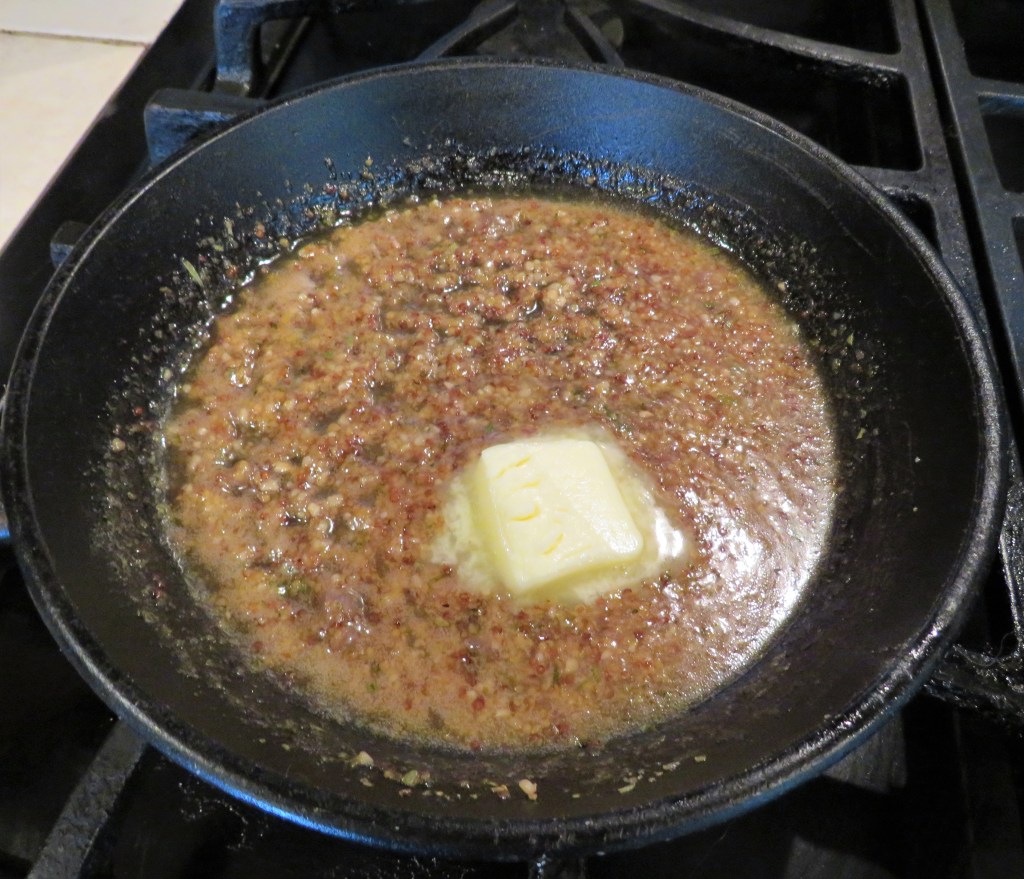
Reserve some of the marinade to top the cooked meats with later. Bring it to a boil, then reduce the heat to a simmer and continue to cook for about 10 minutes, stirring occasionally. At the very end, you can add a dollop or two of butter to finish the sauce if you like.
Serve everything over rice or couscous and voila! I like the pearled couscous better, though I often use the smaller couscous as well. Both are delicious. They have very different tastes and textures.
This is a very tasty and healthy dish that only takes a few minutes to prepare and cook.
Have a great day and make everyday great. Stay safe and stay well. ‘Til next time.
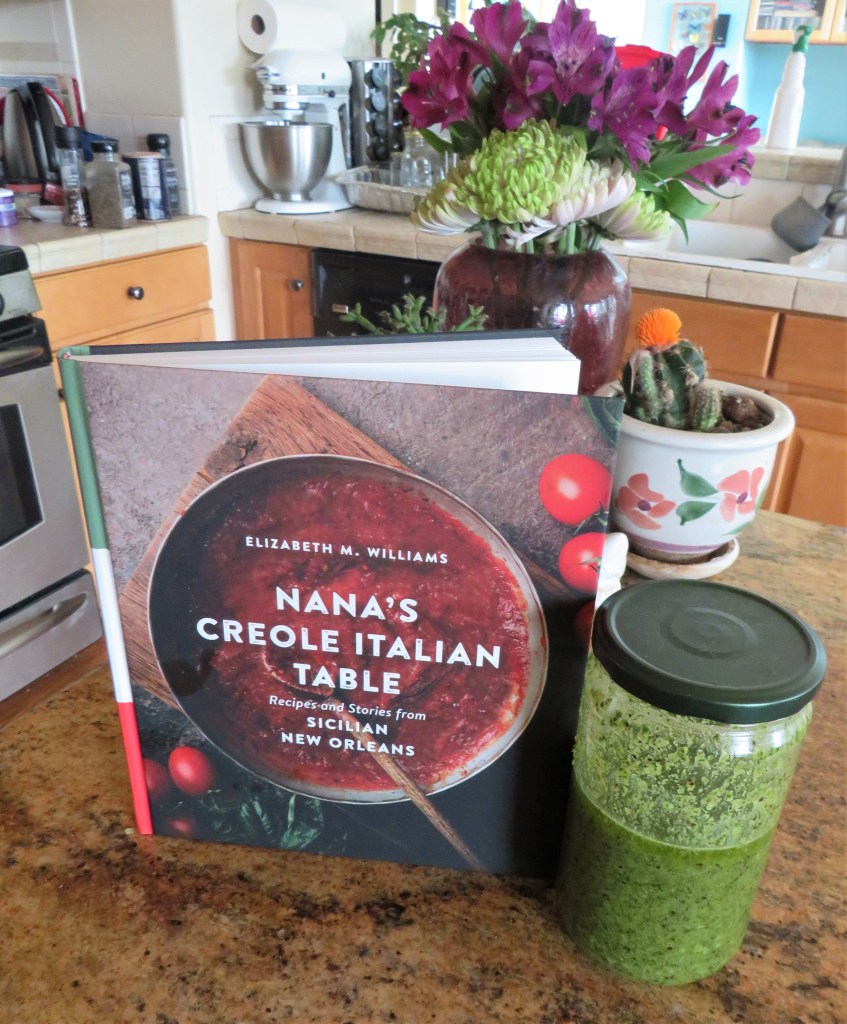
I am most definitely a free-association thinker. I will be thinking of one thing, and then that will take a turn that will lead me to another direction, then something else will turn my direction once again, and so on and so on, until eventually I get back to my original thought. This happens all the time. This is just how I think, how I cook and how I operate. It’s just who I am. 🙂 I bring this up because this is how I was lead to the discovery/purchase of yet another fun cookbook, Nana’s Creole Italian Table, by Elizabeth (Liz) Williams.
I was doing some research on something, I don’t even remember what I was originally looking into, that lead me to a website about the Southern Food & Beverage Museum in New Orleans, founded by Liz Williams. The website is really cool, and I would absolutely love to go visit this museum if I am ever in New Orleans again; and I digress once again. 🙂 The more I delved into the website, the more cookbooks I saw that I was interested in. You know, you can NEVER have your last cookbook. And yet again, one thing lead to another, and I now I have yet another fabulous new cookbook adorning my ever growing and overflowing bookshelves.
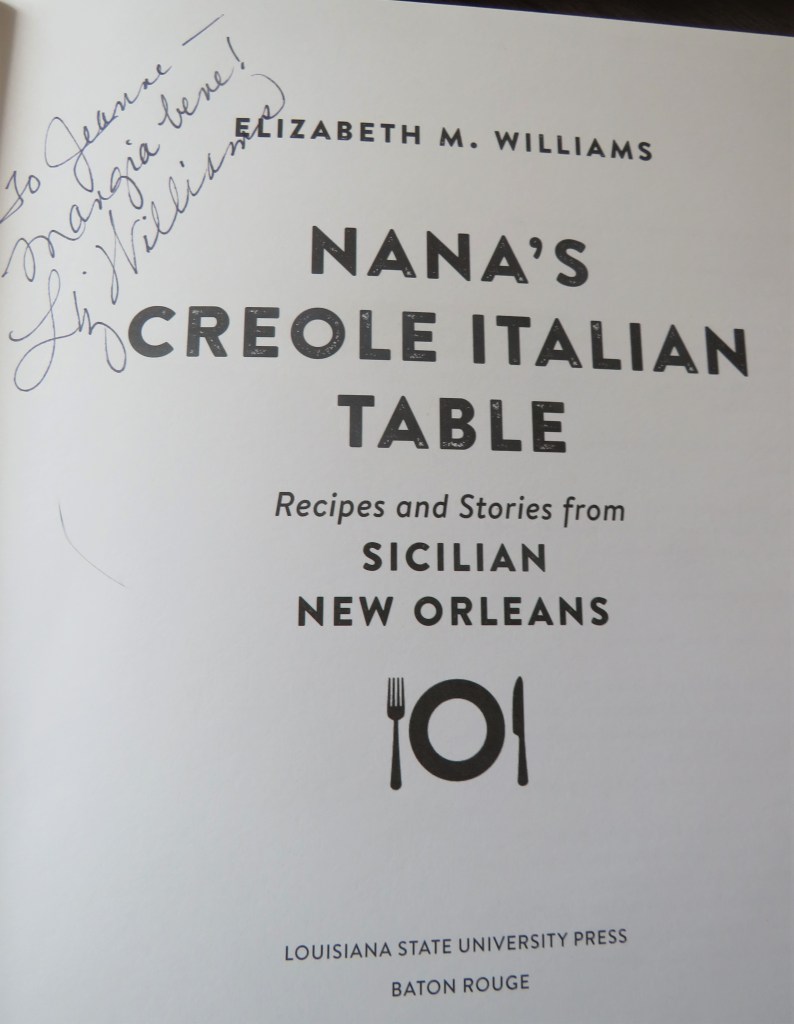
Even when I ordered the cookbook, I must have been distracted, because I thought I could just order it and have it delivered to me. But then I received an email stating my book was ready for me to pick up. Well, I live in Denver and the cookbook was in New Orleans, so that wasn’t going to work. I reached out to Liz Williams and explained the situation, and she was so sweet and so kind. She said no problem, and she would send me the book. My lack of ability to focus actually worked in my favor though, at least this time, because I received an autographed copy of the book that I would not have received otherwise. So I guess sometimes it pays to be a bit of a space cadet. 🙂
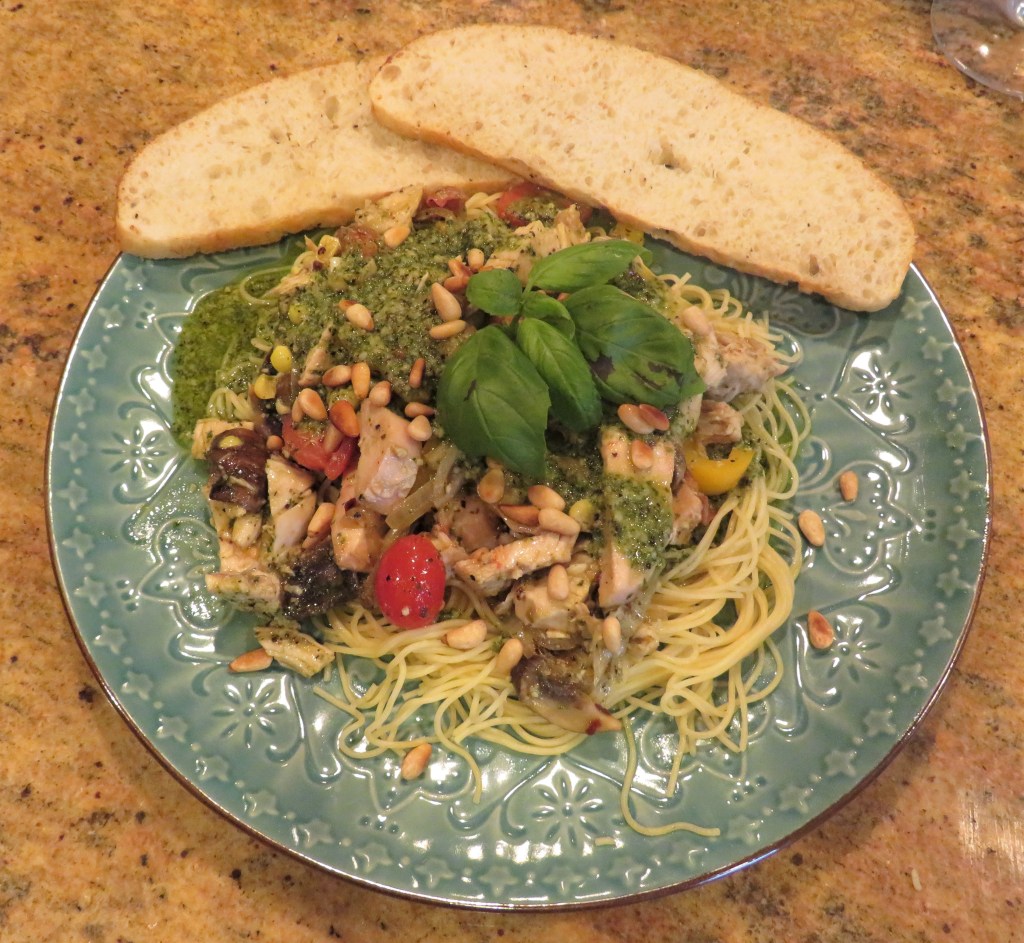
And I have already made something from it, which was just a slight variation of what I was going to make anyway. I made pesto for my pasta, but I made my pesto with some influences from Nana. Of course I still did my own thing, and I added lemon olive oil and lemon balsamic vinegar, instead of just lemon zest. One of the ideas that Liz stated in her book, though, was how recipes evolve, from one household to another, from place to place. Recipes certainly evolve in my kitchen too, that’s for sure. 🙂
Nana’s Pesto
3 cups fresh basil
4 cloves garlic, minced
1/2 cup grated Parmagiano cheese
1/3 cup toasted pine nuts or almonds
1/2 tsp lemon zest
3/4 cup extra virgin olive oil
salt to taste
Add everything to the food processor and process until it is a liquid.
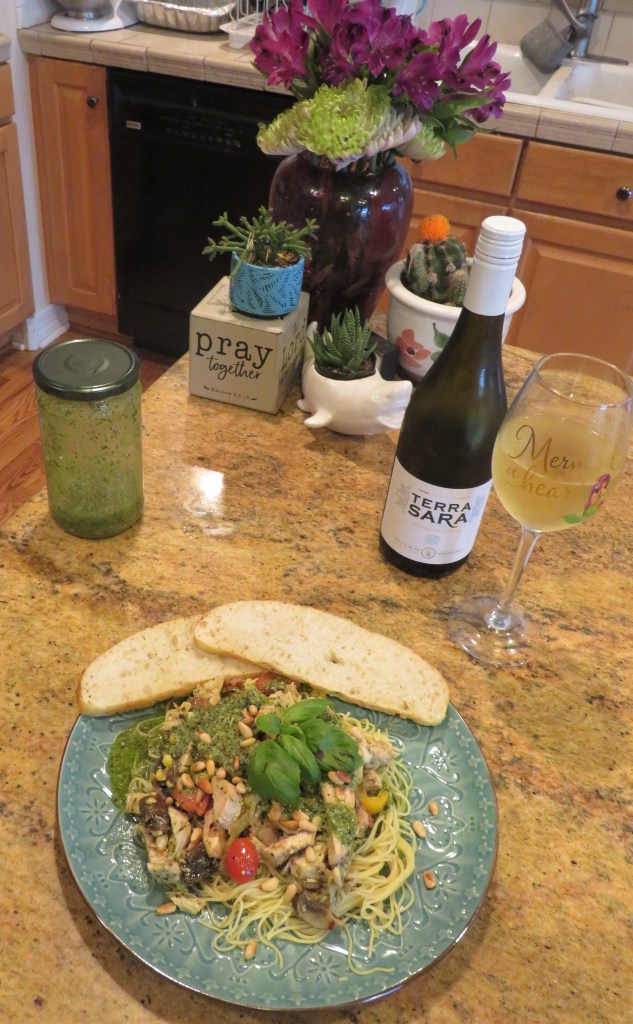
My recipe, is very, very similar, though, I confess, if I am cooking, I never measure anything. I only measure if I am baking. And I did not use lemon zest this time, but instead I used lemon olive oil and lemon balsamic vinegar, as well as quite a bit of fresh ground black pepper. These very simple and subtle changes are the changes that transform recipes into your own recipes. Start with the basics and then re-create from there. No need to constantly reinvent the wheel, or in this case, the recipe.
And my pesto pasta dish for last night’s dinner.
As Liz wrote to me, ” Mangia bene!” or eat well.
If you would like to visit the Southern Museum of Food & Beverage, it is located at 1504 Oretha Castle Haley Blvd., New Orleans, LA 70113 (Directions) | P: (504) 569-0405 | F: (504) 587-7944. You can call or visit their website too at https://www.sofabinstitute.org/
Have a great day and make everyday great. Laissez le bontemp roulez! Stay safe and stay well. ‘Til next time.
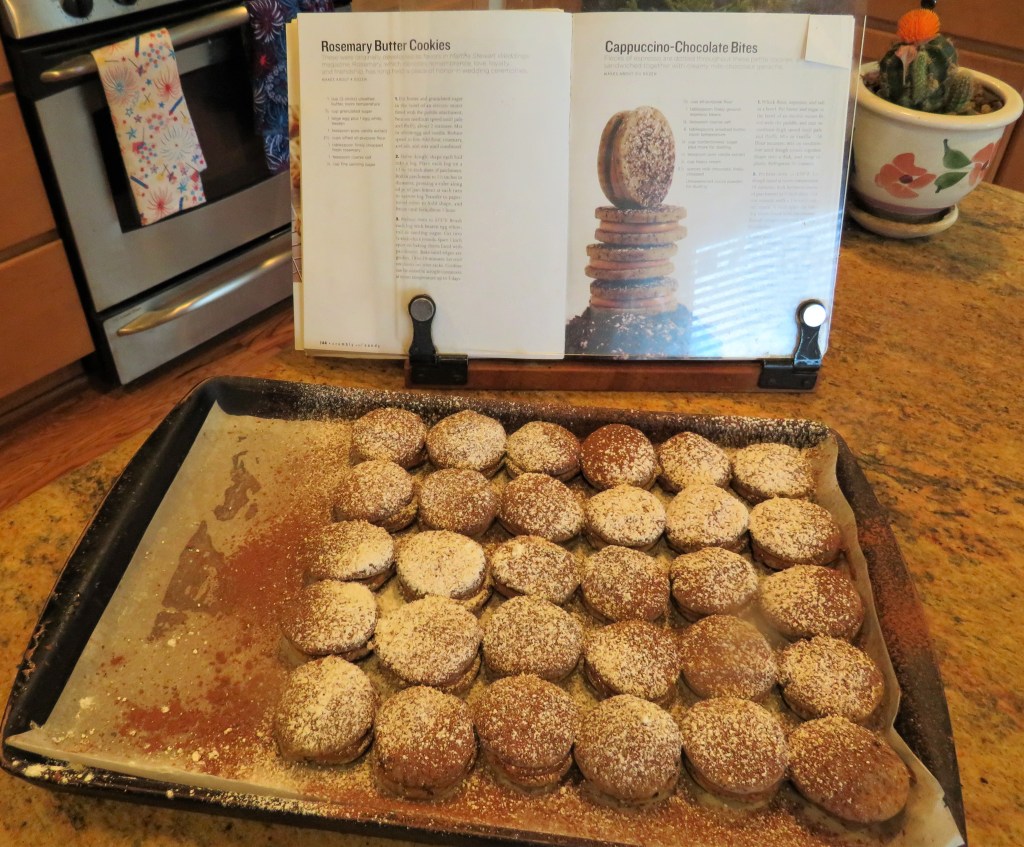
Cookies and coffee. WOW! What a delicious combination. These are grown up cookies for sure. These are sandwich cookies with coffee in the cookie dough and a cappuccino flavored whipped cream filling in between. Oh they are so yummy. They are not overly sweet, so they are perfect to pair with your cup of morning joe too.
Cappuccinos became popular in the United States in the late 1980’s, giving many Americans the impression that they were a “new drink”. However, cappuccinos have been around in Europe since the late 1700’s. Cappuccinos first popped up as the ‘Kapuziner’ in Viennese coffee houses in the 1700s. A description of the ‘Kapuziner’ from 1805 described it as “coffee with cream and sugar,” and a description of the drink from 1850 adds “spices” to the recipe. But the word “cappuccino” has nothing to do with how the beverage is made and instead refers to its distinct light brown color. Though the name cappuccino is an Italian word for coffee that coffee lovers around the world are familiar with, when the cappuccino drink was first introduced in Italy, it was named after the Capuchin friars because the color of the espresso mixed with frothed milk was similar to the color of the Capuchin robes they wore. The name, whimsical in a world of utilitarian coffee-drink names, stuck; we borrowed it into English in the late 1800s. For the most part, contemporary cappuccinos are made with espresso, steamed milk, and foamed milk. However, in some parts of the world, cappuccinos are still made more like Viennese Kapuziners, complete with whipped cream and other additives.
In the United States, people drink cappuccinos at all times during the day. But in Italy, they are only enjoyed in the morning hours, before 11:00 AM. It is just a deep-rooted generational concept that Italians have held onto for centuries, with no real reasoning behind it, or at least none that I can see. In recent years, some European cappuccino customs have changed. Most notably, some Europeans (particularly those in the U.K., Ireland, the Netherlands, Germany, Belgium, France, and Spain) have begun to drink cappuccinos throughout the entire day rather than only in the morning. Now, cappuccinos are popular at cafes in the afternoon and at restaurants after dinner.
When we think of cappuccinos, we automatically think of a steaming hot cup of coffee made with milk. But today, it can also mean something that is made with and/or coffee flavored too. When I made my cappuccino cookies, I added coffee in both the cookie dough and in the whipped cream filling.
Cappuccino Cookies
These cookies are supposed to be small bite-sized cookies but those just weren’t good enough for my taste. So I quadrupled the recipe, which still only gave me about 3 dozen, but at least they were normal sized cookies, and not just the little tiny teasers they were supposed to be. 🙂
3 cups flour
4 TBSP finely ground coffee crystals or espresso, divided
3 sticks of softened butter
1 cup powdered or confectioner’s sugar
1 tsp vanilla
1 1/3 cup heavy whipping cream
10 oz chocolate chips
cocoa powder and powdered sugar for dusting
Combine the flour and 1/2 the espresso together and mix well.
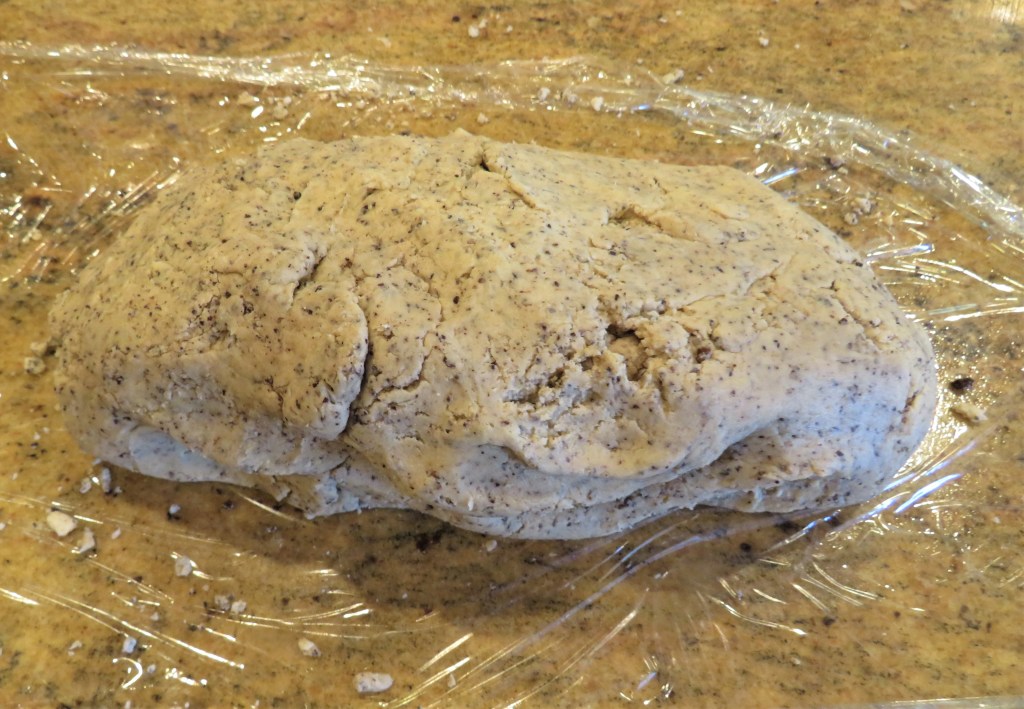
Mix the butter and powdered sugar together until creamy, then add the vanilla. Add the flour and coffee mixture until everything comes together to form a dough. Wrap in plastic and set in the refrigerator for at least 30 minutes before rolling out and cutting.
When you are ready to bake them, preheat the oven to 350* F or 190*C. Line your cookie pans with parchment paper.
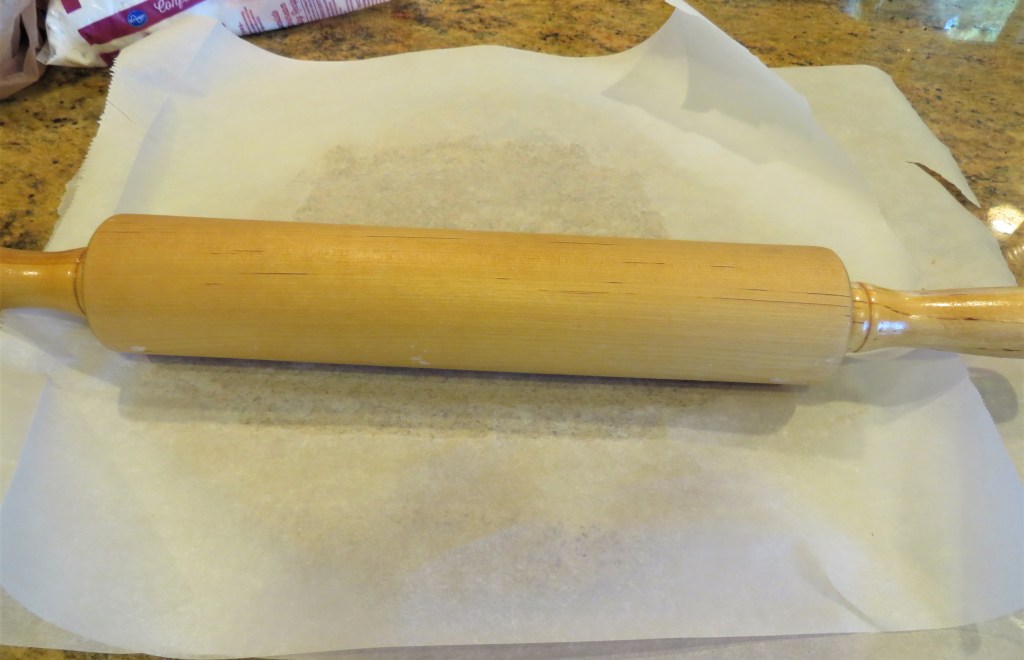
Roll the dough in between two sheets of parchment paper to about 1/8″ thick.
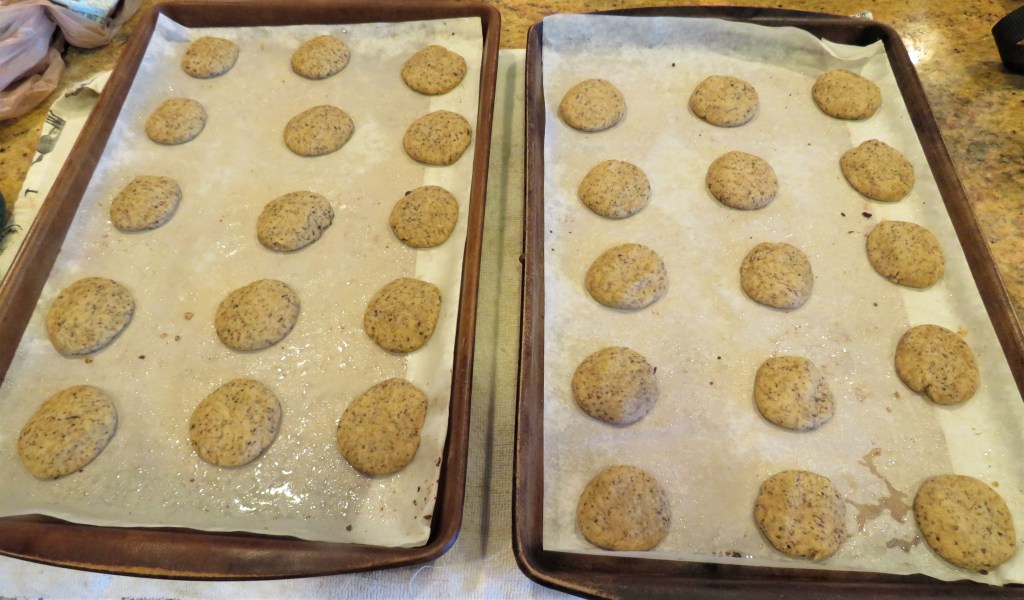
Drop about 1 tsp of the dough on to the prepared cookies sheets, about 1 inch apart, and roll in to a ball. Lightly press with your hands or fingers and bake for about 10-15 minutes or until the edges are lightly browned.
Allow the cookies to cool for about 5 or so minutes before removing them and placing them on a baking rack to cool completely.
Make the coffee cream by bringing the cream to a scalding boil, then pour it over the chocolate chips. Mix together until it is smooth and creamy. Add the rest of the espresso or coffee, and mix thoroughly. Refrigerate for about 4 hours, then beat on high until it forms into stiff peaks.
I had some left over coffee cream from when I made cappuccino brownies Cappuccino Brownies that I added to the mix as well. In case you needed reminding, I am “The Queen of Leftovers” after all. 🙂
When the filling is ready, spread it onto the bottom of one cookie, then place another cookie on top, bottom side down on the filling, to form a sandwich.
When the cookies are all filled, add the cocoa powder to a sifter and do a light duting over the cookies. Do the same with the powdered sugar.
Refrigerate for at least about 30 minutes for the cream filling to set before serving, then watch them quickly disappear. They’ll be gone before you know it.
Have a great day and make everyday great. Stay safe and stay well. ‘Til next time.
Chocolate and cherries!!!!! Again, one of those famous combinations that is perfectly paired together. Chocolate and cherries are some of my favorite combinations, though, I do have quite a few, mostly something else that is paired with chocolate too. 🙂
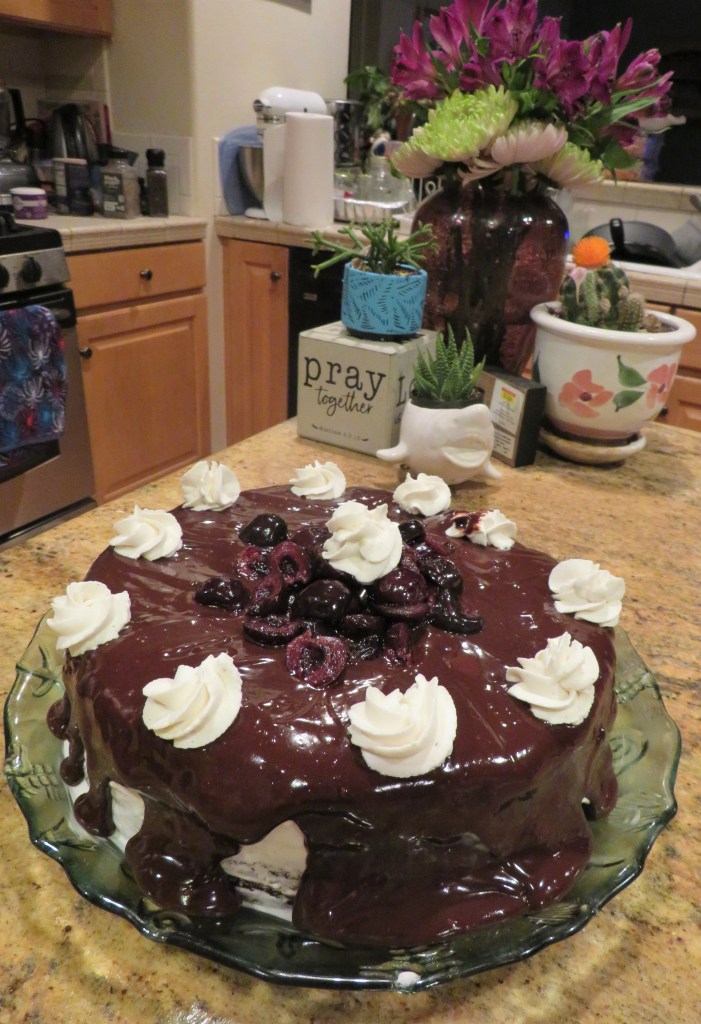
I had cherries and I had chocolate, so what did I do with them? I made a Black Forest Cake of course.
There is one belief that the cake can be traced back to the 1500s, back when Europe first saw chocolate being available. The story goes that it was created in Germany’s Black Forest, a region known for its sour cherries and kirschwasser (a brandy made with cherries), but that is just speculation. It is also believed that it was invented in the early 1915-1927 years, with more than a few German pastry chefs laying claim to it. The only thing that we can actually agree on is that it did originate in the Black Forest region of Germany, where it is known as Schwarzwälder Kirschtorte. The dessert is named after the specialty liquor known as Schwarzwälder Kirsch(wasser) of the Black Forest mountain range in southwestern Germany which gives the dessert its distinctive flavor
A black forest cake is a chocolate cake with cherries either in the batter, as a filling, or both and it’s usually covered in whipped cream and chocolate ganache. As with anything, especially something that has been around for a long, long time, there are many different variations. There is always more than one way to make a delicious cake. 🙂
Black Forest Cake
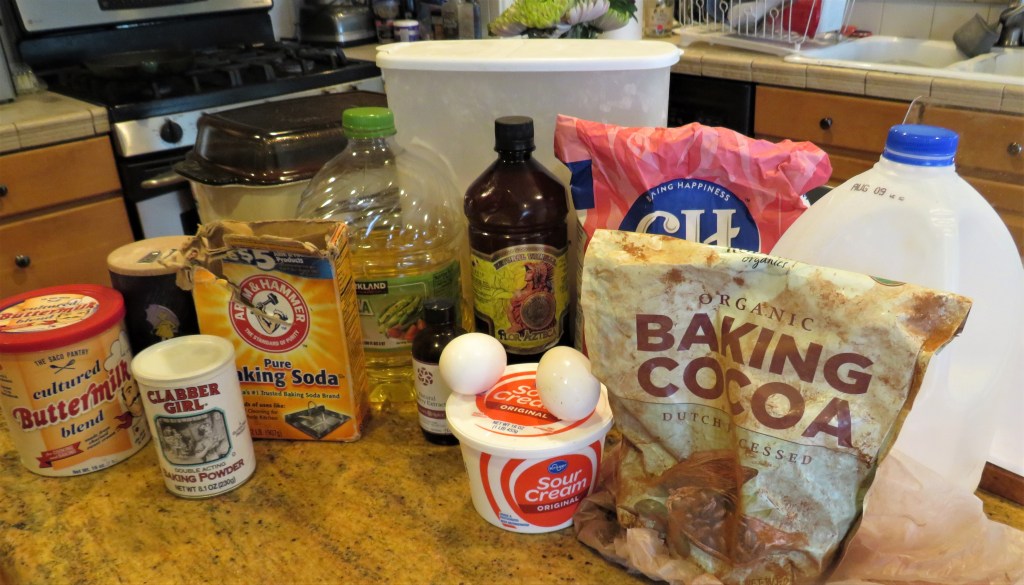
1 3/4 cups flour
3/4 cups cocoa powder
1 3/4 cups sugar
2 tsp baking soda
1 tsp baking powder
1 tsp salt
1/2 cup canola oil
2 large eggs
3/4 cup sour cream or yogurt
1/2 cup buttermilk
1 tsp cherry extract
1 tsp vanilla
Preheat the oven to 350* F or 190* C,
Spray two 9″ or two 10″ springform cake pans with cooking spray and line the bottom of each pan with parchment paper.
Mix all the dry ingredients together and set aside.
Beat the oil and eggs together until creamy, then add the vanilla and cherry extract. Add the flour mixture 1/2 at a time, mix, then add 1/2 the sour cream, mix, and 1/2 the buttermilk and mix. Repeat until all the ingredients are incorporated into the batter.
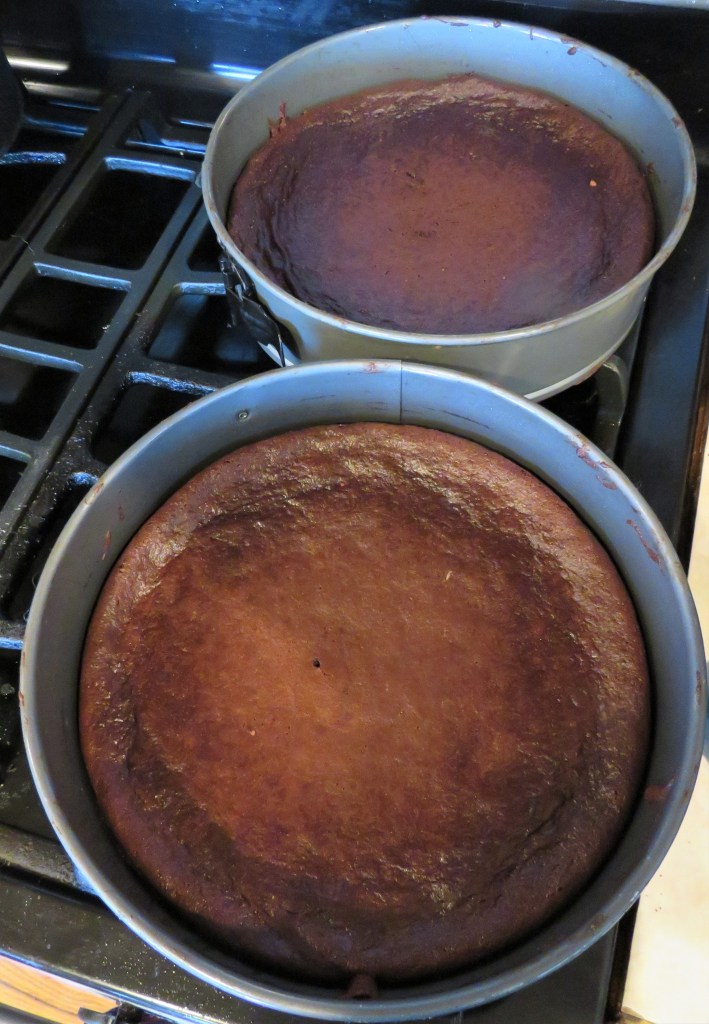
Divide the batter, pouring 1/2 in each prepared pan. Spread the batter out evenly in the pans.
Bake for about for about 30 minutes, or until the center is done and a toothpick comes out clean when inserted in the middle.
Allow the cakes to cool completely before removing them from the pans and removing the parchment paper from the bottoms.
Make the whipped cream frosting and the cherry filling, then completely cover 1 cake with the frosting and add the cherries. Top with the other cake, and cover completely with the whipped cream frosting again.
The Whipped Cream Frosting
2 cups heavy whipping cream
1/4 cup powdered sugar
1 TBSP cherry extract, optional
Mix everything together until the cream forms into stiff peaks, then spread evenly over one cake. Add 1/2 the cooked cherries. Add the other layer of cake, and frost again.
Cherry Filling
I used fresh cherries, but you can also used canned cherries in heavy syrup.
4 cups cherries cut in half and pitted or 2 15-oz cans of dark sweet cherries in heavy syrup
water for the cherries
2 TBSP cherry liqueur or Kirsch
1 cup sugar if using fresh cherries
Put everything together in a heavy sauce pan, bring to a boil, then reduce the heat to a simmer and continue to cook for about 20-30 minutes, stirring occasionally. Let the sauce and the cherries cool completely and this will also help thicken the sauce a bit too.
Chocolate Ganache
1 cup heavy whipping cream
4 oz semi sweet chocolate chips
1-2 tsp cherry extract, optional
Bring the cream to a scalding boil, then immediately pour over the chocolate. Add the cherry extract, and fold together until it is smooth and creamy and all the chocolate is melted.
Pour the ganache over the top of the cake and let it drip over the sides. Add the remainder of the cooked cherries in the center. I added some of my extra whipped cream as well.
Let the cake set in the refrigerator for at least 30 minutes before slicing and sharing with friends. This cake is decadently delicious. I guarantee you are going to absolutely love it!
Have a great day and make everyday great. Stay safe and stay well. ‘Til next time.
We all know that food is important to everyone, no matter who we are or where we come from. It is part of who we are. We use food for all occasions, whether happy or sad. It is a way for us to connect with others like nothing else. We eat when we are happy. We eat when we are sad. We cook for those we love. Food brings great comfort to all of us in our times of need. Food is life.
Here are some food quotes from famous people, foodies and non-foodies alike, that will help explain this even more.
Food for us comes from our relatives, whether they have wings or fins or roots. That is how we consider food. Food has a culture. It has a history. It has a story. It has relationships.
Winona LaDuke, Native American activist, economist and author
Food is a symbol of love when words are inadequate.
Alan D. Wolfelt, Ph.D., Grief Counselor
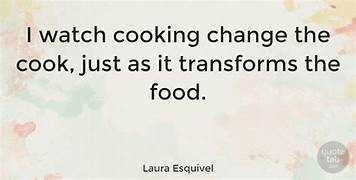
I watch cooking change the cook just as it transforms the food.
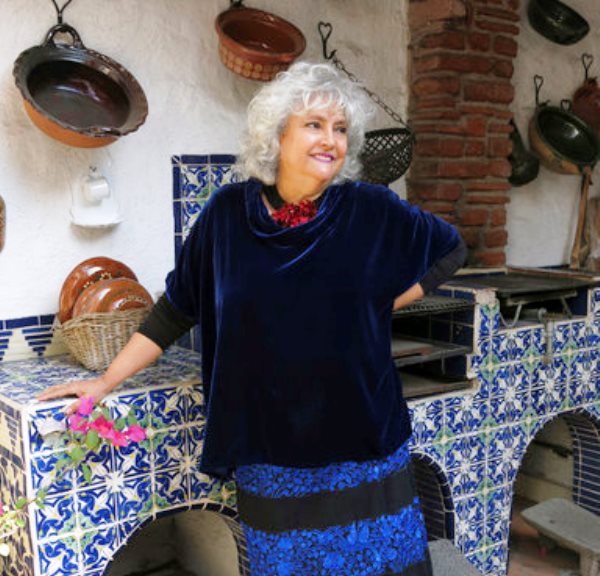
Laura Esquiviel, Mexican author and and cookbook author of Like Water For Chocolate, which was turned into a fabulous movie that is a must see for anyone who is a food lover. It’s an OLD movie, dating back to maybe the 1980’s or 1990’s, but if you can find it, it’s well worth it. Even today, it is still one of my favorites.
Alice Waters, Cookbook author, Chef and owner of Chez Panisse Restaurant. I actually have a couple of her cookbooks.
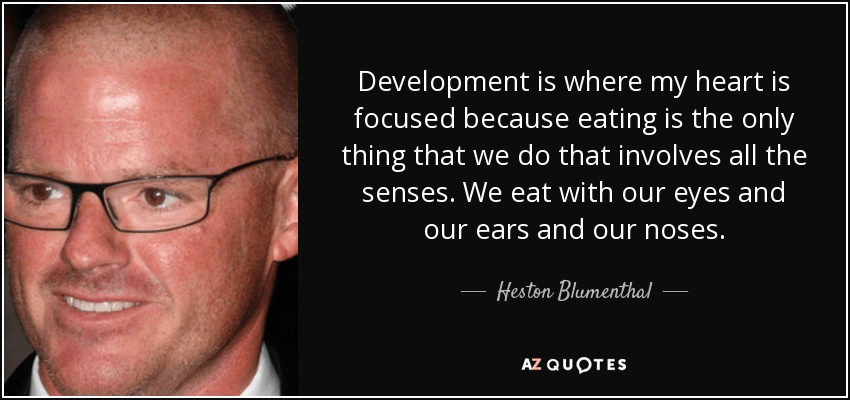
Heston Blumenthal, British Celebrity Chef and TV personality.
Have a great day and make everyday great. Stay safe and stay well. ‘Til next time.





































 A Jeanne in the Kitchen