I have created this site to help people have fun in the kitchen. I write about enjoying life both in and out of my kitchen. Life is short! Make the most of it and enjoy!
Author: ajeanneinthekitchen
I have worked in the restaurant and catering industry for over 35 years. I attended 2 culinary schools in Southern California, and have a degree in culinary arts from the Southern California School of Culinary Arts, as well as a few other degrees in other areas. I love to cook and I love to feed people.
As you know, we eat just about everything. We kind of have a rotation of sorts, and it was time for some fish. We had some beautiful, thick cod portions that were just begging me to cook them in a delicious way. How could I refuse? Of course, I had to oblige. I decided to cook the fish in a Thai style with vegetables and potatoes, and served it with some potstickers on the side.
I had a lot of potatoes that needed to be used, so that was kind of my inspiration for this dish. Plus, it was something a little different. And I am all about different. 🙂 I also love adding all kinds of vegetables to my dishes as well. This recipe was loaded with green beans, carrots, peppers, onions and tomatoes. It was a one-pot dish.
4-5 large potatoes, peeled and diced
1 green and/or red bell pepper, diced
1 jalapeno, diced fine
2-3 carrots, sliced
1/2 onion, sliced very thin
2 cups green beans, par cooked, cut into pieces about 1/2 inch in size
1 cup baby teardrop tomatoes
1 TBSP garlic
1 TBSP ginger
1 can coconut milk
3-4 cod pieces
red pepper flakes to taste
salt to taste
1-2 TBSP curry paste
1-2 tsp curry powder
green onions, sliced Asian style
lemon verbena and/or basil or purple basil, chopped
canola or vegetable oil and lime olive olive (optional) oil for cooking
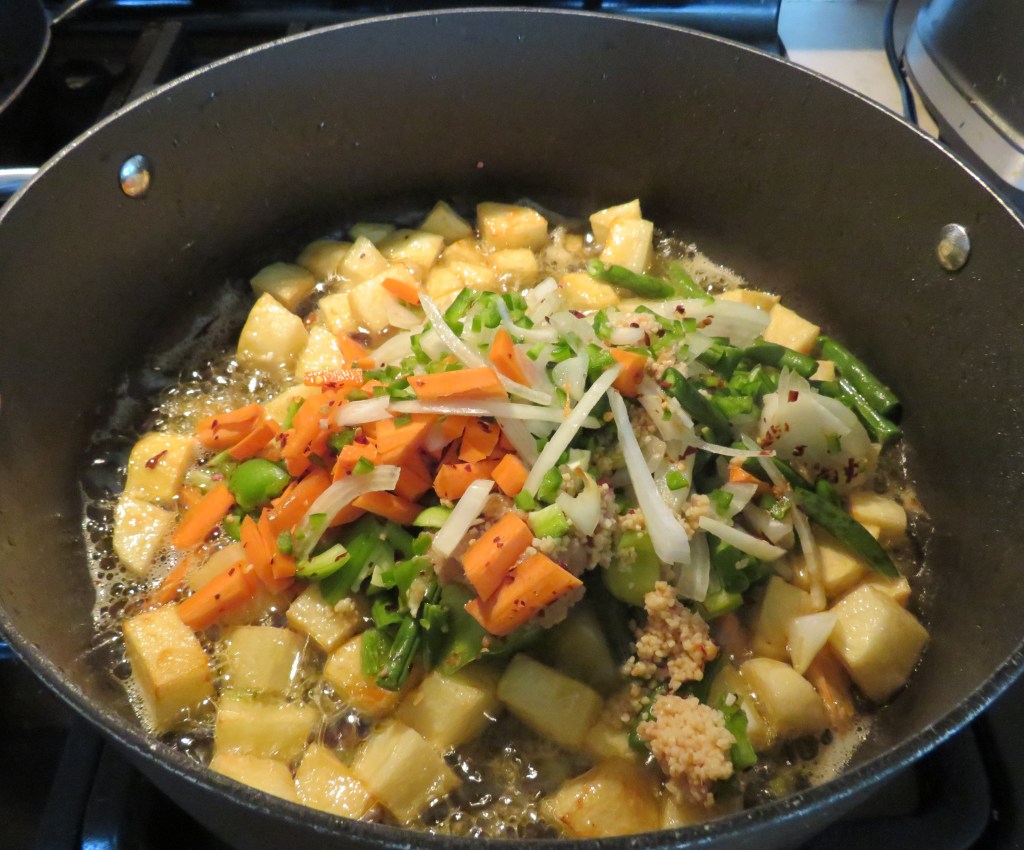
Boil the potatoes for about 10 minutes, then drain. Get a large pan or pot very hot and add the oils, then add the potatoes, and continue to cook for about 10 minutes, or until they begin to brown, stirring frequently.
Combine the coconut milk and spices.
Add the vegetables to the potatoes after about 7 minutes, and saute for an additional 5 or so minutes, or until they soften and the onions are translucent.
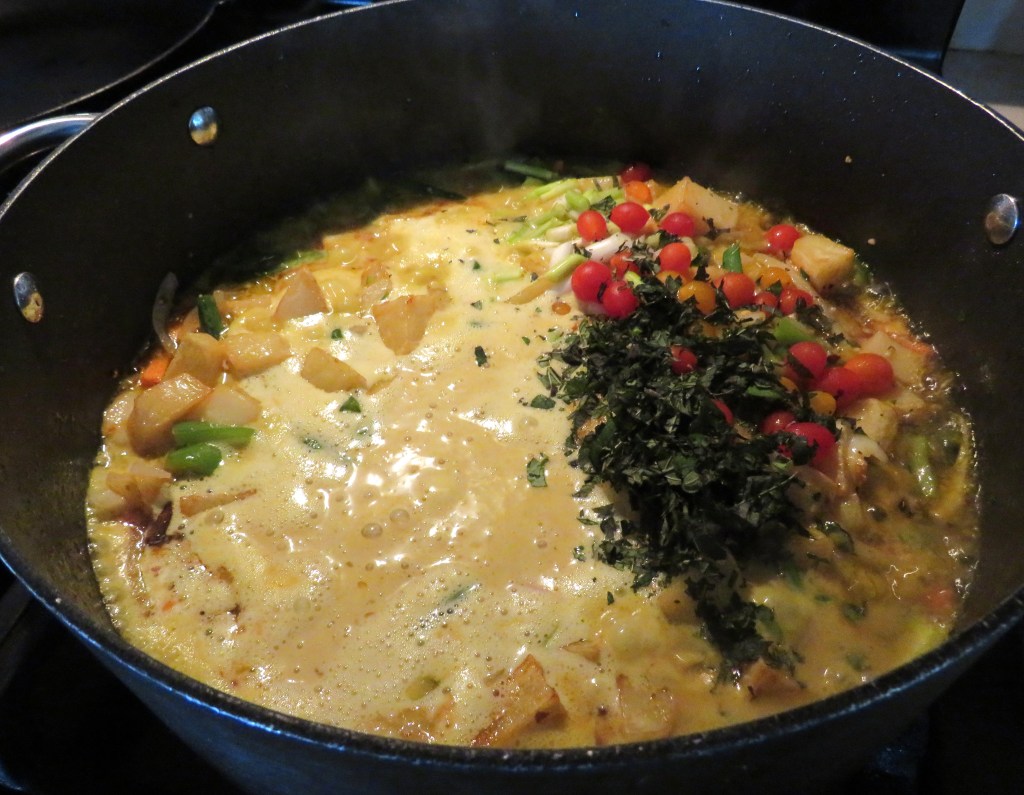
Add the coconut mixture and mix together thoroughly. Bring to a boil, then reduce the heat to a simmer. Add the tomatoes and most of the lemon verbena. You can also use basil or purple basil too if you prefer.
Cut the fish into smaller portions, and gently place on top of the sauce. Cover and poach for about 5-7 minutes, or until the fish is cooked. You will know when it is done, because the fish will be white and opaque.
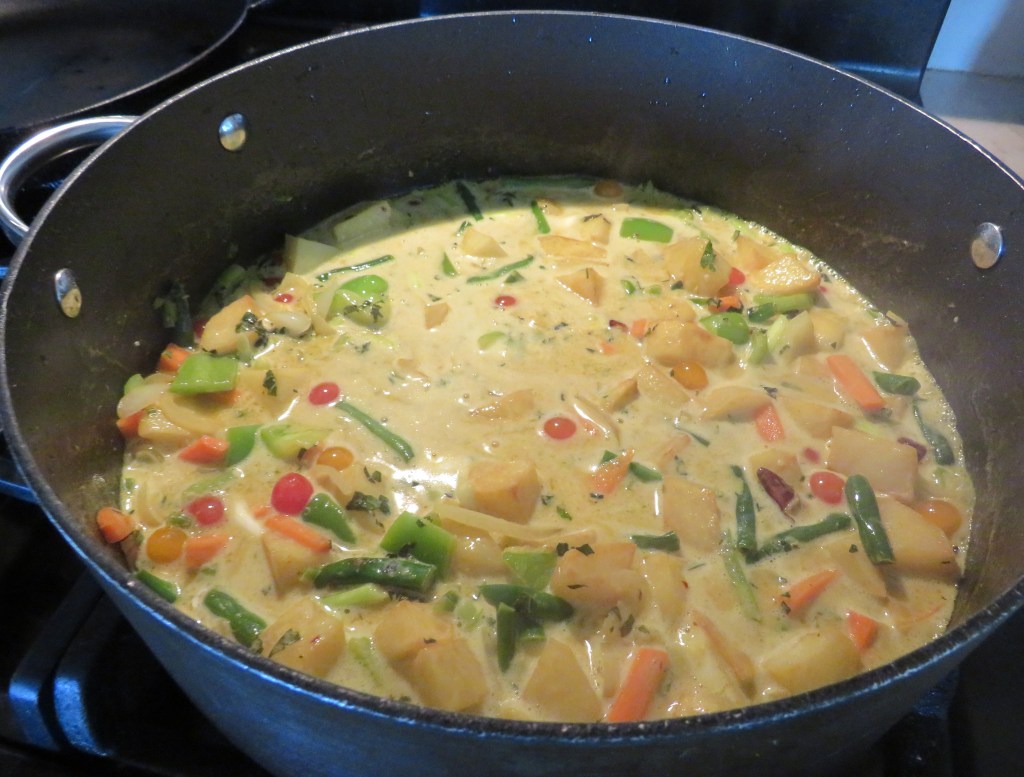
This is kind of a fish stew, so I thought serving it in bowls was probably the best idea. You can also use this same delicious recipe for chicken and/or shrimp or tofu too. The sauce is a versatile sauce. It’s got just the right amount of heat too, but not too much. This dish is definitely a winner.
Have a great day and make everyday great. Stay safe and stay well. ‘Til next time.
Yes, I have plenty of my own recipes and dishes I have been cooking to share, but I came across something I found very interesting, and don’t know much about it all, so I thought I would share it with all of you as well. I hope find it interesting too.
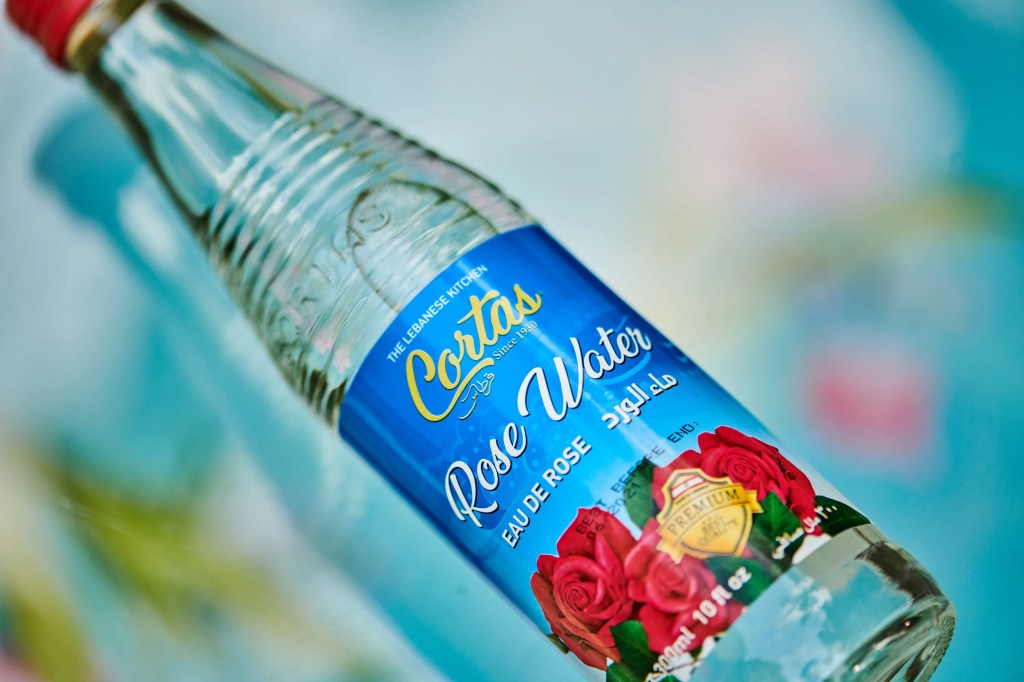
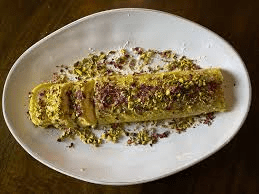
I admit, up until fairly recently, I hadn’t cooked much with rose water at all. I knew it was used for Middle Eastern desserts, but that was about it, really. I tend to buy my Middle Eastern desserts much more so than I make them, because, in all honestly, I am not quite that adept at making them, and it is much cheaper, easier and better for me to purchase them already made by the experts. However, by no means does that mean I won’t make them or that I don’t want to learn how. Au contraire. I love learning new things and experimenting with new ideas.
Rose water has been used for thousands of years for medicinal, culinary, and perfumery purposes. Concentrates and oils have been made from rose hips since about 2630 BC. In fact, rosewater has a long and illustrious culinary history. Made by distilling rose petals with steam, it was first created by chemists of the Islamic world in the Middle Ages. Rose water is a byproduct of the process of steam-distilling rose petals to make rose oil, also known as attar of roses. It’s made from water and rose petals, and contains 10–50% rose oil. Rose water has a sweet scent and is used in many beauty products, including toners, creams, makeup, and hair care. It’s also a key ingredient in Middle Eastern, Asian, and Mediterranean cuisines.
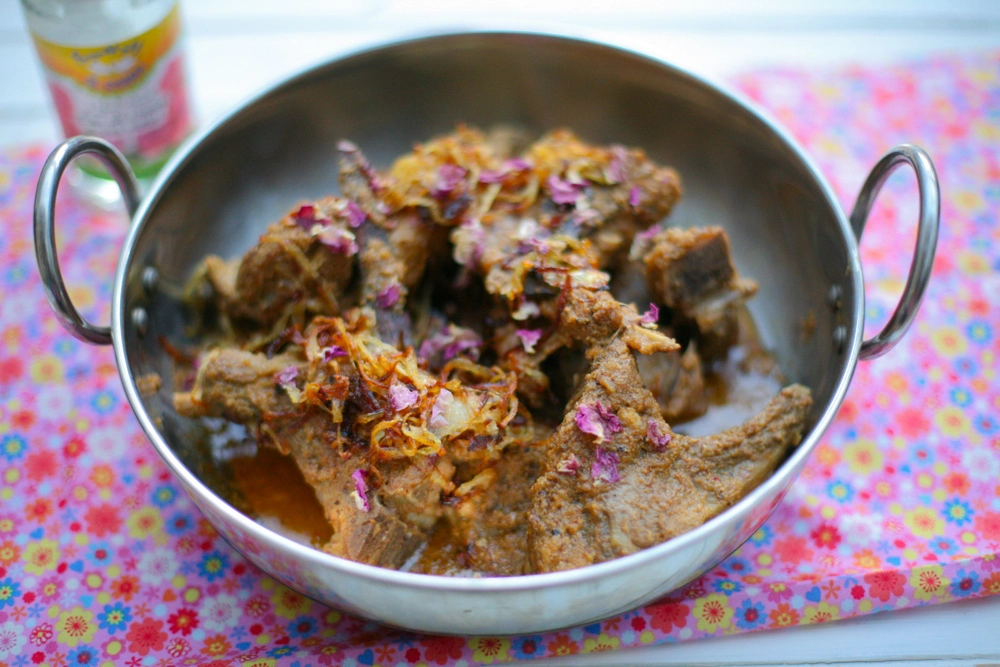
the use of rosewater became firmly ensconced in the cooking of the Middle East, northern Africa, and northern India, all cuisines in which the floral and the aromatic are highly prized. It is believed the Persians are amongst the first to use rosewater in their cooking by infusing it into mutton fat and marzipan. Rose water is known as gulāb in Persia, which comes from the words gul (rose) and ab (water). The earliest written records of using rosewater in food come from the Arab Empire, from the 8th-11th centuries A.D. Crusaders introduced rose water to Europe during the Middle Ages and Renaissance, where it became a luxury item for the aristocracy. It was used as a remedy for depression, in baths, and for rinsing hands. It was widely used in the United States in the 18th and early 19th centuries, and is referenced in Amelia Simmons’ 1796 cookbook American Cookery. Before 1841, when vanilla became widely available (after a 12-year-old slave became the first person to figure out how to hand-pollinate the vanilla orchid so it could be commercially produced outside its native Mexico, but that’s another story), rose water was also a primary flavoring in a wide range of desserts and pastries in Europe and even the United States.
As I am finding out through more research, rosewater is used for a lot more than just pastries and desserts. It is also used in a lot of savory dishes too.
I am getting so hungry looking at all these fabulous ideas. I think I need to start experimenting more with rosewater. 🙂
Learn something new everyday. Have a great day and make everyday great. Stay safe and stay well. ‘Til next time.
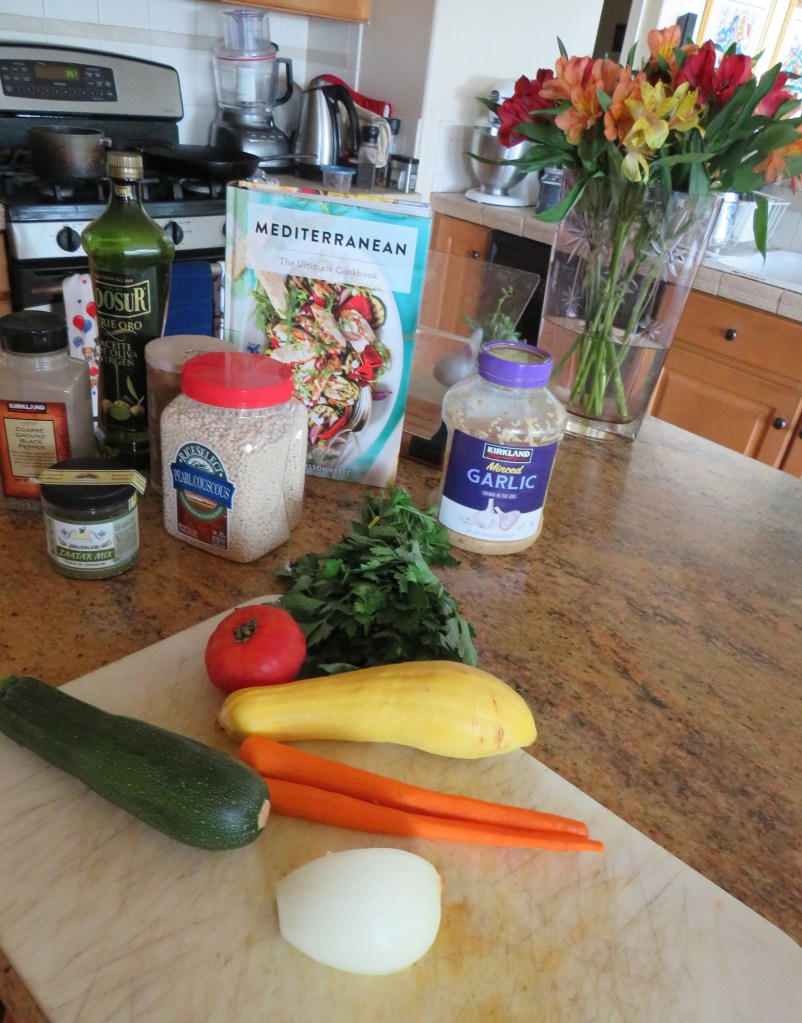
There are several types of couscous available for purchase, the most common being: Moroccan couscous, Golden Couscous, Pearl Couscous and Lebanese couscous. The main difference between pearl or Jerusalem couscous and Moroccan couscous is the size. The grains of Moroccan couscous are much smaller, compared to the pea-size granules in the pearl variety (made memorable by their namesake, but not really a type of couscous). This, of course, affects the preparation and cooking time of each grain. I love couscous and eat it quite often. I use both the pearl and the Moroccan versions and like them both, though I actually have a slight preference for the pearl or Jerusalem couscous. I switch them around depending on what dish I am making. For instance, if I am making tabbouleh, I will use the smaller, Moroccan couscous. For my recipe of couscous with vegetables, I used the pearl couscous.
Couscous with Vegetables
Couscous with seven vegetables is a classic Moroccan dish. It is a celebration of flavors and textures, embodying the warmth and hospitality of Moroccan cuisine. Of course I changed mine up a bit. Would you expect anything different from me???? 🙂
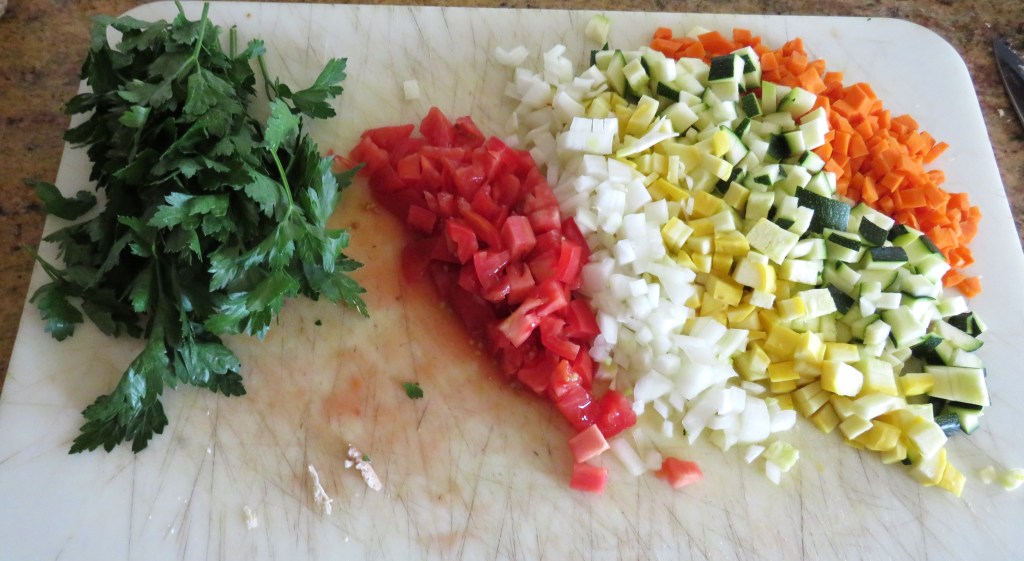
1/2 onion, diced fine
1 TBSP garlic
2 tomatoes, diced fine
1/2 zucchini, diced fine
1/2 yellow squash or crookneck diced fine
1/2 red bell pepper, diced fine
1/2 green bell pepper, diced fine
2-3 carrots, diced fine
1 can chickpeas, drained and rinsed
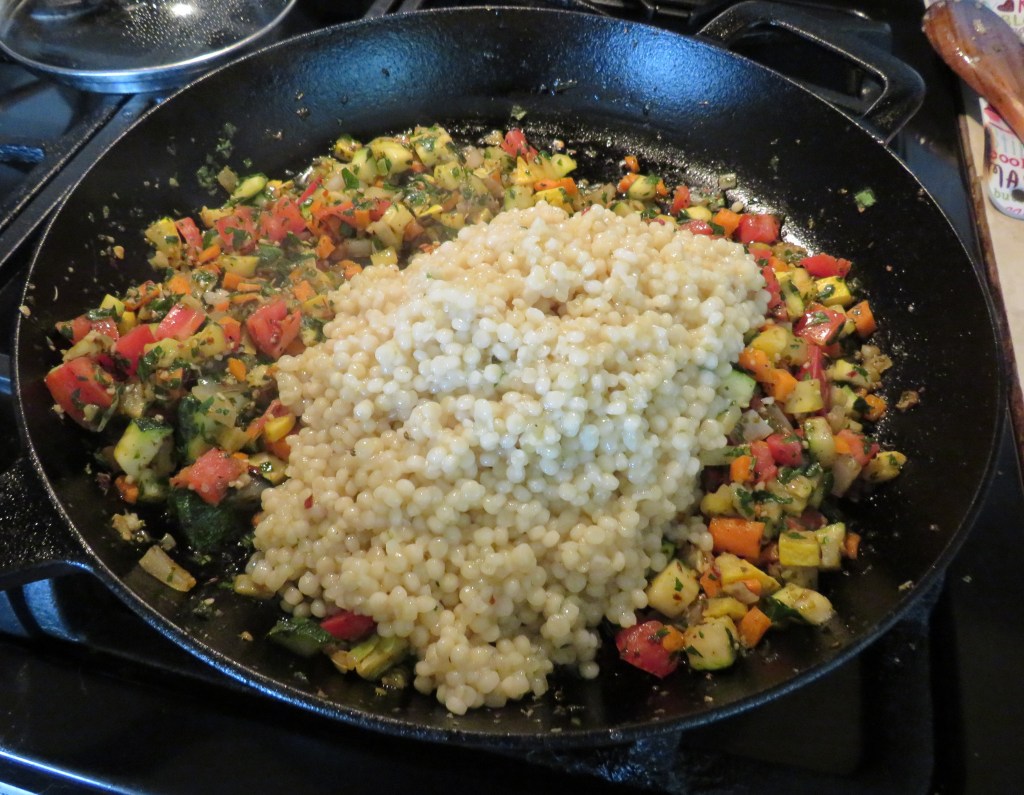
2 cups pearl couscous
salt & pepper to taste
red pepper flakes to taste
2 tsp paprika
1 TBSP Za’atar
chopped parsley
olive oil
Cook the couscous according to the package directions.
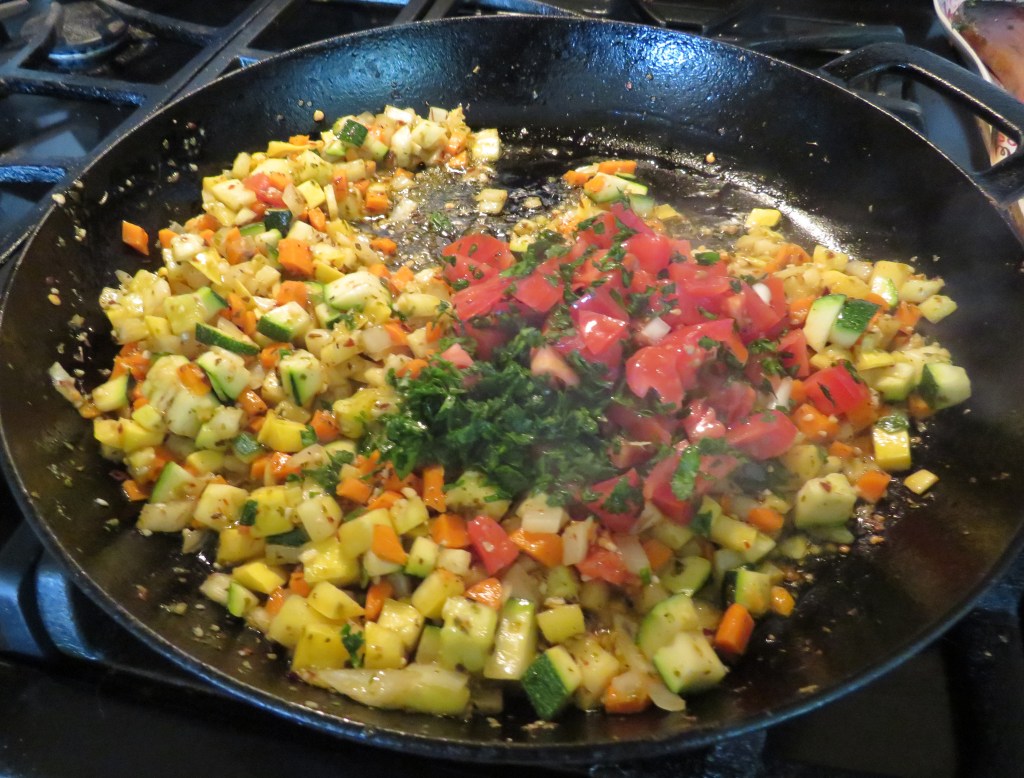
In a large skillet, heat the olive oil, then add all the vegetables except the tomatoes and parsley. Add the seasonings and cook for about 5-7 minutes, or until tender.
Then add the tomatoes, chickpeas and parsley and mix together well. Cook just long enough to heat everything up.
Add the cooked couscous, and thoroughly integrate in with the vegetables.
This dish goes well with anything, but is best with either lamb or chicken. I served it with lamb, pita bread and hummus, to make for a delicious Moroccan meal. Since I cooked lamb, known as the other red meat, I served it all with a delicious red blend too.
I marinated my lamb in a delicious apricot vinaigrette for about 5 hours before grilling it up, so it was full of flavor and very tender.
Have a great day and make everyday great. Stay safe and stay well. ‘Til next time.
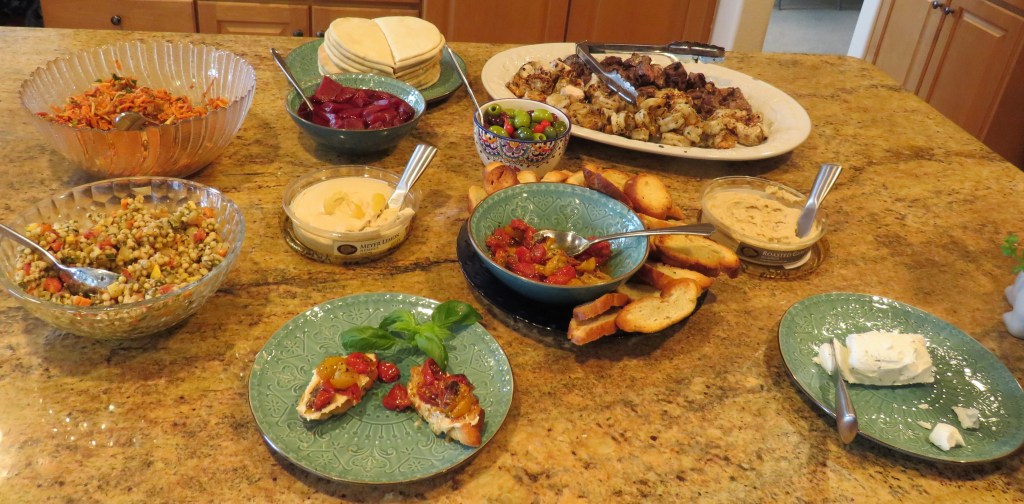
We went a-wining once again, but this time, rather than bringing nibblies to InVINtions, I decided to have everyone come back to my house for dinner instead. There were dishes I was just hungry to make, and it was better to do it as dinner than transportable nibblies.
I had lamb skewers, chicken skewers, shrimp skewers, a couscous and vegetable salad, roasted beets, Moroccan carrot salad, and crositini with lemon hummus and roasted tomatoes. For desserts, just in case I didn’t already have enough, I had fruit and a couple of different kinds of baklava. Everything got rave reviews.
The crostini with roasted tomatoes and lemon hummus was what I had been dying to try ever since I discovered the lemon hummus in the store. I was very curious about it, and ended up LOVING IT! I love hummus anyway, all kinds of hummus, but this might just be my new favorite version of hummus. This recipe for the Crostini with Roasted Tomatoes and Lemon Hummus is a “Jeanne’s” original.
Sorry for the graininess of this photo. My guests were hungry and I was trying to get the right shot, without delaying the meal any longer. What came out was NOT my best photo. But the crostini was DELICIOUS!
Crostini with Roasted Tomatoes and Lemon Hummus
The crostini is just a baguette sliced thin, coated with olive oil on both sides, and baked at 375* F or 191*C for about 20 minutes, or until lightly golden brown. I roasted the tomatoes for about 10 minutes longer, but had them both in the oven at the same time.
I used multi-colored cherry tomatoes. I think using different colored tomatoes made the dish even prettier.
1 pint cherry tomatoes, cut in half
2 TBSP olive oil
coarse salt and fresh ground black pepper to taste
2-3 TBPS Za’atar or to taste
Toss everything together and place on a baking pan lined with parchment paper and roast. That’s it. It doesn’t get much easier than this. 🙂
I’ve heard it said many times, by many professionals. I’ve said it many times myself. Simple is often the best. Fancy is fun, but simple is best.
Have a great day and make everyday great. And remember the K.I.S.S. rule – keep it simple (stupid). Stay safe and stay well. ‘Til next time.
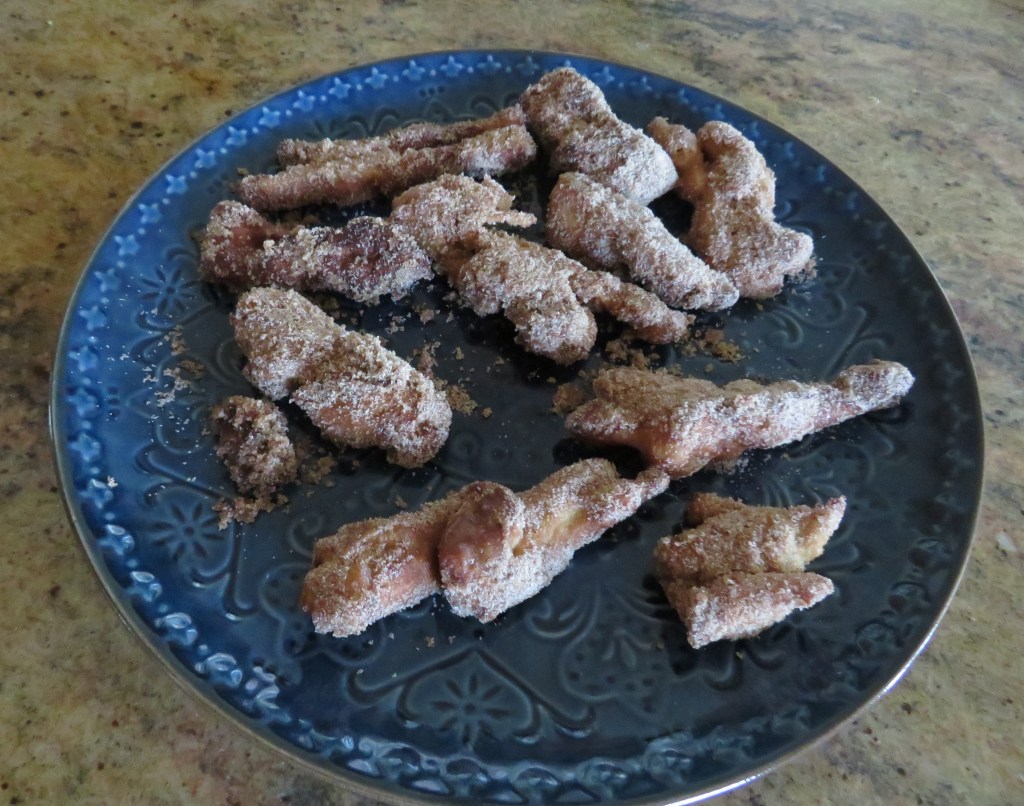
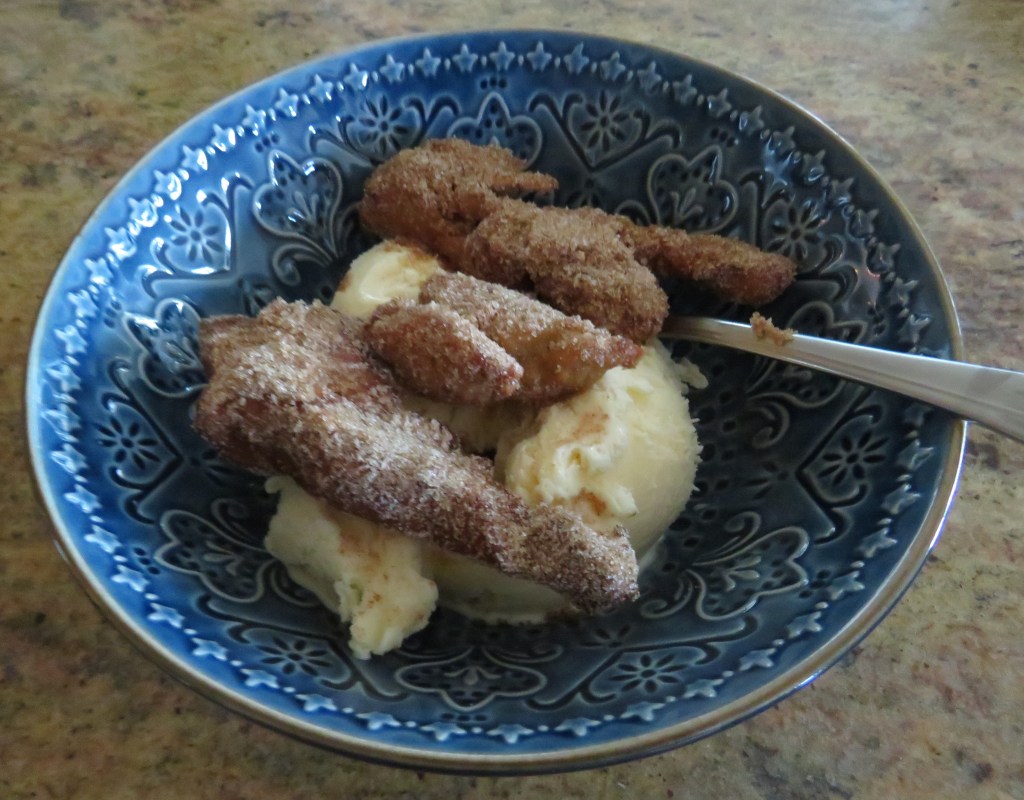
Not only did Noah and I make a Southwestern chicken casserole and guacamole, Southwestern Chicken and Rice but we also made churros, for something sweet to eat after. They weren’t picture perfect, but they sure tasted good, and that is really all that matters. 🙂
They were also good with ice cream, as Larry demonstrated later. Again, I had some extra dough already made, and just remade some more churros later.
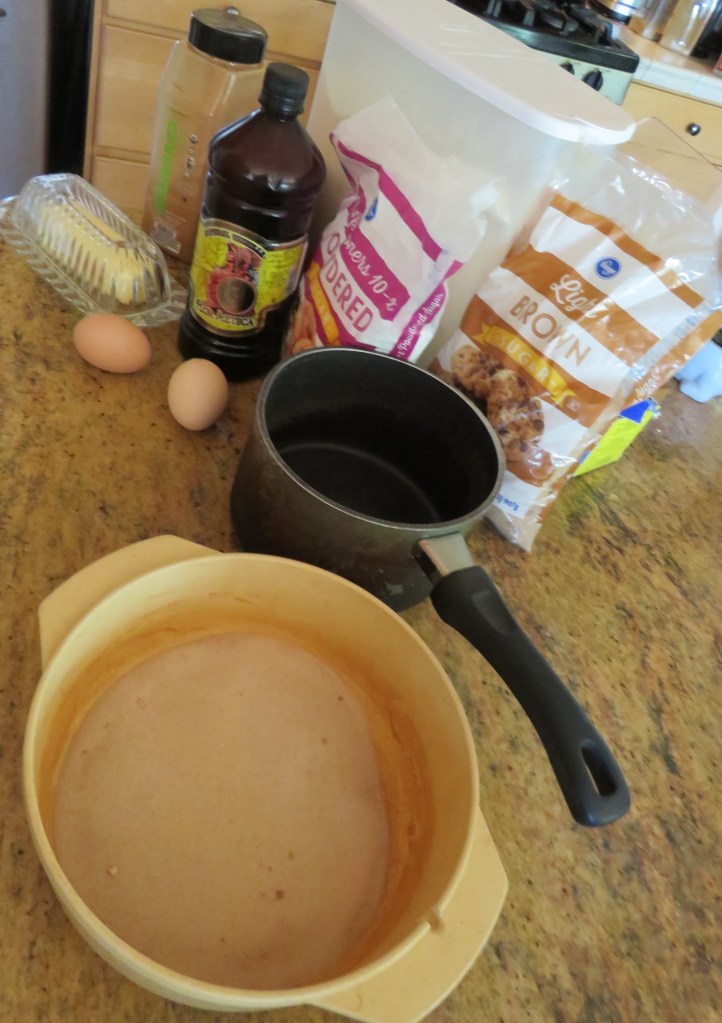
These are very simple to make, with minimal ingredients.
Churros
1 cup water
3 TBSP butter
2 TBSP brown sugar
¼ tsp salt
1 ¼ cups flour
1 tsp cinnamon
1 tsp vanilla
2 eggs
Vegetable oil for frying
Cinnamon sugar for rolling the churros in immediately after removing from the oil.
Combine the flour and cinnamon together and mix well.
Combine the water, butter, brown sugar and salt in a saucepan. Bring to a boil. Immediately add the flour mixture and the vanilla and stir vigorously with a wooden spoon until it all pulls away from the sides of the pan. Let it cool slightly.
Slightly beat the eggs, and add one at a time, beating in between each addition. This is a dough very similar to a pate a choux or éclair dough.
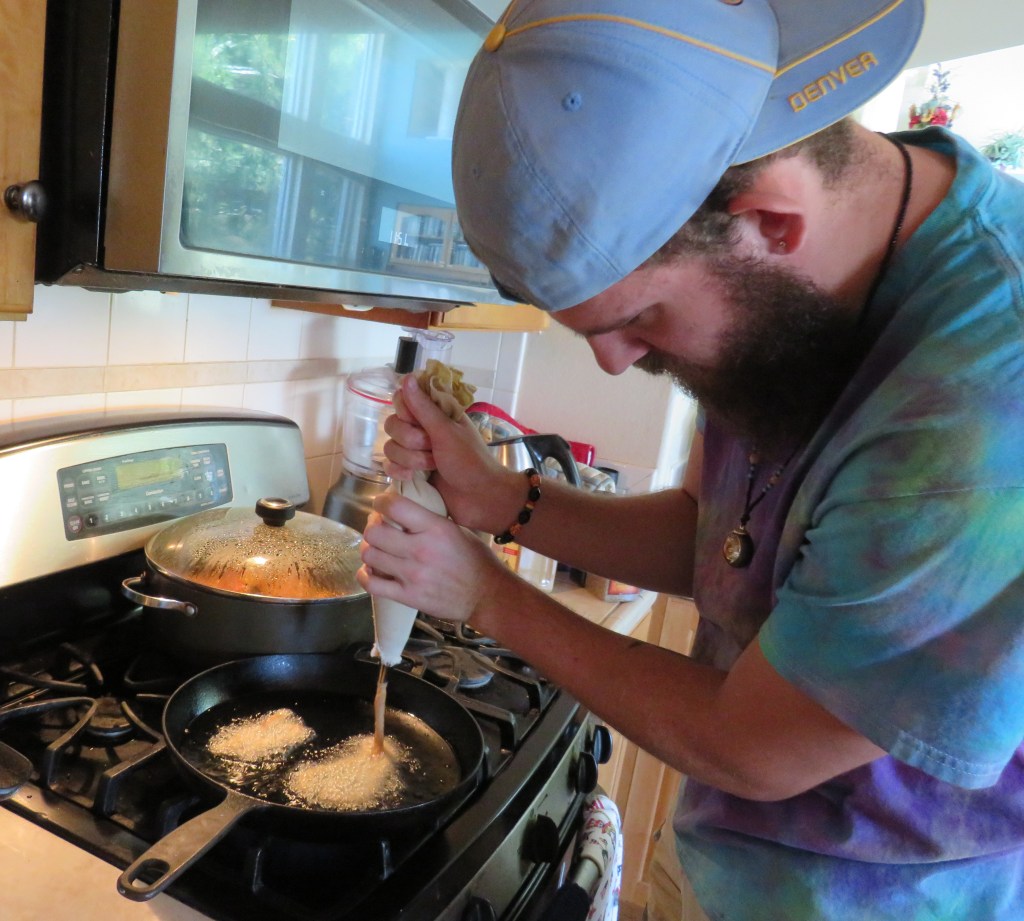
Spoon the dough into a pastry bag with a plain round tip (or no tip).
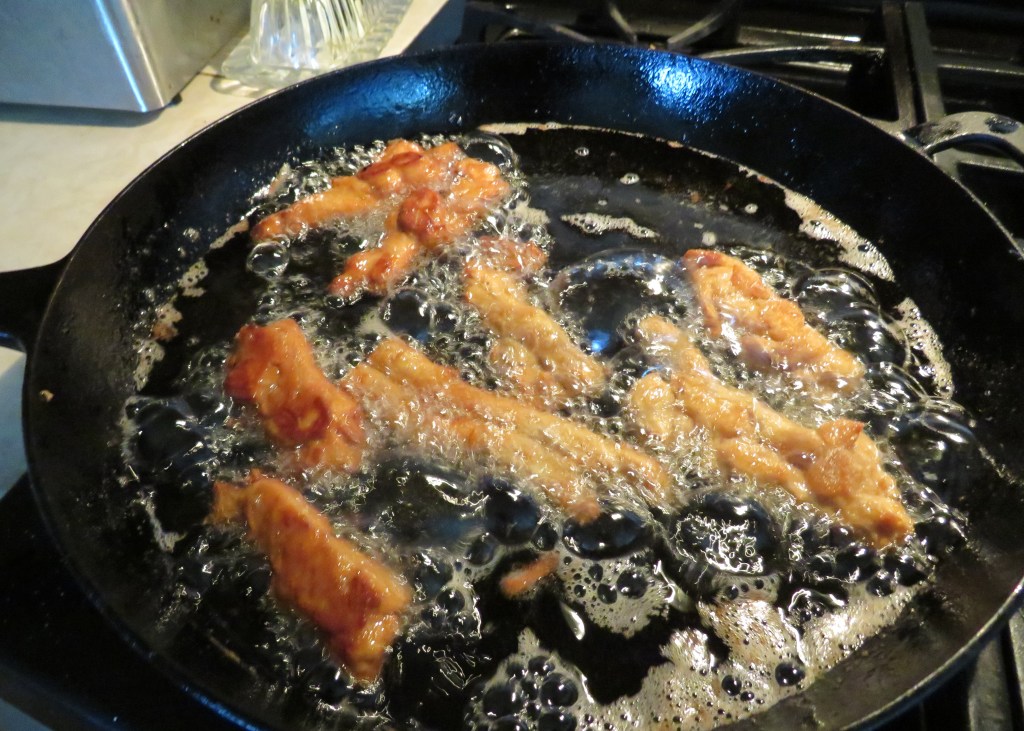
Bring the oil to 350*F, then carefully pipe out the dough into strips, about 5 inches long. Fry the dough for about 2 minutes per side, or until completely golden brown. Do not over crowd the frying pan.
Noah got a little creative with his churros, and that’s perfectly OK. Cooking is all about having fun in the kitchen.
After removing the fried strips, roll into the sugar and cinnamon combination and thoroughly coat the churro.
These are best when eaten hot. So eat immediately, but be careful, they will be hot.
Have a great day and make everyday great. Have fun and be creative. Stay safe and stay well. ‘Til next time.
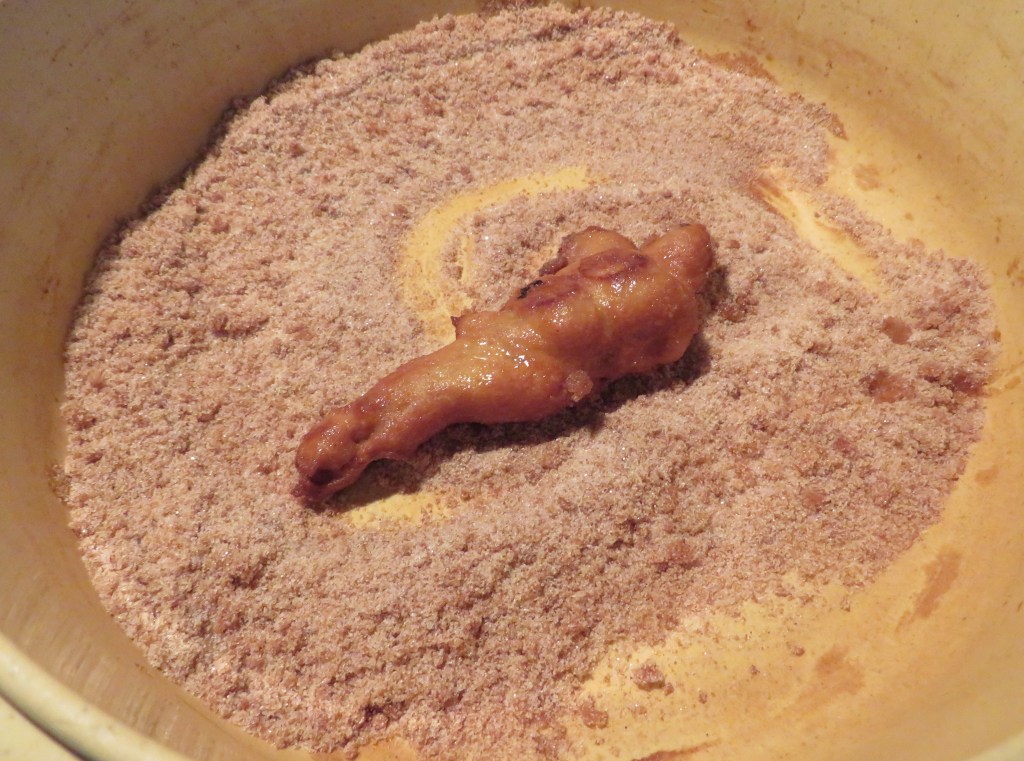
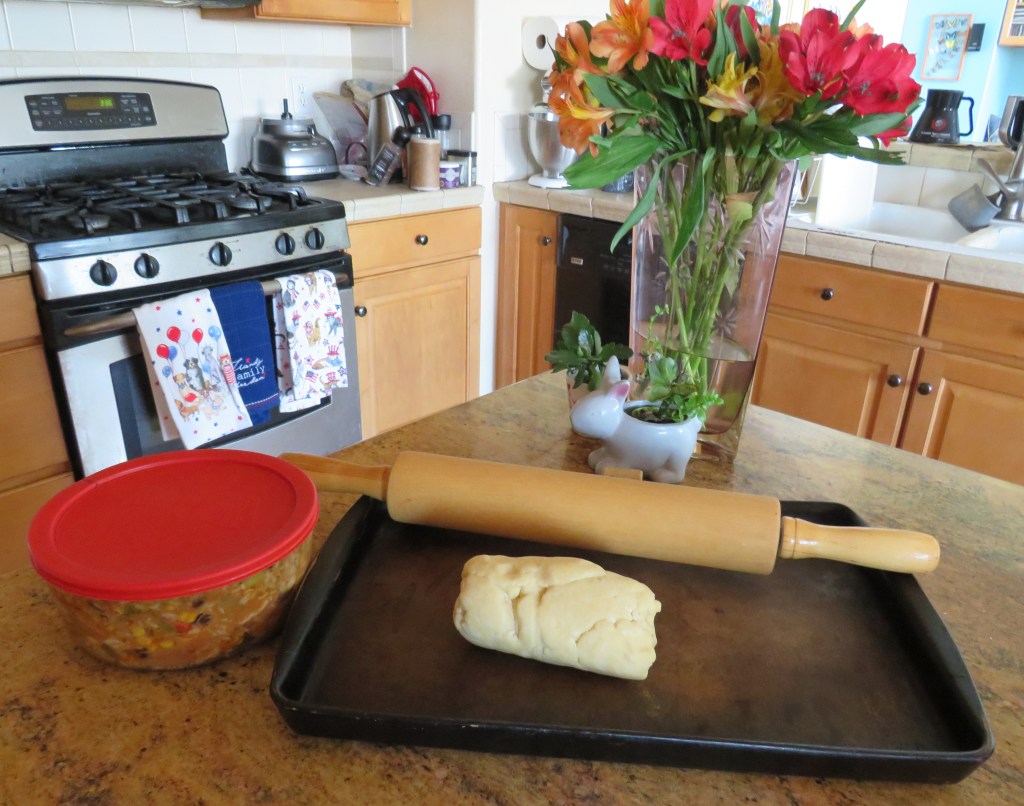
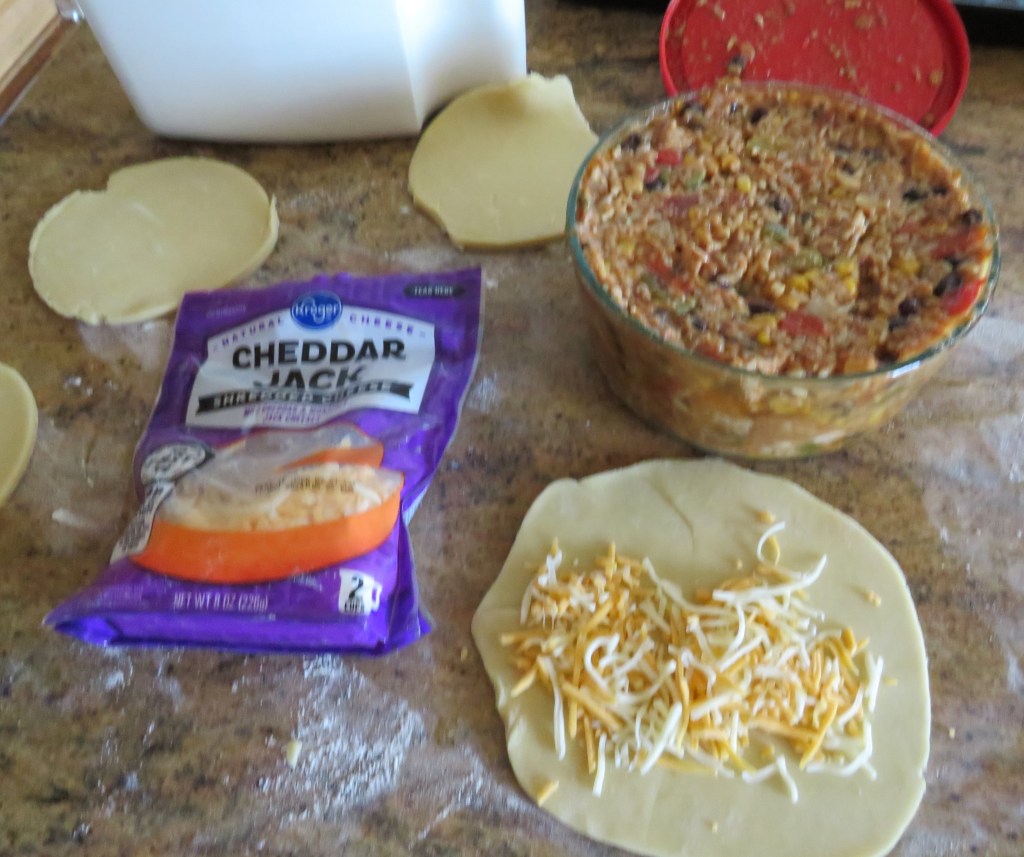
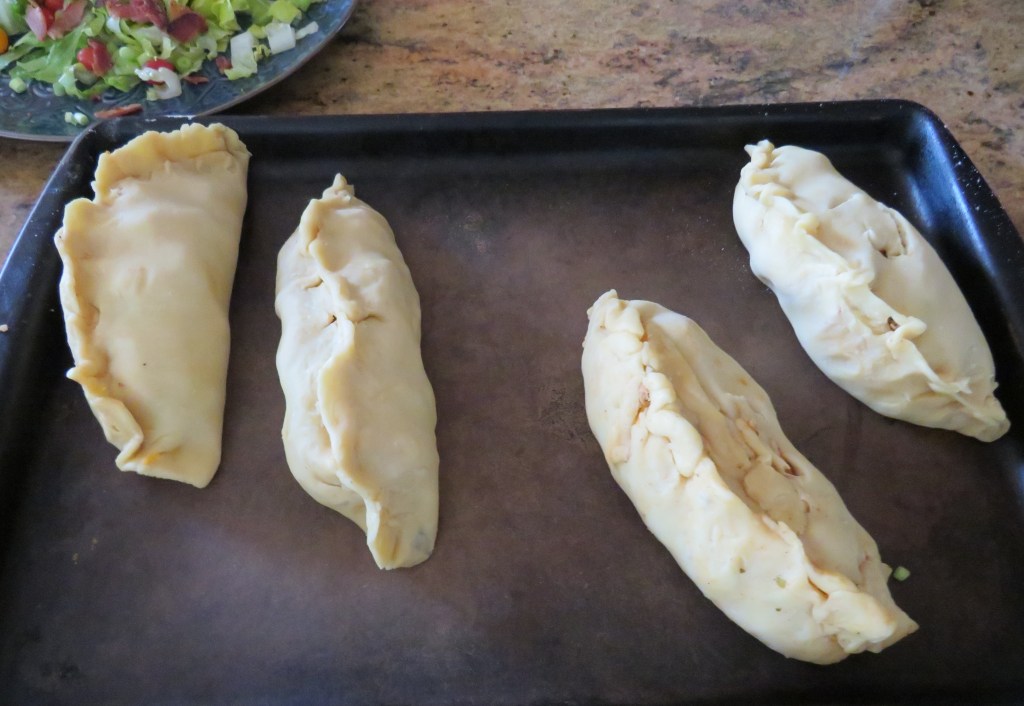
You all know how I LOVE to recreate my leftovers. I did it again with my leftover Southwestern and rice. We ate some as is, but we still have quite a bit. It gets boring eating foods the same way time after time, so I shake things up and change them around. I made some empanadas with some of my leftovers this time.
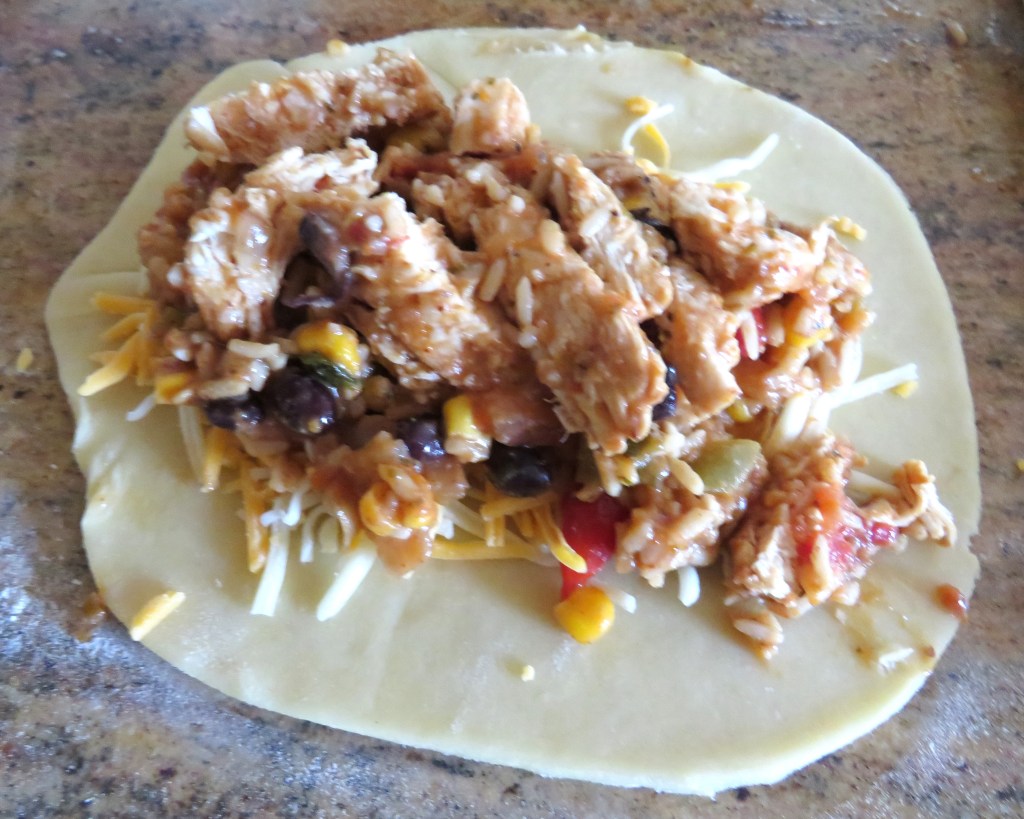
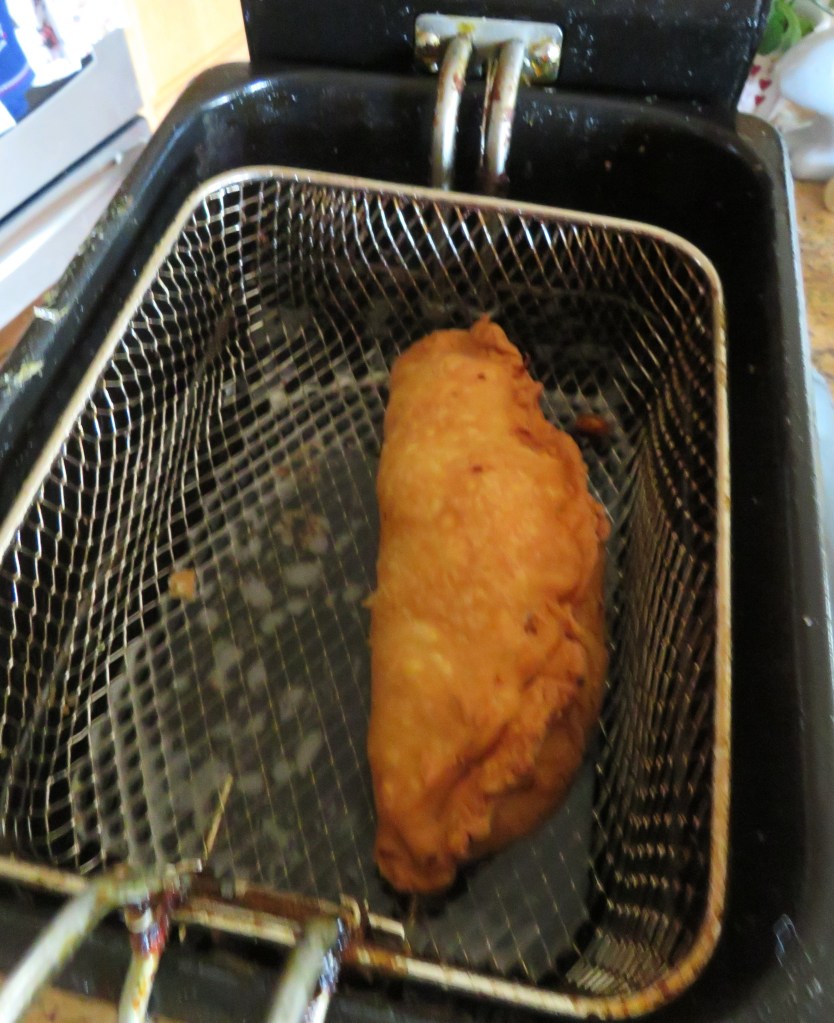
I made my basic dough, added some cheese for Larry and fried them up. For really light and flaky empanadas, roll the dough very thin. Then fill them with what you like. I have a tendency to overfill them, which makes folding them over a bit challenging at times.
The deep fryer is filled with canola oil, and I heated it up to 350* F or 180*C. I fried the empanadas for about 5 minutes, or until they were completely golden and crispy. You can bake or fry empanadas. I have had them both ways, but I like them better fried. I find they just come out so light and flaky and crispy on the outside when fried. Of course if you are trying to cut back on calories, baking them is a healthier option, but we all know FAT TASTES GOOD!!!! 🙂
I did serve them with a big salad, so that make the meal healthier, right?! 🙂
There is ALWAYS many ways to cook your food. As I always say, play with your food. Have fun with it. Be creative. Life is short. Enjoy. Have a great day and make everyday great. Stay safe and stay well. ‘Til next time.
I guess you could say I am in an enviable position. Anyone who writes and/or blogs will definitely tell you we all have those times when we are searching for material to write about. It happens. We all have those lulls. Right now though, I am in the opposite situation. I have SOOOOO much material that it is kind of overwhelming at the moment. But have no fear, I will persevere and we will get through them all, each delicious recipe at a time. 🙂
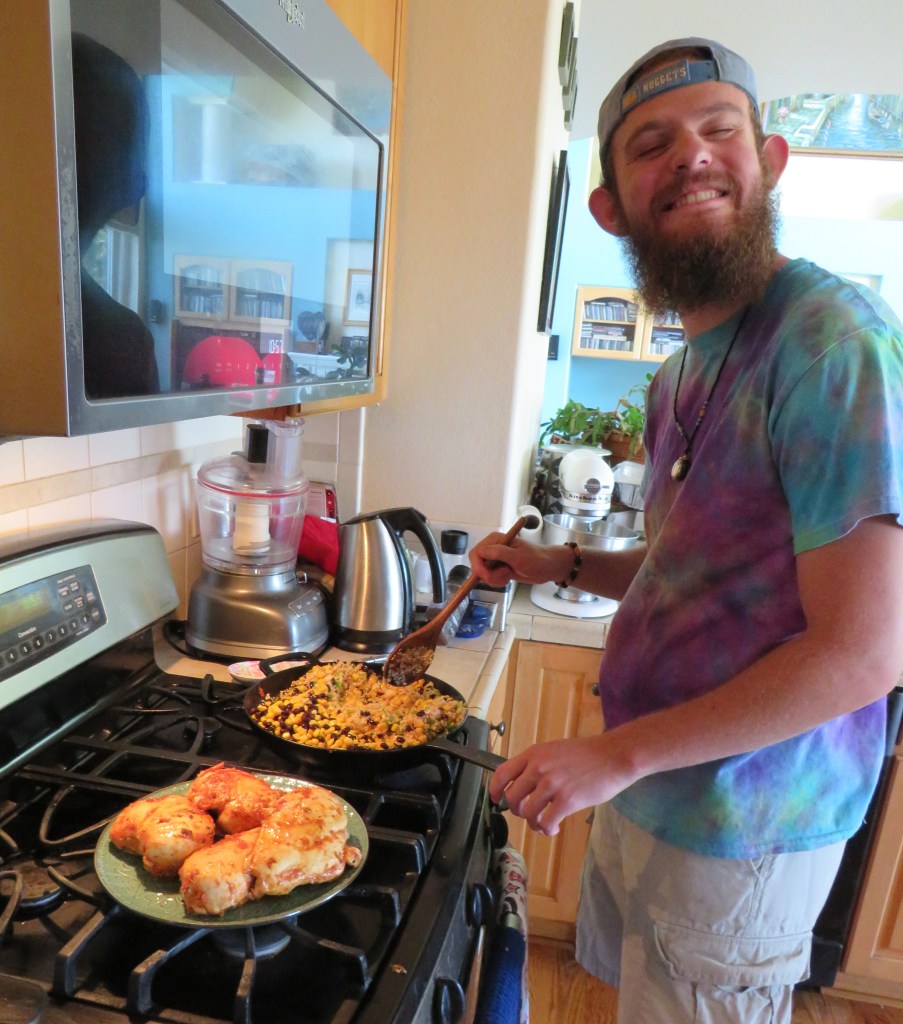
I mentioned I resumed my cooking classes again with Noah. His mom and I worked out a good solution for all of us. I see Noah every Monday now. We cook up all kinds of things, and as before, he loves to cook, and he loves to eat. When we cook, I purchase all the ingredients, teach him how to prepare what we are making for the day day, then let him take home what he makes. This time, however, we made A LOT, so I kept some for our dinner as well.
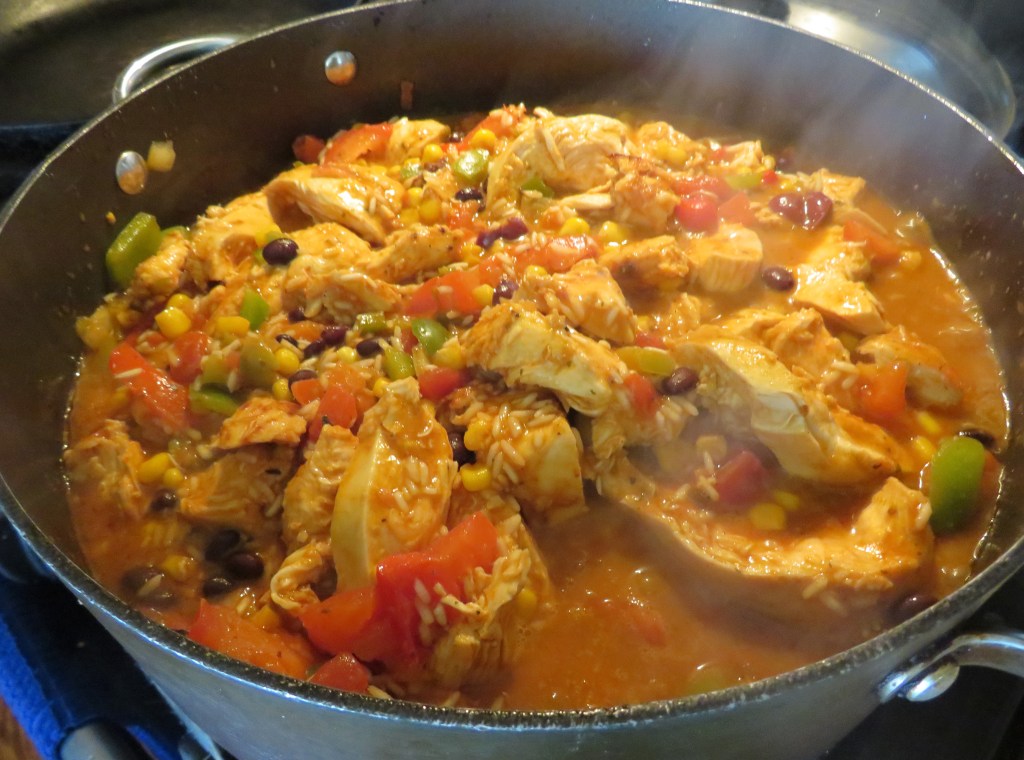
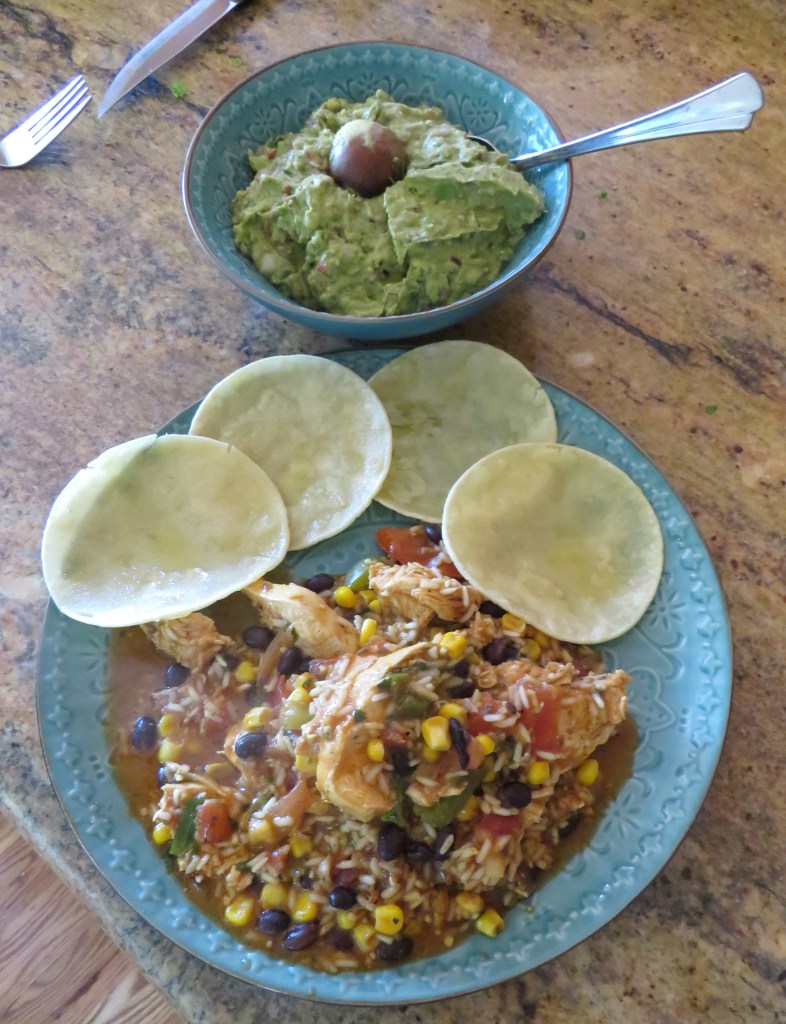
One of the dishes we prepared was Southwestern chicken and rice. It is kind of a Southwestern version of jambalaya. We also made some guacamole and churros.
I always send the recipes of what we make to Noah’s mom too, so she can print them up for Noah to use at a later time.
Southwestern Chicken & Rice
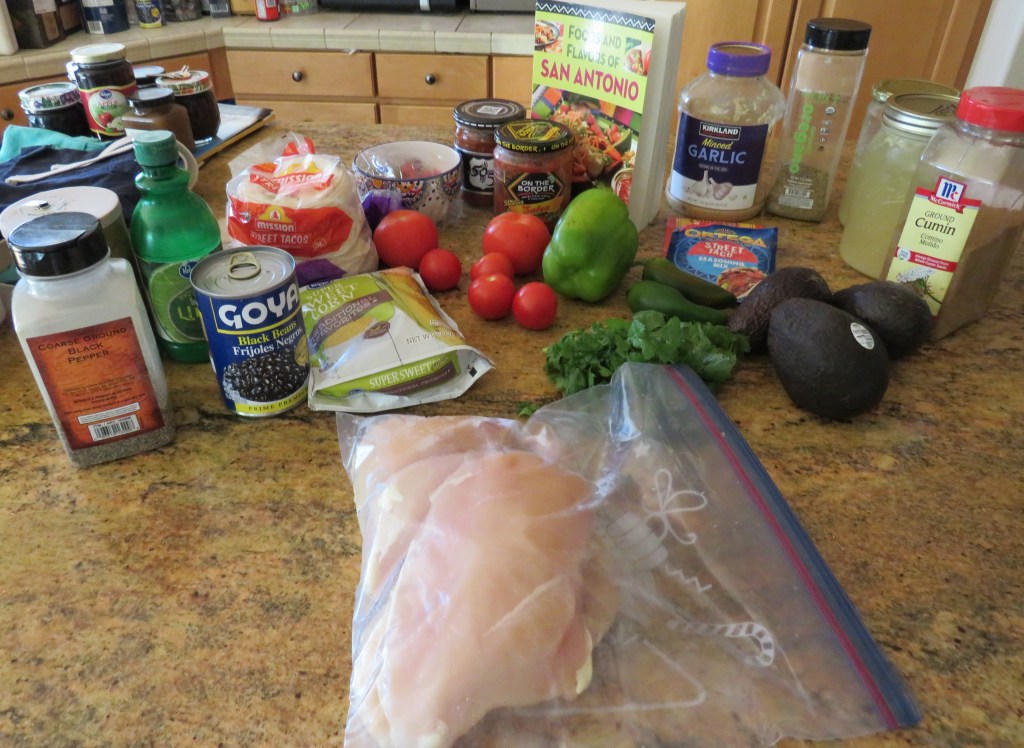
3 large chicken breasts
1 package taco seasoning
1 onion, diced
1 green bell pepper, diced
1 red bell pepper, diced
1 TBSP garlic
1 small package frozen corn, thawed
1 can black beans, drained and rinsed
4 tomatoes, diced
1 jar salsa
2 cups rice
4 cups chicken broth
1 tsp dried oregano
1 tsp cumin
Salt & pepper to taste
Cilantro
Green onions, sliced thin
Olive oil
Marinate the chicken breasts in a large plastic bag with the salsa for at least 30 minutes.
Get a large skillet very hot, add the olive oil, then the chicken breasts. Save the salsa for later. Cook for about 4-5 minutes per side, or just enough to lightly brown them. Remove the chicken and set aside. Cut the chicken into large strips.
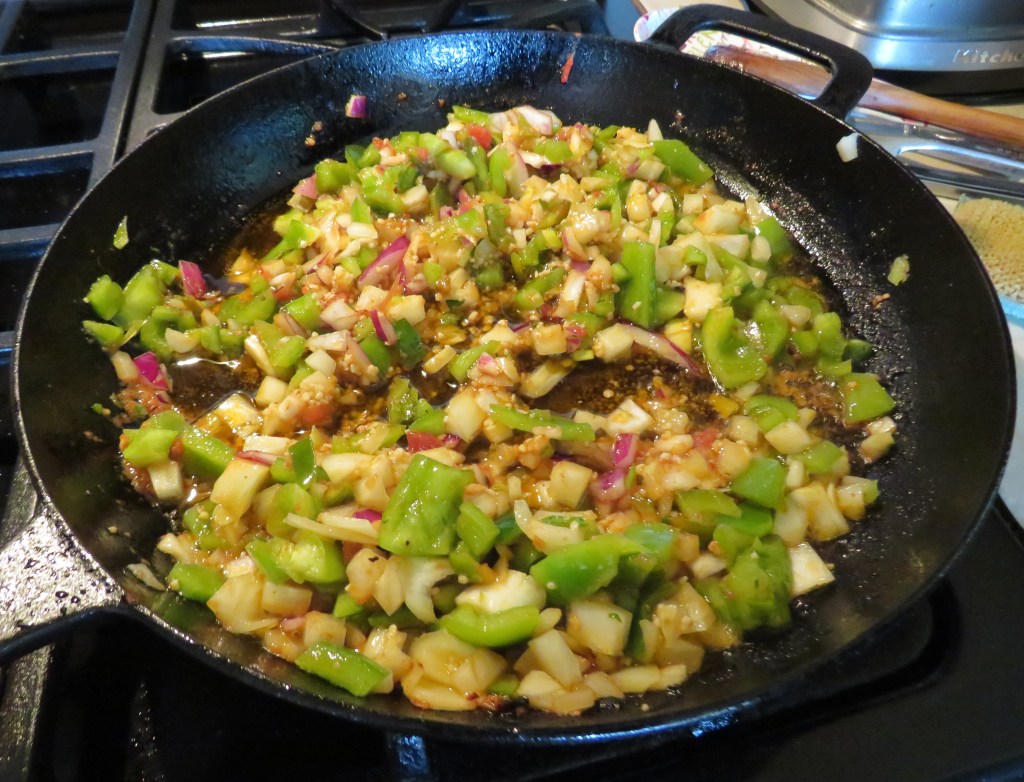
Saute the peppers, corn, onion, and garlic for about 3-5 minutes, stirring frequently.
Add the rice and sauté for an additional 2-3 minutes, then add the salsa, chicken broth, tomatoes and seasonings, and about half of the chopped cilantro.
Add the tomatoes, salsa and chicken broth. Mix together thoroughly, then place the chicken strips on top of the mixture. Bring to a boil, then reduce the heat to a simmer and continue to cook for about 20-30 minutes, or until most of the liquid is absorbed and the rice is cooked. Make sure to stir frequently.
Add the green onions and cilantro on top before serving. Noah ate and enjoyed every bit of it too. He said he “loved it”. WHOOOOOO HOOOOOOO!!!! Always a win/win.
Noah is a lot of fun to cook with. He is so enthusiastic and is willing to try just about everything. It’s fun cooking with adventurous people who love food. 🙂
Have a great day and make everyday great. Stay safe and stay well. And as Wolfgang Puck would say, “Live, love, eat”. ‘Til next time.
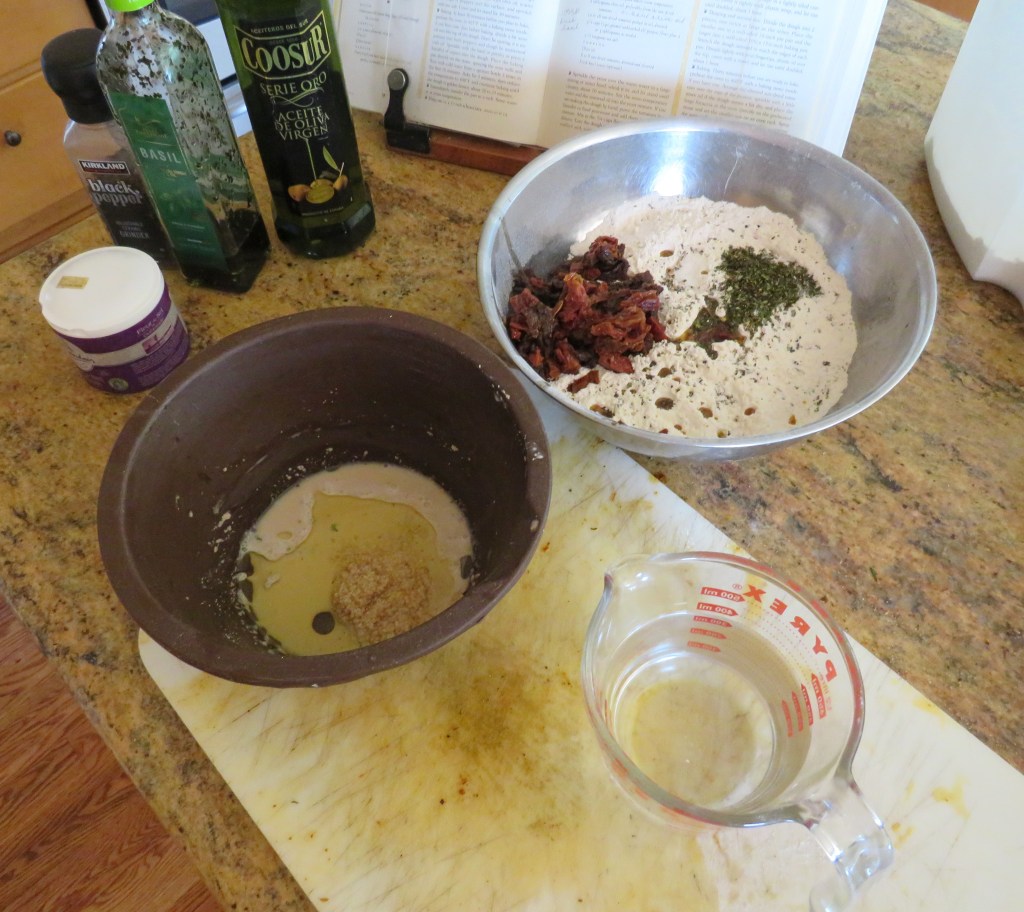
When I made my zucchini puffs, Baked Zucchini Puffs I also made some sun-dried tomato, garlic and herb focaccia to go with it. I almost always take a charcuterie tray when we go wining, because it is very easy to make and goes very well with wines of all kinds. But I was in the mood for something different.
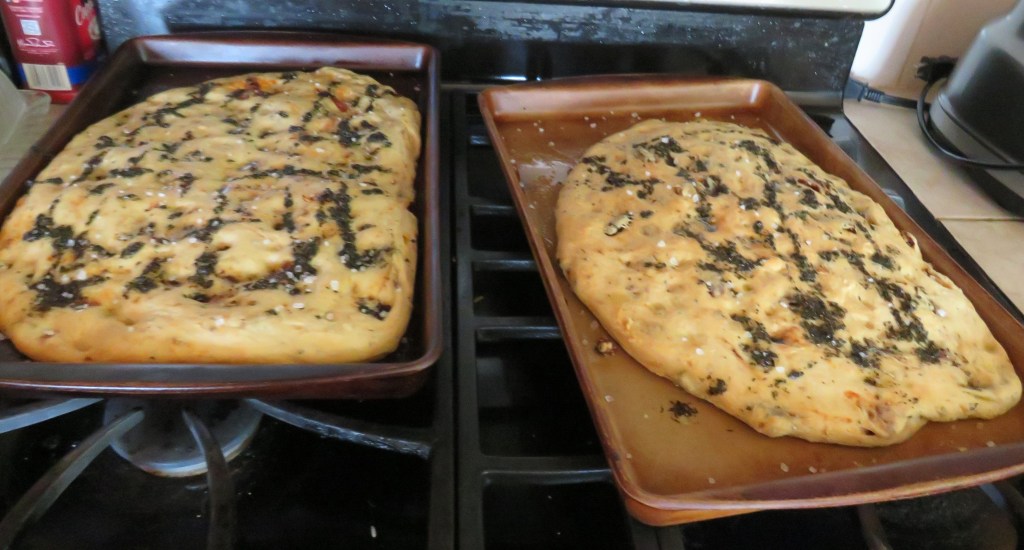
After the focaccia came out of the oven, I drizzled some basil olive oil on top too, to give it even more flavor and texture.
Sun-dried Tomato, Garlic and Herb Focaccia
You would think I was Italian because of my LOVE for garlic and how I love to feed people. I use garlic for and in EVERYTHING. But surprise! No Italian in me, at least not in this lifetime. Maybe in a past life. 🙂
Some focaccias call for a starter dough, where others do not. This particular recipe did not. As usual, I used my recipe as a guide, and then followed my muse and created my own thing.
2 1/4 tsp dry active yeast
1/4 cup warm water
1 3/4 cup +1 TBSP warm water
2 TBSP olive oil or basil olive oil
1 1/2 cups chopped sun-dried tomatoes in oil
5 1/4 cups flour + more to knead the dough
2 1/4 tsp coarse salt + more to sprinkle on top
1 TBSP fresh rosemary, chopped fine
1 TBSP garlic
Combine the flour, salt, rosemary, sun-dried tomatoes and garlic together and mix well.
Mix the yeast with 1/4 cup of warm water and let it for about 10 minutes, or until it becomes frothy.
Combine the rest of the water, olive oil or basil olive oil together and whisk until well blended. Add to the yeast and water combination. Make a well in the center of the flour mixture and add the liquid, mixing it all together from the center out.
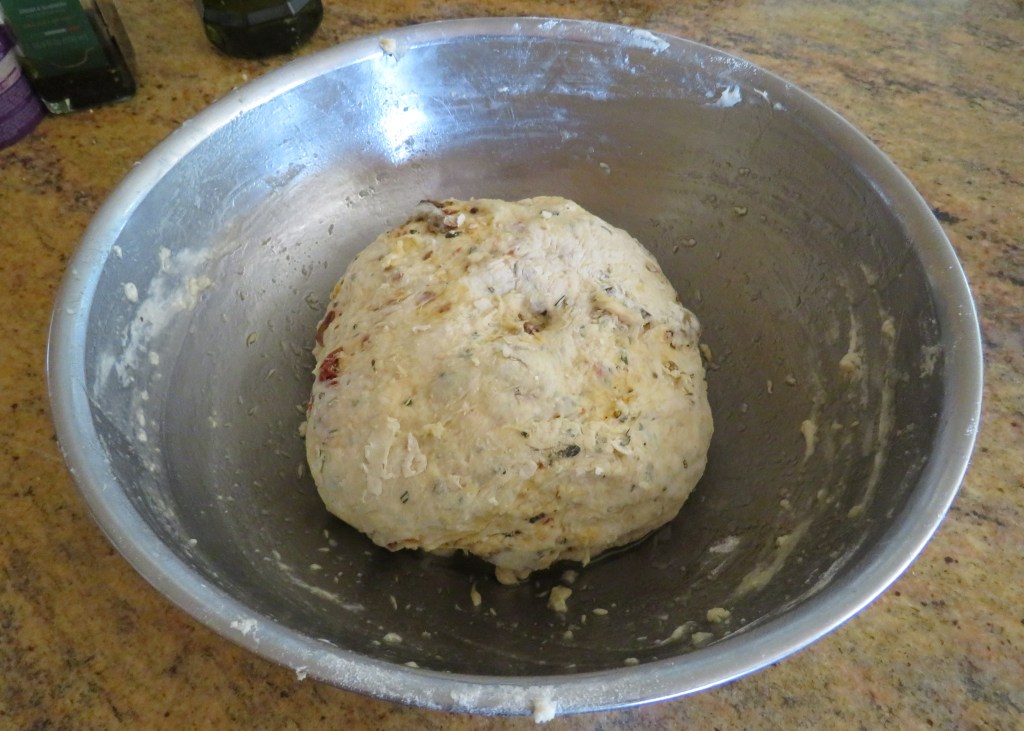
Knead the dough for about 7-10 minutes or until it forms into a soft ball. Oil a large bowl with olive oil or basil olive oil, add the dough ball and cover to let rise for about an hour, or until it doubles in size.
When the dough has doubled, cut it in half. Oil two baking sheets and place one loaf on each prepared baking sheet. Slowly stretch the dough with your hands to cover as much of the prepared baking pans as possible.
When the dough is stretched out on the baking pans, cover it and let it rise again for about another hour.
Preheat the oven to 400* F or 205*C.
Dimple the dough with your finger tips. Drizzle some more olive or basil olive oil on top, sprinkle some of the coarse salt all around the top, and place in the oven. Spray the oven with a spritz of water about three times within the first ten minutes of baking. This is to soften the crust and allows for the dough to bake more evenly while also allowing it to form a slightly crispy crust and keeps the dough moist. Bake for about 20-25 minutes or until the focaccia is lightly golden brown. Drizzle more oil on top after removing it from the oven, and let cool for about 5-10 minutes before slicing.
I cut mine into fingers. Serve warm or at room temperature. This is very tasty and goes with everything. Or you can just munch on it as it is too. I promise you are going to love it. 🙂
Wrap the leftover in plastic or foil and either refrigerate or freeze for later.
Have a great day and make everyday great. Stay safe and stay well. ‘Til next time.
This is the last of my recent travel series. Don’t worry, there will be plenty more travels coming soon, meaning lots more fun and adventures as well. 🙂
When we were in Kansas, we both stayed with our Nephew Jared and his family the first night, then Larry went to Hays to visit with his siblings and help set up for the party. I stayed over another night.
On the first night, there was a little local town BBQ taking place in Pratt, and we all went and enjoyed the festivities. There was so much good food, and a little local church band was playing. There was even a bubble machine all the kids had fun with too.
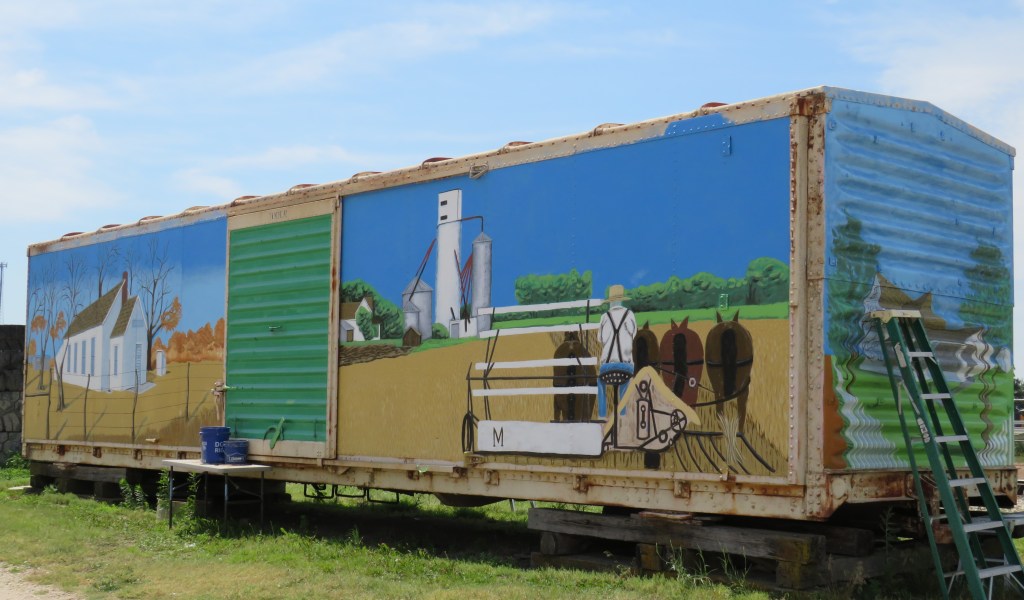
Lexi and I are very close, so it gave us time to play and take in more sights. Then we both left for Hays on Sunday, for the party. Lexi took me all around, showing me different places and different things. One of the places we went was to the little town of Yoder, which is an Amish town. When we got there, things were closing up for the day, so we didn’t get to see as much as we were hoping to.
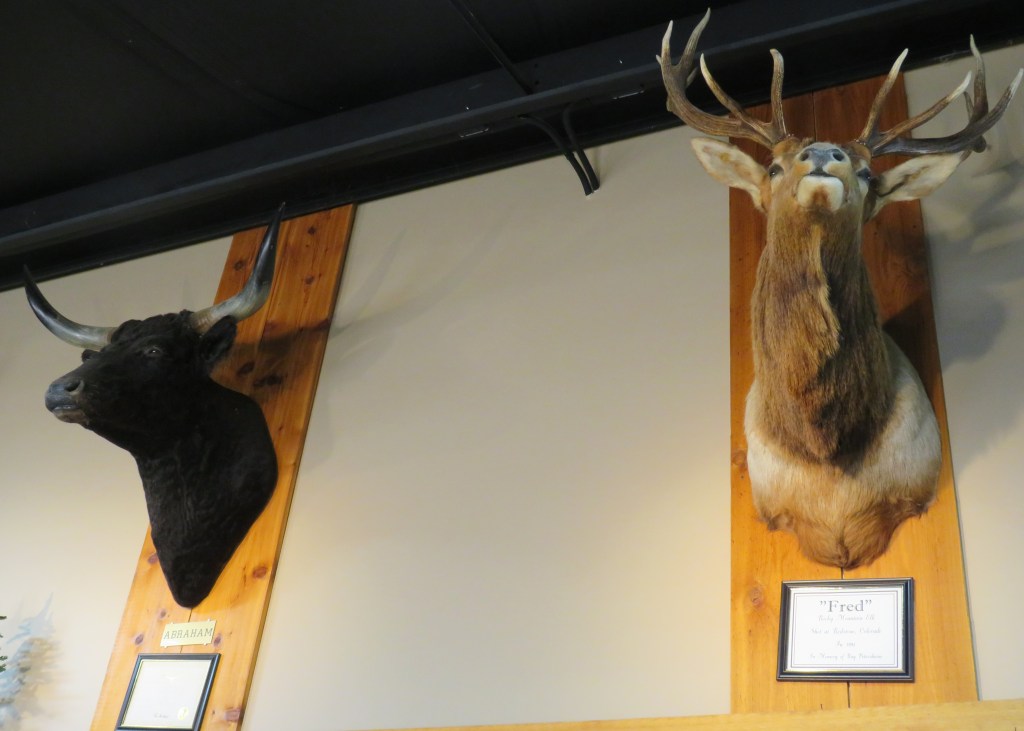
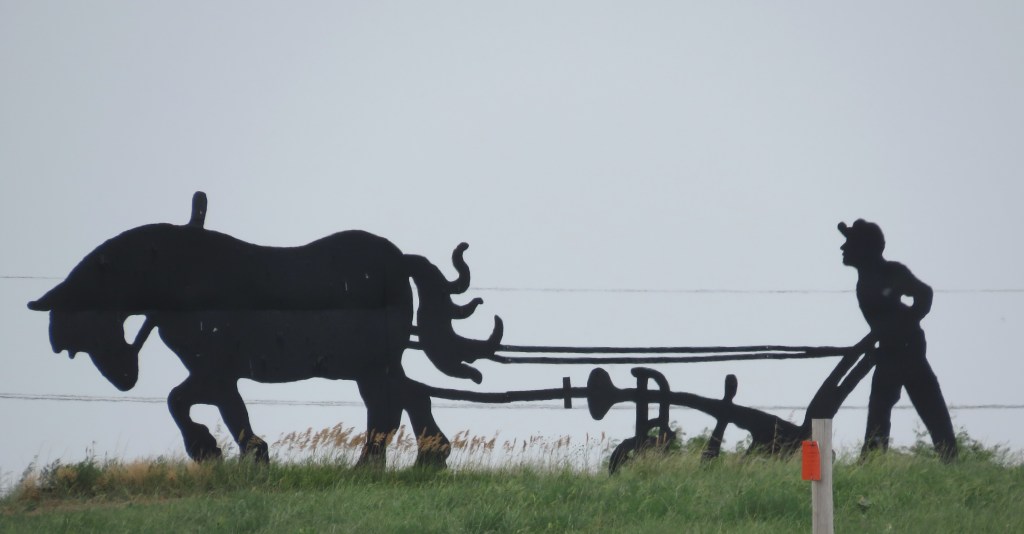
These curiosities caught my eye.
All of these were named.
This one really made me laugh. Larry’s brother Randy has a close friend named Gordon, who is also a friend of ours. We were going to see him at Ollie’s party. I had to show him a picture of this guy , also named Gordon. 🙂 He too got a kick out of it.
We also went to visit with Lexi’s friend, whose dog had puppies. How could we resist playing with adorable puppies, right?! But we couldn’t stay long. There was a bad storm brewing and we were trying to avoid it. But we got stuck right in the eye of the storm instead. It was a BAD storm too. It was like a tornado, with the heavy winds and the heavy rains. We pulled over and got under some protection from the wind and rain, only to see trees toppling in front of us, and trucks and trailers being overturned and telephone poles crashing down. It was a little scary, to say the least, but we pulled through, no worse for the wear. We made it back home safe and sound.
Once we got back to Jared and Lexi’s house, we stayed in for the rest of the day. Lexi and I got creative and started making some snowmen. I have a feeling these will find their way to loved ones as part of their Christmas gif this year. 🙂
I have seen most of Kansas now, and the western and southern parts are almost all farmland. Farming, agriculture, cattle ranching and the oil industry are the major industries in Kansas.
Here are some of the other fun things we saw during our Kansas travels. Across the street from where Ollie’s party was taking place, there was a very creative gentleman displaying his fun and whimsical handmade crafts. He was so friendly, and invited us in to show us a lot of his other creations too, including an operating train he build to take kids out for a ride.
After the party and all the visiting, there were more stops along the way, again, going to places we have never been to before, seeing things we had never seen before. Once place was Nicodemus.
Not only is Nicodemus famous in the bible, and one of our cat’s names, but it is also a pretty important place in Kansas and U.S. history as well. (We actually named our cat after the town of Nicodemus. We name all of our animals after names of places from their place of origin. Nicodemus or Nicky as we call her, and her brother Otis, are both Kansas kitties, both named after Kansas towns. We visited Otis too, but there wasn’t much there).
Nicodemus, Kansas was created after the Civil War. It was the first town that was created as an all Black town, where the African Americans and freed slaves could go and prosper. Formerly enslaved African Americans left Kentucky at the end of the post-Civil War Reconstruction period to experience freedom in the “Promised Land” of Kansas.
Nicodemus represents the involvement of African Americans in the westward expansion and settlement of the Great Plains. It is the oldest and only remaining Black settlement west of the Mississippi River. An all-black outpost on the frontier, this “unsettled” land offered a chance for black farmers and their families to start anew. Today, a few people and buildings remain from the original township, a testament to the resolve of the people of Nicodemus to build a new life on the prairie. Between the end of the Civil War and the 1880’s, many courageous black settlers sought better lives, better land, and better opportunities in the heartland. Despite being much smaller today than it was one hundred years ago, Nicodemus remains an enduring monument to African American westward migration. Desperately seeking opportunities that simply did not exist in the South, former slaves moved west with hope. For some, the long march ended in newly platted Nicodemus, Kansas. They built houses, businesses, clubs, churches, and schools and were able to participate in political and commercial life in ways previously denied to them.
The uniform of the Buffalo Soldiers from the Union Army during the Civil War.
Other sights we saw along the way. Not only is Kansas a farming, agricultural and oil state, but they are also religious and support their military.
But don’t be fooled. Kansas also has its fair share of eclectics too. 🙂 Kansas, just like anywhere else, Kansas is a mix of all kinds of people, with many different influences.
Hope you had fun on our travels too. There is always something new to see and something new to learn. Never stop being adventurous or curious. Learn something new everyday. Have a great day and make everyday great. Stay safe and stay well. ‘Til next time.
I know I have been busy writing about all of our recent travels and adventures. But I have also been busy cooking too. I am always in the kitchen cooking. I even resumed my cooking classes with Noah. We revamped it and changed things around a bit, but we’re still having fun together, cooking up all kinds of good stuff. I have lots of good food ideas for you too.
One of the things I recently made were some baked zucchini puffs. They were part of our nibblie try for some of our wine adventures. I paired them with some sun-dried tomato and garlic focaccia, cheese, olives, and an antipasto try. We met Bruce and Julia http://retirementrvdream.wordpress.com/ at InVintions. Julia brought some sausage bites and some bacon wrapped dates too. We never go hungry. 🙂 We all ate very well and had a great tine together, as we always do.
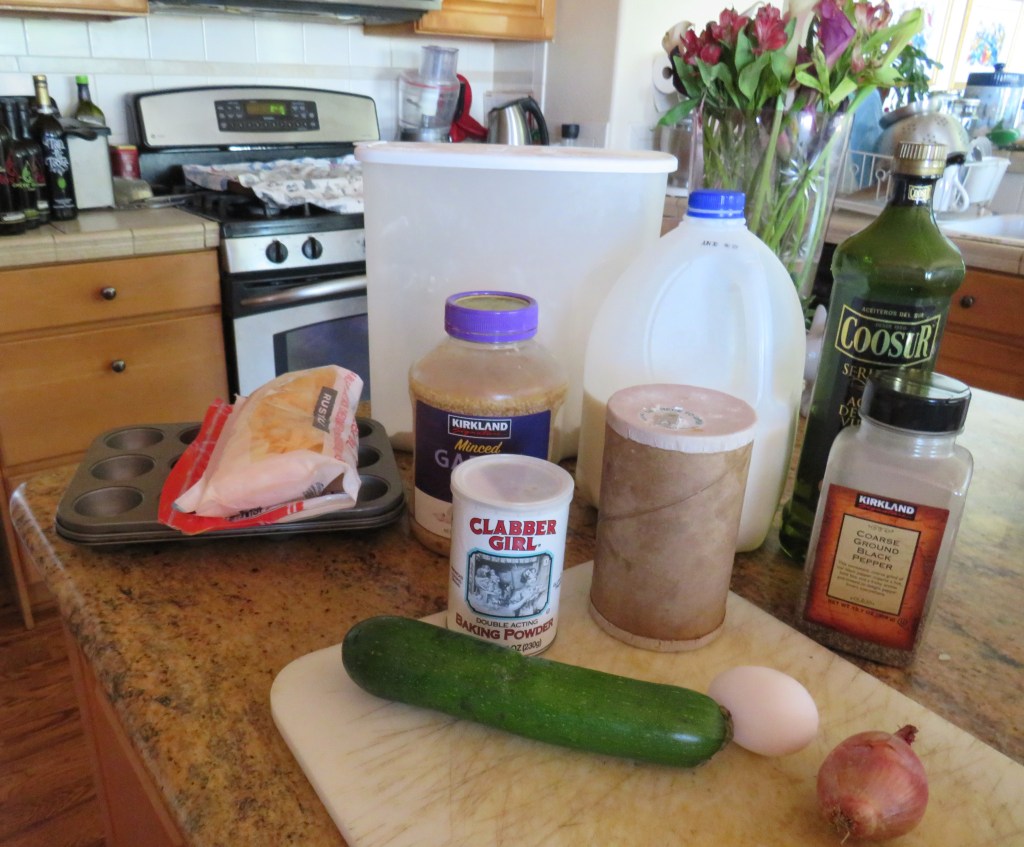
Zucchini Puffs
Preheat the oven to 350*F or 180*C.
Spray cooking spray into some mini muffin pans.
2 cups flour
1 tsp baking powder
1 egg
2 TBSP olive oil
1 1/4 cups milk
salt & pepper to taste
1 cup grated cheese of your choice
1 zucchini, shredded
1 TBSP garlic
1 shallot, chopped fine
chopped parsley
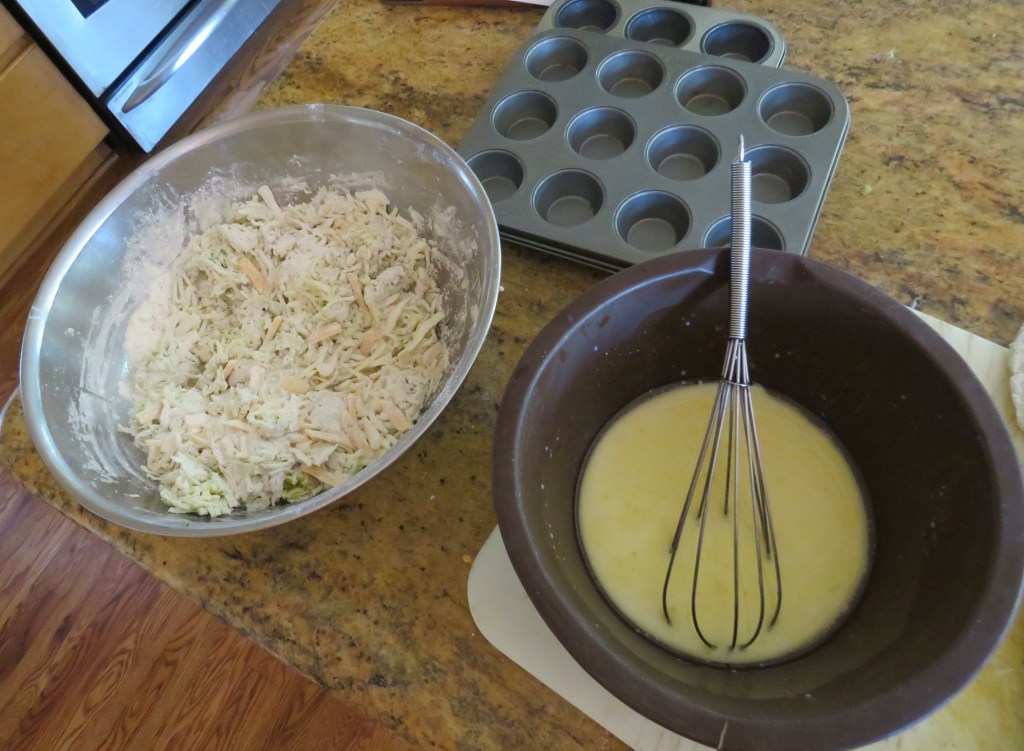
Mix the dry ingredients, the zucchini and cheese together and set aside. Whisk the egg, milk and olive oil together. then add too the flour and zucchini mixture. Fold in until everything is moist and blended together.
Fill the mini muffin cups with the batter and bake for about 20-30 minutes, or until they are golden brown and puffed up. Allow them to cool slightly, then pop them out of the pan. Serve warm and enjoy.
These were a big hit, and are good for any time and any occasion. They are also super easy to make. They are so light and fluffy, I bet you can’t stop at just one either. 🙂
These last few weeks have been super busy. As soon as we got home from, both our big vacation and then a smaller vacation to Hays, KS, we just hit the ground running. There was SOOOOO MUCH going on. But we still had to eat, which means I have been cooking all along. I was trying to give you my trip information and details. I never want to overwhelm you or bore you with too many posts. So I try to spread things out a bit. Have no fear though, I have plenty to share. There are plenty of good things, both from my kitchen and other things as well, coming your way. 🙂
Have a great day and make everyday great. Stay safe and stay well. ‘Til next time.