Steak Pitas with Cucumber-Tomato-Yogurt Sauce

These last few days have been real scorchers, and today is expected to be even worse.  So again, I want to minimalize my time in the kitchen and at the stove.  I put my thinking cap on to come with with a tasty, easy-peasy dish that would also be cool and refreshing on this blistering hot day.  Steak pita sandwiches was my thought for the day.  Besides, I had left over Romanian garlic steak that needed to be used, so this was a perfect choice.  I made some garlic fries and opened a bottle of a smooth red blend, and dinner was served.  I think my husband put to much sauce on his pita, but that’s the way he likes it, so who am I to say any different. And I have to admit, I like my food pretty saucy as well.  Other than frying the French fries in our mini- deep fryer and heating up the meat in the microwave, there was no additional cooking at all today, which is just perfect when the temperature soars and the mercury rises too high.   We added  garlic French fries, and voila, a simple, tasty, easy-peasy meal was served.  We love garlic French fries.  They are super easy to make as well.  Once they are fried, toss them together with minced garlic, salt and parsley while they are still hot.  Make them as garlicky as you dare.  These were an inspiration from the Gott’s restaurants found in Northern California.

IMG_1679


Making the cucumber-tomato yogurt sauce.

IMG_1672

IMG_1674

Assembling the pita sandwiches.

IMG_1676

These pitas were meant to be stuffed.  There are different kinds of pita breads, so make sure you purchase the “pocket pitas”.  Cut them in half, and fill them with your filling of choice.  I used red leaf lettuce, but you can use whatever type of lettuce you like.  Our pitas were stuffed with the red leaf lettuce, sliced tomatoes, red onions sliced very thin, the steak that I cut into small strips (it was a little under done even for me, and I love a good rare steak, but when we microwaved it, it cooked a bit more as well) and the cucumber-tomato-yogurt sauce.  I also added sliced avocado to mine.  If you like cheese, add cheese.  For this sandwich, and sticking to a Greek or Mediterranean theme, I would recommend using feta cheese, but again, use what you like.

Cucumber-Tomato-Yogurt Sauce

I did not have enough yogurt today, so I used a combination of yogurt and mayonnaise.  Don’t use miracle whip for this, just regular mayonnaise.  When cooking, yogurt and mayonnaise are often interchangeable in recipes.  If you don’t have one, use the other, or use a combination like I did.

3/4 cup yogurt

tomatoes, small dice

cucumber, small dice

1 TBSP garlic

red onion, small dice

1 TBSP lemon juice

black pepper to taste

1 tsp cayenne pepper

1-2 tsp paprika

fresh parsley, chopped fine

lemon verbena, chopped fine (optional)


Mix everything together and chill before serving.


Smoked Chicken

Today, when I was coming home from work, my car thermometer read 101* F.  Man, it is HOT, HOT, HOT!  That old saying, “if you can’t stand the heat, then get out of the kitchen” could not be applicable than it is right now.  Thank goodness for grills and smokers, where you can do the bulk of the cooking, if not all of it, depending on what you are making, outside, while keeping your kitchen a bit cooler and more tolerable during these dog days of summer.  As much as I love to cook and to bake, I am going to be honest with you, I don’t enjoy it nearly as much when I am standing over a hot stove or by a hot oven, melting into a giant puddle as the mercury is rising to the boiling point.   So we got some whole chickens, put a spicy Cajun rub over them, put them in the smoker and walked away as they cooked.  We had them in the smoker for about 1 1/2 hours.  When they came out, they were so flavorful and tender.  Delicious!

IMG_1643


Before putting the spicy rub on the chickens, I patted them dry with a paper towel to absorb all the excess liquid and extra moisture.  I removed the gizzards and neck, which I will add to “the kids” food, later.  (They love them.  I hate them).  Then I rubbed olive oil all over the chickens and applied my spicy Cajun run.  I made my rub with cayenne pepper, garlic powder, oregano, thyme, salt, black pepper, and a little paprika.  Just mix everything together and generously apply to your meat.  You can use this same rub for any type of meat.  It is rich, bold and full of spice.  The more pepper you put in, the spicier it gets, so kick it up as many notches as you like.  This makes a delicious dinner with minimal effort and your kitchen is still cool.  It’s a great way to cook when the temperature starts to soar.

IMG_1640

IMG_1641


Jeanne Dear, Can You Make Me Some Custard

Every time I make custard I think of this question my dad would ask whenever he would come to visit,  “Jeanne Dear, can you make me some custard”.  True to his Australian roots and heritage, he loved his custard.   Although he loved all of his sweets, custard was by all means his favorite.  He could easily eat the whole batch in one sitting if I would let him.  It’s funny the things you think of when a loved one has passed on.  My dad has been gone 11 years, and I still think of this with both a smile and a tear.  So every time I make custard, I know my daddy is close by, just waiting with a big spoon in hand to help eat his favorite dessert.

Aside from the fact that custard was my dad’s favorite dessert, it is also a very versatile dessert.  You can enjoy it just plain or with strawberries and/or bananas, or you can dress it up in many different ways.  When I make it, I make a fairly large batch of it, so I can use it for other things as well.  The other day when I made it, I served it with the left over kourambiethes from when I made my rice pudding and added fresh strawberries and whipped cream, making it like a strawberry shortcake.  It is cool and refreshing and with the addition of fresh fruits of the season, it makes a perfect summer time dessert.   The Arias port is the port we brought back Mount Felix Winery, in Havre de Grace Maryland.

IMG_1637


My recipe for custard is definitely tried and true.  I learned how to make it way back when I was in culinary school, from one of my favorite Chef Instructors, Rudy Rosier, a master pastry chef who was originally from Holland.  I have made it for many, many years ever since.  It always gets rave reviews.

All the things you need to make the custard.

IMG_1601

Combine the sugar, milk, salt and butter in a big sauce pan and bring to a scald, making sure all the butter is melted and all the sugar is dissolved.  Don’t stir it.  Just let it cook on it’s own.

IMG_1603


Whisk the eggs, corn starch and vanilla together separately.IMG_1605

Once the milk and butter mixture has come to a full scald, take about 1-2 cups of the hot mixture and add to the egg mixture, whisking it all together quickly as you pour the hot liquid into the cooler egg mixture, so the eggs don’t cook and scramble.   This is called tempering.

IMG_1607

Add the cool tempered mixture to the rest of the milk and sugar mixture.  Continue to cook at a medium heat, whisking the whole time until the mixture thickens.  This should only take a few minutes.

IMG_1610


Once the mixture has thickened, pour it all into a 9×13 baking dish that has been sprayed with cooking spray and immediately cover with plastic wrap to prevent a “skin” from developing.  Once it has cooled slightly, put the custard in the refrigerator for at least a couple of hours to set.  Then use your custard however creatively you desire.  No matter how you decide to use it, the end result will always be the same – DELICIOUS!

IMG_1615

I layered my dessert, starting with the kourambiethes or almond shortbread cookies, then topped them with the custard, sliced strawberries and whipped cream.  Dessert was a big hit.

IMG_1636

Custard

2 sticks butter

6 cups milk

3 cups sugar

1 tsp salt

2 tsp vanilla

4 eggs

1 cup corn starch


Another Fun Evening with Friends

Part of why I love to cook so much is because I love to entertain and share the fruits of my labor with others.  Maybe it comes from working in restaurants and catering for as long as I did.  I love seeing people happy and having a good time.  I find when people open up their kitchens to others, they also open up their hearts.  My family all lovingly call me “a feeder”.  Yep.  I confess.  It’s true.  I love to feed people.  My husband always says stick with what you do best, and feeding people is definitely one of the things I do best.  We shared a good burger night with our very good friends Janet and Bob, and once again, had a fantastic evening filled with good food, good wine and a lot of good times. Life just doesn’t get much better than this.   We had 2-pepper gourmet burgers, Brussel sprout salad and a little of both the left over purple potato salad and the dill potato salad.  I had some left over sauce from when I made the steak au poivre, so we topped our burgers with that.  Delicious!   If I have leftovers, I always try to use them in a different way than they were used for the ” first overs”.  I just hate wasting food, so I really try my best to use everything.  The two peppers were the roasted hatch chilies and then the peppercorns in the au poivre sauce.  You have seen all three of the salads in previous posts, along with their recipes.  The burgers were spicy and full of bold flavors, so I served a Montafiossa Rosa that complimented the meal very well.   Dessert was a strawberry custard over almond shortbread cookies with the Arias port we bought when we were in Maryland awhile back.

IMG_1634


Making the burgers.

I added roasted hatch chile peppers, garlic, onion, salt and pepper, about 1/3 -1/2 cup of bread crumbs and 1 egg to the ground beef mixture and molded it all together.  I find the best way to do it is to just use your hands and then just mash everything together.  Once everything is well mixed, I formed the burger patties.  I like my burgers nice and thick.  Each burger was about 1/3 of a lb.  I let them sit in the refrigerator for a couple of hours before putting them on the grill, but you do not need to.

IMG_1624

IMG_1626


Grilling them up.

IMG_1631

IMG_1632


We weren’t sure if we were eating inside or outside due to Mother Nature being so temperamental, but we were prepared either way.  The sun finally came out just in time for us to eat, so we all opted for dinner on the deck.  We much prefer that to being inside, and given the choice, we will always eat outside.

The inside option.

IMG_1627

The outside option.

IMG_1629

We all had a fantastic time and thoroughly enjoyed the evening.   Once again, great friends, great food, great wine and great times.  Those are my favorite things.


I Am a Pampered Chef

All good chef’s, whether they be professional or just home chef’s, need good “toys” to play with.  These kitchen toys help us create our beautiful and delicious masterpieces from our kitchens.  I have tried many different gadgets and gizmos, but the ones I like best are the ones that are simple and practical.  I am a huge fan of all the Pampered Chef products and have many that I have had and used for years and years.  They are great quality, easy to use, not very expensive and last forever.   I had not been to a Pampered Chef party in quite some time until yesterday when my friend Kathy had one.   Her daughter Sarah has been a Pampered Chef  representative for quite a few years and put on a great presentation.  As usual, the products were fun, practical and very innovative.  We all bought a bunch of new items to add to our current collections.  I had to be careful and not go to wild though.  I  have run out of room for the things I already have, so buying new things has to be at a minimum.  It was tough not to come home with everything though.

This cool, fun piece is a granola maker.  I did not purchase this one (yet), but it is still very cool.  The granola came out wonderful; much better than store bought.

35886997_10212562741519369_2913267443474366464_n

Some of the other items that were used for the presentation were a brownie pan that Sarah used to make little individual quiches out of; a mini chopper that one of the guests was demonstrating how to use; a slicer; an iced party tray holder and the water diffuser that can have fruit (or coffee) in the middle and then pour the water around it. (I did purchase the diffuser.  I like the idea of the fruited water).  All of these recipes, ideas and products can be found on Sarah’s facebook page Sarah Triebold and on the Pampered Chef website.

36176659_10212562742439392_6596148405976694784_n


The mini quiches that were made in the brownie pan.  They were so delicious.

36030953_10212562741719374_5952274821952831488_n


My own personal items from Pampered Chef that have been used on a daily basis for many years.  I absolutely love using my stoneware for baking.  As you can see, they are all very seasoned and well used.  I actually have six baking sheets, put I only put out two.  I also have two pizza stones that I forgot to put out.  I think stoneware is the best for baking because everything cooks nice and evenly and they come out of the pan really easily too.  Cleaning them is a breeze as well.

IMG_1618

This is actually a strawberry corer, although I use it for tomatoes and many other things all the time as well.  This is probably my favorite kitchen gadget out of all the things I have and use.

IMG_1622

More of my fun stuff from Pampered Chef.  I have a fun water pitcher, that looking at it now, I guess is similar to the diffuser, just bigger; a trifle cake dish; and a great can opener.  The can opener actually cuts from the top of the can rather than the sides, and leaves a much cleaner, smoother edge, which means you are less likely to cut yourself  from the edges of the can.  Believe me, I have done that and had to go to the hospital for stitches.  Cuts from cans are nasty, deep and jagged cuts, so I highly recommend using the Pampered Chef can opener instead.

IMG_1620

If you are not currently an owner of Pampered Chef products, I definitely recommend trying them out.  I think you will love them as much as I do.   Just have fun in the kitchen.  That’s what it’s all about.


A Simple Summer Dinner with Friends

There is nothing better than getting together with good friends and sharing good food.  That is hands down my favorite way to spend my day.  And that is exactly what we did last night.  It was a great evening, as it always is when we get together with our dear friends Priscilla and Jonathon.  Regardless of who’s house we are at, we always end up sharing the kitchen duties, with each of us bringing about half the meal while the other one prepares other delectable dishes in her own kitchen.  Priscilla is a fabulous cook and is perfect at getting every last detail just right.  Last night, in between the rain and the sunshine, we enjoyed a simple, easy summer meal where we shared our friendship, great food and a fabulous bottle of wine, in Priscilla’s backyard.  Priscilla marinated a flank steak that we put on the grill.  She also had a nice crusty French bread that we dipped in olive oil and balsamic vinegar.  I made some grilled stuffed tomatoes and a purple potato salad.  Dessert was a delicious strawberry shortcak, made by Priscilla,  finished with a nice, tasty port.  Life is good!

IMG_0159

IMG_1599

You have all seen my recipe for my purple potato salad.  Here is the recipe and technique for stuffing and grilling the tomatoes.  Everything was delicious!  I just love tomatoes.  I cook with a lot of tomatoes, and we eat them a lot.  They are so tasty and so very good for you too.

IMG_1595

large fresh, firm tomatoes

salt & pepper to taste

2 TBSP olive oil, plus more for drizzling on top after the tomatoes are done

2 TBSP ginger, minced

1 1/2 cups cooked rice

1 can garbonzo beans or chickpeas, drained

2 TBSP of each fresh mint and lemon verbena, cut into a chiffonade or shredded


Slice a small slice off the bottom of the tomatoes so they stand up straight.  Slice off a larger portion of the top and hollow the tomatoes out by cutting very carefully around the inside edges (about 1/4 ” from the edges) of the tomatoes and removing the center.  Discard the seeds and the bitter center, while keeping the fleshy, “meaty” center part.

Heat the olive oil in a medium sized skillet, and add the ginger until it is nice and fragrant, cooking for about 1-2 minutes.  Add the tomato pulp, with the juice, salt and pepper.  Add the rice, the garbonzo beans and herbs.  Cook down until all the excess liquid has evaporated.  Once the tomato-rice mixture is cooked, carefully stuff the tomatoes by spooning the mixture into the center of the cut tomatoes.  (This can be done ahead of time and stored in the refrigerator too until ready to grill for a few ours or even overnight).

I actually cooked my rice with the tomato and ginger mixture, so I added 2 cups of water with 1 cup of rice and then cooked it all down.

IMG_1591

IMG_1594

Place the stuffed tomatoes on the indirect heat portion of the grill and cook for about 15-25 minutes or until the skin begins to wrinkle and the filling is nice and hot.  You can served these hot, warm or at room temperature.  If you want a little more zest to these, serve them with lime wedges and squeeze the lime juice over the tomatoes.


*** We had a red blend called Ensemble from Bookcliff Winery in Boulder, CO

*** Our port was a chocolate cherry port from another local winery, InVINtions, a Creative Winery, located in Greenwood Village, CO.

We are very fond of both wineries and frequent them both as much as possible.


Romanian Garlic Steak

When I think of Romania, I think of the dark romance from all the myths and stories we have all heard and grown up with.  I think of the traveling bands of gypsies and wolves running through dark, mysterious forests, and of course Count Dracula.  When I think of Romanian foods, I thinks of rich beefy stews like goulash and borscht made with beets.  I never really gave much thought about other foods found in Romania, other than good hearty foods with lots of garlic.   But the other day, I came across this recipe for a Romanian garlic steak that just sounded to tempting to let slip by.  The Romanian name for this dish is fleica.   I was 1/2 right; other than the steak, garlic is the most important ingredient in this simple recipe, and lots of it.  Don’t be afraid to load up on the garlic.  The more garlic you add, the better the steak will be.  After dining on this steak, fear not, the vampires will be no where near you for quite some time.  It will drive them away by using garlic and a different kind of steak than what all the folklore tells us about.

IMG_1581

This recipe has only 7 ingredients.

8-16 cloves of garlic, minced – According to the recipe, we are all encouraged and have the blessing of the original chef to “double the amount of garlic”, if we dare.  I of course, will always accept a dare, especially one like this.

1 1/2-2 lbs. of flank steak, bone-in rib-eye or a thick top round

1 tsp salt

1-2 TBSP lemon juice

1/4 cup olive oil

fresh parsley, chopped

fresh ground black pepper to taste.


Combine 1/2 the garlic with the salt and lemon juice and pour over the steak, making sure to cover the steak on both sides.  Rub the garlic and salt mixture into the steak and refrigerate for up to several hours or even overnight before grilling it up.

Right before placing the steak on the grill, whisk up the remaining garlic, olive oil, parsley and pepper and again pout it over the steak and really press it in.  Put the steak directly on the fire of the grill and cook to your desired doneness.  Depending on the thickness of the steak, it should be about 4-5 minutes per side for a nice juicy medium-rare steak.  Although, the steak we used was about 2 ” thick, so it took a little longer on each side.

IMG_1570

When slicing the steak, slice into thin strips, cutting the steak against the grain to ensure a nice tender and flavorful cut.  If you cut along the grain, the steak will be tough and chewy.

IMG_1585

I served the steak with a red potato salad with a dill-mustard vinaigrette, and the leftover green bean and cannellini salad I made the other day.  My wine choice was a full bodied, bold syrah with hints of chocolate and cherries to really compliment the big, bold flavors of the steak.  Delicious!

IMG_1583


A Little Greek in Melbourne

Australia, though it does not have the population of the United States, is also a big melting pot of diverse cultures and backgrounds. Melbourne, where my dad was from, is the oldest city in Australia, and I think the second largest, following Sydney.   We still have a ton (or tonne for all the Aussies out there) of friends and “rellies” in Melbourne and the surrounding areas, as well as other parts of Australia.  Melbourne equals multi-cultural and is very diverse, but one of the largest ethnic groups in Melbourne is the Greek population.  Melbourne has the largest Greek population anywhere in the world outside of Greece.  So there are many great Greek restaurants and recipes that can be found all throughout the city, and if you love Greek food like I do, this is fantastic news.

We are going Greek today, with a small, but very delicious taste of Melbourne’s wonderful Greek flavors.  This recipe has become my new favorite dessert.  You’re going to love it as much as I do.  It is Risogalo Rice Pudding.

IMG_1532

IMG_0527


Rice pudding is a dessert that is found in many cultures and many countries, but this one is by far my favorite version, with the addition of a smooth, rich caramel sauce, almond shortbread cookie bits and pistachios.  It is rich and delicious without being overpowering or too sweet.  Each bite is like a little bit of Heaven with just enough sweetness to give it a bit of decadence as well.  When I am cooking, quantities are not really that important to me, because I mix and match and change things all around all the time, but when I bake that is a different story.   Baking is more of an exact science and measurements are very important.  The most difficult part of this recipe for me was converting everything from the metric measurements to our standard US measurements.  All my math teachers would be so proud of the fact that I can still use my brain to find mathematical solutions and make my metric/US measurement conversions.  My numbers may be off a bit, but as you can see, they were not off by much, because the results came out very well, and were very tasty.  I will be nice too all of you today and give you both the metric and the American measurements.  For those of you who know both, please feel free to correct my numbers wherever needed.

There are three components of this dessert.  The rice pudding or risogalo, the caramel sauce and the kourambiethes or almond shortbread cookies.  The kourambiethes can be made ahead and stored.  They are also very tasty when dipped in coffee or used like biscotti.

Risogalo

175 g or 1 1/2 cups rice

700 ml or 3 cups water

900 ml or 2 3/4 cups milk

pinch of salt

1 tsp vanilla

70 g or 1/2 cup powdered sugar

300 ml or 1 1/4 cup heavy whipping cream

1 tsp cinnamon


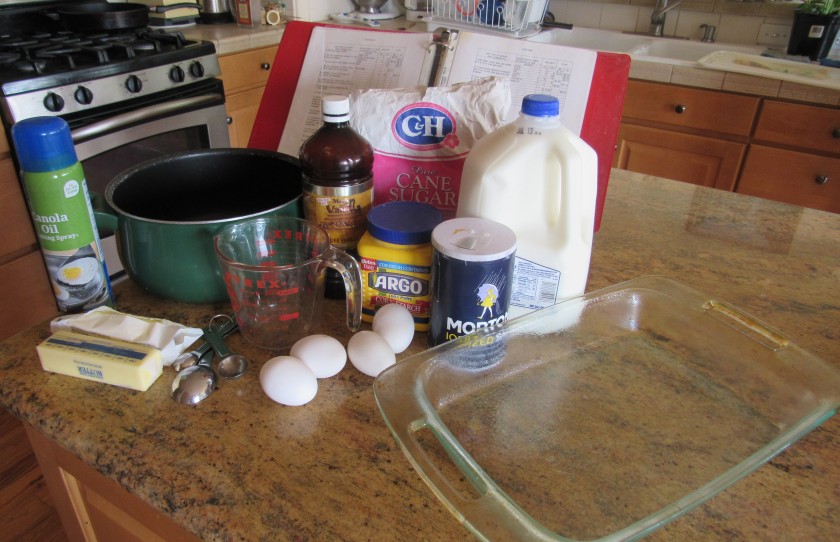
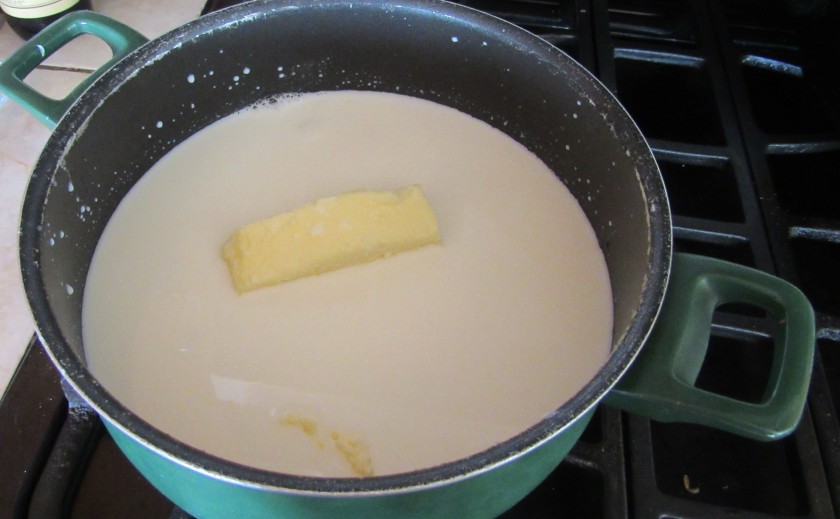
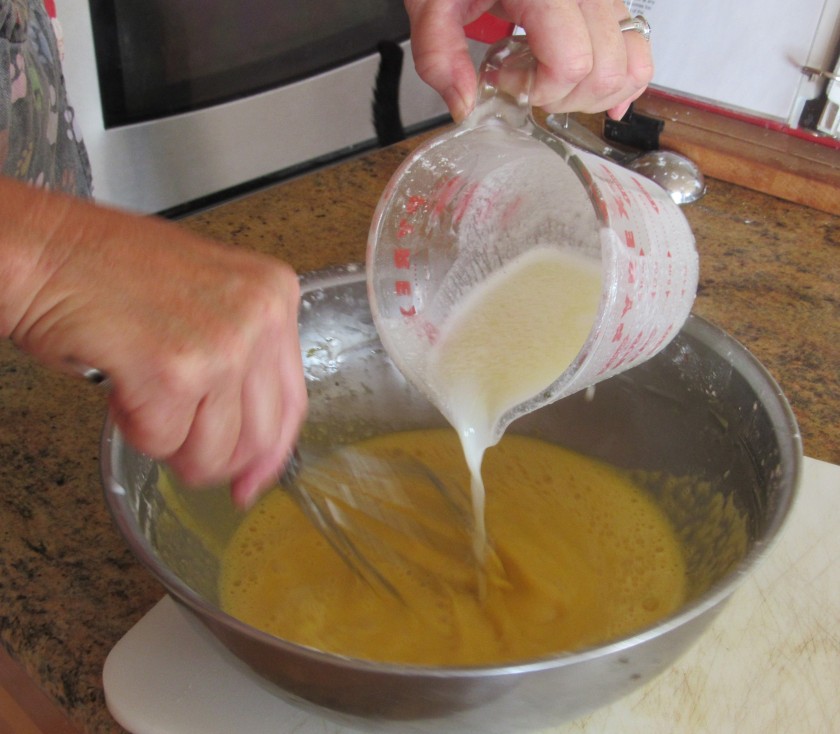
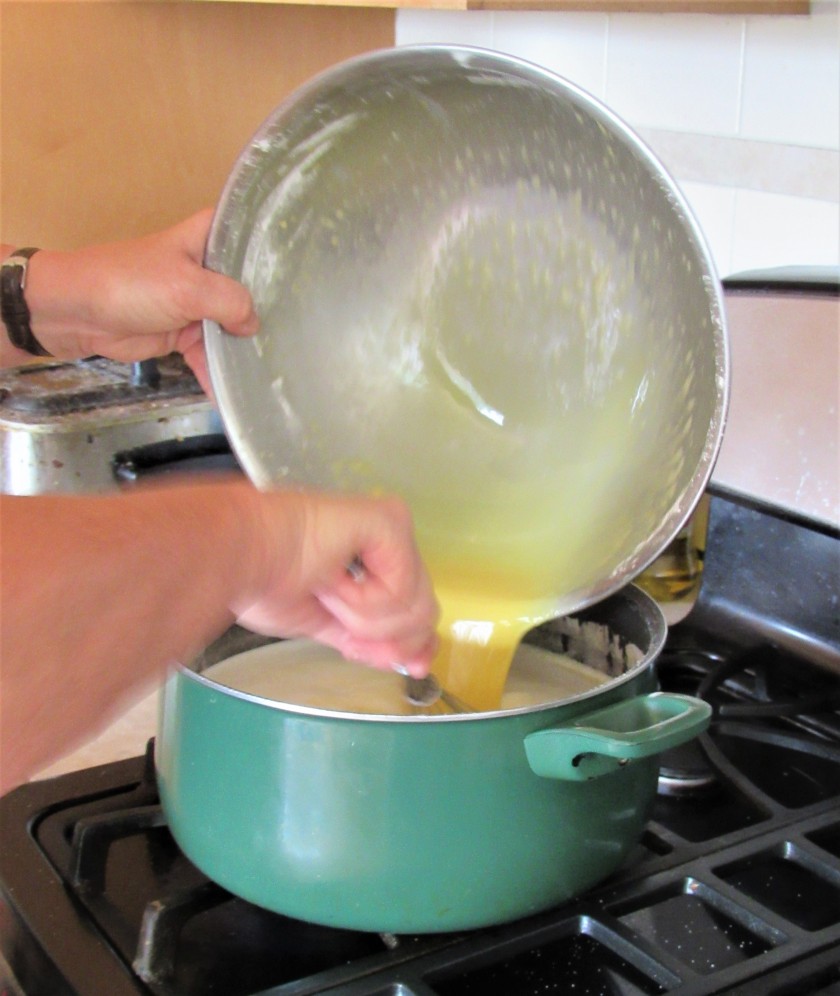
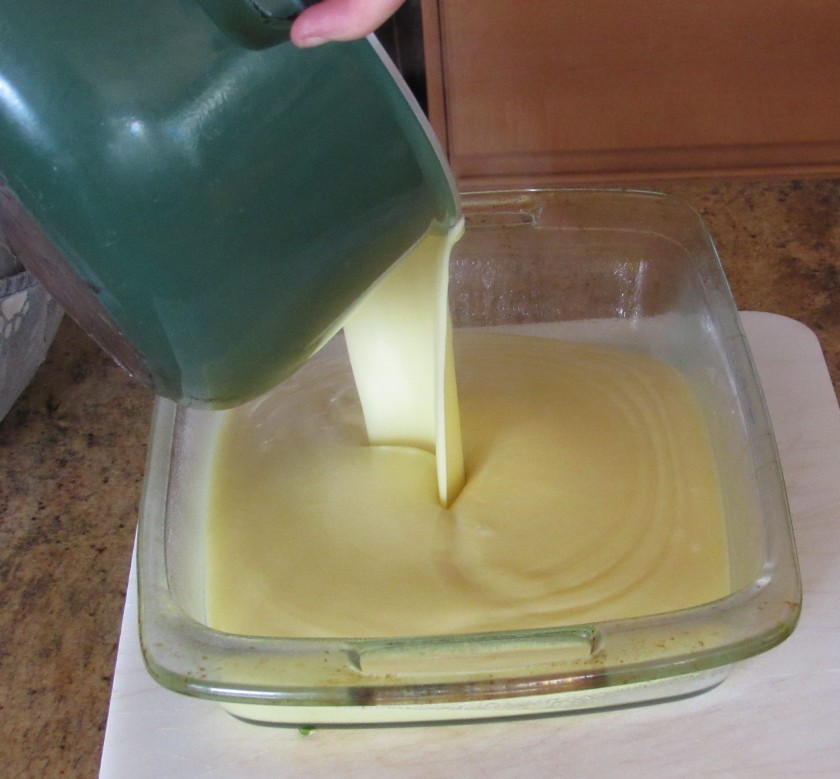
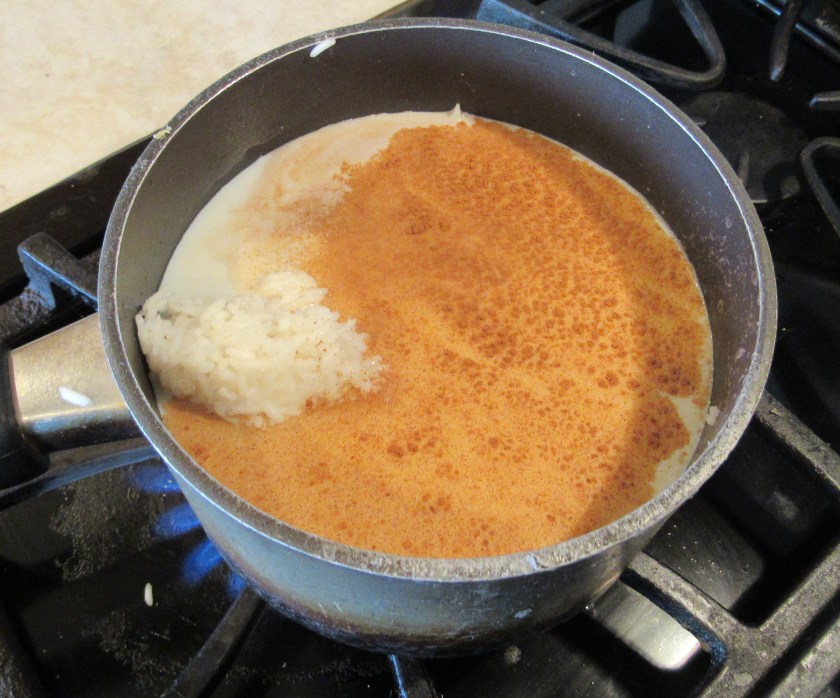
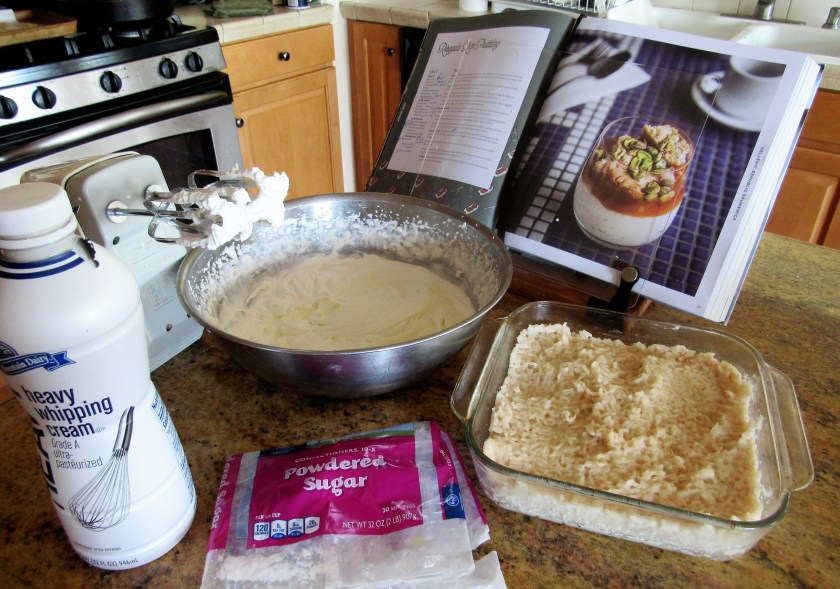
Add the rice and water together in a heavy sauce pan and bring to a boil.  Once it comes to a full rapid boil, reduce the heat and simmer for 6 minutes, then strain.  After straining the rice and discarding the water, place the rice back in the saucepan along with the milk, salt, cinnamon and vanilla.  Bring it back to a boil, then reduce to a simmer again and cook for about 20 minutes or until the liquid thickens and the rice is cooked.  Add the sugar and mix together well.  Change the rice to a flat dish and refrigerate for at least an hour to make sure everything sets.  Whip the cream and powdered sugar together and gently fold into the rice mixture.  Put back into the refrigerator until needed.

Cooking the rice with the milk, salt, cinnamon and vanilla.

IMG_1525

Adding the whipped cream and powdered sugar.

IMG_1527


Salted Caramel Sauce

500 g or 1 3/4 cups sugar

150 ml or 3/4 cup water

400 ml or 1 1/2 cups heavy whipping cream

30 g or 3 TBSP butter

pinch of salt


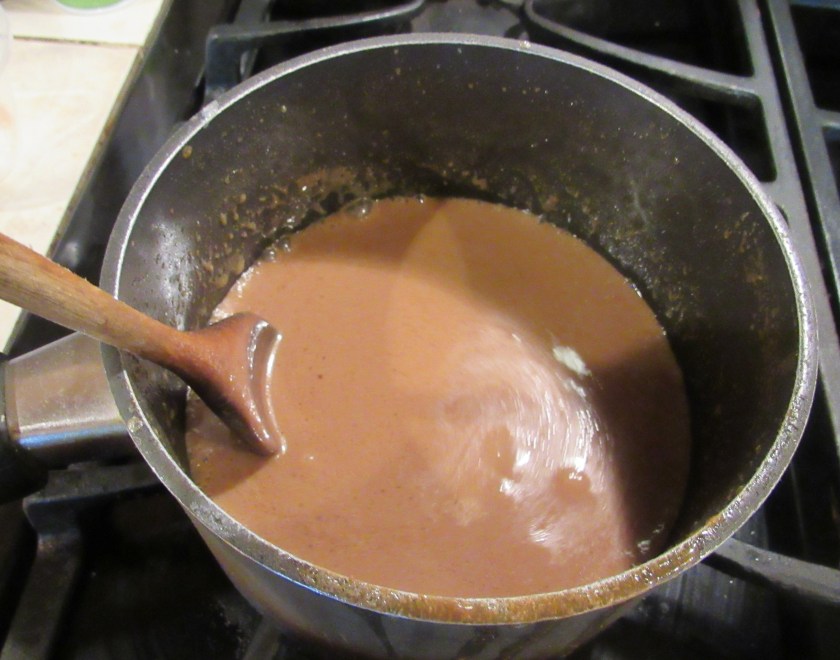
Place the sugar and water into a heavy saucepan and cook over a medium heat.  Stir until all the sugar has dissolved, then leave it alone.   You will need to use a candy thermometer and cook it until the temperature reaches 170* C.  Brush the sides of the saucepan down about every 3 minutes so the sugar does not crystallize on the sides.  You want the sauce to be a nice golden brown.  It takes awhile for it to start browning, but once it does, it browns and cooks very quickly, so be careful not to overcook it.  Add the cream, butter and salt and whisk together.  Cool to room temperature before using.  If your sauce is too thick, add some milk as needed to the mixture.  Mine was too thick at first, but I added some milk and it came to a nice thick syrupy sauce, which is what I was looking for.

IMG_1534


Kourambiethes or Almond Shortbread Cookies

170 g or 1 stick + 5 TBSP butter, softened

50 g or 1/3 cup sugar

1 tsp vanilla

1 tsp almond extract

1/4 tsp salt

1/2 cup toasted almonds

2 tsp baking powder

2 cups flour

water as needed to help mix the dough together and bind it.


Preheat the oven to 350*F or 160*C

Mix the butter and sugar together.  Mix all the dry ingredients together, then add to the butter and sugar mixture.  Mix everything together.  Since I live in Colorado, where it is very dry and also a high altitude, I needed to add about 1 1/2-2 TBSP of water to the mixture to help it mix and bind together.  You are looking for a dry mixture, so you do not want to add a lot of moisture, but just enough to make everything stick together.  Line a baking sheet with parchment paper.  Spread the dough onto the paper.  Press it down with your hands and spread it out to about 1/2 ” or 1 cm in thickness.  Bake for about 15 minutes or until golden brown.  Let cool completely, then cut into “fingers”.

IMG_1530

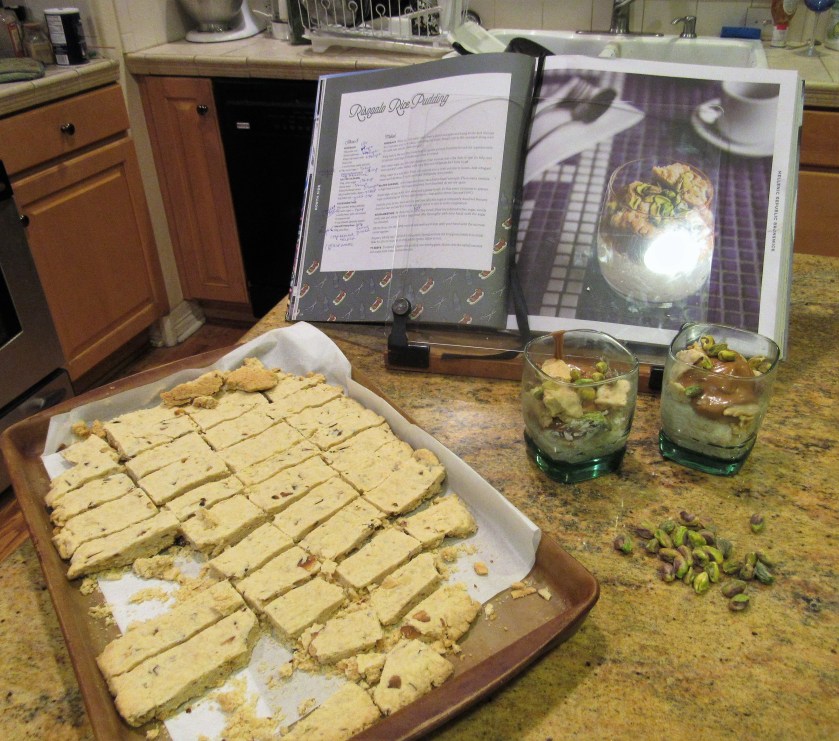
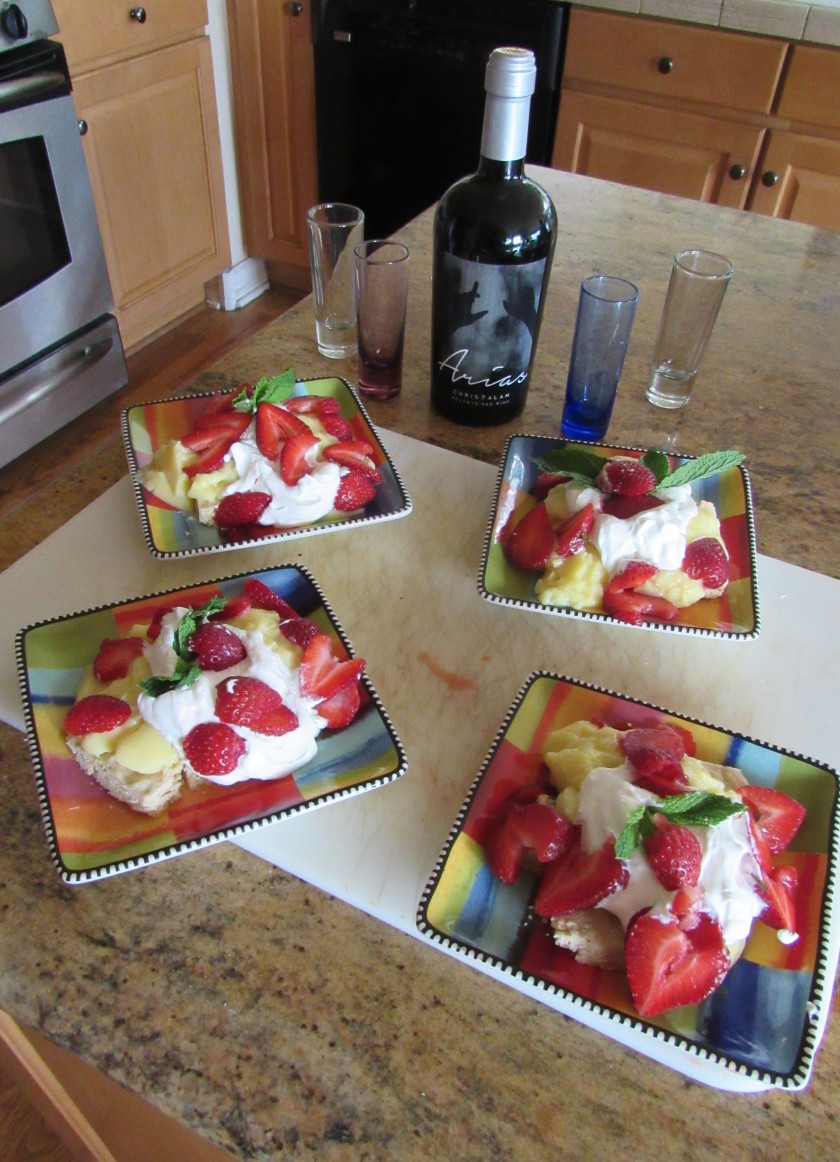
When you are ready to indulge in this delicious dessert, assemble it all together in your serving dishes.    Layer it with the rice first, then the caramel sauce, followed by breaking bits of the shortbread cookies and then top with a few roasted, salted pistachios.  The result – DELICIOUS!


The Cookbook Holder

This is an extra bonus post, per request from my friend and fellow blogger, who can be found at 2020cookingadventures.  He was asking me about my book holder that you see in a lot of my blogs.  I use it ALL the time.  It helps protect your cookbooks and recipes from all the kitchen splatter.  All of us who cook know kitchen splatter happens all the time, regardless of how careful you are when cooking.  It also helps you read your recipes better by propping them up and holding them, leaving your hands free to cook and make your magic happen.  It is adjustable and holds most sizes of books.   It is a simple book holder that sits on a wooden base with slots that hold that removable back piece; the piece that holds the books in place.  The front is a larger plastic shield that is attached by two screws that can be removed to clean the front shield.  The whole book holder can come apart, which makes cleaning very easy.  A friend of mine gave it to me, and I have no idea where she got it, but the first places I would start looking would be a book store or a store that sells kitchen gadgets and kitchen “toys”.  If they don’t carry them, they might be able to refer you to someone who does.  I have had it for quite a few years, and I absolutely love it.  I highly recommend it for anyone who works in the kitchen.  It could also be helpful to all those who do crafts and are following instructions.  It frees up your hands, allowing you to use them on your projects.

IMG_1560

IMG_1563

IMG_1566