Jeanne is Back in the Kitchen and the Kitchen has Opened Again

Is everyone out there hungry?  Are you hungry for more delicious recipes and ideas?  I certainly hope so, because I’m back, and I am more than ready to share my kitchen with everyone once again.   It feels like an eternity, but I am back online and the computer is up and running once more.  It’s funny how we think something so insignificant impacts our daily lives and routines so much, but you really feel the sting when it is gone, even if only for a few days.  Hopefully that is all in the past now, and we can pick up where we left off.  Let’s eat!

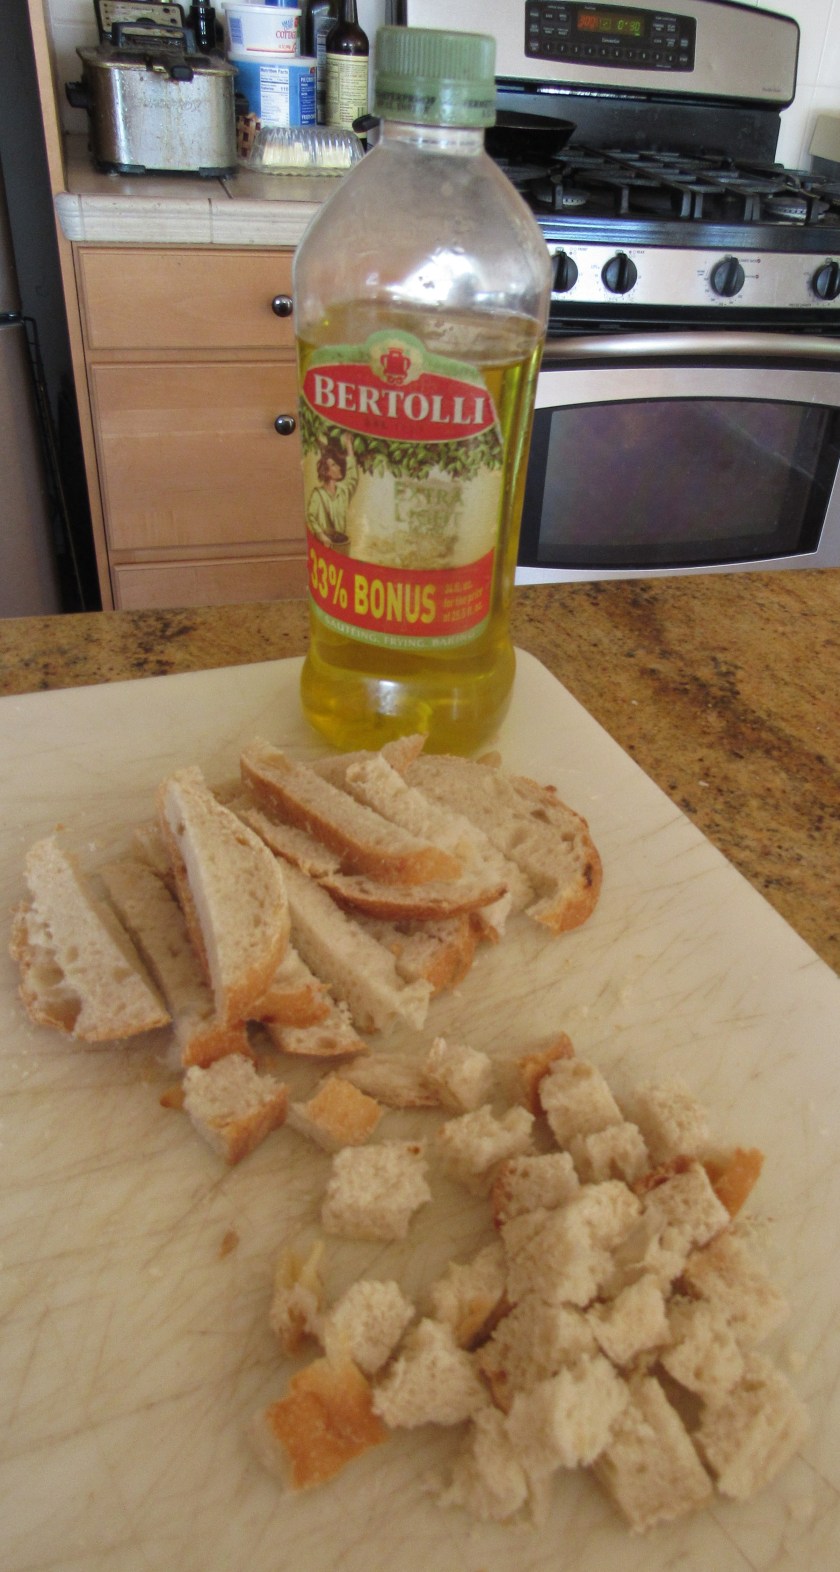
I will start off with a light and tasty summer treat that will help you beat the heat.  We love sea scallops, and we eat them on a fairly regular basis.  I don’t think I have ever had a scallop dish I did not like.   Hmmm ….. maybe I need to do more research.  This recipe has sea scallops, pesto AND bacon; three of my favorite foods.  How could I possibly go wrong with this one right?!  I think you will all love it too.  We grilled scallops wrapped in bacon topped with pesto.  YUM!  I finished off the meal with a fresh, lemony green bean salad; warm cheese bread that we dipped in olive oil, balsamic vinegar, garlic, and fresh ground black pepper; and of course wine.  By now, you should know there is always wine.  Tonight’s wine choice was a light, crispy, refreshing chardonnay.

IMG_1559

I par-cooked the bacon in the oven first, at 350* F, for about 15 minutes.  You want the bacon still soft and pliable so you can wrap it around the scallops.  Wrap the bacon around the raw, uncooked scallops, then skewer.  I topped them with homemade pesto then they went on the hot grill.  Scallops do not take very long to cook, so once they are on the grill, cook them for about 4-5 minutes then turn them over and continue to cook for another 4-5 minutes.  I topped it with more pesto right before serving.

IMG_1554

Lemony-Fresh Green Bean Salad

IMG_1549

IMG_1550

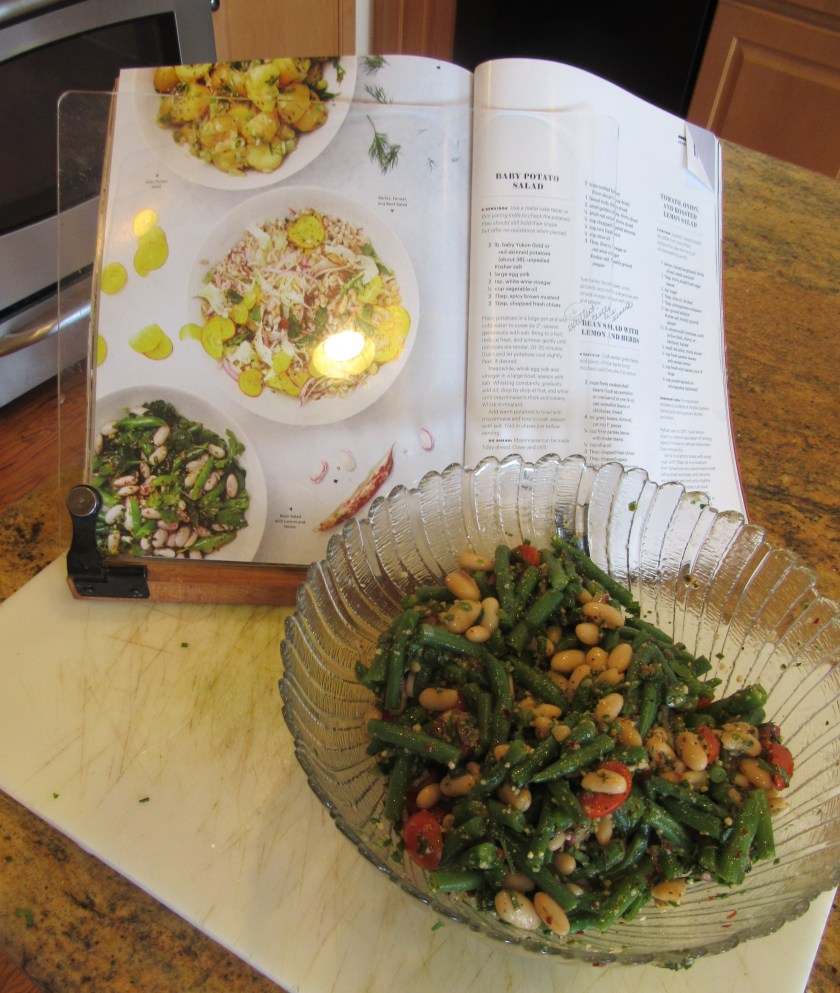
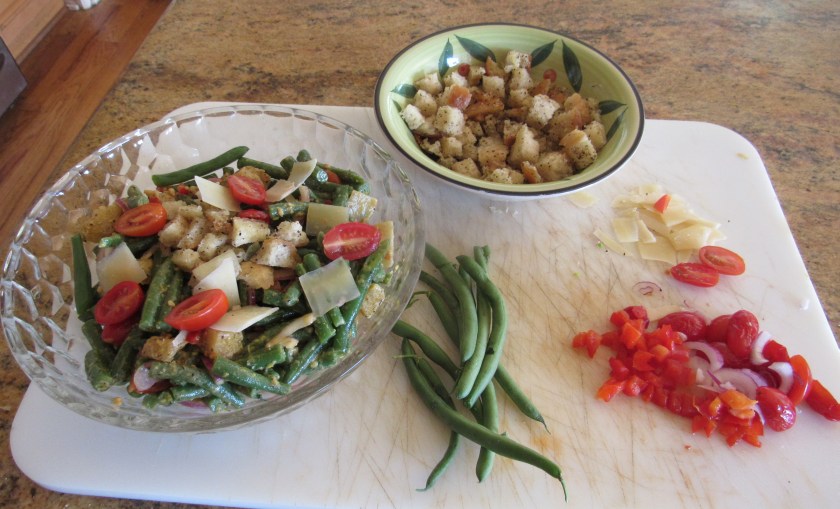
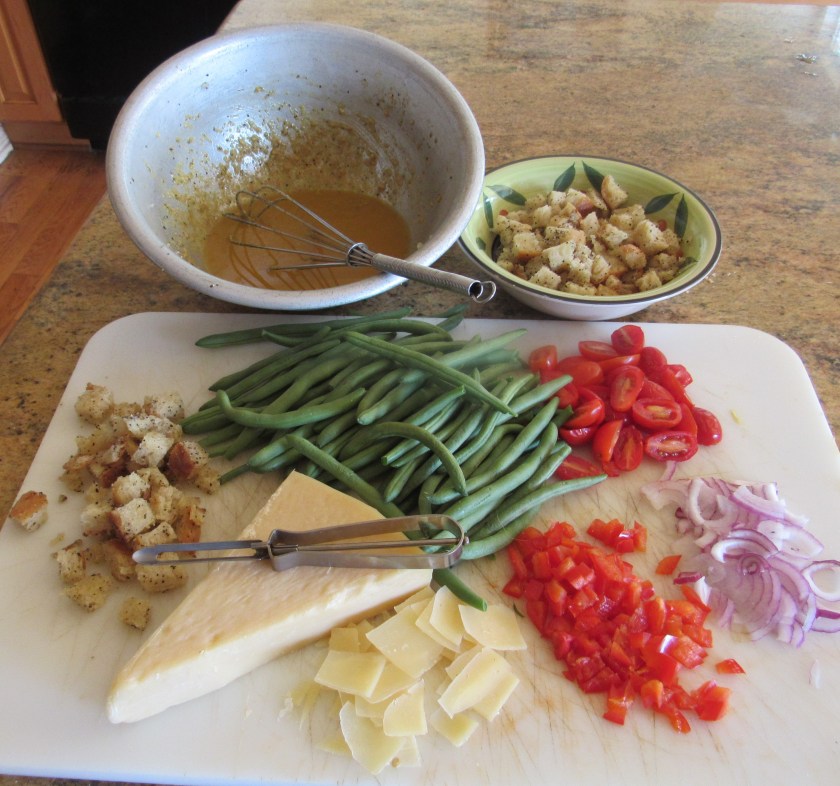
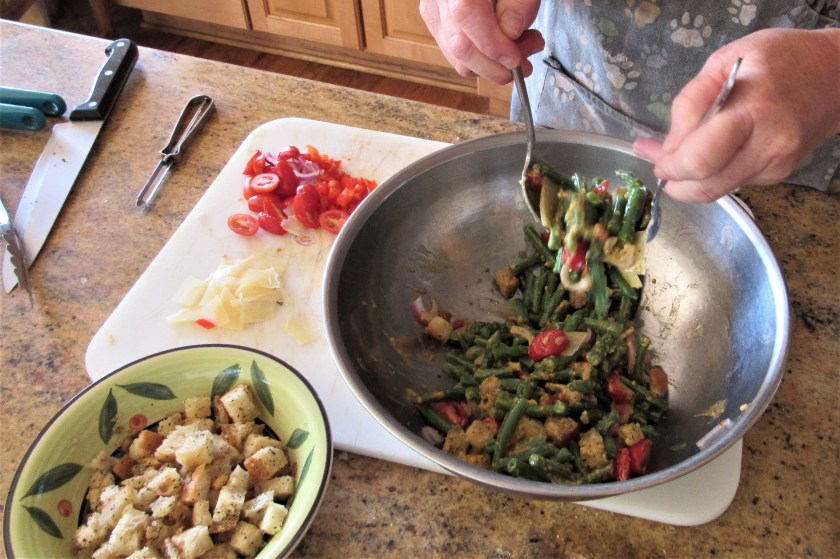
We eat a wide variety of vegetables all the time, but we tend to eat even more vegetables in the warmer weather.  Green beans are a perfect summer vegetable because you can eat them hot or cold and they are very versatile.  They go with anything and everything.  This salad is a double beaned salad, with both green beans and cannellini  beans. It is super easy to make and very refreshing.  I served it as a side salad, but if you want to make it more of meal, serve it over either rice or pasta, and add chicken, shrimp, scallops, or your protein of choice.

Lemony-Fresh Green Beans Salad

6 oz. fresh green beans, cooked slightly

1 can cannellini beans, drained and rinsed (you can also use garbonzo beans if you prefer)

1/4 cup fresh parsley, chopped fine

1/4 cup olive oil

3 TBSP fresh chives, chopped fine

2 TBSP capers, drained

1 TBSP lemon zest

2 TBSP lemon juice

1/2 tsp ground Aleppo chilies

1 TBSP garlic, minced

1/2 cup grape or cherry tomatoes, cut in half

1-2 TBSP each, fresh basil and/or lemon verbena or lemon balm (optional)

Place the fresh green beans in boiling water and let cook for about 6 minutes.  You want them to still be crispy and snappy, not mushy.  Once they are cooked, rinse them in cold water immediately after removing from the boiling water.  Cut the beans to about 1″ in size.  Toss everything together and chill before serving.  I usually toss my olive oil mixture separately, then add to the bean mixture.  I use a lot of lemon verbena in the summer because it grows wild in my backyard.  It literally has taken over.  I love using it in as many recipes as I can.  It really brings a nice fresh and zesty flavor to salads and dressings.

With this quick and easy meal, you can easily relax and beat the heat.


BBQ Chicken Salad with Cowboy Beans

It has been ridiculously hot these past few days.  Today it was about 97* F.   When it is this hot, we are looking for any way possible to cool down.  Part of that cooling process is to eat less and to eat lighter foods.  Tonight was perfect for a nice cool salad.  A couple of days ago, my husband was playing with his new toy; his new smoker (new to him), and smoked some beef short ribs and some chicken.  I made a smoky, spicy BBQ sauce to accompany both the ribs and the chicken.  He made a lot, which means of course there were plenty of left overs.  So tonight, I used the BBQ chicken in a salad along with some cowboy beans, tomatoes and onions, topped with a drizzle of BBQ sauce and another drizzle of Vidalia onion dressing.  It was a perfect meal to help us cool down from the heat of the day.  As I hope you are learning about me, I am the queen of leftovers and recreating them into something completely and totally different than what they were at first.  I took smoked chicken and made it into a BBQ chicken salad.

IMG_1517

Smoked chicken and ribs with a bold, spicy smoky BBQ sauce.  We marinated the chicken and ribs in the sauce before smoking it, and then brushed it over the meat again while it was cooking.  I made the sauce from just everyday items we tend to have on hand most of the time.  My base was the smoky BBQ sauce from one of my favorite BBQ places around, Georgia Boys.  Then I added some Heinz 57 sauce, Sweet Ray’s BBQ sauce, honey, chili lime powder from Savory Spice, red pepper flakes, garlic and onions.

IMG_1512

These are the ingredients I used to make my cowboy beans – dried kidney beans, garlic, jalapeno, diced very small; red, yellow, and orange bell peppers, diced very small; red onions, diced small, cumin, sage, crushed Aleppo chiles from Savory Spice, thyme, oregano, and salt and pepper.

IMG_1509.JPG

Soak the beans for at least one hour, then drain the water.  I cooked about 1 1/2 cups of beans, and added about 3-4 cups of fresh water.  Boil the beans at a fast, rapid boil  for about 3 minutes after soaking them, then reduce the heat to a simmer, and cook for about 2 1/2 hours, or until the beans are tender.   Saute the vegetables and spices until they are tender.  Add the beans to the vegetable mixture.

IMG_1513

IMG_1515

Layer your salad, starting with chopped lettuce.  I used Romaine, but you can use whatever hearty lettuce you like.  Then I sliced some red onions very thin, and sliced some tomatoes.  I added about 1/3-1/2 cup of beans to the lettuce, then added my sliced chicken.  I topper it with with a little more BBQ sauce and some sweet Vidalia onion dressing, and finished it with some chopped cilantro and green onions.  The result was a perfect ending to a long, hot day.  Delicious!


A Taste of Europe

Almost anywhere you go when traveling in Europe, you will find some version of an almond cake.  This very simple, elegant cake is like the European signature cake, found everywhere from Sweden to Spain, Austria to France, and Germany to Italy.   In Sweden, the almond cake is known as a visiting cake; the Italians call it torta di mandorle and in Spain it goes by the name of tarta de Santiago.  Whatever name you choose to call it, and wherever you choose to enjoy it it, it is still a delicious almond cake.  Just like a rose by any other name is still a rose, an almond cake by any other name is still a delicious almond cake.  Almond cakes have been prevalent all over Europe since the Middle Ages, and they are even more popular today than they were then.  Almond cakes have staying power and have been around for a very long time, and they will continue to be around for a very long time to come.

To me, this is a very welcoming cake to enjoy over a good cup of coffee or tea when friends or family stop by.   I like it plain, just as it is.  My husband enjoys it with a bit of ice cream on the side.   However you like to eat it, it will definitely be a treat for your taste buds.

This particular recipe has everything blended together and processed in a food processor rather than being mixed in a mixer.  Apparently mixing everything together in the food processor moderates how much the cake will rise, making sure it is not too fluffy or not to dense, and ensuring it comes out just right.  Mix the toasted almonds and dry ingredients first then pour into a separate bowl.

After removing all the dry ingredients, then process the remaining ingredients together.  Once they are all processed and well incorporated, then add the almond flour mixture and pulse again until well mixed.  Pour the batter into a prepared cake pan.

Top with more almonds, sugar and lemon zest before baking.  The almonds going on top of the cake do not need to be toasted, since they will be toasted during the baking process.

IMG_1487

Almond Cake

1 1/2 cups toasted almonds plus 1/3-1/2 cup almond slivers

3/4 cup flour

3/4 tsp salt

1/4 tsp baking powder

1/8 tsp baking soda

1 1/4 cup  + 2 TBSP sugar

4 large eggs

1 TBSP+ 1/2 tsp lemon zest, divided

3/4 tsp almond extract

1/3 cup vegetable oil

5 TBSP melted butter


Preheat oven to 325* F

Spray a cake pan with cooking spray and line with parchment paper.


Toast 1 1/2 cups of almonds, then add to your food processor along with all the dry ingredients and pulse until everything is finely ground and mixed together.  Remove from the food processor and pour into a bowl and set aside.

Process the eggs, 1 1/4 cups of sugar, 1 TBSP lemon zest and almond extract for about 2 minutes or until the mixture is a very pale yellow cream.  Then pour in the oil and melted butter while the processor is mixing.  Once everything is mixed together well, add the almond and flour mixture and pulse again for about 5 pulses or until everything is well blended.

Pour the cake batter into the prepared cake pan.  Top the batter with almonds and the remaining sugar and lemon zest.  Bake for about 1 hour or until the cake is golden brown and a toothpick comes out clean when inserted into the middle.  Let the cake cool completely before removing from the cake pan.


Red Devil Spicy Sausage Rolls

My friend Delores and I talk about food (and dogs) a lot.  We both love to cook and we both love to eat.  We exchange recipe ideas all the time.  We both love our dogs too, so there are also a lot of conversations about dogs, but that is for another day.  These red devil spicy sausage rolls, or saichichin del Diablo (according to my Spanish/English dictionary, saichichin is a sausage log or roll), were actually a creation of mine based on Delores’ explanation of them.  We really enjoyed them a lot, but they are so big and so filling, one was more than enough to fill our tummies.  So, Muchas gracias mi Amiga, for this simple and delicious recipe.

IMG_1505
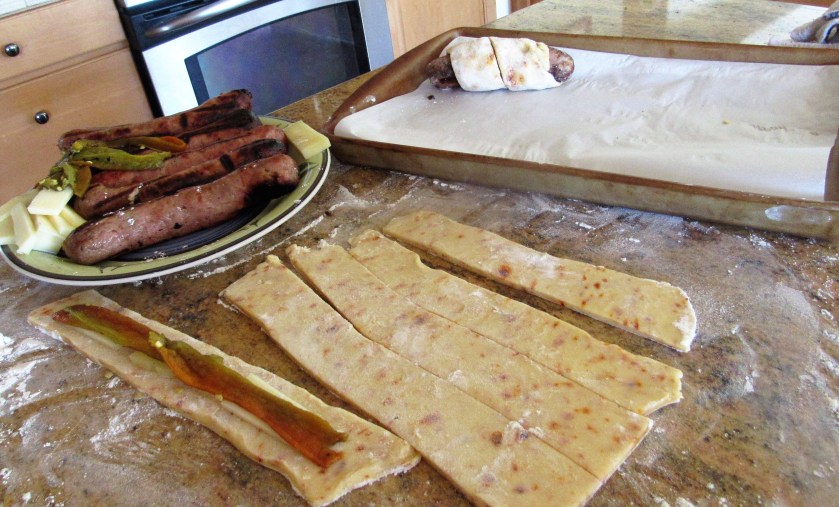
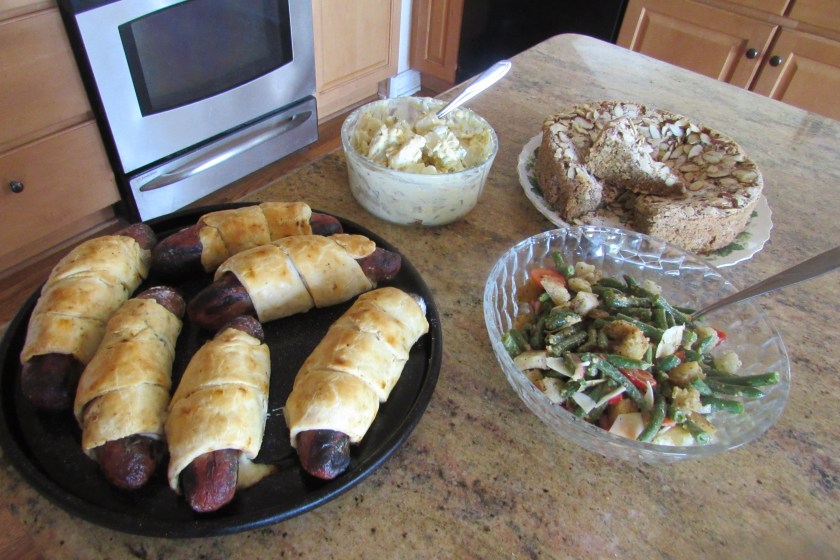
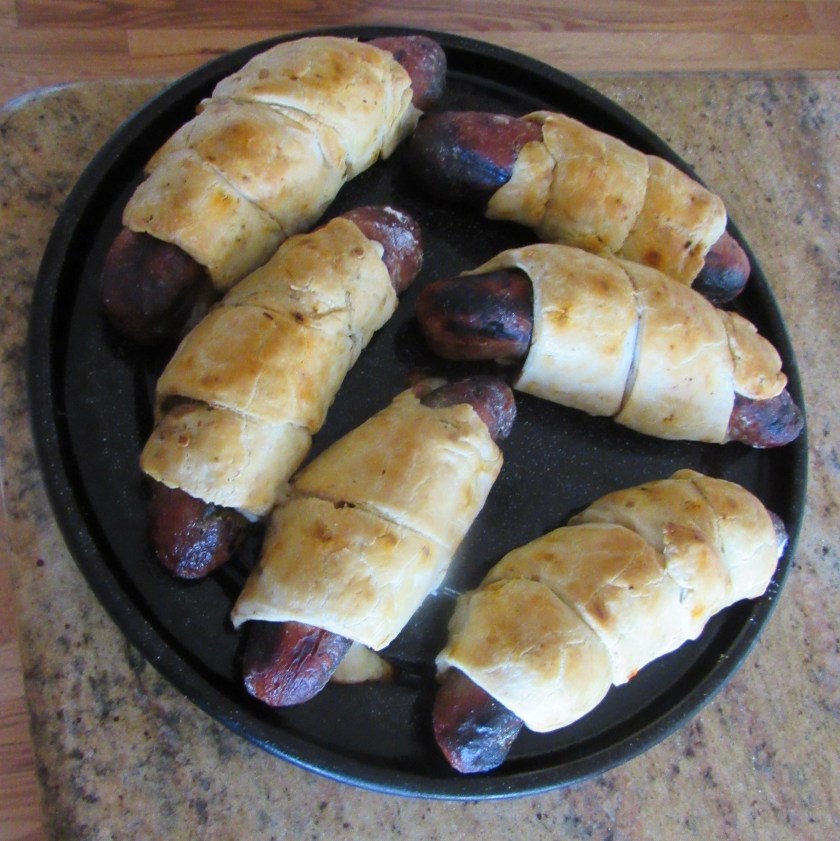
We grilled spicy green chili sausages (unfortunately, my husband cooked them a bit too much, so they dried out a little, but they were still really tasty), then wrapped them in a pastry dough with roasted green chilies and white cheddar cheese.  You can use whatever type of cheese you like.  I cut the dough into wide strips and added strips of white cheddar cheese with a layer of strips of roasted chilies on top of the cheese.  Then I gently rolled the dough around the cooked sausages.

IMG_1500

Before baking the red devils, I brushed them with an egg wash, made of 1 egg and a dash of heavy whipping cream, whisked together.

IMG_1502

Red Devils or Saichichin del Diablo

Cooked green chili sausages

roasted chili peppers

cheese of your choice (I used mild white cheddar cheese, but next time I will try them with jalapeno jack)

pastry dough

Red Devil Dough

This time around, I made my regular pastry dough and added about 1 TBSP of ground Aleppo chilies into the dough mixture.  Next time I make these though, I am going to try them with softer bread dough instead, t make a comparison of which way we like best.

1 1/2 cups flour

6 TBSP cold butter

a pinch of salt

1 egg

4-6 TBSP heavy whipping cream

1 TBSP ground Aleppo chilies

In a food processor, pulse the flour, butter, salt and chilies until you have a soft and crumbly mixture.  Then add the egg and the cream and mix again until the dough forms into a ball.  Remove from the food processor, wrap in plastic wrap and let chill for at least an hour before rolling it out.  Roll the dough about 1/4-1/2″ in thickness on a lightly floured surface.  Then cut into strips to wrap around the sausage, cheese and peppers.  Brush with an egg wash and bake at 350* for about 30-40 minutes, or until golden brown.  You can serve with marinara sauce or a creole mustard sauce.  This time I served it with creole mustard and then topped it with chopped parsley.

Our simple, but delicious summer meal that we dined upon al fresco, on our beautiful deck facing the ponds.  We had the red devils, potato salad and the green bean Caesar salad, along with a nice, crisp chardonnay that had hints of apricots, honey and jasmine.  Dessert was a light and moist almond cake.  I was busy cooking in the kitchen.  I got up early to avoid some of the heat, making as much as possible before the weather got too hot.

IMG_1504

Cool Green Bean Caesar Salad

The last thing we want to eat when the temperatures and the mercury are rising are heavy foods.  We want to eat as many cool dishes as possible.  This means a lot of different kinds of salads, both as side dishes and as main meals.   Tonight we are having a cool green bean Caesar salad.  It is a new twist to an old classic.  I am serving this along with a cool potato salad (just a regular mustard/miracle whip version with hard boiled eggs today) and some spicy sausage rolls, or Saichichin del Diablo, a recipe from a friend of mine.   Add a good cold beer or a light, crisp white wine, and you will be chilling down and relaxig from the sweltering heat of the day.

IMG_1495

Cool Green Bean Caesar Salad

1 1/2 lbs green beans, remove the stems and cook

2 oz. shaved Parmegiano cheese

1/2 red onion, sliced very thin

1/2 red bell pepper, diced small

3/4 cup grape tomatoes, cut in 1/2

croutons

Place the stemmed green beans in boiling water and cook for about 5-7 minutes, or until they are mostly tender, with just a slight crunch still left to them.  Once they are cooked, drain them and set aside to let cool.  Once cooled, cut them into 1″ pieces and toss everything together with as much dressing as you need to coat the beans, but like a regular Caesar salad, you do not want too much dressing.   There is such a thing as too much of a good thing, especially dressings on salads.    You want it coated and nice and flavorful, but you no don’t want your salad swimming in dressing either.

All you need to make your salad.  Shave the Parmigiano cheese nice and thin with a vegetable peeler.

IMG_1491

IMG_1493


Cool Caesar Dressing

3 TBSP olive oil

black pepper to taste

1 TBSP Dijon mustard

1 TBSP Worcestershire Sauce

3 cloves garlic

1 1/2 TBSP lemon juice

I had some leftover pepita dressing I had made earlier and added about 2-3 TBSP of that as well.  Mix everything together and toss in as needed with your green bean mixture.


Making the Croutons

IMG_1488

To make the croutons, take some crusty bread and cube into your desired size.  Cut the bread with a serrated bread knife.  Toss the bread cubes with olive oil and black pepper and roast in the oven for about 20 minutes, or until golden brown and crunchy.  Toss the bread cubes and rotate the pan after about 10 minutes.  Remove from the oven and let cool.  Once they are cooled, toss in with your salad mixture, or just add to the top of your salad.  You can use any kind of bread and/or seasoning you would like to make your croutons.  I used a rustic garlic pugliese loaf that was a few days old; just perfect for making croutons.  Store bought croutons are fine well too.

Enjoy and stay cool!


Steak Au Poivre

I am a “saucy” kind of girl.  I just love sauces on top of my foods. If the sauce is good enough, it almost makes the meal in and of itself.   Steak au poivre starts out with filet mignon, which is my favorite cut of steak, but the sauce just made it absolutely divine.  We eat well on a regular basis, but we don’t often eat filet mignon.   This was the first time in a very long time that we had filet mignon.  But it was so worth the wait.    As many of you know, there are a lot of French influences in the world of cooking.  An au poivre sauce is just such an example.  Au poivre means with pepper, so steak au poivre is a steak made with crushed peppercorns, both as the seasoning for the steak itself, and also in the sauce.

IMG_1475

Crush whole peppercorns and really press them into the filets on both sides.  Some people crush their peppercorns by using the bottom of a skillet and kind of rolling them on the peppercorns.  I have never had much success doing it that way, so instead, I used a hand-held meat tenderizing “hammer”.  I put the peppercorns in a plastic back and wrapped a towel around the bag than just started pounding the peppercorns until I got them to the right consistency.

IMG_1463

In a very hot skillet, coated with enough oil to brown the steaks and to prevent them from sticking, sear the steaks on both sides.   I love my steaks on the rare to medium rare side, so I seared the steaks for about 4-5 minutes per side.  If you like your meats more cooked, just cook them a little longer longer; about 6-7 minutes will give you a medium steak.  With this flavorful cut of meat, you definitely DO NOT want to over cook it.

IMG_1465

When the steaks are cooked to your desired doneness, remove them from the heat and keep them warm in the oven set at 200* F.  Drain off the extra oil, keeping the peppercorns, and add minced shallots and 2 TBSP butter.  Saute the shallots for about 3-5 minutes or until they are translucent and slightly browned.  Add 1/2 cup of cognac or brandy.  Be careful, because it will flare up and flambe, but the flames will die down within a few seconds.

IMG_1467

Add the cream and Creole spices, Creole mustard and any additional meat juices from the pan.  Bring to a boil, then reduce the heat and reduce by half.  This will take about 3 minutes.  Whisk in the remaining butter and serve over your steaks.

IMG_1468

IMG_1470

Steak Au Poivre

4 6 oz filet mignon steaks

1 TBSP Kosher salt

2 tsp whole black peppercorns

1 tsp olive oil

1/3 cup shallots, minced

4 TBSP butter, divided

1/2 cup cognac or brandy

3/4 cup heavy whipping cream

1 tsp Creole seasoning

1 TBSP Creole mustard


Top with fresh chopped parsley.IMG_1479

I served my steak au poivre with a vegetable galette and mashed potatoes, finishing the meal with a beautiful Strabilante Verdot.  This is definitely a five star meal.  As my idol an mentor would say, Bon Apetite!


Vegetable Galette

My husband teases me and says I don’t like to eat leftovers.  Not true at all.  I just don’t like leftovers as they were the first time around.  I like to recreate them into something totally different, so no one knows that they already had their time and space on on the plate.  A couple of days ago, I had made a lot of sauteed vegetables, which of course meant there were quite a few left over.   Don’t get me wrong, they were very good the first time around, but I think the way that I made them tonight made them even better.  I made them into a vegetable galette, which is basically a rustic tart.  Delicious!  I just love the whole idea of rustic cooking.  To me, it seems more real and down to earth than making something picture perfect.  I served this delectable tart along side steak au poive, and a very smooth, bold and fruity Strabilante Verdot.

IMG_1472

Rolling out the dough.

IMG_1457

Making the galette.

IMG_1459

Folding over the edges.

IMG_1460

IMG_1461

Brush the dough with an egg wash before putting in the oven to bake.

IMG_1462

Vegetable Galette

You can use any kind of vegetables you like.  I used sauteed zucchini, yellow squash, red onions, eggplant, mushrooms and garlic, cooked with thyme, oregano and marjoram.  Make sure to drain off any residual oil or liquid from your vegetables before using them as a filling for the dough, otherwise, you will have a gooey mess.


The Dough

2 cups flour

10 TBSP cold butter, cubed

1 tsp salt

2 eggs

1/4 cup heavy whipping cream

1 TBSP lemon pepper


Mix the flour, butter, lemon pepper and salt in a food processor until well blended, then add the eggs and whipping cream and mix again until the mixture forms into a ball.  Wrap in plastic wrap and refridgerate for at least 1/2 hour before using.

The Filling

Use whatever cooked vegetables you like.

cheese of your choice.  I used Mozzarella.

pine nuts


Egg Wash

1 egg

1 TBSP heavy whipping cream


Preheat the oven to 375* F

After the dough is ready, roll it to about 1/4-1/2 ” thickness on a lightly floured surface.  Then place on a baking sheet lined with parchment paper.  Cover the surface of the dough with the cheese of your choice, leaving about 2″ uncovered around the edges.  Then cover with the cooked vegetables.  Layer with more cheese and finish with pine nuts.  Gently fold the dough over and layer it to a width of about 2″ from the edges.  Brush the dough with egg wash and bake for about 45 minutes or until your crust is golden brown.  Your will have a rich, buttery crust that is really light and flaky.  Serve hot.


Cool Pawdelicious Summer Treats

According to the calendar, it is still technically Spring.  Summer isn’t here just yet.  But the temperature and the mercury are already rising, despite that fact, and it is already sweltering hot.  We are only in early June and we are already reaching temperatures in the mid 90’s here in Colorado.  If it this hot for us humans, just imagine how hot it is for our fur babies, especially those who have a double coat and thrive in cold weather.   Lucie and Vinnie HATE the heat.   The colder the better for them.  Although, double-coated dogs have a more regulated body temperature because the double coat acts as an insulation buffer to a certain degree.  So on these dog days of summer, when you and your dogs are melting, give your dogs a bit of of break from the heat with these cool, “pawdelicious” treats.  They are like doggy popsicles.  Lucie and Vinnie absolutely love them.   As much as they love them though, and they will eat them all in one sitting if you let them, definitely fight the temptation to give them too many at one time because with the coconut oil ….. well, let’s just say it will definitely clean out their systems and there will be a runny mess to clean up.

Fritzie is inspecting and putting her paw print of approval on these, making sure  everything is just to her liking.  These pawdelicious treats have only three simple ingredients – peanut butter (either creamy or chunky), coconut oil and cinnamon.  These ingredients are fairly common in most households, and they only take about five minutes to make.   These are a cool, refreshing and relatively healthy treat for your fur babies.   Peanut butter is very high in protein and relatively low in fat, which is just perfect for the dogs.

IMG_1436

Lucie and Vinnie are also eagerly awaiting to give their paw prints of approval.

IMG_1430

The clean-up crew hard at work.

IMG_1433

IMG_1434

Time for treats.

IMG_1438

Pawdelicious Peanut Butter and Coconut Dogsicles

I cup peanut butter, either creamy or chunky

1 cup coconut oil

1 tsp cinnamon


Pour into molds and freeze.  Serve them frozen to your fur babies.  You will definitely get an approving paw or two after giving your fur babies these cool and refreshing treats.


Spicy Curried Panang-Style Shrimp

There are many different varieties of curries and curried dishes are found in many different parts of the world.  There are hot and spicy varieties and sweeter varieties, as well as everything in between.  I love them all.  My favorite curried dishes are more of the Thai and Indian styles of curries, although if a dish has curry in it, chances are, I am really going to like it, no matter what style it is.

Shrimp Panang Style Curry over wild rice, served with a pork empanada and topped with with sliced green onions and toasted coconut.  A good semi-dry Reisling would be a perfect accompaniment to this dish.

IMG_1422

My husband often teases me, and it has become a running joke in our house, that “I like stuff in my stuff”.  So When I cook soups, stews, casseroles, or one-pan dishes, I usually add a wide variety of fresh vegetables of all colors and textures to really make the dish come alive.   I make sure we eat plenty of greens, reds, yellows, purples and everything in between.

IMG_1408

Saute the vegetables first in either olive oil, peanut oil or canola oil.  I almost always use olive oil.  Cook them until they are moderately softened, but still have a light crisp to them, for about 7-10 minutes and set aside.  Don’t cover them after they have been cooked or they will loose a lot of their vivid color and freshness, becoming kind of limp and soggy.

IMG_1410

Cook your shrimp (or protein of your choice) separately.  You can use the same oil, adding more as needed.  Cook the shrimp for about 3-5 minutes per side until nice and pink.  Remove the shrimp from the heat and set aside.

IMG_1415

IMG_1418

Make your sauce, bring to a boil, then reduce the heat to a simmer and add the vegetables, shrimp and seasonings.  Cook for about 10 minutes, stirring frequently to make sure it doesn’t stick.  When everything is cooked and ready to serve, top with sliced green onions and toasted coconut if desired.  You can serve this over a rice of your choice or noodles of your choice.

Spicy Curried Panang-Style Shrimp

2 lbs peeled and deveined shrimp

1/2 each green, red, yellow and orange bell peppers, sliced thin

1/2 large red onion, sliced thin

3/4 cup mushrooms, sliced thin

1/2 cup green beans, cut about 1″ in length

Curried Sauce

1 heaping TBSP fresh ginger

1-2 heaping TBSP garlic

1-2 TBSP lime juice

1 can coconut milk

1/2-3/4 cup peanut butter, either creamy or chunky

1 TBSP red pepper flakes or to taste

2 TBSP curry powder and/or curry paste – I used green curry paste, but red curry paste is fine too.  I use them both quite frequently.

1 tsp tumeric

2-3 TBSP honey

2 TBSP cilantro, chopped fine

salt & pepper to taste

green onions, sliced Asian style or at a diagonal

toasted coconut, optional


Cook the vegetables and shrimp separately and set aside.  Combine all the ingredients for the sauce and whisk together well.  Add them to your skillet and bring to a boil, then reduce to a simmer and add the vegetables and shrimp.  Continue to cook for about 10 minutes at a simmer, stirring frequently.  When done, serve over either cooked rice or noodles and top with the sliced green onions and toasted coconut if using.   You can substitute chicken or scallops, or a combination of all three if you wish.  You can also make it vegetarian or vegan too, by substituting tempe or tofu, just having the curried vegetables.