Lets get it going #59

I am always up for a good party. I’ll cook. Come see what’s cookin’ with “A Jeanne in the Kitchen”. You can find me at ajeanneinthekitchen.com

itsgoodtobecrazysometimes's avatarIts good to be crazy Sometimes

Its all a bit quiet this week, are you lot getting fed up of partying every weekend?

If not come and join in click here and lets go for it

View original post

Smoked Turkey and Vegetables Crepes

We have all heard of and most likely eaten some type of crepe.  They are very thin and delicious French pancakes that can be filled or not filled.  Crepes are very versatile and can be eaten many different ways, at any time of day.  They can be filled with a savory filling and eaten as a main meal or they can be filled with fruit and/or other fillings to be eaten as either a dessert or breakfast.   The word crepe is French for pancake, but derives from the Latin word crispus, meaning crisp.  Originally they were called galettes, which translated to flat cakes.  Crepes originally hail from the Northwest region of France, known as Brittany.  When they were first created, they were used as bread and very rarely had fillings.  Up until about 100 years ago, savory crepes were always made with buckwheat flour and were knows as galettes sarrasines.  Dessert crepes were made with wheat flour.  In France, “crepes are traditionally eaten on Candelmas and Shrove Tuesday to celebrate renewal, family life, and hope for good fortune and happiness ahead.  ” (p. 5 – Crepes – Sweet & Savory Recipes for the Home Cook, by Lou Seibert Pappas).  It is customary to touch the handle of the frying pan and to make a wish with a coin in the hand while the crepe is being flipped.  In earlier times, the French farmers would give their landowners crepes as a symbol of their allegiance to them.  Crepes are eaten all over the world and go by many names.  The Italians call them crespelles.  In Hungary, they are known as palacsintas.  The Jewish culture refers to them as blintzes and the Russians call them blinis.  To the Greeks, crepes are called kreps and Scandinavians call them plattars.  Each country and each culture adds a slightly different and unique twist to their crepes, but no matter what you call them, or where you eat them, they all have one thing in common; They are all delicious.

I made my crepes last night with a bit of a Southwestern flair.  When Larry smoked the ribs and the turkey, we had some smoked turkey legs as well.  I wasn’t sure what I was going to do with them, then the idea of making crepes struck me, and my Southwestern smoked turkey and vegetable crepes were created.  I took the meat of the bones and shredded it, then added pumpkin, spinach, sun-dried tomatoes, garlic, shallots, and red pepper flakes to use as my filling.

IMG_4391

IMG_4372

Smoked Turkey and Vegetable Filling

1-1 1/2 lbs smoked turkey, shredded

1-2 cups fresh spinach, stemmed and chopped in a rough cut

1 shallot, minced

1-1 1/2 TBSP garlic

1/3 cup sun-dried tomatoes, chopped

5-6 mushrooms, sliced thin

1 cup pumpkin, cubed small

1-2 tsp red pepper flakes, or to taste

salt & pepper to taste

olive oil for cooking


Saute the pumpkin first for about 5 minutes, then add the rest of the vegetables and the other ingredients and continue to cook for about another 5-7 minutes.  One the vegetables are all cooked, add the turkey.  Mix everything together well and set aside.

IMG_4376

IMG_4378

IMG_4379

Savory Sage Crepes

2 large eggs

1/2 cups milk

1/3 cup water

2/3 cup flour

2/3 cup corn flour or masa harina

2 tsp fresh sage, chopped fine

2-3 TBSP melted butter

1/4 tsp salt


Mix everything together in the food processor for about 30 seconds or until well blended, then cover and chill in the refrigerator for at least 1 hour before cooking.  In a small, HOT skillet, with butter, and add about 3 TBSP of the batter to the hot skillet.  Make sure to swirl it all around to cover the pan completely.  Cook for about 1 minute, then loosen the edges with a spoon, and gently flip the crepe over and continue to cook for about 1 more minute.  Repeat until the crepe mixture is all done.  Greek Crepe Cannelloni Stuffed with Beef.

Preheat the oven to 350* F

Once the crepes are all cooked, spray a baking pan with cooking spray, and fill each crepe with filling, then roll everything together.  Lay the crepes side by side in the baking sheet until the baking sheet is full.  Before baking, if you like, you can top the crepes with cheese of your choice.  bake for about 20 minutes, or until the filling is nice and hot.

IMG_4387

IMG_4389

I hate dry food and almost always have some kind of a sauce to top my foods.  I made a tangy pumpkin-yogurt sauce to top my crepes.

IMG_4386

Tangy Pumpkin-Yogurt Sauce

1 cup pumpkin vinaigrette

1 cup plain yogurt

1 TBSP ginger

1 TBSP fresh cilantro, chopped fine


Mix everything together and heat in a saucepan for about 5 minutes, then spoon over the hot crepes and serve.  I served my crepes over wild rice with a roasted vegetable medley, with a fruity, lightly oaked chardonnay.  C’est ce bon!

IMG_4390


Larry Is In the Kitchen Tonight

Every now and then I let my husband Larry into the kitchen too.  It’s pretty rare, but on occasion, it does happen.   He doesn’t really like to cook so much, but he does likes to grill and smoke things.  A few months ago, he “inherited” a smoker from one of his brothers when he replaced it for a new one.  We still have a few kinks to work out, but mostly things come out pretty good.  My biggest complaint with using the smoker is that things often come out dry and/or overcooked.  I admit, I do not even know how to use the smoker, so I am not to blame for this.  I much prefer to cook than to use either the smoker or grill.  The smoker and the grill is in Larry’s repertoire, not mine.

The other day when we had our Christmas party, Holiday Fun, while Larry was smoking the bacon wrapped turkey, he also added a rack of ribs that I had rubbed with a Cajun rub.  Larry was so proud of his ribs and how they turned out.

Larry is adding the last of the apple butter BBQ sauce to the ribs before putting them in the oven (I really don’t remember what ingredients I used to make the apple butter BBQ sauce, but I am sure I could easily replicate it when I need to).

IMG_4360

Before putting the ribs into the oven.

IMG_4361

After they came out of the oven.

IMG_4362

Cajun Rub

2 TBSP Cajun spice rub

2 tsp paprika

2 tsp dried thyme

2 tsp dried oregano

1 tsp cayenne pepper

1 TBSP garlic

1 TBSP brown sugar


Mix everything together well and rub over your favorite meat.


Vinnie is carefully watching Daddy, hoping desperately that some will fall his way.

IMG_4365

And dinner is served.  We had Cajun ribs with apple butter BBQ sauce, leftover mashed sweet potatoes, leftover Brussels sprouts slaw, and an herbed cheese bread with a red smooth, full bodied red blend to make the meal complete.

IMG_4366


How to Cut an Avocado

Growing up in Southern California, where avocados are in abundance, and we eat avocados all the time, I just always thought that everyone knew how to cut them and how to remove the seed.   But the other night while at a Christmas party, we were talking to someone who was telling us how she had cut herself very badly while removing the seed from an avocado, and she now has an aversion to cutting them.  That was a real eye opener to me.  So I thought I would show everyone how to properly remove the seed from an avocado to prevent anyone else cutting themselves while in the process.  This post is more of a public service announcement or a PSA, and is not like my normal posts.  I want everyone to be safe now rather than sorry later.

Once you know how, cutting avocados is really pretty easy.  Start with a sharp knife at the top of the avocado, right where the stem is.  Insert the knife at the stem and rotate the avocado away from you.  You will have one even cut that will cut the avocado in cleanly in half.   Slap the blade of the knife hard into the center of the seed.

IMG_4353

Give the knife and seed a slight turn to one side, which will loosen the seed from its pocket. The seed will come out of its pocket very easily, while still attached to the knife.

IMG_4354

IMG_4355

Carefully remove the seed from the knife.  If you are using the whole avocado, and there will be no leftovers, discard the seed.  If you are only going to use part of the avocado, or if you are making guacamole, keep the seed and place it back on the remaining avocado or into the guacamole to help keep it fresh and to help preserve the “greenness” of the avocado.  Lemon or lime juice will also help.

Once the seed has been removed from the fruit, take a large spoon, and gently go around the edges of the skin and the “meat”, making sure to support the meat of the fruit with the spoon, and all the meat will come out of the skin very easily, in one piece.  This works best when the avocados are ripe.  With unripened avocados, you do the same thing, but unfortunately, the meat is more firm and does not cooperate as well.  If the avocados are not ripe, and you have a couple of days to wait before using them, place them in a brown paper bag with a banana to help soften and ripen them.

IMG_4356Once the avocado has been removed from its skin and the seed has been removed, it is ready for you to eat and enjoy how you like.  Desfruitas!


Not Feeling Well? I’ll Make You Some Chicken Noodle Soup

I am sure most of us have grown up hearing the phrase “Not felling well?  I’ll make you some chicken noodle soup”.  As it turns out, there is more to this than it being just a mere wives’ tale after all.  Research is now showing that there really are some medicinal qualities to eating chicken noodle soup, or chicken soup with vegetables, when you are feeling under the weather.   There are many different versions of chicken soup around the world, and it seems like eating chicken soup is a universal remedy when feeling ill.  No matter what other ingredients go into the soup, it almost always contains onions, garlic and carrots, as well as the chicken and the stock.   According to Dr. Stephen Rennard, MD, from the University of Nebraska Medical Center, eating some kind of a hot soup even with the minimal ingredients of chicken, onions, garlic, carrots and stock acts as an anti-inflammatory agent for the nasal cells, which reduces nasal congestion.  Researchers cannot specifically identify the ingredient or ingredients in chicken soup that makes it so effective against fighting off colds and infections, but say it may just very well be the combination of the vegetables and the chicken working together that gives chicken soup its medicinal effectiveness.   The chicken and chicken stock are both full of proteins and amino acids; one in particular, called cysteine, that help thin the mucus in the lungs, as well as aiding in building up weak muscles, which also helps to fight off infections and illness.  With the addition of onions and garlic, both containing protein, calcium and sulphur, the swelling in the nasal cavities is reduced, which aids in combatting nasal congestion.  By adding carrots, you are also adding Vitamin A, and that strengthens and increases the white blood cells, which in turn fight off infections.  The more vegetable you add, the more healing properties of the soup.   So next time you are feeling under the weather, you really should eat that chicken noodle soup that is offered to you.  It really will help you feel better.  Of course, you can eat chicken soup at any time, not just when you are sick.

I have been craving chicken noodle soup for awhile, and decided with it being excellent soup weather, now was the perfect time to make some chicken noodle soup.  I love thick, chowdery soups, so I made a thick, creamy chicken noodle soup.  It warmed me up from the inside out.  No, it is not as healthy as a chicken noodle soup without the cream, but it sticks to the ribs more (unfortunately, in more ways than one) and is more of a meal with the addition of the cream.

IMG_4344


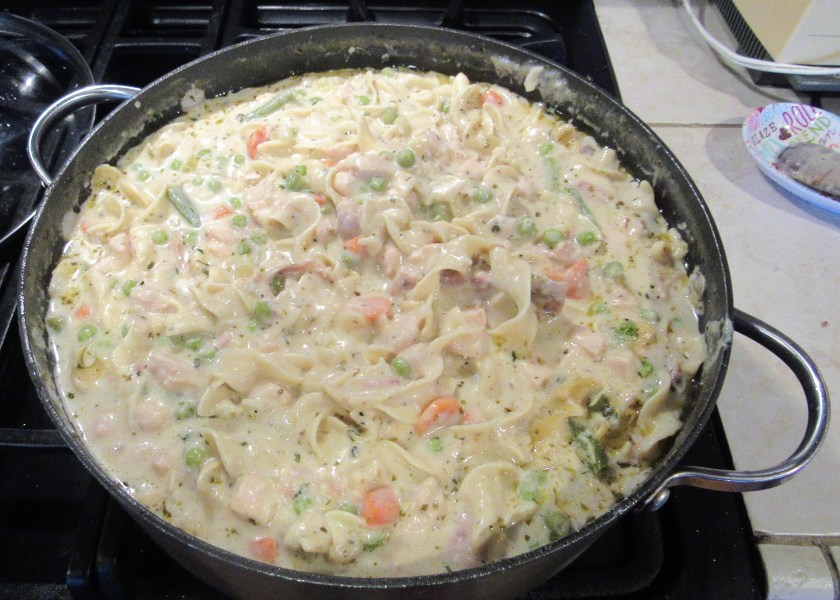
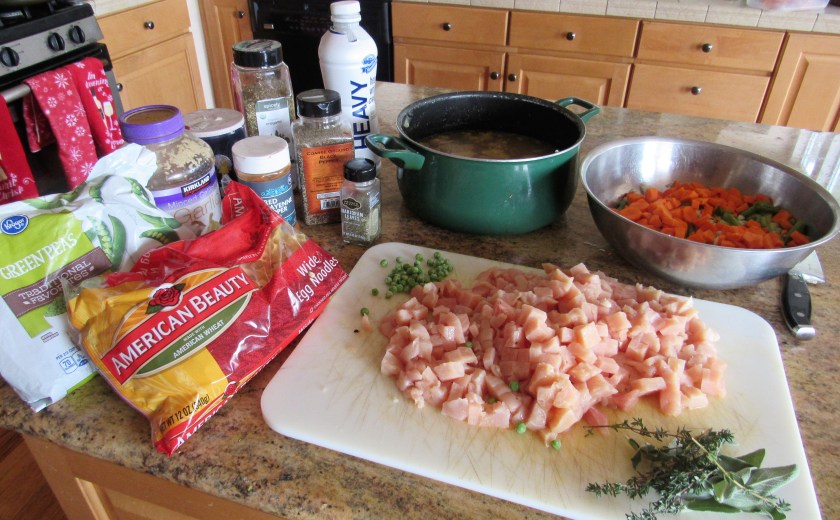
Thick and Creamy Chicken Noodle Soup

IMG_4329

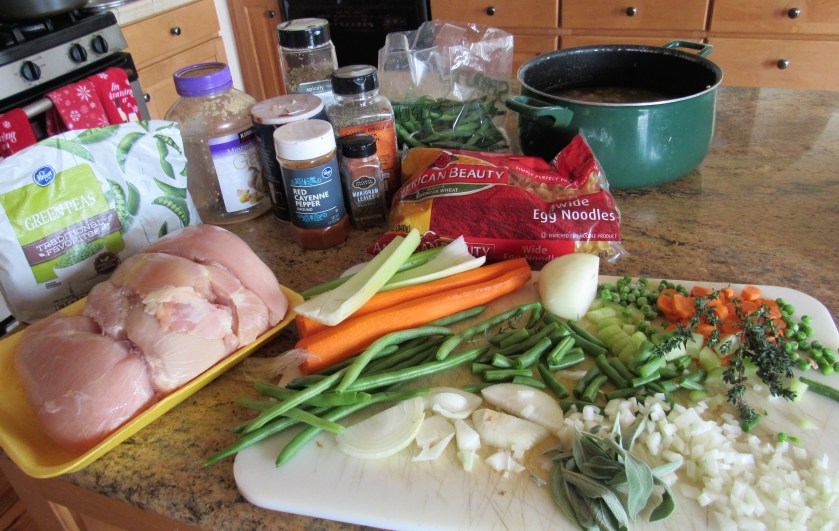
1 1/2-2 lbs chicken, cubed small

1 onions, diced fine

3 carrots, diced fine

3 celery stalks, diced fine

1-1 1/2 heaping TBSP garlic

6 cups chicken stock ( I made my own turkey stock and used that)

1 cup fresh green beans, cut into 1″ pieces

1 cup frozen peas

1 lb uncooked noodles of your choice (I used extra wide egg noodles)

3/4-1 cup flour

salt & pepper to taste

1-2 tsp cayenne pepper (optional)

1 tsp each fresh thyme, oregano, sage – if fresh, chop fine

olive oil and butter for cooking

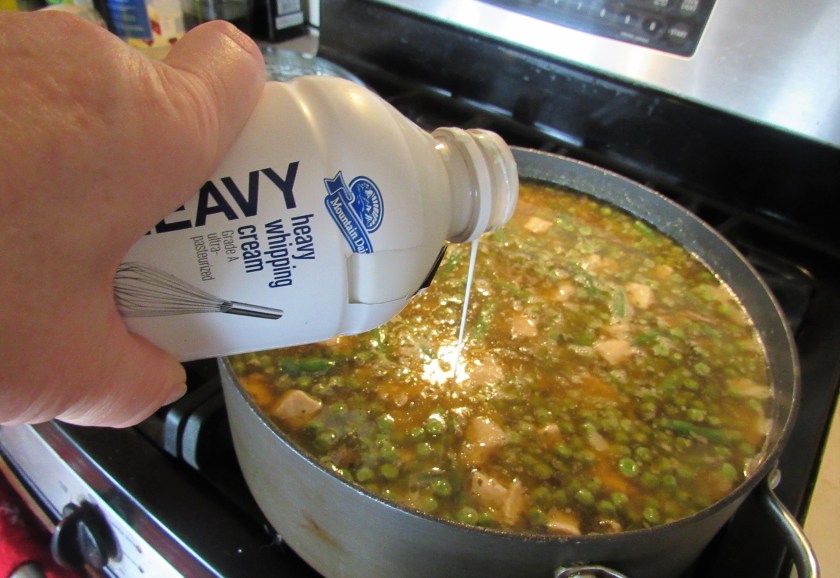
2 cups heavy whipping cream


IMG_4330

Once you have the vegetables and chicken cut, coat the chicken in flour.   Cook the chicken in a large pot in a combination of olive oil and butter.  Cook until the chicken is cooked completely and is slightly browned.

IMG_4332

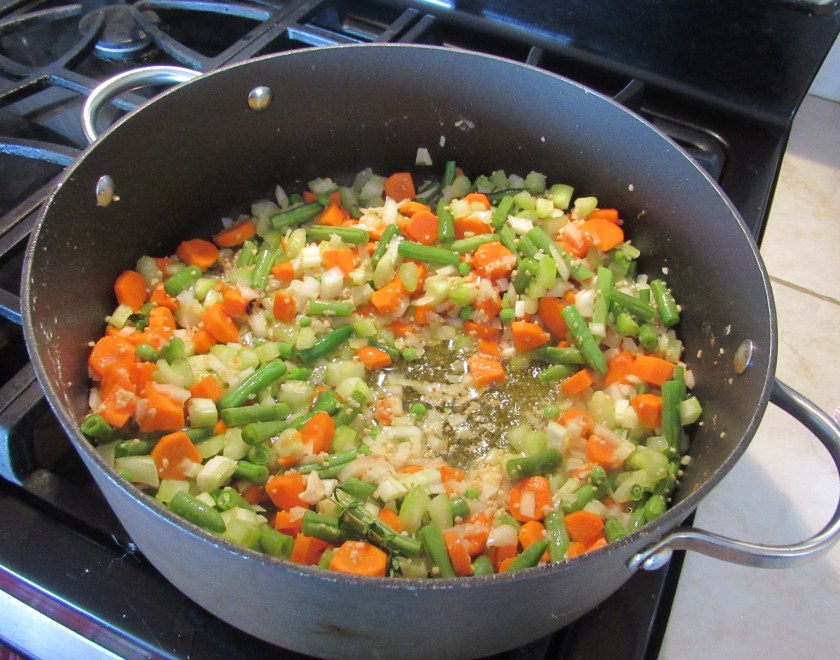
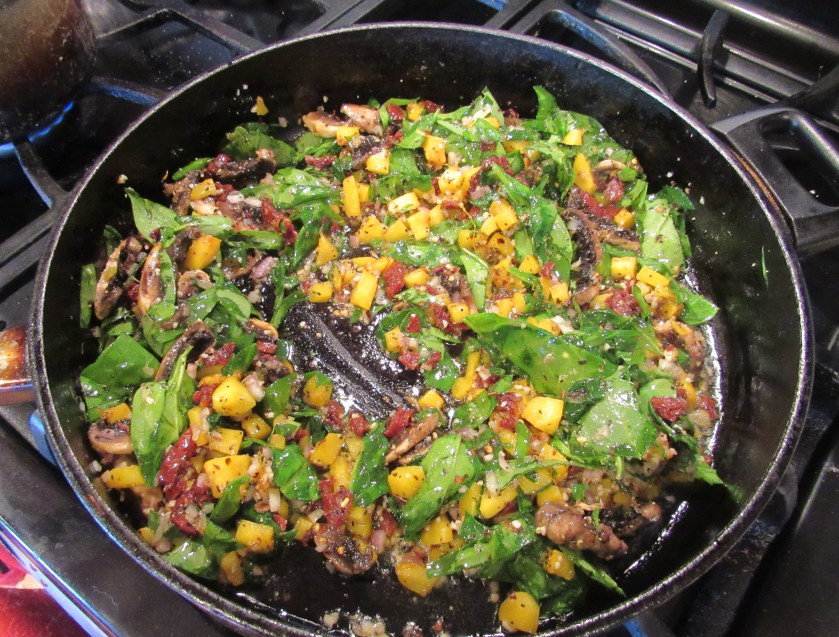
Once the chicken is completely cooked, remove it from the pot and set it aside.  Add the vegetables, and more oil/butter if needed, and cook them until they are tender and the onions are translucent.

IMG_4335

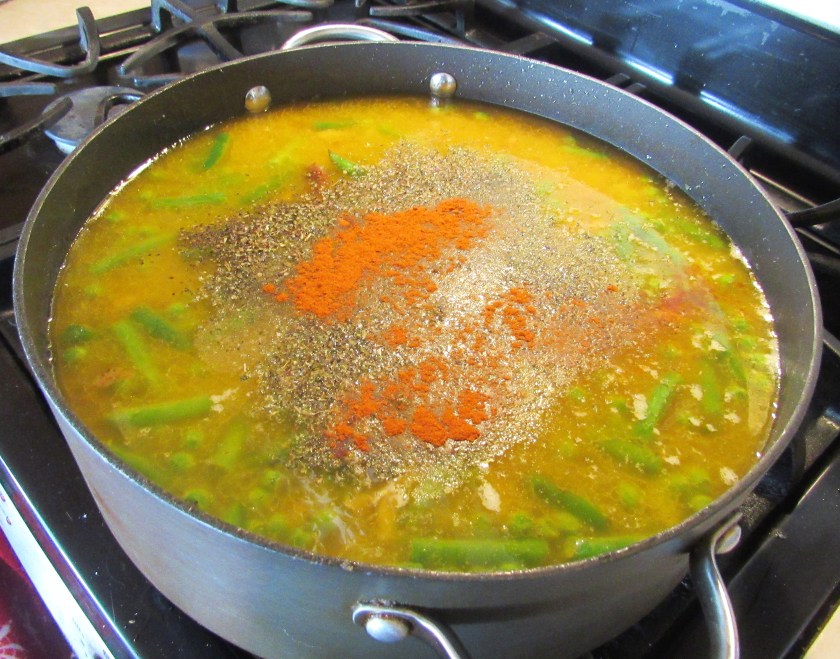
Once the vegetables are cooked, add the chicken, stock and seasonings.  If you are using dried herbs, now is the time to add those too.  If you are using fresh herbs, wait to add those later.  Mix well and bring to a boil. Let it boil for about 5 minutes, then reduce the heat to a simmer and let simmer for about 30 minutes, stirring occassionally.

IMG_4336

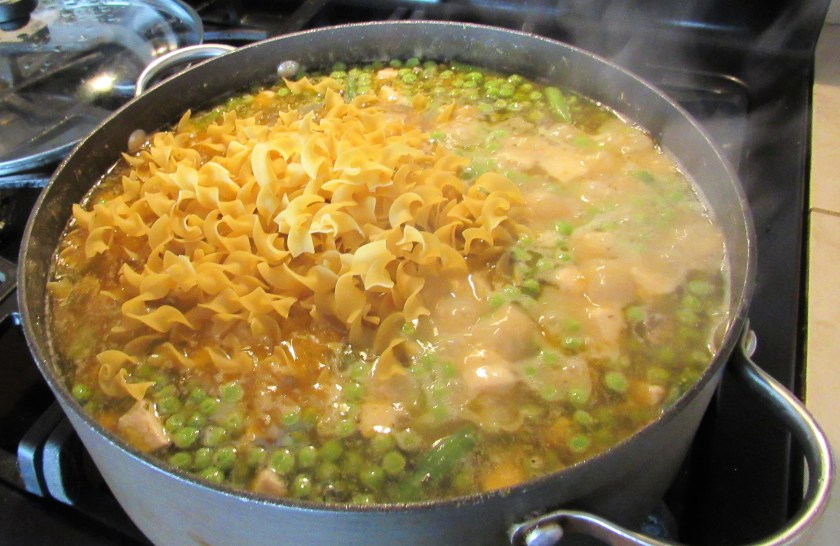
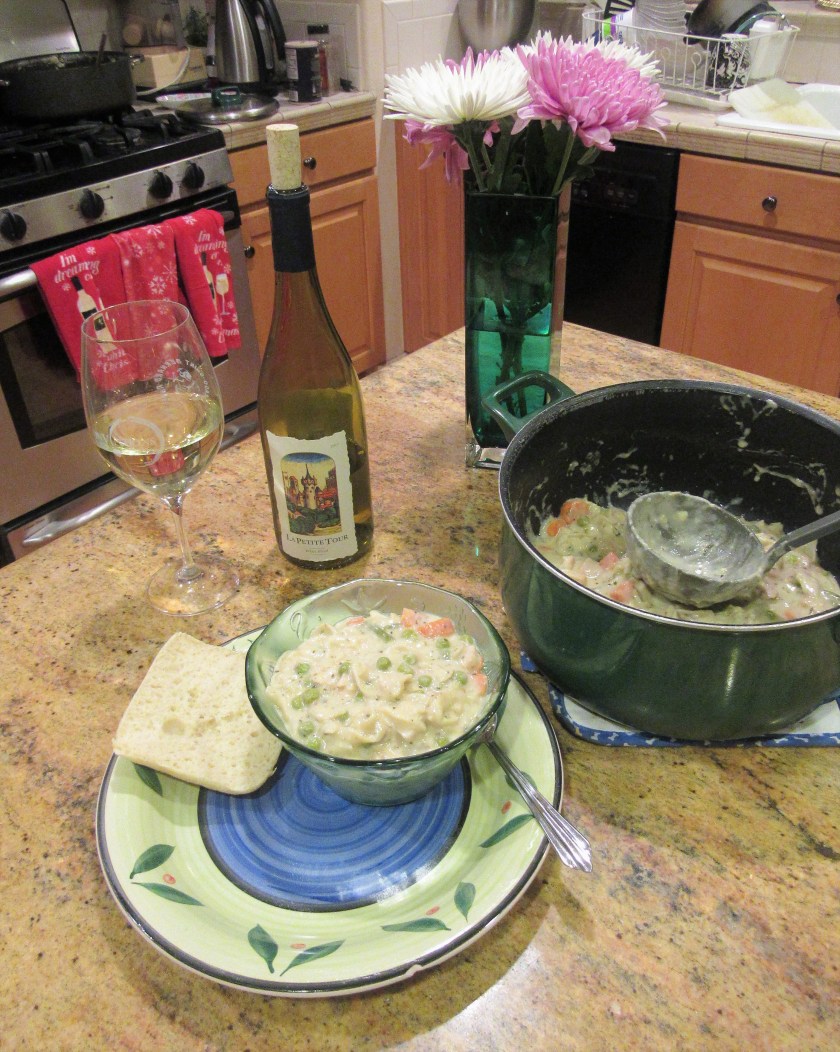
Add the pasta, cream and fresh herbs if using, and continue to cook for about 10 more minutes.  Adjust the seasonsings if necessary.  Combine everything well.  Ladle it up and enjoy.

IMG_4337

IMG_4339


It was a simple meal of just soup with warmed ciabiatta bread and wine.  Every time I make a simple meal of soup, it always reminds me of my favorite picture that I grew up with.  Granted, my soup and meal is not as humble as the meal in the picture, but it is a good reminder that sometimes simple is best.
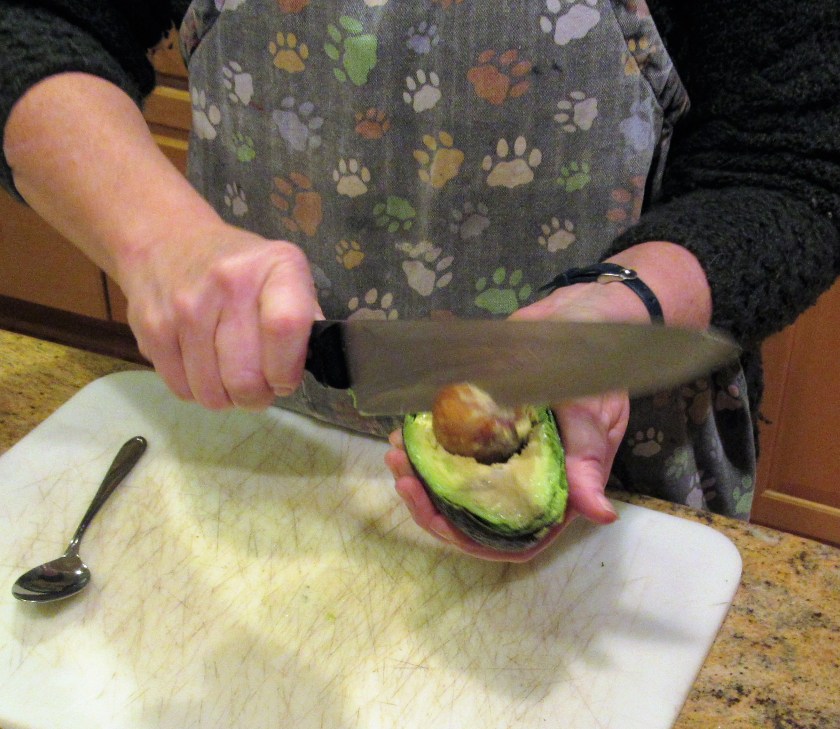
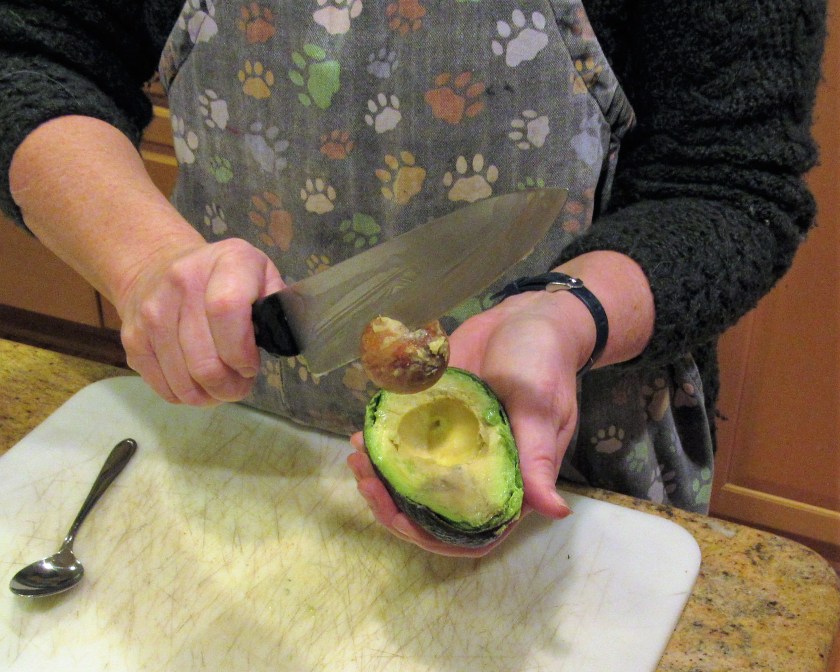
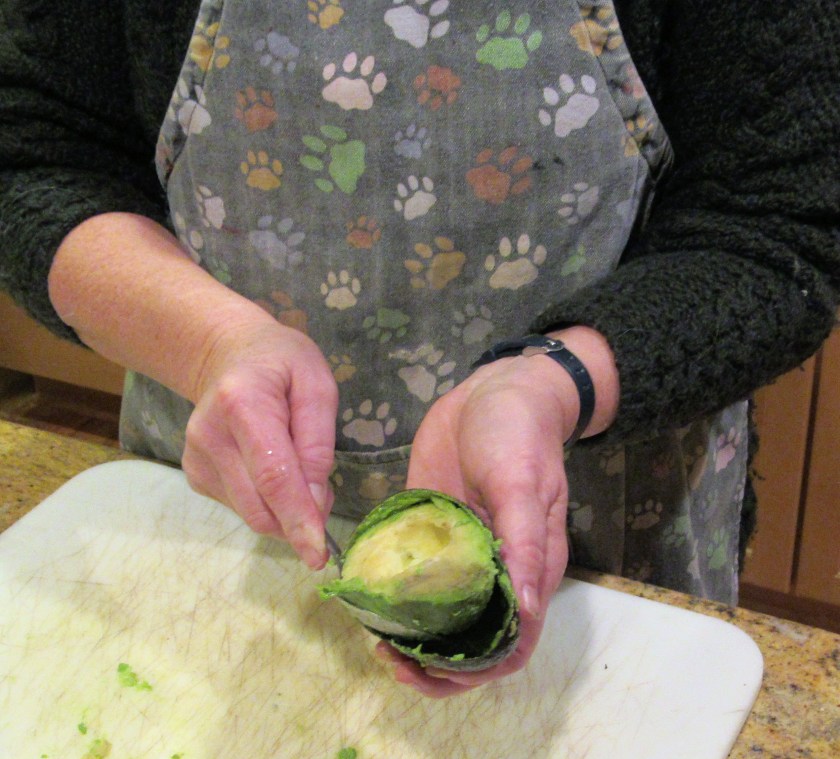
IMG_4343

IMG_4346

Make It Real

This was a compliment I received from a very good friend of mine regarding my blog and all it’s recipes.  This is the best compliment anyone could give me.    I just had to share it with all of you.  “One thing I really love about your recipes (and your blog) is that you use/feature real ingredients that most of us have and use all the time or can easily buy (Hello, Kirkland brand.) Nothing is too fancy, there’s nothing I have to “google” to see what it is and, the best part, everything tastes so good!”  This is EXACTLY why I created my blog.  I want people to feel comfortable in the kitchen.  Things don’t have to be fancy or made with specialty ingredients to be good.  As long as they are made with love, inspiration, curiosity and a willingness to learn and try new things, then no matter what comes out of the kitchen, it will be a success.  

Thank you Traci.  Love you and Scott heaps and heaps.

IMG_0646

IMG_0649

A Medley of Nuts

I love nuts.  Yes, they contain fats, but they also contain a lot of protein as well as many other nutrients, which means they are very good for us and are all around much healthier for us than not.  But just like with anything else though, everything in moderation.  Nuts of all kinds are always a staple around the holidays too.  After all, nuts and nutcrackers are a big part of the Christmas and Holiday traditions around the world.  I really wanted to make a pecan pie for Thanksgiving, but I got out voted.  So for our Holiday party, there was no one to out vote me, and I made my favorite nut tart, with a medley of different nuts as one of my desserts.  I try to make this tart at least once every holiday season.  It was a big hit, as I knew it would be, and sad to say, it all disappeared very quickly.  I might just have to make another one before the end of the Holiday season.

IMG_4308

Nut Medley Tart

Pate sucre or pie crust

3 cups of mixed nuts – your choice

3 eggs

1 cup honey

1/2 tsp either orange extract or grated orange peel, or both

1 tsp vanilla

1/4 cup butter, melted

whipped cream, optional for topping


I used pecans, macademia nuts, cashews, and almonds, but use whatever kind of nuts you like.

IMG_4292

Preheat the oven to 350* F

Toast the nuts in the oven for about 10 minutes, making sure to stir them at least once.  Remove the nuts from the oven and set aside.

Make your pie crust or pate sucre Thanksgiving Dinner – Part III – Pumpkin Pie and roll it into the tart pan.  Once the dough covers the pan, use the rolling pin to roll over the edges of the dough and it will cut off the excess dough while it is shaping it into the pan.

IMG_4295

Mix all the ingredients together and mix until well blended, then gently fold in all the nuts.  Pour the mixture into the shell.

IMG_4296

Since I had some extra dough, I used some festive cookie cutters and made some decorations for the top of the tart.  This is optional, but if you do this, make an egg wash to brush over the top of the dough cut-outs to help them brown.  Bake for about 40-50 minutes or until the top is golden brown.  Let the tart completely cool before removing the bottom of the tart pan and cutting.

IMG_4297


Holiday Fun

Every year, my husband and I host a fun ornament exchange.  Everyone is invited, and all are welcome.  My motto is “the more the merrier”.  There have been times when the house has been jam packed and there is barely enough room to move around and other times when we have a smaller, more intimate crowd.  Either way, whether the crowd is large or small, we always have a good time.  I tell everyone who wants to participate to bring a wrapped ornament and a dish to share.  After we have all visited and wined and dined, it’s time to let the games begin.  Because our ornament exchange is meant to be a fun game, and it is much more fun when people “steal”, so I always encourage “stealing” ornaments once they have been opened.  Sometimes, it gets pretty vicious and people get very territorial with their newly acquired ornaments, but it is all in good fun.  In the end, everyone goes home with a new ornament for their tree, and happy memories of a fun evening, shared by friends both new and old.  Last night was the day of our party for the 2018 Holiday season.  We rang in the season with food, fun and festivities celebrated with friends.  This is always the best way to ring in the Holidays.

In case you hadn’t noticed by now, I love to cook.  I make our ornament exchanges a potluck, but I still love to cook up quite a bit for the party as well.   My husband is always trying his best to reign me in, telling me “this is a potluck, you do not have to make a bazillin different dishes”.  He tries his best to reign me in, but he is never to successful at it.  Try though I may, I just can’t seem to help myself.  I think of one thing, which leads me to another, then that leads to something else, and so on, and so on,  To me, potlucks are always a barrel of fun.  I love trying all the new creations that people bring to share.  So with me making a lot of different delectable dishes, and then everyone else bringing their own delectable dishes, we ALWAYS end up with a ton of food.  And this is the season for sharing, so share we do.  Once again, there was a lot of good food enjoyed by all, there was something for everyone, from a variety of sweets and treats and savory dishes too.

This is our main tree, in our family room.  We have a very eclectic collection of ornaments.  They all weave together to tell a story of who we are and what we like to do.  We always collect ornaments from wherever we travel, the funkier and more exotic and unique, the better.  We have ornaments that express our personal interests and hobbies.  We have special ornaments that were handmade just for us.  Some are fun and whimsical and some are porcelain and are collectibles.  And some have been handed down through the generations, but all contribute to the story of who we are and how we like to live.  They are all fun and they all have a special meaning and a special place in my heart.

47156248_1142505925914052_5159062759735820288_n

Our second tree, in the living room.

IMG_4315.JPG

Our third tree, up in our art niche, going up the stairs.

IMG_4316

And our fourth tree, that was made especially for me by my friends Kathy and Lynn.

47384468_1957097760993685_5975808923452571648_n

Larry and I at the appetizer table.

47379778_694629744253559_3643539637596585984_n

Baked pita chips with hummus.

IMG_4305

Cheese, sausages and crackers.

IMG_4312

Turkey marinated in my paprika vinaigrette Steak with Paprika Vinaigrette.   I served all these appetizers on some of my new serving platters that I received from my friend David Richman, CEO of Chefware. Presents for the Chef.  All these platters got rave reviews.  Everyone commented on how gorgeous they are.

IMG_4317

All the dishes above, as well as this delicious mixed nut tart and my Kissed Cookies,  Kissed Christmas Cookies were my culinary contributions to our fun evening.

IMG_4308

IMG_4270

And to all of you who helped us ring in the holidays  …..

47223881_694629554253578_666200048094150656_n

IMG_4318


IMG_4319

IMG_4321

IMG_4322

IMG_4324

IMG_4325

IMG_4326

Thank you to all my friends and family who helped make this yet another fun-filled event filled with lots of love.  All of you are what made our party so much fun.  However you say it, and however you celebrate … Merry Christmas, Feliz Navidad, Joyeux Noel, Froelich Weinnachten, Mele Kalekimaka, Happy Channakah, Happy Eads, Buon Natalie, Happy Kwanza or Happy Holidays, have a good one and a Happy, Healthy New Year.


Kissed Christmas Cookies

Cookies are my absolute favorite dessert.  I love cookies.  Any kind of cookies.   I always have.  When I was a little girl one of my best friends’ mother used to bake cookies everyday.  The house always smelled so good, and it was always filled with love. Mrs. Nash would make all kinds of cookies, and everyday when we would come home from school, there would be a new variety of cookies waiting for us to gobble up and enjoy.  This is one of my favorite childhood memories.  Mrs. Nash was like my second mother.  My friend Kathy and I grew up together and are still  like family to this day, many, many years later, even though she still lives in California and I have been living in Colorado for almost 19 years.  Cookies always bring up images of love and family to me.  Maybe that’s why they are my favorite type of dessert.

The Holidays are here, and today we have our Christmas party and ornament exchange.  So I will keep this brief and short, since I still have a lot of things I need to prepare and do before all my guests arrive.  My cookie contribution for this year’s party is a fun, festive and colorful type of cookie.  I made chocolate cookies with colorful sprinkles and Hershey’s kisses.

IMG_4270

Chocolate Kissed Christmas Cookies

1/2 cup shortening

1/2 cup softened butter (1 stick)

1/2 cup sugar

1/2 cup brown sugar, firmly packed

1 tsp baking powder

1/8 tsp baking soda

2 TBSP milk

1 egg

1 tsp vanilla

1/4 cup cocoa powder

2 cups flour

Christmas colored nonparells

chocolate kisses, unwrapped

IMG_4259


Combine all the dry ingredients together, mixing well, and set aside.

Mix the shortening, butter and sugars together until well blended, then add the egg, milk and vanilla.   Once all the wet ingredients are mixed together, add the dry ingredients 1/2 at a time, mixing well in between.  Once everything is mixed, wrap the dough in plastic wrap and let it set in the refrigerator for at least 30 minutes before making the cookies.

IMG_4261

Preheat the oven to 350* F

When the dough is ready, spoon out about 1 heaping tsp of dough and roll into a ball,  then roll the ball into the nonparells and coat the whole cookie.  Slightly press the dough out to flatten it and place on a non-greased cookie sheet.  Repeat until all the dough is used.

IMG_4263

Bake the cookies for about 10-12 minutes or until the edges are firm.  Immediately after removing the cookies from the oven, place an unwrapped candy kiss in the center of the cookies, and slightly press it into the soft cookie.  I placed them back in the oven for about 1 more minute after I added the kisses to soften the chocolate kisses a bit.  Let cool, then remove from the baking sheet and cool completely on a wire rack.  After that, it’s cookie time!

IMG_4268