Empanadas de Rincon Argentino

Argentina is a relatively large country, known for its food and wines almost as much as it is for soccer, or football as it is known to the rest of the world outside of the USA.  Some of the culinary wonders Argentina is famous for are its beef and chimicurri sauce Steak Chimichurri, all its fabulous wines, particularly its Malbec and its empanadas.  They make many, many different varieties of empanadas and eat them on their own or as a side dish served with something else.  My friend Priscilla, whom you have heard me make mention of many times, is from Rosario, just outside of Buenos Aires, Argentina.  If there is something from Argentina that she really recommends, I am most definitely going to take her advice and follow her recommendations.

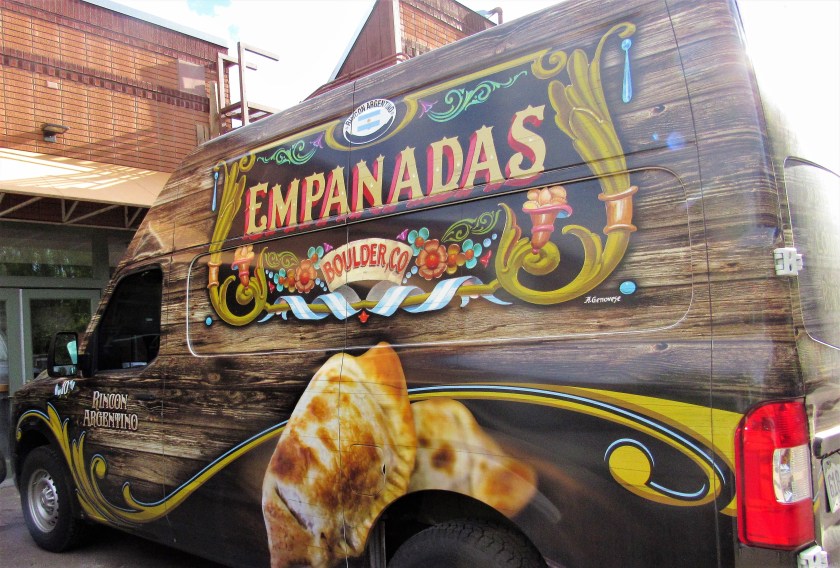
There is a small Argentine restaurant in Boulder, Colorado named Rincon Argentino, which is famous for its empanadas.   Priscilla has been raving about this restaurant for years, and though I have eaten and enjoyed their empandadas many times at her house, I never had been to the restaurant itself until now.   We went with our friends Janet and Bob, whom you have also gotten to know many times through my posts.  Rincon Argentino is a small family owned restaurant, owned by Buenos Aires native, Christian Sabor, who has since made Boulder his home.  He and his wife have owned and operated Rincon Argentino since 2012.  It is a small ” fast-casual spot that specializes in empanadas — very good empanadas”.  He specializes in empanadas “because they’re simple to take out and carry around, to go hiking with”.  People in Boulder are always on the go, and they like to either enjoy their food that they can easily take with them, or eat while relaxing out on their patio with a glass of wine or beer after they return from their adventures.  Either way, Rincon Aregentino is more than happy to oblige and their empanadas speak for themselves.  Rincon also delivers and caters for you as well.

IMG_6767

IMG_6768

A lot of small restaurants have you order from the board, then give you a number and deliver the food to your table.

IMG_6771

Once you order, your food is prepared in the open kitchen, in this special oven.  You can see it all being lovingly prepared by hand.

IMG_6772

You can dine inside, in this charming little dining area ….

IMG_6773

You can enjoy the beautiful patio on a nice, sunny day.

IMG_6769

We chose the patio option, where we sat with our numeros de colores and some wine and beer under the leaves of this big shady tree, watching the life in Boulder go by.

IMG_6774

In just a few short moments, our empanadas arrived, fresh and hot out of the oven.  Because there are so many varieties of empanadas from which to choose, we chose four different kinds and split them in half.  We also tried all their delicious sauces.  They offered a creamy avocado sauce and both los chimichurri verde y los chimichurri rojo, or the red and the green chimichurries.

IMG_6775

IMG_6776

As expected, everything was scrumptious and we enjoyed every last bit.  We wanted more, but we were completely satiated and did not need anything else.  Our tummies were deliciously satisfied with what we had.

If you want something different and want a little bit of Argentina, then I highly recommend Rincon Argentino.  You can find it at 2525 Arapahoe Ave., # AO5, in “The Village at Boulder”, Boulder, CO or at http://www.rinconargentinoboulder.com


The only negative I have to say, and it has ABSOLUTELY NOTHING to do with the restaurant, but everything to do with some of the stupid, crazy people who visit.  I was outside taking all these pictures, and some stupid idiot ran into me, literally.  The parking lot is very small and cramped, and I was standing in the parking lot taking pictures, when some moron literally backed his car into me and his rear bumper was kissing my legs.  But what made it even worse, was that not only did he hit me once, but he continued to back up and continued to ram his bumper into my legs even more.  He could easily see me; how could he not.  I am not a short person, and he should have seen me in his rear view mirror.  Needless to see, once I realized what was happening, I screamed more than a few choice words at him, but the jerk did not even stop.  He just drove away.  I am very lucky I was not hurt, but I was extremely pissed about being hit, and being hit more than once.  Then the stupid jerk just drove away, knowing full well he had run into me numerous times.  Everyone who was dining on the patio saw the whole thing.  So, when you do go, be careful for the morons who occupy the parking lot.


I Never Thought It Could Happen

Trigger warning!  Trigger Warning!  Trigger warning!


It happened!  I NEVER in my wildest dreams would have ever thought it could have happened here in my kitchen.  But it did.  I RAN OUT OF GARLIC!!!!!!  At first I didn’t think much of it because I though I had more downstairs.  But when I went downstairs to get it, panic set in.  There wasn’t any!  Fortunately, I had just barely enough to use for what I was cooking at the time, but just barely.

IMG_6758

We had to make an “emergency” trip to Costco to get some more.  This has never happened in my house before.  I stocked up to ensure it never happens again.  I should be OK for awhile, although I am still a bit traumatized from this whole ordeal.  I think I just need to open one of the garlic jars and take in a few large whiffs, and then I will be OK.  Phew!!!!!  That was a close one; too close for comfort.  🙂

IMG_6759

From Roast to Quesadillas

When I made my roast, I had a big piece of meat.  A Roasted Dinner  It was probably about 5 lbs of meat, if not more.  Well, there are only the two of us eating it, and it goes a long, long way.  We are still working our way through it.  I am doing my best at recreating it in many different ways, but it just seems like it is not going away any time fast.  I think we still have one more meal left from it, and maybe a lunch for my husband as well.  Then finally, that delicious roast just may be finished and it will be time to make another one.  I made it into delectable sandwiches the other day.  Herb Roasted Potato Wedges  Now, I am using it to make some fabulous quesadillas.  We eat quesadillas a lot.  They are an easy way to use up leftovers and they taste great too.

IMG_6723

Quesadillas are one of those versatile dishes that you can use whatever you like as the filling.  There is no right or wrong way to make them.  Sometimes I make them as a side dish to a meal and other times I make them the meal.  I almost always put in a lot of vegetables.  Sometimes I add meat and sometimes I don’t.  The only really key ingredients that are a must for making quesadillas is tortillas, of any size, either corn or flour, and QUESO or cheese, any kind of cheese you like.  You cannot have a quesadilla without cheese.  🙂  I used jalapeno jack this time.  I am not much of a cheese eater in general, but when I do eat cheese, I prefer to eat the white and lighter cheeses.  My husband loves cheese of all kinds.

I used mushrooms, zucchini, yellow squash, onions, garlic, red peppers and jalapeno to mix with my meat for the filling.  I also added some cumin and oregano.

IMG_6725

I generously spread whatever cheese I am using on the tortilla.  While the tortilla is browning, it is also melting the cheese.  I do this twice, to make the top and the bottom of the quesadilla.

IMG_6726

While the second half is cooking, add your filling on top of the cheese and add the other cheesy tortilla over the filling.

IMG_6727

Since I am a saucy kind of girl, I always add salsa and either avocado slices or guacamole to mine as well.  My husband does not like avocados, but likes our cream.  Make them how you like them and top them with whatever you like.  Make yourself a margarita, or grab a cold beer and Desfruitas!


Spinach and Potato Stuffed Chicken with Tomato Sauce

Since I love stuff in my stuff, I cook a lot of meats that are also stuffed with, you guessed it, more stuff.  Does this make me stuffy?  Oh wait, I digress.  I have to admit I followed this new recipe almost 100%, which is saying quite a bit for me, and though I liked it, it was not my favorite way to prepare a spinach stuffed chicken.  I read and re-read the recipe many times, but it made no mention of cooking the spinach before stuffing it into the chicken.  Looking at the picture, I should have known it was cooked, but reading the recipe there was no mention of it.  So I tried it their way, but next time, I am going rogue once more, and doing it my own way again, as I do most of the time anyway.  Although I love raw spinach as a salad, when stuffing it into meats, I prefer it cooked.  But I tried something new.  Sometimes new recipes work, and sometimes they don’t.  Just because something isn’t quite right the first time though, does not mean I give up on it.  No, no, no.  Au contraire mes amis.  It just means I try and try again until it does come out right.  So I will definitely make this recipe again, but there will be some changes made and the dish will be a smash hit.  This was good, but I can make it oh so much better.

IMG_6695

Spinach and Potato Stuffed Chicken with Tomato

I am going to give you the recipe that includes my alterations, so when you make it, it will come out really tasty and delicious, rather than just ho hum.


1 potato, peeled cooked and roughly mashed

4-5 oz fresh spinach, chiffonade or cut into strips

1 shallots, peeled and minced

1 egg, lightly beaten

1 TBSP garlic

4 large chicken breasts

4 slices of either mozzarella or provolone cheese, optional

cooked lentils

salt and pepper to taste

olive oil

1 stick of butter


Preheat the oven to 350* F or 180* C.

Spray a cooking pan with cooking spray.


Cook the lentils according to the package directions and set aside.

Cook the spinach with the shallot, garlic and salt & pepper in olive oil.

Boil the potato until it is soft.  Drain the water and mash the potato roughly with a potato masher.  It’s OK if it is still a bit chunky.  You want that texture.

IMG_6689

Once the potatoes are roughly mashed, mix in with the cooked spinach mixture and the egg.  Mix everything together thoroughly.  This picture shows the raw spinach.  You can do it either way, but I much prefer the cooked spinach version.  Your choice though.

IMG_6690

IMG_6691

Slice the chicken breast down the middle and add the stuffing mixture.  Fold one side over the other and hold in place with toothpicks.

IMG_6693

Add salt, pepper and olive oil to the chicken breast and gently rub in.  Then top each with a little bit of butter on top.  Cover with foil and bake for 25 minutes.  After 25 minutes, remove the foil and add the cheese if you are using it and continue to cook for about another 20 minutes, or until the cheese is melted and/or the chicken is lightly golden in color.

IMG_6694

While the chicken is cooking, make the sauce.

Tomato Sauce

4-5 tomatoes, diced in a medium dice

1 TBSP garlic

1 shallot, minced

salt & pepper to taste

2/3 cups chicken stock

fresh parsley

mushrooms

olive oil


Cook the tomatoes, garlic, shallots and salt and pepper together until the shallots are translucent, then add the chicken stock.

IMG_6686

IMG_6688

Mix everything together and add the mushrooms, whole, but with most of the stems removed.  Cook for about 10 minutes.

IMG_6692

Once everything is cooked, it is time to layer your plate.  Start with the cooked lentils, then add the chicken and top with the sauce.  Place the mushrooms around the plate.  Serve it with your favorite wine, either white or red, but if choosing a red, I would recommend a lighter red so it won’t overpower the light, simple sauce.  Personally, I would choose a white to compliment the chicken more than the light sauce, but again, go with what you like.

IMG_6696


Herb Roasted Potato Wedges

It had been a very busy day, and leftovers were the food choices du jour.  However, I wanted at least one thing on the plate that was a first-over and not a left over.  We had the meat and the veggies covered, but I needed a starch to complete the meal.  I went to my library of cookbooks and turned a few pages and found just what I was looking for.  Of course, I still made it my own way, rather than simply following the instructions, but then that’s what I do.  Would you really expect anything any different from me?  I decided to make some herb roasted potato wedges, using both a russet and a sweet potato.  This recipe only calls for a few simple, everyday items.  It’s easy to make and is a nice touch to any meal, be it simple or fancy.

IMG_6681

Herb Roasted Potato Wedges

IMG_6676

1 large sweet potato or yam (I admit, I can’t really tell the difference, and to me, they are interchangeable).

1 large russet potato

salt & pepper to taste

olive oil

1-2 TBSP garlic

2-3 tsp herbs of your choice – I used basil, oregano, thyme, sage and marjoram

1 TBSP parsley


Peel and cut the potatoes into large wedges.  Add all the rest of the ingredients and toss everything together, making sure to completely coat the potato wedges with all the herbs and the olive oil.

IMG_6677

IMG_6679

Preheat the oven to 475* F/240* C

Once the potato wedges are generously coated, evenly spread them out on a baking sheet in a single layer.

IMG_6680

Roast for about 20 minutes or until the potatoes are golden brown and crisp.  Keep a careful eye on them because the sweet potatoes and the russet potatoes cook differently.  You do not want to burn or overcook the sweet potatoes.  You can mix them like I did or just use either the russet or the sweet potatoes individually.  Serve them as a side dish with your favorite meal.   I served them with a roast beef sandwich made from the leftover roast and the rest of my Brussels sprouts and mushrooms in cream sauce. A Roasted Dinner

This was a perfect meal that we enjoyed out on our deck, with a glass of wine and our gorgeous view.  Life is good!

IMG_6682


National Chocolate Chip Cookie Day

Today, May 15, is National Chocolate Chip Cookie Day.  It is one of two days per year dedicated to these wonderful cookies that are America’s all time favorite cookies.  We also celebrate the morseled cookies on August 4.  Because my husband is a self-proclaimed geek and loves to celebrate all these quirky holidays just because they are fun, I made a whole bunch of chocolate chip cookies for him to take into work today.

Chocolate cookies are most definitely, hands down, America’s favorite cookie.  They have been ever since 1940, when the Nestle Company first started promoting and advertising the chocolate chip cookie.  It’s hard to believe these tasty treats were actually created by accident though.   In 1937, Ruth Graves Wakefield was an employee working for the Toll House Inn in Whitman, MA.  She was busy making cookies and realized she did not have enough chocolate to make the recipe she was originally going to make, so she decided to use the chocolate she did have and cut it into small pieces or morsels.  What she had was a block of semi-sweet chocolate.  From their very humble beginnings, chocolate chip cookies became an instant success, and have been ever since.  In 1939, Ms. Wakefield agreed to sell her recipe to Nestle and to the Toll House Inn.  In 1940, Nestle started putting Ms. Wakefield’s recipe on the packages of their chocolate morsels.  The cookie actually came first, and the chocolate morsels would soon follow.  Ms. Wakefield’s payment for America’s favorite cookie was a lifetime supply of chocolate.

The cookie shop was in full production mode.  I made a batch of chocolate peanut butter cookies as well as a batch of toffee chocolate chip cookies.  Hopefully they all disappear.  As much as I LOVE cookies, even I would be hard pressed to eat all of these cookies.

IMG_6698

IMG_6700

Enjoy your chocolate chip cookies today.  The only thing stopping you is your imagination.  Be creative.  Eat.  Enjoy.  Be a kid again.


My First Guest Chef

Today is the launch of something new here at “A Jeanne in the Kitchen”.  Today is the first of hopefully many more segments to come, of having a guest chef in Jeanne’s kitchen.  Our first guest chef is a very good friend of mine, Scott Hensiek.   Scott and I go way, way, way back, all the way to our junior high school days.

This is us in front of our old high school in Pasadena, CA.

IMG_1719 
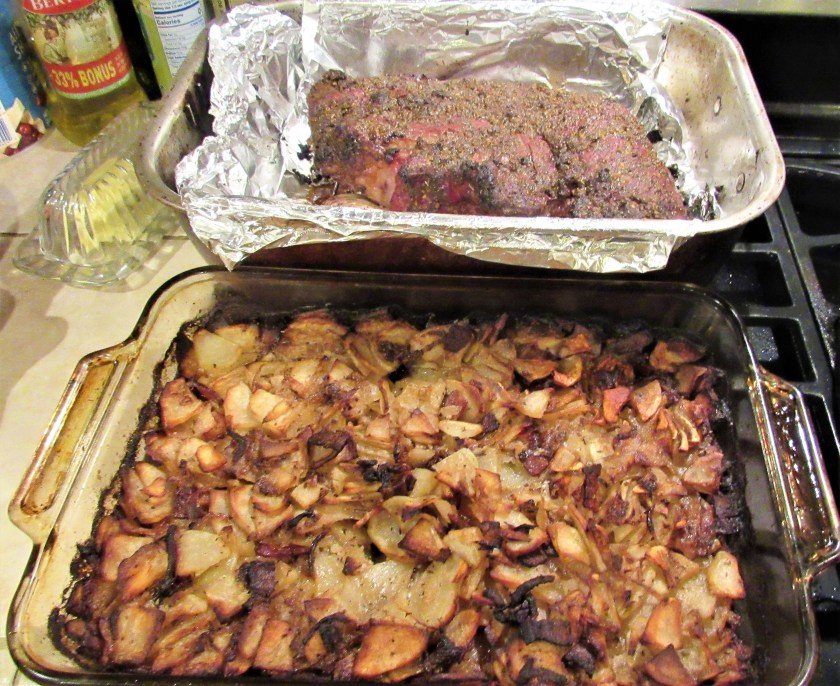
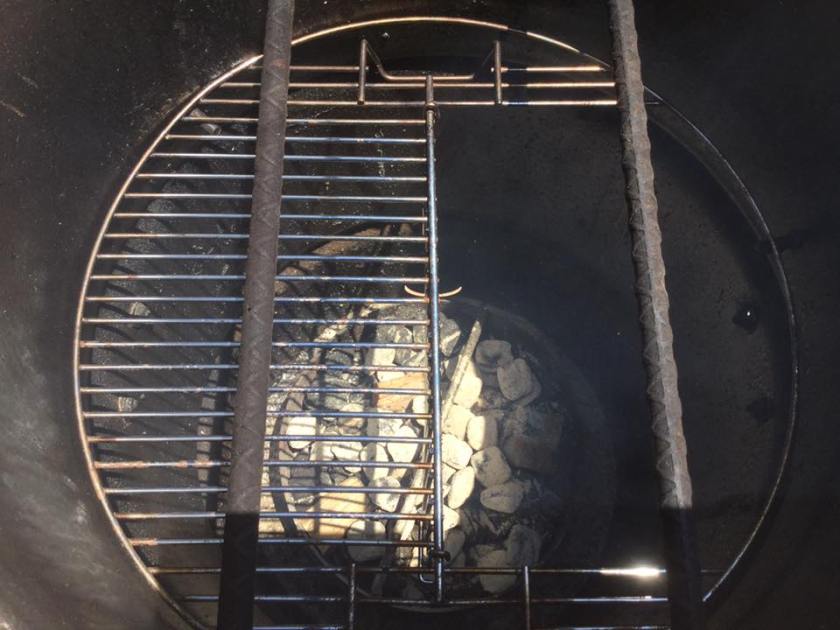
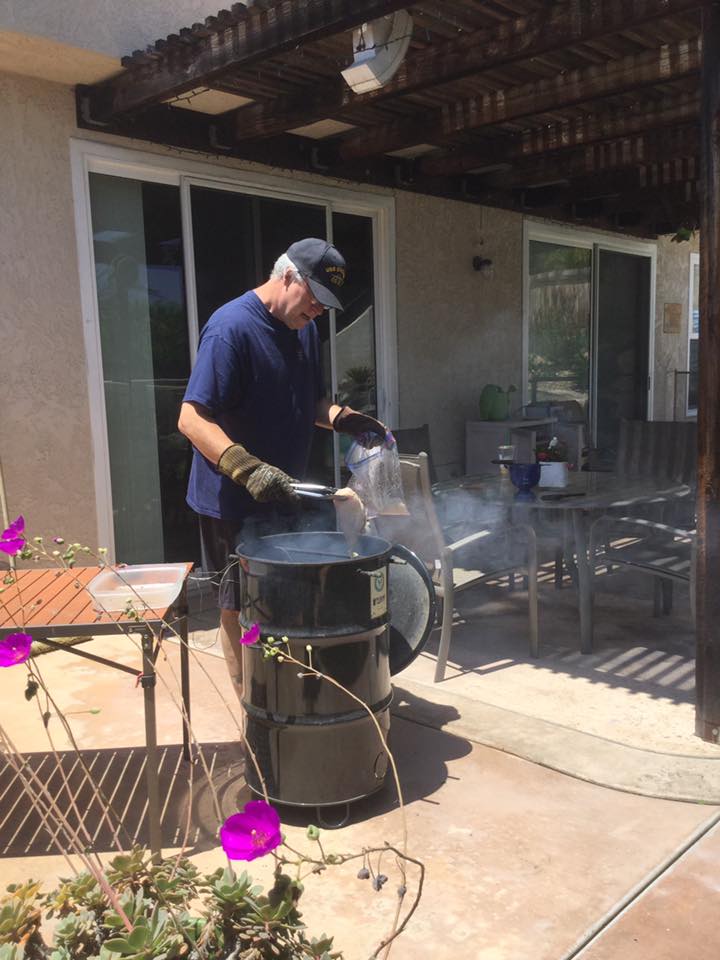
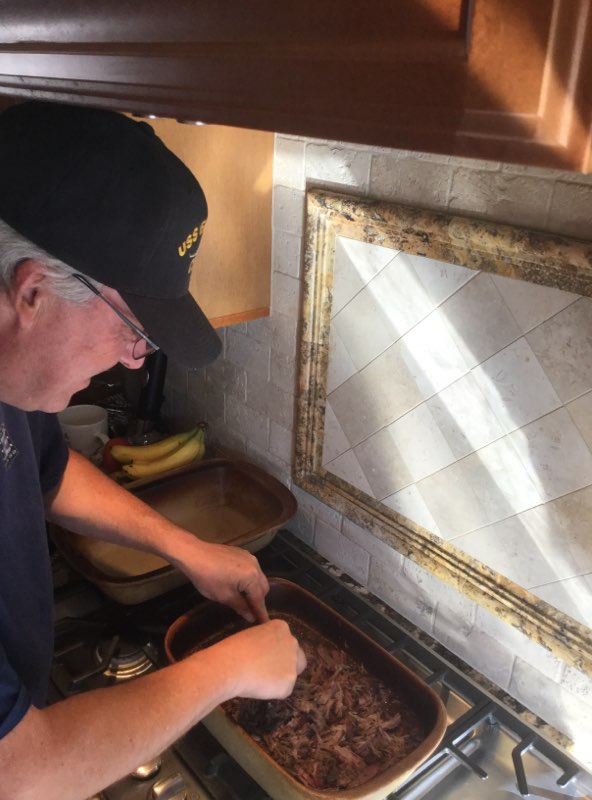
Scott loves to cook and have fun in the kitchen just as much as I do.  He is also a fabulous cook.   One of his specialties is using his smoker to cook his meats.  Today, Scott shares his recipe for his Barbacoa Street Tacos.

60770796_329650421056203_3041512766046208000_n


Barbacoa ([barβaˈkoa] (help·info)) is a form of cooking meat that originated in the Caribbean with the Taíno people, from which the term “barbecue” derives.[1] In contemporary Mexico, it generally refers to meats or whole sheep or whole goats slow-cooked over an open fire, or more traditionally, in a hole dug in the ground covered with maguey leaves, although the interpretation is loose, and in the present day (and in some cases) may refer to meat steamed until tender. This meat is known for its high fat content and strong flavor, often accompanied with onions and cilantro. Barbacoa was later adopted into the cuisine of the southwestern United States by way of Texas. The word transformed in time to “barbecue”,[2] as well as many other words related to ranching and Tex-Mex cowboy or vaquero life. Considered a specialty meat, barbacoa is only sold on weekends or holidays in certain parts of South Texas and in all of Mexico. Barbacoa is also popular in Florida, as many Mexican immigrants living there have introduced this dish. Barbacoa is also well known in Honduras. A traditional Mexican way of eating barbacoa is having it served on warm corn tortillas with salsa for added flavor; the tacos are often eaten with diced onions, chopped cilantro and a squeeze of lime juice. I was introduced to this particular way of cooking Barbacoa by my brother. This recipe is adapted to the Pit Barrel Cooker and is finished in the oven once the smoke is applied during a 2 hour hang in the Pit. Once the Chuck Roast is finished in the oven it is shredded directly into the vegetable and spice mix. This allows for a moist and flavorful shredded beef. I serve it on corn tortillas with a Chipotle Slaw, Guacamole and Cotija Cheese. Serve with your favorite sides. Pinto beans, black beans Mexican rice or Mexican street corn. You won’t NOT make this again.

Getting the smoker ready for the meat.

60088650_864158580595683_8363787508550467584_n

60219533_864158507262357_1688321806919794688_n

As the smoker is getting nice and hot, Scott starts to prepare his meat.  Once the coals get white hot, it is time to place the meat on the grill.

60354930_864158583929016_6299465710280114176_n

Heavily season chuck roast with salt and pepper and cook on smoker at 225 until an internal temp of 165 is reached.

60336682_864158523929022_2623391446308225024_n

60332582_864158607262347_7883098943490359296_n

Since Scott has more than a little time to relax while the meat is smoking, it was time for a smoke break for him as well.

60337168_864158517262356_4357937864521023488_n (1)

While the roast is cooking, mix the other ingredients together in a 13×9 or similar aluminum or oven safe pan. Once the roast hits 165º, place into pan directly on top of other ingredient mixture and cover tightly with foil. Cook in smoker or oven at 350º for 2.5-3 hrs or until roast is fork tender.

Scott is cutting the limes, garlic and onions to use as his marinade for the meat.  WOW!!!!  This is one very nice chef’s knife.  This knife is much nicer than mine.  Scott means business.

60614885_864158433929031_6585156674133164032_n

60343909_864158440595697_4048657278125998080_n

Cooking all those fragrant and tasty flavors to use for the marinade for the meat.

60309592_864158447262363_7943184462219575296_n

60154295_864158473929027_3511911392623984640_n

Once the meat is tender, shred all of the meat in the liquid and mix thoroughly. If more liquid is needed to give the meat a good coating, add 1/2 to 1 cup of hot water. Place it back into oven and cook for an additional 15-30 minutes until most all liquid has cooked into the meat.

60263282_864158593929015_2131029782907846656_n


60323750_325920644768431_2101060029397336064_n

When everything is done, layer the meat onto either corn or flour tortillas along with some chipotle slaw and some cotija cheese.  It’s now ready to enjoy with a cold margarita or beverage of your choice.


Recipe for the Barbicoa

3 lbs chuck roast (fat trimmed)

4 cloves garlic, minced

2 chiptoles in adobo sauce, chopped (or more to taste)

1 small white onion, finely chopped (about 1 cup)

1/4 cup fresh lime juice

2 tablespoons apple cider vinegar

3 bay leaves

1 Tablespoon ground cumin

1 Tablespoon dried Mexican oregano (or regular oregano)

2 teaspoons salt (plus additional to season roast)

1 teaspoon black pepper (plus additional to season roast)

1/4 tsp ground cloves

1 cup beef broth or water

Heavily season chuck roast with salt and pepper and cook on smoker at 225 until an internal temp of 165 is reached While roast is cooking, mix the other ingredients together in a 13×9 or similar aluminum or oven safe pan. Once the roast hits 165º, place into pan directly on top of other ingredient mixture and cover tightly with foil. Cook in smoker or oven at 350º for 2.5-3hrs or until roast is fork tender. Once meat is tender, shred all of the meat in the liquid and mix thoroughly. If more liquid is needed to give the meat a good coating, add 1/2 to 1 cup of hot water. Place back into oven and cook for an additional 15-30 minutes until most all liquid has cooked into the meat.


Chipotle Slaw

2 teaspoons finely chopped canned chipotles in adobo

1/2 cup mayonaise

2 tablespoons honey

1 tablespoon lime juice

1/2 pound (about 2 cups) shredded white cabbage

1/4 cup red onion, chopped fine

1/4 cup green onions, sliced thin

1 cup corn

1 TBSP cumin


Combine chipotle, mayonaise, honey and lime juice in a large bowl.  Add cabbage and onions, tossing to coat.  Add salt and pepper to taste.  Refrigerate until ready to serve.

60433966_2277545365894571_4888426510953742336_n

Scott, thank you so much for the absolutely fabulous recipe and all the fun pictures.  Thank you for being my first guest Chef too.  One of these days, we will actually cook together side by side.  Just think of all the possibilities.  🙂


Fettuccine Alfredo with Chicken, Broccoli and Mushrooms

Fettuccine Alfredo is an Italian-American classic.  It is loved the world over just as it is, or with chicken and vegetables and/or shrimp added to it as well.  I am most definitely a meat eater and love “lots of stuff in my stuff” as my husband would say.  So for me, I like it with either chicken or shrimp and vegetables.  Even though it is loaded with calories, and is not the healthiest of dinners, it is still one of my absolute favorites.  I love fettuccine Alfredo.  I just wish I could eat it everyday.  Sometimes I make a spicy Alfredo sauce as well.  This time though, I was just craving it without the spice.

As you might expect, with a name like fettuccine Alfredo, the dish was originated in Italy, by Italian Chef Alfredo di Lelio, in 1914.  He created this dish in Rome in 1914, using butter and Parimigiano-Reggiano cheese.  The original version was an extra buttery fettuccine al burro, or fettuccine in a butter sauce.  The recipe was brought over to the United States by the actors Mary Pickford and Douglas Fairbanks in 1927.  They discovered it while honeymooning in Rome.  However, in the United States, the addition of cream was used because our cheeses and butters are not as rich as the Italian versions.  The Italian-American classic version, however, is not nearly as popular in Italy as the original Italian version, although it became very popular in the rest of the world.

IMG_6601

Fettuccine Alfredo with Chicken, Broccoli and Mushrooms

IMG_6588

2 lbs chicken, cut in slices about 1-1 1/2 ”

1/2 lb broccoli, cut into small florets and blanched

1/2 lb mushrooms, sliced

1 heaping TBSP garlic

salt & pepper to taste

1 cup dry white wine

2 cups heavy whipping cream

1/3 cup milk, or as needed

3/4 cup shredded mozzarella cheese

fettuccine, cooked

3 TBSP butter

olive oil


I also had a wee bit of chipotle butter that I added as well.


Blanche the broccoli florets in boiling water for about 3 minutes, then immediately put them into an ice bath with cold water and ice cubes to prevent further cooking.  This will also make the bright green color really pop out.

IMG_6589
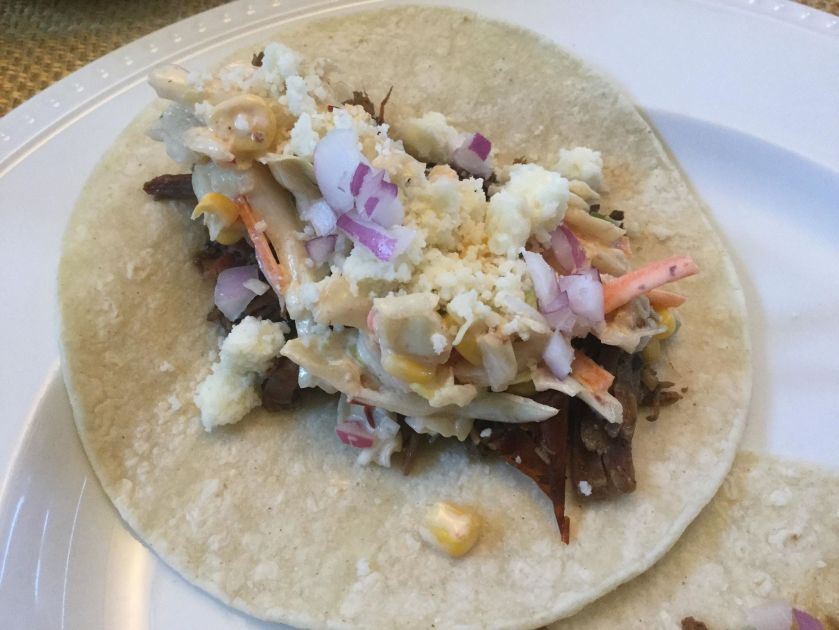
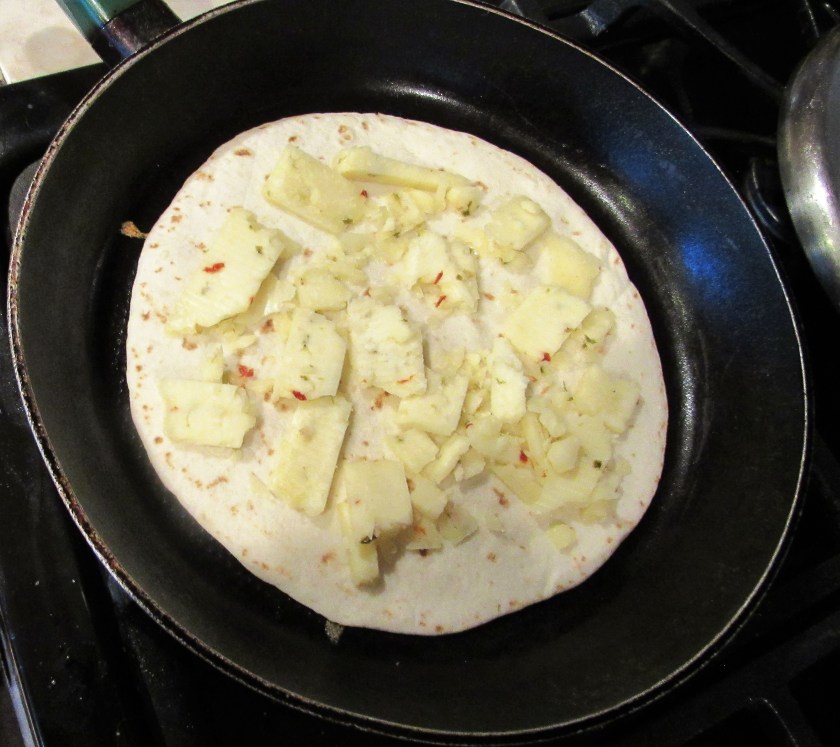
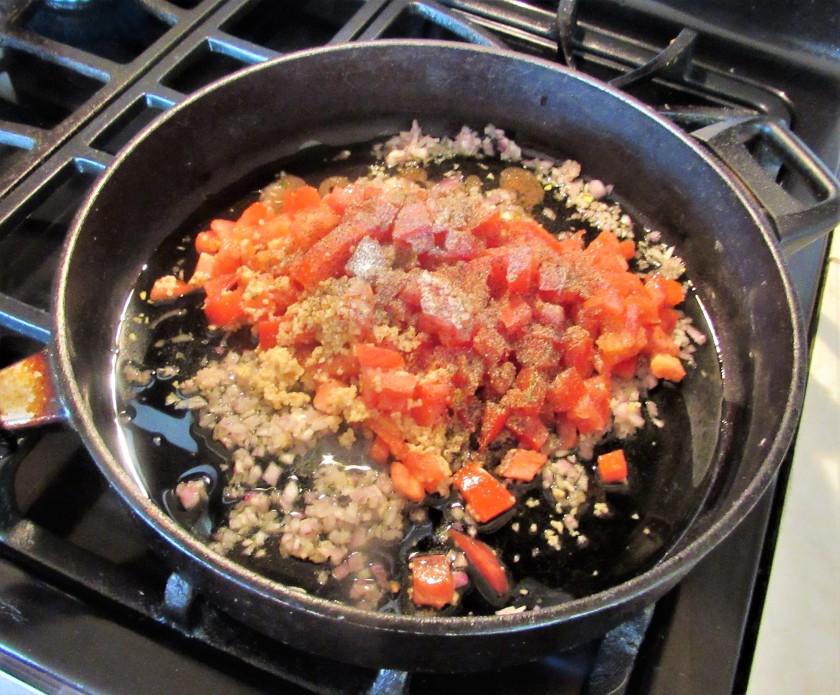
Saute the chicken pieces in the hot olive oil until they are completely cooked, then remove from the pan and set aside.

IMG_6590

Saute the mushrooms and garlic in the same pan for about 5 minutes, adding more olive oil if necessary.  Add the mushrooms, garlic and broccoli to the chicken.

IMG_6593

Add the wine to the hot skillet, making sure to gather up all the scraps from the bottom of the pan.  Let this cook for about 1 minute, then add the cream, cheese and seasonings.  if the sauce is too thick, cut it with some regular milk as needed.

IMG_6595

IMG_6597

IMG_6598

Mix everything together and stir constantly until all the cheese melts and is incorporated into the sauce.  Adjust the seasonings if needed  then add the chicken and vegetables.  Mix everything together well and serve over cooked fettuccine.  Top with more Parmigiano cheese if you like.

IMG_6599

I completed the meal with the same dry white wine I used for the sauce and some garlic-herb cheese bread.  Delicioso!  Mangia!

IMG_6602


Come Be a Guest Chef in Jeanne’s Kitchen

I just thought of this fun new idea.  There are so many wonderful chefs and home cooks out there, and I would love, love, love to see what’s cooking in your kitchen too.  You see what I am cooking all the time, now it is your turn to share your recipes and ideas with me.  I am opening my kitchen up to all of you out there.  Like with our very successful Great Blogger’s Bake-Off we had a few months ago, I want you to share your kitchen experiences, both good and bad with me.

baker

The Rules:

  • Send me pictures AND your recipes, INCLUDING pictures with you in the kitchen with your recipes, to my private e-mail address, ljbjej@q.com or PM me on my facebook page.
  • You can cook or bake anything you like, even foods for your four-legged friends.  As many of you know, I cook my dogs’ food all the time.
  • Tell me your stories of why you prepared the dish you did.  Does this recipe have any special memories or meaning to you?  If so, please share those with too.
  • This will be an open invitation.  It is not a contest that will expire, but hopefully will be something I can feature once a month.
  • Have fun.

chef-prepares-food-kitchen-cartoon-450w-1129766546


d09dfd1c3533216e087effb91c1f2046


I am really looking forward to seeing what great ideas come out of your kitchens.


Potato Casserole with Bacon and Caramelized Onions

Potatoes are a staple in our house.  We eat them a lot.  Because we eat them so frequently, I am always looking for new ways to cook them so we are not always eating the same thing.  I get bored with the same old, same old.  I am always doing “research” and am always on the lookout for something new, something different and something exciting to bring to my dishes and to our meals.  My research is not difficult.  It just means pouring through my own ever-growing library of cookbooks.  Sometimes I look for things online too, but there is something special about going through the books to find the right dish for the meal of the day.  On my latest quest, I discovered this recipe for a potato casserole with bacon and caramelized onions that just sounded really interesting, so I had to give it a try.   I will definitely be making these more often from now on too.  I served this dish along with my roast and the roasted Brussels sprouts in cream sauce.  A Roasted Dinner and Roasted Brussels Sprouts with Mushrooms and Cream Sauce

This recipe is a traditional French recipe, known as pommes de terre boulangere or baker’s potatoes.  The name comes from the times when villagers all used the residual heat from the baker’s ovens to cook their meals at the end of the day.  The meats would roast on the upper shelves of the oven while casseroles and other foods would cook on the lower shelves beneath the meats.  The juices from the meats would drip down and flavor all the dishes below.  This cooking method is no longer used, but the name pommes de terre boulangere has remained ever since.

IMG_6586


Potato Casserole with Bacon and Caramelized Onions

IMG_6562
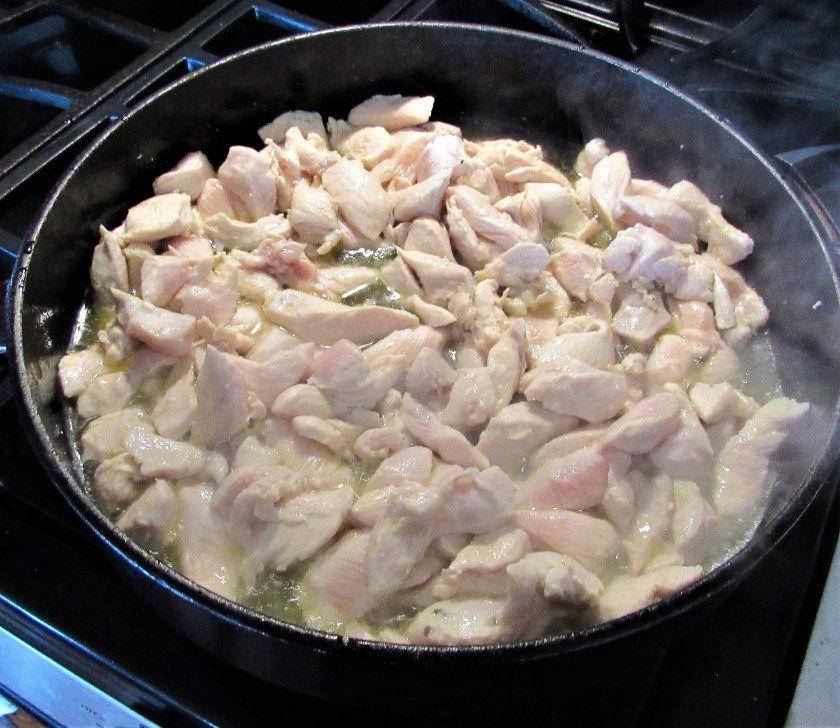
3 lbs large potatoes, sliced very thin – I sliced them in my food processor, but a mandolin or a very steady hand and sharp knife works well too

4 slices of bacon, cut into pieces about 1″ in size – I like to use the thick pepper bacon, especially for dishes like this

1 onion, cut in half and sliced very thin

salt & pepper to taste

1 1/4 cups chicken broth

1 1/4 cups beef broth

4 TBSP butter, cut into small pieces – more if needed

1 TBSP garlic

1 tsp fresh thyme or 2 tsp dried thyme


Preheat the oven to 425* F – or when roasting meats at the same time, adjust to the temperature of the meat and adjust the time as needed.

Spray a 9×13 baking pan with cooking spray

IMG_6563

Cook the bacon in a saute pan for about 10-13 minutes, or until it is cooked to your liking.  Then remove the bacon and drain on a paper towel and set aside.

In the same pan, add the onions and garlic and cook on a medium heat for about 25 minutes or until the onions are softened and golden in color.  Add a tsp of water at a time as needed if the onions are browning too fast and sticking to the bottom of the skillet.

IMG_6564

IMG_6566

When the onions are cooked and golden brown, add them to the potatoes, along with the bacon and the seasonings.  Mix everything together well and transfer everything to the prepared baking dish.  Firmly press everything down into the pan.    Add both the chicken broth and the beef broth, making sure to completely cover the potatoes.  Cut the butter into small pieces and arrange evenly over all the potatoes.  I think next time, I may even use more butter pieces.  I am like Julia Child, “there is no such thing as too much butter”.

IMG_6571

Bake for about 45-55 minutes or until the potatoes are golden brown around the edges and most of the liquid has been absorbed.  Before serving, let the potatoes stand for about 20 minutes so the moisture and liquid is fully absorbed into the potatoes.

IMG_6578

The potatoes came out a little crispier than what I intended, but that tends to happen when I let my husband into the kitchen.  I get everything all ready for him and leave him cooking instructions.  Sometimes he follows them, and others times, not so much.  Oh well.  It still came out very good, and is definitely a “do-over”.