I have created this site to help people have fun in the kitchen. I write about enjoying life both in and out of my kitchen. Life is short! Make the most of it and enjoy!
Author: ajeanneinthekitchen
I have worked in the restaurant and catering industry for over 35 years. I attended 2 culinary schools in Southern California, and have a degree in culinary arts from the Southern California School of Culinary Arts, as well as a few other degrees in other areas. I love to cook and I love to feed people.
it was a beautiful sunny day, despite the fact that there is still a lot of snow around. This is typical for Colorado though. Even though we have a ton of snow, we also have a lot of sunshine. So when the sun is shining, even if there is snow, it is still a beautiful day out.
I didn’t see many birds today, but I did a Northern Flicker sitting up high in a tree. Apparently he thought it was a beautiful day out too.
Yes, these shots will be available to purchase too, under the name of “Photos by Jeanne”. I am still just getting everything started. 🙂
Paella vs Jambalaya. What’s the difference between the two? Not much really. They are close kissing cousins to each other. Jambalaya and paella are both one pot rice dishes loaded with medleys of meat, seafood, and vegetables. To me, the main differences are in the spices that are used. Spices differentiate jambalaya and paella. Saffron is the main spice flavoring paella, but it is not in jambalaya. Cayenne pepper gives jambalaya a bolder flavor profile than paella. Jambalaya is more French and paella is Spanish. Again, very similar, yet with subtle differences.
I very rarely actually use the real saffron, which means I guess I make more of a jambalaya than a paella. But considering I have strong southern roots and I am not Spanish, I guess that makes sense. Besides saffron is way too expensive for my tastes and if Larry really knew how much saffron was, he would NEVER allow me to use it under any circumstances. The name of the dish doesn’t really matter though. The taste of a dish is really all that counts.
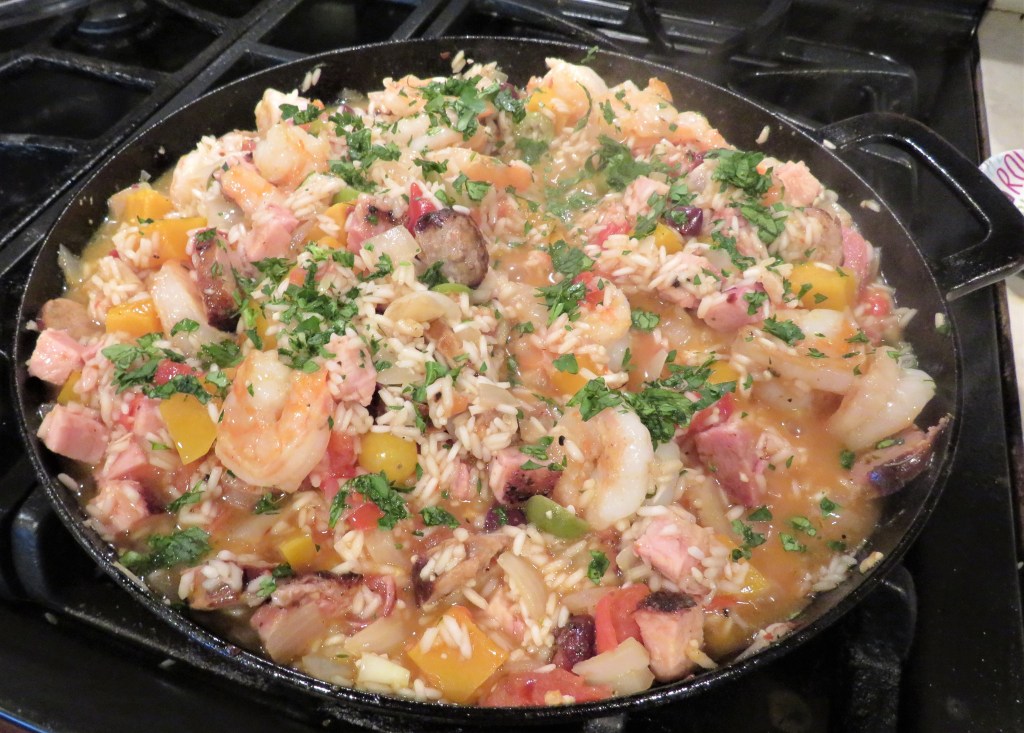
My latest jambalaya/paella dish was loaded with shrimp, sausage and pork loin. Both the sausage and pork loin were leftovers from other dishes, which made me even happier. I got to use up my leftovers while cooking up something else completely different. This is a win/win for me, as you all very well know. I almost added mussels too, which would have made this dish even meatier, but there was so much meat already the dish didn’t need anything more.
I added all kinds of goodness to this recipe. Shrimp, sausage, pork loin, tomatoes, onions, garlic, pumpkin, olives, Peruvian peppers, rice and a dry white wine. My recipe was kind of a paella jambalaya fusion. I used parts of each and mixed and matched them until the flavors were just right, as well as adding my own personal touches too.
There are so many different and delicious versions of both paella and jambalaya available, so I am not really going to give a specific recipe, but instead will give you the cooking methods. Both paella and jambalaya are traditionally “poor man’s” food, and they are made with whatever you have on hand, and vary from region to region, as well as from household to household. You can add whatever you like and discard what you don’t like. You can also change it everytime you make it too. There are no rules.
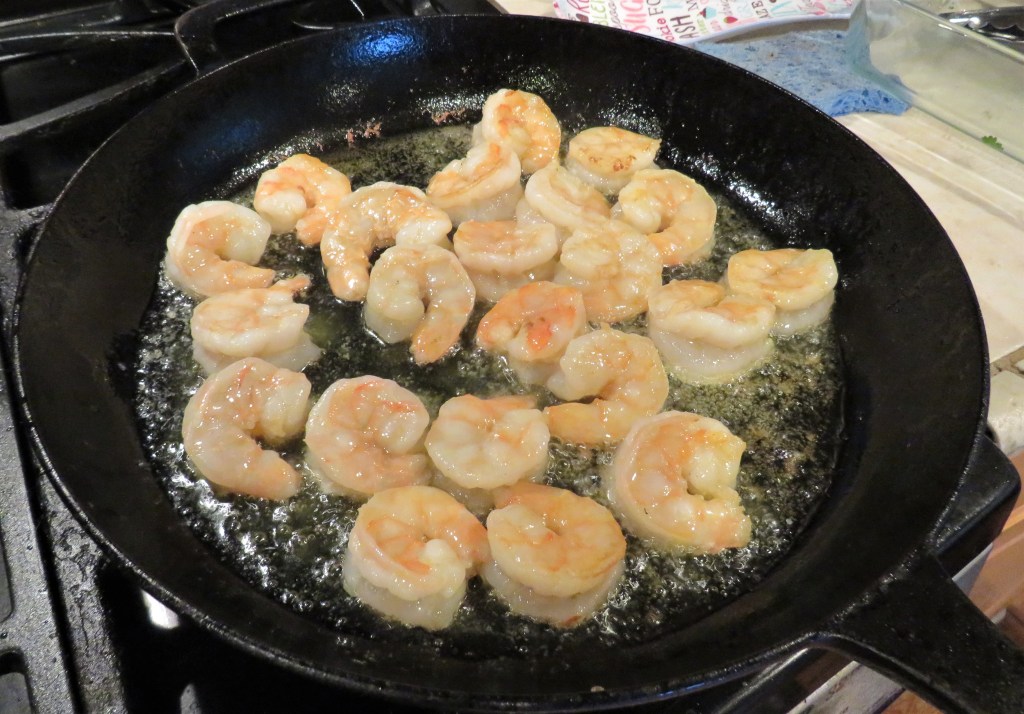
In a very hot skillet, with olive oil and some lemon olive oil (optional), I cooked the shrimp first until they were done. Then removed them from the heat until later.
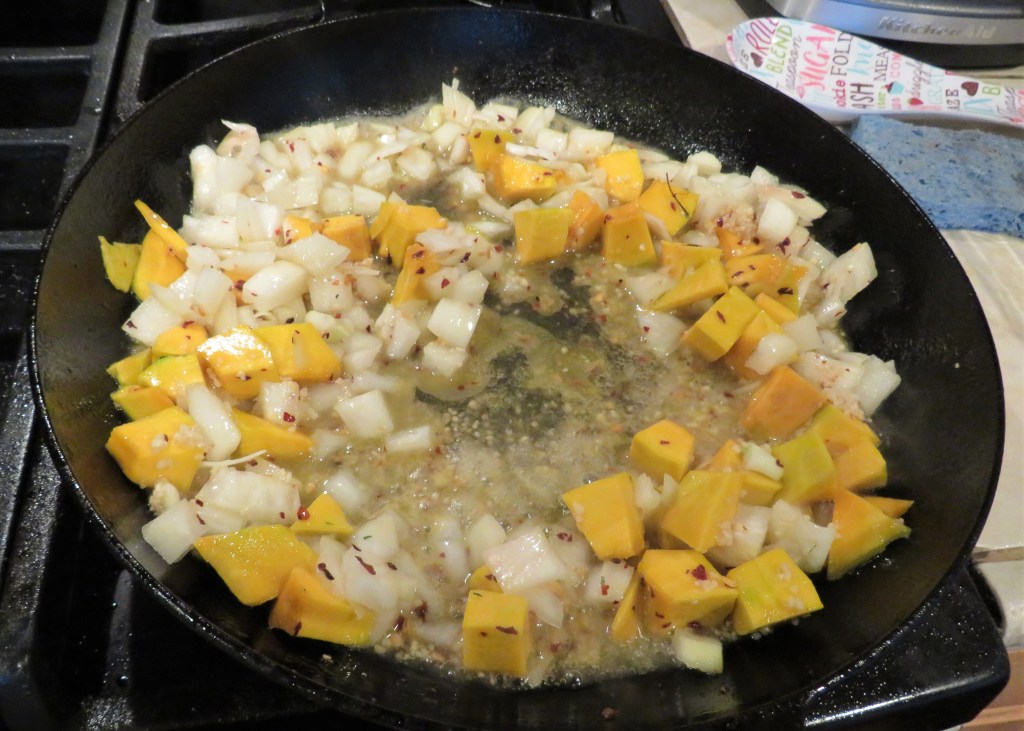
Once the shrimp were cooked, the onions, garlic, pumpkin and red pepper flakes were next. I cooked them for about 7-10 minutes, stirring frequently, until they were tender and the onions were translucent.
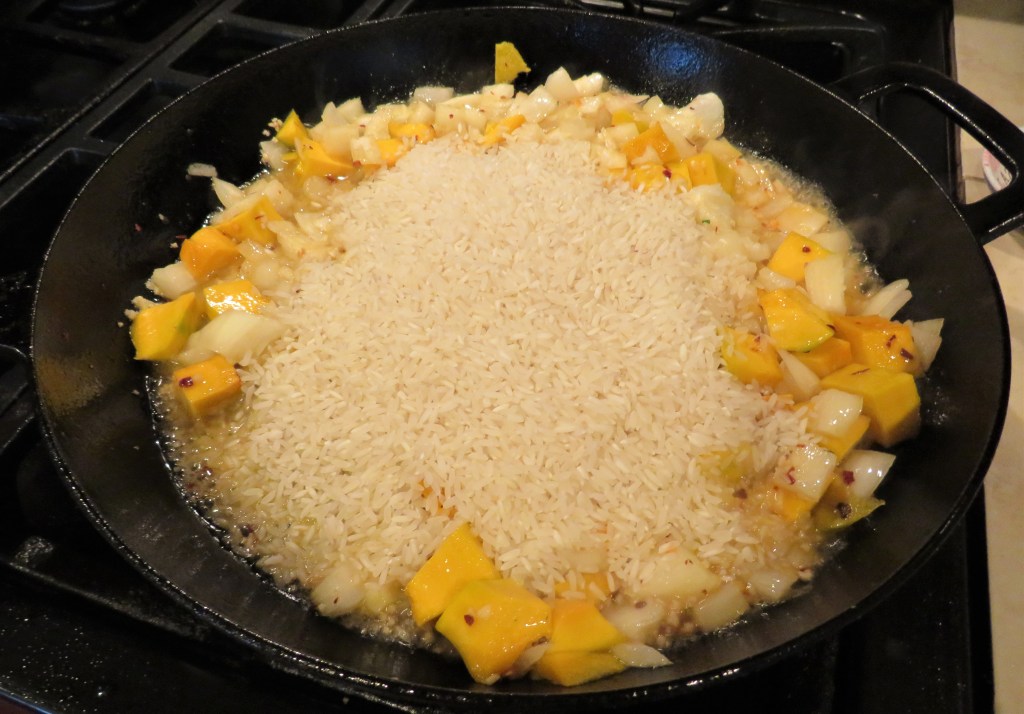
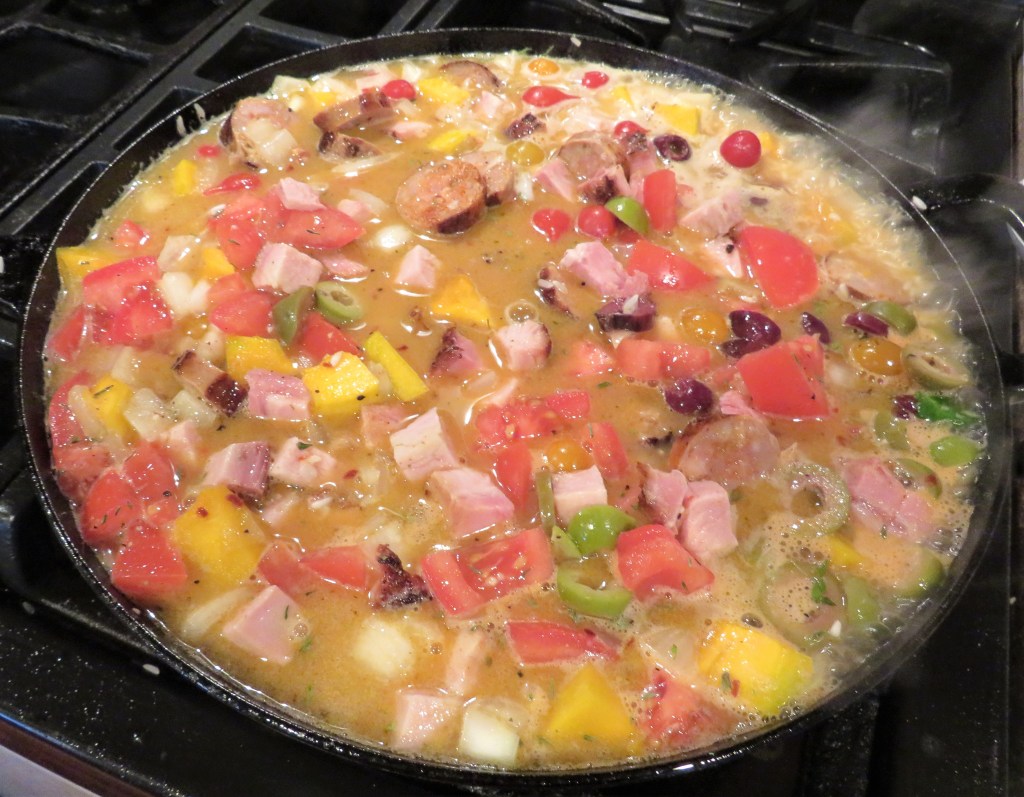
Next came 1 1/2 cups of rice and about 1 cup of dry white wine. I sauteed the rice for a few minutes, then added the rest of the ingredients, including about 3 cups of chicken broth.
Bring everything to a full, rapid boil, then reduce the heat to a simmer, add your spices and seasoning and continue to cook for about 30-40 minutes or until most of the liquid has evaporated, stirring often to make sure the rice doesn’t stick. Although, a true Spanish paella is cooked with the rice sticking and forming a slight crust on the pan. It even has its own special name – arroz crujiente, or a socarrat, which means to lightly toast. This happens when the rice is not cooked evenly and it crusts onto the pan. This is more of a Spanish layering and cooking technique, that can take years to master. However, most Americans prefer their rice to be cooked more evenly, so we tend not to use this method as much. I like the arroz crujiente, but Larry does not.
I re-added the shrimp towards the very end, just to reheat it and not to overcook it. Over cooked shrimp is very rubbery and tough. Once everything was cooked and mixed together, a final touch was to add some lemon juice on top of everything, to really enhance the flavors.
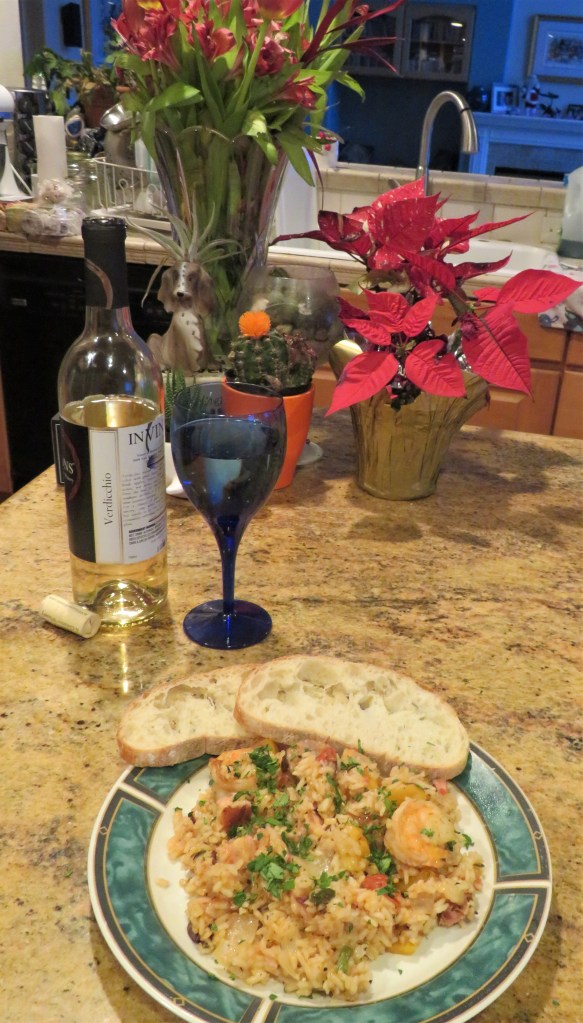
Sticking with Spanish tradition, of course I served it with a warmed bread and some dry white wine on the side. !Deliciosa!
Que tengas un lindo dia or have a great day Everyone. Stay safe and stay well. ‘Til next time.
As you all know, I love to do things with my hands and love to be creative. I appreciate creative projects of all kinds and have many different interests. My talents are ever-growing and expanding. I love exploring all areas, both new and old. I love to do all kinds of crafty projects too. My mother and I used to do them all the time, so in a way, when I do things like this, it is like having my mom around with me too.
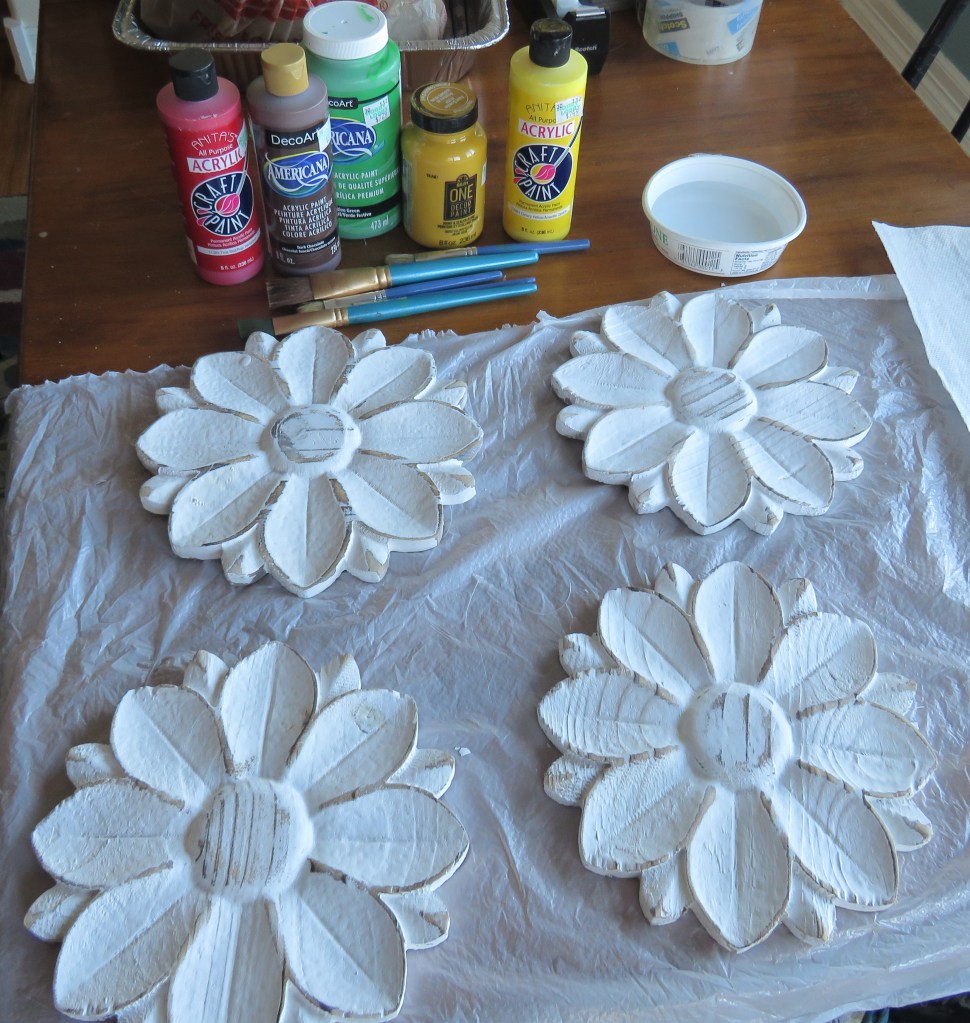
I was in Hobby Lobby the other day and saw these little sunflowers that looked like they needed some color. So I brought them home and colored them up.
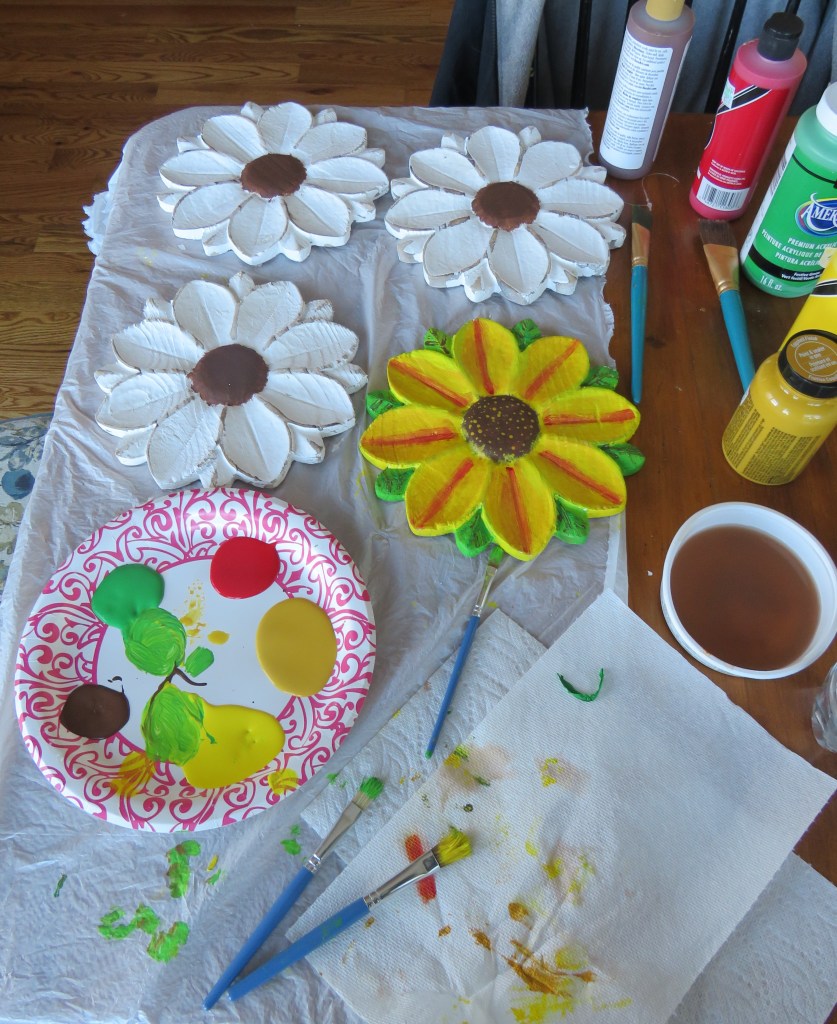
To me, they looked like sunflowers, at least this time. Who knows? Maybe next time, they will look like a different kind of flower. 🙂
My sunflowers have bloomed and blossomed. I am just waiting for the paint to dry then my flowers will be rearranged.
Hopefully these will help brighten up your day a bit. Have a great one. Make it colorful.
Rustic cooking is one of my favorite ways to cook. I like things big and bold and chunky, so you can actually see and taste what’s in your dish. Then I like it topped with a nice sauce that compliments all the flavors. To me, that is a prefect dish.
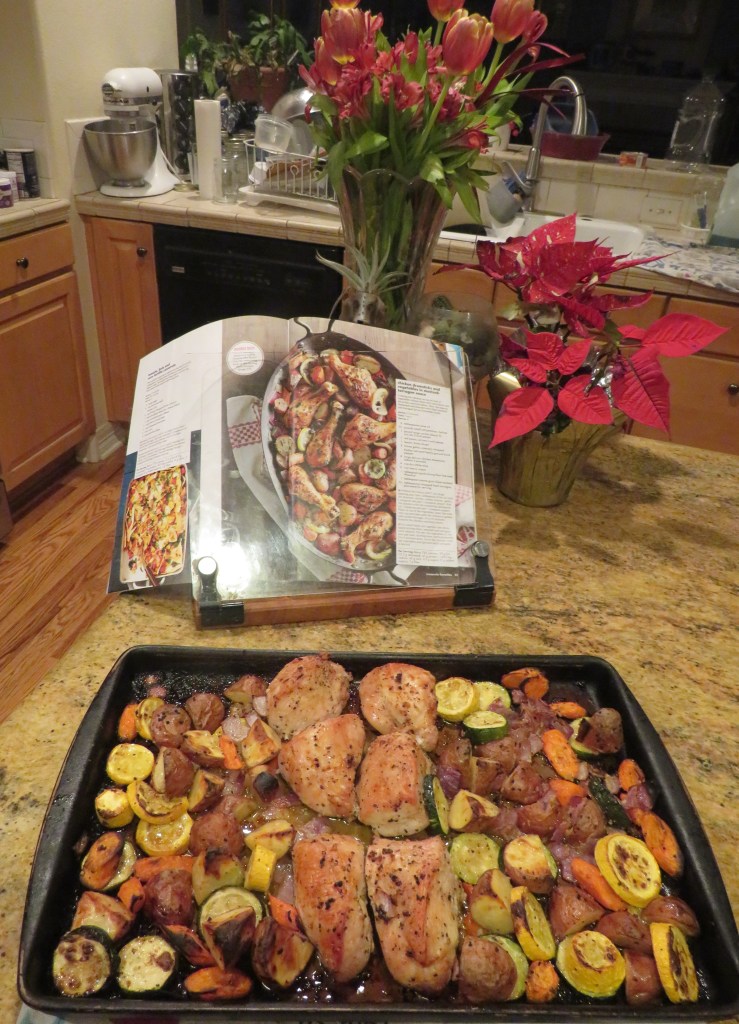
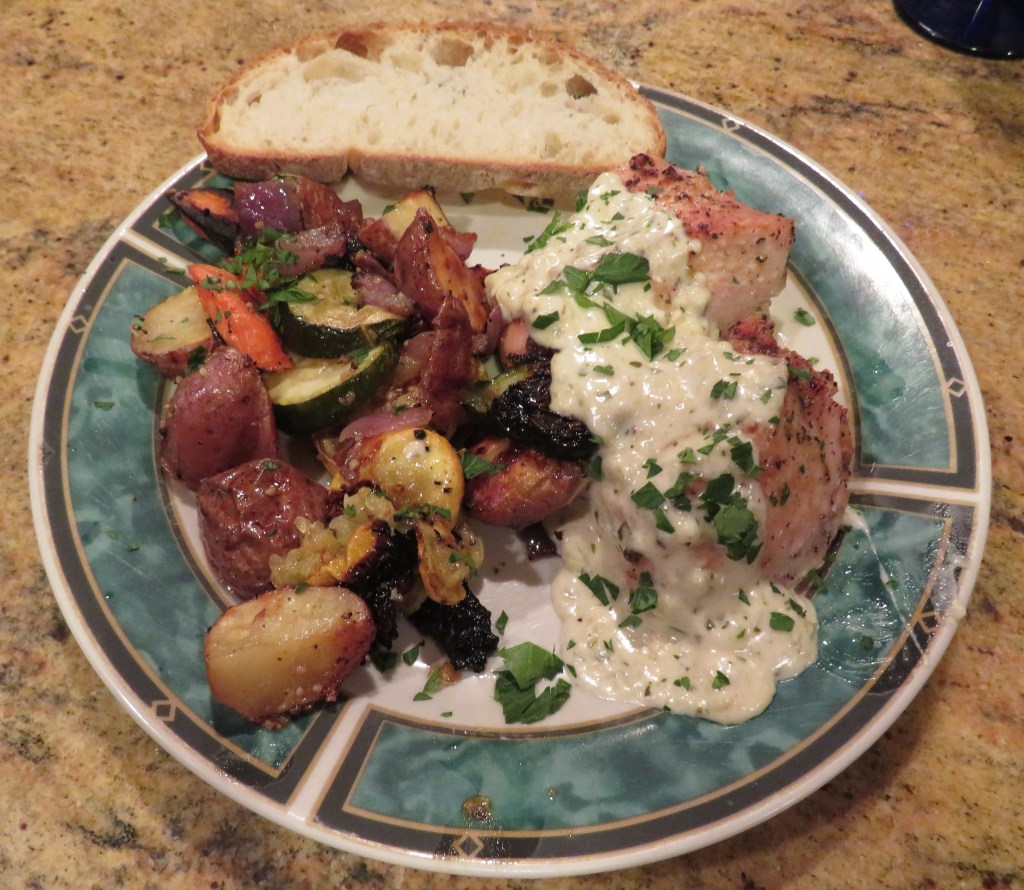
I made yet another rustic dish last night that was a perfect warm and comforting dish for a cold and chilly night. It was rustic roasted chicken and vegetables with a creamy Dijon and tarragon sauce. Everything was cooked together all on one pan too. It was most definitely my kind of meal – easy-peasy and delicious. It doesn’t get much better than that.
Roasted Chicken and Vegetables with Creamy Dijon and Tarragon Sauce
I used chicken breasts that I cut into large pieces, but you can also use drumsticks or other parts of cut chicken too.
Preheat the oven to 425* F or about 220*C.
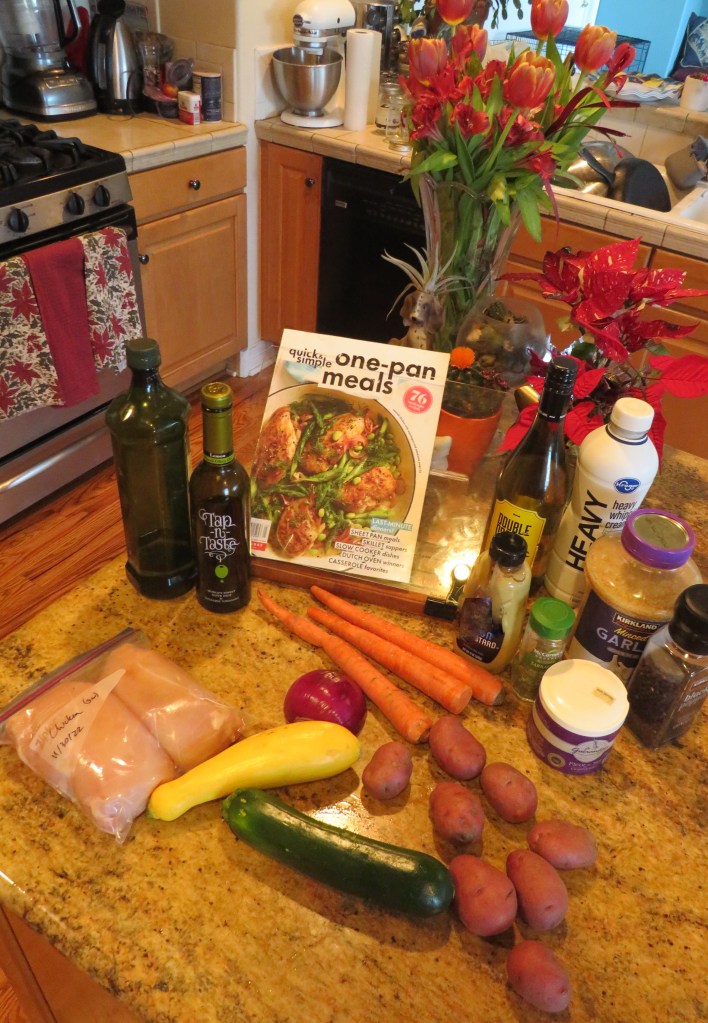
1 1/2-2 lbs chicken breasts, cut into large pieces
1 zucchini, sliced into thick rounds
1 crookneck, sliced into thick rounds
3 carrots, peeled and sliced into thick pieces
1/2-3/4 red onion, diced medium
1 1/2-2 lbs red potatoes quartered
1-2 TBSP garlic
olive oil
lemon olive oil, optional
salt & pepper to taste
Creamy Dijon Tarragon Dressing
1 cup dry white wine
2 tsp dried tarragon or 1 TBSP fresh tarrogon, chopped
1- 1 1/2 cups heavy whipping cream
1 TBSP Dijon mustard
1-2 TBSP flour
fresh ground black pepper to taste
2 TBSP butter
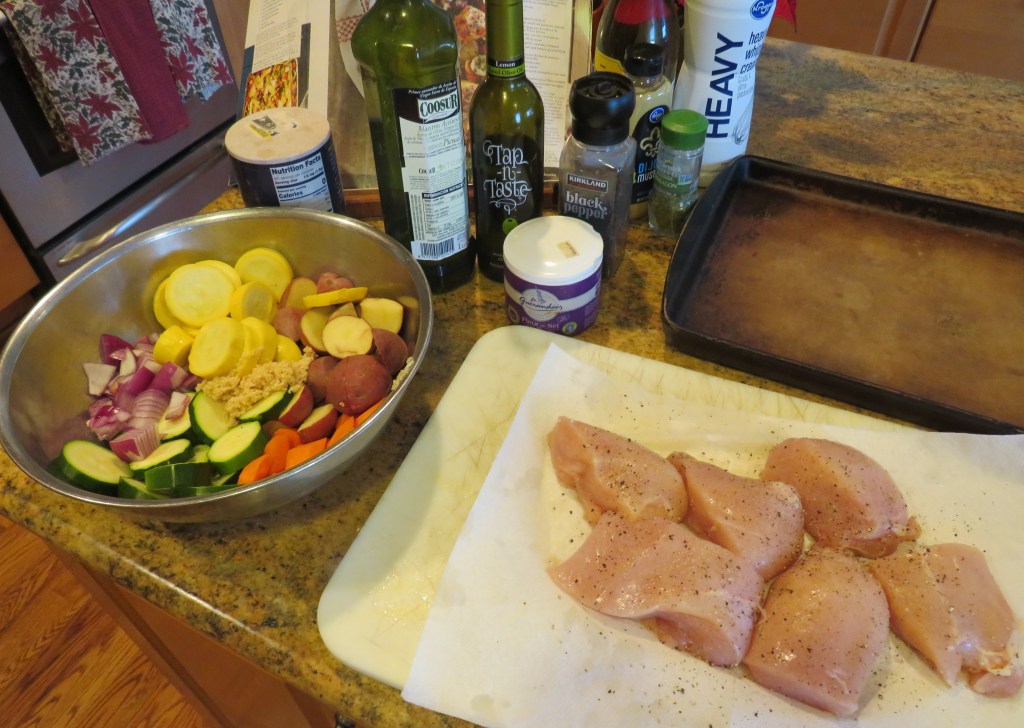
Pat the chicken dry with a paper towel, then season with salt & pepper and drizzle the lemon olive oil over it. Place it on a baking sheet, with plenty of room left for the vegetables.
Toss all the vegetables together with olive oil and lemon olive oil, and salt and pepper. Then add to the baking sheet with the chicken.
Place the pan in the oven and cook for about 25-30 minutes, then stir the vegetables and turn them so they cook evenly, and place back into the oven for another 25-30 minutes, or until they are slightly charred and tender and the chicken is completely cooked.
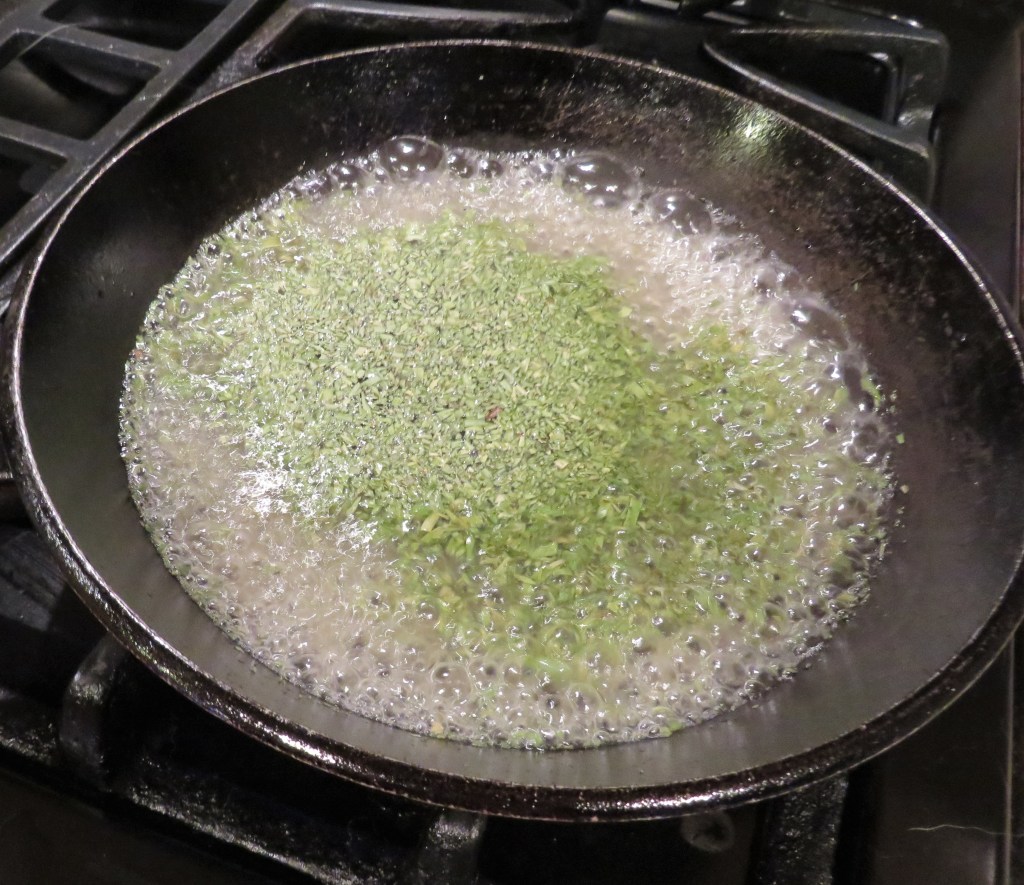
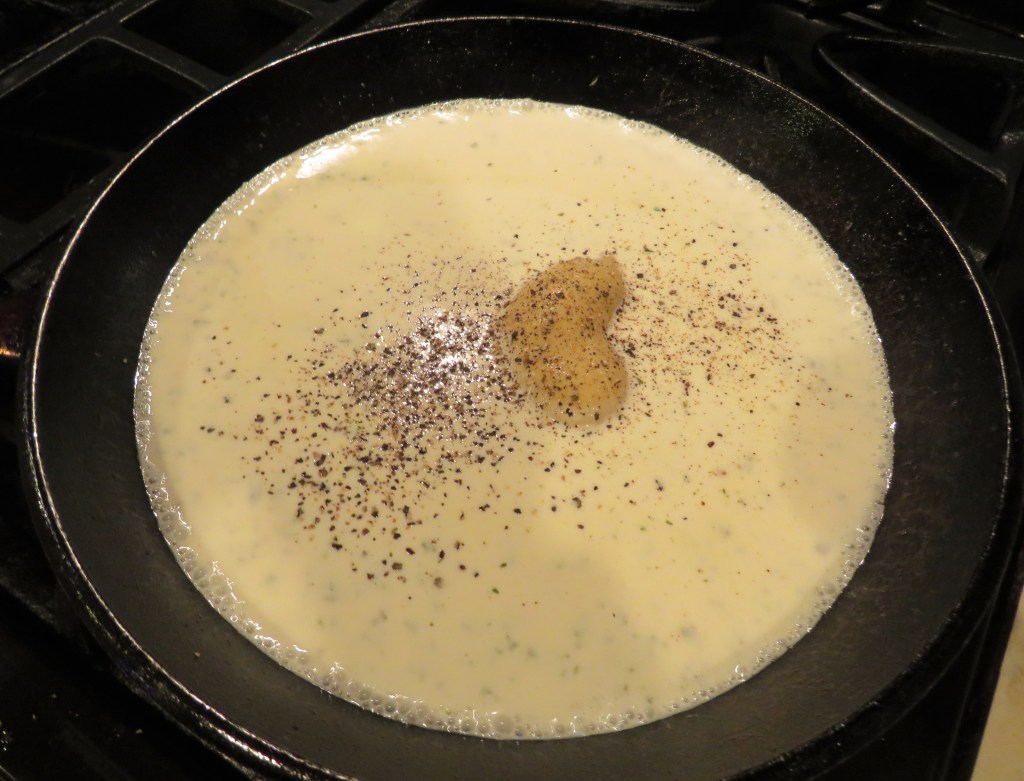
While the chicken and vegetables are cooking, prepare the sauce. Start by reducing the wine to about 1/2 of what it was when you started, along with the tarragon.
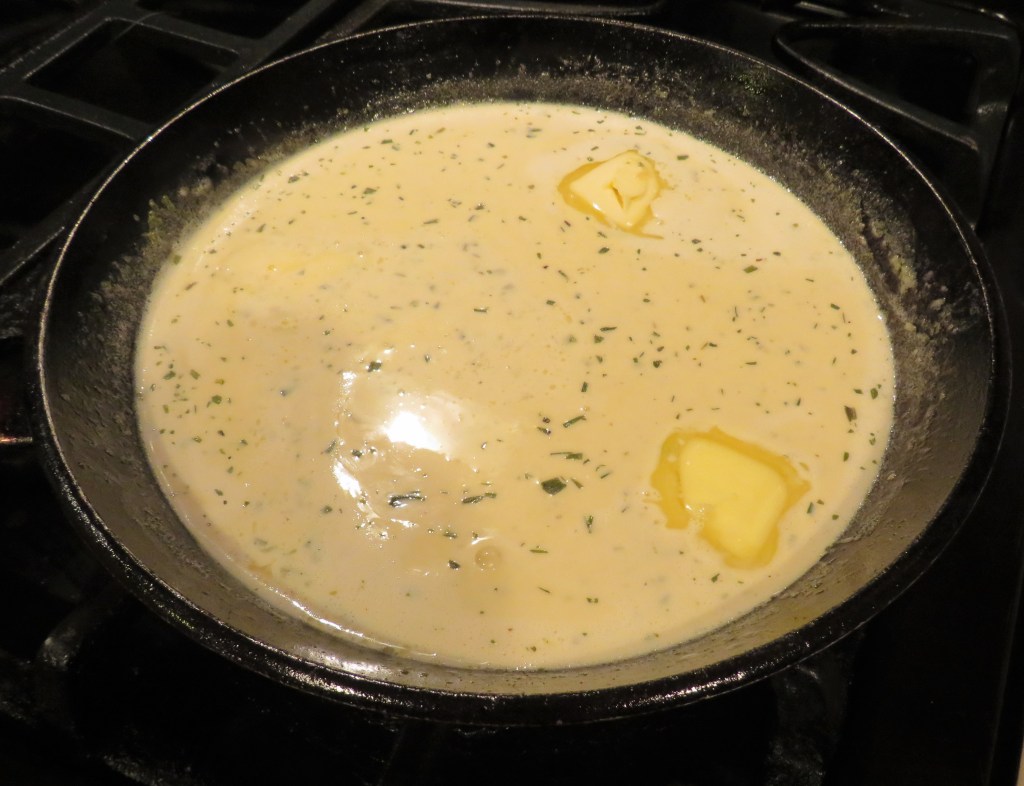
Add the cream, the Dijon mustard and some more fresh ground black pepper, plus 1-2 TBSP of flour to thicken the sauce. Mix everything together completely, bring to a boil, then reduce the heat to a simmer and continue to cook for about 5-7 minutes, stirring frequently. Make sure all the lumps of flour are broken down.
Add the butter right at the end to make a smooth, creamy finish to the sauce.
Once everything is ready, serve it up and top with the Dijon tarragon sauce, with a cool crisp dry white wine on the side, preferably the same wine you used for the sauce. Delicious!
Have a great day Everyone. Stay safe, stay warm and stay well. ‘Til next time.
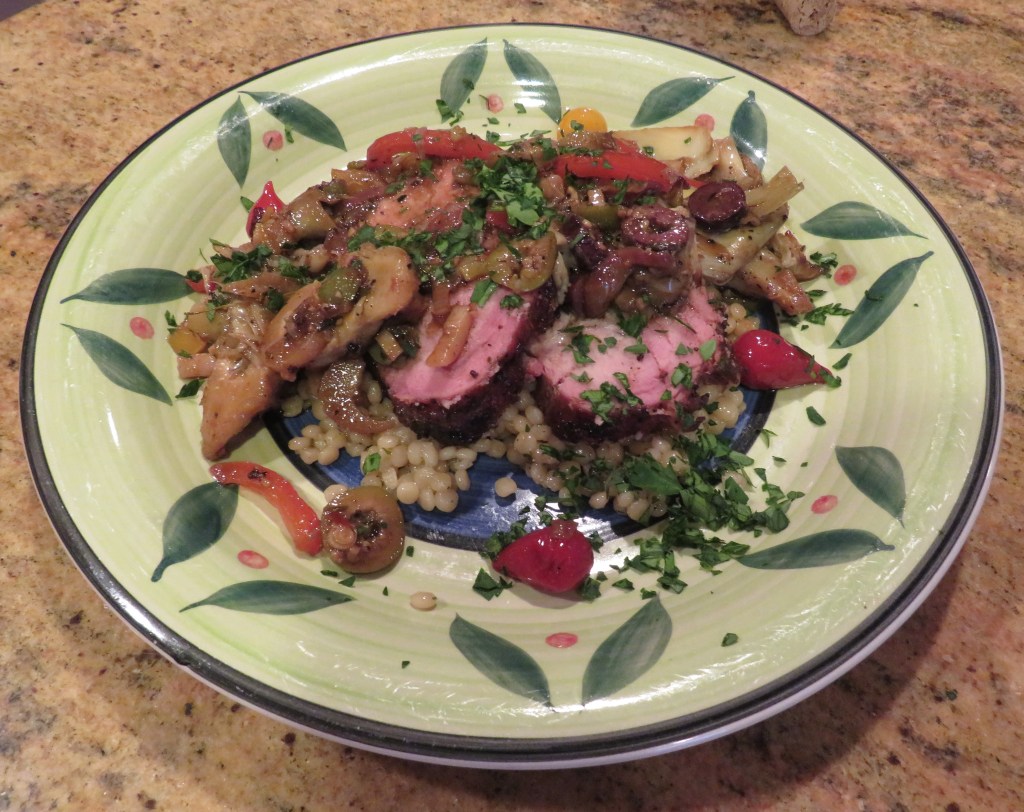
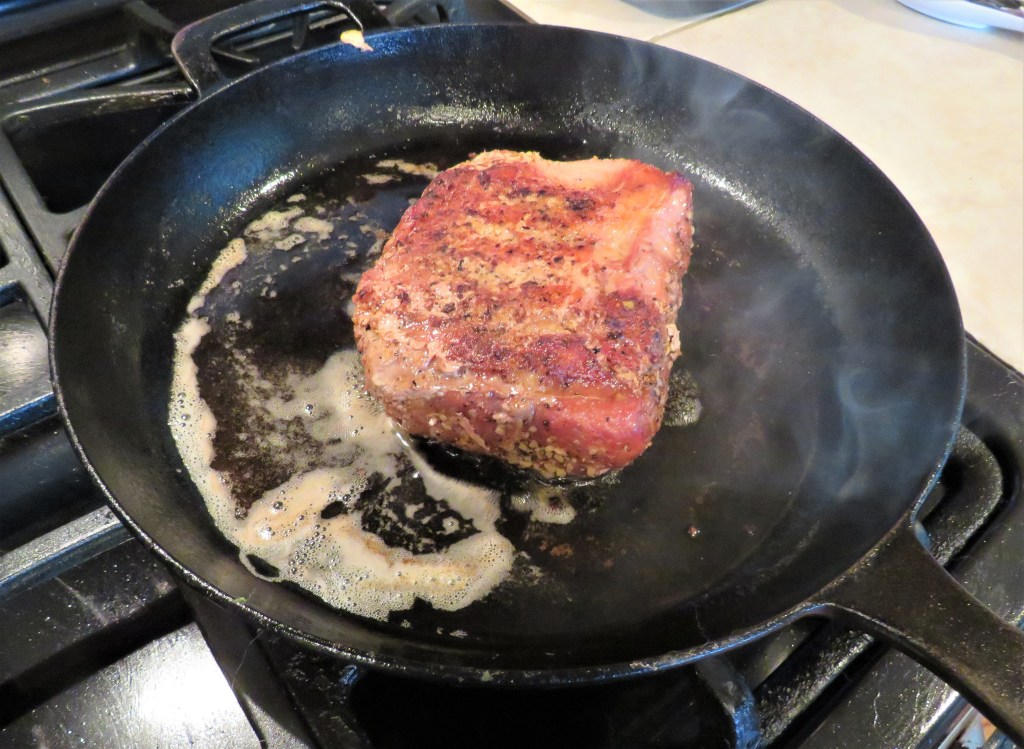
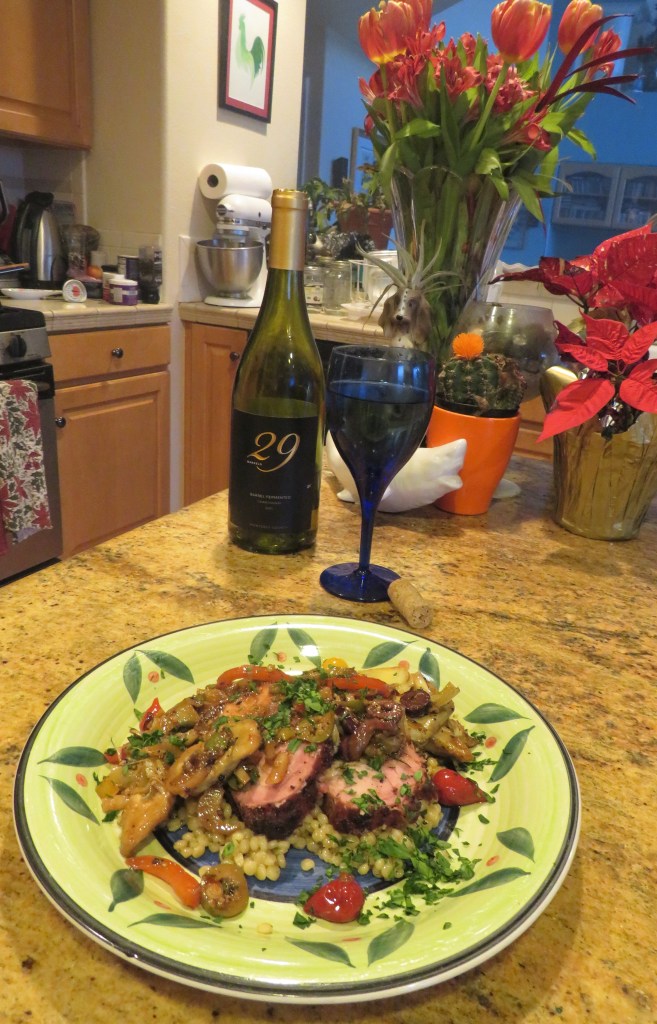
When Larry smokes, he smokes. He fills up the smoker with all kinds of meats and just goes crazy. The last time he pulled out the smoker was for Christmas Eve, and once again, his smoker was filled with all kinds of meat, including a pork loin. Once it was smoked, we put it in the freezer to pull out again and use later. And later just came. I prepared it in a Mediterranean style, or as I call it, Puerca Mediterranea.
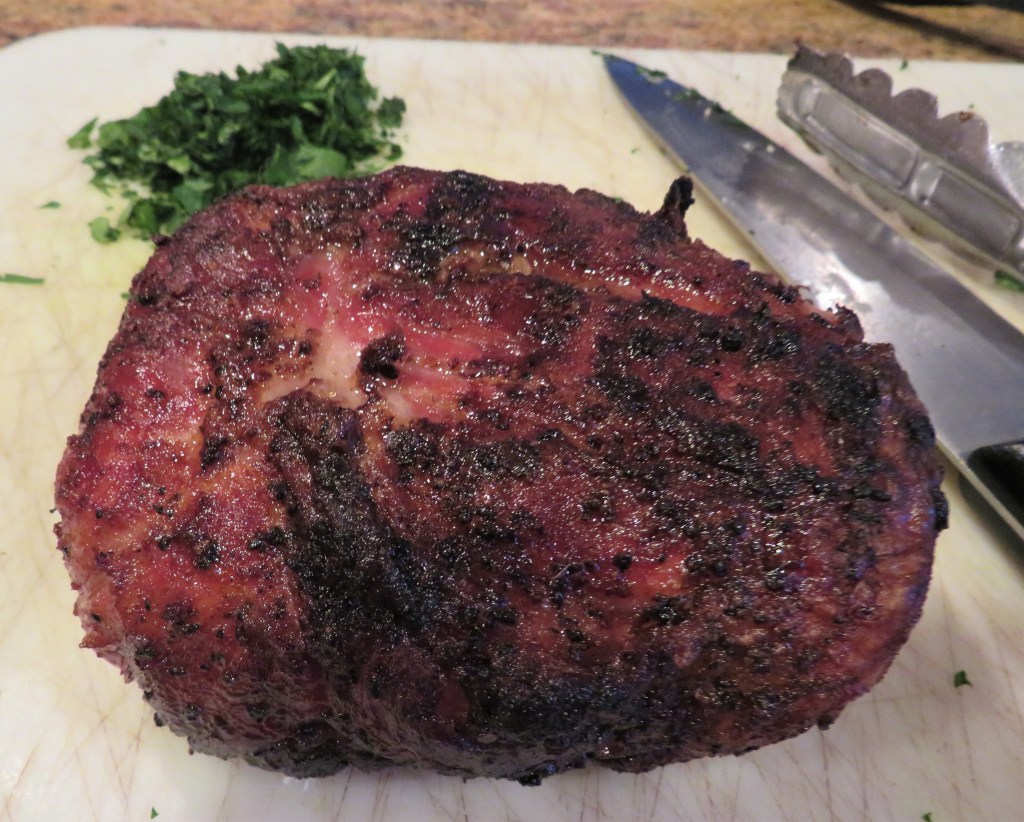
Basically the pork was cooked with a reverse sear. Larry smoked it first, so it was already cooked, and then I seared it in a combination of butter and olive oil in a very hot skillet for 3 minutes per side to give it a nice crust. After searing it, I put in the oven at 375* F for about 20 minutes to make sure it was hot all through the center. Oh it was so good too. It was crispy on the outside and juicy, tender and moist on the inside, and loaded with flavor.
Let the pork set for a few minutes before slicing.
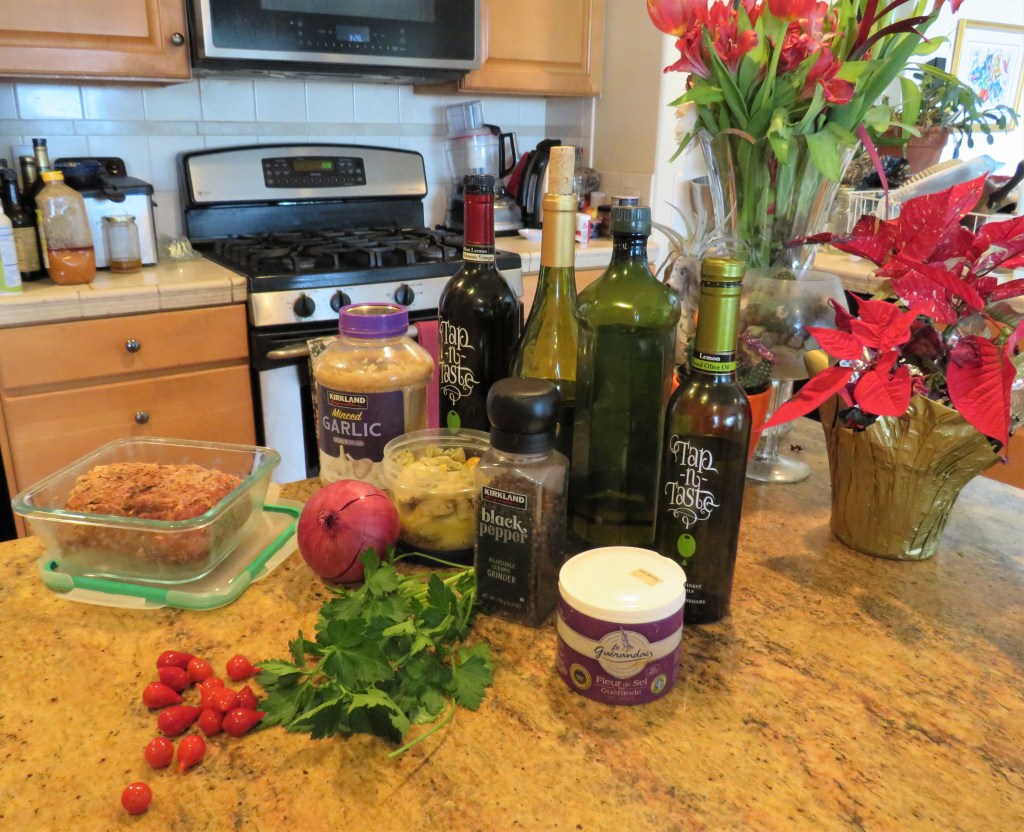
I couldn’t just serve pork and nothing else though, could I? Of course not. And again, I had some leftovers that needed to be used, so I did what I do best, and recreated with them. While the pork was resting, I made my topping.
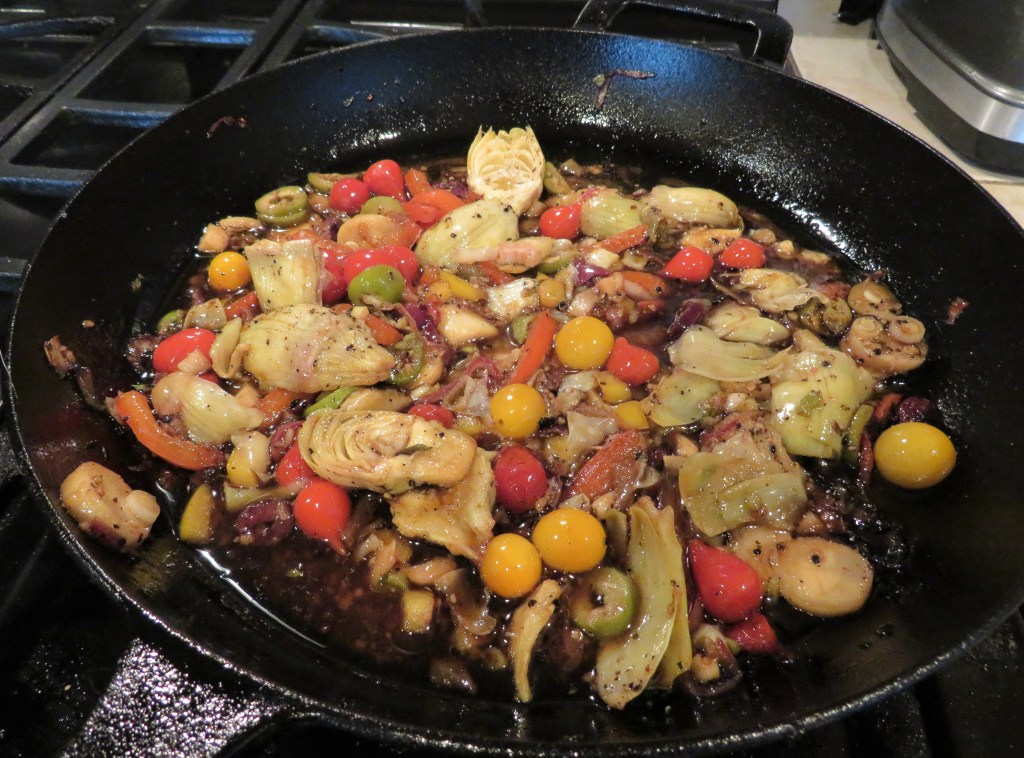
I had some leftover Insalada Mediterranea from when I made my calzones. Un Insalada Mediterannea I added some more onions, garlic, red bell pepper, sweet Peruvian peppers, white wine, lemon balsamic vinegar, lemon and regular olive oil and fresh ground black pepper and salt and used that as my topping for the pork.
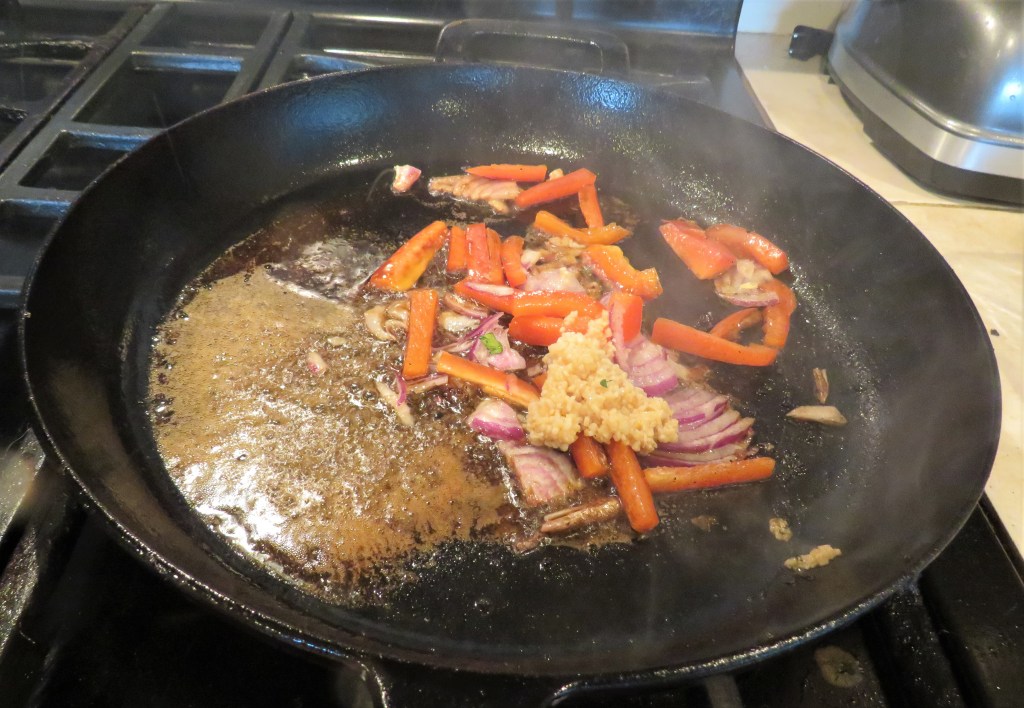
Once the pork was seared, and in the oven to make sure it was completely cooked, I deglazed the pan with about 1 cup of dry white wine, then added the onions, peppers and garlic and cooked until they were tender, or about 5 minutes, stirring frequently.
I added the rest of the vegetables with some more olive oil, and the lemon olive oil and lemon balsamic vinegar and continued to cook for about 5 more minutes, again, stirring frequently.
When the pork had set and was ready to slice, I sliced it into thin slices, served it over couscous and then topped it all with my Mediterranean vegetable mixture. I served it all with a chilled chardonnay on the side, but a light or medium bodied red would have also gone nicely with this dish too.
Delicious or should I say Delicioza! As I always say, play with your food. Leftovers never have to be boring, nor do they have to be the same old same old. They can be just as fun and exciting as the firstovers. You just have to be creative and use your imagination a bit. 🙂
Have a great day Everyone. Stay safe and stay well. ‘Til next time.
Cakes have been a part of world’s diet since the 13th century. However, hack then, they were nothing like we know them today. When cakes were first introduced, they were more of a sweet bread, than the velvety sweet cakes of today. Many times, people would put dried fruits and nuts in their cake recipes. As a result, the desserts were rough and had an abrasive texture. It wasn’t until 500 years later when bakers began to make dessert more appealing. They were able to find ways to break down the flour in the recipes so cakes could be softer and tastier.
Velvet cakes first came about in England’s Victorian era, with the introduction of cocoa powder into the cakes. The cocoa would help break down the coarse flour. As a result, the flour was softer and the cake was velvety, hence the name of a velvet cake. Often times, the cakes had a red tint as well, due to the chemical reaction between the cocoa and acid that give the cakes their red color. Natural cocoa has a lot of acidities and works well with the baking soda and buttermilk. Cocoa powders have become better over the years. Now, most of the cocoa powder you buy has to undergo special processing. During the production phases, the cocoa interacts with an alkalizing agent. The base (alkalizing agent) causes the cocoa’s acidity to neutralize. As a result, the other cake ingredients no longer have a chemical reaction with the cocoa. Today, because of the neutralizing agents, often red coloring is used to make the cakes turn red. The red color of the cake isn’t nearly as important as the flavor and texture of the cakes though. A cream cheese frosting is a nice accent to adorn the “red velvet” cakes and has become a popular topping for them.
The actual “red velvet cake” wasn’t made popular until 1943, by Irma Rombauer, author of The Joy of Cooking. During WWII, rations were in place, and sugar wasn’t readily available, so beet root was often used as a sweetener. The beet root made the cake batter red in color, as well as making the cakes more flavorful and moist.
Today, red velvet cakes are known by many different names, some of which include red carpet cake, red mystery cake, flame cake, authentic red velvet cake and Waldorf Astoria cake.
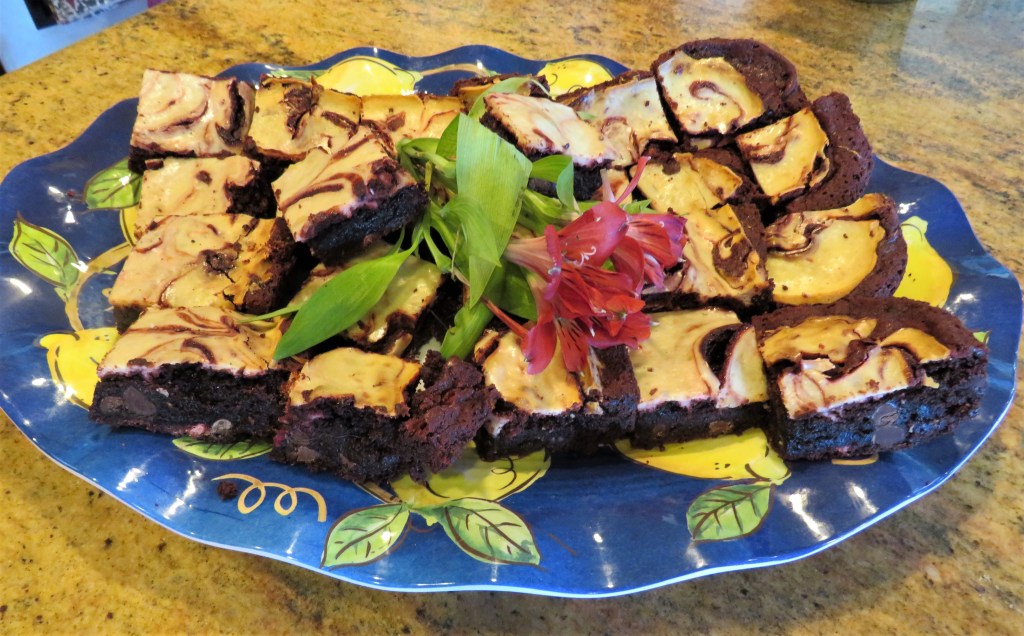
I turned my “red velvet cake” into brownies. And yes, I topped them with a cream cheese frosting as well. They were very popular indeed, and they all disappeared in no time.
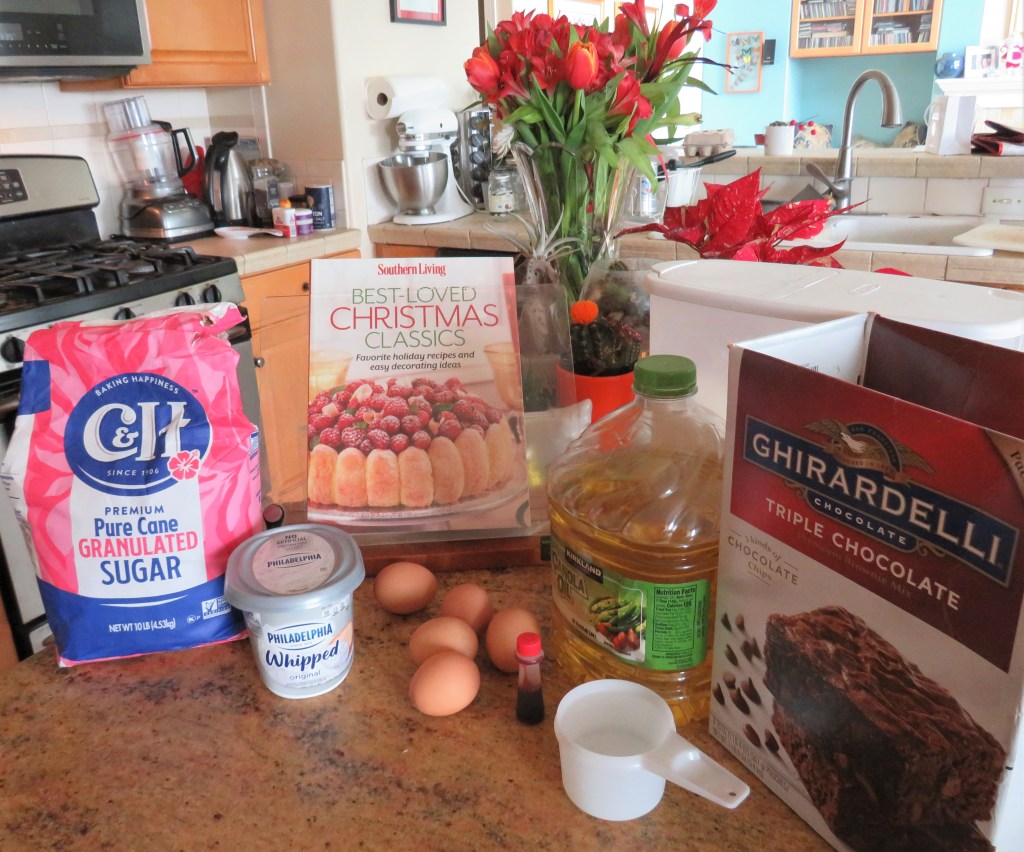
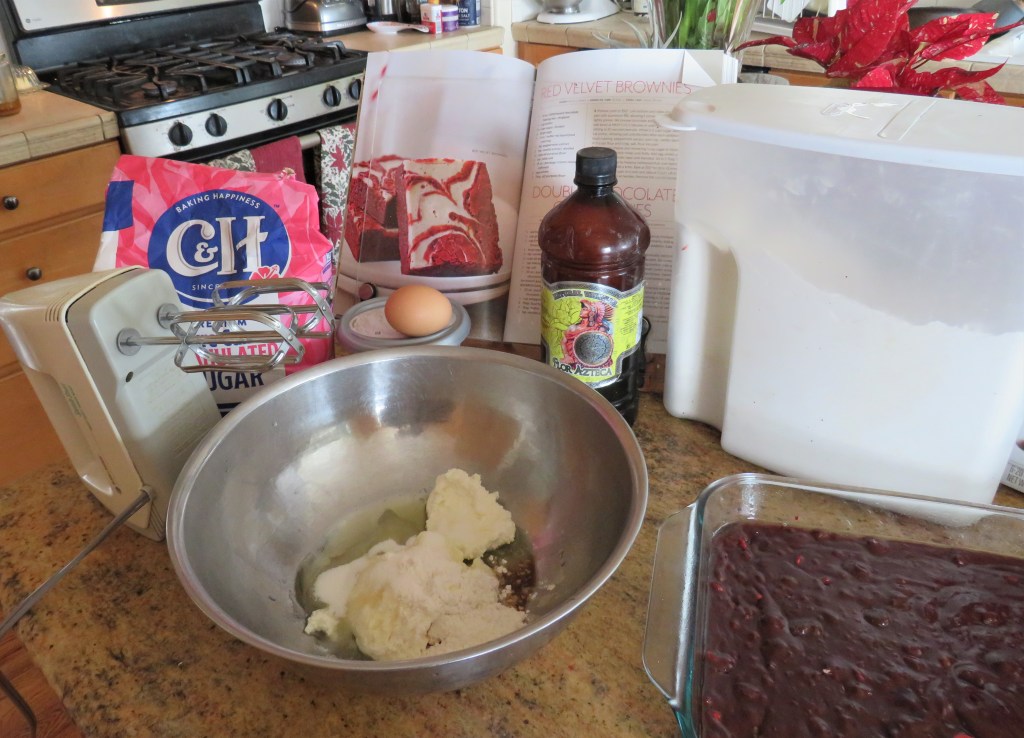
I admit I cheated though, and sometimes, there is absolutely nothing wrong with cheating by starting off with a cake or brownie mix. I did not make these entirely from scratch. I started off with Ghirardelli’s packaged brownie mix and then created from that. There are so many fantastic cake and brownie mixes available today, that sometimes it is just smarter, and cheaper, to use those than to always make everything from scratch. Many years ago, when I was first in culinary school, my pastry instructor was a master pastry chef, originally from Holland. His name was Chef Rudy Rosier, or Chef Rudy as we lovingly called him. He actually created and perfected many of the pre-packaged cake recipes that are available today. So if you get a known, major brand, chances are, they are going to be very good indeed. There is no need to reinvent the wheel, or in this case, the cake.
Red Velvet Brownies
2 packages of Ghirardelli brownie mix
2 eggs
2/3 cup water
2/3 cup vegetable or canola oil
1 oz red food coloring
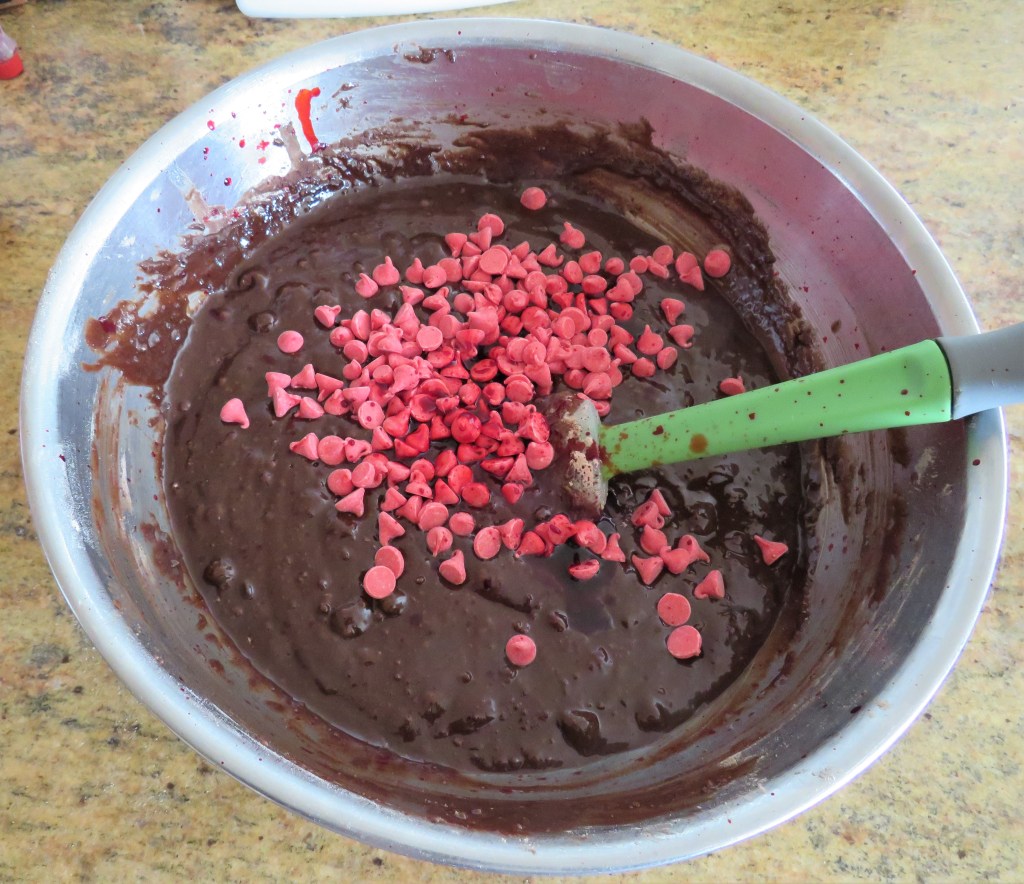
1/2 package of cherry chips, optional
1/2 cup softened or whipped cream cheese
2 egg whites
1/4 cup sugar
2 TBSP flour
1 tsp vanilla
Preheat the oven to 350* F or 190*C.
Spray a 9×13 baking pan with cooking spray.
Follow the directions on the package for the brownies, then add the food coloring and cherry chips, and carefully fold into the mixture.
Mix together the cream cheese, sugar, egg whites, vanilla and flour with a mixer until well blended and smooth.
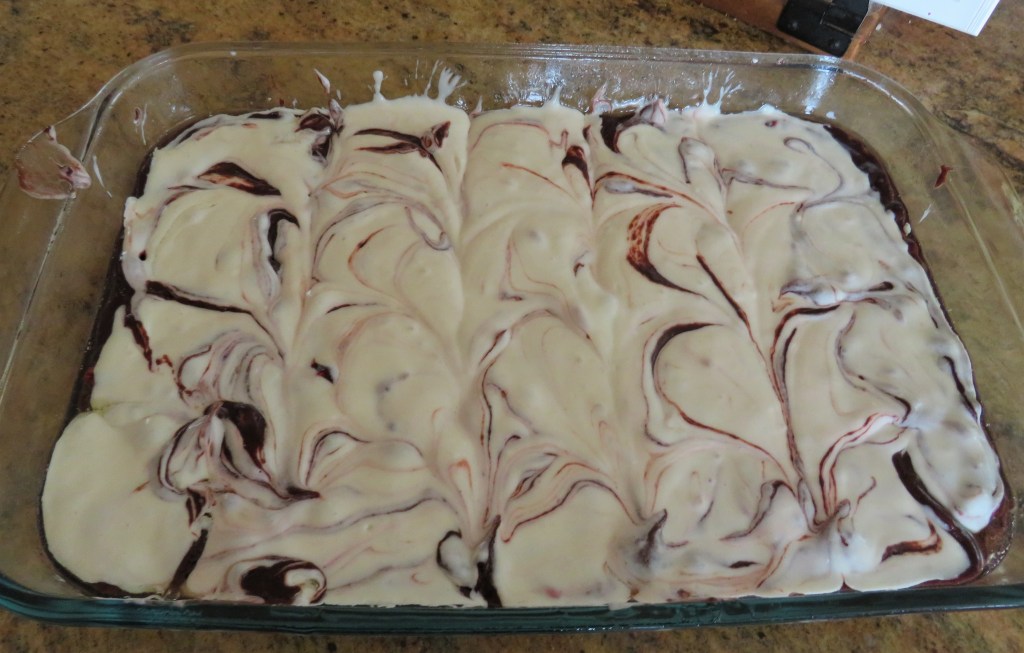
Spread the brownie batter evenly into the prepared pan, then add the cream cheese topping, making sure to completely cover the brownie mixture. Gently swirl the cream cheese mixture into the brownie mixture with a knife.
Bake for about 30-40 minutes. Let cool completely before removing from the pan and slicing.
Share with friends and enjoy. These delicious treats will be gone before you know it. Everything is always better with chocolate, and especially with a rich, velvety chocolate. 🙂
Have a great day Everyone. Stay safe and stay well. ‘Til next time.
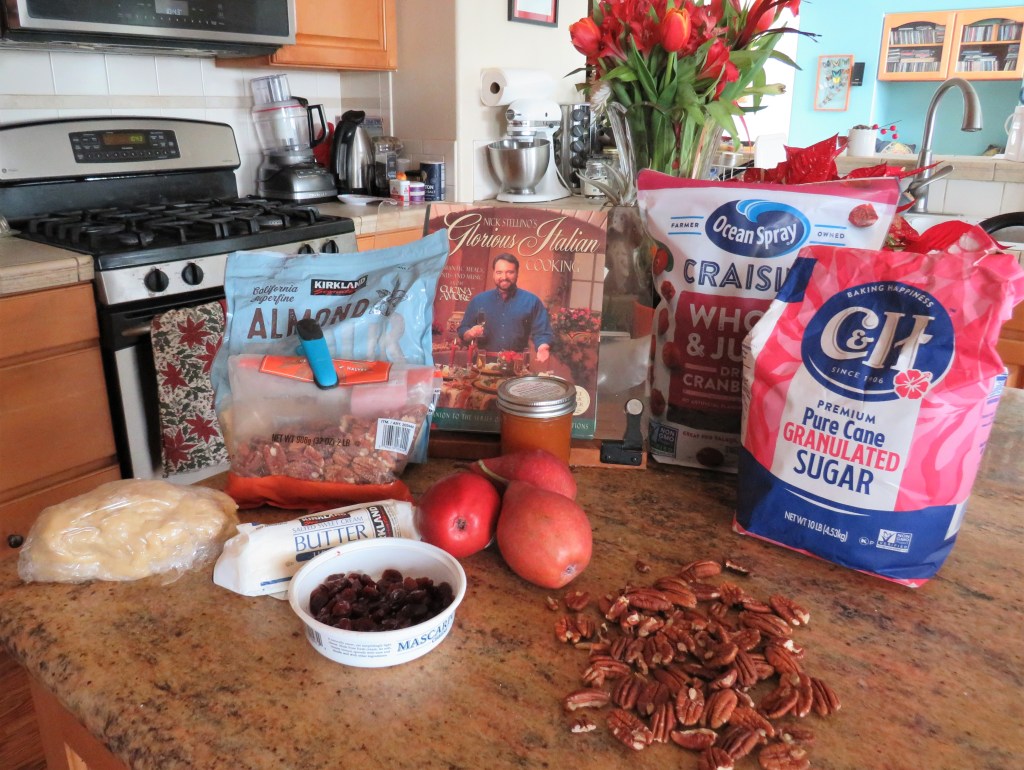
I usually make something with pears during the holiday season, but this holidays season was so busy, and I made so many other wonderful dishes, that I just couldn’t squeeze anything else in. Until now. It is still kind of the holiday season, so it still counts, right?! Although, I love pears and pears are good any time of year, so you don’t have to wait for the holidays to prepare this scrumptious dessert.
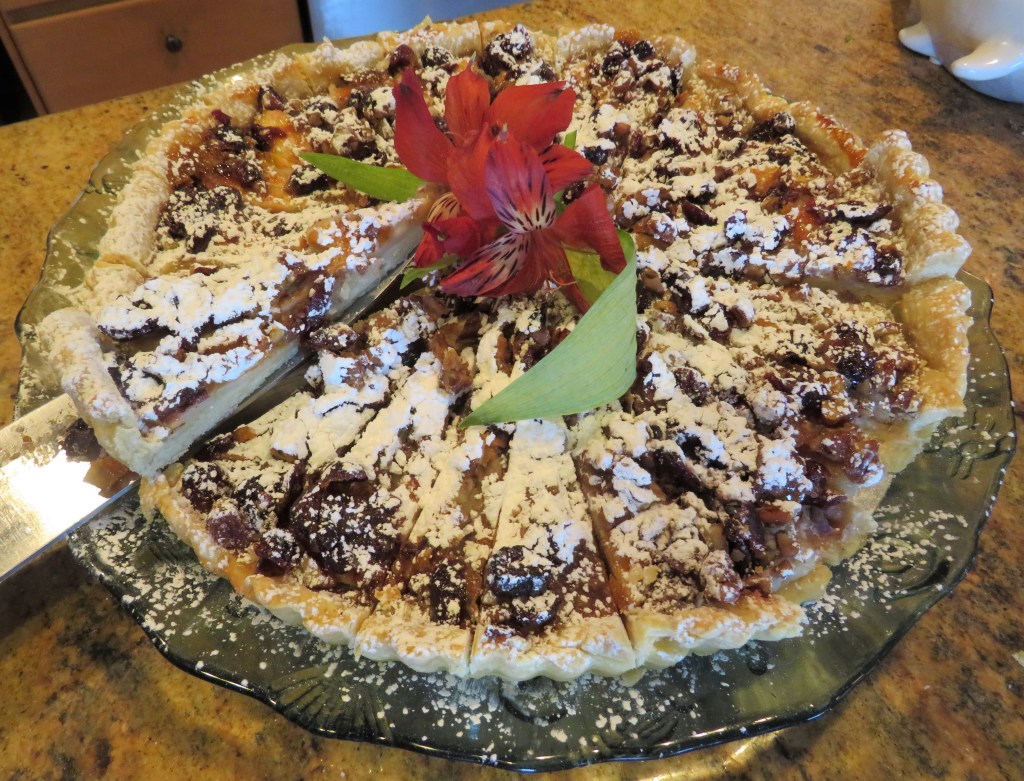
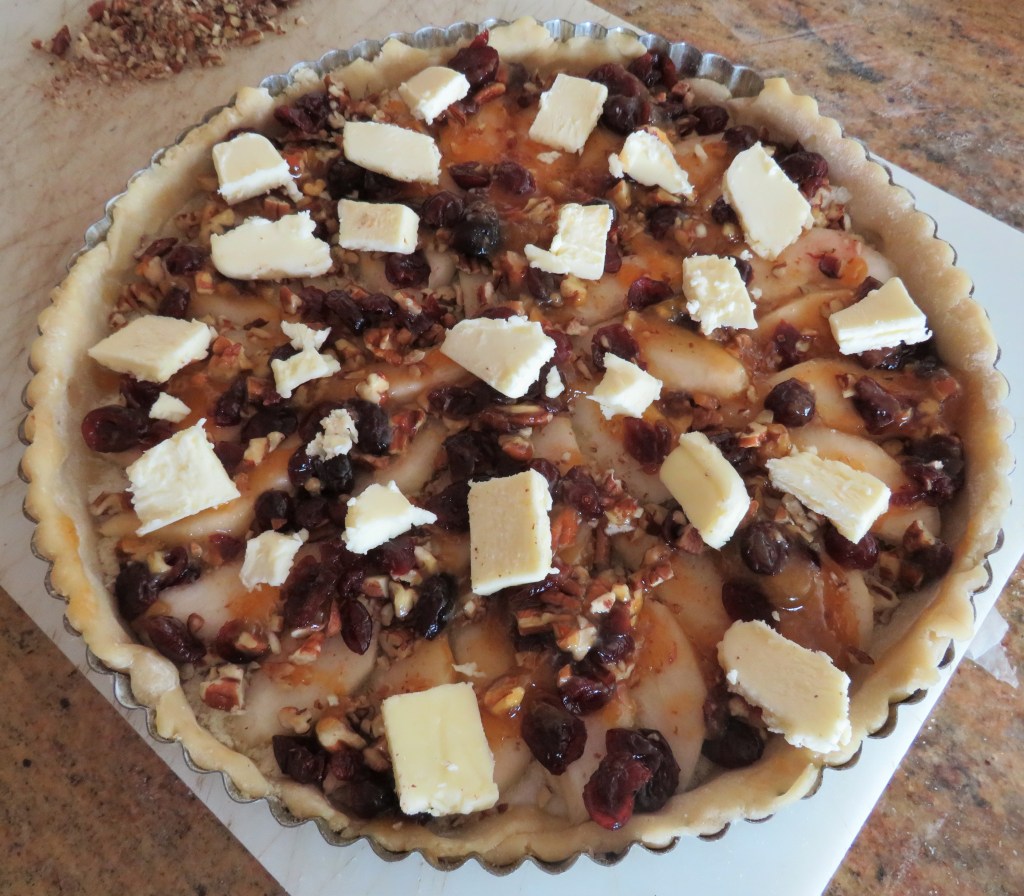
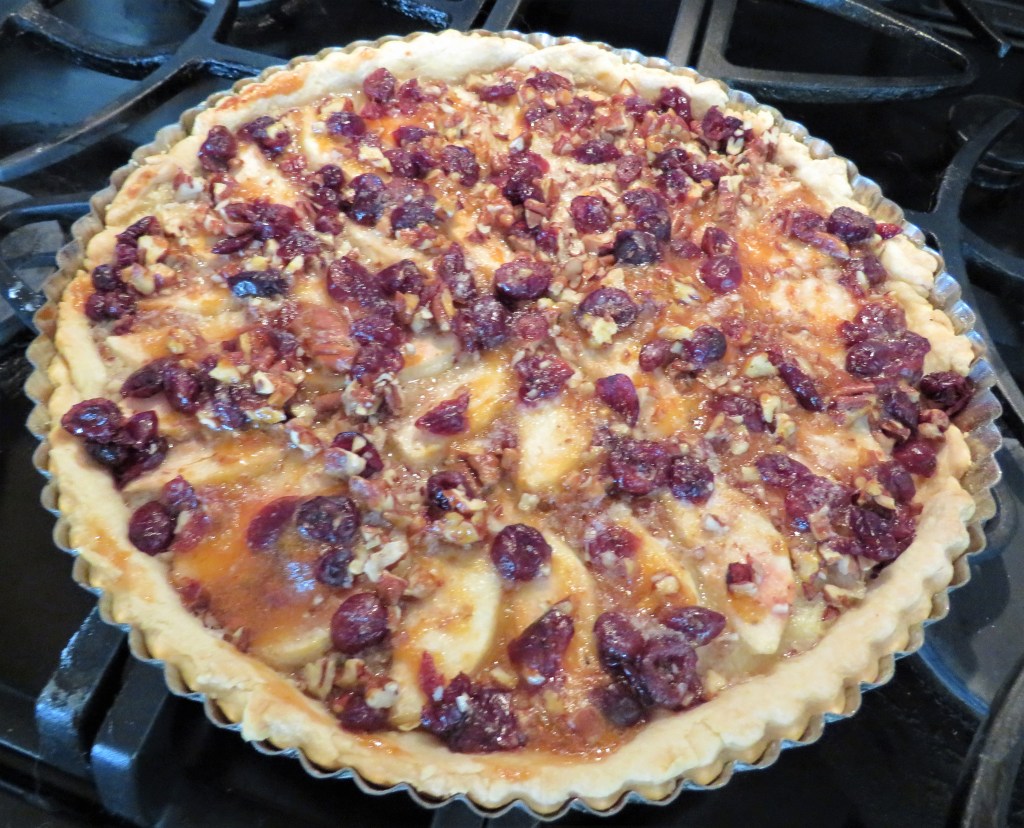
I made an Italian pear and cranberry tart with chopped pecans. It was very good, and quickly disappeared. That’s what I like to see.
I started with a pate sucre, or a sweetened basic tart dough. The only difference is a pate sucre has about 3 TBPS of powdered sugar added to the dough while it is being made.
Pate Sucre Dough
1 1/2-1 3/4 cup flour
6-TBSP cold butter, cubed
3 TBSP powdered sugar
dash of salt
1 egg
5-6 TBSP heavy whipping cream
Put the flour, butter, salt and powdered sugar into a food processor and pulse for about 30 seconds, or until it resembles sand. You can use a pastry cutter if doing it by hand too. Then add the egg and the cream and blend until it all forms into a dough. Wrap the dough in plastic wrap and refrigerate for at least 30 minutes, and up to 24 hours before rolling it out to shape your pan.
Pear and Cranberry Tart
You can use either walnuts or pecans, but since I am not a huge walnut fan, I always substitute pecans for walnuts.
pute sucre dough
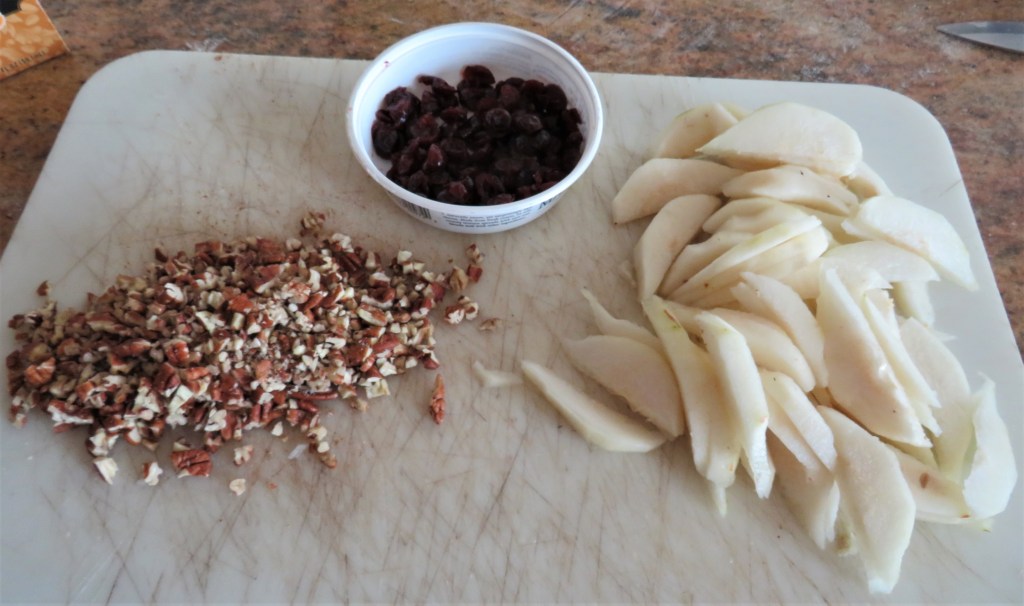
1/4 cup dried cranberries, soaked in warm water for at least 20 minutes, drained
3 pears, peeled and sliced very thin
2 TBSP sugar
2 TBSP almond flour
3/4 cup chopped pecans or walnuts
2-3 TBSP cold butter, cut into pieces
1/3 cup apple, apricot or peach jam or preserves
1 tsp almond extract
powdered sugar for dusting
Preheat the oven to 350* F or 190* C.
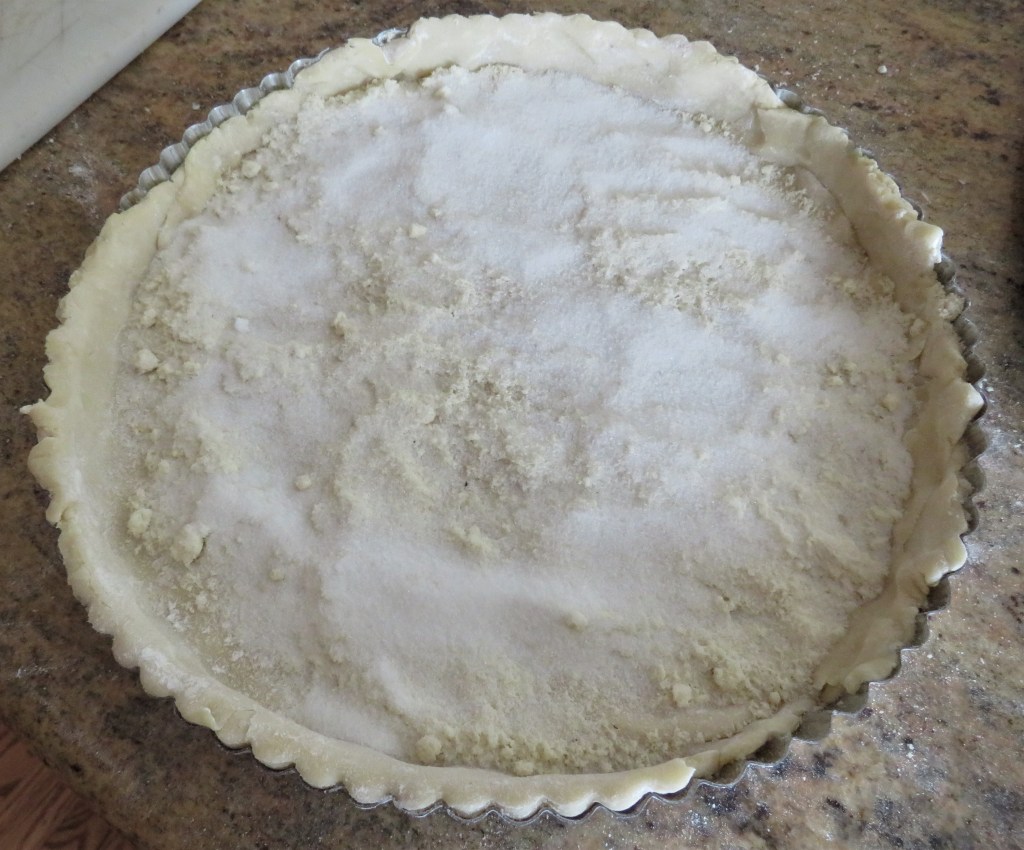
Roll out the dough on a lightly floured surface and press firmly into a fluted tart pan. Sprinkle the almond flour and sugar around the bottom of the dough.
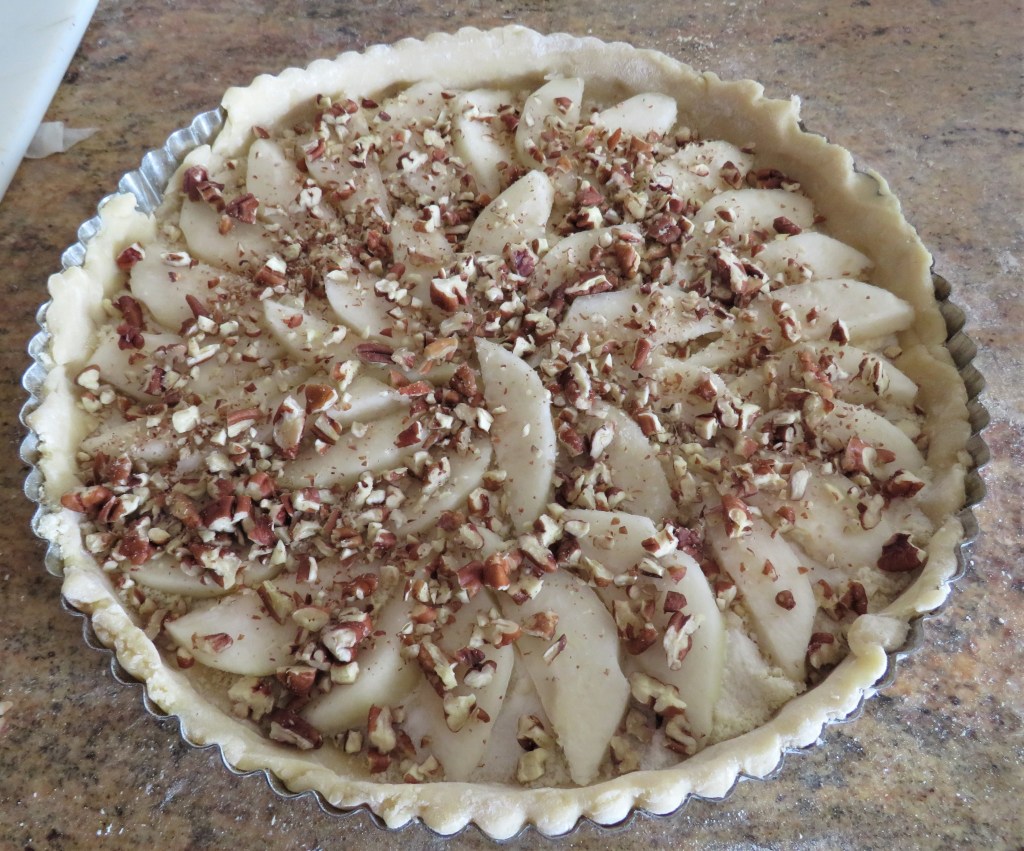
Arrange the pear slices around the pan, then top with the cranberries and chopped nuts.
Melt the preserves (I used peach and Amaretto preserves) until they are are completely liquid, stirring constantly so they don’t burn. Turn off the heat then add the almond extract and combine thoroughly.
Spoon the preserves over the top of the fruit and carefully spread it out evenly to cover the top. Then scatter the butter slices around the top of the tart.
Bake for about 40-45 minutes, or until the edges are just lightly browned.
Let the tart cool completely before removing it from the pan and dusting it with powdered sugar. Then slice it up and enjoy it with friends. This tart is not overly sweet, but is just sweet enough, especially with the powdered sugar, and perhaps a little whipped cream or ice cream on the side too.
I cut my pieces very small because I was serving it to a lot of people, for my coffee cart. It literally just melts in your mouth. !Delizcioza! !Mangia!
Have a great day Everyone. Stay safe and stay well. ‘Til next time.
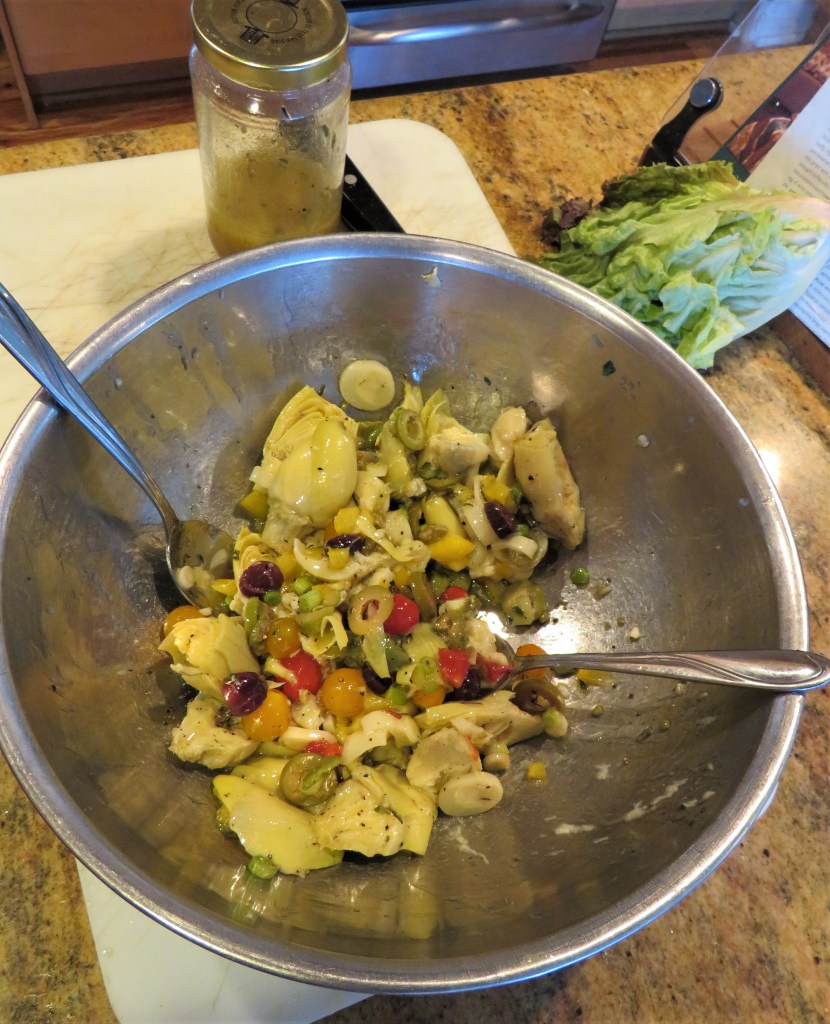
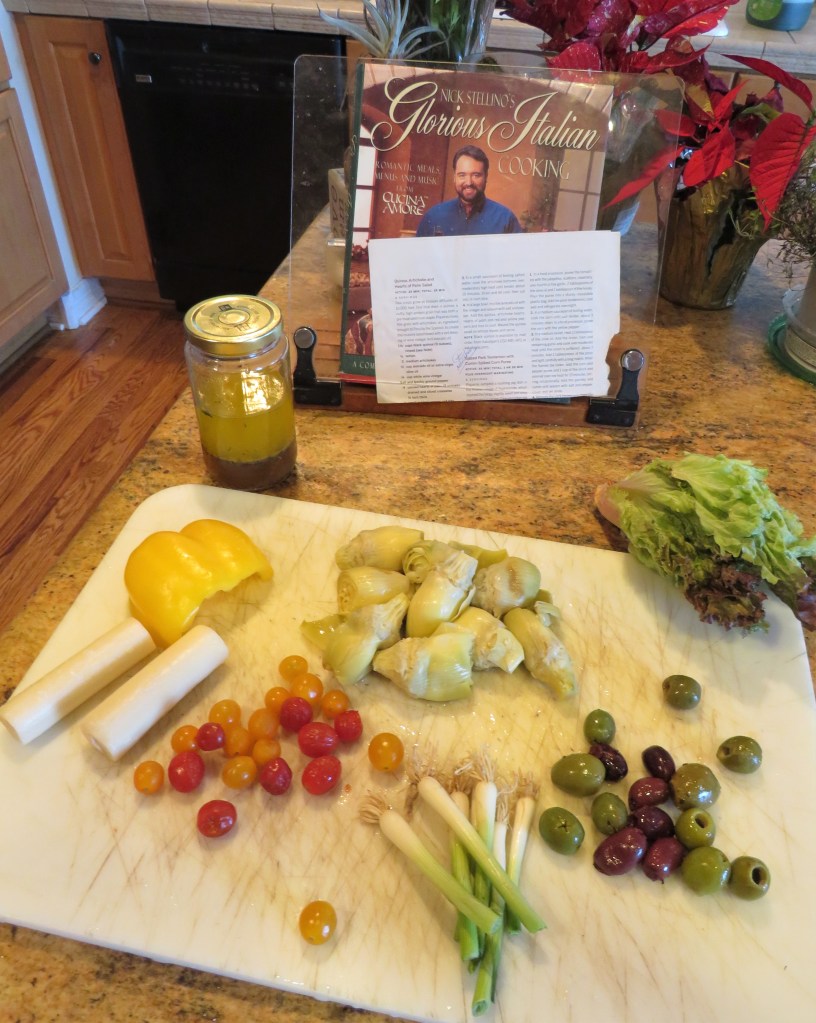
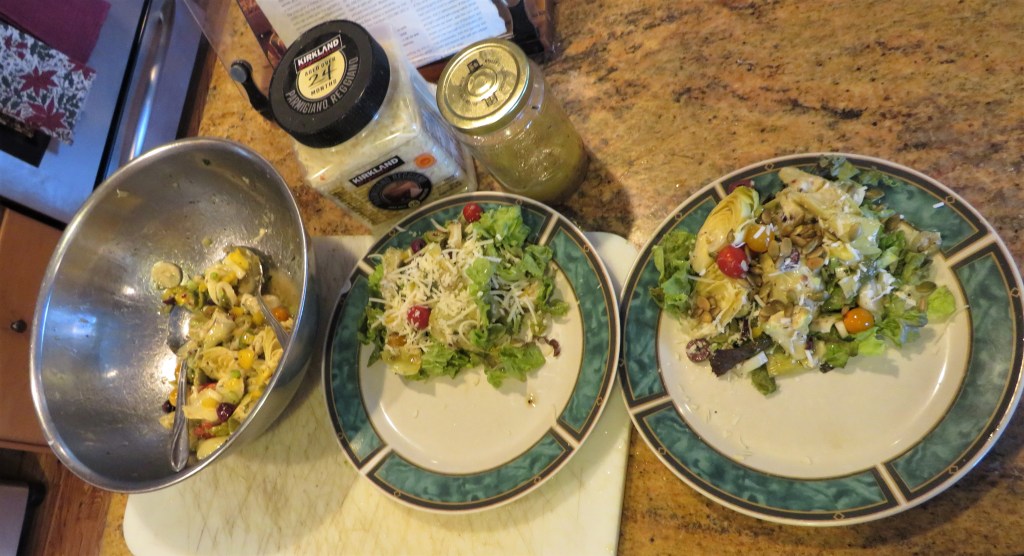
When I made my calzones Loaded Calzones I had to have something to serve alongside them as well. I couldn’t just serve calzones and nothing else. And if you’ve noticed, I like to cook in themes. So, calzones are Italian, I needed an Italian side dish to go with them. I created my own version of a Mediterranean salad or, un insalada Mediterannea. It was super easy and super simple to make, all from basic ingredients most of us have in our pantries already.
Insalada Mediterrnea
1 can artichoke hearts, drained and cut in half
2-3 hearts of palm, sliced very thin
1/2-1 bell pepper, any color, or a mix, chopped
1/4 cup green onions, sliced thin
1 cup mix olives, sliced
1 cup tomatoes – I used the very tiny tomatoes
lettuce, chopped rough
Parmigiano cheese, optional for topping
pepita seeds, optional for topping
Gently toss everything, except the lettuce and the toppings, together in the lemon vinaigrette then serve atop a bed of chopped lettuce. Top with the Parmagiano cheese and/or the pepita seeds and enjoy. Mine has the pepita seeds and Larry’s has the cheese.
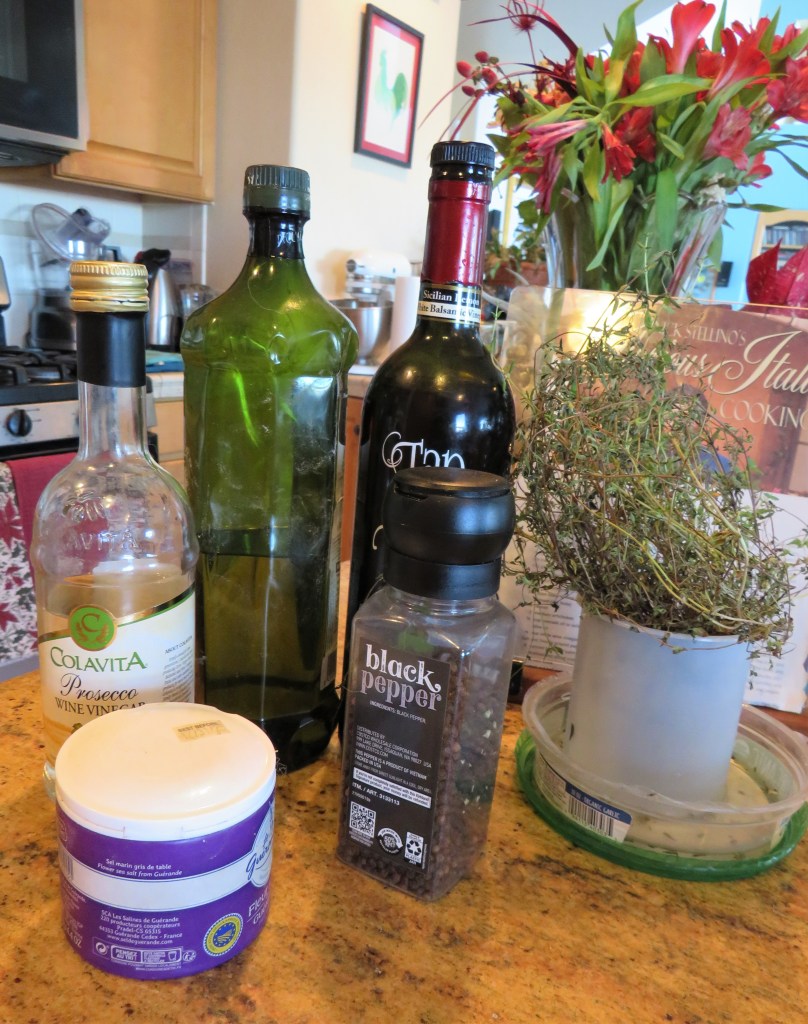
Lemon Vinaigrette
1/2 cup olive oil
2-3 TBSP lemon balsamic vinegar
1/4 cup white wine or Proseco vinegar
3-4 sprigs of fresh thyme, chopped
fresh ground pepper and salt to taste
Combine everything together thoroughly. This is a very light dressing and can be used as either a dressing or a light marinade for chicken or seafood too.
Sometimes the best things in life, and in cooking, are the simple things. Have a great day Everyone. Stay safe and stay well. ‘Til next time.
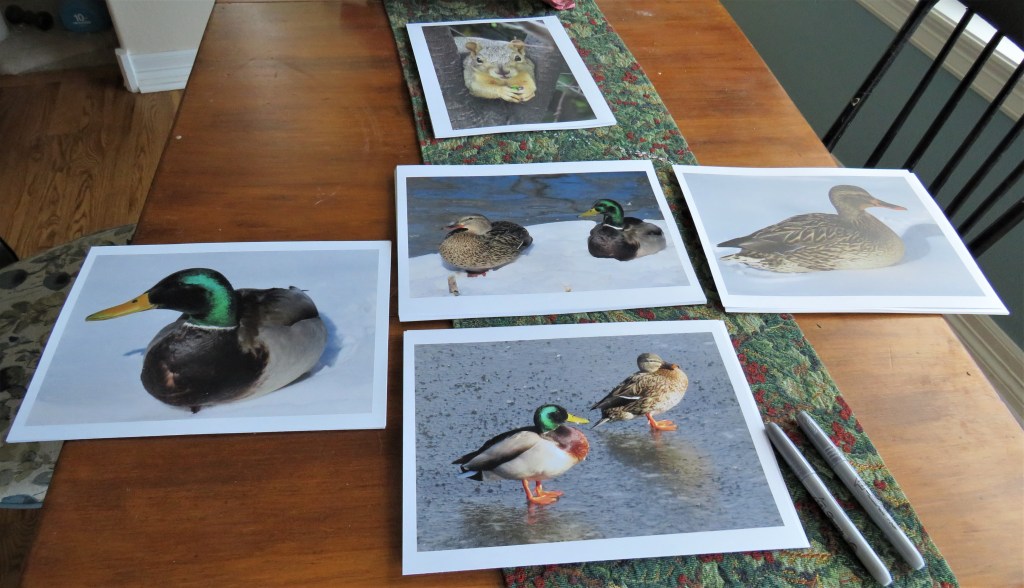
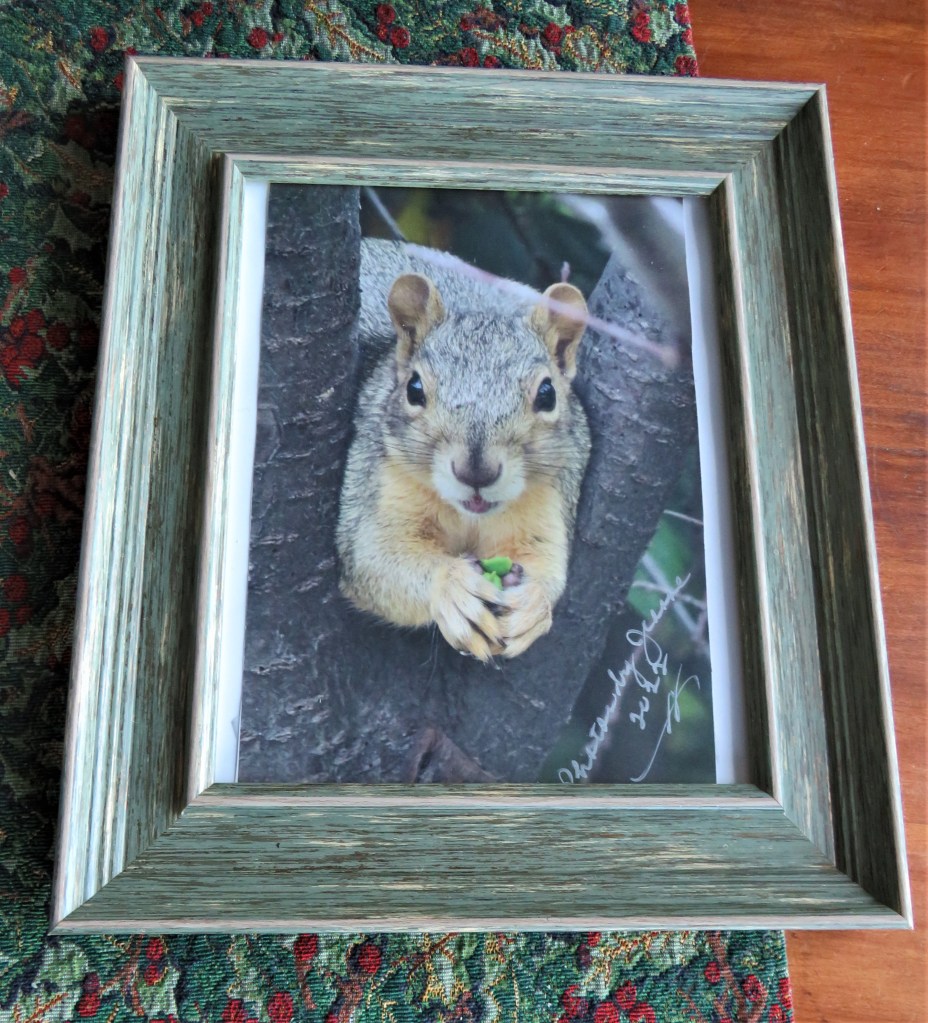
It seems I am always reinventing myself, or at the very least, adding new things on to my ever-expanding repertoire. This time, I have decided to take yet another chance by trying to make a go out of selling some of my photos. I am going to start small and go to local art shows and art fairs and see what happens from there. A friend of mine does face paintings for kids at these shows and she has already said we could share a booth. There has already been a lot of very positive responses to this new, crazy idea of mine. Let’s see how it goes.
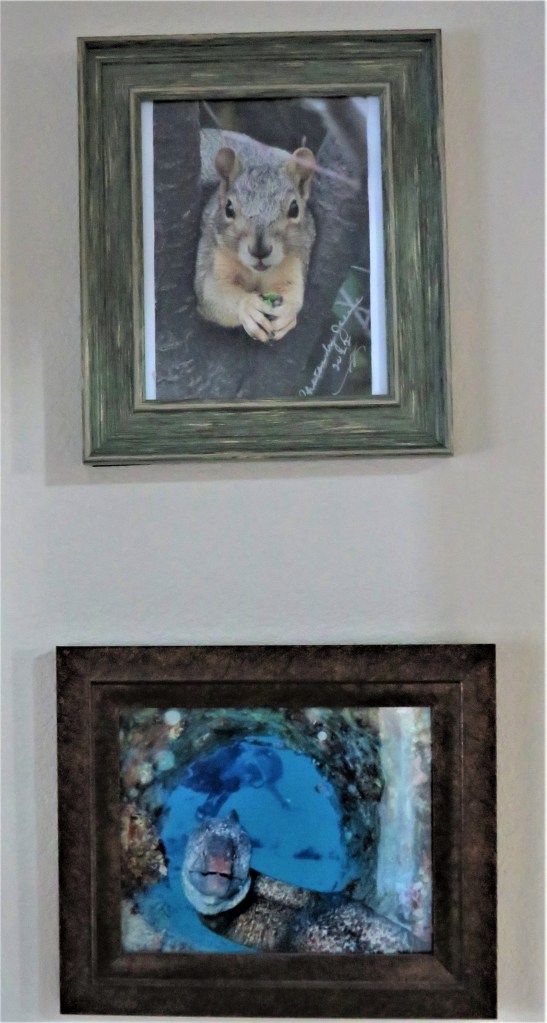
My first venture into the “professional” world of photography starts with these few pictures, but I have 100’s more if this works out.
Let me start by saying though, I AM NOT A PROFESSIONAL photographer at all. I am merely an amateur. My photos are all natural, with only the help of my editing tool on my computer. I do not use different filters or lenses. When I printed these few pictures up, I have to admit, I was very impressed with how they turned out. I wasn’t sure how they would come out blown up and printed. The young salesgirl who was helping me out was impressed too.
Larry seems to be the only skeptic in the room though. His first comment was “you are duck heavy with these photos”, followed by “how much is this going to cost” and “how are you going to make money out of this idea”. There is a reason for all the ducks though. I am still playing with this whole idea, and I printed those up to give as a gift for some friends of mine. You know, you have to sample the goods with people you love and trust before going public with something. 🙂
At some point, all of my nature photos will be available for sale, however, you have all seen them already, and it would be very easy to get them to you if you should so desire. I am going to sell the prints for $15 and the framed prints for $50, at least to start with. I have been asking around and the general consensus is that these are very fair prices. I have already done the math with just these few pictures. At the very least, if all I do is sell the prints only, it would be $825, and the best case scenario, if I were to sell them all framed would be over $2700. So there is definitely $$$$ to be made, if there is a market and a desire for them., IF being the key word. So once again, we’ll see what happens. You never know until you try, right?! And even if things don’t work out at first, I can always keep trying and tweaking things until they are just right. Try, try and try again is what I always say.
This photo of the eel was taken years ago, on a diving trip to Hawai’i. Larry is in the background waving and the spotted moray in front is smiling at the camera. I entered this photo into a photo contest years ago, liking it a lot but never giving it much thought beyond that, and it won us a free, all expense-paid trip to Cancun for a week. So again, you just never know, but you will never know until you try. My motto is – “Never stop trying. You just may surprise yourself with what happens”.
Be adventurous and step outside of your comfort zone. There is a wonderful, amazing world that awaits you.
Have a great day Everyone. Stay safe and stay well. ‘Til next time.
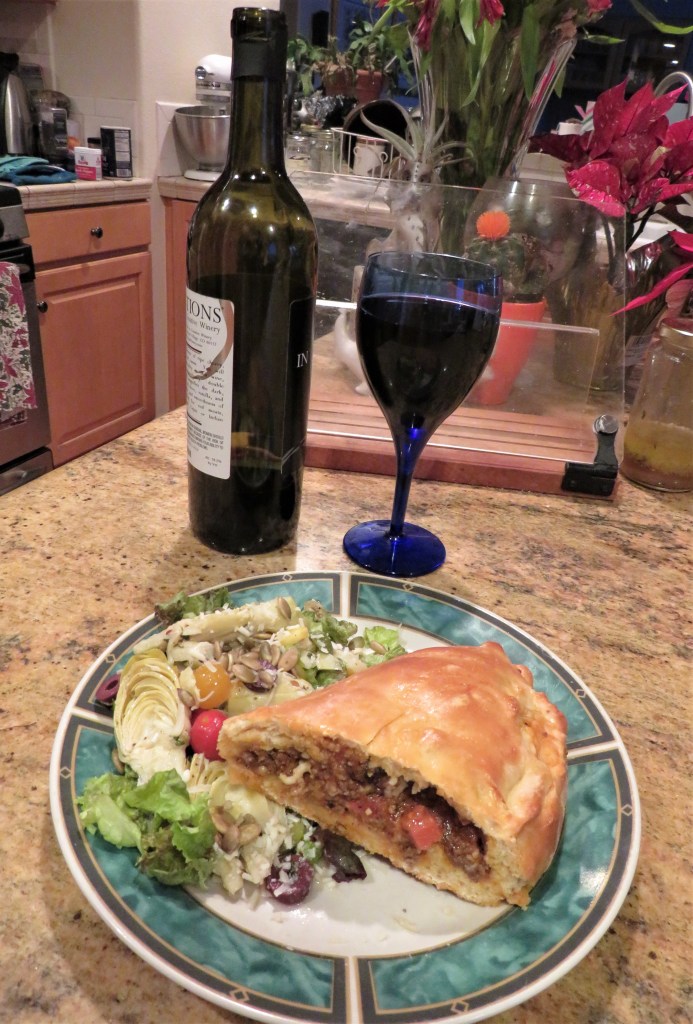
You all know how much I love recreating from my leftovers. I had yet another opportunity to do just that once again. This one was a simple, obvious recreation, but it was still very tasty all the same. I took my leftover spaghetti sauce and turned it into calzones.
We like a very rich and meaty spaghetti sauce. It’s always loaded with fresh tomatoes, mushrooms, ground beef sausage, and herbs, as well as marinara sauce. You know, just how a Sicilian nona would make it. 🙂 I love spaghetti and pasta, but as you know, I also love to change things around too, and I do that quite frequently. This time, I turned it into calzones. I served a quick little Mediterranean salad on the side, along with some rich velvety red wine, and voila! Dinner was done; Italian style.
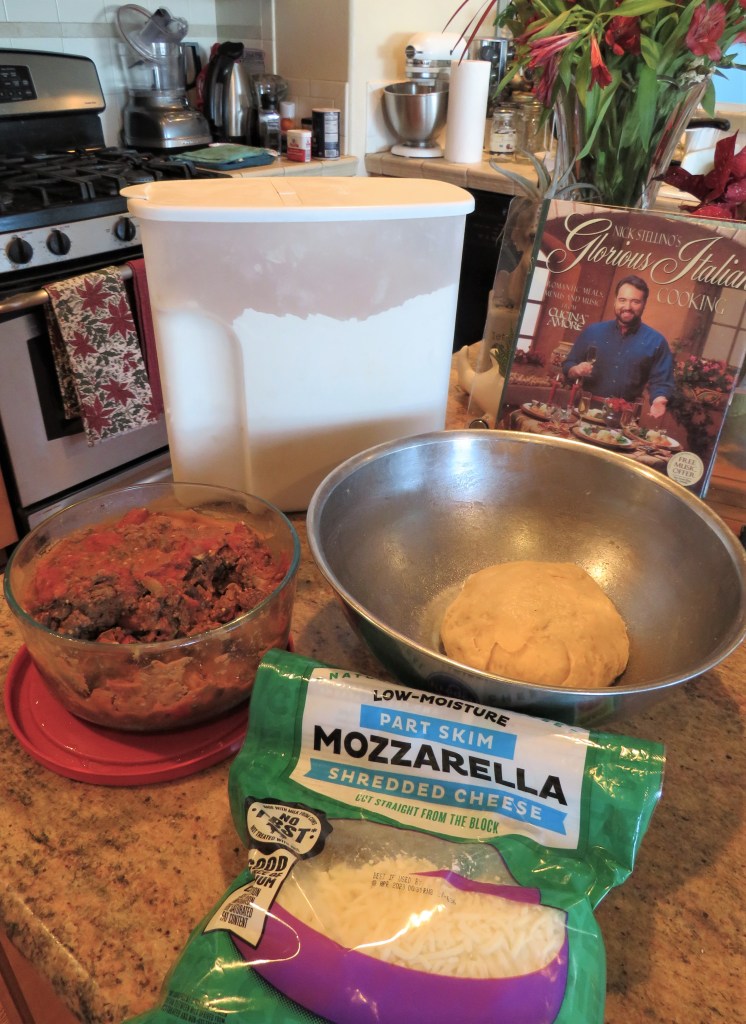
When it comes to making pizza doughs and calzones, it is always a personal choice. There are so many different options available and so many of them are very good. You just have to choose the one(s) you like best. I have one recipe for both that I like to use a lot, and this is the recipe I chose for these calzones too. Pizza with Pesto, Sausages and Vegetables It is the same recipe for both. After all, a calzone is really just a stuffed pizza sandwich. 🙂
I love calzones, but I very rarely order them at a restaurant. I love my calzones stuffed, and so often at restaurants, you just get mostly bread and not a lot of stuff inside. So when I make them, I really load them up.
Once I made my dough and let it rest, it was time to fill it up. My filling was already made. It was just a mater of loading it all up and making it pretty.
I rolled out the dough to a circle (of sorts) on a lightly floured surface, then added a layer of mozzarella cheese, a generous portion of my sausage and beef sauce, with another layer of mozzarella cheese on top. Then I folded it over and shape it into a calzone.
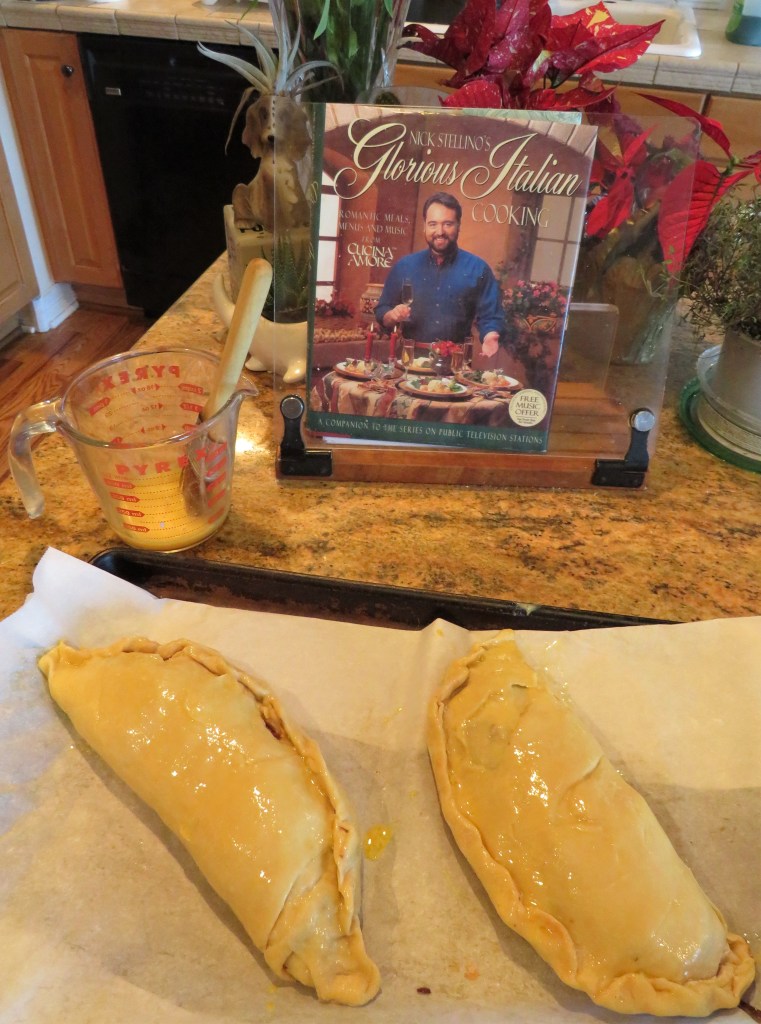
Once the calzones were made, I coated them with an egg wash before putting them in the oven.
They were baked at 350* F or 190*C for about 40-45 minutes, or until golden brown.
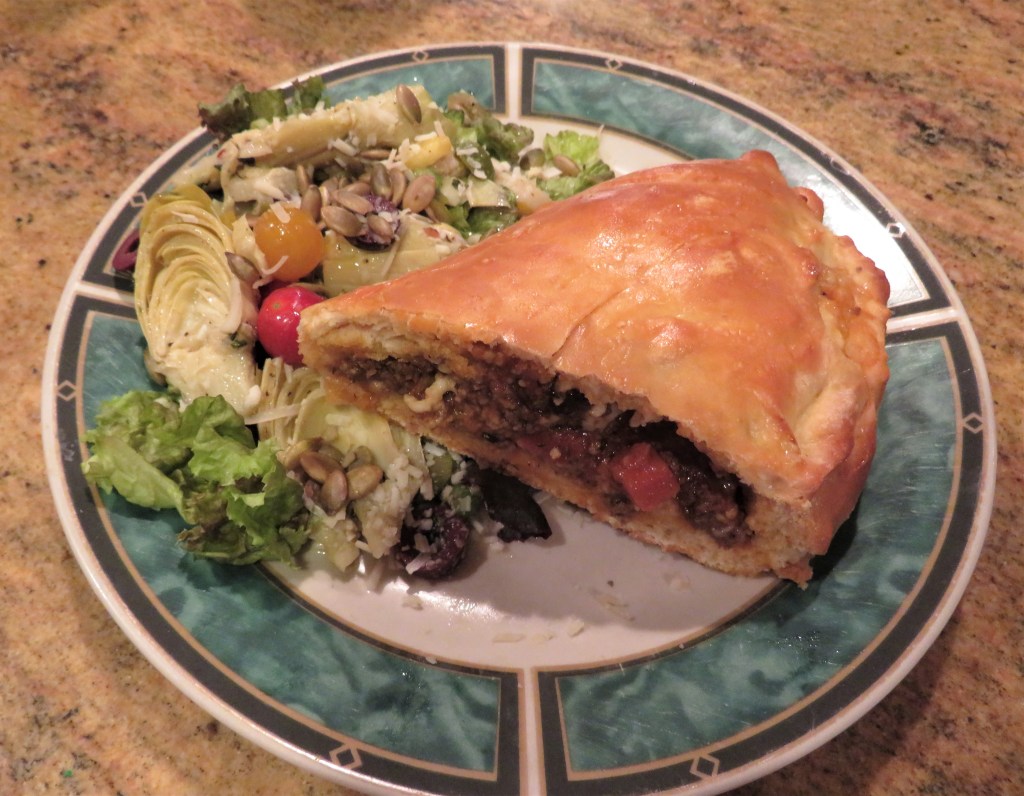
After removing them from the oven, I let them cool for a few minutes before cutting them. These turned out to be HUGE so 1/2 a calzone each plus a salad was more than enough.
They were light and crispy on the outside and filled with warm, comforting goodness on the inside. !Deliziosa!
Have a great day Everyone. Stay safe and stay well. ‘Til next time.