Cookies for the Cudas

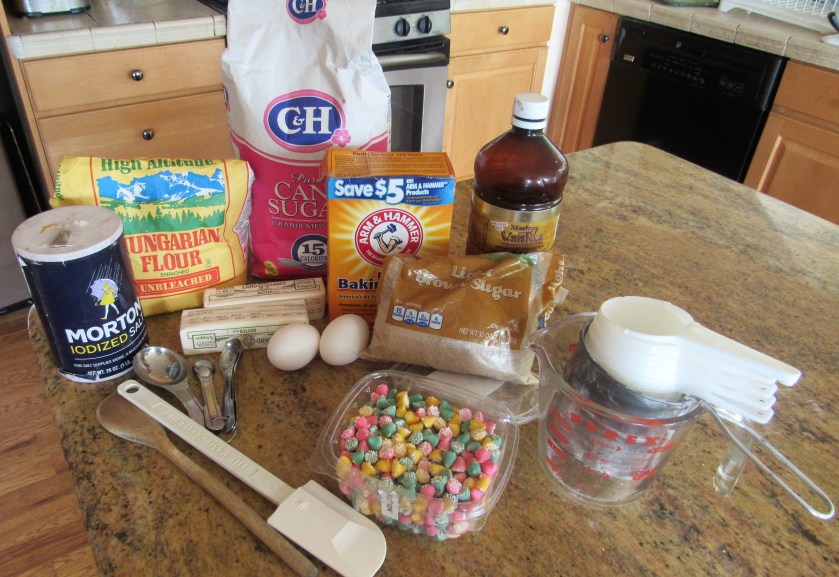
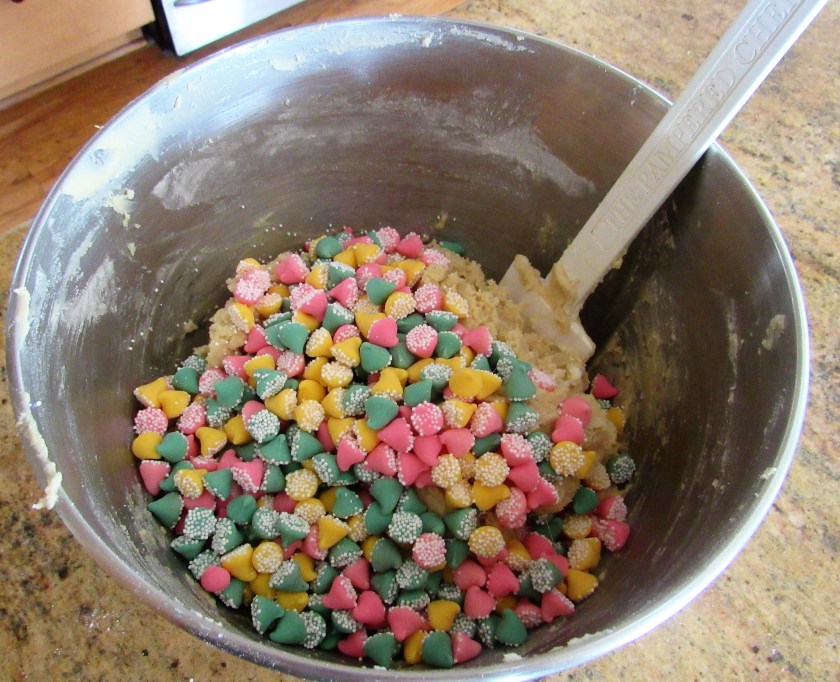
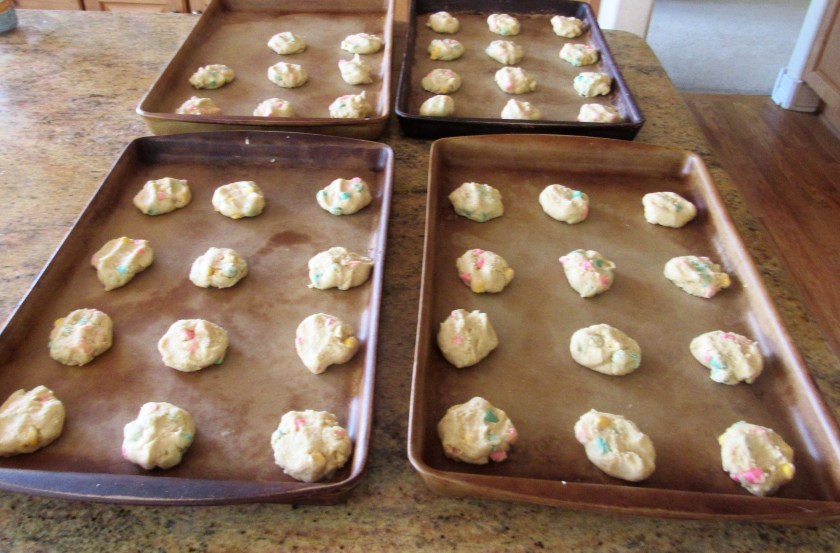
You all know me as Jeanne, from ajeanneinthekitchen, but that is only part of who I am.  When I am not in the kitchen, I can always be found somewhere in the water.  I am a “professional mermaid and dolphin”.  I teach a wide variety of water aerobic classes; I am an age group swim coach for the Front Range Barracudas, aka The Cudas; I am a Masters Swimmer (I was still competing up until a couple of years ago before I had my injuries, but am planning on coming back again real soon) and I am an avid scuba/rescue diver.  We travel and dive all over the world.  With that being said, yesterday was the end of our season for The Cudas, but it was also the end of an era for our home pool, so we had a “Bye-bye BCC (Broomfield Community Center) party for the team.   As well as being one of the coaches for the team, I am also the self-appointed food coordinator for the team.  Surprise, surprise, I know.  Our party was a potluck so everyone brought something, though mostly cookies and snacks.  I too brought cookies, but of course, I made my own.  No store bought cookies for this girl; no way.   Knowing that I was making cookies for kids who are all under ten years old, I knew I had to keep it fun and pretty simple.  I found some fun pastel colored mint chips that I used instead of chocolate chips, and made the team’s cookies with those.  They were a big hit, and by the end of the party, they had all completely disappeared.  I will take that as a major stamp of approval.  🙂   The party was a lot of fun, and all my swimmers had a blast, but it was also a bittersweet day, particularly for me.  BCC has been a part of my daily life for the past 15 years.  I still work, coach and swim at plenty of other pools, but that was my home pool.  The new pool will be phenomenal once it is built, but we won’t have it for about another two years.  Oh well.  Another day, another pool.  All of my Cudas and myself will still “just keep swimmin” no matter where we are.

IMG_2099

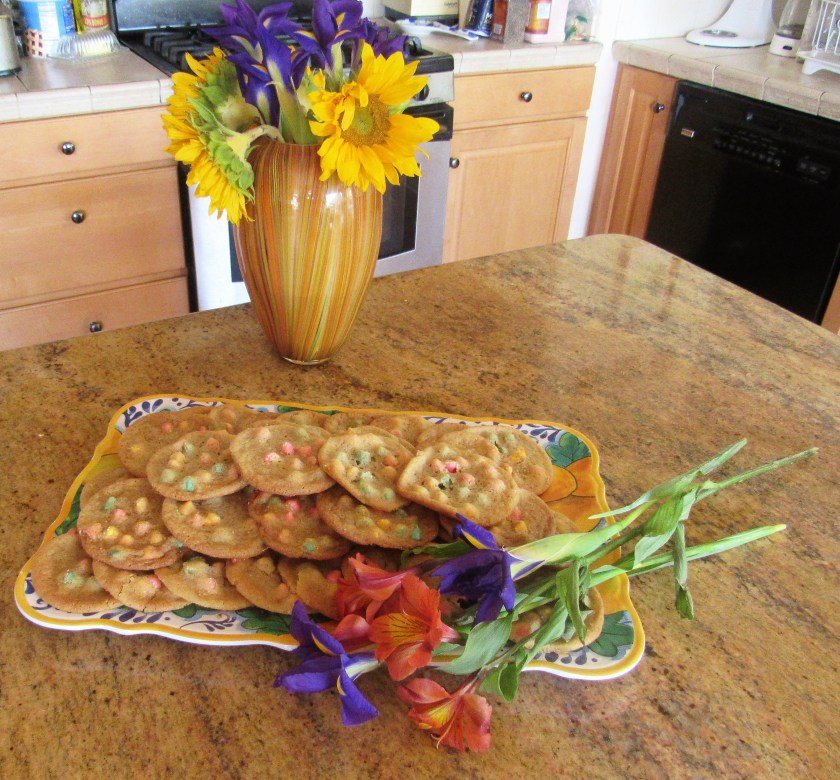
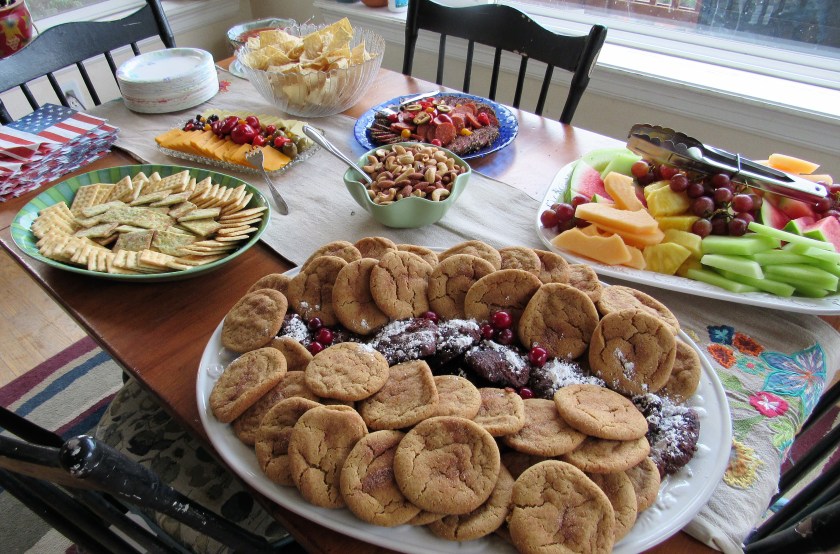
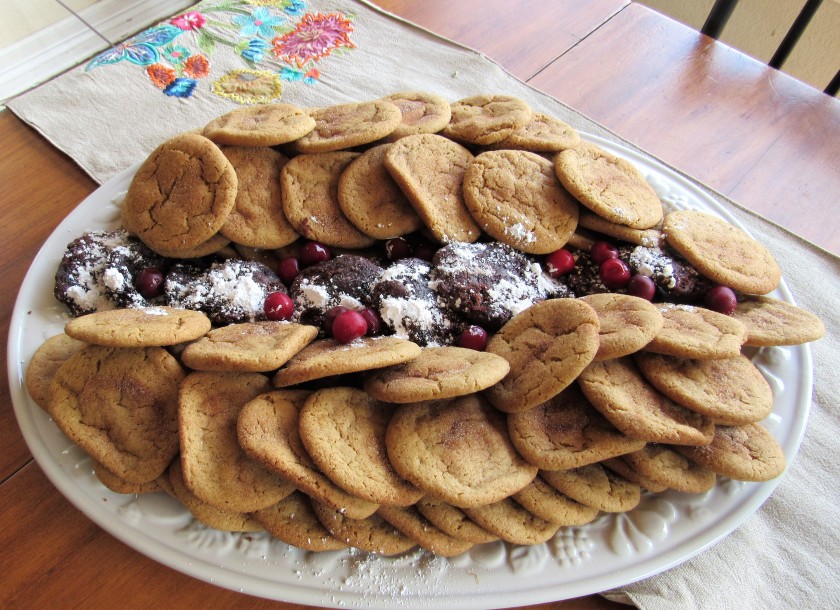
All it takes to put a few smiles on our kids’ faces.

IMG_2091

IMG_2096

IMG_2098

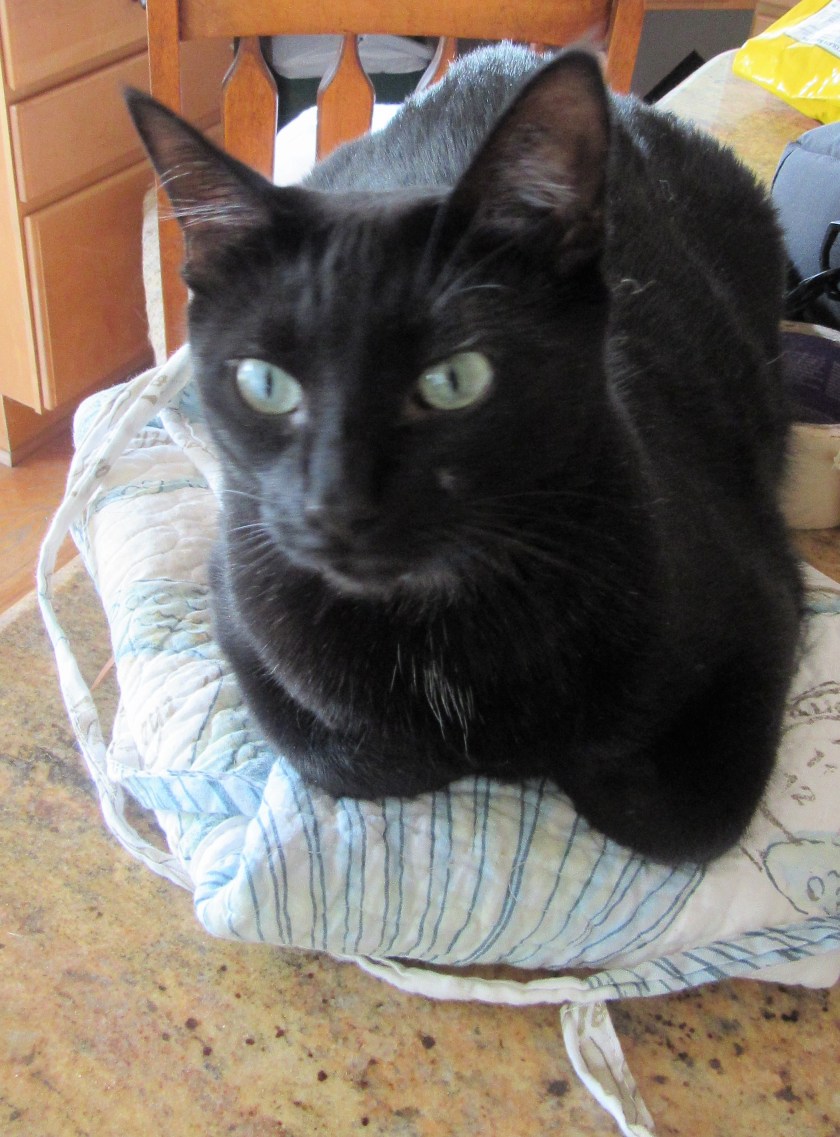
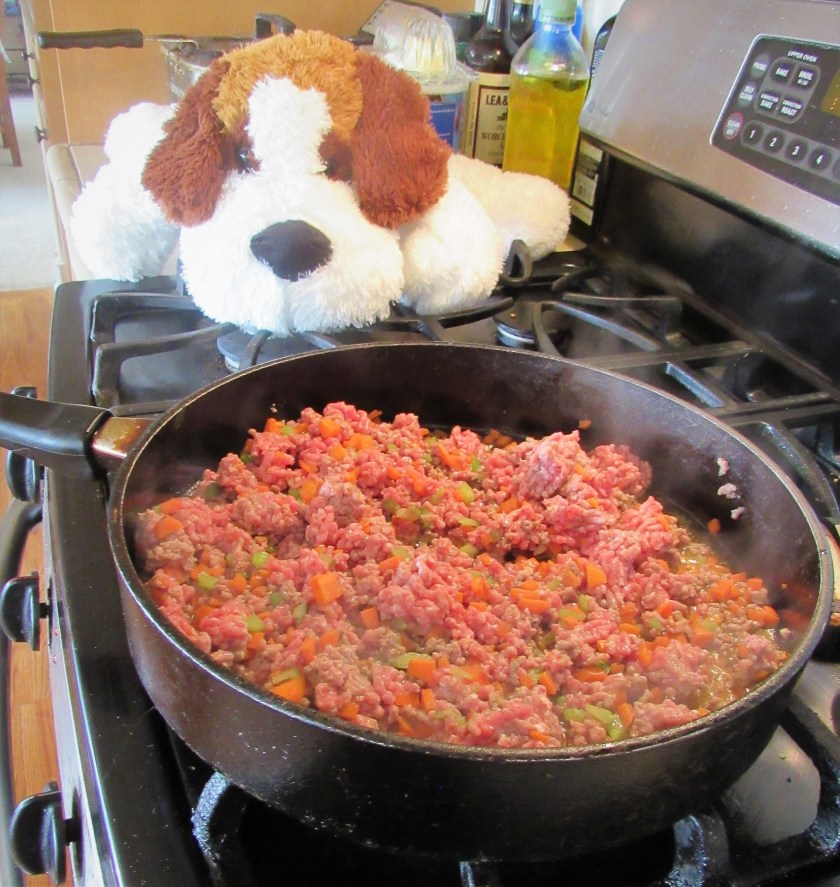
My Sous Chef and special assistant, Nicodemus, who was supervising and making sure Mommy did everything just right.

IMG_2093


Have No Fear, the Queen of Leftovers is Here

After our hockey party, The Celebration Feast we had quite a few leftovers.  You saw what I made with the left over chicken and linguisa Chicken and Sausage del Diablo but that only used some of our leftovers.  There were plenty more.  Being the “Queen of Leftovers”, I had to recreate and re-use more of the leftovers, and make them into something totally different than what they were the first time around, or my reign as Queen might just be in jeopardy.   Some of the other leftovers from the party were the smoked pork loin with cherry chutney, which I cut up and added to some leftover rice.  I also added some toasted almond slivers and made them into empanadas.  I make empanadas quite often.  Sometimes I fry them, while other times I bake them.  It really just kind of depends on how I am feeling at the time, and whether or not I want to turn the oven on.  This time, they were fried.  I actually prefer the fried version slightly more than I do the baked version, but essentially, they are about the same.  Although the baked version has slightly less calories than the fried version, so they are a bit healthier.

IMG_2088

I served the empanadas with my Spicy Southwestern Scallops and, of course a margarita especial.  Spicy Southwestern Scallops

IMG_2085

There are many different recipes that you can use for the empanada dough, but I prefer my tried and true basic go-to, master dough, that I use for so many recipes.  Just with so many of my dishes and recipes, there is no right or wrong way of doing things.  Use what works for you.  If you have a recipe that you like, and you are comfortable with, use that.  Like I tell my students and my swim team, just think of me as a guide, and do what works best for you.

Making the stuffing.

IMG_2046

The key to real light, crispy and flaky empanadas is to roll them out thin.  You want them to be thin, but not to thin where they break apart and do not hold your stuffing.  I rolled them out to about 1/4 ” in thickness.  I added about 1 1/2 heaping TBSP of filling per circle, then carefully pinched them together.  After tightly sealing them, I pressed them down with a fork to tighten the seal even more.

IMG_2047

IMG_2049

Empanadas can be filled with anything you like.  They can be sweet or savory.  You can bake them or you can fry them.  Again, there are many different ways to make them.  Be creative, and try them many different ways.  If you are baking them, brush them with an egg wash before baking so they will brown up to nice golden brown.  I actually was planning on baking them, so I added my egg wash, but while I was at work, my husband fried them instead.  Oh well.  No need to fret about it.  They still came out delicious.

Jeanne’s Master Dough

1 1/2 cups flour

6 TBSP COLD butter, cubed

a pinch of salt

1 egg

about 6 TBSP heavy whipping cream


Mix together the flour, butter and salt in a food processor until everything is well incorporated.  Then add the egg and the cream and mix everything together until the dough forms into a ball.  Remove from the food processor and wrap in plastic wrap.  Let the dough chill in the refrigerator for at least 30 minutes before using.  The dough will keep up to about 3 days in the refrigerator.  When you are ready to use your dough, let it come to room temperature before rolling it out on a lightly floured surface.  I usually add a little flour to my rolling pin as well.  Then roll to your desired thickness and and shape it however you like.  I use this same recipe for my tarts as well.  If I am making a sweet tart or dough, the only difference is that I also add about 3 TBSP of powdered sugar.  This is called a pate sucre.  Sometimes, when I am making a savory dough, I add black and/or lemon pepper and other spices to my dough as well.  Again, be creative and use your imagination.

I doubled my dough recipe for my empanadas.


Spicy Southwestern Scallops

I love food.  I love everything about it; shopping for it, cooking it, and especially eating it.  I like most anything, and I am always up for trying new things and experimenting, both with what I cook and what I eat, and how I prepare my foods.  There is a big difference between liking something and loving something though.  Scallops AND most things Southwestern are two types of foods I just absolutely LOVE.  This dish satisfies both of these desires.  In Spanish, scallops are known as vieiras.  Aside from the fact that scallops have always been amongst my favorites, they are actually very healthy for you too.  They are high in protein and low in calories and are a great source for magnesium and potassium, as well as a whole bunch of other necessary vitamins and minerals.  They are also an excellent heart healthy food because they contain a lot of vitamin B12.  Vitamin B12 helps keep the body’s homocysteine levels low, which in turn helps to keep our heart, arteries and blood vessels all healthy.  Statistics have shown that eating seafood, and particularly scallops, at least once a week will lower your heart rate by 2.3 times per minute.  When you think about how many times our heart beats throughout the day, that is a substantial reduction.   For the most part, a lower heart rate means a healthy heart.

Scallops of many varieties are found in the oceans all over the world.  They are in the mollusk family, and are known as bi-valves.  The edible part is the muscle in the center of the two shells that opens and closes the shell.  This is known as the “nut”.  The “coral” or the reproductive glands are also edible, and are eaten in most other parts of the world, although they are not as popular to eat in North America.

Spicy Southwestern Scallops served over Arroz Cubano (tomorrow’s post).

IMG_2081

Making the spicy rub for the scallops.

IMG_2070

Coat the scallops completely with the spicy rub.

IMG_2072

In a very hot skillet, with very hot oil mixed with butter, pan-fry your scallops about 3 minutes per side.  You want them completely cooked and firm, yet still sweet and juicy without becoming tough or rubbery.

IMG_2074

Once the scallops are cooked, remove from the pan and set aside and keep warm.  Add 1/2 cup of dry white wine to the pan and stir it well to scrape off all the pan drippings.  Cook for a couple of minutes, then add more butter and bring to a boil.  Cook until the liquid has reduced by abut 1/2.  This is your sauce for your scallop dish.

IMG_2076

The full meal:  Spicy Southwestern Scallops over Arroz Cubano, with avocado, served with pork and cherry chutney empanadas (both the Arroz Cubano and the pork and cherry chutney empanadas will be other upcoming posts in the very near future).   A margarita especial is always a good accompaniment to any meal, but because yesterday was “National Tequila Day”, I just had to have one.

IMG_2085

Spicy Southwestern Scallops

1 1/2-2 lbs sea scallops

3 tsp chili-lime chili powder

1-1 1/2 tsp cumin

1/2 tsp salt

1/4 tsp black pepper

1 tsp cayenne pepper

4 TBSP butter

1/2 cup dry white wine

1/4 cup lime juice


Rinse scallops thoroughly and pat dry with a paper towel.  Mix all the spices together.  Coat the scallops completely with the dry rub.  In a hot pan with a combination of both hot oil and 2 TBSP butter, add the scallops and cook for about 3 minutes per side.  When they are cooked, remove them from the heat and set aside.  Add the wine to the hot skillet and mix in all the pan drippings.  Add the rest of the butter and bring to a boil.  Then cook down until the liquid is reduced by half.   i served mine over Arroz Cubano and added more sauce, topping each scallop.  I also added avocado slices on top.  Esta mui, mui delicioso!  Disfruitas!


Chicken and Sausage del Diablo

As most of you know, I am the self-proclaimed Queen of Leftovers.  I think I almost love the challenge and creativity of recreating something new from leftovers as much as I love cooking “first-overs”.  I thrive on challenges and get inspired by them.  True to my nature, and with that being said, we had a bunch of leftovers that needed to be recreated.  I had chicken and linguisa from our hockey “Celebration Feast” (The Celebration Feast)  and tomatoes and salsa that desperately needed to be used ASAP.  So I put my thinking cap on and came up with the idea for Chicken and Sausage del Diablo.  I served it over fettuccine, with some warmed cheese bread that we dipped in olive oil with balsamic vinegar, garlic and pepper, and a nice, delicious bottle of Atteca Garnacha wine, a smooth, semi-dry red with hints of cherries and mulberries.  The wine was a gift and it just had to be opened to be fully appreciated.  It went perfectly with dinner.

IMG_2059

Going through my refrigerator and coming up with things that needed to be recreated into something new, I found linguisa from our hockey party, some left over chicken and some bacon wrapped chicken as well, tomatoes that were beginning to get a bit mushy and salsa that was starting to get a little vinegary.   Perfect!  Let’s put them all together and see what we come up with.  When your salsa and tomatoes are past their prime, don’t throw them away.  They are perfect to use as a sauce.  The vinegary, acidity will cook down and the mushy tomatoes will just break down into the sauce, which is what you are looking for with a nice, rich and flavorful tomato sauce.  I love all kinds of tomatoes, and often have a variety of different kinds in my refrigerator.  Don’t be afraid to mix and match.  It just makes your sauce that much more flavorful.

IMG_2051

IMG_2053

Sauteing the peppers, mushrooms, jalapeno and garlic with olive oil, oregano (I used dried, since I ran out of fresh) cumin and salt and pepper.

IMG_2055

Once the vegetables were softened, I added the tomatoes, salsa, and cooked meat.  I also added some marinara sauce as well.  I let this all simmer together for about 20 minutes then added it to the cooked fettuccine.  Delicioso!

IMG_2057

Chicken and Sausage del Diablo

1 lb cooked chicken, shredded

1/2 lb cooked linguisa, pepperoni or other sausage of choice

1/2 each red, yellow and orange red peppers, sliced thin

1 cup sliced mushrooms

1 jalapeno, diced fine

1/3 cup red onion, sliced thin

1 heaping TBSP garlic

1 1/2 cups tomatoes, cut in 1/2

salsa and marinara sauce

fettuccine or pasta of choice, cooked

olive oil

1 TBSP oregano

1 1/2 tsp cumin

salt and pepper to taste


Saute your peppers, garlic, jalapenos, and mushrooms together in olive oil until softened, for about 5-7 minutes.  Add your seasonings and cook down for about another minute.  Then add your tomatoes and salsa, and cooked meats.  Bring to a boil, then reduce to a simmer and cook for about 20 minutes, or until the sauce reaches your desired thickness.  The more you cook it down, the thicker it will become.  Serve over cooked fettuccini and top with mozzarella cheese if desired.


Cool Cucumber Salad

Cucumbers to me always say summer.  They are always so cool and refreshing and really help lower your internal temperature, especially when the heat is on outside.   They are also very healthy for you.  They are full of vitamins and minerals such as potassium, and vitamin C and they are very low in cholesterol and calories, since they are 96% water.  I made a cool cucumber salad for our Celebration Feast, The Celebration Feast, for my husband’s hockey team’s victory dinner for winning their division championships last season.  It is a salad my husband grew up with, coming from a very German family, and it is one of his favorite salads.  It is a typical German salad, and the German name for it is Gurkensalat.  All my German cookbooks say to add just a wee bit of sugar to help cut down the acidity from the vinegar, but my husband prefers it without sugar, since that is how his mom made it while he was growing up.  For the most part though, when I make it, I win, and the sugar goes in more so than not.  And it is only a tiny bit of sugar anyway, so it is hardly even noticeable.  And of course, I have added my own twist to it, so the recipe has my own signature on it, which is very typical for me.  Some recipes call for sour cream to be added, however I do not add the sour cream.  I prefer it lighter and fresher.

IMG_2015

This is a very simple salad with just a few simple ingredients.

IMG_2011

Making the dressing.

IMG_2013

Cucumber Salad

3-4 cucumbers, peeled and seeded, sliced thin

1/2 red onion, sliced very thin

2/3 cup grape tomatoes, cut in 1/2

1/3 cup apple cider vinegar

1 TBSP sugar

2 TBSP black pepper

dash of salt

1 TBSP fresh dill, chopped

1/3 cup olive oil

Mix the cucumbers, onions and tomatoes together and set aside.  Then mix the vinegar, sugar, dill, pepper, salt, and olive oil together and pour over the vegetable mixture.  Chill and serve.  Some people like to add a little sour cream as well to give it a creamy consistency.  I do not add the sour cream, but that is another option.  if you are adding sour cream, add 1/2 cup.

To seed the cucumbers, just take a spoon and slide it down the middle of the cucumber.  The seeds just roll right out.  This is a very easy process.


The Celebration Feast

We are a hockey house.  Our professional team is the Colorado Avalanche.  We LOVE our AV’s.  Not only do we cheer for the Av’s and go to as many games as we can, but my husband also plays hockey on an adult men’s league.  He has been playing for about 20 years now.  His team is The Slapshots.  We started a tradition a few years back that whenever his team won their league’s championship, we would host a celebration feast.  The Slapshots were victorious last season, so honoring our tradition, we hosted the team feast again.  His teammates are a really good group of guys, and he has been playing with some of his teammates for over ten years.

Our feast was a carnivore’s dream.  We had a lot of meat.  they are hockey players after all; they need their protein.   But meat wasn’t the only thing we served.  We had a pretty big menu all around.  We also had a lot of food.  We had plenty enough to feed a second team as well, but only one team showed up.   Not everyone from the team could make it, and those that did come certainly made a large dent in all the food, however, I still have a ton of leftovers.  So, the Queen of Leftovers will be busy re-creating once again.

This is just one table full of food.  This was our appetizer/dessert table with chips & salsa; crackers and a cheese and pepper platter; mixed nuts; peppered salami and linguisa; a large fruit platter; and our cookie platter (Cinnamon + Sugar = Snickerdoodles).

IMG_2023


The carnivores’ corner had all of our main dishes with a smoked pork loin with a cherry chutney; smoked bacon-wrapped chicken with a mustard vinaigrette; brats and hot dogs (for the kids) with all the fixin’s; 3-mustard potato salad and a cool cucumber, onion and tomato salad.

IMG_2025

IMG_2024

A small gathering of some of our champions enjoying their celebration feast out on on our deck.  These were the early birds.  Everyone was very happy and satisfied and said I fed them well.  They were all happy hockey players, and all said they would be back again, whether or not we win another championship game.  Congratulations Slapshots!  You earned this feast.  We are always happy to host these championship feasts.

IMG_2028

Cinnamon + Sugar = Snickerdoodles

Snickerdoodles as we call them today, are an old fashioned cookie that have been popular since the 1800’s, especially in New England.  They are also known as cinnamon sugar crinkles.  It is believed that snickerdoodles are German in origin and the name “snickerdoodle” is  a corruption of the German word schneckennudelin which means crinkly noodles.  These delicious cookies are crunchy on the outside and chewy on the inside, and the “signature crinkle” comes from the way the cinnamon and sugar crinkle on top of the cookie while baking.    The combination of cinnamon and sugar is always a winning combination, no matter what it is made with.  Cinnamon and sugar are also two of my husband’s favorites, which now that I know the history,  makes a lot of sense to me due to the fact that he is German through and through.  We are having a party later for his hockey team (it has become out tradition, especially if they win their championships), and he requested snickerdoodle cookies, which are his favorite cookies.  He actually planned the whole menu, since it is his party (you will all see the results later).  He planned it, and I make it.  That’s the deal.  The cookies were the first thing I made this morning, since I had to have the oven on to bake them and I did not want the oven on during the heat of the day because, once again, our temperatures are going to be in the high 90’s.

IMG_2009

We had a few of the cherry-chocolate brownie cookies leftover as well, so I added those to the cookie plate.  The more cookies and food our guests eat, the less I will “have” to eat later, which means less calories going instantly to my waistline.  🙂

Making the cookies.

IMG_2001

IMG_2005

Snickerdoodles

2 1/2 cups flour

1 TBSP baking powder

1/4 tsp nutmeg

1/4 tsp salt

1 1/2 sticks of butter, softened

1 1/3 cups sugar

1 TBSP molasses

2 large eggs

1 tsp vanilla


Topping

1 TBSP cinnamon

1/4 cup sugar

Mix together and set aside.


Preheat the oven to 350*F

Mix all the dry ingredients together and set aside.   Mix the butter, sugar and molasses together in a mixer until well combined.  Then add the eggs 1 at a time.  Add the vanilla and mix again.  Then add the flour mixture 1/2  at a time, and mix until just combined each time.

Shape the dough into balls and roll into the sugar and cinnamon mixture and place on an ungreased cookie sheet.  Lightly press the cookies down to flatten them.  I added a little more cinnamon-sugar mixture to the cookies before baking them, to make sure they had a lot of flavor.  Bake for about 16-18 minutes or until the tops are fluffy and the cookies are golden brown.  Let cool slightly when they are done, then transfer to a cookie rack to cool completely.  I dare you to stop at just one.  🙂


Beef and Barley for the Big Dogs

As those of you who have been following me know, I make my own wet dog food for our two Saint Bernards, Lucie and Vinnie.  I usually make enough to last for about one week at a time, although Lucie and Vinnie could and would easily eat it all in one sitting if I would let them.  They too have to watch what they eat though; or I should say “we” have to watch what they eat.   They are already big enough; we don’t need them to get any bigger.  Lucie is a big girl, at a svelte 150 lbs and Vinnie is tall and lean, though very muscular and weighs about 140 lbs.  We love the “big dogs” and wouldn’t have it any other way.  When we had our malamute, he was a big boy too, weighing in at 130 lbs when he was at his heaviest.  All large or giant breed dogs are prone to hip problems, so helping them keep their weight down helps with their hip issues as well.   Saint Bernards are definitely a giant breed and are about as giant as they come.  There are only a few other breeds that are larger.  Lucie and Vinnie eat very well, and get a wide variety of foods that are high in protein and low in fat, with plenty of dog-friendly fruits and vegetables added in.   This week, since I had left over barley, I mixed it in with lean ground beef and added carrots, celery and parsley.  Then I blended everything together with a milk gravy.  They love it and always look forward to dinner time.  In the mornings, we feed them dry food only mixed with green beans, but in the evenings, they get their dry food mixed with the wet food mommy makes for them.   It is always devoured within seconds, so I am going to take that as no complaints about what they are eating.  They are always hungry and begging for more too.


Vinnie (left) and Lucie (right) are patiently waiting for dinner.

IMG_1970


Fritzie is my little friend and sous chef who helps me when I am cooking for Lucie and Vinnie.  She is supervising, making sure everything is cooked just right.  Cooking up the ground beef and vegetables.

IMG_1963

Cooked barley and parsley.

IMG_1965

After mixing everything together, Fritzie gave it a “paws” up of approval.

IMG_1967


Seared Ahi Tuna Salad

We eat a lot of salads in the summer, or whenever the weather is too warm or hot.  I think my husband could easily eat the same salad all the time and would never tire of it.  Me, I love variety, and so I mix things up quite a bit all the time.  Our temperatures were in the mid 90’s again today, so it was a perfect day for a cool summer salad with a lot of vegetables and seared ahi tuna.  Because I love so many vegetables, colors and textures in my foods, I tend to put in a little bit of everything.  But when you add a little bit of a lot of things, it turns out to be a HUGE salad.   One time my brother-in-law came over for lunch on one of the days we were having salads.  He was under the impression it would be a smaller, light salad.  He was in for a quick surprise.  He has since learned when I make a salad, I REALLY make a salad.

I started out with a base of chopped Romaine lettuce, then built my salads from there, adding sliced cucumbers, grape tomatoes, sliced red bell peppers, shredded carrots, sliced red onions, green beans, sliced green onions, hard boiled eggs, toasted almond slivers, and then topped it all off with some shaved Parmagiano cheese.  Again, I love all kinds of vegetables, and as I have said before, I like a lot of stuff in my stuff.  There is no right or wrong way to make a salad like this.  Add what you like and forget the rest.

IMG_1985


They are almost done.  Just waiting for the grilled tuna, and then the finishing touches of green onions, toasted almonds and the cheese.  You can easily make the main part of the salad ahead of time and just chill before serving it.

IMG_1988


Today’s marinade/dressing was a soy ginger vinaigrette with fresh basil.

IMG_1992


Soy Ginger Vinaigrette

1 TBSP garlic

1 TBSP ginger

1/3 cup soy sauce

1-2 tsp red pepper flakes

1/3 cup rice vinegar

2-3 TBSP honey

1/3-1/2 cup orange juice

1/2 cup olive oil.

2 tsp fresh bail, chopped fine.


Whisk everything together and chill.

I used the same dressing as a marinade for my tuna as well (separately of course though).  Since ahi tuna is a thicker, heavier and heartier fish, I marinated it for a couple of hours in the refrigerator before grilling it.  I grilled it to a golden brown all around and kept the center nice and pink.  This is called searing your meat.

IMG_1996

Enjoying our cool summer salad on our deck with a nice view of our ponds.  I served a cool, crisp chardonnay with hints of green apple and honey and warmed cheese bread along with our salads.


Slow Cooked Pork Loin with Jalapeno-Cherry Sauce

I still have a ton of cherries left and am trying to find new and creative recipes for them.  By looking at the amount of cherries I still have, you would never know that I have already used a bunch for both the cherry-chocolate brownie cookies AND for this recipe as well.  But I will definitely find fun, delicious ways of using the rest of them before too long.  If I can’t use them all up I will freeze whatever is left, which will give me a bit more time to do my homework and find more cherry recipes.  But, I love a challenge, and it is a bit of challenge to use them all without making the same things twice in a row in a short period of time.  So I say, bring it on!  I WILL rise to the challenge!

Again, our temperatures are soaring, so I want to spend as little time in the kitchen as possible, or at least make things that will not heat up the kitchen too much.  With that in mind, I brought out the slow cooker for this recipe, which helped reduce the kitchen heat considerably.  I can thank my friend Rose for the inspiration for this delicious recipe.  We will definitely be doing this one again; probably in the very near future too.

This is before cooking it nice and slow for about 4 1/2 hours, on a medium heat.

IMG_1980

All my ingredients.

IMG_1973

Before cooking, I patted the meat dry with a paper towel, then added salt and pepper to both sides and seared it in a HOT skillet with hot oil until it was browned on all sides.  It took about 4 minutes per side.

IMG_1976

Once the meat was browned, I added it to the slow cooker, on top of sliced onions.  Then I added ginger and garlic all around.

To make my sauce, I halved and pitted my cherries and mixed them with jalapeno jelly, one jalapeno, diced fine,  salt and pepper and honey, and added it on top of my pork.  I also added some cilantro and about 1 cup of water to the mixture, to make sure there was enough liquid in the pan.  I closed the lid and forgot about it for about 4 1/2 hours, until it was all done.  Once everything had finished cooking, I added about 3 TBSP of cornstarch, mixed with some of the juice to thicken the sauce up.  I brought it all to a boil, then reduced the heat and cooked it down for about 7 minutes.  You can vary the cooking time depending on how thick you like your sauce.

IMG_1977

IMG_1983

I served the jalapeno-cherry pork loin with some of my leftover Southwestern potato salad, corn on the cob and cheese bread.  Next time I will serve this over wild rice.  The jalapeno-cherry sauce will go nicely with wild rice, but we had just had rice, and I still had quite a bit of potato salad I need to use.  My wine choice was a cool crisp chardonnay, but a pinot noir or a lighter red would accompany the meal very well too.


Slow Cooked Jalapeno-Cherry Pork Loin

3-4 lbs pork loin, seared until brown on all sides

salt and pepper to taste

red or white onions or a combination of both, sliced to a medium thickness

2 TBSP garlic

2 TBSP ginger

2-3 cups of cherries, halved and pitted

1 small jar of jalapeno jelly

1 jalapeno, diced fine

1/2 cup honey

1 TBSP black pepper

cilantro

3 TBSP cornstarch mixed with some of the hot liquid


Sear your pork in a HOT skillet in hot oil.  Then add on top of the onions, garlic and ginger.  Mix all the wet ingredients together, then toss in the cherries.  Cover with the sauce, and add a little water.  Cook in the slow cooker at a medium temperature for about 4 1/2 hours, or until the meat is tender.

Once the meat is cooked, take some of the juice from the pan and add it to the cornstarch.  Mix well, until all the lumps are dissolved and you have a milky liquid.  Add this to the rest of the sauce and bring to a boil.  Once it starts boiling, reduce the heat to a simmer and stir constantly until it reaches your desired thickness.  I poured all the sauce into a saucepan and heated it up on the stove rather than try to reheat it in the slow cooker.

This sauce would also go well with ham or duck too.