Kissed Christmas Cookies

Cookies are my absolute favorite dessert.  I love cookies.  Any kind of cookies.   I always have.  When I was a little girl one of my best friends’ mother used to bake cookies everyday.  The house always smelled so good, and it was always filled with love. Mrs. Nash would make all kinds of cookies, and everyday when we would come home from school, there would be a new variety of cookies waiting for us to gobble up and enjoy.  This is one of my favorite childhood memories.  Mrs. Nash was like my second mother.  My friend Kathy and I grew up together and are still  like family to this day, many, many years later, even though she still lives in California and I have been living in Colorado for almost 19 years.  Cookies always bring up images of love and family to me.  Maybe that’s why they are my favorite type of dessert.

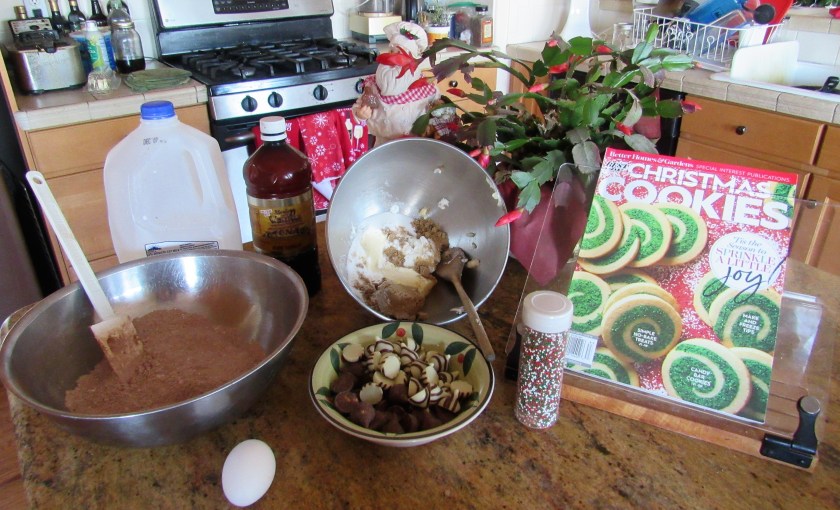
The Holidays are here, and today we have our Christmas party and ornament exchange.  So I will keep this brief and short, since I still have a lot of things I need to prepare and do before all my guests arrive.  My cookie contribution for this year’s party is a fun, festive and colorful type of cookie.  I made chocolate cookies with colorful sprinkles and Hershey’s kisses.

IMG_4270

Chocolate Kissed Christmas Cookies

1/2 cup shortening

1/2 cup softened butter (1 stick)

1/2 cup sugar

1/2 cup brown sugar, firmly packed

1 tsp baking powder

1/8 tsp baking soda

2 TBSP milk

1 egg

1 tsp vanilla

1/4 cup cocoa powder

2 cups flour

Christmas colored nonparells

chocolate kisses, unwrapped

IMG_4259


Combine all the dry ingredients together, mixing well, and set aside.

Mix the shortening, butter and sugars together until well blended, then add the egg, milk and vanilla.   Once all the wet ingredients are mixed together, add the dry ingredients 1/2 at a time, mixing well in between.  Once everything is mixed, wrap the dough in plastic wrap and let it set in the refrigerator for at least 30 minutes before making the cookies.

IMG_4261

Preheat the oven to 350* F

When the dough is ready, spoon out about 1 heaping tsp of dough and roll into a ball,  then roll the ball into the nonparells and coat the whole cookie.  Slightly press the dough out to flatten it and place on a non-greased cookie sheet.  Repeat until all the dough is used.

IMG_4263

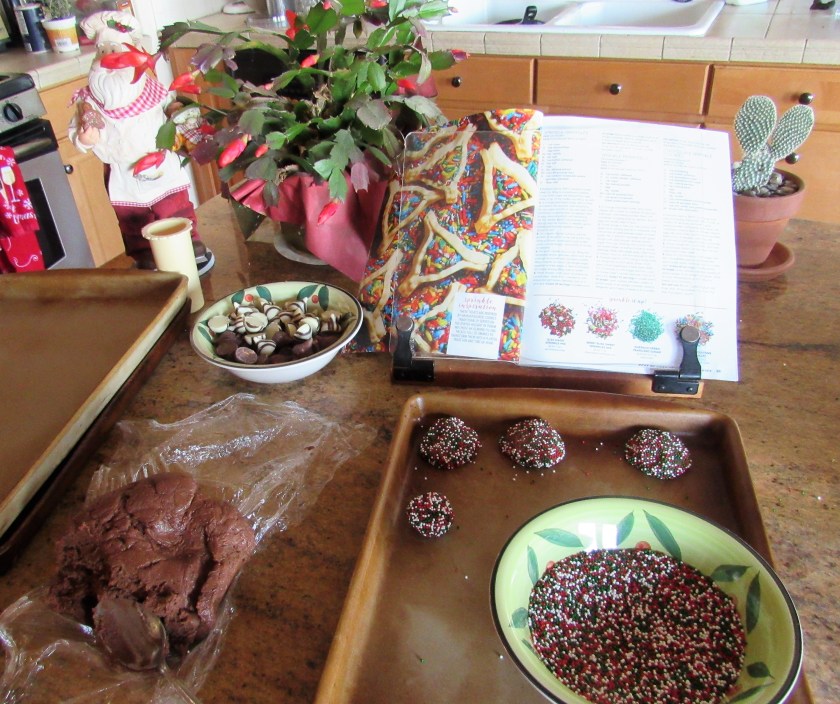
Bake the cookies for about 10-12 minutes or until the edges are firm.  Immediately after removing the cookies from the oven, place an unwrapped candy kiss in the center of the cookies, and slightly press it into the soft cookie.  I placed them back in the oven for about 1 more minute after I added the kisses to soften the chocolate kisses a bit.  Let cool, then remove from the baking sheet and cool completely on a wire rack.  After that, it’s cookie time!

IMG_4268


Honey-Chipotle-Lime Shrimp

Shrimp is one of my favorite seafoods.  I just love it.  One of the things I love about shrimp is that it is so versatile.  Like with chicken, the possibilities for cooking shrimp are endless, as was so greatly expressed by Bubba in the movie Forrest Gump; I can’t remember the full speech that Bubba gave about shrimp, but he named so many delicious ways of eating and cooking shrimp that by the end of the scene my mouth was watering and suddenly I was really hungry for something with shrimp.  Well, here is one more delicious recipe we can add to that never-ending repertoire.  Honey-chipotle-lime grilled shrimp.  It was quick and easy and very tasty.  It had just the right amount of heat and sweet to get all the taste buds crying out for more.   This meal was a bit of flavor fusion, but all the flavors fused together deliciously.

IMG_4284

Honey-Chipotle Lime Shrimp

IMG_4272

1-1 1/2 lbs of large shrimp, peeled and deveined

1/3 cup olive oil

2-3 TBSP lime juice

2 TBSP honey

1 TBSP garlic

3-4 whole chipotle chilies with sauce, minced

2 TBSP fresh cilantro, chopped fine


Mix all the ingredients together well, then add the shrimp and let marinate for about 30 minutes.  Once the shrimp has marinated in the sauce, skewer them and grill for about 6 minutes, making sure to rotate the skewers so the shrimp cooks evenly and does not burn.  Reserve the marinate and cook it for about 5-7 minutes, then add on top of the cooked shrimp as a sauce.


Since I was grilling the shrimp, I decided to make vegetable kebabs to go with the grilled shrimp.  You can use any kind of vegetables you like.  As I mentioned in my post, Roasted Green Beans with Mushrooms and Pine Nuts vegetables contain very little if any fat, so they need to be marinated or coated in some kind of a fat when roasting or grilling so they do not burn.  The flavors of the vegetables also really pop out and come to life  when you use a bold and flavorful. acidic marinade.  I used a a variety of bell peppers, red onions, mushrooms, zucchini and yellow crookneck squash that I marinated in a zesty Italian dressing.  The vegetables will take longer to cook than the shrimp, so put those on the grill first.  When grilling vegetables, you want to cut the vegetables into large, thick chunks that will be able to withstand the direct heat from the grill and will not fall apart.


IMG_4280

I served the honey-chipotle-lime shrimp over some leftover rice with corn, vegetable kebabs and naan bread.   To me, the perfect wine choice would be a rich, buttery chardonnay to help cut down on the acidity of the dish from the marinades.

IMG_4282


Roasted Green Beans with Mushrooms and Pine Nuts

Roasting vegetables is one of the easiest ways to cook vegetables, and is really one of the healthiest ways too.  Besides being easy and healthy, it is also a very versatile way of cooking vegetables and the possibilities are endless.   All you need to do is to cut the vegetables how you want them (try to make sure they are all cut about the same size so they cook evenly.  Cut heartier vegetables smaller and lighter vegetables slightly larger when roasting different kinds of vegetables together), then toss them in some kind of fat and put them on a baking sheet lined with parchment paper, then place them in a hot oven to cook.  Make sure you give the vegetables plenty of room and spread them out into a single layer on the pan to ensure even cooking for all the vegetables.   Because vegetables contain little or no fat, they need to be coated in some kind of fat so they do not burn or stick to the baking dish.   I use olive oil for everything, and prefer using it to butter for coating my vegetables.  I love butter, don’t get me wrong, and I use a lot of butter too, but believe it or not, I actually use way more olive oil than I do butter, especially for my vegetables.  Aside from coating the vegetables in fat, you also want to make sure you use plenty of seasonings and flavors when roasting vegetables as well.  One of the reasons why roasting vegetables makes them so good is because roasting concentrates the flavors, “making the vegetables taste like better versions of themselves” (p. 443 – All About Roasting – A New Approach to a Classic Art, by Molly Stevens).  The dry heat of the oven allows the sugars in the vegetables to caramelize, giving them a slightly sweet flavor with a slight crunchiness that comes from the browning of the edges of the vegetables.  The result from roasting vegetables is the perfect combination of sweetness and crunchiness to make them absolutely delectable.  This sweet and crunchy combination also allows for big bold flavors to really bring out the best in all the vegetables, so using a bold vinaigrette, or a bold cheese or even something salty or citrusy, will  really enhance all the natural flavors of the vegetables.  When roasting vegetables, you want the oven to be hot.  Most recipes will call for an oven over 400* F.  Since we most often serve roasted vegetables as a side dish to a roasted meat, and we often cook them together, reduce the oven temperature to the temperature of the meat, and just cook the vegetables a little longer than you normally would when cooking them on their own.  Most meats do not require as high of a cooking temperature as vegetables.  You can roast fruits the same way you roast vegetables, only be aware that fruits have much higher sugar contents and therefore they will caramelize pretty quickly, and if not watched carefully, they could burn very easily.  So with all these useful tips for roasting vegetables, use you imagination and let the roasting begin.


Roasted Green Beans with Mushrooms and Pine Nuts

IMG_4245

1 lb fresh green beans, trimmed

2 shallots, sliced thin

1 cup mushrooms, rinsed and quartered

1 TBSP garlic

2 TBSP pine nuts

olive oil to coat

salt & pepper to taste

1 tsp thyme

your choice of red, yellow, or orange bell peppers, diced (optional)

Parmagiano cheese for topping


Preheat the oven to 425* F or 400* F if using a convection oven.

Toss everything together and spread out in a single layer onto a baking sheet that has been lined with parchment paper.   Place into the hot oven and roast for about 20-25 minutes, or until the vegetables are slightly softened the middles and have a little crust and are browned around the edges.  When the vegetables are done, sprinkle Parmagiano cheese on top and serve.

IMG_4251


A Roasted Dinner

When there is a bit of a chill in the air, there is nothing better than something straight out of the oven to help warm you up.  When it is cold outside, I just love pulling something roasted out of the oven and serving it up for dinner, which is stated best by cookbook Author Molly Stevens,  “The word roast carries a lot of significance.  The mere suggestion of serving a roast for dinner conjures images of juicy well-seared meats, caramelized drippings, crispy nubbins of goodness, concentrated flavors and gustatory pleasures” (p. 5 All About Roasting – A New Approach to a Classic Art).  From meats and fish to vegetables, it all comes out great when roasted to perfection.  Dinner last night was one of those deliciously roasted nights.  We enjoyed a roasted pork loin with a fig and prune compote over mashed sweet potatoes, with roasted green beans, mushrooms and pine nuts, and the last of my herbed popovers from Thanksgiving, Herbilicious Popovers served with a warm, full bodied red blend with hints of black cherries and black pepper.

IMG_4256

The other day I was looking for something in my pantry when I realized I had some dried figs and some dried prunes when my husband mentioned something about figs that made me think both the prunes and the figs would be delicious with the pork loin.

IMG_4238

Herb- Crusted Pork Loin with Ginger-Fig Prune Compote

2-3 lbs boneless pork loin

1 TBSP garlic

2 tsp fresh rosemary, chopped fine

2 tsp fresh thyme, chopped fine or 1 tsp dried thyme

1 TBSP whole grain mustard

1 tsp dried lavender

1/3 cup olive oil

1 cup water

2 TBSP lemon juice

2 TBSP honey

2 tsp ginger

1 tsp allspice

salt & pepper to taste

1/4 dried prunes

1/3 cup dried small figs, whole

1/2 cup red wine


Chop the rosemary and thyme and blend with the garlic, 3 TBSP olive oil, mustard and lavender.  Mix it well then generously coat the pork loin.  Cover and let it set in the refrigerator for at least 6 hours before searing.

IMG_4241

Preheat the oven to 400* F

Once the meat has chilled, scrape off the coating and set aside.  Generously coat the pork loin with salt and pepper and olive oil.  In a hot skillet, heat the rest of the olive oil (I also added about 2 TBSP of butter to the olive oil) and sear the meat on all sides, until it is crusty and browned on all sides.  Cook for about 4 minutes per side.

IMG_4253

Once the meat has been seared and is crusty on all sides, place it in the oven, uncovered  and roast for about 30-40 minutes, or until the meat thermometer reads 145* F when inserted in the middle of the meat and the juices are clear.

In the meantime, make your fig and prune compote.  In a small sauce pan, mix together the water, honey, lemon juice, spices and pepper, as well as the herb scrapings from the pork marinade.  Bring to a boil then reduce to a simmer, then add the wine, dried figs and prunes, and once again, bring to a boil and reduce to a simmer, cooking for about 20 minutes.  If you like a thicker compote, simmer it for longer.

IMG_4243

Once the pork loin is completely cooked and is ready to serve, top it with the ginger, fig, prune compote and serve.   I served it atop mashed sweet potatoes.

IMG_4255


Fish Tacos

In a period of four short days, we made the transition from Thanksgiving to Christmas.  The Christmas cards are all done and are now in the mail.  Most of the Christmas lights are up outside.   And the house is decorated.  On top of all this, we had a very busy social calendar this weekend as well.  Needless to say, I did not have a lot of time to do a lot of cooking.  Nor did I have the energy to do so either.  So I just made some quick and easy fish tacos.  They only took a few minutes to make and they were delicious too, and mostly healthy.

IMG_4233

We had some fish sticks that needed to be used, but they were too small to just have on their own.  We love fish tacos and eat them quite often when we are traveling around the tropics.   I made a quick and easy slaw from Brussels sprouts, in addition to some rice mixed with corn, and fish tacos were born.  Then we topped them with avocado and sour cream and finished them off with a margarita especial.  Fabuloso!

Sometimes my favorite way to cook is to look in the refrigerator to see what I have and to  just go from there.  I knew I did not have any lettuce or cabbage, but I had Brussels Sprouts, which are part of the cabbage family, so I made a Brussels sprouts slaw to serve on top of the fish tacos.   I just made enough Brussels sprouts slaw for our tacos, and I did not measure anything (but then I rarely do).  I just used up some of my vegetables that were already cut and needed a new purpose.

IMG_4229

Brussels Sprouts Slaw

Brussels sprouts, stem removed and sliced thin

jalapeno, diced fine

red onion, sliced thin

yellow and orange bell peppers, sliced thin

cumin

salt & pepper

cilantro lime dressing


Toss everything together and saute for about 5-7 minutes.  I cooked it just long enough so the vegetables were not raw, but not too long to make them soft.  I still wanted them crunchy and snappy.

IMG_4231

After the slaw was made, I fried the fish sticks and cut them up.  I heated up some tortillas, melted some cheese onto them and started layering the tacos.  Voila, we had a quick, easy and delicious meal of fish tacos.

IMG_4234


Thanksgiving Dinner – Part III – Pumpkin Pie

I think people look forward to the Thanksgiving desserts almost as much as they look forward to the turkey.   Some people may even prefer the desserts to the turkey.  I admit I did not go over board this year because one of nieces loves to bake too.  She is actually very good.  Her specialty is vegan desserts.  So since most of the family is vegan, and she likes to do those desserts, I stepped back and let her have at it.  She brought a few different vegan deserts including a chocolate silk pie, a vegan pumpkin pie, some kind of a chocolate flourless torte and some pumpkin doughnut holes.  Sadly, I do not have any pictures of her desserts.  I meant to take some, but things got chaotic once dinner was finished and it was time for dessert.

The only desserts I made for our meal this year were a pumpkin pie and and an apple pie.  However, I really only made the pumpkin pie because my husband bought a store bought apple pie, so that doesn’t really count as me making it.  I tried a new recipe for the pumpkin pie this year too.  It was one of the easiest pies to make and one of the best pumpkin pies too.  I wanted to make a pecan pie as well, since that is my favorite, but I am really trying to cut back on my sweets, and no one else wanted pecan, so I got out voted.  It’s just as well.  i do not need the extra calories.  I got off easy this year.  🙂

IMG_4178

Pumpkin Pie

Crust or Pate Sucre

1 1/2 cups flour

6 TBSP COLD butter, cubed

3 TBSP powdered sugar

a pinch of salt

1 egg

5-6 TBSP heavy whipping cream


Blend the flour, butter, salt and powdered sugar together in a food processor until it is all crumbly.  Then add the egg and the cream slowly, while continuing to blend.  Keep processing everything together until it all forms into a ball.  Remove the dough ball from the food processor and wrap in plastic wrap, then let it chill in the refrigerator for at least 30 minutes before rolling it out.

IMG_4165

IMG_4166

Preheat the oven to 425* F

Roll the dough on a lightly floured surface to about 1/4-1/2 ” thick, then lift with the rolling pin and gently lay the dough onto the pie dish.  Press the dough firmly into the baking dish to shape it and crimp the edges by pinching them with your fingers.

Pie Filling

1 15 oz can of pumpkin puree or 2 cups of cooked pumpkin puree

1 14 oz can of sweetened condensed milk

2 eggs

1 tsp cinnamon

1/2 tsp ginger

1/2 tsp nutmeg

1/2 tsp allspice

1/2 tsp salt

Mix everything together well and pour into the pie crust.  I added pecans to the top of the pumpkin custard mixture before baking.  Bake for about 40 minutes, or until the center is firm to the touch or when it no longer jiggles when shaken.  Let the pie cool completely before adding whipped cream and serving.

Before baking.

IMG_4174.JPG

I added the whipped cream right before serving the pie.  Lucie and Vinnie helped me clean out my bowl after I had already served the pie with the whipped cream.  After all, they like Thanksgiving too.  Lucie is enjoying her whipped cream so much, she is even wearing some in her ears and on her nose.

IMG_4225

The calm before the feasting.

IMG_4222

I am thankful for so many things, but most importantly for good friends and family, good health, a beautiful home, a warm heart, and the opportunities I have been given.  Happy Thanksgiving everyone.

IMG_4217


Thanksgiving Dinner – Part II – Appetizers and Sides

Our Thanksgiving dinner was way more than just the turkey, although at Thanksgiving, the turkey will always get top billing and will always be the center of attention. Since most of my family that joined us is vegan, we had a lot of vegetables and vegan foods.  I also was cooking for seven kids, ranging in ages from 6-15, so most everything was pretty simple, certainly much more so than my usual cooking  Aside from the turkey, I also made 2 kinds of mashed potatoes, both vegan and non-vegan.  The vegan mashed potatoes were  made with rice milk and vegan butter, and then regular garlic mashed potatoes with butter and heavy whipping cream for the rest of us.  There was also stuffing, using my leftover chorizo and spinach from when I made my Chicken stuffed with chorizo and spinach, obviously NOT vegan.  Chicken Stuffed with Chorizo and Spinach  This time of year is a great time of year for the Queen of Leftovers to appear.    We also had vegan, gluten-free rolls as well as herbed popovers for those of us who wanted real bread.  Herbilicious Popovers  But before we starting eating the main meal, we had a cheese and salami platter with crackers, served on one of my brand new serving platters from Cheforward, Presents for the Chef As usual, we had enough food for about another 10 or so people to join us.  So where were you?  I had enough food for everyone  🙂

Everything just seems to pop and come to life on this new serving platter.  I just love it!

IMG_4212

I had just the exact amount of extra chorizo and spinach filling for the stuffing.   You can use any kind of bread you like, just make sure it is at least a few days old, and crusty, even a bit stale is a good thing.  This will ensure that it really soaks up the liquid and when cooked it will stay very moist.  I used a garlic loaf that I cubed.  There are so many different and delicious varieties of stuffing recipes.  There is no one particular one that is better than any others.  I usually vary them year to year, doing something different all the time.

IMG_4181

I sauteed my onions, garlic and celery until they were soft and translucent, then mixed everything together, along with 1 can of chicken broth.

IMG_4183

Once everything is well combined, add it all to a baking dish that has been sprayed with cooking spray.  Really press down and compact the bread, making sure it absorbs all the liquid.  Wrap the pan tightly with aluminum foil and bake at 375* F for about 40-45 minutes covered.  If you want a little bit of a crust to the stuffing, remove the foil and continue to bake for abut 10-15 minutes.  Do not overcook though, or the stuffing will become dried out.

IMG_4188

For veggies, I just made some corn, and then a vegetable medley with three different colors of cauliflower and broccoli and carrots.  These were all safe bets and pretty staple vegetables that most kids are guaranteed to eat.  I know all my nieces and nephews are big cauliflower fans too.  I just made it more fun by having the three different colors.

IMG_4202

And then there was bread …. well popover rolls, actually.  I used fresh rosemary, chives, sage, thyme and oregano mixed in with the flour.  Herbilicious Popovers  I make these quite often.  I love how they are so light and buttery, and they just seem to go with everything.

IMG_1280

These are just the foods I made.  We had a whole other array of vegan foods that my “sister” brought.  Needless to say, we had a feast for sure.


Thanksgiving Dinner – Part I – The Turkey

I hope everyone enjoyed their Thanksgiving.  Yet another successful Thanksgiving has come and gone, and is now in the history books.  There were eleven of us all gathered together to celebrate my favorite holiday, Thanksgiving.  It was my husband and myself and my “sister”, her husband and all seven of their kids.  We had a full house, a full table, and at the end of the evening, full tummies as well.  We basically had two full Thanksgiving meals combined into one.  My “sister’s” husband, my husband and I all had the traditional Thanksgiving fair, complete with turkey, stuffing and all the fixin’s.  My sister and all of her kids, however, are vegan, so they had their own version of Thanksgiving dinner, complete with tofurkey (NO, I DID NOT make the tofurkey.  I hate the stuff.  We bought it and cooked it according to the package directions), and plenty of vegetables and potatoes to go around for all of us.  And of course, there were lots of desserts as well, both vegan and non-vegan.  It does not really matter so much what is on the table to be served, but rather who is at the table to be served that makes the meal and the day so special.


I had a 16 3/4 lb turkey, which was more than enough for the three of us who were eating it.

IMG_4159

IMG_4161

I made a juniper brine that I poured over the turkey and let set in the refrigerator for about 1 1/2 days before cooking the turkey.

IMG_4157

IMG_4158

Juniper Brine

2/3 cup salt

2/3 cup sugar

6-10 whole cloves

1 tsp juniper berries, crushed

1/2 tsp whole black peppercorns, crushed

1 tsp allspice

1-2 tsp fresh sage, chopped

4 sprigs fresh thyme

2-3 bay leaves

8 cups hot water

4 cups cold water

1 plastic turkey brining bag

large pan to hold the turkey


With the back of a small skillet, crush the whole peppercorns and the juniper berries by basically smashing them with the back of the skillet and then firmly pressing them until they crack.  This only takes a few seconds.  Mix all the ingredients together in the hot water in a large pot.  Boil for 3 minutes, or until all the sugar and salt have completely dissolved.  Add the cold water and cool to room temperature.  Place the turkey into the brining bag and pour the whole contents of the liquid into and all around the turkey.  Place the bag with the turkey breast side down into a large roasting pan and loosely cover.  Let it set in the refrigerator anywhere from 12-36 hours before cooking.

Once the turkey is ready to cook, empty the liquid and discard the bag and all its contents.  Pat the turkey dry with a paper towel.  Gently separate the skin from the meat, by working your hands gently under the skin.

IMG_4193

With whatever rub you decide to use, generously rub the whole inside of the turkey, underneath the skin with the rub.  Spread it evenly over all the meat of the turkey.

This year, I decided to make a Cajun turkey and I made a Cajun rub.

IMG_4191

Cajun Rub

I stick butter, softened

1 TBSP garlic

1-2 tsp each sage, oregano, thyme, and marjoram

1 TBSP Cajun spice mix

1-2 tsp cayenne pepper, or to taste

1-2 tsp salt

Preheat the oven to 500* F

Mix everything to together and rub generously over the meat, in between the meat and the skin of the turkey.   Generously coat the turkey’s outside with salt, pepper and olive oil .  Then place it back into the roasting pan, breast side down.

Place the turkey in the pre-heated oven and roast for about 20-30 minutes at 500* F.  Then turn the heat down to 350* F.  Continue to cook the turkey for about another 30 minutes or so, breast down, then carefully flip the turkey over to continue cooking, until the internal temperature of the turkey reaches 160-165*F or until the juice comes out clear.   The time will vary according to the size of the turkey.  Usually allow for about 15 minutes per pound.  I had a 16 3/4 lb turkey, so I roasted it for about 3 1/2 hours.  While the turkey is cooking, baste it occasionally with the juices to keep it moist.  Let the turkey rest at room temperature for about 10-15 minutes before starting to carve it.

IMG_4211

This post is one of a small series of posts regarding Thanksgiving.  Please stay tuned.  there was a lot more to eat than just turkey, although the turkey came out great.


Happy Thanksgiving

I will be busy in the kitchen, making preparations for tomorrow, so there will not be a formal post today.  However, I just wanted to send a message of thanks to everyone.   I wish you all a very Happy Thanksgiving to be shared with those you love and hold dear.

46396538_2221660164825065_7742688607088934912_n


A Christmas Scarf

I know this post is out of my normal range of posts, however, I wanted to share this beautiful scarf with all of you.  It was made by Michelle Miller.  She is one of my “blogging” friends and she is so talented.  Stop by and check out here website Blessings By Me@michellemiller1978 .   If you hurry, she just might have time to make something special for you as a holiday gift.

IMG_4120

Please focus on the scarf and Lucie, not the tired chef who just got home from swim practice.  🙂

IMG_4151

IMG_4154