I have created this site to help people have fun in the kitchen. I write about enjoying life both in and out of my kitchen. Life is short! Make the most of it and enjoy!
One of the dishes I made for St. Patrick’s Day was an Irish vegetable casserole to accompany my tilapia with black butter sauce. Tilapia with Black Butter Sauce This vegetable casserole was inspired by the Irish playwright George Bernard Shaw.
George Bernard Shaw was in Irish playwright, critic, polemicist and political activist. He was born into poverty in Dublin, Ireland in 1856. He later moved to England, where he lived the rest of his very long and productive life. He wrote over 60 plays and died at the ripe old age of 94, in 1950. For most of his life, George Bernard Shaw was a vegetarian too. He became a vegetarian in 1881, in large part because of the abject poverty in which he grew up. When there was meat, which was very rare, it was cooked horribly and boiled to the point of it being tasteless shoe leather. He never acquired the taste for meat and lived on a diet complete from vegetable sources and sweets for the rest of his life. Food was never that important to him in real life, but ironically, food played a very large role in many of his plays.
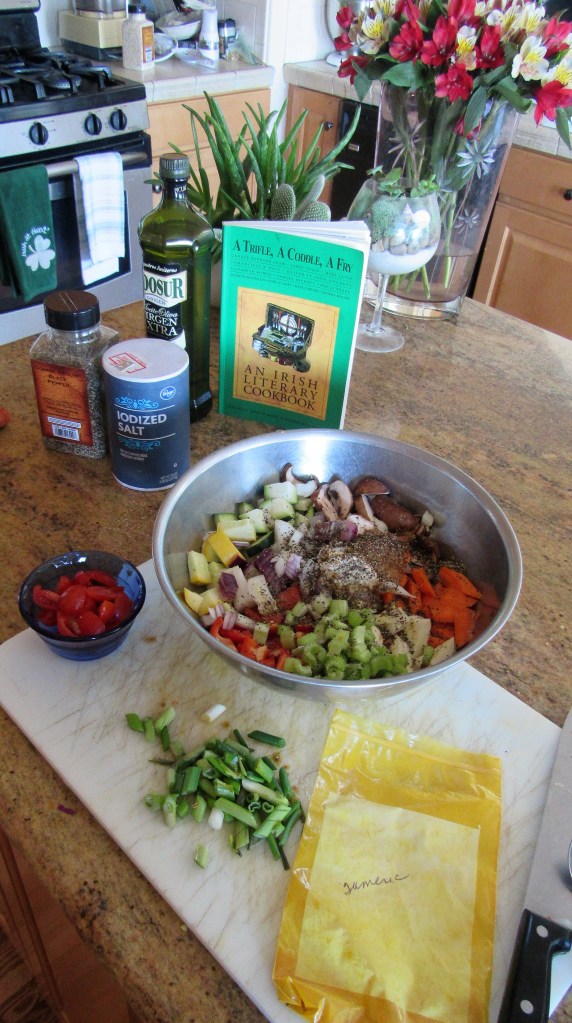
Irish Vegetable Casserole
1 onion, diced medium
1/2 zucchini squash, diced medium
1 parsnip, diced medium
1/2 yellow crookneck squash, diced medium
2-3 celery stalks, diced medium
1/2 red bell pepper, diced medium
2-3 carrots, diced medium
1/2 lb mushrooms sliced thick
2 tomatoes, diced medium or about 1/2 cup of grape tomatoes cut in 1/2
1 can white beans, drained and rinsed
1 1/2 TBSP garlic
1 tsp turmeric
1 TBSP ginger
1 tsp cayenne pepper or to taste
green onions, sliced Asian style
salt & pepper to taste
olive oil
chopped parsley
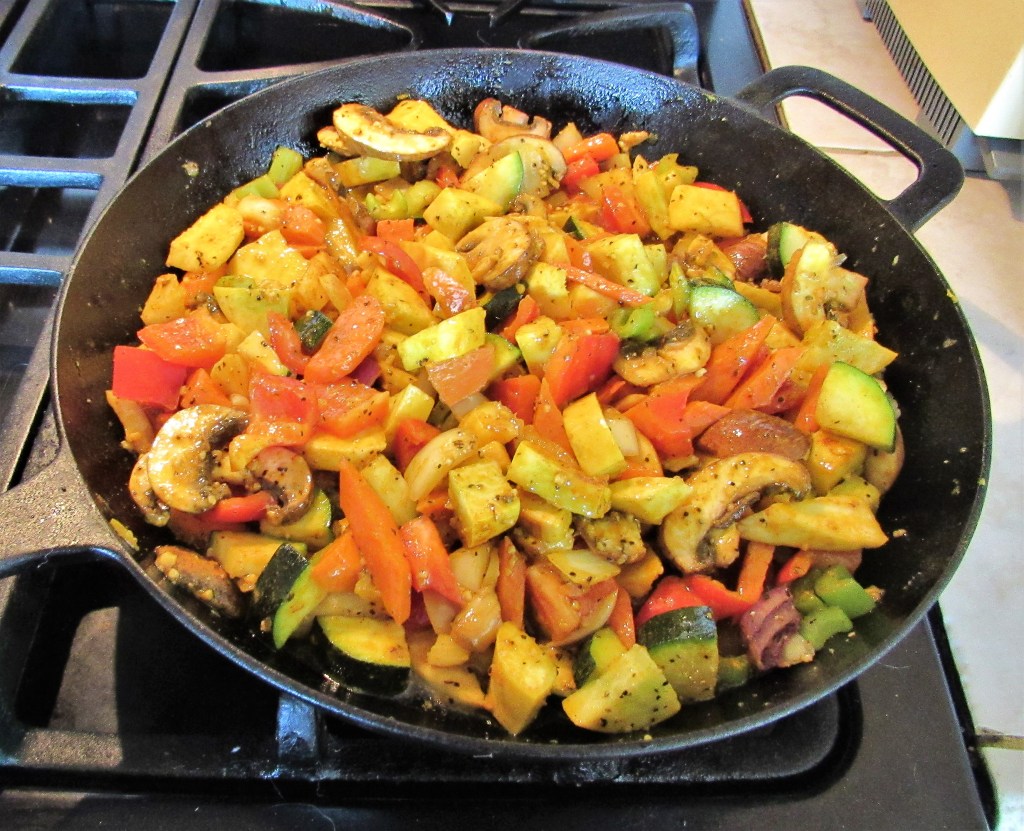
Mix all the hearty vegetables together along with the spices and seasonings and olive oil, then saute for about 7-10 minutes, or until they start to soften.
Preheat the oven to 350*F or 180* C.
Line a baking sheet with aluminum foil.
Once the vegetables have softened and the onions are translucent, transfer them onto the baking sheet. Add the beans, tomatoes and green onions and cover with foil. Bake for about 40-50 minutes.
When the vegetables are done, sprinkle with the chopped parsley. You can eat this on its own or over rice. I have done it both ways, and enjoy both ways as well. Slainte is tainte.
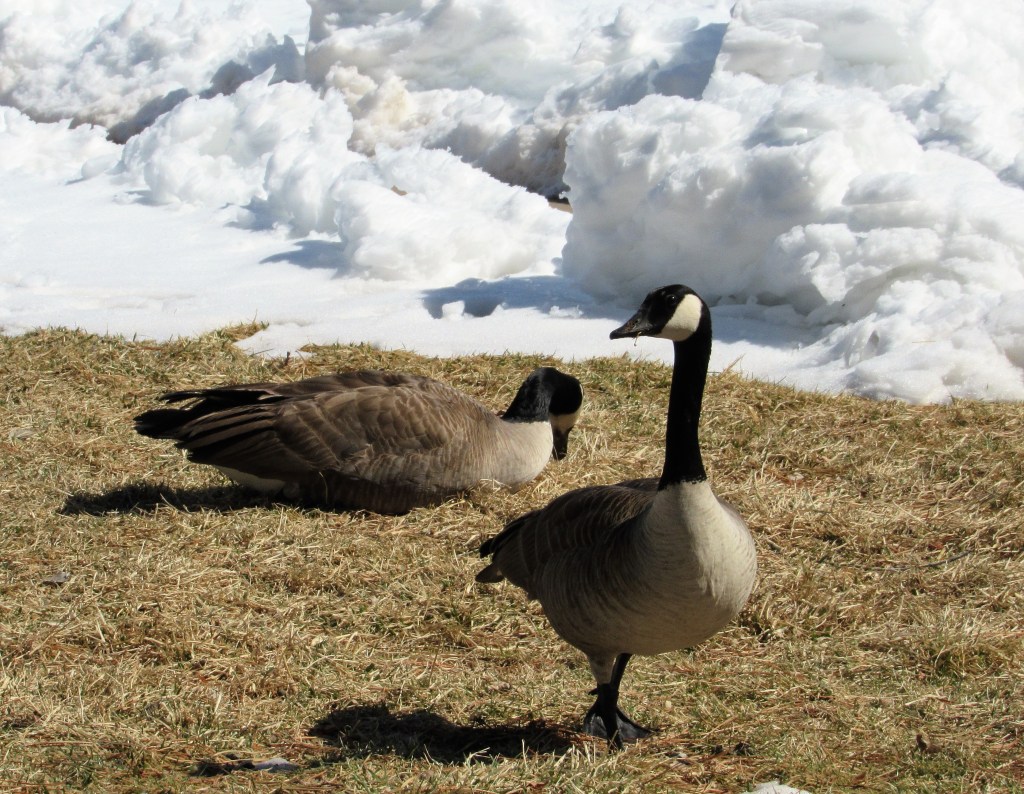
There is still snow everywhere, though it is beginning to melt. But typical Colorado weather, the sun was shining brightly and the skies were a very vibrant blue. The temperature was perfect. The lakes are still quiet, but the ducks and geese are beginning to swim side by side once again, and the buds are started to pop up as well. My irises, though covered in snow at the moment, were already peeping their shoots up through the ground before we got hit by snowmageddon and the buds in the trees are becoming very plentiful too. It won’t be too long now. Spring is in the air.
The Canadians scouting out the grounds.
Ring-necked ducks checking out the neighborhood.
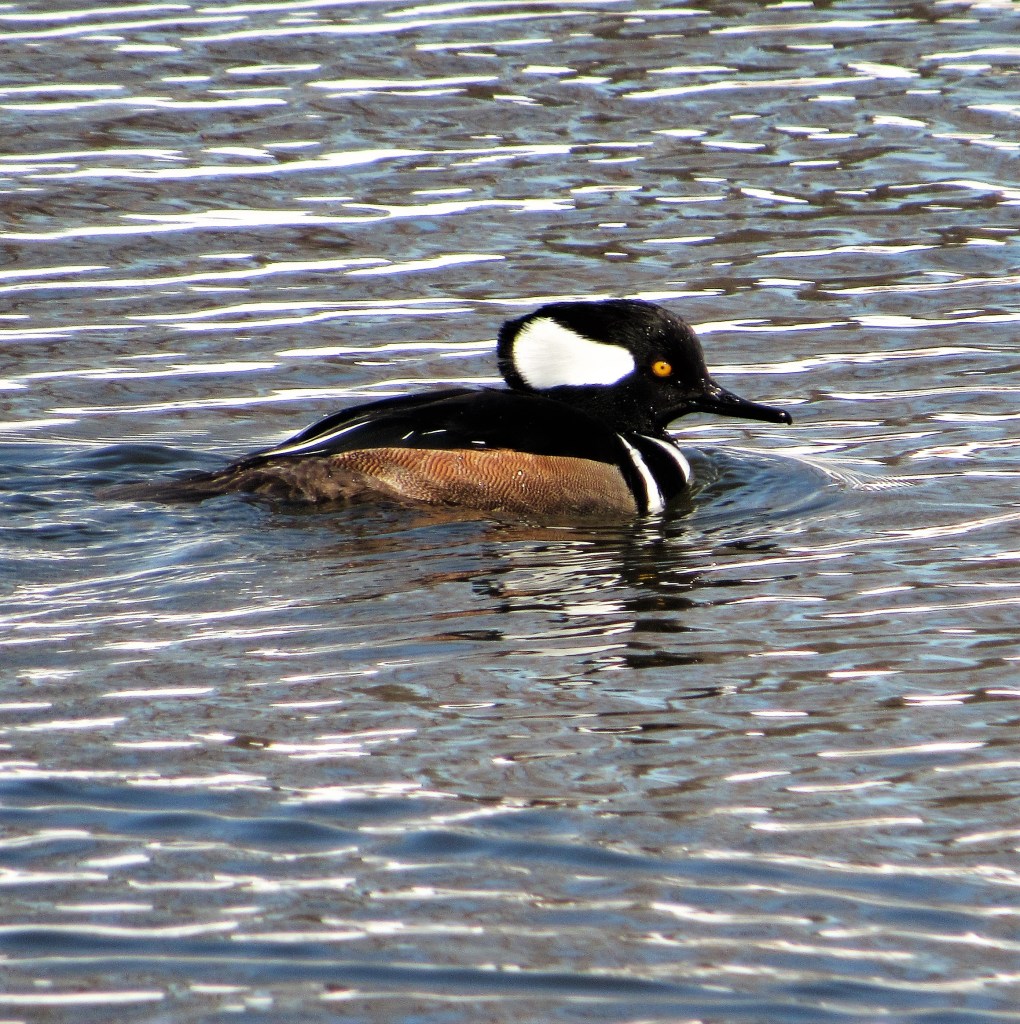
There were some hooded mergansers out and about too.
There was even a Northern Flicker looking at real estate and his view from above.
Take a walk in the sunshine, clear your head and take it all in.
I hope those of you who are Irish, even if only for the day, enjoyed your Irish holiday. I have a lot of Irish, Scottish and Welsh in me, as well as most of the Northern European bloods. My dad was an Aussie, and the early Australian colonials were predominantly Irish, Scottish or Welsh (they were sent over mostly as prisoners).
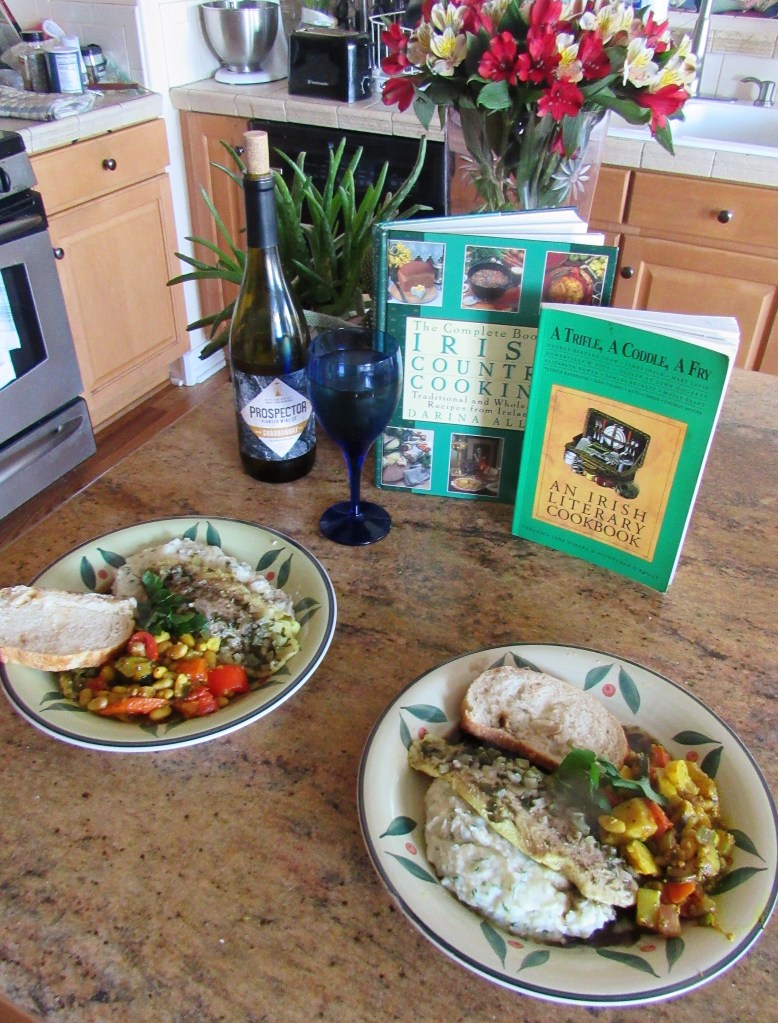
I know most people cook corned beef and cabbage as their St. Patrick’s Day feast, but I rarely do. I mean, I do cook corned beef on occasion, in fact, I will cook it for tonight’s dinner. I just rarely cook it for St. Patrick’s Day. First, I am not a big fan of corned beef and second, I just like to do other things and celebrate with other Irish foods. For whatever reason, I tend to cook a lot of seafood for our St. Patrick’s Day dinners. This time was no different. I cooked some tilapia with a black butter sauce, that I served over mashed potatoes and an Irish vegetable casserole on the side, along with some warmed bread and a chilled, crisp chardonnay.
For this recipe, you can use any white fish you like. I just happened to have tilapia on hand, so that is what I used. It was super easy-peasy and simple, but it was also very, very good. This particular recipe is an Anglo-Irish favorite.
Since Ireland is an island, known as the Emerald Isle, seafood is eaten a lot and is a staple to the Irish diets, particularly those who live by the seashores. Often times the people eat whatever seafood has been caught for the day, so many of the recipes are flexible and go with whatever the daily catch brings in.
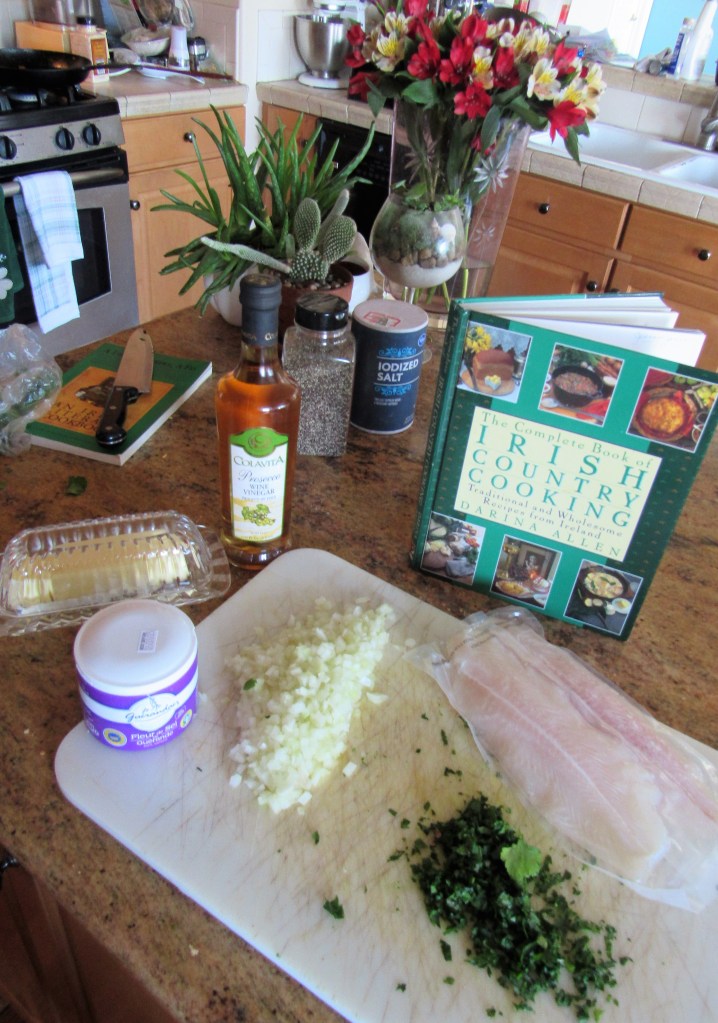
Whitefish with Black Butter Sauce
1 1/2 lbs whitefish of your choice
1 onion, diced fine
2 TBSP white wine vinegar
fresh parsley, chopped fine
a sprinkle of salt or fleur de sel to taste
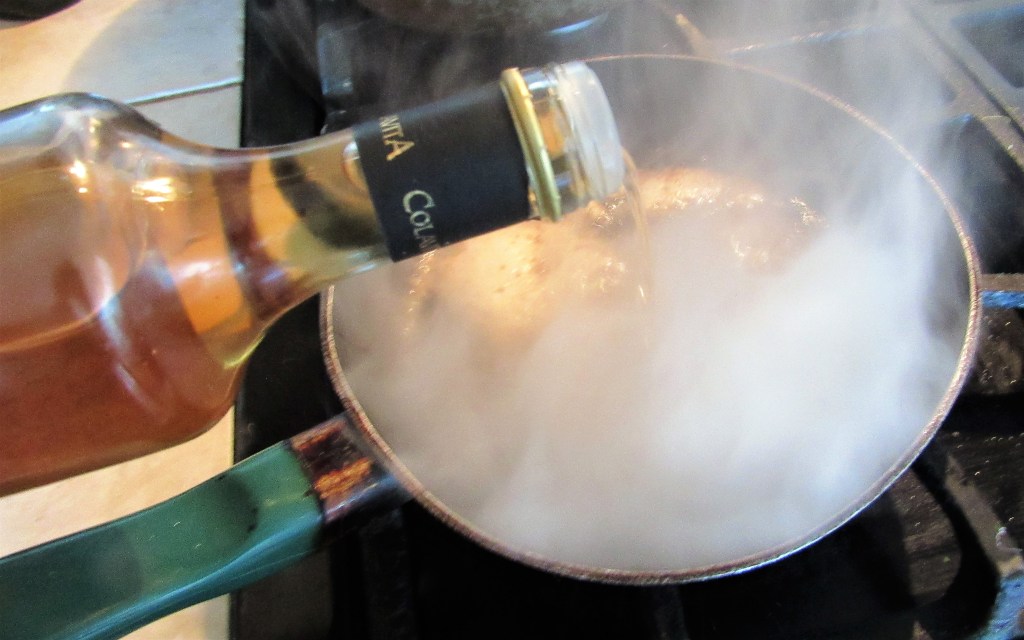
Black Butter Sauce
4 oz butter
2 TBSP white wine vinegar
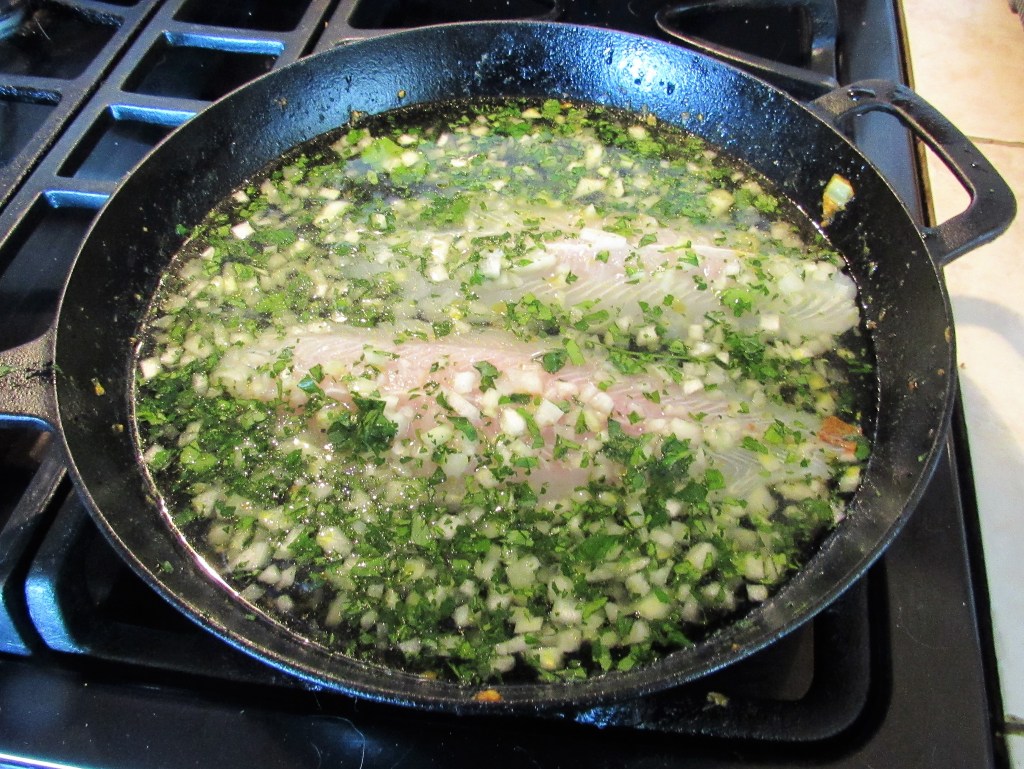
Place the fish in a large skillet, add the onions and parsley and white wine vinegar, then completely cover the fish and toppings with cold water. Bring everything to a boil, then reduce the heat to a simmer, cover the fish and continue to cook for about 20 minutes.
For the sauce, melt the butter in a separate pan and let it brown. As soon as it is a rich, dark brown, add the white wine vinegar and mix together well. Dish up the fish and serve it with the black butter sauce on top.
This is simply delicious. The butter sauce is very light with a very unique flavor. And yes, it is a dark brown sauce.
Slainte is tainte or health and wealth to all of you.
Larry is about to pull out the smoker again and he will be smoking up a whole bunch of meats. So I got busy and made some delicious sauces to go with all those meats. (More on this later).
I think by now, you all know I am a “saucy kind of girl”. I love adding sauces to my foods, and particularly my meats. So, I made a couple of sauces that will go well with all the smoked meats we are going to have. I made a Colorado style green chili honey mustard sauce and I made a Southern style mustard BBQ sauce. I made them a couple of days early because sauces usually taste better after a couple of days, when all the flavors can blend in together and marinate.
My first sauce was the Colorado style green chili honey mustard. I would have made more, but I ran out of Dijon mustard; in fact, I actually used up all of my mustards today. That’s OK though. This sauce packs a punch and a little dab will do you.
Colorado Style Green Chili Honey Mustard Sauce
4 oz roasted green chilies – I used my roasted Hatch chilies
1/2 cup Dijon mustard
1/2 cup whole grain mustard
1/2 cup honey
1/4 tsp cayenne pepper
Mix everything together in a food processor until it is well blended. Refrigerate until ready to use. This spicy and delicious sauce could not be any easier to make and will go well with any kind of meat, particularly chicken or pork.
The other sauce I made was just as easy. Surprisingly, it reminds me a lot of Heinze 57 sauce, which I love. Now I know how to make it. This sauce recipe comes from South Carolina. Some people refer to it as the “low country BBQ sauce” because it is very common in the eastern part of the state and around the Columbia areas. I have never been to South Carolina, so I actually have no idea what they are talking about.
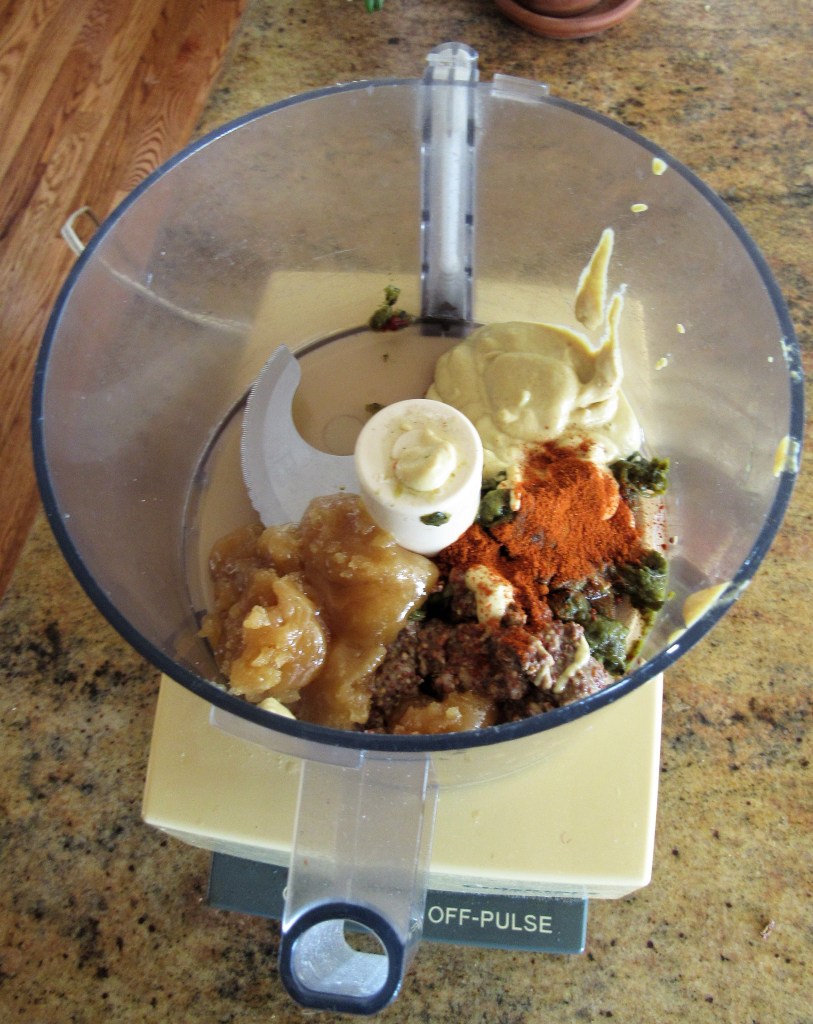
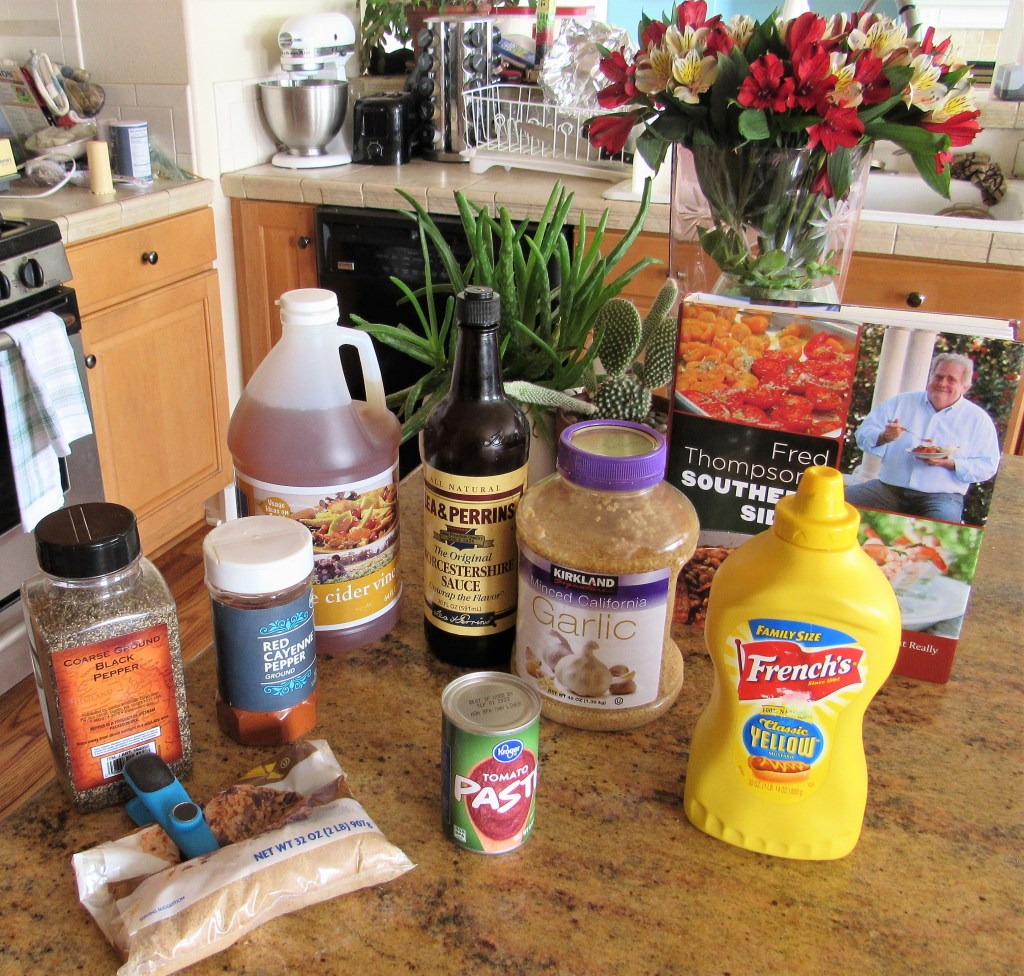
Southern Style Mustard Based BBQ Sauce
1 cup yellow mustard
1/2 cup spicy yellow mustard
1/2 cup packed brown sugar
1 can tomato paste
5 TBSP apple cider vinegar
1 TBSP Worcestershire sauce
1/2 tsp cayenne pepper
1 TBSP garlic
1/2 tsp black pepper
1/3 cup molasses
Put everything together in a saucepan and cook just until all the sugar melts and everything is blended together well, stirring constantly. Refrigerate until ready to use. I ran out of yellow mustard too, so that’s when I thought of adding the spicy yellow mustard as well, which gave the sauce a little extra kick. I like things with kick. 🙂
After tasting it, I decided it needed a bit more of something, so I added the molasses too. The molasses gave it just the flavor and texture I was looking for.
This sauce will go really well with all kinds of smoked or grilled meats too.
Sauce things up. Life is always better when it’s a bit saucy. 🙂
What is a Cumberland sauce? I had never heard it by name before either, though I have made it many times. A Cumberland sauce is a sauce made with either port or a dry red wine and fruit or fruit juices. It originated in Germany around 1846, as an accompaniment to meats like ham, pork, lamb and venison. It was officially created as a sauce around 1846, but its traditions of serving meats with port and/or wine and fruit dates back to the medieval times. It is a sweet and sour sauce of sorts, but with a European heritage rather than an Asian heritage, as we would normally think of a sweet and sour sauce. Like with any recipe that has been around through the ages, and is found in many different areas and regions, there are many different variations. It is said the name comes from the name of the Cumberland region in England, where it is a very popular sauce for meats, but no one really knows for sure.
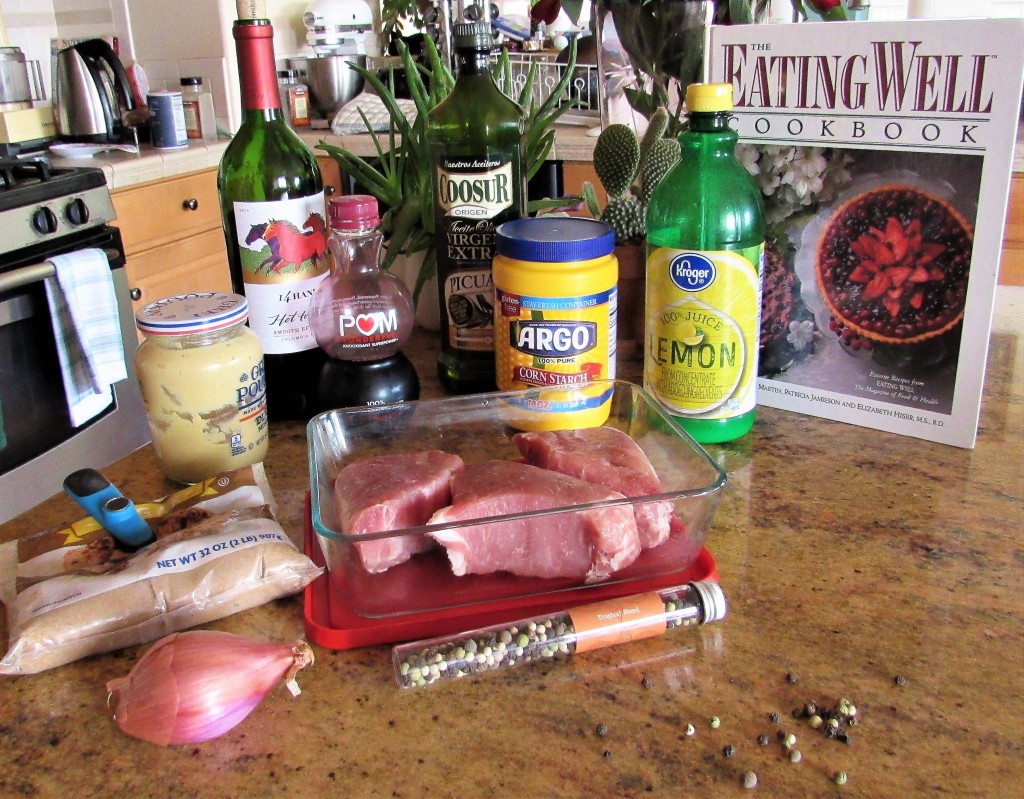
Pork with Cumberland Sauce
1-2 lbs pork – either as chops or loin (or venison, lamb or ham)
1 shallot, minced fine
1 cup dry red wine
salt & pepper to taste
1 tsp cornstarch
1 TBSP lemon juice
2 TBSP pomegranate juice or red currant jelly
1 tsp brown sugar
1 tsp Dijon mustard
olive oil
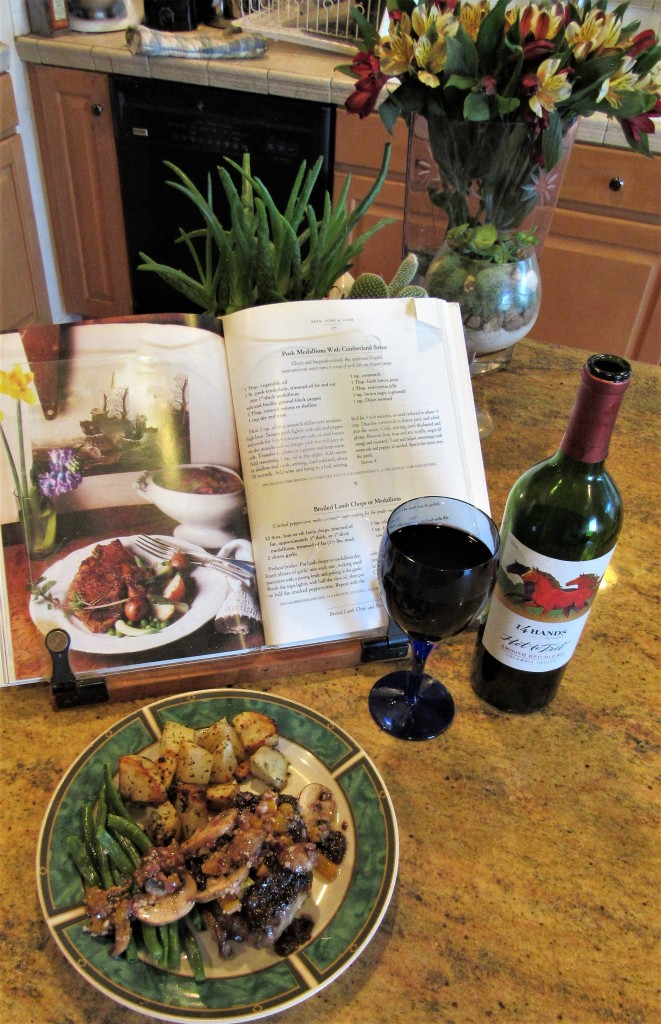
As always, I did my version slightly differently than the recipe calls for. I mixed the red wine, brown sugar, mustard, pomegranate juice, lemon juice and salt & pepper together to make a marinade and marinated my pork in it for about 4-5 hours. This way, the pork was nice and flavorful and very tender. I also added some of my fancy peppercorns I got for my birthday too. Another Birthday Surprise
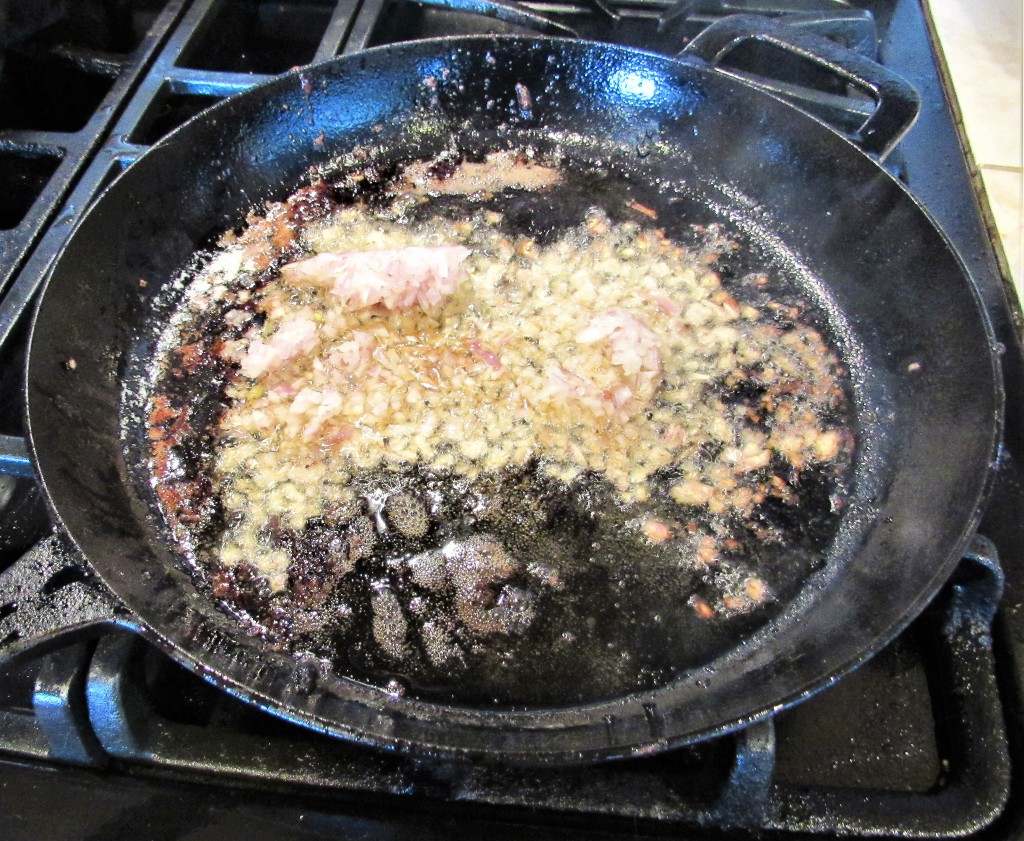
When it is time to cook the pork, get the skillet very hot and add olive oil with a little butter to completely brown the pork on all sides. Once it is completely browned, remove it from the skillet and keep warm.
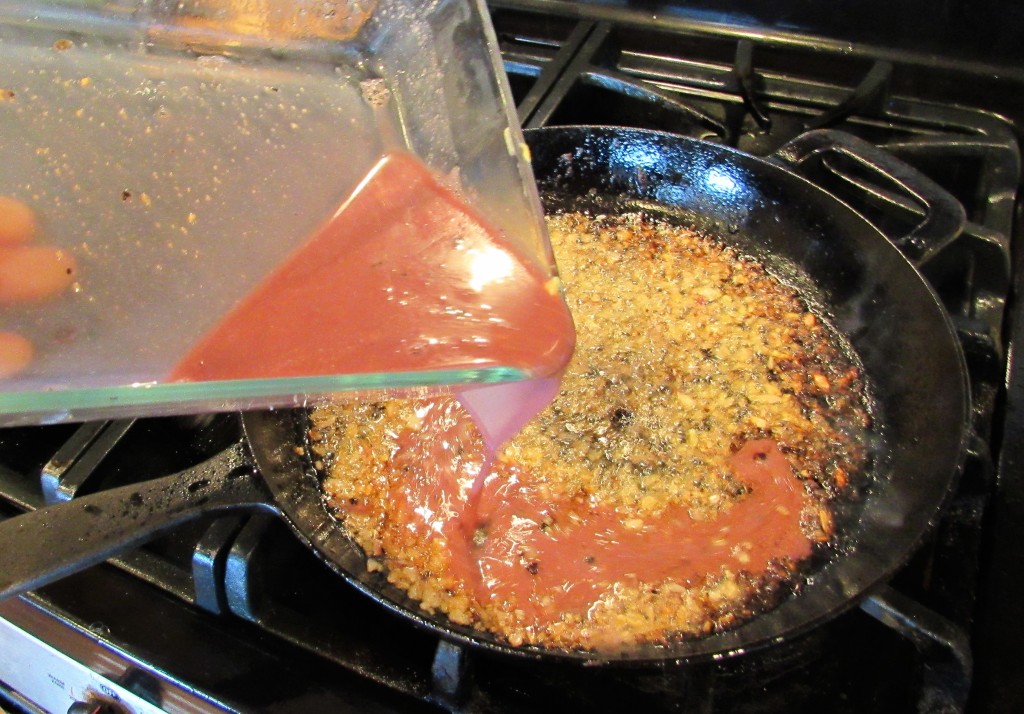
Saute the shallots in the oil until they are translucent, then add the marinade, reserving a little to mix with the cornstarch. Bring to a boil, then reduce the heat to a medium/low heat and cook for about 5-7 minutes.
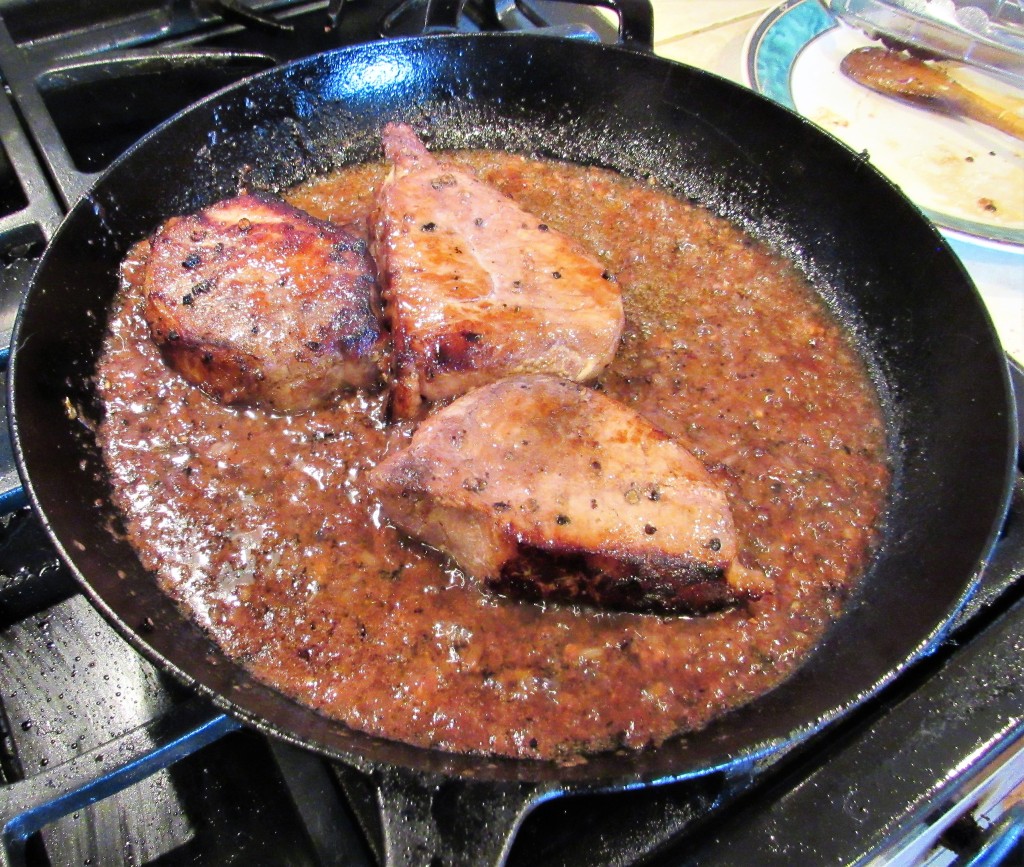
Mix the cornstarch into the reserved liquid and add to the skillet, then add the pork and coat it with the sauce. The sauce should be thick and glossy.
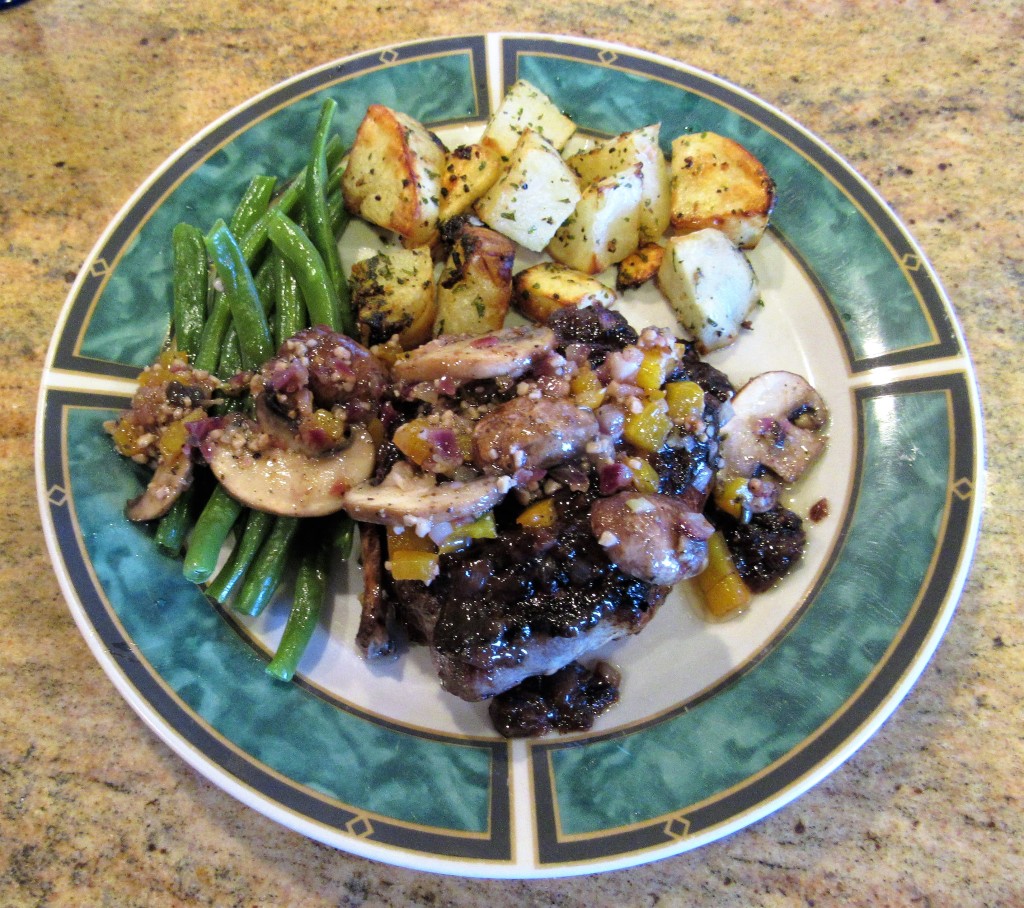
When the pork is heated and thoroughly cooked, serve it up and top with the sauce. I served it with roasted potatoes and green beans. I also added some mushrooms, garlic, onions and peppers and finished it all off with more of the same red wine I made the sauce with. Delicious!
I was going to post something else, but I figured since yesterday, and this whole weekend, were snow days, with tons of snow, I would make some soup to help take off the chill. Nature Walks – A Snow Day Hot soup on cold snow days is just a perfect match. The soup of the day this time was chicken tortilla soup.
We bought a Costco rotisserie chicken a couple of days ago, and only ate a small portion of it. The leftover chicken was perfect for soup, and I just felt like something a little different today, so I made a chicken tortilla soup that I served with some vegetable quesadillas on the side.
Chicken Tortilla Soup
1 1 /2-2 lbs cooked chicken, cubed
1 1 /2 cups frozen corn
12 can black beans, drained and rinsed
4 Roma tomatoes, diced medium – I mix and match my tomatoes all the time. I like the different flavors of them
1/2 onion, diced fine
2 TBSP garlic
6-8 cups chicken stock
3-4 roasted Hatch chiles, diced fine
1 tsp cumin
1 tsp thyme
1 tsp marjoram
1 tsp oregano
1-2 tsp chili powder
olive oil
salt & pepper to taste
oil for frying the tortilla strips
fried tortilla strips
cheese, optional
I had a sneaky little helper. She was looking so sweet and innocent, and then I turned my back for a split second, and next thing I know, she had stolen some of the chicken breast before I was able to cut it up.
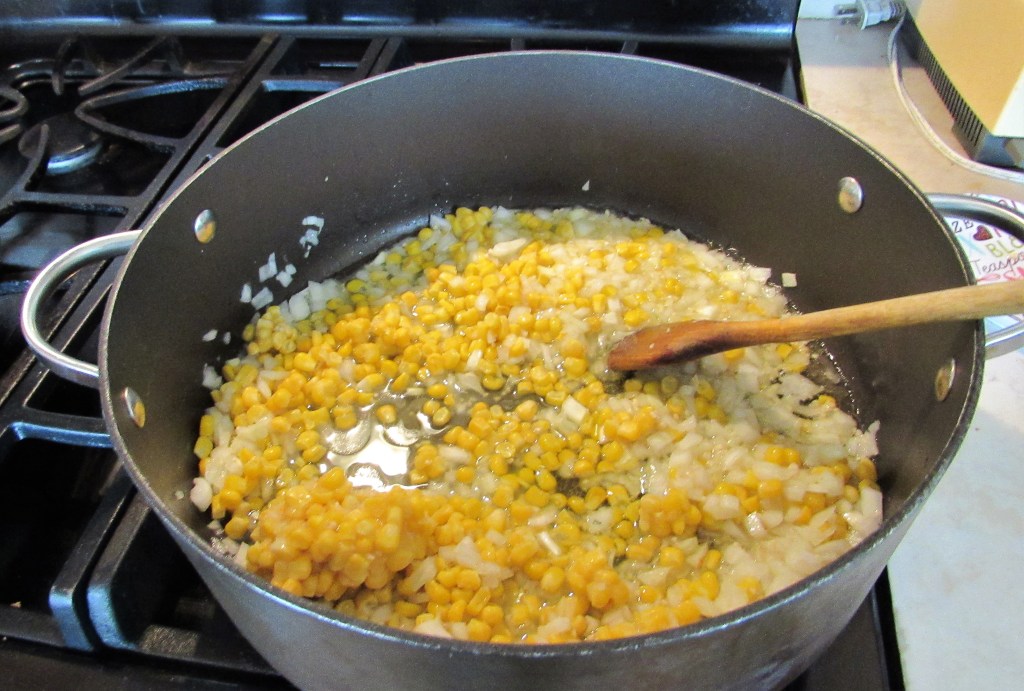
Start by sauteing the onions, corn and garlic in the olive oil in a big soup pot for about 5-7 minutes, or until the onions are soft and translucent.
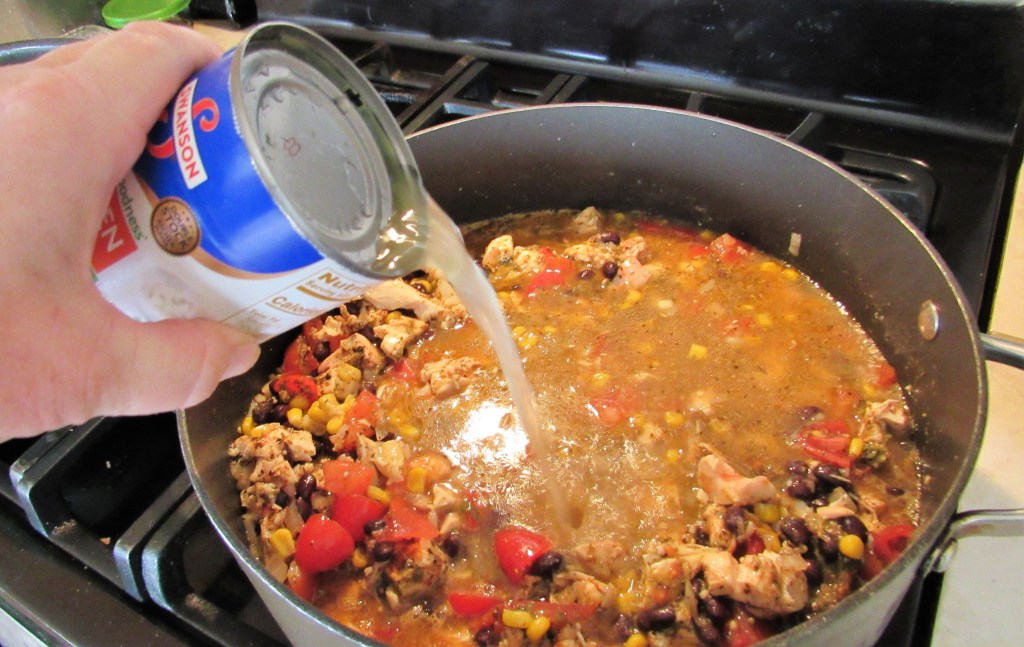
Then add the rest of the ingredients and mix together well.
Bring the soup to a full boil, then reduce the heat to a simmer and continue cooking for about 20-30 minutes, stirring frequently.
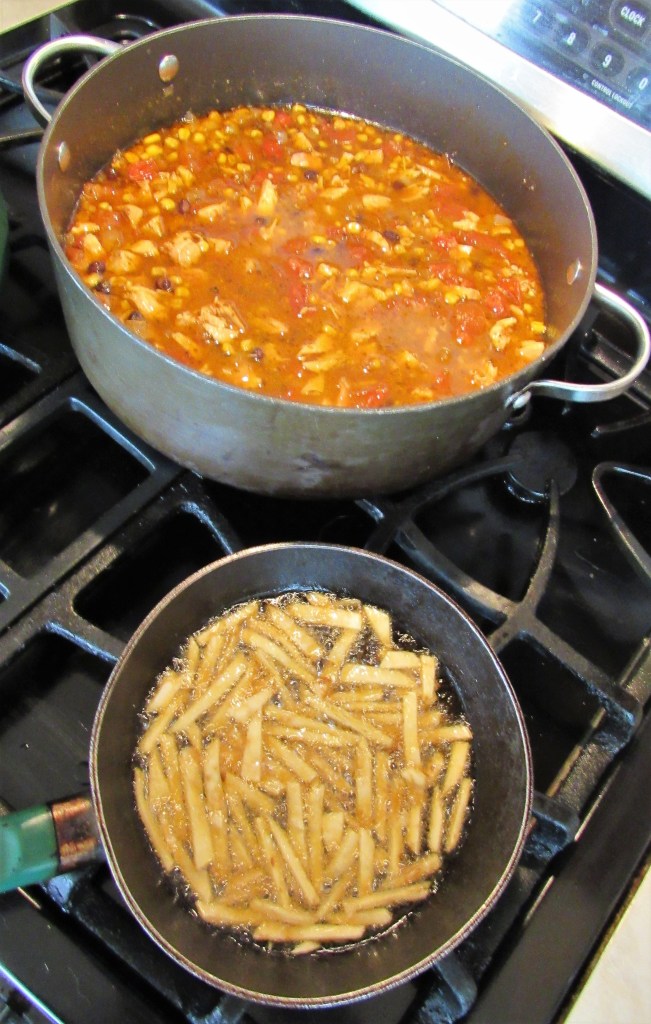
While the soup is cooking, cut a tortilla into thin strips and fry them in just a little bit of hot oil for a few seconds until they are golden brown and crunchy. Remove from the oil immediately and place them on a paper towel to drain. Add salt if you like. Set aside.
When the soup is done, serve it up and top with cheese if you like, some cilantro and the fried tortilla strips. You can eat it all on its own, or serve it up with something else on the side. This spicy soup will warm you up from the inside out on those cold, chilly, snowy days.
!Desfruitas! Stay safe, stay well and stay warm Everyone. ‘Til next time.
Well, even though title of this series is “Nature Walks”, we weren’t really walking anywhere this weekend. We were lucky to even “walk” out into the backyard. We had a little bit of snow. OK! We had a ton of snow. We had about 26 inches of the thick, beautiful, white stuff dumped on us over the weekend. There wasn’t a whole lot we could do except stay indoors. Even the puppy dogs, who are both snow-loving breeds, were having some difficulties in all the snow. But they also still managed to have some fun and to enjoy themselves as well.
Even Nicodemus had to see what was going on with all this fluffy white stuff. She didn’t seem to have nearly as much fun as Vinnie and Juneau were having though.
Once Vinnie and Juneau came back inside, it was time for a good old fashioned game of tug.
Even when buried under two feet + of snow, make the most of it and Carpe Diem! Stay safe, stay well and stay warm Everyone. ‘Til next time.
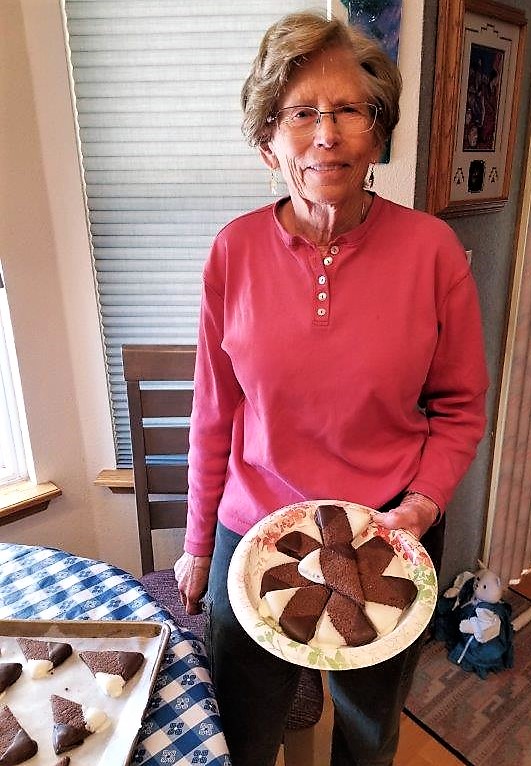
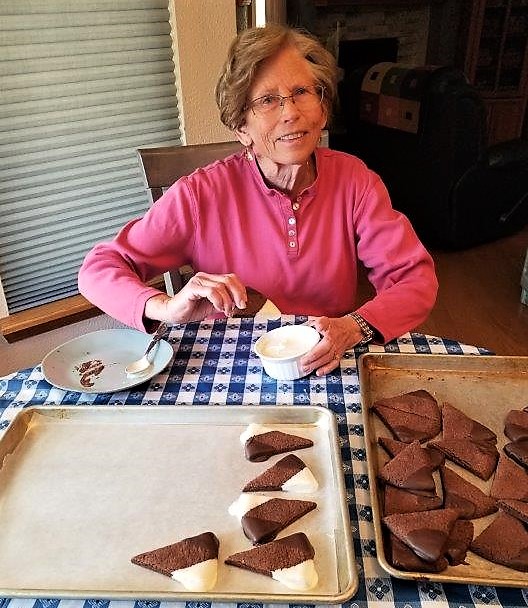
WOW!!!!! We went for quite a stretch without any guest chefs, and now I have two within a week of each other. I LOVE IT!!!!! This time it is my dear friend, Janet Townley, who is my guest chef. You have “met” Janet many times through my blogs. She and I have been great friends for a long, long time. We always have so much fun together, both in and out of the kitchen. Janet is a fantastic cook and loves to “play with her food” just like I do. But as good of a cook as she is in general, her specialty is making cookies. And when she bakes cookies, SHE BAKES COOKIES!!!!!!!
Janet’s cookie recipe that she is sharing with us today is for her chocolate dipped espresso cookies. She always makes these to perfection, but this time, she really outdid herself. They are my favorite cookies that she makes, and I love all kinds of cookies. Janet calls these her “6-hour cookies” because they are labor intensive, so she only makes them on special occasions or for special people. I am always so glad when she does make them, and even more glad when I get some too. They are worth EVERY bite, and I like to eat them nice and slow to savor all the flavors.
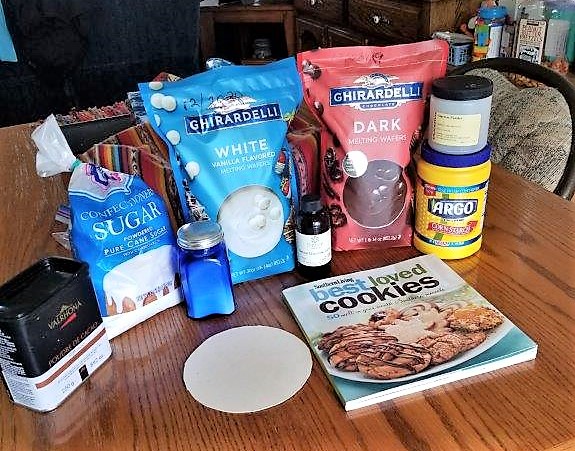
Chocolate Dipped Espresso Cookies
1 1/4 cups flour
1/4 cup cornstarch
1/4 cup unsweetened cocoa powder
1 tsp instant espresso powder or instant coffee
1/4 tsp salt
1 cup unsalted butter, softened (2 sticks)
1 tsp chocolate extract
1 cup powdered sugar
3 (1 oz) chocolate baking squares, melted – Janet likes Ghirardelli the best
3 oz white chocolate, melted – Janet likes Ghirardelli the best
Preheat the oven to 325* F or 170* C.
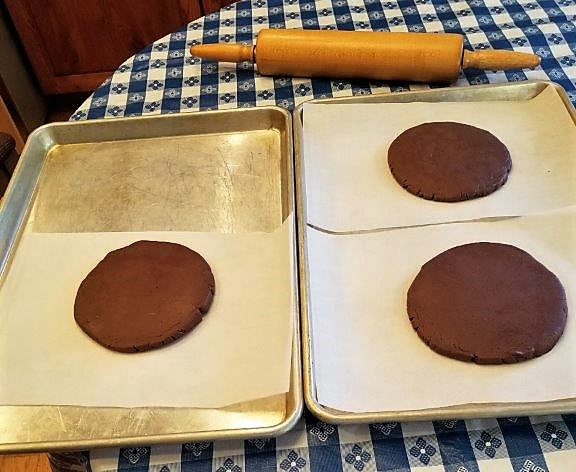
Line your baking sheets with parchment paper.
Make or use a round disk about 5 1/2 inches in diameter to use as your cookie guide.
Combine the dry ingredients together and set aside.
Cream the butter and slowly add the powdered sugar and chocolate extract. Gradually stir in the dry ingredients and mix until everything is just blended. DO NOT overmix. These cookies are supposed to be delicate and light.
Divide the dough into 3 equal portions, to about 6 3/8-6 1/2 oz each. Work with one portion at a time, keeping the unused portions covered in plastic wrap until you are ready to use them. Place the portions on the prepared baking sheets and cut your circles using the guide, into circles of 5 1/2 inches each.
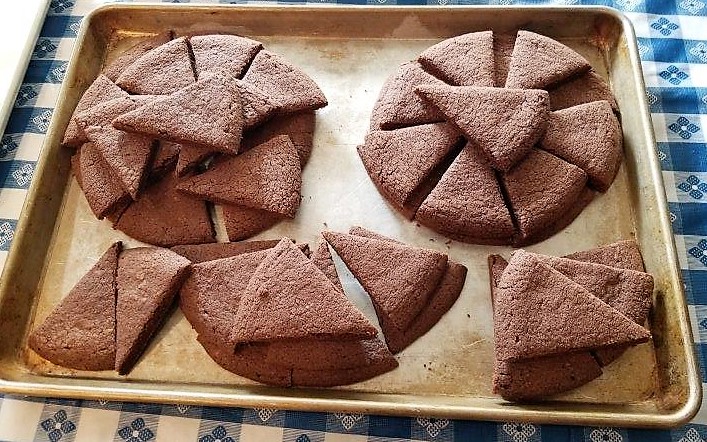
Bake for 20-25 minutes or until the cookies are firm to the touch. Allow the cookies to cool for about 5 minutes, then score them while they are still warm to cut them into wedges. Once the cookies are cut into wedges, allow them to continue to cool completely before dipping the edges in the melted chocolate.
Melt the dark chocolate first then dip one corner of each cookie into the melted chocolate, shaking off the excess chocolate. Place the cookies on a baking sheet lined with parchment paper once again and place the tray in the freezer for a few minutes to set the chocolate.
Once the chocolate is set, repeat with the white chocolate until all the cookies are dipped.
These cookies are light and delicate, but decadently rich at the same time. It is REALLY hard to stop at just one. Thank you so much Janet, for FINALLY sharing this recipe. These are some of my favorite cookies.
Stay safe, stay well, and for those of you under snomageddon watch, stay warm. ‘Til next time.
Today marks the 3rd anniversary of “A Jeanne in the Kitchen”. Can you believe it? Time just flies. It’s hard to believe it has already been 3 years since I first launched “A Jeanne in the Kitchen”! What a long way it has come too. In the past 3 years that “A Jeanne in the Kitchen” has been around, I have posted 1,252 blog posts; I have shown you many different recipes from around the world; introduced you to quite a few new Guest Chefs; I have 8,577 followers and counting, from the 4 corners of the world; I have reviewed many different restaurants and small businesses; and I have shared my life’s adventures and travels with you all. It has been quite the journey, with plenty more still yet to come. I hope you are all still enjoying it all. You just never know what is going to turn up. I guess that means we all have to stay tuned and “don’t touch that dial” to see what’s coming next. 🙂 My blog’s progress and success is because of all of you. So let’s keep this thing going, shall we?! 🙂 Thank you, thank you, thank you!
Paella is one of the most popular and famous of global dishes, but to define exactly what paella contains is almost impossible. There are as many variations of paella as there are cooks, with many claiming that their recipe is the best tasting or most authentic. The origins of the dish, however, are quite humble. Understanding a little of its history will help explain why so many varieties exist. Paella is a classic Spanish dish made with rice, saffron, vegetables, chicken, and seafood all cooked together and served in one pan. Paella was originally farmers’ and farm laborers’ food, cooked by the workers over a wood fire for the lunchtime meal. It was made with rice, plus whatever else was on hand around the rice fields and countryside. Paella was also traditionally eaten straight from the pan in which it was cooked with each person using his own wooden spoon.
Valencia, in Eastern Spain, is the undisputed home of paella. It is one of the largest natural ports in the Mediterranean and has been one of the most important rice-producing areas in Spain since rice was introduced by the Moors over 1200 years ago. In fact, the Spanish word for rice is ‘arroz’, which is derived from Arabic, not Latin like most of Castilian Spanish. It’s a little confusing but ’paella’ or to be more exact ‘la paella’ is the name for cooking pan itself and not the dish. The word comes from old Valencian (in Valencia they have their own language somewhat similar to Catalan) and probably has its roots in the Latin ‘patella’ meaning pan. It has also been suggested that the word ‘paella’, is derived from the Arabic word “Baqiyah”, which means ‘leftovers’ – once again emphasizing both the dish’s humble and Arabic beginnings.
There are however, some other wonderful (if less likely) theories about the origins of the name. The most romantic of them suggests that the dish was first prepared by a lover for his fiancée and that the word is a corruption of ‘para ella’ (meaning ‘for her’ in Spanish). Like all myths there is a small grain of truth in this and although many women still traditionally do the cooking in Spain, making paella is usually left to the men – very much like BBQ’s in both the US and the UK.
Quite a few years ago, a friend of mine who is from Spain, was telling me that her husband was busy making paella, and that it took him all day long to make it. I just don’t understand how it takes so long to make. Paella is a dish very similar to its Creole and Cajun cousin, jambalaya, found here in the southern regions of Texas and Louisiana, and is made from whatever you have on hand rather than fancy, expensive, hard to find ingredients. You literally just throw everything together in one big pot and cook it all up. It’s really pretty easy to make and not that time consuming at all. This is how I learned how to cook. I love these kinds of rustic foods. They are real and from everyday people.
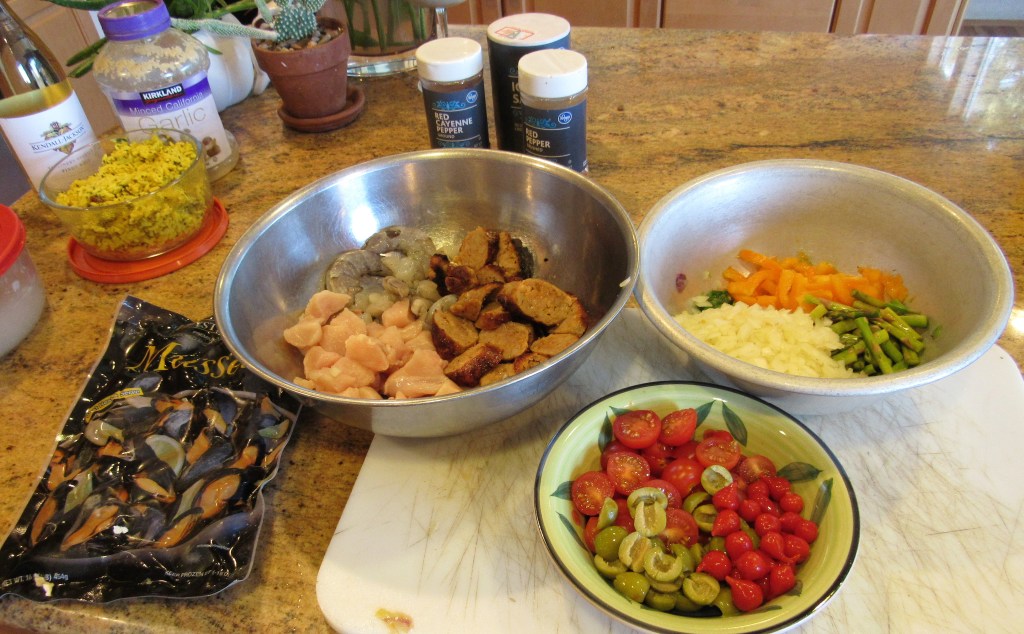
The other day, I had 1 piece of chicken, 2 sausages, just a little shrimp and some mussels, none of which would have been enough for a meal for the two of us on their own, but when I threw them all together with some leftover lemon rice and vegetables, it made a big pot of perfect paella. Grilled Shrimp with an Asian Pesto Sauce
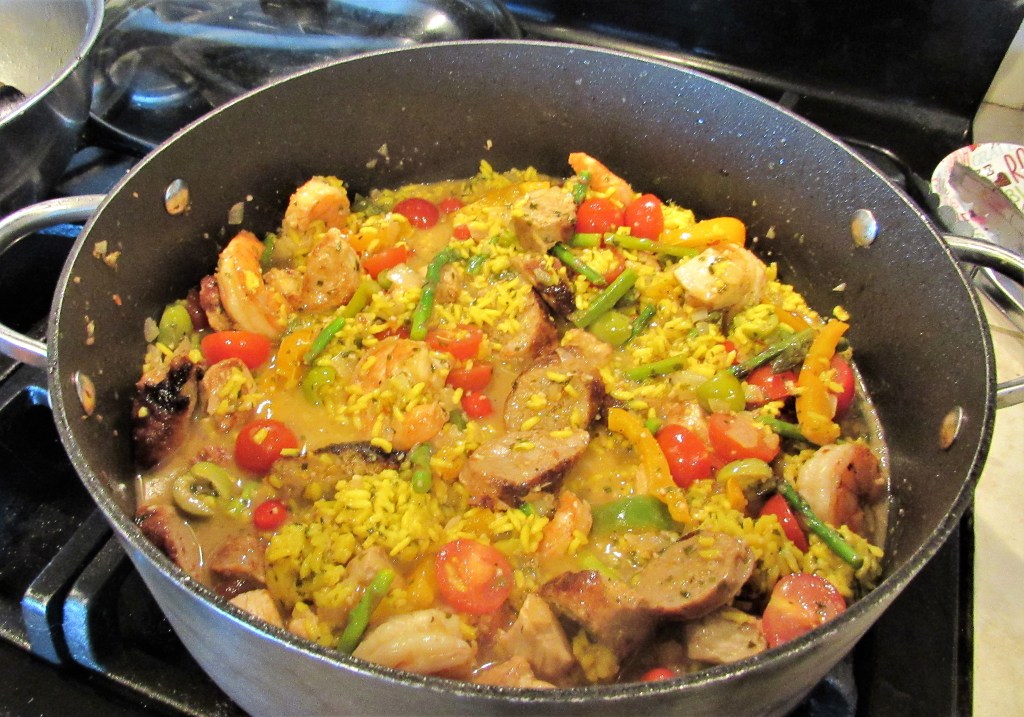
My paella this time around consisted of shrimp, mussels, chicken, sausage, lemon rice, asparagus, bell peppers, olives, tomatoes, Peruvian peppers, garlic, onions, dry white wine, and spices.
I cooked the sausages up first, then sliced them when they were cooled.
Next, I sauteed the peppers, onions, asparagus and garlic in the same pan with olive oil. I cooked the vegetables for about 7 minutes, or until the peppers and onions were soft and translucent, before removing them and setting them aside.
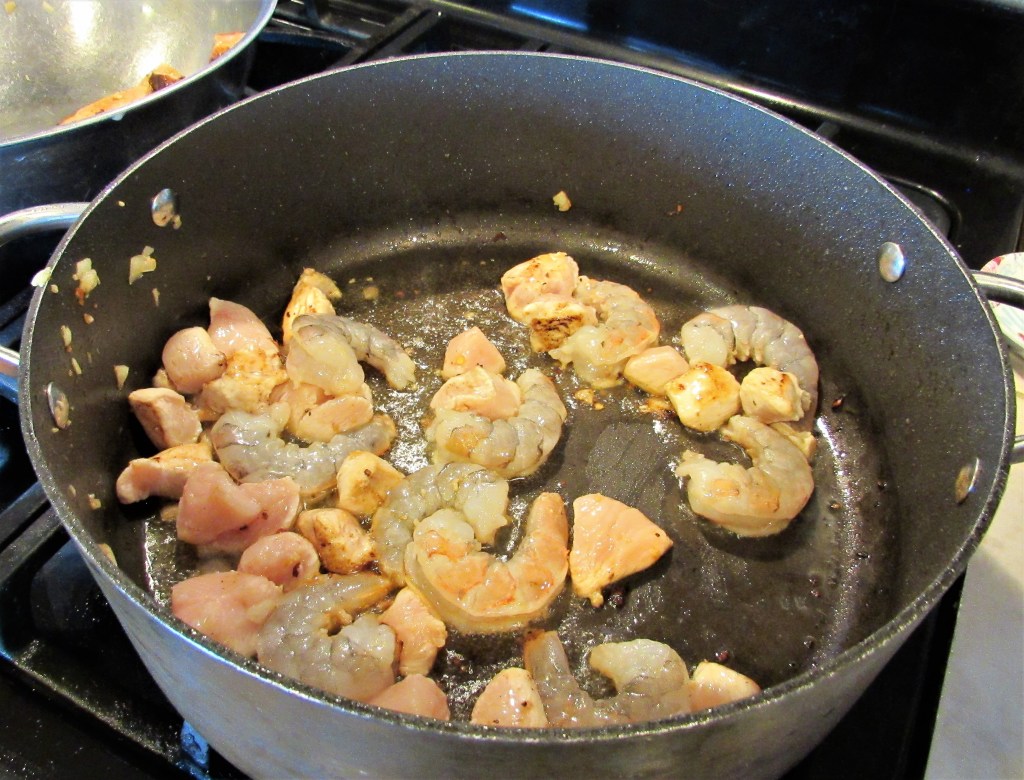
The chicken and shrimp were next.
Once they were cooked, I removed them and added them to the sausage.
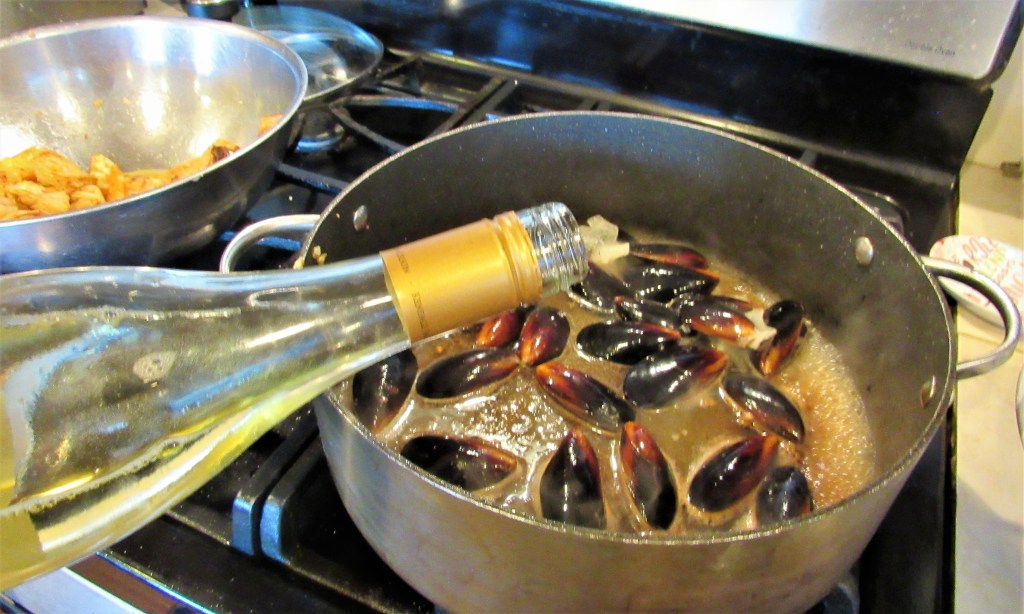
Next, I added the mussels that I poached in the white wine for about 5 minutes or until they were all opened up. The best mussels to use are mussels that are frozen live. Once they open, they are done. If they do not open up, throw them away. They are not good because the mussels have already died.
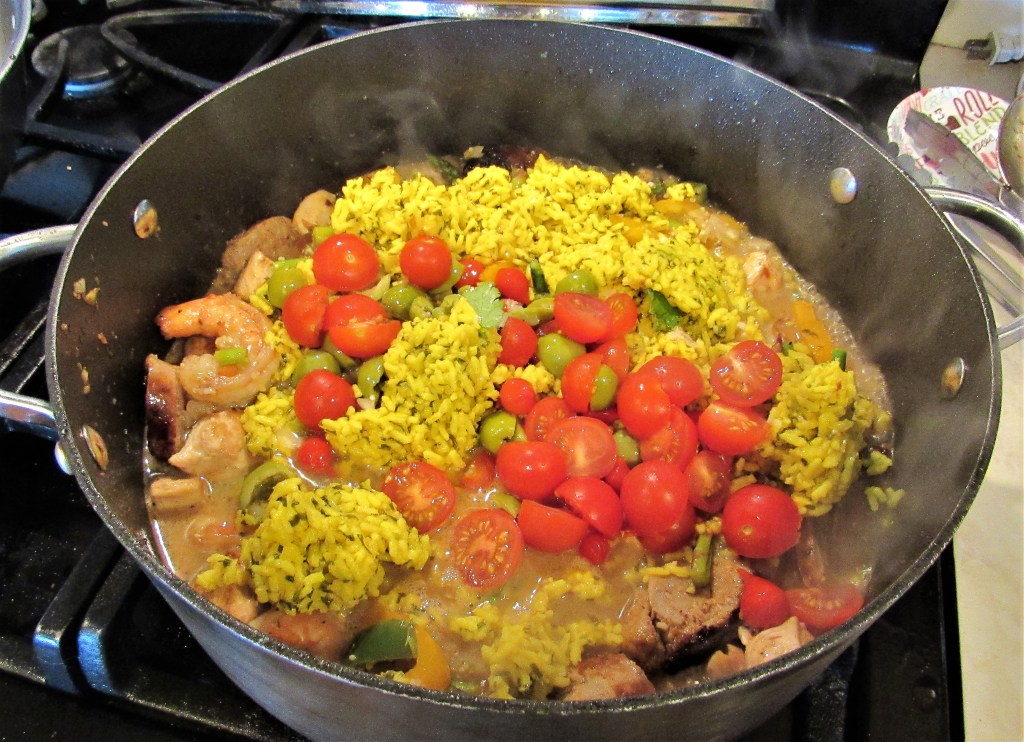
Once the mussels were done, I set them aside separately, and re-added all the other ingredients into the pot. I also added the rice, seasonings, tomatoes, Peruvian peppers, olives and some chicken broth to the mixture and cooked it for an additional 7-10 minutes, stirring frequently.
My rice was already cooked, so I only added about 1 cup of chicken broth to the mixture, and it did not have to cook that long. Otherwise, add the chicken broth and rice at about a 2:1 ration of liquid to rice and cook for about 30 minutes, or until the rice is fully cooked. Don’t add the tomatoes and olives until the end of the cooking process. They are more delicate than the other vegetables, and if they cook longer, they will break down.
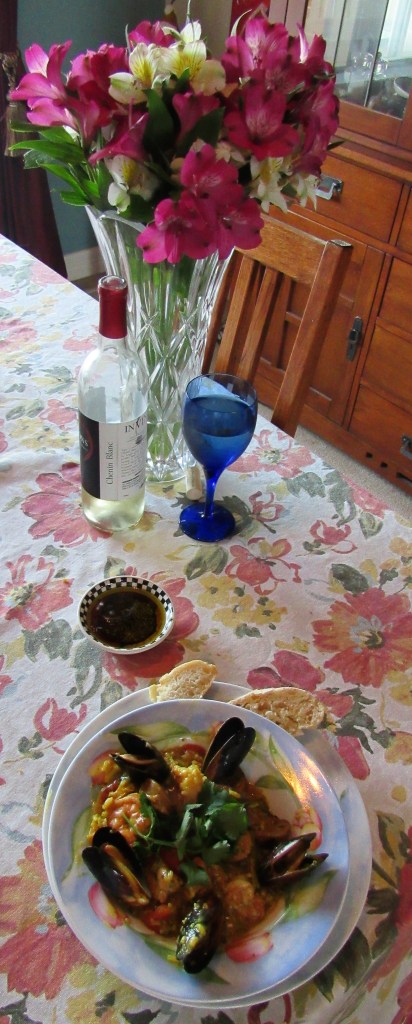
Once everything was done, I added the mussels. They did not need to be cooked any longer and only needed to be re-heated.
I served this simple Spanish rustic meal with some warmed bread and an olive oil dip, and a dry, barrel-aged chenin blanc on the side, just like they would serve it in Spain. !Esta mui fantistico!