I have created this site to help people have fun in the kitchen. I write about enjoying life both in and out of my kitchen. Life is short! Make the most of it and enjoy!
I love the Northern Flickers. Our Flickers like to hang around pretty much year round. almost always see them in the trees, so it was even more of a treat to see one on the ground. I usually see the males too, but this one looks like a female based on her coloring. I saw her on the ground, in the grass first, then she flew up into the tree. The Flickers get their name from their flick, flick, flick song they sing.
Beauty is all around us, even in the most unexpected places. All we have to do is look for it, and we will find it.
It is spring now and spring is the perfect time of year to start making a lot of things with lemons. Though I love lemons, so I tend to use them throughout the year, but definitely more so in the spring and summer months.
It’s no secret that pairing lemons and blueberries together is a match made in heaven. Blueberries and lemons were just meant to be together. Flip through the pages of any cookbook and it’s likely that most recipes featuring blueberries will call for a citrusy addition. Whether it’s a splash of mouth-puckering juice in a jam or ribbons of zesty peel in a pie filling, lemon is the not-so-secret ingredient that makes berry-forward treats taste even better. The tartness of the citrus fruit works to balance the sweetness of the blueberries. It also neutralizes any of their bitterness to better enhance the more subtle flavors. Furthermore, lemons add a freshness that can help cut through the decadence of blueberry confections, making the dynamic duo a must when baking.
My latest lemony treat was some lemon tartlets topped with blueberries. These were a huge hit and disappeared immediately. One minute they were they, the next minute they had all disappeared. 🙂
Lemon Tartlets
Start with the pate sucre or sweet crust first. Then make and fill with the lemon curd. I doubled the recipe to get about 38 individual tartlets.
Pate Sucre
1 2/3 cups flour
1/2 cup powdered sugar
1 tsp salt
1/2 cup or 1 stick cold butter, cubed
1 egg
2-3 TBSP heavy whipping cream
Blend the flour, salt, butter and powdered sugar in a food processor until it resembles coarse sand. You can also use a pastry cutter, or mix it by hand as well. Then add the egg and cream and blend together until it all forms into a ball. Wrap the dough ball in plastic wrap and refrigerate for at least 1/2 hour before using.
Preheat the oven to 325* F or 107*C.
Once the dough is set, cut or roll it into small little balls and firmly press the balls into the tart or tartlet pans. I made little individual tartlets, but you can also make a larger tart with the same recipe and technique.
You can use baking beans if you having them. I usually do not. Instead, I just remove the tartlets when they are almost baked and press them back into shape and place them back in the oven to finish baking. Bake them for about 20-25 minutes, or until they are lightly golden and set. Pop them out of the tartlet pans and allow to cool completely before filling.
Lemon Curd Filling
4 egg yolks
1/2 cup sugar
1/2 cup lemon juice
5 TBSP butter, cut into pieces
1 tsp lemon extract
1 TBSP lemon zest
whipped cream, for topping
blueberries for topping, optional
Combine the egg yolks, lemon juice and the sugar into a heavy saucepan. Whisk together, then place on the stove at a low heat, and whisk continuously for about 5 or so minutes, or until it starts to thicken.
Start adding the butter a little at a time, whisking in between each addition. Continue to cook for about 15 minutes, whisking the whole time. Add the lemon zest and the lemon extract at the end of the cooking process and mix in thoroughly. You should have a nice thick lemon curd.
Add about 1-2 TBSP of filling to each tartlet.
Place the tartlets in the refrigerator for at least 2-3 hours before topping with the whipped cream and blueberries. I also added a few yellow sprinkles to the tartlets to make them really stand out. Place the tartlets back in the refrigerator until ready to serve, then watch them all quickly disappear. 🙂
Have a great day Everyone and make everyday great. Stay safe and stay well. ‘Til next time.
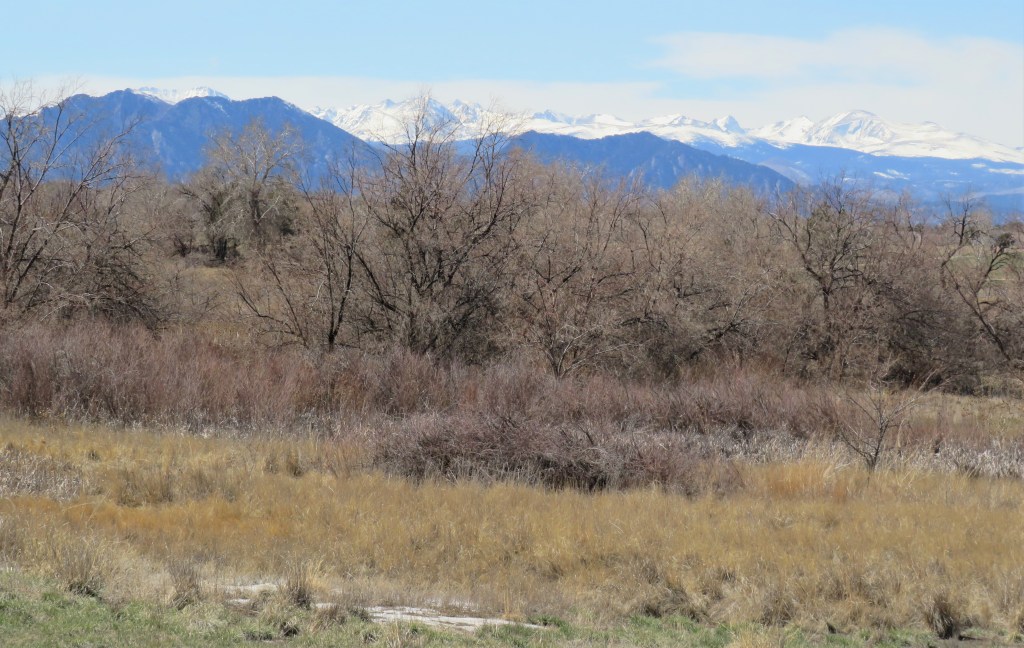
It was such a beautiful day out, so Larry and I took Juneau out for a long walk too. We took her out to the open space behind our house too. She doesn’t get to venture out there too often. But It was just so beautiful, we just felt like taking a longer walk than usual. So glad we did too. 🙂
Yes, this gorgeous view is just a short walk from behind our house.
There were so many feathered and fury friends out too. We saw a coyote out in the distance, but we couldn’t get a good shot of him. He looked like he was thoroughly enjoying himself though. He was even rolling in the grass, just like Juneau does.
The prairie dogs were out enjoying the day,
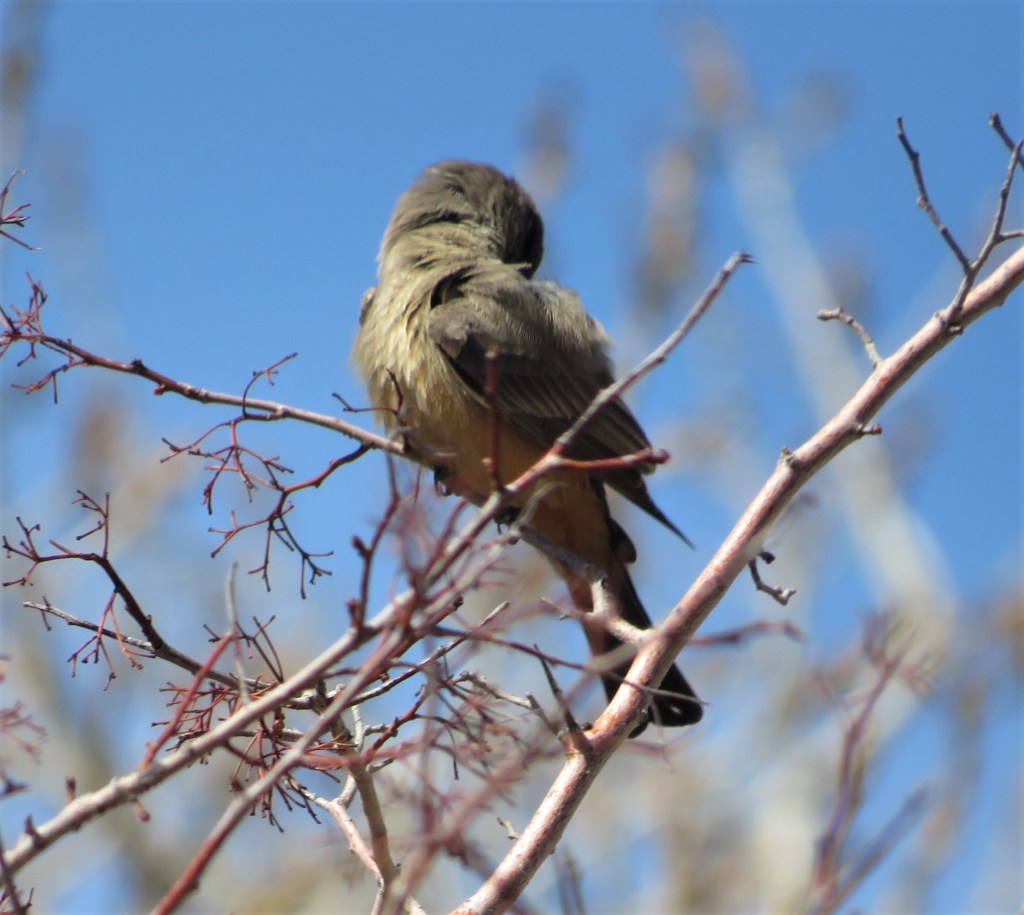
as well as a Says Phoebe.
I even saw an American Kestrel way up high. I love all the birds of prey. I think they are some of my favorite birds. They just seem so majestic to me. Kestrels are small ospreys.
As you can see, it was a gorgeous day, and a lot of our furried and feathered friends were out enjoying the day too.
Gumbo is a type of thick, soupy chowder that is unique to New Orleans and the Creole and Cajun cooking styles of the area. Most gumbos, and Creole and Cajun foods in general, were not originally prepared by chefs, but were instead prepared by good home cooks who wanted to make people happy by serving foods that looked and tasted good. Each recipe is unique and was created with the individual magic of the person who prepared it.
Because every gumbo is unique, and many are family heirlooms passed down from generation to generation, one of the main rules in New Orleans is “not to mess with anybody’s mama’s gumbo recipe. Or if you do, lie about it because the process of preparing a gumbo can lead to arguments, duels and fanciful thinking.” (Kit Wohl, New Orleans Classic Gumbos and Soups)
The basic recipe for successfully making a good gumbo is to start with the Holy Trinity in New Orleans’ cooking, which is onions, green bell peppers, and celery. From there, the only other rules are to use what you have on hand and/or what’s in season, make a good flavorful stock and a roux, then add the meat, chicken or seafood for your flavor profile.” Cooks everywhere borrowed from all around, used what they had and made everything work together”. (Kit Wohl) As you all know, this is most definitely my way of thinking and cooking too.
Creole cooking has roots from many different cultures – Spanish, French, African and Caribbean. All these influences have been blended and crafted together for centuries to perfect what we now know and love as Creole cooking. Cajun cooking is very similar. The saying is that Creole is more upscale and Cajun is the cooking of the bayous and the lower ends of town.
Gumbos are held in the highest regard and are known as the foods of the kings; The Mardi Gras Kings that is.
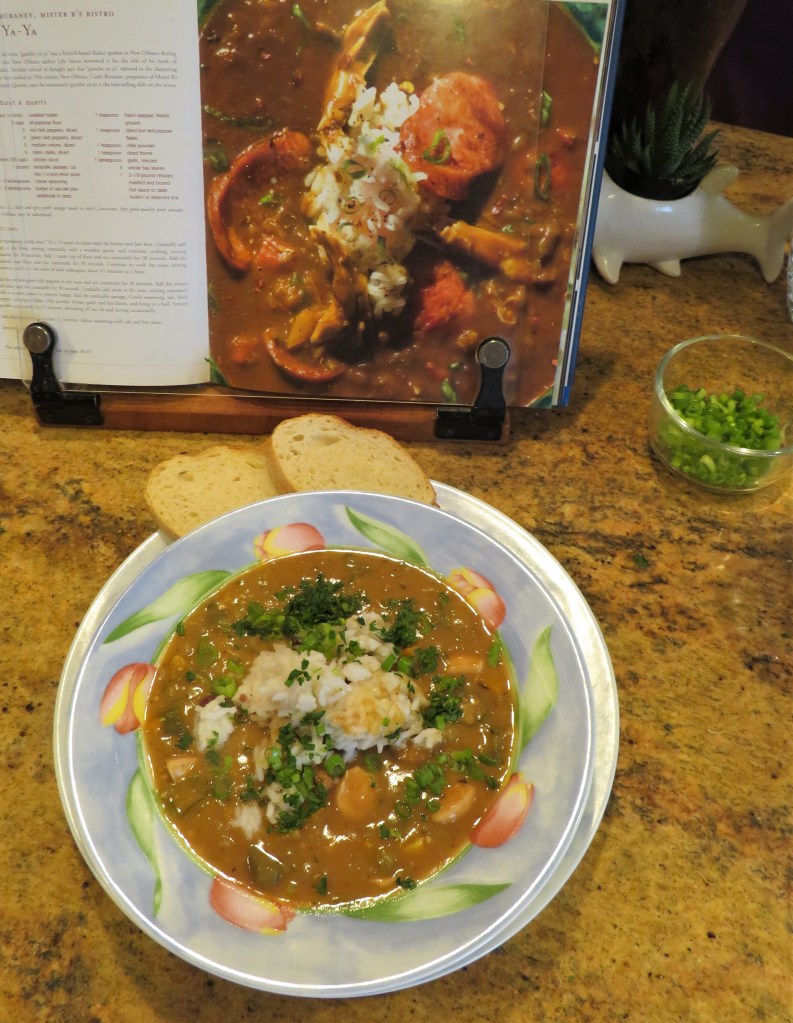
As you can imagine, there is NO one type of gumbo and as mentioned above. EVERYONE seems to have their own recipe that is “the best”. The particular gumbo I made last night is known as Gumbo Ya-Ya, from the recipe of the famous Brennan’sRestaurant in New Orleans. Legend has it that the term “gumbo ya-ya” comes from a French dialect that was spoken in New Orleans during the 1800’s. Other theories say that the term “gumbo ya-ya” referred to all the women’s chatter in the kitchens while they were cooking the meals. Who knows? All I know is that it is delicious. 🙂
Gumbo Ya-Ya
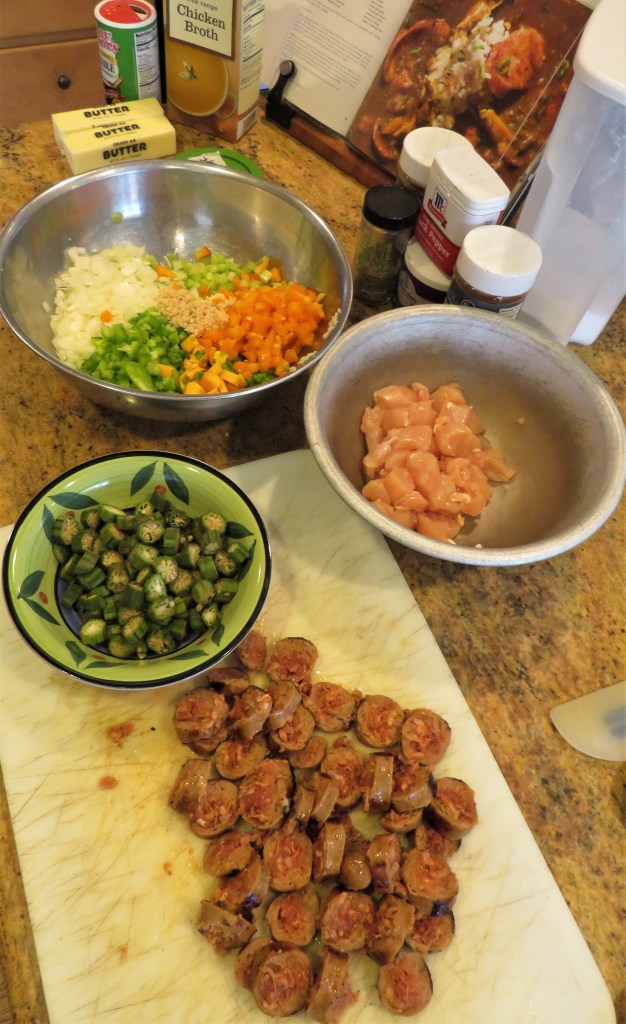
Following the Creole mantra, I did not have any red bell peppers, so I used what I had, which was an orange bell pepper. I also had just a little delicata squash left over, whichIthrew into the pot as well. I also added okra.
2 sticks butter
1 1/2 cups flour
1 red bell or orange bell pepper, diced
1 green bell pepper, diced
1 onion, diced
1 jalapeno, diced
2 celery stalks, diced
1-1 1/2 cups okra, diced
8 cups chicken stock, or more as needed
1/2-3/4 lbs Andouille sausage, sliced
1/2-3/4 lbs chicken, cubed
1 TBSP Creole seasoning
salt & pepper to taste
1 tsp red pepper flakes, or to taste
1 tsp chili powder
1 tsp thyme
1 TBSP garlic
2 BAY LEAVES
Once everything is ready and the mis en place is set, start by cooking the sausage enough to be able to slice. It will finish cooking later. Then make the roux. You can make any color roux you like. The color and cooking time affects the flavor of the gumbo. I cooked my roux to a nice caramel color, which gave the gumbo a nice nutty and warm, earthy taste. Depending on the color and consistency you are looking for, this could take up to about 45 minutes, stirring constantly.
When the roux is to the color and consistency you are looking for, add the vegetables, and cook for about 10 minutes, or until the vegetables are tender and the onions are translucent.
Mix everything together well. Cook the chicken and sausage until done in olive oil while the roux and vegetables are cooking.
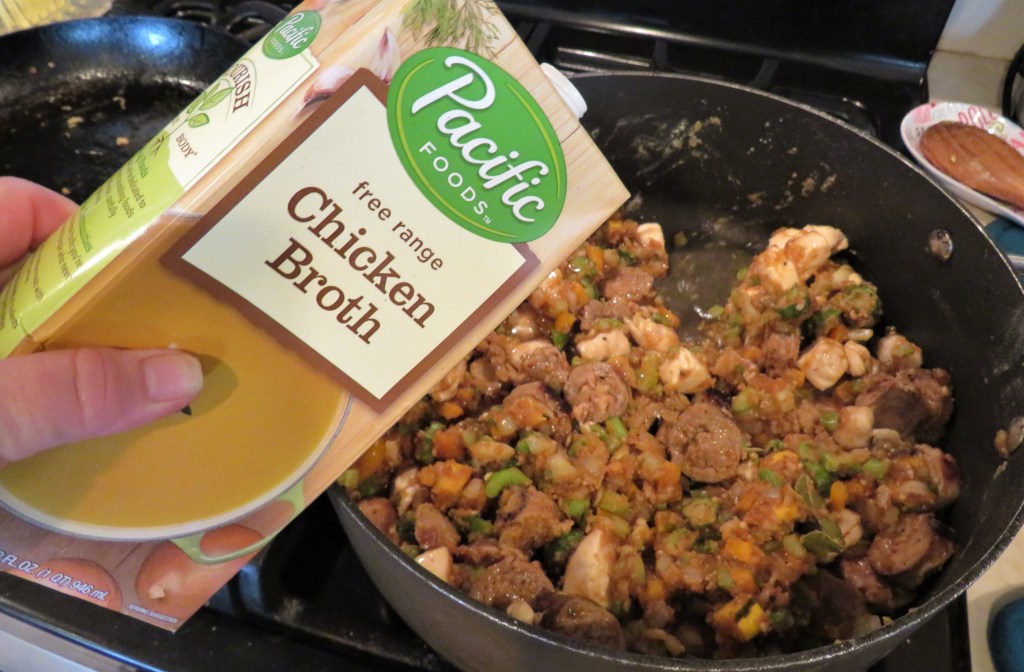
When the chicken and sausage are completely cooked, combine them with the roux and vegetables and mix thoroughly. Then add the chicken stock and seasonings.
Cover and bring to a boil, then reduce the heat and adjust the seasonings as needed, and simmer for about 45 minutes, stirring occasionally and skimming the fat off the top.
I served the gumbo with red beans and rice, and topped it all with fresh parsley and green onions. I served a cool, crisp chardonnay on the side, but you can serve it with whatever you like. Once again, there are NO RULES to this type of cooking! 🙂
Laissez le bontemps roulez! Bon Appetit! Enjoy! Have a great day and make everyday great. Stay safe and stay well. ‘Til next time.
Sometimes its fun to take a break and shake things up a bit. I don’t know about you, but I love to learn new things, no matter how trivial they may seem. In fact, sometimes, it is the trivial things that are the most fun. I will be busy baking in the kitchen later, but for now, I thought I would share some more fun food facts with you once again.
We are always told to eat our vegetables. We’ve all grown up with our parents telling us this. But not all vegetables are the same. Did you know that a lot of vegetables are actually mostly water? It’s true. Cucumbers, iceberg lettuce, celery, bok choy, radishes, zucchini, green bell peppers, and asparagus are all vegetables that are about 95% water.
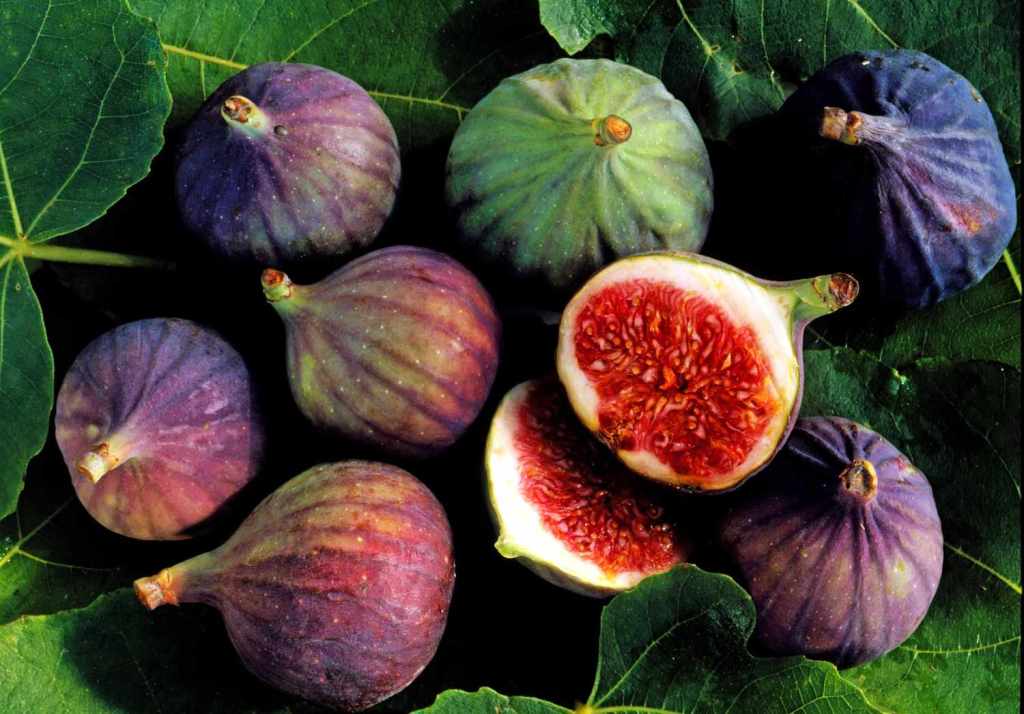
2. Figs. Are they fruit or flowers? Most of us think they are fruit, but they are actually flowers. They are inverted flowers. Fig trees have flowers that bloom inside the pod, which then matures into the fruit we eat.
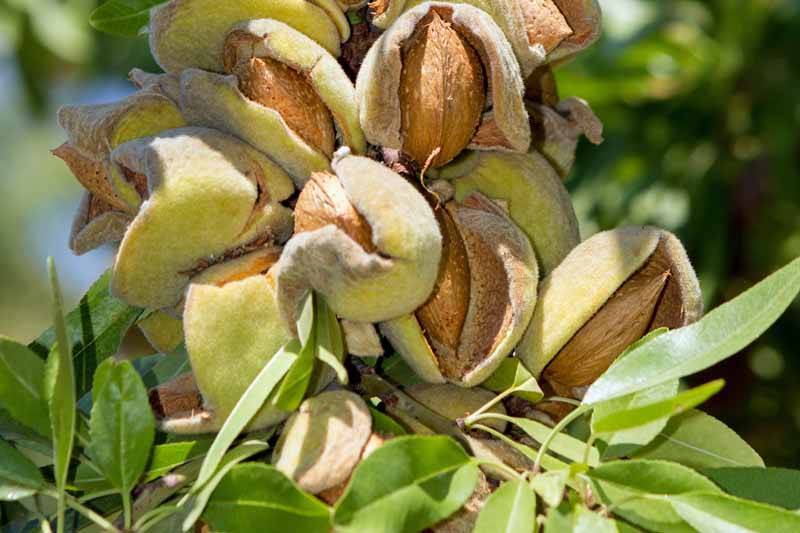
3. Sometimes you feel like a nut, sometimes you don’t. Almonds. We all think of them as nuts, but are they? Nope. They are really the seeds of the almond fruit.
4. Something is “berry” suspicious here. Watermelons and bananas are berries, but strawberries are not. WHAT????? Berries, by definition, are fruits that come from a single ovary with multiple seeds, so bananas and watermelon fall into that category. Berries, as we know them, are actually from the aggregate fruit family, meaning they are a bunch of little fruits all grouped together. Strawberries aren’t technically even fruit, but are fleshy receptacles instead. The “fruit” parts are the little speckles found all over the strawberries that are called achenes.
5. Rhubarb, once again, not a fruit, but is a vegetable because it is actually the stalk of the plant that we eat. If you listen hard enough, you can actually hear the rhubarb grow. As the buds crack open, they makes a sound. Some people say there’s a constant creaking during growing season.
So I hope we all learned something new about the foods we eat. Are you totally confused yet? I know I sure am. I hope you have all enjoyed your fruit and food lesson for the day. 🙂
Have a great day and make everyday great. Step out of your comfort zone and learn something new. It keeps us young and on our toes. Stay safe and stay well. ‘Til next time.
Today when I was out walking, the lakes were pretty quiet. There wasn’t too much going on, even though it was beautiful sunny day, albeit very blustery. But to ,y surprise, there was a new couple on the lakes. We have new ducks. They’re called Gadwalls. There was both a male and a female out hehre swimming in their new territory.
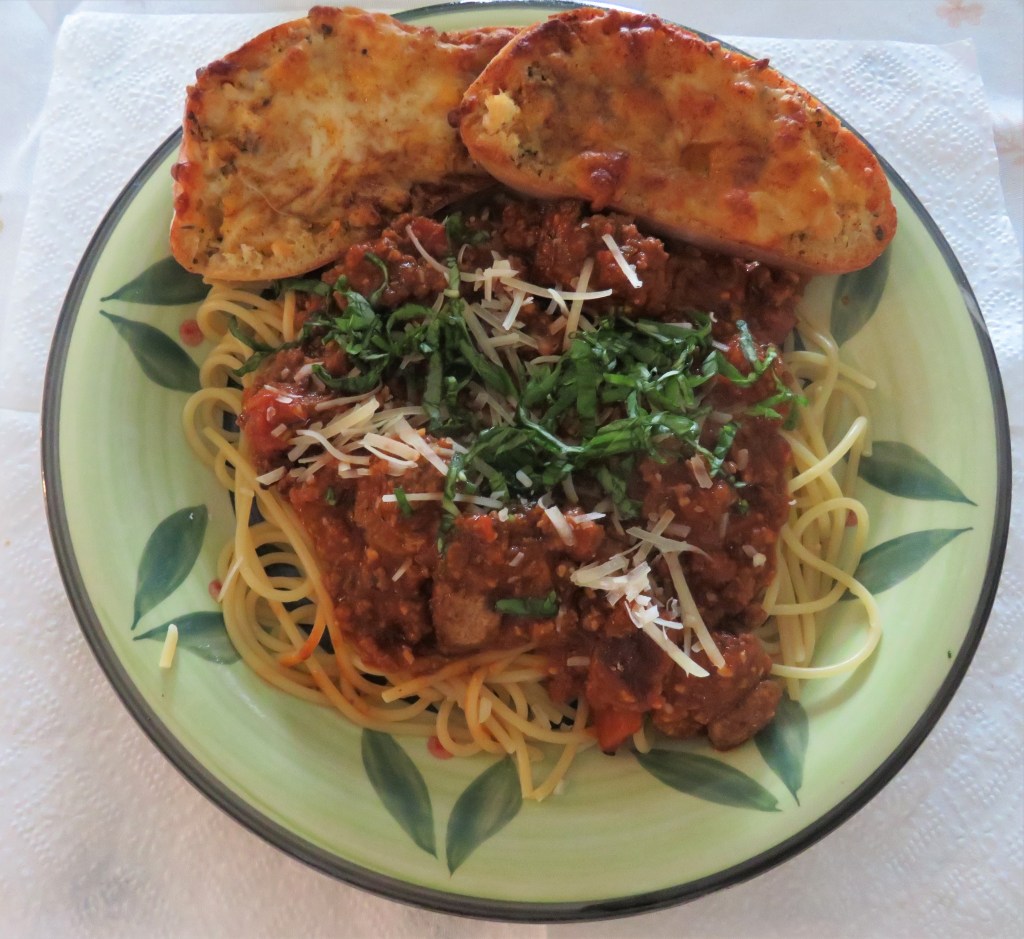
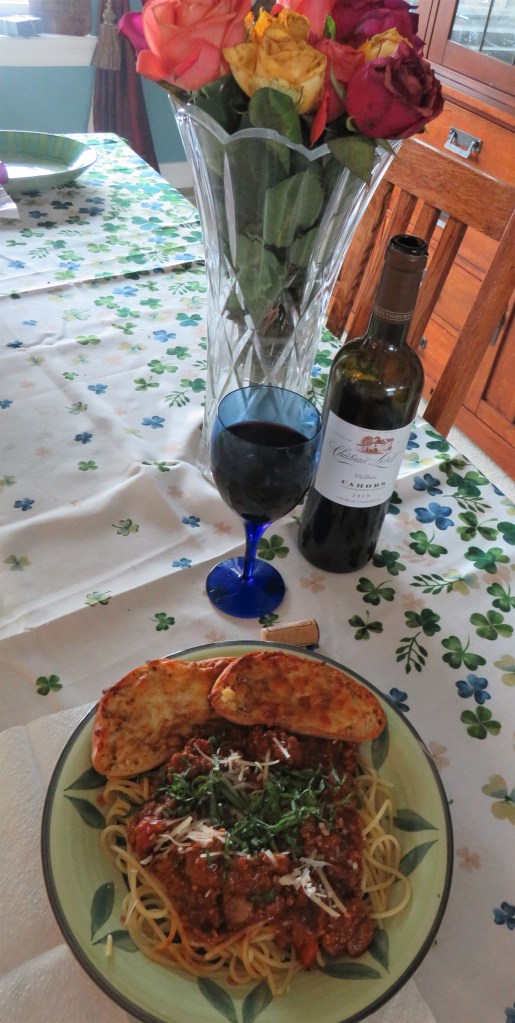
I know it seems like I am always cooking different and exotic foods, but believe it or not, I actually make a lot of just plain, good comfort foods too. With the past week we’ve had, comfort food was exactly what we needed. It was time for just some good old plain spaghetti Bolognese with garlic herbed cheese bread. It just hit the spot.
The name Bolognese means something from Bologna. Bologna boasts some of the country’s best cuisine. Though not considered an authentic Bolognese dish, Spaghetti Bolognese has gained lots of popularity worldwide. This particular dish is craved for and equally appreciated by both locals and foreigners who believe they are eating a typical Italian recipe. That being said, Spaghetti Bolognese isn’t a native Italian dish as most people believe.
Spaghetti Bolognese is very popular all over the world, and not just with Italians. It is the second most popular dish in British (and probably American) homes, and it ranked third most popular with German ex-pats living in Italy.
Originally, what we now know and love as spaghetti Bolognese actually started off as Tagliatelle and a rich ragù. In Italy, ragù is a term used to describe a type of meat sauce that has been cooked for many hours over low heat. Each ragù boasts numerous ingredients, which varies from region to region. In fact, “alla bolognese” is only one of the many different ragùs prepared in Italy. The original recipe has both French and Italian roots dating back to the 18th century.
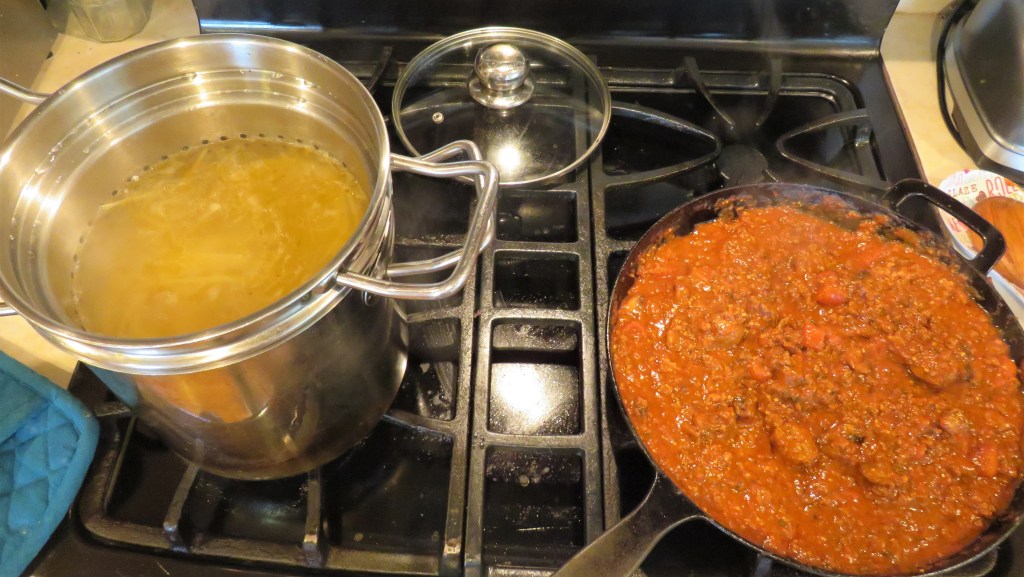
Larry and I both like our Bolognese sauce rich, thick and very meaty. I admit, I cheat and actually buy jarred pasta sauce, but I doctor it up with more tomatoes, garlic and herbs and a little red wine to make it just right. I load it up with lots of ground beef and hot Italian sausage, as well as lots of sliced mushrooms too. When it’s ready, I dish it up over some spaghetti. Larry adds Parmigiano cheese to his too. I almost always serve it with my garlic-herbed cheese bread. Sometimes I don’t know if Larry likes the bread or the spaghetti more. But they make the perfect paring.
And since this is a rich, hearty, red sauce with a lot of meat, I always serve it with red wine too. This time it was a fruit forward, full-bodied Malbec.
!Mangia! !Buon Appetito! Enjoy.
Sometimes we all need some comforting, and that includes our comfort foods too.
Have a great day and make everyday great. Stay safe and stay well. ‘Til next time.
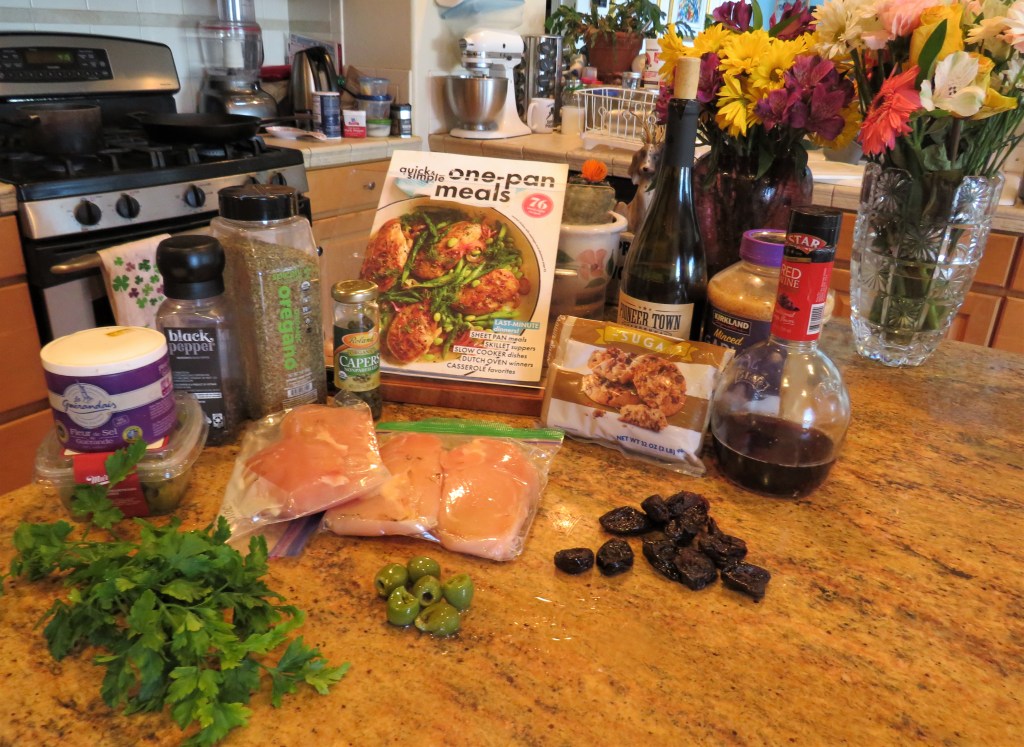
Marbella is a beautiful coastal area in Southern Spain, in the Costa del Sol region, so you would think with a name like Chicken Marbella, this dish would be a Spanish recipe. Nope. It is actually a Jewish-American dish invented on Manhattan’s Upper West Side in the late 1970s, though it was inspired by Spanish and North African cuisines. This delicious dish was introduced to us by Julee Rosso and Sheila Lukins, co authors of The Silver Palate Cookbook. Ms. Lukins said it was a family meal often served at Shabbat and Jewish holiday dinners, that later became very popular with her catering clients.
Chicken Marbella is a combination of olives, capers, prunes, oregano, garlic, red wine vinegar, brown sugar and white wine. And, while not intended specifically as a Jewish holiday recipe, it fits the bill perfectly and has been a stalwart in Ms. Lukins’ family for decades. The Mediterranean inspirations are deeply felt, the agrodolce of the Italian kitchen is stacked deep in this dish and yet it all feels like the sweet and sour flavors of your bubbe’s kitchen.
I find or create recipes first, then learn about their history after. I LOVE doing that. To me, it makes the dish all that more enticing once I learn about it’s history and background. 🙂 This recipe just sounded really good so I had to make it. And guess what?! It is really good!!!! I will most definitely be making this dish again, and again. 🙂
Chicken Marbella
1 1/2 – 2 lbs chicken
2 TBSP brown sugar
1 1/2 tsp oregano
3 TBSP red wine vinegar
1/2 cup dry white wine
1 TBSP garlic
1 TBSP capers
1/2 cup pitted prunes
1/2 cup green olives, cut in half
1/4 cup fresh parsley, chopped
I used chicken breasts, but you can use any parts of the chicken you like. You can slow cook this recipe or you can do a quicker version, on top of the stove. I did the latter version, and cooked it all on the stove top. It took about 20 minutes vs 4-5 hours in the slow cooker. I am giving you the stove top recipe.
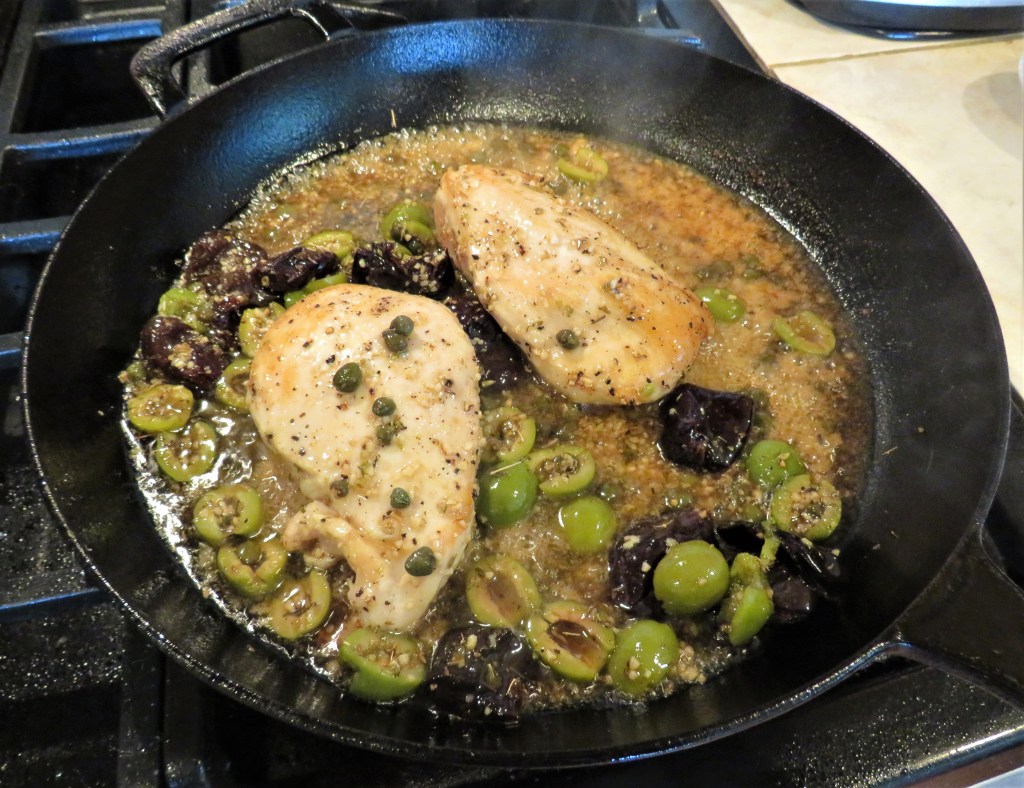
Pat the chicken dry with a paper towel, then season both sides with coarse salt and fresh ground pepper. Brown both sides in a very hot skillet with a combination of olive oil and butter. Cook the chicken for about 3 minutes per side until it is browned. Then remove and set aside.
As the chicken was cooking, I combined all the rest of the ingredients together, except for the parsley.
In the same skillet, add the olive and prune mixture and bring to a boil. Reduce the heat to a medium heat and cook for about 5-7 minutes. Then re-add the chicken and continue to cook for an additional 7-10 minutes, or until the chicken is completely cooked.
Add the chopped parsley right before serving. I served this over cooked orzo, with some sauteed delicata squash, mushrooms and broccoli rabe on the side, with some warmed ciabatta and and more of the same white wine I used in the mix to complete the meal.
The flavors of the olives, capers and prunes just harmonized together perfctly. It was sweet and slightly sour and tangy all at the same time. Delicious!!!!! I will most definitely be making this dish again and again.
Have a great day and make everyday great. Stay safe and stay well. ‘Til next time.
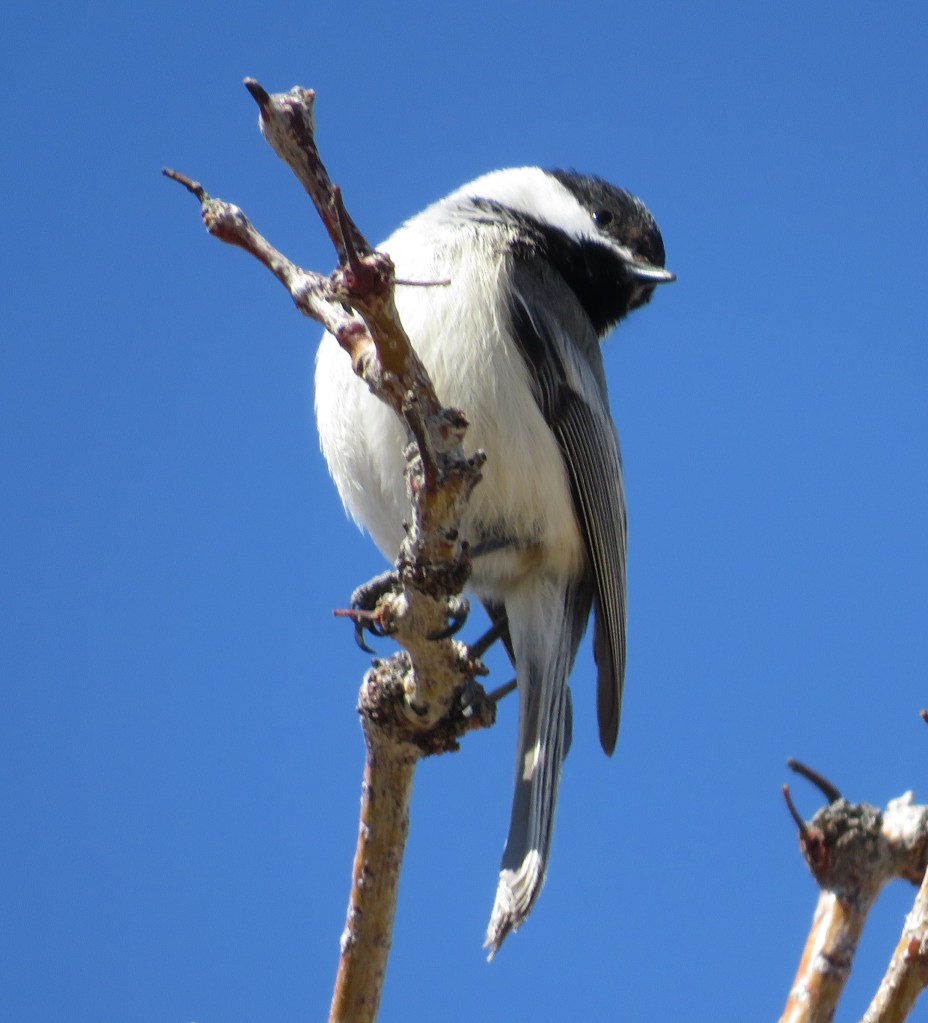
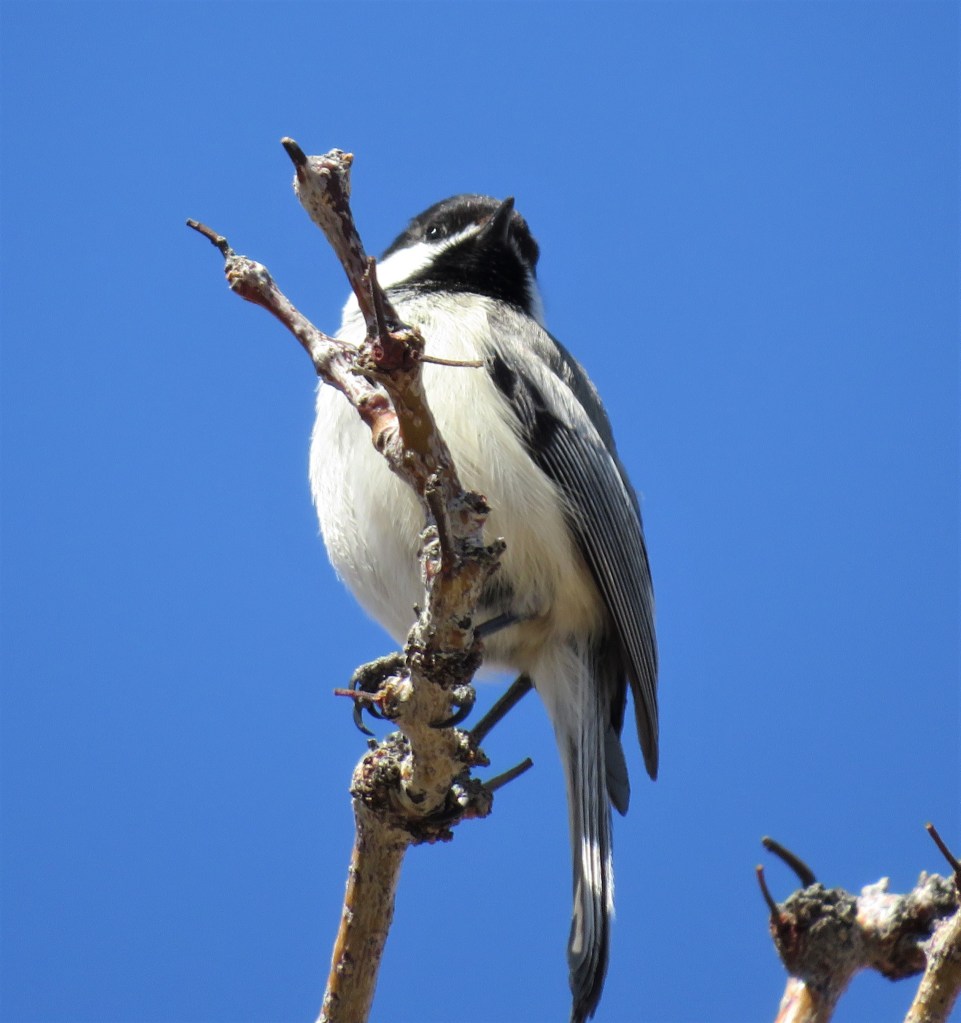
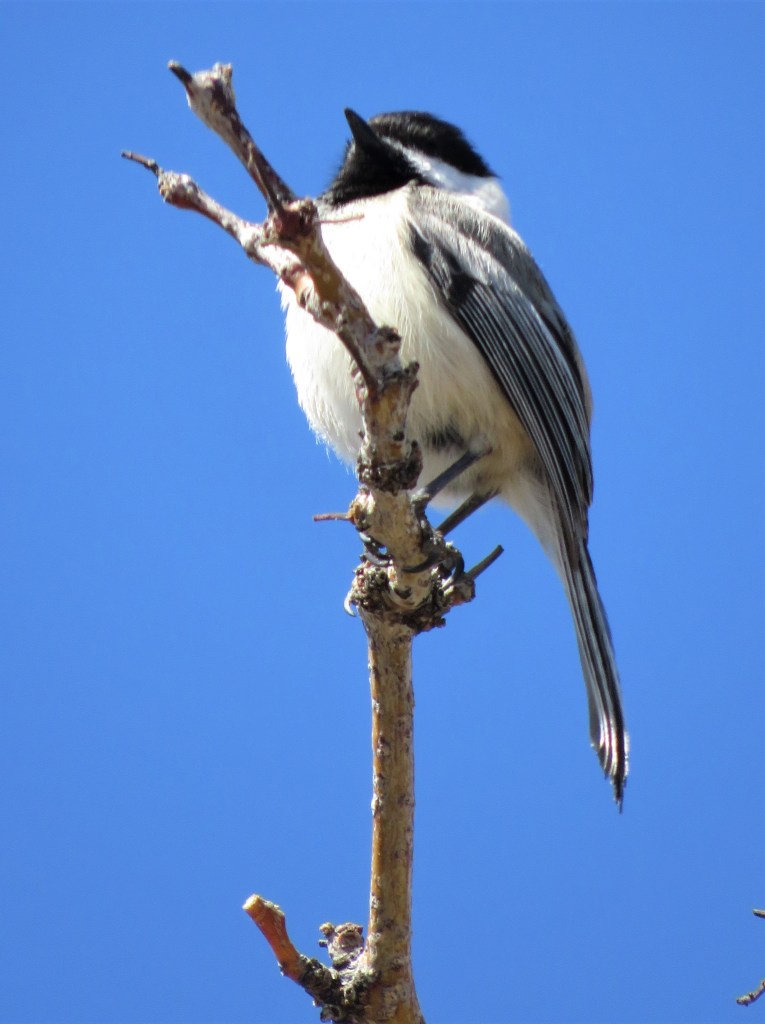
WHOOOOOO HOOOOOOO!!!!!!! Success at last. I FINALLY have been able to get some very good shots of the little Black-Capped Chickadee! They have been so elusive and hard to capture for quite some time. But today, I got very lucky!!!!
Colorado has two types of Chickadees native to our lands. The Mountain Chickadee and the Black-Capped Chickadee. The Black-Capped Chickadees like the lower elevations, so these are the ones we have around us. We are at 5,420 feet above sea level, but many of our mountainous areas are well over 14,000 feet above sea level. They also like to be around people and prefer the hustle and bustle of the more urban areas, rather than the quiet solitude of being in the woods, like their cousins, the Mountain Chickadees. They are usually around from January – summer. They get their name because of their scratchy chick-a-dee-dee-dee song.
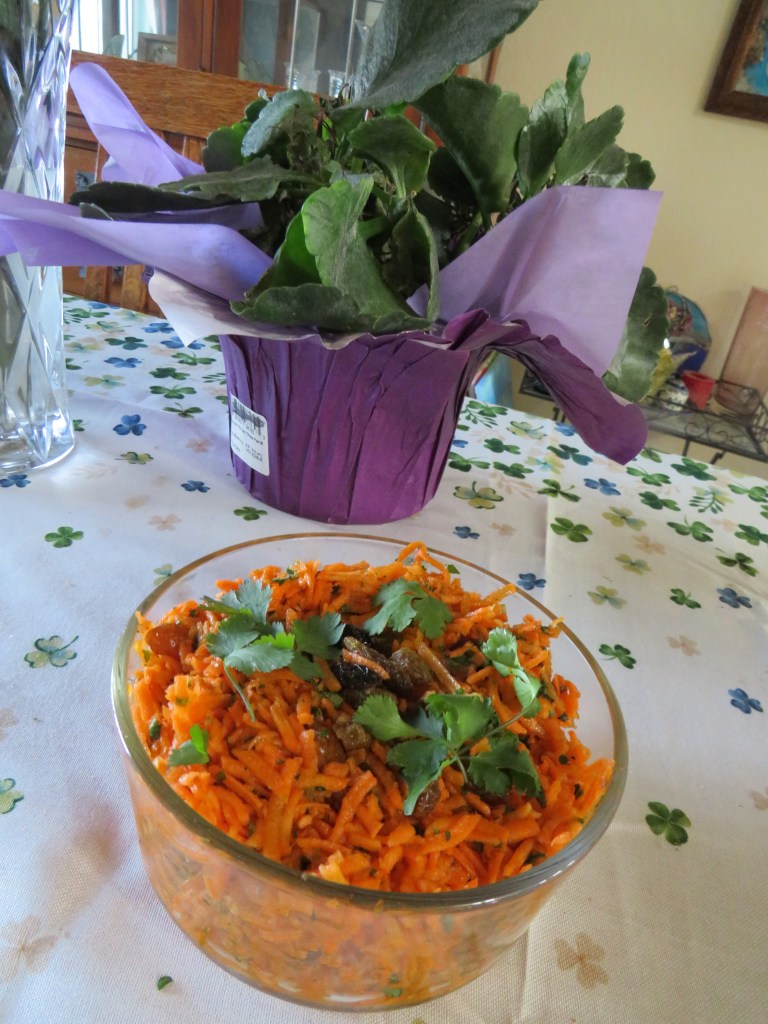
Here is the last bit of my Tunisian Tastes series (for now) :). It is for another side dish, a carrot and cumin salad.
Cumin is one of the most popular, heavily used and oldest spices in the world. It is also one of the most used spices in all of Middle Eastern foods. Cumin is used predominantly in Mexican, North African, Indian, and Mediterranean foods. Cumin is a strong highly fragrant savory spice that is used for all kinds of dishes. It is the perfect ingredient when you want to add warmth and earthiness to a wide variety of dishes and recipes. It is good for spicing up all kinds of vegetables, meats, potatoes, lentils, beans, dates, and just about anything else you can think of. Cumin adds a nutty warmth, pepperiness and smokiness to whatever recipes it is in. Cumin is also used in making garam masala and curries, which allows them to carry more heat.
Carrot and Cumin Salad
3 cups peeled shredded carrots
1/2 cup golden raisins
1/2 tsp salt
1/2 tsp ground black pepper
2 TBSP olive oil
1-2 TBSP lemon olive oil, optional
1-2 TBSP lemon balsamic vinegar, optional
1 tsp cumin
1/4 cup fresh chopped cilantro
Mix everything together and chill or serve at room temperature. I personally like this salad more at room temperature because I find it brings the warmth of the flavors together and makes them really pop.
This is a simple salad that has a lot of bold flavors. It is a good side dish for just about anything you would like to serve it with. it goes well with everything.
Have a great day and make everyday great. Stay safe and stay well. ‘Til next time.