A Trip to Jerusalem

The other day, after wining with Janet, Bob, Mike and Lauren, we took a trip to Jerusalem – the restaurant in Denver that is. I wish we were really going to Jerusalem, but that will just have to wait for another time, although Janet and Bob will be going for real in March. I can’t wait to hear all about their fun adventures.

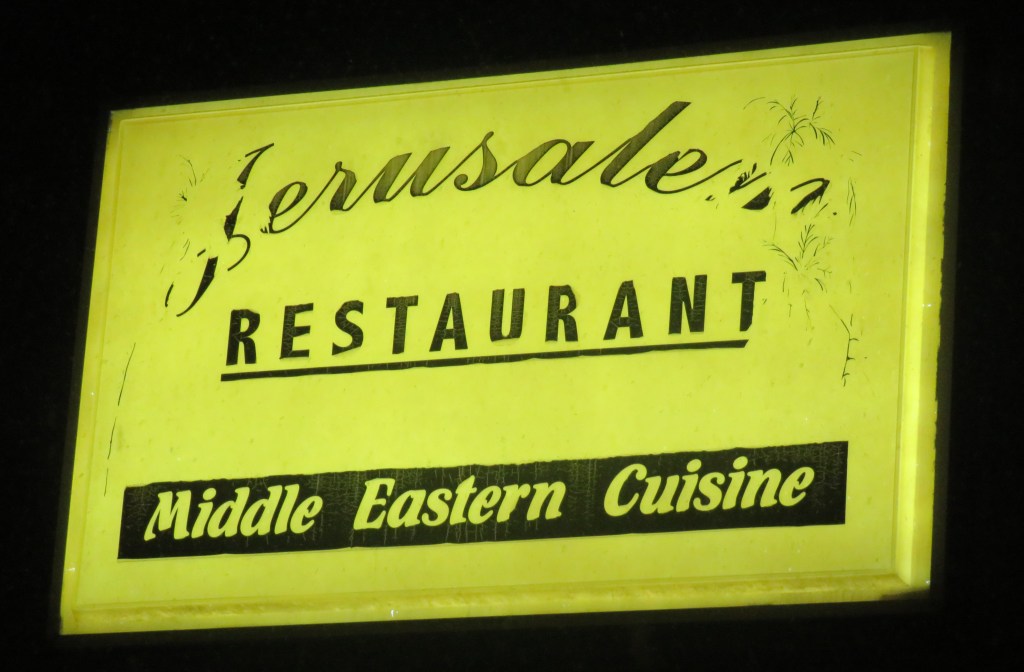
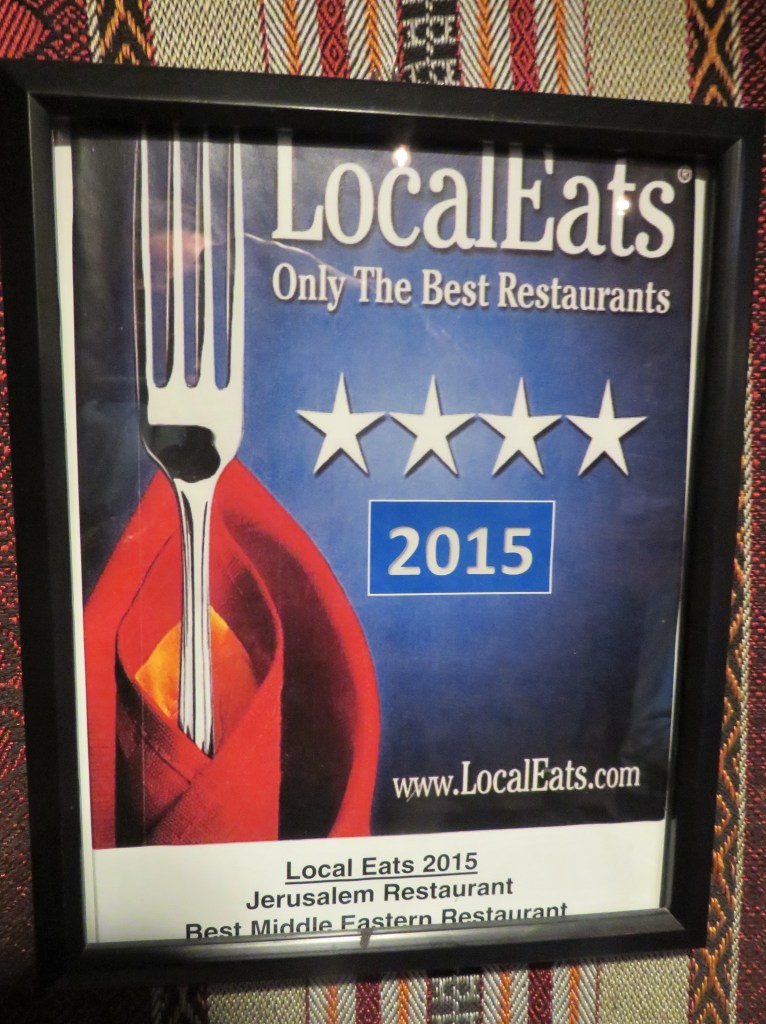
Jerusalem is a Middle Eastern restaurant centrally located in Denver. Jerusalem Restaurant is a family-owned business that has been serving authentic Mediterranean and Middle Eastern cuisine in Denver for over three decades. Jerusalem Restaurant is acclaimed for their authentic Mediterranean/Middle Eastern cuisine, warm hospitality and lively ambiance.

Jerusalem Restaurant provides traditional recipes that contain robust flavors of the Mediterranean region prepared with the freshest ingredients obtained locally.

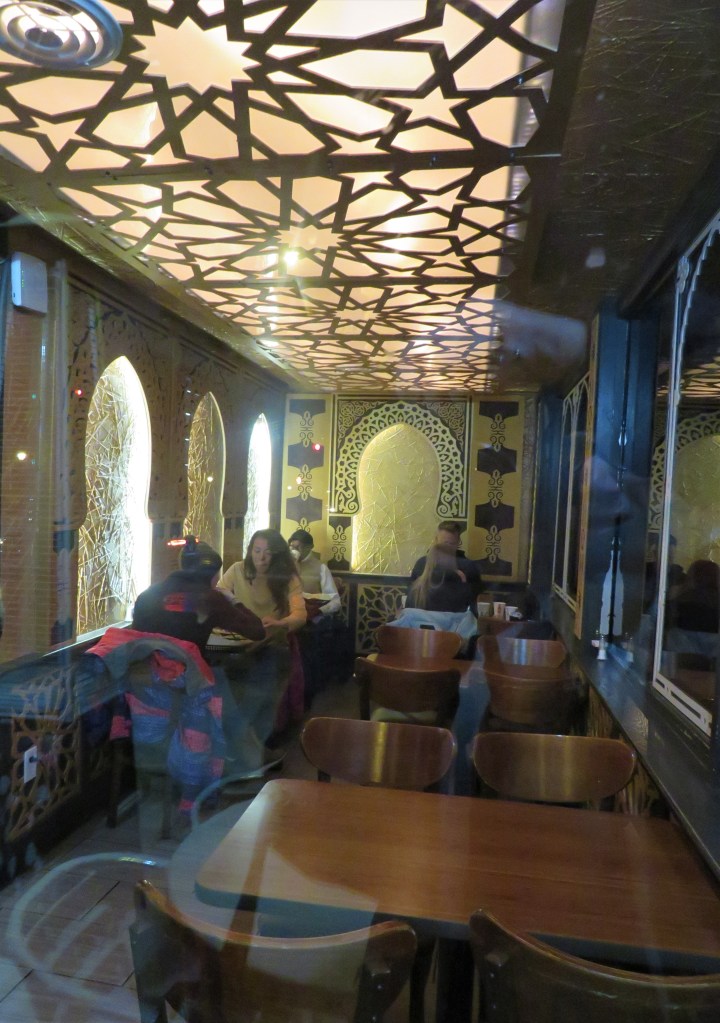
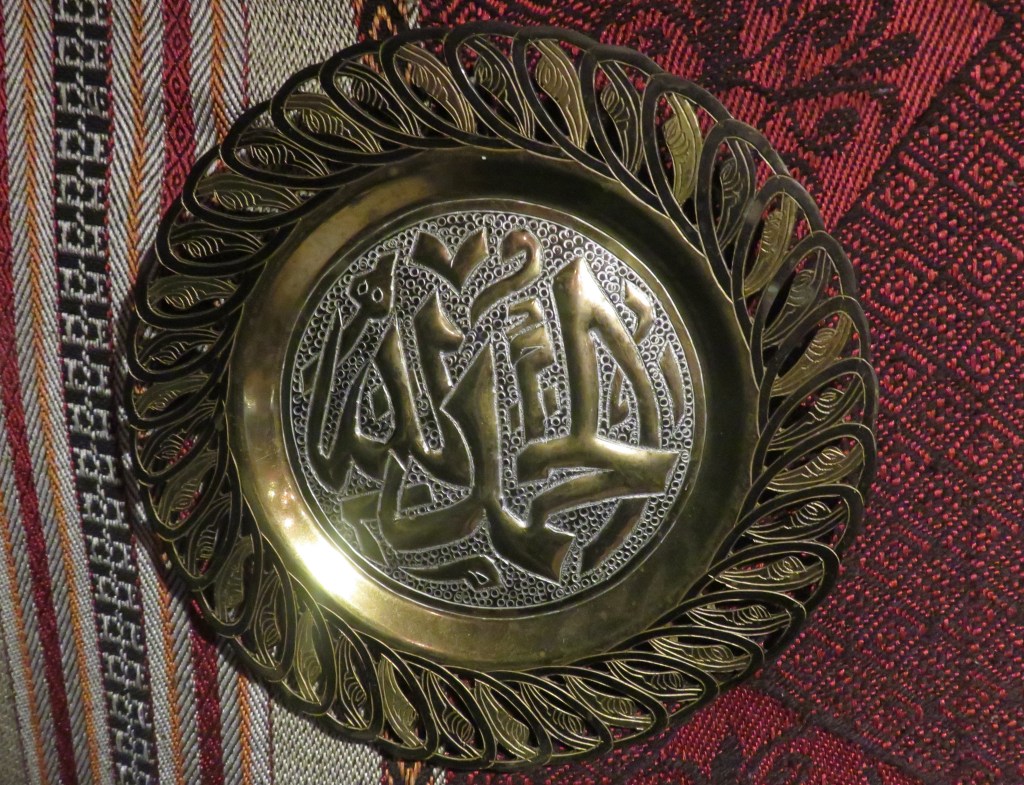
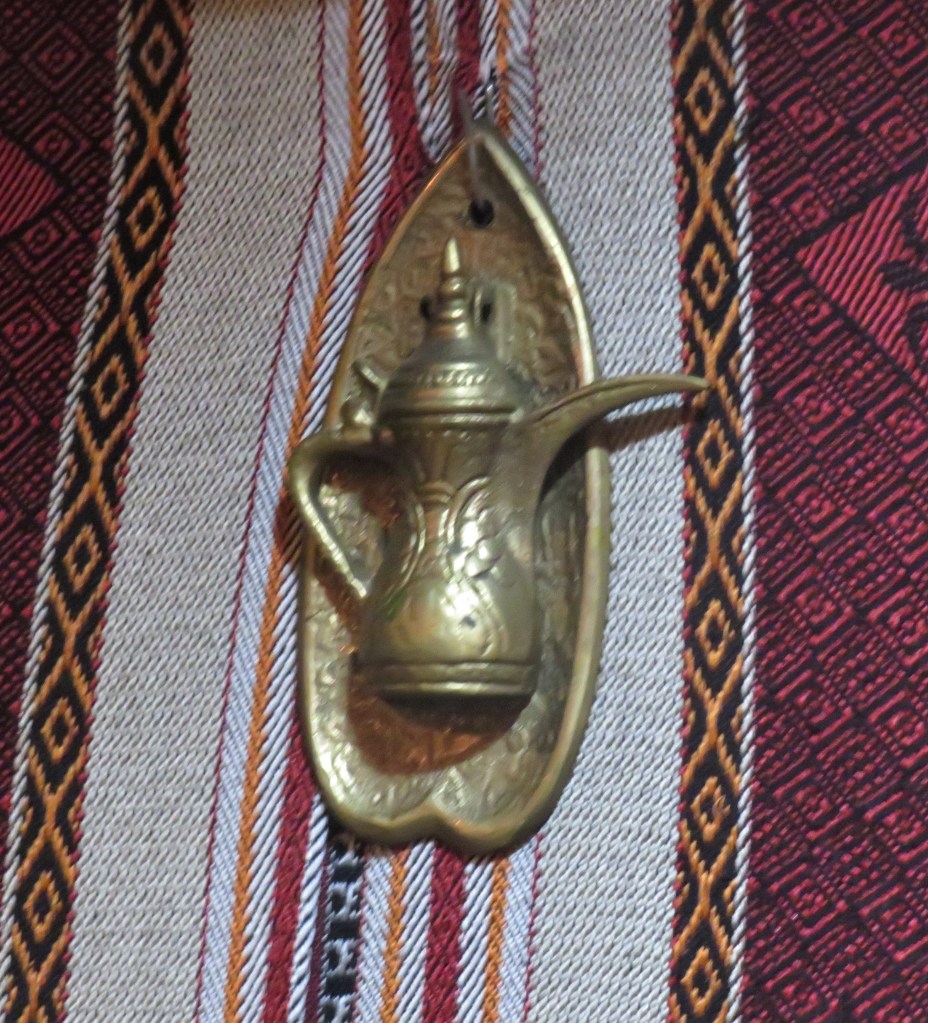
We dined upstairs. The walls were decorated with tent-like materials and was authentic Middle Eastern design. Normally that would have been very charming, however, it was bitter cold outside, and unfortunately, we were all freezing, but that is no reflection upon the restaurant itself. Jerusalem has no control over the weather or Mother Nature. The food was delicious and despite the weather, we all had a good time.

We ordered a variety of things and we all sampled everything. We started off with some hummus and pita bread. The hummus was so smooth and creamy.

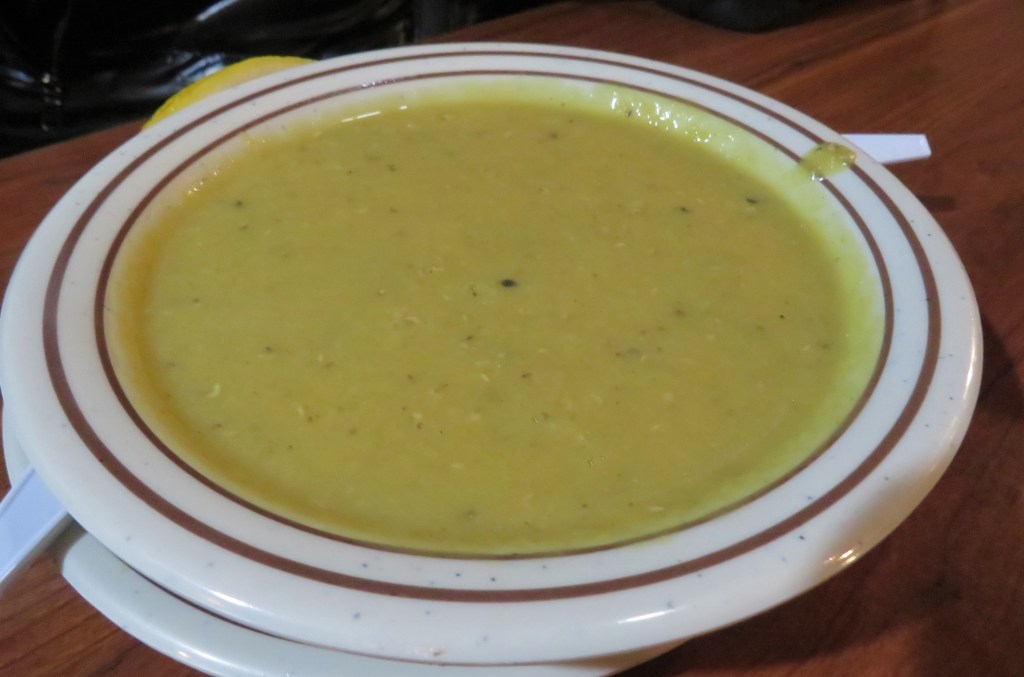
Mike and Lauren started off with a bowl of lentil soup.

We also ordered a couple of plates of sambusa that were deep-fried potato and spice pockets. They just melted in our mouths.

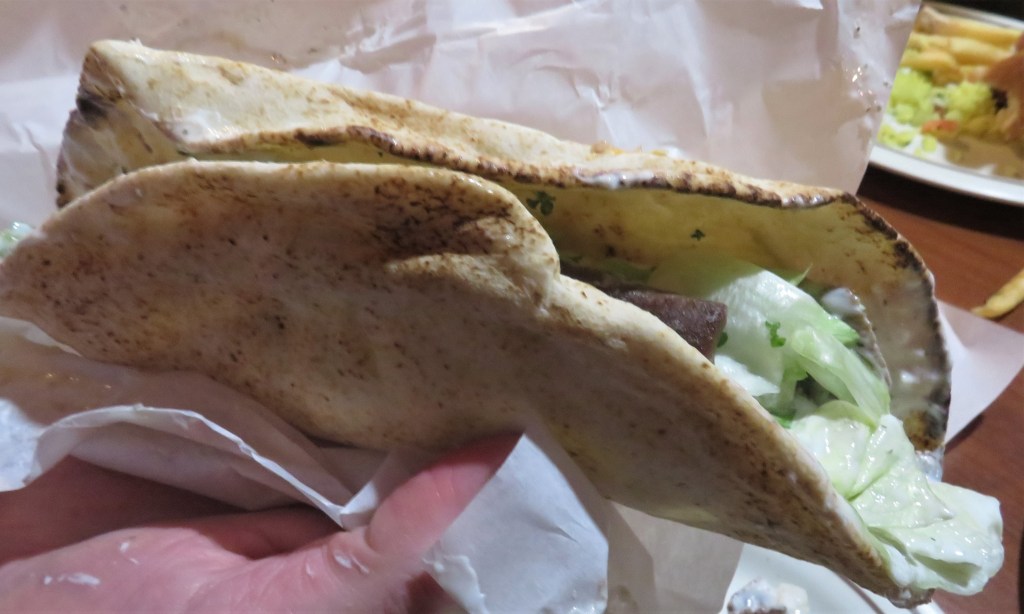
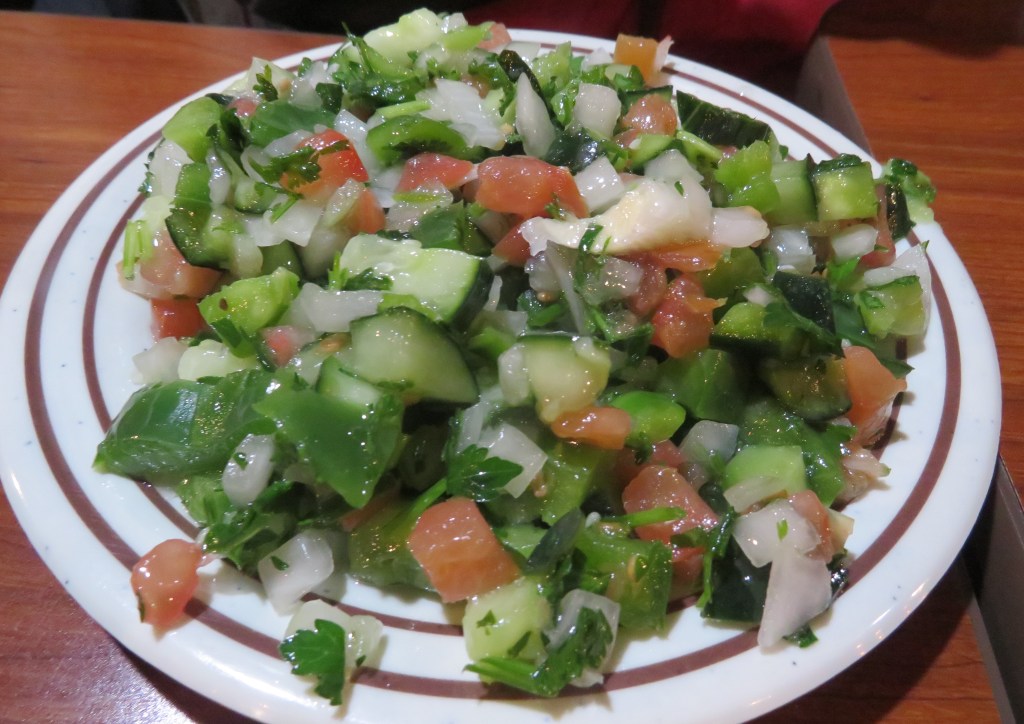
There were a few gyros ordered around the table, some chicken and some beef/lamb. The meat was very tender and flavorful. Some had deliciously crisp, perfectly fried French fries on the side, and Bob order fatoush as a side dish.

Fatoush is a salad made from tomatoes, onions, and cucumbers all mixed together and spiced perfectly with Mediterranean spices and garlic.

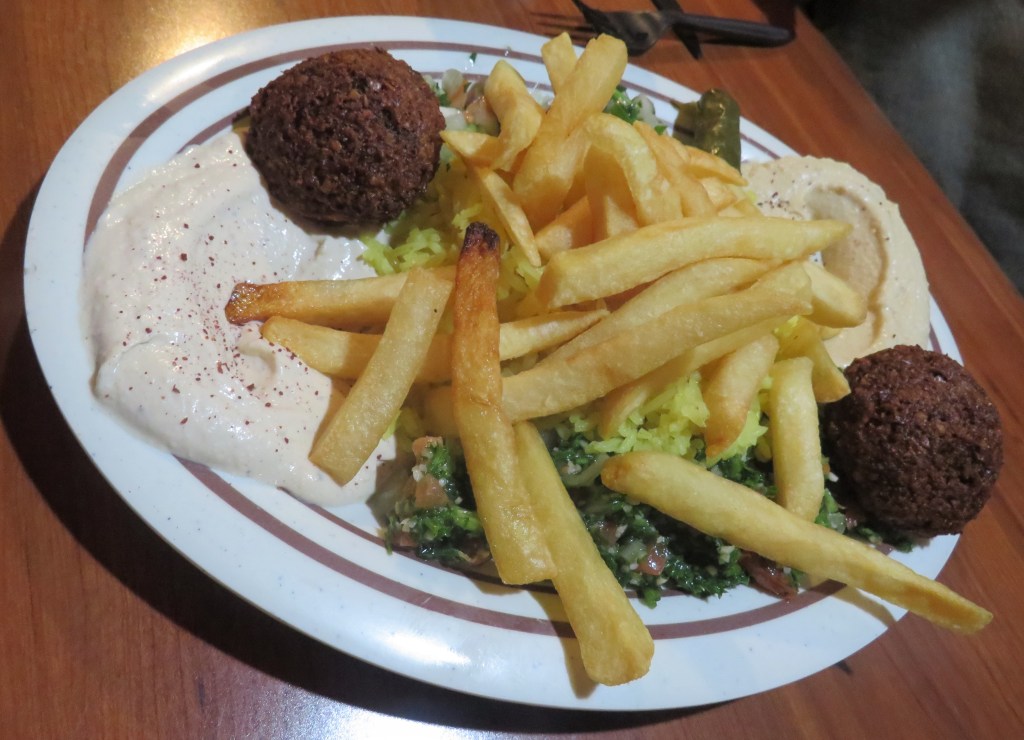
Janet and I shared a mixed vegetarian platter with more hummus, baba ganouj, falafels, more French fries, tabbouleh, dolmas and rice. We think we had the best deal because we got a lot of variety.

Everything was delicious and we all had a fun time. Because we all shared and sampled, none of us ate too much, and we all saved a little room for dessert later. They had a wide variety of Middle Eastern desserts from which to choose. All were delicacies, which made it hard to choose just one. There were a few variations of baklava, which is definitely a weakness of mine. We decided upon one of the baklava desserts. It was light and flaky and just perfect.

Jerusalem is a small restaurant with seating areas downstairs, upstairs, and weather permitting, outside too. They also have a thriving take-out business as well. They are located at 1890 East Evans Avenue, in Southeast Denver. You can walk in our call ahead. Their phone number is (303) 777-8828.

It’s always so much fun when all our friends are adventurous foodies like us. Every time we go out, we always have new culinary adventures and make very tasty memories. And no matter what we do, we always have a great time together. Life is very good indeed, and not to mention, very tasty as well:)

Have a great day Everyone. Stay safe and stay well. ‘Til next time.

Jeweled Tartlets

Cookies come in many shapes, forms and sizes. Some have fillings, some don’t. Some have toppings, some don’t. Some have chocolate, some have nuts, some have fruit, and some have none. The possibilities are endless. Cookies have been my absolute favorite snack my whole life. I can honestly say I don’t think I have ever come across a cookie I don’t like. Of course there are some I like better than others, but over all, if it’s a cookie, I can pretty much guarantee I am going to enjoy it. My big problem is there are way too many cookies and not nearly enough time to enjoy them all. 🙂

Because I love cookies so much, I try not to have many around the house at any given time, though I make them all the time to give away. I do my best to make them when I have another home for them rather than mine, otherwise I would easily eat them all.

My latest batch of cookies were little tiny jeweled tartlets. Aside from them being pretty to look at, and tasty to eat, they are also only about 20 calories each, making them even better. SWEET!!!!!!

These precious little gems are refrigerator cookies made with whatever kind of jam or preserves you like. They are not overly sweet, but are just sweet enough, to satisfy, especially when dusted with powdered sugar.

Jeweled Tartlets

These little jeweled gems are easy to make but are time consuming. So make them when you have plenty of time to dedicate to the process. They only require a few basic ingredients that we all have on hand in our pantries too.

1 large egg yolk or 2 medium egg yolks

1/2 tsp orange extract or vanilla

1 1/2 cups flour

1/2 cup sugar

1/4 tsp salt

1/2 tsp orange or lemon zest

3/4 cup cold butter, cubed

1/2 cup of your favorite fruit jam or preserves

Combine the flour, salt, butter and zest in the food processor and pulse until it all resembles coarse sand. I chose to use orange zest and therefor used orange extract too. I love orange flavoring.

Beat the eggs slightly, add and the orange extract or vanilla, then add to the flour mixture and blend until large moist clumps start to form.

Empty the mixture onto a work surface and start molding together with your hands until it all sticks together and forms a dough. Then shape it into a square or a rectangle, wrap with plastic wrap and refrigerate for at least 2 hours.

When the dough has set, slice it into strips about 1/2 inch wide., then cut into small pieces and roll in the palm of your hand until the pieces form into small balls.

Place the dough onto a baking sheet lined with parchment paper. With the end of a wooden spoon, punch a small hole into the center of each ball and press it lightly with your fingers to enlarge the hole. Place back in the refrigerator for about 15 minutes to set.

Preheat the oven to 350*F or about 190* C.

Carefully fill each whole with a dollop of your favorite jam or fruit preserves. I used both raspberry preserves and orange marmalade.

Once all the cookies are filled, place the baking sheets into the oven and bake for about 15 minutes, or until the edges of the cookies just begin to turn a very light golden color and the cookies are set. Allow them to cool completely on a wire cookie rack. Once they are completely cooled, if you like, you can give them a light dusting of powdered sugar to add the finishing touches.

Because these are tiny and each cookie is only about 20 calories, you can pop these in your mouth and eat a bunch with little or no guilt at all. I know I can. 🙂

Have a great day Everyone. Stay well and stay safe. ‘Til next time.

Taking A Small Break Today

My apologies. Nothing to share today due to a lot of issues with my eyes as of late. I should be back to normal later. I had to see the eye surgeon this morning and my eyes are still having difficulty focusing, so reading and writing is a bit challenging at the moment.

Have a great day. Stay safe and stay well Everyone. ‘Til next time.

Pork With Apples and Red Cabbage

Pork served with apples has been around for centuries. It is served this way in many European cultures, especially in the German, Polish, Hungarian and Russian cultures. Apples, other fruits in general, were paired with a lot of meats and other dishes long before sugar was readily available to many households. The apples and fruits were used to sweeten things up, but when apples are paired with cabbage, they are thought of as more savory than sweet. This combination of apples and cabbage, particularly red cabbage is very popular in the Germanic countries, especially when served with pork or sausage, though it is often used with chicken as well.

There are a lot of theories as to why pork and apples two are always paired together. One is that, in ancient times, the acidity of apples helped digest meats such as pork. Another is that farmers used to let pigs clean up the orchards of any fallen apples, thus associating the two. Another one is that when apples are usually ripe, farmers often begin butchering their meat around the same time and eventually put the two together. All I know for sure is that apples, pork and red cabbage all taste great together. The rest is up for debate.

Larry is of German ancestry, so every now and then I prepare traditional German foods for us. Unlike most of us, Larry’s background is 100% German. Me, on the other hand, I am am 100% American mutt, with my background coming from all over Northern Europe, which eventually landed in Australia (my dad). Variations of pork with apples and red cabbage are in all of my German cookbooks, and I have made many of them. They are all delicious with only subtle differences.

You can use any kind of firm apples for this dish. You want firm apples since other varieties will turn mushy in the cooking process. I prefer to slice my apples, making them easier to eat, although some recipes call for just slicing them in half. Again, your choice. I used small apples that I had.

German Pork with Apples and Red Cabbage

My good friend Julia, our very own from https://retirementrvdream.com/, sent me a delicious care package for Christmas that included this fabulous boiled apple cider. I had never heard of it before, and now I am wondering how I ever got by so long without it. I used this in my dish and WOW! The flavor was fantastic!

2 lbs pork chops, or sausage

2-3 firm apples of your choice, either sliced or cut in half

1/2 red onion, sliced thick

1/2 head red cabbage, sliced

salt & pepper to taste

1 cup apple cider

2-3 TBSP apple cider vinegar

butter and olive oil for cooking

Get a large skillet VERY hot, then add a combination of both olive oil and butter.

Pat dry the pork chops with a paper towel and season with salt and pepper on both sides. Sear the pork on all sides, about 2-3 minutes per side depending on thickness, until you have a golden crust all around. Once the pork is completely seared, remove it from the skillet and set aside.

Add more olive oil and /or butter if needed then add the cabbage, onions and apples. Stir occasionally, and cook for about 5-7 minutes, or until they are tender.

Add both the cider and the cider vinegar and adjust the seasonings as needed.

Red-add the pork to the dish. Bring to a boil, then reduce the heat to a simmer, cover, and cook for about 20-25 minutes, stirring occasionally. At about the half way point, turn the pork over and continue cooking.

I served this delicious dish along side some very creamy mashed potatoes, making it even more of a German dish, and some chardonnay. I served white wine because it is pork, however, a smooth red wine would also go very nicely with this dish too.

This dish is Kostlich or delicious! GenieBen! Enjoy!

Have a great day Everyone. Stay safe and stay well. ‘Til next time.

Nutella Banana Brownies

We have a time share in Playa del Carmen, Mexico and one our favorite treats to get when there is a Nutella banana crepe. There is something magical about the combination of rich creamy Nutella and bananas, mixed together with chocolate. In a word, fantistico! But Nutella and bananas also go very well when cooked together as brownies too. I made those as one of my treats for this morning’s coffee cart, and as you would expect, they were a huge hit. They all disappeared very quickly.

It is always a very rewarding and satisfying feeling when you make something and it all disappears.

Nutella Banana Brownies

Once again, I cheated and used my Ghirardelli Brownie mix, but I will give you the full recipe. I love the Ghirardelli Brownies. They have been completely perfected, so why reinvent the wheel, right?!

When baking with bananas, you want them freckled or even better, brown. That makes them nice and soft and flavorful and much easier to work with too.

Preheat the oven to 350* F or 180* C.

Spray cooking spray in a 9×13 baking pan.

3/4 cup butter

3/4 cup brown sugar

7 ounces dark chocolate, chopped

1 tsp vanilla

2 eggs, lightly beaten

2 ripe bananas, mashed or sliced

1 cup flour

1 tsp baking soda

1 tsp baking powder

2 TBSP cocoa powder

1/2 cup Nutella spread

1/2 cup chocolate chips

If you are making it from scratch, combine all your dry ingredients together and set aside.

Melt the butter, brown sugar and chocolate together until smooth and creamy. Once it is all melted together, add the eggs and vanilla and mix well. Add to the chocolate flour mixture and add the bananas and chocolate chips. Gently fold together and spread evenly into the prepared baking pan.

I eliminated most of that though, t because since I cheated and used a mix. It was already done for me. As I have said many times before, if you have a good, reliable mix, there is nothing wrong with using that. You don’t always have to make everything from scratch all the time.

Once the batter is spread evenly in the baking pan, drop spoonfulls of the Nutella on top of the mix. Then take a a knife and swirl it into the mixture.

I just happened to have some chocolate with hazelnuts too, so I broke off small pieces and scattered them around on top of the brownies. This made them even more scrumptious.

Bake for about 35-40 minutes or until they are set and a toothpick inserted in the middle comes out clean. Allow the brownies to cool completely before removing from the pan and slicing to share with friends.

I heard so many comments of “YUMMY” and “SCRUMPTIOUS” today. They definitely brought a big smile to my face as I was watching everyone enjoy their brownies and lick their fingers clean. I even heard people say that normally they were not Nutella fans, but they loved these. My job here is done for the day. I left very content indeed. 🙂

Have a great day Everyone. Stay safe and stay well. ‘Til next time.

Past Deliciousness

The other night, our friend Bryan was dining with us. He is very easy to cook for since he is open to trying everything and loves everything he tries. But he does have his favorites too, so I try to make those for him when he specifically requests something. This time he requested scallops, chorizo and spinach over angel hair pasta, so of course, that is what he got. 🙂 Angel Hair Pasta with Scallops and Chorizo He was just as pleased with it this time as he has been in the past too; always a good thing.

The boys, Larry and Bryan, topped their meals with fresh shaved Parmigiano cheese

As you can see, there is all kinds of fresh goodness in this dish. I love it, but then it has some of my favorites too – scallops, pasta, sausage, veggies. How can you go wrong, right?!

Cook the scallops in olive oil first, cooking them about 2-3 minutes per side, then remove them and set them aside for later.

Next comes the suasage.

Then deglaze the pan with the white wine, shallots, garlic and red pepper flakes.

Add the spinach and mushrooms. Mix everything together and allow to cook for about 5-7 minutes, stirring constantly, to cook the spinach and mushrooms.

Add the chicken broth, tomatoes and seasonings. Bring to a boil, then reduce the heat to a simmer and continue to cook for about 5-7 minutes, stirring frequently.

Re-add the scallops and mix together well.

Finish with a dash of either lemon juice or lemon balsamic vinegar and serve over cooked angel hair pasta. If you like your sauce a little thicker, you can add a little flour to the mix and cook it down too. You definitely want the flour to cook. No one wants to get a mouthful of raw flour.

Serve with warmed bread of your choice and, of course, wine. I served it with chardonnay, but a light red would go nicely too. You want the bread to help soak up the flavors or the sauce. You do not want to let any of this delicious sauce go to waste. This dish is layered with goodness and full of flavor. You’re going to love it!

Have a great day Everyone. Stays safe and stay well. ‘Til next time.

Pain D’Epi

One of the first things we think of when someone mentions France is the baguette. Baguettes are long baton-like sticks of bread.  By French law, a baguette must be made with only flour, salt, water, and yeast.  The baguette was included on a list of France’s intangible cultural heritage in November 2018. Even though baguettes are associated with France and iconic French food, it appears they were actually created by Vienna-born baker named August Zang in 1839. Zang was the first baker to introduce steam into the baking process, which allowed for breads to be crispy on the outside while remaining fluffy and soft on the inside.

Baguettes are long, thin, wand or baton-like loaves of bread. Their long, thin shape dates back to 1920 when a law was passed preventing bakers from working between 10pm and 4am. This made it impossible to make the traditional larger bread loaf in time for customers’ breakfasts. Baguettes are traditional French breakfast foods. The longer, thinner baguette solved the problem because it could be prepared and baked more rapidly. There are even different kinds of baguettes. There is the regular baguette and then there is the French baguette, even though both are iconic French breads. Like with many foods though, the differences are very subtle, but they are different enough to recognized by the French government and baking regulatory standards. The French, as well as many other European food and beverage regulatory agencies, take their foods and beverages very seriously and there is no room for exception. French bread is wider and longer than a baguette, with a much softer crust. It doesn’t require any special equipment to make and it’s just as versatile as a baguette, but its soft outside makes it perfect for toast or garlic bread. The Italians have a very close relative to the baguette, which they call filone. The only difference between the two is the Italians add olive oil to the dough.

Even though the French are very particular about the ingredients that can be used to make their traditional French baguette, they do allow for some variations in shape. One of the allowed variations is to make the pain d’epi, or “ears of wheat” bread. Pain d’epi are baguettes that have been cut at the sides to form bread sticks that resemble wheat stalks. These are easy to pull apart to make more individual portions without having to slice the bread.

I love baguettes, but then again, I love all breads. There is something unique about the baguettes to me though, that really give them a special place in my heart, as well as my taste buds. Many moons ago, when I lived in San Francisco, I was poor; so poor that I took the bus into work everyday rather than the BART (Bay Area Rapid Transit) and walked about 1-1 1/2 miles to and from work from the bus station because the tickets were about 1/4 of the price of the tickets for BART. Every morning, en route to work, I would stop in at Boudoin’s Bakery and get a mini baguette for breakfast. I had it timed just perfectly, so when I walked into my building, I was just finishing my last bite.

I ventured into the world of baguette making yesterday, something I really hadn’t done since my culinary school days, and I made some pain d’epi. Mine however, didn’t exactly look like wheat stalks they were supposed to represent, but they sure did taste good, especially smeared with rich, creamy butter. I guess I am a bit rusty on this particular rustic bread and need more practice. This is a challenge I readily accept. 🙂

Even though my form was a bit off, I stuck with the French baking tradition, however, when it came to the ingredients. The only ingredients I used were flour, water, salt and yeast.

Baguettes or Pain D’Epi

2 1/2 tsp dry active yeast

1 2/3 cup lukewarm water

3 1/2 cups flour

1 1/2 tsp salt

Combine the yeast and the water together and let rest for about 5-10 minutes, or until it becomes frothy.

Combine the flour and salt together then make a well in the center. Pour the yeast mixture into the center of the well and draw in as much of the flour as needed to make a soft paste. Cover and let rise for about 20 minutes to make your sponge. This is rise #1. There are 4 rises for this bread.

After the first rise and the sponge is ready, gradually bring in the rest of the flour and form the dough into a soft, sticky dough. Turn the dough onto a lightly floured surface and knead for about 10 minutes until a soft dough ball has been formed. Place the dough in a large bowl and cover to let rise again for about 1 1/2 hours, or until it has doubled in size. This is rise #2.

Punch down the dough and recover to once again let it rise and double in size yet again, for about 45 minutes. Rise #3.

When the dough is ready, divide it half and shape into long, thin baguettes, about 12 inches long. Everything is the same up to this point for the pain d’epi, but now, cut the dough with sharp scissors. Cut at an angle and cut down to about 3/4 of the way through the dough. This is where I screwed up. I actually cut them completely then reattached them to the dough.

Place the dough logs onto a baking sheet dusted with flour and let rise again for the final rise, for about 50 minutes, or until they double in size once again.

Preheat the oven to 475*F of 240* C.

Slash the tops of the loaves or pain d’epi with a sharp serrated knife. Bake for about 25-30 minutes or until they are golden brown and hollow when tapped on the bottom. Allow the bread to cool for a few minutes before eating, then smear with butter and Bon Appetit!

Have a great day Everyone. Stay warm, stay safe and stay well. ‘Til next time.

Southwestern Turkey Chowder

We have had snow on the ground all throughout December and all of January so far. And we have had quite a few big storms in that time from as well. This is pretty unusual for us. Usually it snows and then it melts fairly quickly. But I love it; as long as I don’t HAVE TO drive in the middle of a storm. It is gorgeous to look at. It is also perfect weather for soups, stews, chowders, and of course lots of baking. I have been doing a lot of baking these days, and I also made a huge pot of a delicious Southwestern turkey chowder to go along with my olive and tomato bread. Rustic Olive and Tomato Bread They paired perfectly with each other as well as a glass or two of chardonnay.

Southwestern Turkey Chowder

This chowder was filled with all kinds of hearty goodness and tons of vegetables. When I make soups and chowders, I just throw in all kinds of stuff and never bother to measure anything. I stop when my pot is full.

5-6 bacon, cut into pieces and cooked

3-4 celery ribs, diced

1 onion, diced

2 cups corn

1 red bell pepper, diced

2 TBSP garlic

2 potatoes, diced

3-4 roasted Hatch chilies, diced

3 lbs cooked turkey breast, cubed

6-8 cups turkey stock

2 cups heavy whipping cream

1 cup flour

olive oil and lime olive oil (optional)

salt & pepper to taste

red pepper flakes to taste

2 TBSP fresh oregano and thyme chopped fine

2 TBSP fresh cilantro, chopped fine

Cook the bacon with a little olive oil until it is to your desired doneness.

Add more olive oil and/or butter, then add the onions, potatoes, corn, peppers, celery, garlic and red pepper flakes and cook for about 5-7 minutes, or until they are tender and the onions are translucent. Add the flour, mix in well and continue to cook for an additional 5-7 minutes, stirring constantly.

Add the turkey and stock and seasonings. Combine well, cover and bring to a boil. Then reduce the heat to a simmer and continue to cook for about 30-40 minutes, stirring frequently.

Add the cream and mix in well. Adjust the seasonings as needed. Bring to a boil once again, then reduce the heat to a simmer and continue to cook for about 10-15 minutes, stirring frequently. Add the fresh herbs towards the end of the cooking process.

When the chowder is ready, ladle it up and enjoy. Larry topped his with some shredded cheddar cheese too. It just melted into the soup like velvet.

If you live in cold country like I do, stay warm from the inside out. There is nothing better than a hot chowder to help warm you up too. Stay warm, stay safe and stay well Everyone. ‘Til next time.

Rustic Olive and Tomato Bread

Both yesterday and today are very good days for baking. We are in the midst of what the weather forecasters are calling another “snowmageddon”, though the last time they predicted this, it turned out to be a big nothing burger. However, today, it seems to be pretty true. We’ve already had about 5 inches of snow, and it is still snowing and the winds are beginning to blow too. When the winds blow, it often creates white-out conditions and the visibility gets pretty bad. It is definitely a good day to stay indoors. At the moment, we are blanketed in a thick layer of white snow. We are currently under a weather advisory to stay indoors if possible.

Yesterday’s baking was a rounded loaf of a rustic bread filled with olives, sun-dried tomatoes, onions and garlic. YUM! I served it alongside a delicious Southwestern turkey chowder.

This delicious bread was filled with all kinds of goodness. I used a bunch of mixed olives, sun-dried tomatoes, fresh oregano and garlic and red onions. It’s almost a meal all by itself. i could easily eat the whole thing in one sitting. 🙂

Rustic Olive and Tomato Bread

3 1/2 tsp dry yeast

2/3 cup lukewarm water

3 1/2 cups flour

2 tsp salt

1/2 cup sun-dried tomatoes in oil, chopped fine

1 cup olives, sliced

1/2 red onion, diced fine

2 TBSP garlic, minced

1 tsp red pepper flakes

3 tsp fresh oregano, chopped fine

olive oil for the bowl

This bread needs a starter sponge. To make the starter, combine the yeast and water and let stand for about 5-10 minutes. Add about 1/2-1 cup of flour to make a thick paste, then cover and let rise for about 1 hour.

While the starter sponge is rising, cook the onions, tomatoes, garlic and olives in olive oil for about 5-7 minutes, or until the onions are soft and translucent. Add the chopped oregano and mix well. Then add to the sponge.

Add everything to the remainder of the flour and knead for about 8-10 minutes until everything is combined and you have a soft, sticky dough. Form it into a ball, lightly coat a large bowl with olive oil and add the dough. Cover it and let it rise for about 1 hour, or until it doubles in size.

Punch it down and shape it into a ball, which is known as chafing the dough. Cover it and proof it once more, for about 45 minutes, or until it doubles in size once again.

Preheat the oven to 400*F or 200*C.

Spread a thin coating of olive oil onto a baking sheet and place the dough on the pan. Bake for about 45 minutes, or until it is hollow when tapped on the bottom. You can add some steam every so often too if you like. Let it cool for about 5-10 minutes before slicing it. Then mangia! Enjoy!

On a day like today, if you don’t have to go out, don’t. Stay warm, stay safe and stay well. ‘Til next time.

Another Batch Of Food Funnies

Sometimes life is hard and gets way too stressful. Sometimes we all need a break and we just need to step back and have a good laugh at life in general. Laughter is the best medicine after all, and today, it seems like with so many other things, laughter is in short supply. So hopefully some of these food funnies will bring a smile or two and help you lighten your loads a bit.

Who doesn’t love pizza, right?

Truer words were never spoken.

I can most definitely relate to this one.

Have a great day Everyone. Stay safe, stay well, and have a few laughs along the way. ‘Til next time.