The Classics

Auguste Escoffier is known as the father of modern cuisine. He invented over 5,000 recipes, published Le Guide Culinaire textbook and developed approaches to kitchen management. He redefined French cooking and established new culinary principles that encompassed refinement, organization, and innovation. His meticulous attention to detail and emphasis on quality ingredients set a new standard for professional cooking. So suffice it to say, M. Escoffier knows a few things about food and cooking.

One of the many things M. Escoffier is known for is creating the basis for all sauces, known as the Mother Sauces. There are five basic sauces, in Escoffier’s opinion, that started all the other sauces we use today. I don’t know if I agree with this theory of not, but most classically trained chefs do. We are at least taught this in culinary school. But, you all know I am a rebel, and I was most definitely a rebel in culinary school too. My favorite Chef Instructor, Chef Andre Averseign, used to tell me all the time, ” Non, non, non, Jeanne – [gee-ne], dis is not right”. Then he would taste it, and say “oh, dis is good”. 🙂

According to the French Chefs, sauces are the foundation of fine cuisine. Their preparation is considered the most important business in every large kitchen. But with any recipe, the written words, which are what we call the “recipe” are “only a guide to the real thing. The reality is in the performance. No recipe can represent the human creativity and complexity”. (p. xiv, preface, The Sauce Bible, Guide to Saucier’s Craft, by David Paul LaRousse).

The Mother Sauces are: Hollandaise, Veloute, Bechamel, Espagnole and Tomato.
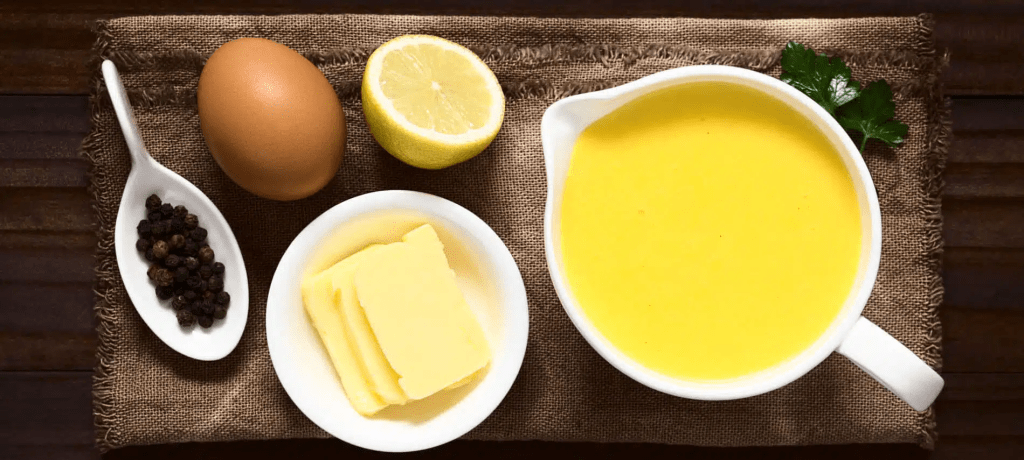
Hollandaise Sauce

A traditional Hollandaise sauce is a sauce made from egg yolks, melted butter, lemon juice or vinegar, a dash of Dijon mustard, and a dash of nutmeg. It is usually served with fish, eggs, vegetables or chicken. Despite having “Holland” in its name, it’s generally agreed among chefs that Hollandaise sauce was first born in France and was originally known as Sauce Isigny, named after a small town in Normandy famous for its butter and cream. According to history, France couldn’t produce its own butter during the First World War and imported it from Holland – which led to it being known as Hollandaise. A Bearnaise sauce is a close cousin to Hollandaise, but it is usually made with tarragon, shallots and vinegar. Rich, creamy butter sauces used for a variety of dishes today are direct descendants of both of these sauces. I love Hollandaise sauce and rich, buttery sauces in general, and make them quite often, but then I love ANYTHING with butter.

Veloute Sauce

Veloute is another butter sauce, along the same lines as a Bearnaise sauce. VeloutĂ© much like Bechamel Sauce, is a creamy white sauce which is thickened with a roux. While both sauces are smooth, creamy and generally white or cream colored, the biggest difference between them is that veloute is made with a white stock or broth, (most commonly chicken stock or fish stock), and Bechamel is made using milk.  Veloute sauce is usually served over lighter meats, like chicken, fish and pork or vegetables. I make veloute variations quite often too. Again, it is the butter delivery system.

Bechamel Sauce

A traditional Bechamel sauce only has three ingredients, milk, melted butter and flour, and of course simple seasonings. Often, there is a hint of fresh nutmeg used in a Bechamel sauce too. It starts with a blond roux, made by whisking flour and butter for about 2 minutes in a saucepan on the stove. That’s just long enough to cook the flour without browning it to eliminate the pasty taste that comes from raw flour. Once the roux has bubbled for a minute or two, add half the milk and whisk to eliminate any lumps. Then whisk in the remaining milk. A Bechamel sauce can be used for any of the same dishes and recipes as either a hollandaise or a veloute sauce. It is also the base for many cheese sauces too.
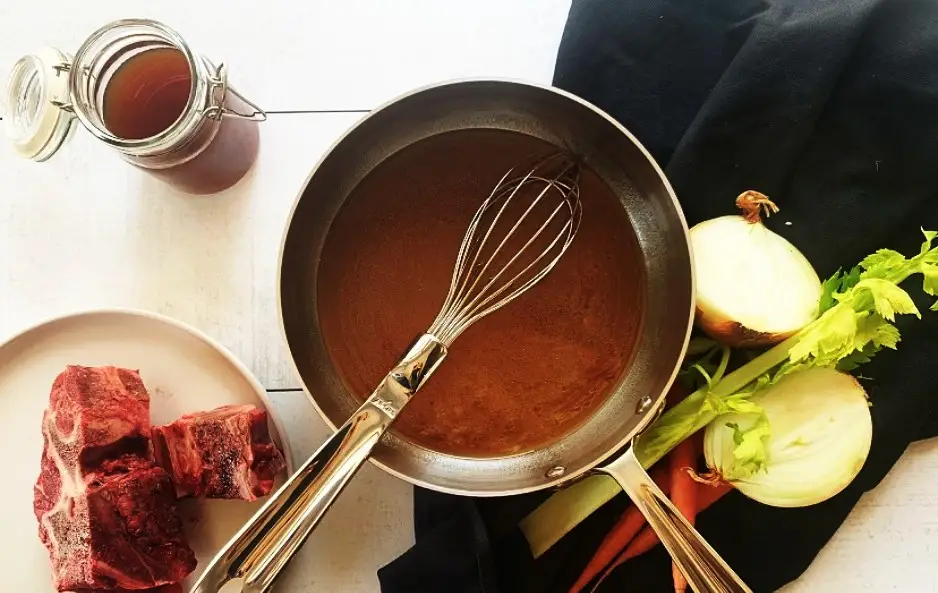
Espagnole Sauce

Espagnole (pronounced like the word for Spanish: español) is a basic brown sauce that is also one of the five mother sauces of classical cuisine. It’s also the starting point for a rich and deeply flavorful sauce called demi-glace, which is traditionally served with red meats.

Making espagnole sauce is not too different from making velouté—they’re both essentially stock-based sauces thickened with roux. Where they differ is that espagnole​ is made with brown stock (i.e. beef stock), and it includes additional ingredients such as tomato purĂ©e (which adds color and acidity) and mirepoix, which is a fancy name for chopped up carrots, celery, and onions. These add a tremendous amount of flavor and aroma to the sauce.

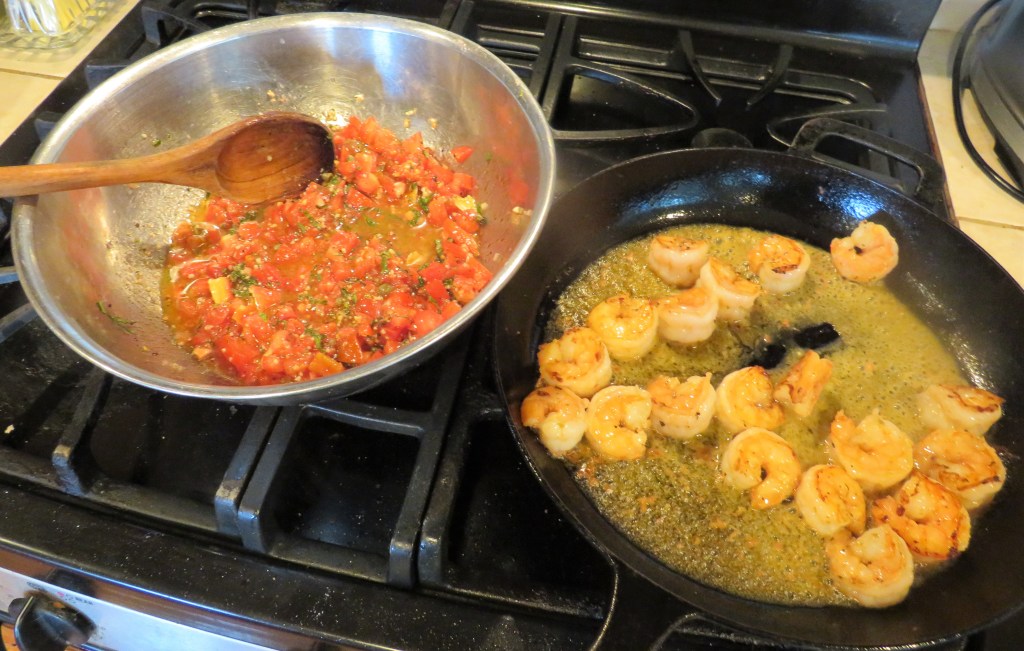
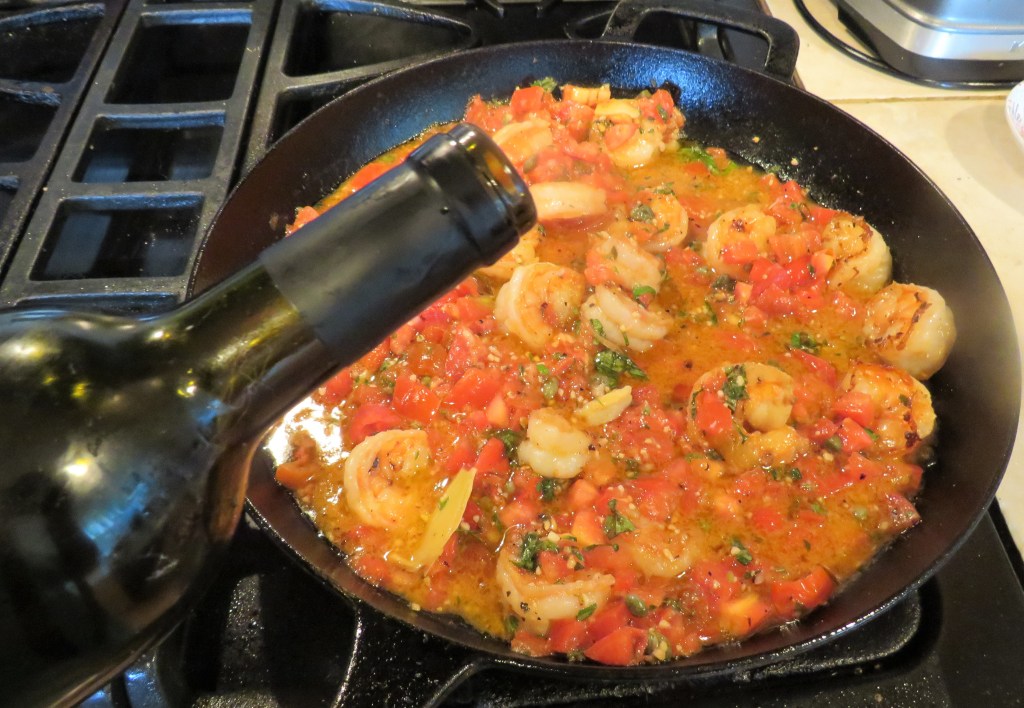
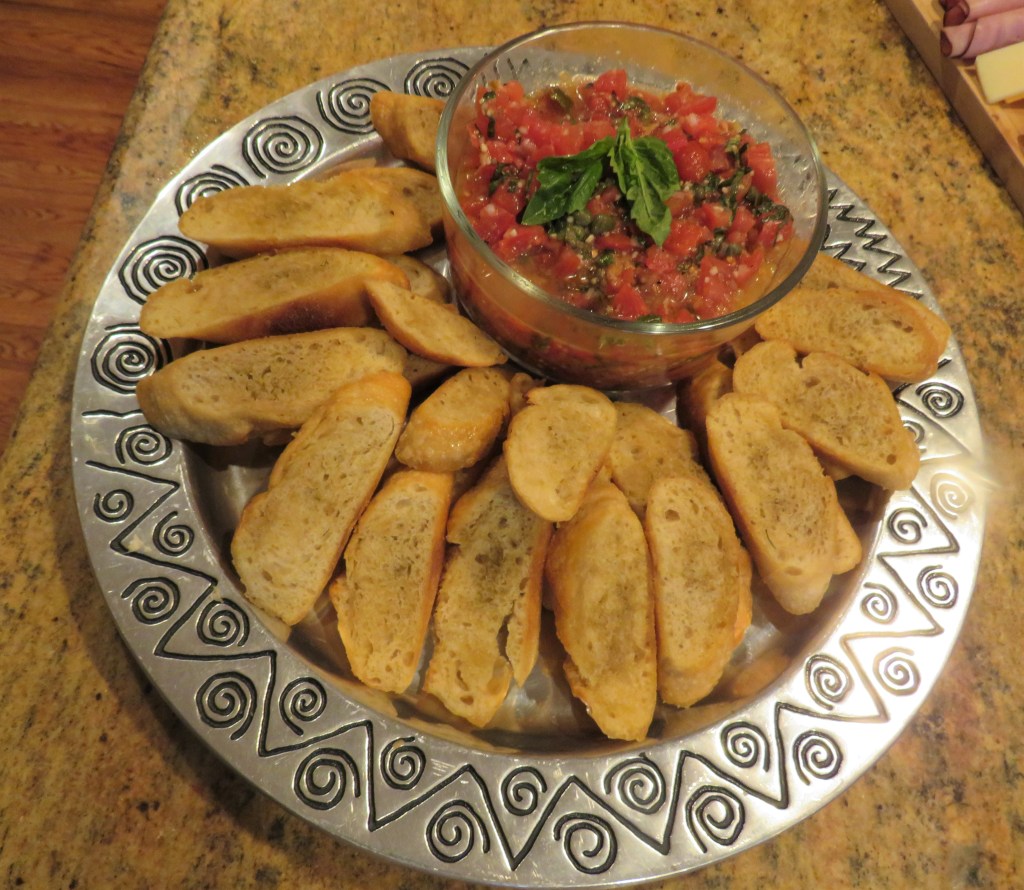
The last of the five Mother Sauces is a tomato sauce. We ALL know what tomato sauces are, especially if we eat anything Italian. 🙂 Sauce tomat is one of the classic French mother sauces. It’s deeply tomato-y, creamy without cream, and can be used as a base for braised meat, thinned for soup, or tossed with pasta.

The French, Mother Sauce method of making a tomato sauce –

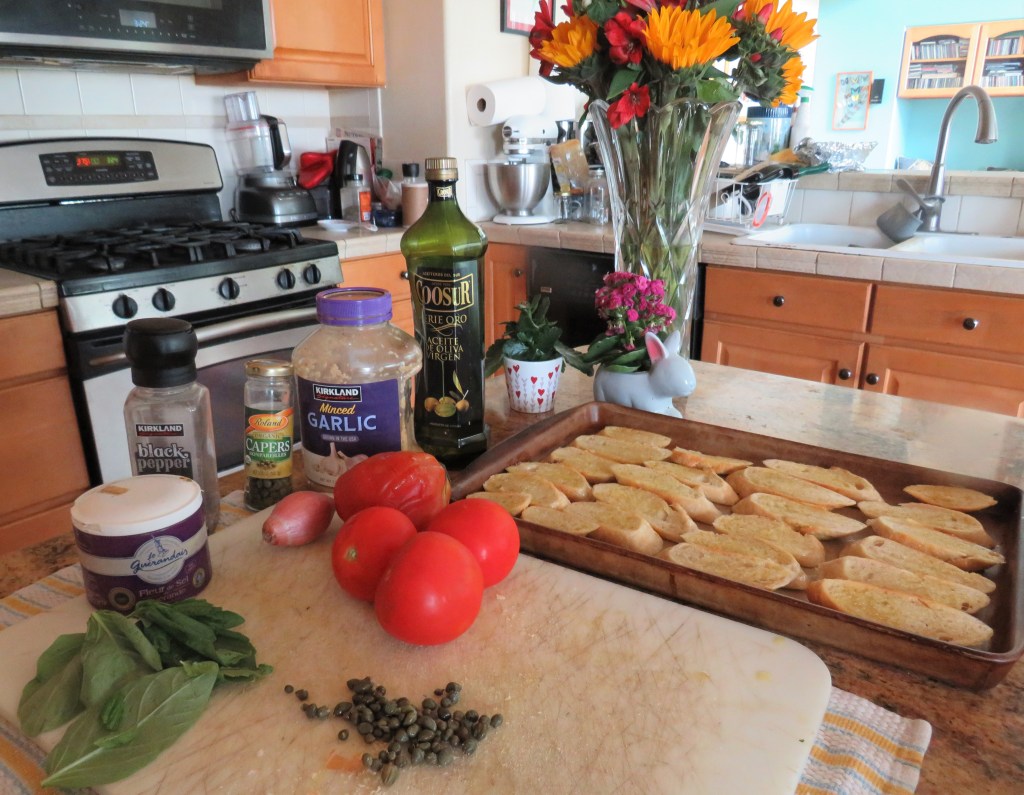
The sauce starts with lightly browning diced salt-cured pork, followed by softening the mirepoix (finely chopped onions, carrots, and celery) for a few minutes. Add garlic, a bay leaf, a few sprigs of thyme, whole tomatoes crushed in a bowl, and stock. Cover the pot and pop it in the oven for a slow simmer. 

All that deliciousness comes with a time commitment. The sauce needs to simmer for a couple of hours to build and concentrate all of those flavors, but that can be done handily in the oven, allowing you to use your time however you please instead of standing over the stove. 

So when I say “sauce it up”, now you can sauce it up in the traditional French chefs’ way too. Chef Raymond Oliver says “a sauce is not only the fluid part of a cooked dish, but the very soul of cooking”,(p. xiv, preface, The Sauce Bible, Guide to Saucier’s Craft, by David Paul LaRousse) . Now this, I do agree with. The sauce is what makes the meal. 🙂

Make your day saucy and live it up. Have a great day and make everyday great. Stay safe and stay well. ‘Til next time.

Nature Walks – Just The Goslings

As you can probably tell, I get very excited when we have goslings. They grow up so quickly, and don’t stay little for long. So I have to capture their cuteness while I can. I am going to give you yet another gosling day, and then I will give it a little break. I mean, we do have plenty more to see than just cute, adorable goslings. But how can I resist???? 🙂

Smile and the world smiles with you. Have a great day and make everyday great. 🙂

Bruschetta Shrimp

You all know I love to recreate as much as I can from my leftovers. When I made my bruschetta to take with us for our latest wining adventure, Bruschetta we made a dent for sure, but I still had quite a bit leftover too. It was way too good to let go to waste, though I would NEVER do that anyway, and I had shrimp down that needed to be used. So the leftover tomatoes from my bruschetta got turned into bruschetta shrimp. I served it with my olive bread Herbed Olive Bread and a cool, crisp Pinot Grigio on the side. It was a perfectly refreshing and light spring meal.

I added a few more tomatoes, a little extra basil, and the cooked shrimp. Then I deglazed the skillet with some dry white wine.

When the wine was reduced by about half, I added the tomatoes to the cooked shrimp. I cooked it just long enough to heat everything up.

After everything was hot, I topped it all off with a little lemon balsamic vinegar to make all the flavors really come to life and pop, then served it all over angel hair pasta, also leftover. If you don’t have lemon balsamic vinegar, lemon juice will work just fine too.

Be creative with leftovers. Walk on the wild side and see what happens. You just may surprise yourself with what comes out of your kitchen. All you need is a little imagination, and VOILA!

Have a great day and make everyday great. Stay safe and stay well. ‘Til next time.

Nature Walks – More Gosling Cuteness

In case you hadn’t noticed, I love seeing all my cute little goslings. And they grow up so quickly, I have to capture them while I can, when they are still little and just so darn adorable. 🙂 Yesterday, I saw not one, not two, but three groups of goslings out enjoying the day with their parents. Two groups were even smaller than than first group, meaning they are just a couple of days old. They were just so cute. Seeing them totally made my day. One group had 6 goslings and the other groups each had 5.

All that swimming made them hungry. It was time for a lunch break.

Mom and dad are making sure they are eating a nutritious lunch.

I think it’s nap time time now.

Look for the things that make you smile everyday. Have a great day make everyday great.

Making Muffaletta

If you are from the south, and particularly from New Orleans or Louisiana in general, you know what muffaletta is. Most people are unfamiliar with it though. But I am about to change that for you.

Muffaletta is an Italian-American sandwich that was made famous in the French Quarter of New Orleans. Sicilian immigrant Lupo Salvadore created this now famous sandwich at the Central Grocery in 1906, which is one of New Orleans oldest markets and is still thriving today. Lupo noticed Sicilians shopping for various ingredients found on the sandwich and trying to put them together, but making a total mess of it. He decided to do it for them and sold the muffaletta in his shop. He created his own recipe for the olive salad that made the sandwich incredibly popular.

The name muffaletta, or one of its many spelling variations, derives its name from Sicilian dialect that means ‘soft and spongy bread’. This soft round bun is so versatile and many locals use it as a sandwich to fill with local hams and cheeses. Muffaletta is usually served hot, when all the flavors melt together. But some people like it cold too. I like it hot.

Yesterday I gave you a teaser, telling you I was going to make something interesting out of my olive bread. Herbed Olive Bread Today, I give you the muffaletta I made with it. I had various lunchmeats leftover from our latest InVINtions trip, Bruschetta, and making muffaletta was just the perfect idea on how to use it up.

First, I hollowed out one of my round loaves of olive bread, saving the filling for croutons. Then I brushed the remainder of my latest batch of orange vinaigrette all over the inside of the bread. Oranges and olives go great together, by the way.

Then I roasted peppers and made some spinach with garlic and onions.

After the peppers were roasted, sweated, peeled and seeded, and the spinach was ready, it was time to start the layering process to make the sandwich. First was some Provolone cheese, followed by layers of beef, turkey and ham.

Next came another layer of Provolone cheese, followed by the sliced pepper strips, finished with a topping of the spinach and onions. I added another brushing of the orange vinaigrette on the top of the bread, then wrapped it all up in foil and put it in the oven to melt all the flavors together.

I baked it at 375*F or about 191*C and cooked it all for about 30 minutes. I wrapped it in foil since the bread was already baked and I did not want it to brown any more. Delicious! I GAR-UN-TEE Y’all are goin’ to love this one. 🙂

When you eat muffaletta, you are getting your whole meal all in one, in one sandwich. It’s got your vegetables and salad already packed into the sandwich. So with every mouthful, you get a little bit of everything. As with any recipe that has been around for a long time, there are many, many different variations. This is but one of many endless possibilities. Enjoy and laissez le bontemps roulez!

Have a great day and make everyday great. Be adventureous,but stay safe and stay well. ‘Til next time.

Nature Walks – Swim Lessons For The Goslings

The other day we saw the goslings for the first time of the season, and now they are already swimming. Before swimming though, mom and dad were going over the rules and teaching them some dry land stuff. You need to learn to walk before you can learn to swim.

Now, onto the swimming lessons.

Have a great day and make everyday great. ‘Til next time.

Herbed Olive Bread

I love making bread. There is something very therapeutic and relaxing about it. That being said, I decided it was time to bake some bread again. And I had something specific in mind for something I am going to make tonight. You will just have to wait a little longer to see what that will be though. A little anticipation is a good thing. 🙂

Yesterday’s bread which will be part of tonight’s dinner, as well as last night’s, was an herbed olive bread. I have made many different versions of olive bread, but I think this one is my favorite, at least so far. This is a Tuscan bread that can easily be a meal in itself, with a little cheese and wine on the side.

Herbed Olive Bread

I like mixing and matching my olives, and rather than chop them like a tapenade, I prefer to slice them. This way you can really see the olives in the bread, and they are so colorful and pretty.

1 package or 2 1/4 tsp dry active yeast

2 cups warm water

4 1/2-5 cups flour

1 1/4 tsp salt

1 TBSP olive oil +more for oiling the bowl

1 cup sliced olives

2 TBSP fresh basil, chiffonade, or 2 tsp dried basil

2 TBSP fresh oregano, chopped, or 2 tsp dried oregano

Sprinkle the yeast over the water, whisk together and let set for about 10 minutes or so, until it becomes frothy.

Combine the flour, herbs, olives and salt together. You can use regular all-purpose flour or a combination of all-purpose and bread flour, equal portions of both. I just used all-purpose flour this time. Make a well in the center of the flour mixture.

When the yeast water is frothy, add 1 TBSP of olive oil to the mix. This time, I used basil olive oil.

Mix everything together and knead until you have a smooth, elastic dough and shape into a ball. Cover and let rise for about 1 1/2 hours in a warm spot. Let the dough rise until it has doubled in size.

When the dough is ready, punch it down and divide into two equal portions. On a lightly floured surface, roll the dough into two balls once again and place on a slightly oiled baking pan. Dust the dough with a light topping of flour, cover and let rise again for another hour.

Preheat the oven to 400* F or 190*C. Bake for 30 minutes or until lightly browned. Remove and let cool for about 10 minutes before slicing. Then either dip it in olive oil or lather it up with butter, and enjoy.

Bread is the food of life. Take your daily bread and enjoy. 🙂 Have a great day and make everyday great. Stay safe and stay well. ‘Til next time.

Nature Walks – Meet The Goslings

Yesterday when we we taking the dogs out for a walk, we met our first batch of goslings for the season. As always, they are so darn cute. They are just little tiny babies too, only a couple of days old. I will get as many pictures of them as I can, because we all know they will grow up way to soon. But because we had the dogs, it was hard to stay and take a lot of pictures, or even take very good pictures. Dorrie and Juneau were on a mission. They had to go. But here is the first batch of the baby pictures.

Mom and dad were both so proud. They had five babies with them, all staying very close to mom.

Have a great day and make everyday great. Stay safe and stay well. ‘Til next time.

Bruschetta

It was time for our monthly trip to InVINtions, A Toast to InVINtions! which meant it was time for more nibblies. I tend to make the same thing all the time, because charcuterie trays are easily transportable and go well with wine tasting. But I get bored, and don’t like doing the same thing all the time. So this time I changed it up a bit. I still did make a cheese and meat platter, and still brought a tray of dolmas (stuffed grape leaves), olives, artichoke hearts and baby corn, but I also made some bruschetta to take along too.

The history of the bruschetta dates back to the Etruscan age: while occupying the land between Rome and Tuscany, they began dressing the local, salt-less bread (best when it’s a day old and a little bit stale) and baking slices in ovens or grilling their leftover bread over open fires. In fact that word bruschetta literally means to roast over coals.

The primary ingredient in Bruschetta is tomatoes and as you already know tomatoes are extremely good for health. They are packed with Vitamin C, Vitamin K1, folate and potassium. Moreover, they are also a rich source of antioxidants such as Chlorogenic Acid that is known to help lower blood pressure.

Bruschetta is the Italian version of pico de gallo. It is a simple, poor man’s food, which is simply delicious. These rustic, simple foods are hands down, my favorite foods to eat and enjoy, and to prepare. The simplicity in the kitchen always wins and the bruschetta is one of those simple dishes that is also rich in flavor and authenticity. A delicious appetizer, a poor dish that is a must in restaurants throughout Italy.

Bruschetta

Preheat the oven to 400* F or 205*C.

1 baguette, sliced at an angle

olive oil for brushing the baguette

Slice the baguette into thin slices, slicing it an an angle. Generously brush the olive oil on both sides of the bread. Bake for about 20-25 minutes, then flip all the pieces over and continue to bake for an additional 20 minutes or so, until the bread slices are lightly golden brown and crisp. Let cool. Once they brushetta or crostini slices have cooled, you can store them in an airtight container too.

5-6 tomatoes, diced

1 TBSP capers

1 shallot, diced fine

1 TBSP garlic

3-4 TBSP olive oil

1-2 TBSP lemon olive oil, optional

1 TBSP lemon juice

salt & pepper to taste

5-6 fresh basil leaves, chiffonade

I love tomatoes, and there are so many wonderful varieties available, so I love to mix and match my tomatoes. I almost always use a variety of different tomatoes, and my bruschetta was no different. I had an heirloom, some vine ripened tomatoes and some small cherry tomatoes that all got thrown into the mix, after dicing them into a small dice. Everything is all mixed together well, and then chilled until ready to use. I love using anything lemon with tomatoes too. The lemon flavors just really make the flavors of the tomatoes come to life.

As I mentioned above, I made a bunch of nibblies to take along with us. There were only five of us attending, but of course I made enough food to feed a small army. That’s just what I do. Believe it or not though, we made quite a dent in all the food. 🙂

Food is life. If you eat well, you are living well. Life is good, and even better when enjoyed with good food and good friends. Have a great day and make everyday great. Stay safe, stay well, and enjoy life to the fullest. ‘Til next time.

African Coconut Chicken And Vegetables

You all know I am a very adventurous eater, and will eat and make almost anything. I love international and ethnic foods from all over too. I get my inspiration for my dishes from many places, including many of you. Though I may get my initial inspiration from you, or many various recipes in cookbooks, I rarely follow the recipes exactly as they are written. It’s just how I am wired. I just can’t do it. I always have to take those recipes and make them my own by adding my own unique twists. 🙂 One such recipe is from one of our one, yet again. My inspiration for my African coconut chicken comes to me from Randy, at Cook Fork Plate, https://cookplatefork.com/. Thank you Randy for this delicious and exotic idea. 🙂

This is my version of Kenyan coconut chicken, known as Kuka Paka. I started off following Randy’s recipe, but of course, I just couldn’t help myself, and well, ….. I made it my own, as I always do. But that’s what chefs do. We all do. There is NOT a chef out there who will not take the opportunity to put his/her own personal touches to any dish or recipe.

African Coconut Chicken and Vegetables

The biggest change I made to the recipe was the addition of a lot of vegetables often used for many different African recipes and dishes. I added more spices as well. I also served it over angel hair pasta rather than rice. I also used some of my leftover Costco rotisserie chicken that was already cooked.

2 lbs chicken breast, cut into pieces

salt & pepper to taste

red pepper flakes to taste

1 TBSP garlic

2-3 jalapenos, diced fine

1 TBSP ginger

2 tsp coriander

1 tsp cumin

3-4 tomatoes, diced

2 cups baby spinach, chopped

tiny teardrop tomatoes, optional

1 can coconut milk

2 TBSP lemon juice

1 cup chopped cilantro

2 cups pumpkin, peeled and diced

1/2 onion, sliced very thin

olive oil for cooking

coconut oil, optional

lemon balsamic vinegar, optional

Get a large skillet very hot, then add the oil(s). I have coconut oil I added as well. It really made the flavors pop, but I realize not everyone has access to specialty olive oils and they can be a challenge to find.

Add the onions, garlic, jalapenos, red pepper flakes, cumin, salt and pepper and pumpkin to the hot oil(s) and cook for about 5 minutes, stirring frequently. Cook until the onions are translucent and the pumpkin is mostly tender.

Add the spinach and the chopped tomatoes and mix together thoroughly.

Add the coconut milk and mix well.

Then add the chicken and incorporate into the mixture. I used cooked chicken, but if you are cooking the chicken yourself, brown it on all sides first, then add it to the mixture. Bring to a boil, then cover, and reduce the heat to a simmer and continue to cook for about 20-25 minutes, stirring often.

Towards the end of the cooking process, add the chopped cilantro, lemon balsamic vinegar and the tiny teardrop tomatoes, if using, and just cook long enough for them to heat up. Then serve. You can serve this delicious sauce over either rice or pasta. This time I chose angel hair pasta.

My friend Lauren asked what made this an African dish. It is the combination of the spices, the vegetables and the coconut milk. These combinations are found in many of my African recipes from my African cookbooks. I served it all over angel hair pasta, with some tomato focaccia on the side, and a cool, crisp Spanish white on the side. I figured a good Spanish white wine would go perfectly with the African spices, and indeed, it did. 🙂

Once again, many thanks Randy. This was a delicious dinner that was inspired by you and your recipe. 🙂

Have a great day and make everyday great. Stay safe and stay well. ‘Til next time.