Last of the Leftovers

WHOOOOOOO HOOOOOOOO!!!!!!!  We have finally finished off all the leftovers we had from our little gathering last week.  Lots of Leftovers They were all delicious, but I am really glad to start cooking first-overs again.  The last of the leftovers was the smoked pork.  We made it into sliders the first time around, and the second time around, I used it as an Asian stir-fry.  My refrigerator is now empty and all the leftovers are gone, so it is time to fill it up again, with more yummy, delicious first-over foods.  I wish I could lose all the weight that I have gained as fast as I can get rid of all the leftovers. That just isn’t happening nearly fast enough, unfortunately, but that’s another story for another day.

This was our smoked pork when we first took it off the smoker.  This, like everything else we served, was very tasty, so we were not going to let it go to waste, although unfortunately, all this food is quickly going to my waist.  From this, we shredded it and used it for sliders first, and from sliders, it became an Asian stir-fry with a lot of vegetables.

IMG_2906

This is one of those meals that just kind of grew from using a little bit of this and a little bit of that, which allowed me to use up all the leftovers I had and empty out my refrigerator.  I added my leftover pork along with the left over sweet potatoes that I sliced thin; a little extra of both red and green bell peppers, sliced into thin strips; and some green beans, mushrooms, onions, garlic, ginger, basil and lemon verbena (from my backyard).  Once everything was cooked, I added some leftover soy-ginger vinaigrette/marinade Seared Ahi Tuna Salad for my sauce, served it over rice with some Asian dumplings, and voila, dinner was done.

IMG_2950

Cooking my vegetables.  Saute the hardier vegetables first, like the sweet potatoes, green beans and bell peppers then once those are soft and tender, add the rest of the vegetables and the garlic and ginger and continue to cook until they are all done.  This is one of those meals that I really emphasize using what you like and using what your have.

IMG_2952

Since the pork was already cooked, all I had to do was add it after the vegetables were cooked and then I added my soy-ginger vinaigrette/marinade mixed with a little corn starch to thicken it up, and cooked it all for about another 7-10 minutes.  After everything was cooked, I added the basil and the lemon verbena and mixed them in well with the rest of the stir-fry.

IMG_2953

Once everything was done, I served it over rice, added some cooked Asian dumplings and topped it off with a bit more basil and lemon verbena for my garnish.  Then I finished it all off with a cool, crisp chardonnay that had hints of apples, citrus and melon that accompanied the meal very well.   But the best part …… all the leftovers are now done and have been recreated, eaten and enjoyed as something totally new and different from what they were as first-overs.

IMG_2954

Soy Ginger Vinaigrette/Marinade

1 TBSP garlic

1 TBSP ginger

1/3 cup soy sauce

1-2 tsp red pepper flakes

1/3 cup rice vinegar

2-3 TBSP honey

1/3-1/2 cup orange juice

1/2 cup olive oil.

2 tsp fresh bail, chopped fine.


Whisk everything together and chill until ready to use.

Gifts From the Heart

My dear friend Priscilla, whom I have known since I was 12, had a birthday.  We have known each other most of our lives, so birthdays are most special when we just get together and have a good time enjoying each other’s company.  But this time, I made her day really special.  I made her gifts, and they all came from the heart, and to us, those are always the best kinds of gifts.   Everything I gave her I made especially for her.  Priscilla loves to cook and appreciates good food and wine just like I do.  I made her the lavender truffles, Time for Truffles although she did not know that at the time I posted about them.  They were a big hit.  I also bottled the wine as well.  The wine came from our favorite winery here in Colorado, InVINtions, A Creative Winery, located in Greenwood Village, down in the Southern Denver Metro area.   It was one of their red blends, but we bottled it and it is our label (if you look closely, it is my dog Vinnie on the label, also enjoying his glass of wine).  I also painted this fun whimsical picture for Priscilla as well.  My creativity has been blossoming in many different areas lately.  There was definitely a theme of wine and chocolate going on; two of my favorite things.

IMG_2956‘We had a girls’ night out, since our husbands went out on their own too.  This doesn’t happen too much anymore, so we took full advantage of our girls’ night out and had a great time.  After Priscilla opened her presents, we went our for dinner to a fun Cuban restaurant in nearby Louisville, CO.  The restaurant was called Coabana, and you can contact them at Coabana.net.  Neither of us was hungry enough for a full dinner, so we chose a fabulous selection of tapas and sangria.

IMG_2962

Even though we thought we were dining light, and split everything, there was still a ton of food. Because it was all so delicious, of course, we had to eat as much of it as we could.  From left to right, we had shrimp ceviche with avocados and pickled onions, served with grilled plantains or tostones; croquettas de pescado or fish croquettes; lamb empanadas with a roasted red pepper and habanero sauce and chips and salsa.  The atmosphere was fun and festive and very colorful.  It was like a little bit of Havana right here in the North Denver Metro area.  I really recommend Coabana.  The food is traditional Cubano style food.  The atmosphere was fun and colorful.  And the service was very good and very friendly.  You can tell by the smile on Priscilla’s face that we had a very enjoyable evening and dinner, and I hope she had a very happy birthday too.

IMG_2964

Gyros with Brisket

Believe it or not, we have actually used all of the beef brisket we had left over from our party.  I will use the left over pork tonight and we still have a few odds and ends that are also leftover, but those will all get used up very soon.  It has been fun coming up with so many completely different menu ideas that all originated from the same meal.  I hope you all have enjoyed this not-so traveled world of what to do with leftovers.  But the end is near.   We are slowly whittling away our leftovers, bite by bite.  Leftovers are great, especially when they have been recreated and transformed into something else, but I am actually looking forward to really cooking again too.  🙂 Lots of Leftovers

This last meal with the brisket and the cucumber salad was beef gyros topped with a cool and creamy yogurt sauce and feta cheese.

IMG_2945

I sliced the beef into thin strips and reheated it, chopped some more lettuce, tomatoes and red onions, and added it to the cooked pita bread.  I topped it with a creamy yogurt sauce and feta cheese.  The final touch was a French malbec and some leftover sweet potato salad.  This was such a quick and easy meal that was perfect after another long, hot day.

IMG_2015

I used my remaining cucumber salad Cool Cucumber Salad and chopped it up into a small dice.  Then I added yogurt, garlic, lemon juice paprika and more black pepper to my yogurt sauce and topped it with parsley.

IMG_2944

Layer it all together on top of the warmed pita bread, and top with feta cheese (optional) and voila!  Delicious gyros are right in front of you, ready to eat.  It’s like going out to eat in a Mediterranean restaurant in the comfort of your own home.   I just cooked my pitas directly over the flame on my burner, but sometimes I wrap them in foil and put them on the grill, if we are using the grill for other things..

IMG_2947

Yogurt Sauce

I cup of chopped cucumbers, tomatoes and red onions, cut into a small dice

1-1 1/2 cups plain yogurt

1 heaping TBSP garlic

1-2 TBSP lemon juice

1 tsp paprika

1 tsp black pepper, or to taste


Mix everything together and chill.  Serve cold.


Time for Truffles

I find recipes in the darnedest places sometimes, and often they are really good recipes too.  I found this recipe for lavender truffles in a light murder mystery book of all places, and it just sounded way too inviting not to try.  I am so glad I did too.  They turned out really delicious, and they just melt in your mouth.  The book was a light murder mystery, in the vein of Murder She Wrote, the old TV series that starred Angela Landsbury back in the 80’s.  The book was called “Death is Like A Box of Chocolate“.  It is a light, easy read, with a few surprisingly really good truffle recipes in the back.  It is definitely a fun book to check out.  And don’t forget to try out the truffle recipes too.

IMG_2940

The recipe itself only has four simple ingredients.  They were time consuming, but not difficult to make, once I figured out what I was doing and how I was supposed to do them without making a huge mess.  It took me a couple of tries to figure things out, but once I did, they were very easy to make.


Lavender Truffles

2-2 1/2 tsp dried lavender or 24 fresh lavender flower heads

2/3 cup heavy whipping cream

2 1/2 cups chocolate chips, or your favorite dark or bittersweet chocolate, divided

4 TBSP butter


Place the cream and lavender into a saucepan and heat on high just until the mixture starts to simmer, then melt the butter into the mixture and incorporate well.  Turn off the heat, and let it steep for 15 minutes.  After it has steeped, strain the lavender from the cream mixture and discard, then add 1/2 of the chocolate and melt completely, stirring constantly, over a medium heat.

Once the chocolate mixture has melted, line a baking sheet with parchment paper and pour the chocolate over the parchment paper.  Spread it out and smooth it over the parchment paper, then chill for at least 2 hours.   You want the chocolate to set, but you do not want it firm.

After the chocolate has set, put some plastic gloves on so the heat in your hands does not melt the chocolate, and spoon about 1/2 tsp of the mixture and roll into a ball.  Place the rolled balls on another baking sheet, lined with another sheet of parchment paper.  Repeat until the mixture is all used and rolled into balls.  Chill and set once again, for at least 2 more hours.

After the second chilling, melt the rest of your chocolate (if it does not melt smoothly, add a little milk as needed to make the mixture is more liquid and smoother, which makes it much easier to work with.  I found adding the extra milk made the chocolate more like a ganache, and gave a real shiny sheen to the coating, which I like.  I think it also gives a very nice finish to the chocolate).  Insert a toothpick into the chilled truffle balls and dip completely into the melted chocolate and gently swirl it around, making sure to cover the truffle ball completely.  Gently shake off the excess chocolate, and repeat until all the balls have been dipped.  I added some colored sprinkles to mine, but that is optional.  If you are doing this, add it to the balls before placing them back into the refrigerator to set once again, for at least 2-4 hours.  Once they are set, they are ready to enjoy.  The truffle filling is very smooth and creamy, with subtle hint of lavender.  These are so good.  If you like chocolate, you will love these.

Cooking the cream and the lavender.  I used dried lavender.

IMG_2927

Straining the lavender after it has steeped for 15 minutes.

IMG_2928.JPG

The second cook, adding 1/2 of the chocolate.

IMG_2929

Spreading out the chocolate for the first chill.

IMG_2930

Making the truffle fillings.  These are now ready to go back into the refrigerator for the second chill and set.

IMG_2932

Sorry for the poor quality on this one.  It was difficult to show what I was doing and take a picture at the same time.  Dipping the truffle fillings into the melted chocolate.  Gently shake off the excess chocolate.  Now is the time to use sprinkles if you choose to do so.  Once they are all done, chill again for at least another 2 hours.  If you prefer to be more fancy and add more elaborate decorations, do so after they have chilled and set once again.

IMG_2937

Time to sit back and enjoy.  Time for truffles.

IMG_2938

From Brisket to Steak & Cucumber Salad

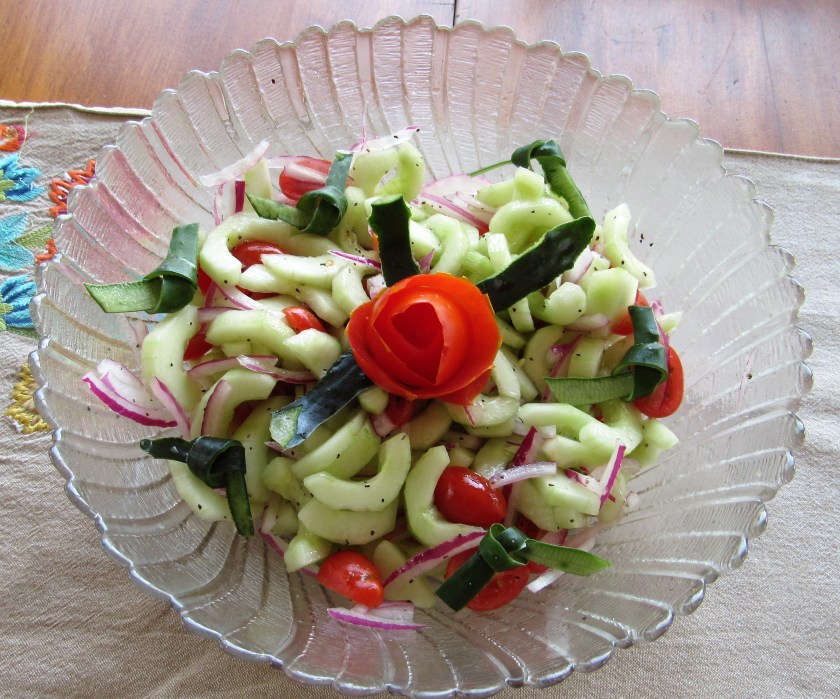
On really hot days, nothing is better than a cool salad.  We are back in the upper 80’s and lower 90’s again for this week, which means it is still salad weather.  And since I had a ton of cucumber salad, as well as a lot of other leftovers Lots of Leftovers that still needed to be used, and some of the delicious brisket, I combined them to make a nice cool steak and cucumber salad, Cool Cucumber Salad .  It was just perfect for dinner.

IMG_2015

This cucumber was HUGE.  It was about 1 foot long and about 6″ in diameter.  We were afraid it would be bitter, but it turned out just fine, especially with a little bit of sugar from the dressing.

IMG_2905

The brisket is in the middle , on the top white plate.  YUMMY! It was so tender and full of flavor.  I did not cook that, so unfortunately, I cannot have bragging rights, but take my word for it, it was out of this world!

IMG_2909

After chopping a bit of romaine lettuce and boiling a couple of eggs, all I needed to do was add some of the cucumber salad and slice the brisket.  The dressing was the vinaigrette that was in the salad already.  To finish it off, I toasted a couple of the slider buns that were also left over and finished the dinner off with a smooth South African Shiraz.  This quick and easy salad, along with the wine, was the perfect ending to a long, hot day.

IMG_2923

Recreating From Leftovers

If you read yesterday’s blog, you learned I had a ton of leftovers from a small party we had over the weekend.  Lots of Leftovers We could easily eat them just as they are, since they are already delicious and tried and true.  But more so than not, I like to recreate my leftovers into something completely different than what they were originally.  That makes it much more fun, and it also switches things up a bit, giving us more variety with our menus.  I love to create, but I also love to re-create as well.

The first recreation from this weekend’s stock of leftovers is enchiladas from the smoked chicken.  Sometimes when I make enchiladas I layer them, and sometimes I roll them.  This time I rolled them.  Enchiladas are so versatile.  You can fill them with anything you like and you can use whatever salsa you like with them as well.  This time, when I made them, I pulled and shredded the chicken, and made a filling with garlic, onions, jalapenos, red bell peppers and corn, but I have also made them with spinach and mushrooms and layered them.  Chicken Enchiladas with Spinach and Mushrooms  I make enchiladas quite often, and I make them with different fillings and different sauces all the time.  You can be as creative as you like when it comes to the fillings you choose when making enchiladas.

Recreating from leftovers, using my leftover smoked chicken and leftover tomatillo sauce to make enchiladas.

IMG_2912

I shredded the chicken and sauteed all my vegetables in olive oil, salt and pepper, cumin, oregano and cayenne pepper, then mixed them together to make the filling for my enchiladas.

IMG_2914

Spray a baking dish with cooking spray and add a little of the sauce you are using to the bottom of the pan.  Heat up the tortillas for about 15 seconds in the microwave to make them soft and pliable, then add your filling and either roll or layer your enchiladas.  This time I rolled them.  If rolling, roll them nice and tight, and stack them side by side.

IMG_2915

Once your pan is filled, cover the rolled enchiladas with your sauce and then with whatever cheese or cheeses you like.  I used mostly cheddar, then added some jalapeno jack cheese on top.  Bake in the oven at 375* F for about 40-45 minutes or until the cheese is all melted and the inside filling is hot.

IMG_2916

Once you remove the enchiladas from the oven, top with tomatoes, green onions and cilantro, or toppings of your choice.  If you like a little sour cream and salsa on your enchiladas, top it with those as well and serve.  I had some leftover rice and beans that I served along side my enchiladas to make a perfect meal.  Enjoy with a nice cold margarita especial and you are all set.

IMG_2920


Lots of Leftovers

The other night, we hosted a potluck get-together with friends we met back from our days when we volunteered with the Colorado Saint Bernard Rescue.  We all had a good time catching up with each other and visiting, and while we were visiting we were also busy filling our tummies with some delicious food.  Everyone brought a ton of food, and of course, I made a ton of food, which means we had two tons of food.  We had a wide variety of delicious and delectable foods.  I alone made a smoked pork loin and some smoked chicken, a Southwestern sweet potato salad, a cucumber-tomato-onion salad, Cool Cucumber Salad and an apple spice streussel cake Apple Spice Streusel Cake.  Then our guests all brought food as well, including more smoked, pulled pork and a smoked brisket, both of which were out of this world delicious; chicken wings and a beautiful antipasto salad.   We had enough food to feed a small army, and then some. But alas, there were only a few of us, and there was no way we could possibly eat all the food we had.  In fact, we barely even made a dent in the abundant spread of food, which means we have a ton of leftovers that need to be used.  It is a good thing the Queen of Leftovers is here.  I will be busy for quite some time re-creating dishes out of all these wonderful leftovers.

The pork is ready for the smoker.

IMG_2896

The finished product.  Delicious!

IMG_2906

After everyone left and took home what they wanted, this is all the food that was still left over.  It looks like so one even ate anything at all, but believe me, we did.   It looks like the Queen of leftovers will be busy for awhile.

IMG_2909


Apple Spice Streusel Cake

I am looking forward to the changing of the seasons once again.  I grew up in Southern California, and there really was not much ado about the changing of the seasons, but in Colorado it is pretty evident and spectacular, nothing like it is in New England, but still pretty darn good all the same.  Here in Denver, the weather is already starting to make some subtle little changes.  Daytime temperatures are much cooler than they have been during the heat of summer; the nights have a bit of a cool crispness to them; the sun is beginning to go down earlier each night; and the colors are beginning to change ever so slightly.   My favorite season of the year, fall or autumn as some call it, is just around the corner.   We Americans have a hard-core love of all things apple, and the apple orchards are almost at their peak, which means it will soon be apple season too.  Soon houses everywhere will be filled with the warm scents of apples, cinnamon and pumpkin, as well as all the rest of the fabulous scents of the season.  Cooking with apples is most definitely a fall tradition, and I am already getting a jump start on that.   We are having a small get together later tonight, and one of the dishes I made was an apple spice streussel cake.

IMG_2893

Gathering all my ingredients for my cake.  In culinary terms, this is called mis-en-place, or getting everything needed and ready to use.

IMG_2885

Making the streusel.  I used streusel both as a filling and for the topping.

IMG_2887

Cooking the apples until they are soft and tender in butter, brown sugar and cinnamon.

IMG_2888.JPG

Once the streussel is made and the apples are cooked, it is time to make the cake.  Just like with most recipes for baking, mix your dry ingredients together in one bowl, and the wet ingredients separately, then combine them together.  Once everything is ready and prepared, it is time to assemble the cake.  I followed the recipe and tried my best to layer the ingredients as they recommended, but that did not work out so well because my batter was not spreading out like it should and was definitely not cooperating as it supposed to.  What I should have done was fold the apple-cinnamon mixture into the batter, then add a layer of streussel filling so it would run through the middle of my cake like a ribbon.   I attempted to put a layer of batter, then the streusel, then apples, then more batter.  Instead, I just ended up blending it all together and then adding the streussel on top.  The taste will still be the same.  The only difference will be in the presentation, and I don’t think people are going to be terribly concerned about that.  They will be more focused on the taste, as they should be.

IMG_2890

Ready to bake.

IMG_2891

Once the cake has cooled completely, I removed it from my springform cake pan, and made the apple icing to drizzle on top.

IMG_2892


Apple Spice Streussel Cake

Stressel filling/topping

1 1/2 cups flour

3/4 cup packed brown sugar

1/2 tsp cinnamon (or if you have it 1 tsp of apple pie spice rather than using all these different spices)

1/4 tsp nutmeg

1/4 tsp allspice

1/4 tsp salt

1/2 cup (1 stick) melted butter

Mix all the dry ingredients together and add the melted butter.  Using a fork, mash everything up together until it is crumbly.  Set aside.


Cake

Preheat oven to 350* F

Spray an 8-8 1/2″ cake pan with cooking spray and line the bottom with parchment paper.

2 cups apples, peeled and diced small (about 2 medium-sized apples.  I used gala apples, because they are my favorite, but you can use your favorite type of apple as well.  There are certain types that lend themselves better to baking than others, but in the end, it really is a matter of choice.)

2 TBSP butter

2 TBSP brown sugar

1 1/2 cups flour

3/4 sugar

1/2 tsp baking powder

1/4 tsp baking soda

1/4 cup butter, melted

1 egg

1/2 cup buttermilk (I always use the powdered buttermilk mixed with milk, but if you prefer regular buttermilk, that’s fine too)

1/2 tsp vanilla


Cook the apples in the butter, brown sugar and cinnamon for about five minutes or until the apples are soft and tender.  Remove from the heat and set aside.

Mix the rest of the dry ingredients together and set aside.  Whisk the egg, buttermilk, vanilla and butter together then add to the dry ingredients.  Gently fold the cooked apples into the batter.  Add half the batter to the prepared cake pan, then add about half the streussel, and repeat, finishing with the rest of the streussel on top.

Bake at 350* F for about 45 minutes to an hour, or until an inserted toothpick comes out clean and the streussel topping is golden brown and slightly crusty.


Once the cake has completely cooled, remove it from the cake pan and drizzle the apple spice icing over the cake in a random pattern.


Apple Spice Icing

1 1/2 cups powdered sugar

1/4 tsp salt

1/4 tsp cinnamon

2 TBSP apple juice, or apple cider or milk


Mix everything together.  If your icing is too runny, add more powdered sugar to thicken it up, as needed.


IMG_2893


Caramelized Onion, Herb & Polenta Loaf

Due to my Southern heritage, I instinctively make either corn bread or biscuits whenever I have red beans & rice, or any other Southern dishes for that matter.   Those are just staples that go with every meal in the South.  When making the same things over and over, sometimes it is easy to get into a rut though.  Don’t get me wrong though, I love both cornbread and biscuits, but I also love to try new ideas as well.  I love to shake things up and make old recipes new again.   My husband said he wanted red beans & rice along with our Linguisa sausage for dinner.  No problem; easy-peasy.  This is a pretty typical Southern meal, and we eat it quite often.   This time though, instead of falling back to my old stand byes, I found a new recipe I tried that complimented the meal very nicely.   Corn meal, as it is known in the South, is known as masa in Latin America and polenta in Italy and the rest of Europe.  So in essence, one man’s polenta is another man’s cornbread.  I made a polenta loaf, or a cornbread loaf, with caramelized onions and herbs.   I served it with honey butter, but you can also serve it with creme fraiche as well, if you prefer things a bit more tangy rather than sweet.  If you choose to use creme fraiche, drizzle a little extra olive oil and add some cracked pepper to the topping as well.  In one word – DELICIOUS!

IMG_2881


Caramelized Onion, Herb & Polenta Loaf

1-2 sweet onions, sliced thin

2 TBSP butter

1 TBSP white balsamic vinegar

2 tsp sugar

4 large eggs

3/4 cup olive oil

3/4 cup milk

2 1/4 cups flour

1/3 cup fine ground corn meal or polenta

1 TBSP each fresh thyme, sage, and rosemary – dried is fine too, but use a little less of each if using dried – about 1 1/2 tsp each

2 1/4 tsp baking powder

1 tsp salt

1/2 tsp black pepper


Preheat the oven to 350* F.

Spray a loaf pan with cooking spray.

IMG_2869


Slice the onions thin, about 1/4 “.  In a very hot skillet or pan, melt the butter and add the onions, the white balsamic vinegar and the sugar.  Cook the onions until they are soft and a golden brown in color, or caramelized.   If you like the onions darker and sweeter, cook them a little longer.  Once they start to brown, they cook very quickly, so be careful not to let them burn.

IMG_2871

While the onions are cooking, mix all the dry ingredients and the herbs together and set aside.

IMG_2873

Whisk the eggs together and slowly add the olive oil while they are whisking.  Then add the milk and continue to mix until everything is well blended.  Add the dry ingredients and continue to mix just until everything is well incorporated together.

IMG_2876

Fold in the caramelized onions to the mixture then pour or spoon into your prepared loaf pan.  Make sure that the batter is evenly distributed in the pan.  Bake at 350* F for about 1 hour, or until an inserted toothpick comes out clean and the loaf is golden brown and set.

IMG_2877

IMG_2879

Once the polenta loaf has completely cooled, enjoy it with either honey butter or creme fraiche and olive oil and black pepper.

IMG_2881


Panzanella Salad with Peppers and Onions

As you all know, I absolutely LOVE trying out new things.  I also love to try different food combinations that may even seem a little “out there” to some.  Those are actually the most fun to experiment with.  Being adventurous and bold, both in and out of the kitchen, is what makes life interesting and spices things up.   With this recipe, I love all the individual components of the salad, but I never put them together as a salad before.  I am so glad I did though.  I wasn’t sure how my husband would like this bread and pepper salad, but to my pleasant surprise, he really liked it a lot.  He is a pretty adventurous eater as well, luckily for me.  This easy-peasy salad may just make it into our regular side salad rotation and just may become one of our new favorites.  This bread and pepper salad is Italian in origin, and is known as a panzanella salad.  Panzanella is very versatile.   All you need to really make this salad is roasted or grilled vegetables of your choice,  any type of crusty bread that is rich in texture, and something juicy and/or saucy to soak up the bread.  Making a panzanella salad is not only very tasty and rich in texture, but it is also a really good way to use up old bread as well.  As with most things, there is no right or wrong way to make this versatile salad.  Just make it by using what you like and what you have.  Throughout the ages, more so than not, most recipes come from using up the ingredients that are on hand at the time, as well as what was readily available in local areas.   For me, when I cook by just using what I have on hand, especially if it turns out really good, the hard part is remembering exactly what ingredients I actually used to make sure I can repeat it again.

I roasted everything together in the oven, but if your prefer to grill it, that’s fine too.  Grilling everything adds to the flavors of the ingredients, but it was raining outside, and I did not want to use the grill, so I chose the oven instead.

IMG_2863


Panzanella Salad with Peppers and Onions

1/4 loaf of your favorite crusty bread, cut into large cubes about 1×1″ in size

1 each red and green pepper, cut about 1″ in size

1-2 small red onions, cut about 1″ in size

1 small eggplant, cut into cubes about 1″ in size – optional

6 TBSP olive oil

3 TBSP sherry or red wine vinegar

1 tsp paprika

2 TBSP green onions, sliced thin

salt & pepper to taste


I mixed everything together, except the green onions and roasted it in the oven at 375* F for 10 minutes, then stirred it up and continued roasting it for another 10 minutes, or until all the bread was golden brown and crusty.  After removing the baking sheet from the oven, add just a bit more sherry vinegar and sprinkled the green onions on top.  This salad is best served either warm or at room temperature.

If you choose to make this a grilled salad instead of roasting everything together, grill the peppers whole and the onions and eggplant in very large, thick slices, and then cut them to your desired size.  Same with the bread.  Grill it in thick slices, and after it is cooked, then cut it.  Once everything is cooked, then toss it all together with the remaining ingredients.

I added green peppers too, but the green peppers and eggplant were both an after thought, hence, they are not featured in my picture with the ingredients.

IMG_2857


IMG_2858

Mangia and enjoy! A delicious panzanella or bread salad.

IMG_2864