Some Flavors from the Middle East

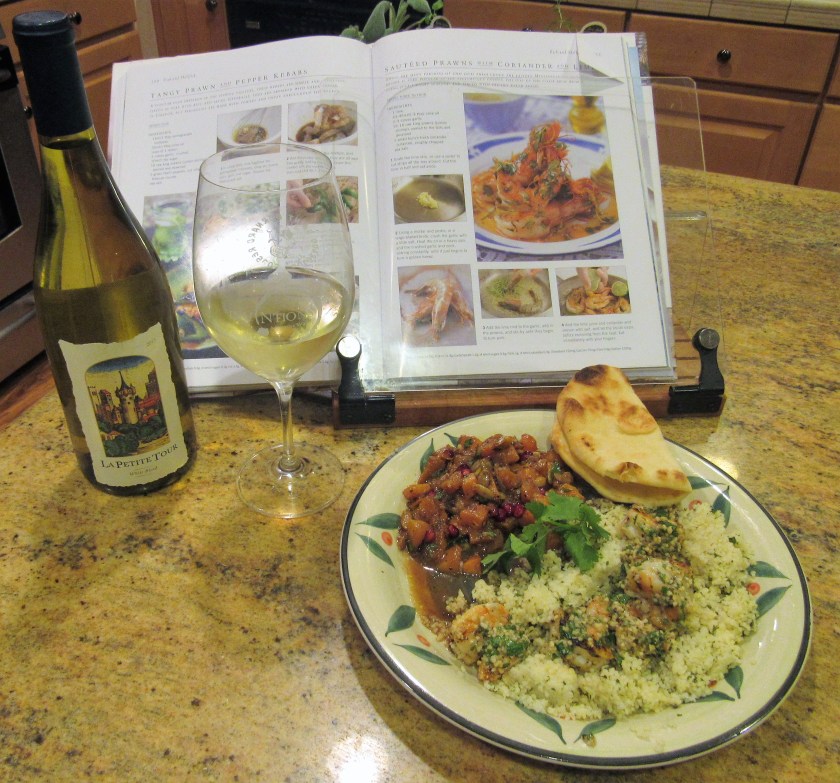
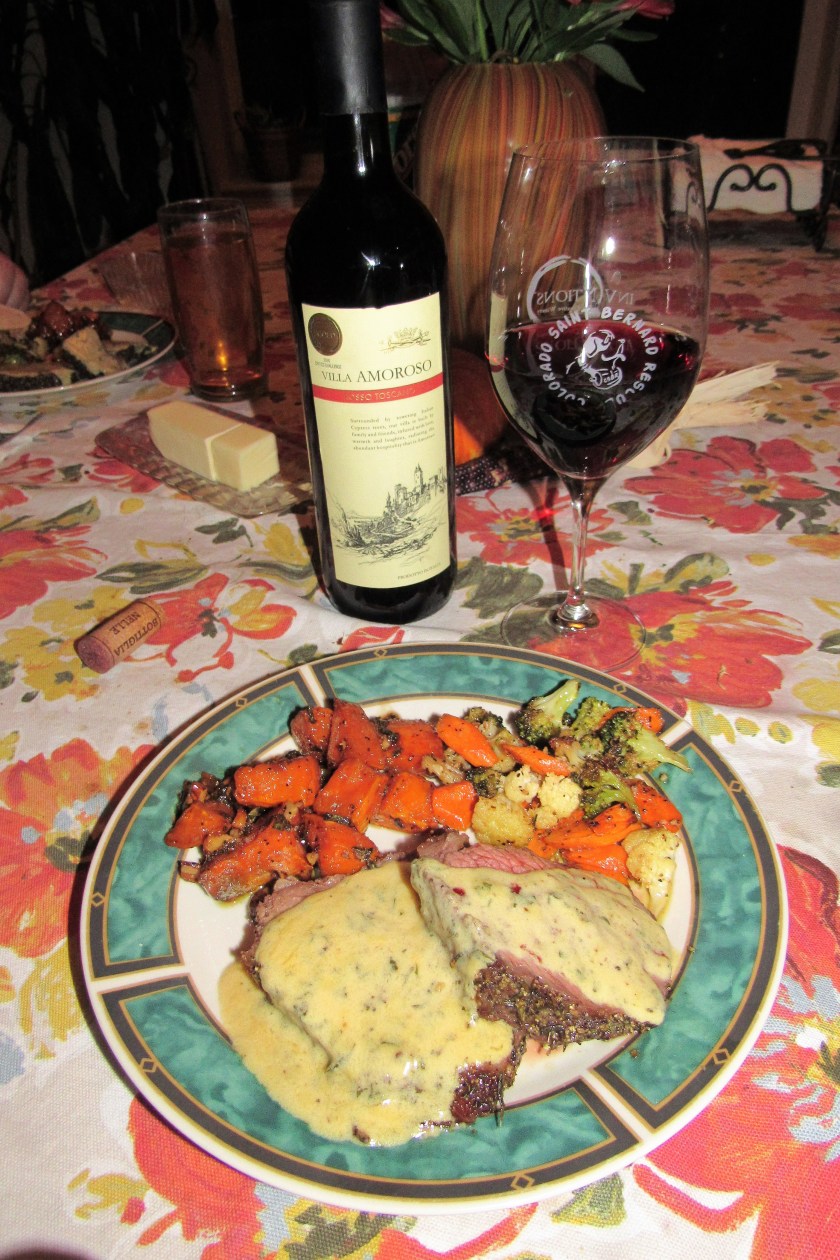
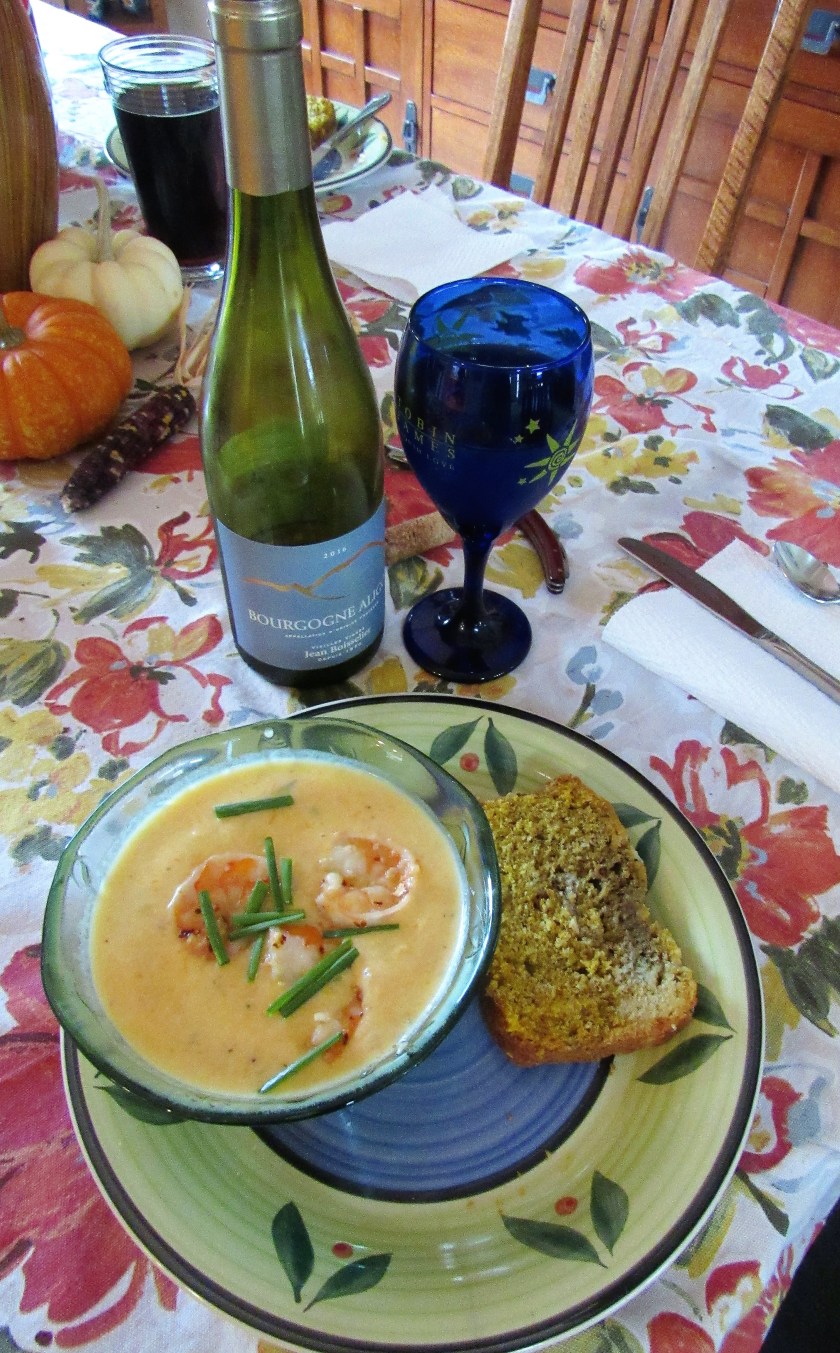
The Middle East is where many different cultures from three different continents all come together and meet.  It is the melting pot for South Eastern Europe, Western Asia and the Eastern parts of North Africa.  There are many different countries within this region of the world as well, but most of the culinary influences hail from three countries – Lebanon, Syria and Jordan.  These three countries make up what is known as the Fertile Crescent. Though these three countries all share a common language and have the same cultural heritage, they all three have their own unique and distinct personalities.  These regional distinctions are also found in the foods from these areas.  Lebanon is famous for its wide array of mezze or little dishes, similar to tapas in Spain.  Jordanian recipes are renowned for the meat dishes, and the Syrians are best known for their piquant or spicy dishes that are meant to be eaten with breads.   “The cuisines of Lebanon, Syria and Jordan are generally regarded as Arab food at its best”, The Food and Cooking of the Middle East.   Dinner had bits and pieces of all three of these Arabic regions.  It was full of flavor and full of color.  We had grilled shrimp marinated in lime juice and cilantro, that I served with roasted pumpkin with pomegranate and pepita seeds, cous cous and pita bread with hummus.  I completed the meal with a crisp chardonnay that had hints of apples and melon.

IMG_4084

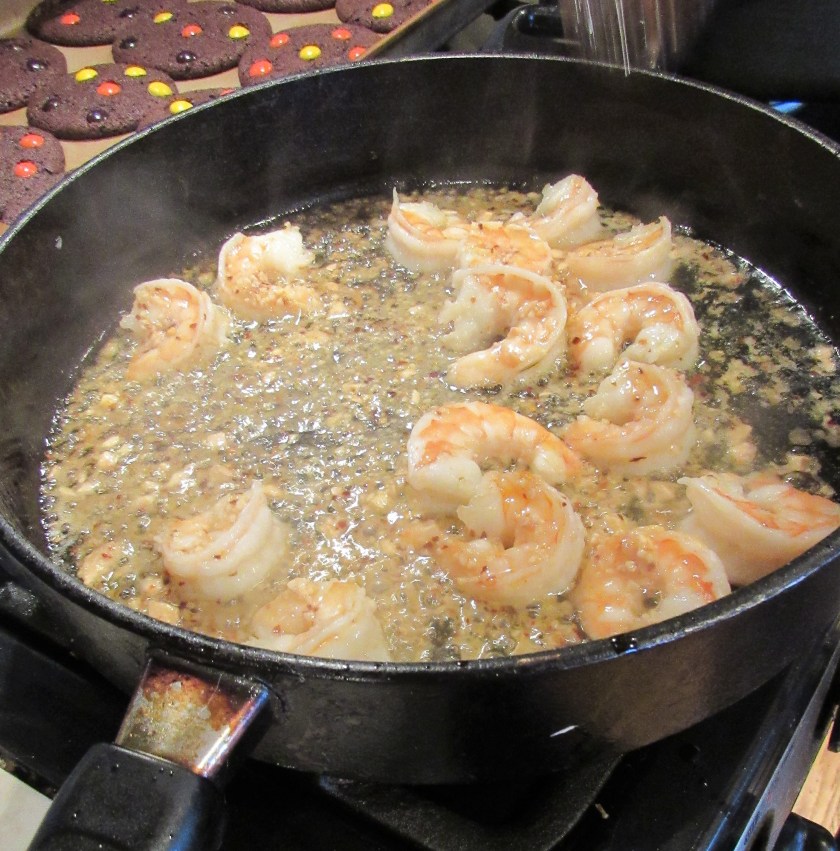
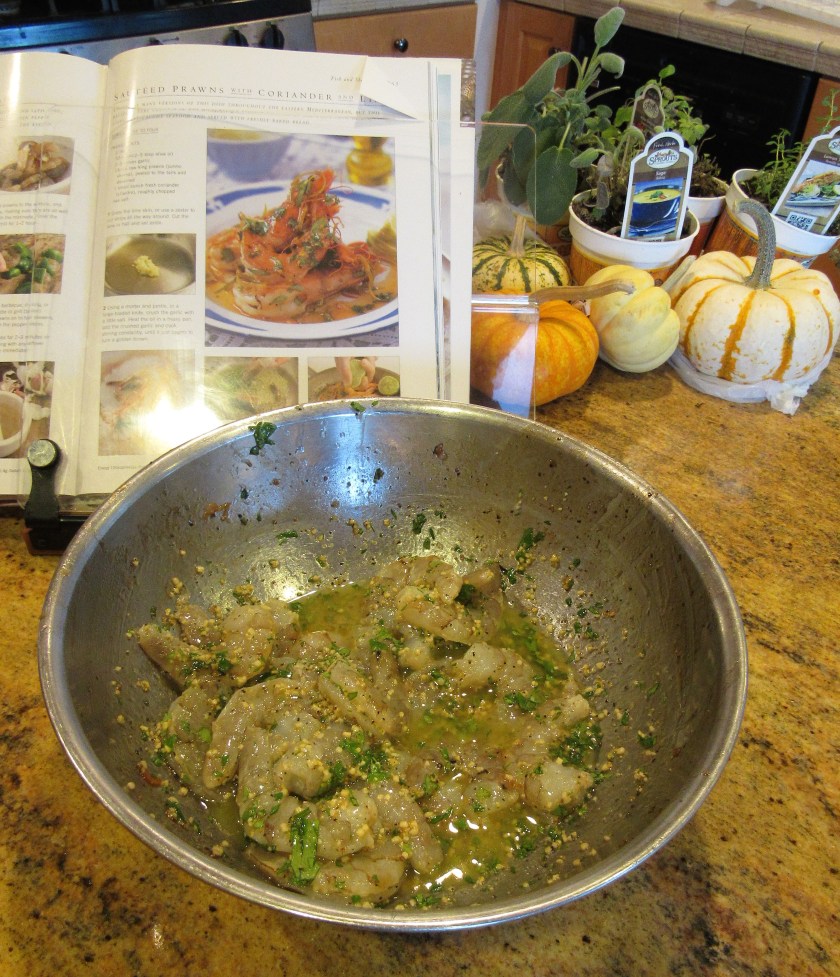
Shrimp with Cilantro and Lime

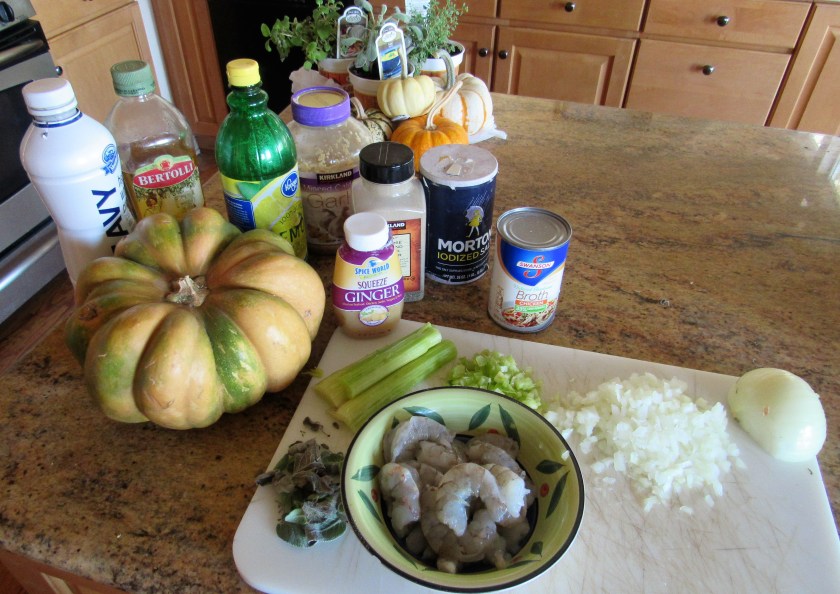
15-16 large shrimp or prawns, peeled and deveined

2 TBSP lime juice

1-1 1/2 TBSP garlic

salt and pepper to taste

3 TBSP olive oil

1 small bunch of cilantro, chopped in a rough cut


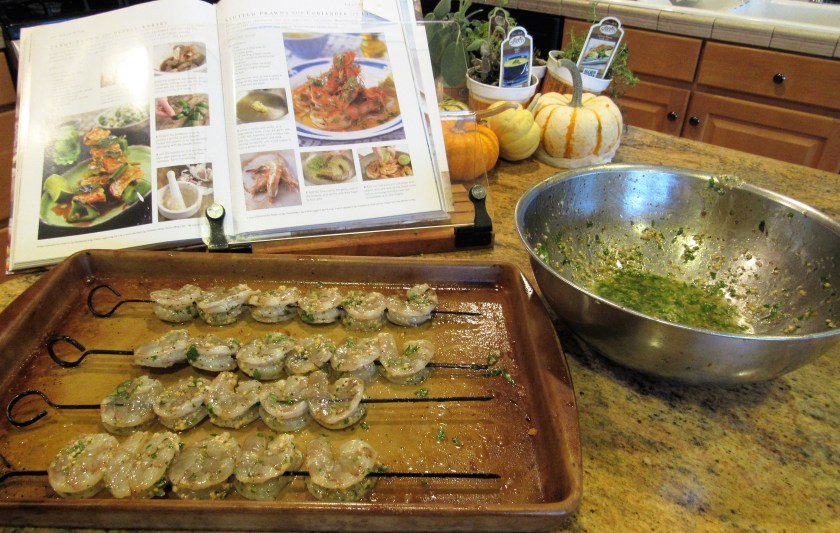
Mix everything together and marinate the shrimp for about 1/2 an hour and chill.  I skewered the shrimp and grilled them, but you can also pan-fry everything together as well.

IMG_4077

IMG_4079

Save the marinade.  Once the shrimp is cooked and ready to serve, heat up the marinade and top the cooked shrimp with it.  YUM!

IMG_4081


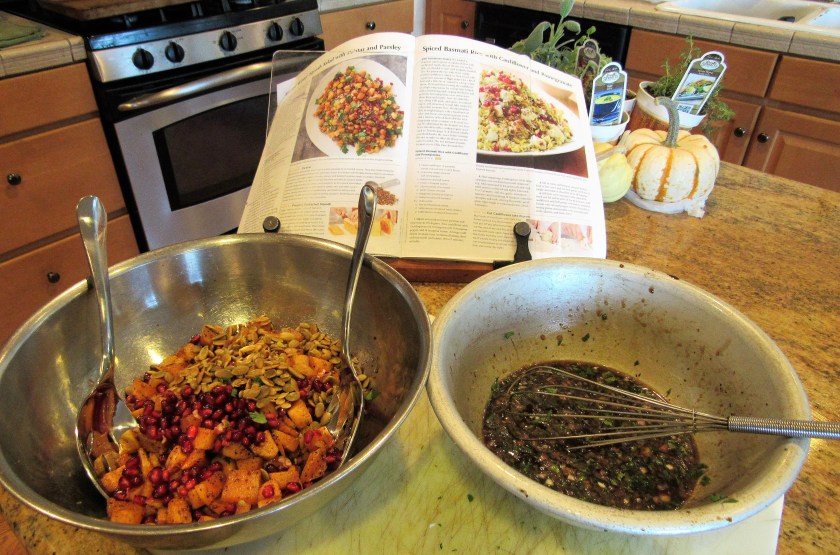
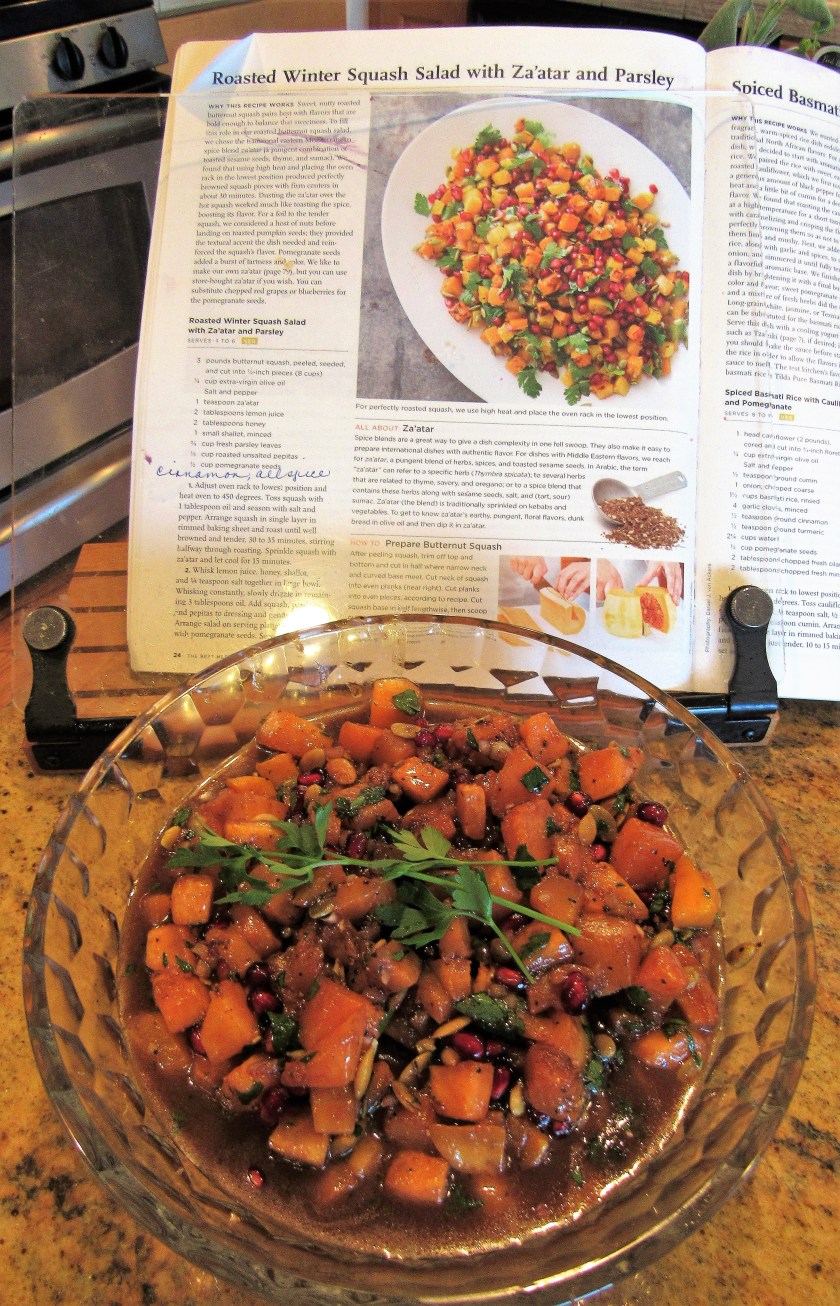
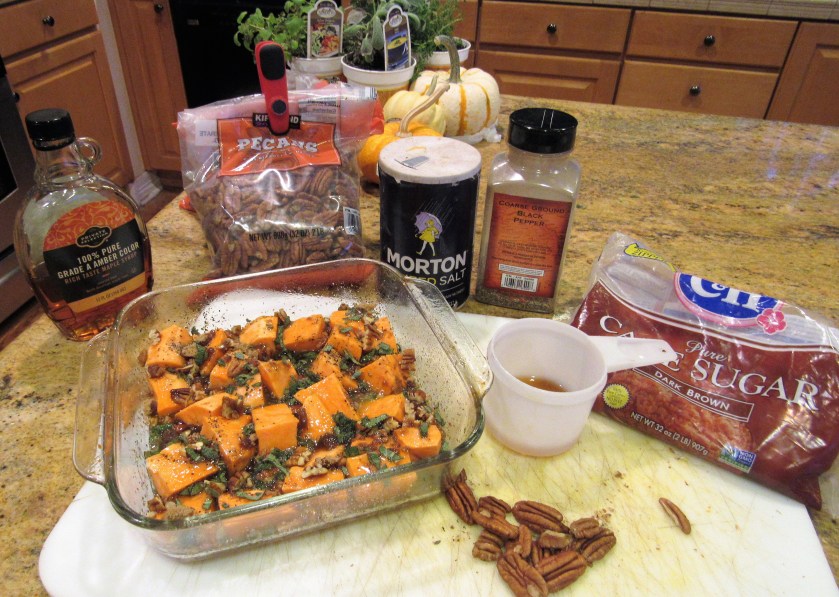
Roasted Pumpkin with Pomegranate and Pepita Seeds

IMG_4068

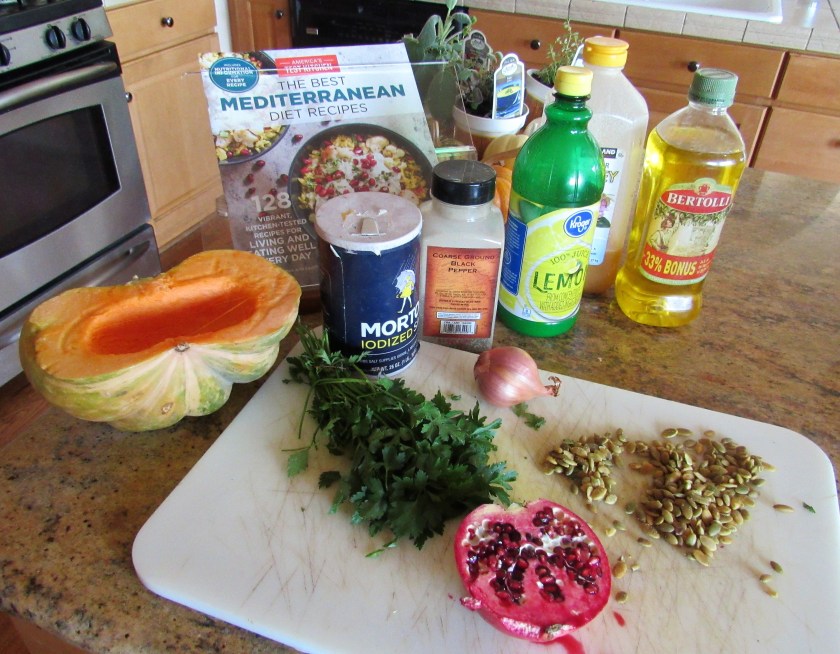
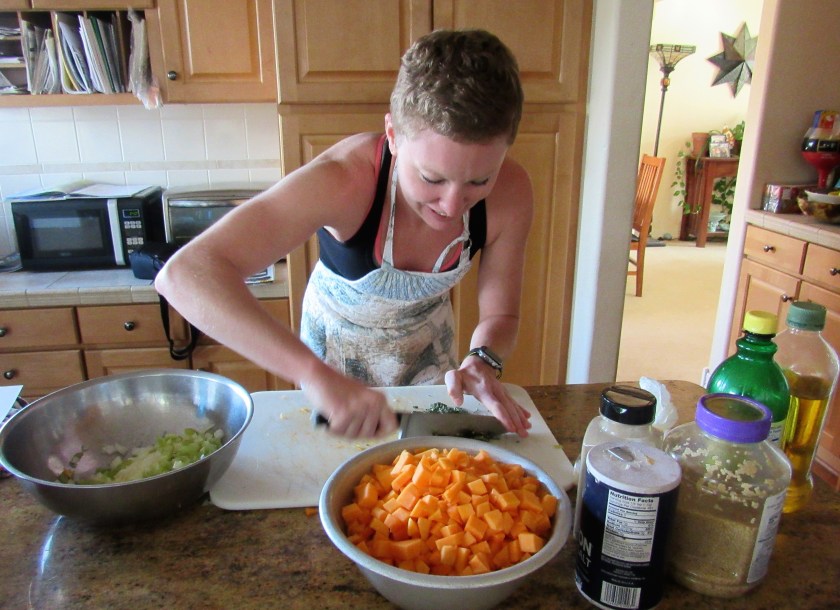
3 lbs of pumpkin, peeled, seeded and cubed

1/4 cup olive oil

salt & pepper to taste

2 TBSP lemon juice

2 TBSP honey

pomegranate dressing (optional)

1 shallot, minced fine

1 bunch of parsley, chopped in a rough cut

1/3 cup toasted pepita seeds

1/2 cup of pomegranate seeds

1 1/2 tsp cinnamon

1/2 tsp allspice


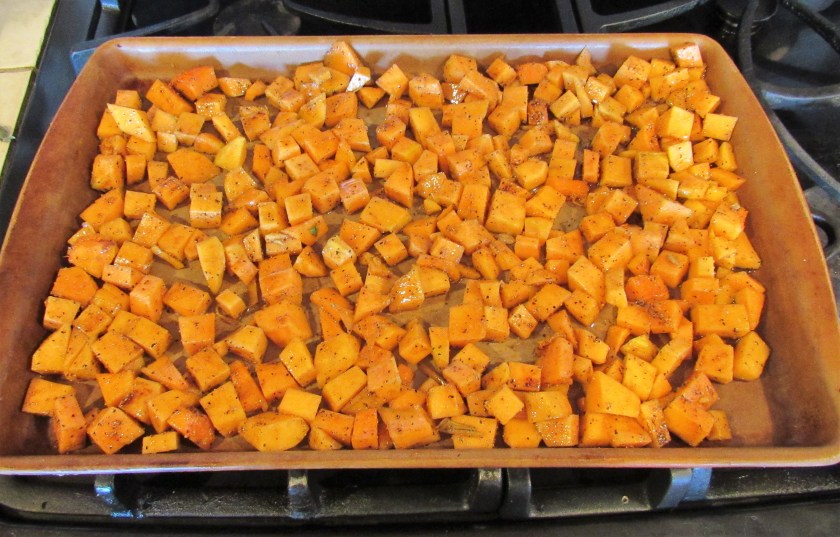
Preheat the oven to 450*F


Toss the pumpkin cubes with half the olive oil, salt, pepper, cinnamon and allspice.  Roast for about 20 minutes or until the pumpkin is tender, stirring after about 10 minutes.  Once the pumpkin is cooked, remove from the oven and let cool.

IMG_4070

Once the pumpkin has cooled, toss it with the pepita seeds, pomegranate seeds and parsley.  Mix together the lemon juice, honey, olive oil and pomegranate dressing, if using.  I had some left over pomegranate dressing and used that for some extra flavor.   Then toss everything together and serve.   I really like this dish served warm, but you can eat it cold too.

IMG_4073

IMG_4075

IMG_4083


Whoooo Hoooo its the weekend share #56

Hey out there, if you like food and fun food facts, then I am the blogger for you. My blog is A Jeanne in the Kitchen and you can find me at ajeanneinthekitchen.com. Stop by and say hi.

itsgoodtobecrazysometimes's avatarIts good to be crazy Sometimes

Its that time on a Thursday you have all been waiting for, yep its the weekend share, so roll up roll up and add your links

blog party1

If you have never done this before, give it a go, you lose maybe 30 seconds of your life adding a link and you never know who might see it, I will, my mum probably will, so its well worth it.

As everything is life there are rules, if you are new or just need reminding here they are

Rules are very simple,

  1. You can share up to five links
  2. They can be a post, your blog, someone elses post or blog
  3. You can comment on here from now till 11.30pm on Friday evening (GMT time)
  4. I shall start sharing from Midnight Saturday till 11.30pm Sunday (GMT time)
  5. It can be anything you want, however I will have final say if I think its…

View original post 151 more words

Mexican Vegetable Medley

I love all vegetables, and we eat them all the time.  As I have said many times, I eat vegetables with my vegetables, and more so than not, I serve multiple vegetables at a time.  I guess my love for vegetables comes from growing up in Southern California, where fresh vegetables are in abundance all year round.  There is also a very large Hispanic population, and therefore a large influence on life in Southern California  in general, which also probably plays a large role in my love of vegetables and good Mexican food.  A good friend of mine had told me, not so long ago, that I “was more Mexican than American”.  I was also told, many years ago by one of my chefs who used to work under me, that “mi corazon esta Mexicana, no esta Americana”.  Although, biologically I do not have any Latina blood in me, this is probably true, to a certain extent.

Traditional Mexican cuisines are a fusion of Mesoamerican and Spanish foods that have been blended together over time to give them their own unique personalities.  The diet of the Aztecs consisted of mostly chilies, beans, tomatoes, herbs, vanilla, avocado. papaya, pineapple, achiote or annatto, squash, sweet potatoes, turkey and fish.  I love all of these foods, and we eat them all quite often.  When the Spanish came to the New World, they introduced olive oil, almonds, beef, chicken and pork, which we eat a lot of as well.  What is popularly known as Mexican food here in the United States, is actually more of a Tex-Mex type of food, and is completely different than what is traditionally served in Mexico.  Authentic Mexican food is all about the freshness of the ingredients, so a lot of fresh vegetables and fruits, mixed with a variety of herbs and spices, as well as many variations of queso blanco or white cheeses, are things most commonly found in and used when preparing Mexican dishes.  The yellow cheeses we see used in Mexican foods here in the United States, are from the American influences, and are not traditionally used in Mexico.

Garlic and onions are two of the most popular ingredients and flavors used in Mexican cooking.  Most savory Mexican recipes use at least one of these ingredients, if not both, as do I, in almost every recipe.  Traditional Mexican cooking also uses a wide variety of herbs and spices as well.  The most popular herbs used in Mexican cooking are Mexican oregano (not the Greek oregano), basil, cilantro, mint, sage, and thyme.  Spices that are mostly used in Mexican cooking are cumin, coriander, allspice, cacao powder, nutmeg, cinnamon, cloves, achiote or annato seeds, and epazote.  Epazote is used mostly when cooking beans, and is used to help correct digestional problems that often come about when eating too many beans.  But it has to be used sparingly because eating too much can also be toxic.

I have all the basics of Mexican cooking right here.  I have a variety of peppers, squash, tomatoes, garlic, onions, sage, thyme, oregano, cilantro, cumin, and red pepper flakes.  I also used my queso blanco and some pinons or pine nuts.

IMG_4044

Once everything was cut, I sauteed all the vegetables and spices together until they were soft and tender.  I added the fresh herbs right at the end so they would not loose their flavors.

IMG_4047

After everything was cooked and the herbs were added, I transferred it all to a baking dish coated with cooking spray, then topped it with mozzarella cheese (you can use any cheese you like) and pine nuts.  I baked it uncovered at 375* F for about 30 minutes, or until the cheese was all melted and a little crusty and the pine nuts were toasted.

IMG_4050

IMG_4052 - Copy


Esta mui fresca, mui delicioso y saludable.  !Desfruitas!


Southwestern Green Chili Sausage Rolls

We had taken some green chili  sausages out of the freezer, and I wanted to do something different with them, but by the time I figured out what I wanted to do, I did not have enough time to get it done.  I made some green chili sausage rolls that I served with a Mexican blend of vegetables and a combination of rice and lentils, for a quick and easy Southwestern comida.  I may run out of time to be as creative as I like, but my ideas are very rarely in short supply.  Because I was pressed for time, I actually “cheated” this time.  As you all know, I much prefer to make my own breads and dough for things if I can, but sometimes, life happens and there just is not enough time for that.  Fortunately there are plenty of good alternatives out here that help us out when we are in a pinch.  I used some Pillsbury Crescent rolls for my dough wraps, and everything turned out just fine, as I knew it would.  These are very easy to make and taste great.

IMG_4054

This is all it takes to make these sausage rolls.  You can use any kind of cheese you like.  I actually used both mozzarella and cheddar cheese for my sausage rolls.   I am not a big cheese eater at all, but I can do the lighter cheeses.  My husband prefers cheeses that are heartier and more flavorful.  So mine had the mozzarella cheese and my husband’s had the cheddar cheese.

IMG_4037

Cook the sausages completely and let them cool before wrapping them.  Whether you use your own dough that you make or store bought, roll out it out to about 1/4 ” in thickness, on a lightly floured surface, then cut into thin strips.

IMG_4039

Wrap the dough strips carefully around the cooked sausages and then top with your favorite cheese.  Bake at 350* F for about 30 minutes or until the cheese is all melted and the dough turns golden brown.

IMG_4042

I topped my green chili sausage rolls with avocado slices and salsa, then served them with a Mexican medley of vegetables and spices (possibly tomorrow’s post) and a combination of leftover lentils mixed with tomatoes, spinach and rice.  I was more in the mood for a glass of wine than I was for a margarita, so I chose a crisp viognier with hints of grapefruit and other light citrus flavors to accompany the meal.  !Desfrutas!


IMG_4053


Roasted Beef Tenderloin with Rosemary and Fennel

Fall seems to have left us for while, and we have jumped right into winter.  It started over the weekend, and it is still here.  Our temperatures outside have been in the low 20’s, and we have had two days of snow.  The good thing about the Colorado snow, however, is that it does not last very long, and as soon as the sun comes out, the snow starts to melt off, unlike other parts of the US where the snow stays around for months and months.  But it is still very cold outside.  And when it is cold outside, the best thing to do is stay warm inside.  That can easily be done by having the oven on for some good baking and roasting.  That is exactly what I did too.  I roasted beef tenderloin with rosemary and fennel, along with some roasted vegetables and roasted sweet potatoes mixed with maple syrup and pecans.

IMG_4028

The view of the first lake from our deck.  When the weather outside is frightful, make the most of it and enjoy the warmth from inside with some good wine and delicious foods from the oven.

IMG_4012

IMG_4013


Roasted Beef Tenderloin with Rosemary and Fennel

1-2 TBSP olive oil

1 TBSP fresh rosemary

1 1/2 tsp fennel

salt & pepper to taste

1 beef tenderloin 4-5 lbs

IMG_3981

Blend all the ingredients together in the food processor and generously coat the beef tenderloin.  Let it sit uncovered or loosely covered in the refrigerator for anywhere from 24-36 hours.

IMG_3983

IMG_3984

When you are ready to roast the meat, take the meat out of the refrigerator cover and let set at room temperature for about 30 minutes before putting it into the hot oven.  Preheat the oven to 375* F if using a regular oven and 350* F is using a convection oven.  Roast for at least 40-50 minutes for a rare meat, where the thermometer inserted in the center reads 120* F, and longer depending on your desired doneness.  For me, medium rare is just perfect, and the thermometer should read between 125-130* F when inserted into the thickest part of the meat.   Cook the meat to your preferred level of doneness, just keep in mind, the longer you cook the meat, the more dried out and tough it will become.

While I had the oven on, I also roasted some mixed vegetables with garlic, salt & pepper and olive oil, as well as some sweet potatoes mixed with pecans, brown sugar, butter, fresh sage and maple syrup.

IMG_4018

Roasted Sweet Potatoes with Pecans and Maple Syrup

1-2 large sweet potatoes, peeled and cut into large chunks

1/3 cup chopped pecans

1 TBSP brown sugar

3-4 TBSP butter melted

1/2 cup maple syrup

2 tsp fresh sage, chiffonade into thin strips

salt & pepper to taste


Sprinkle all the ingredients evenly over the sweet potatoes and roast at 350* F for about 30 minutes, or until he sweet potatoes are tender and slightly caramelized, stirring occasionally.

IMG_4014

I also made a mustard cream sauce for the meat.  All I needed was a few simple ingredients to make this tasty sauce.   In addition to these simple ingredients, I also added some black pepper, parsley and butter to finish the sauce.

IMG_4020

Mustard Cream Sauce

1/2 cup heavy whipping cream

2 TBSP Dijon mustard

2 tsp lemon juice

salt & pepper to taste

2 TBSP butter

parsley

In a hot skillet, add the heavy whipping cream and Dijon mustard and mix well.  Then add the lemon juice and salt & pepper.  Cook it down for about 5-7 minutes, at a medium/low temperature, stirring frequently, then add the butter right at the end.  Finish with parsley and serve over the roasted beef tenderloin (optional).

IMG_4023


Nicodemus was Mommy’s little helper today, making sure Mommy made everything just right.

IMG_4022

Just the results Nicodemus and Mommy were looking for.  To complete the meal, I served it with a robust, fruity, smooth red blend.  A perfect meal for a cold wintery day.


IMG_4034


Pumpkin Ginger Soup with Shrimp

My friend Elizabeth is having fun learning how to cook new things, and every now and then we get together, and I introduce her to new foods.  She came over the other day, and we did just that.  It was a cold day, although nothing like what it has been these past few days, so I thought it would be a good day for soup.  I also had a lot of pumpkins that needed to be used.  We made a pumpkin and shrimp soup that came out really, really good.  I took my pumpkin Parmesan bread out of the freezer and served that with the soup, along with a crisp white blend.   It was the perfect late lunch on a cold and dreary day.

IMG_4004

Pumpkin Ginger Soup with Shrimp

Make the soup first, then top it with the cooked shrimp, along with a dollop of sour cream and chives if you like.

The Soup

2 TBSP olive oil

1 medium onion, diced fine

1 TBSP garlic

1 TBSP ginger

2-3 lbs of pumpkin

3 celery stalks

4 cups chicken stock

1- 1 1/2 cups heavy whipping cream

salt & pepper to taste

2 tsp fresh sage

IMG_3986

I made my own chicken stock that we used.   In a large soup pot, heat the oil and saute the onions and celery until they are both translucent.  Then add the garlic, ginger and the pumpkin, and cover with the stock.  Bring to a boil, then reduce the heat to a simmer and continue cook for about 30-45 minutes, or until all the vegetables are soft and tender.

IMG_3989

IMG_3994

Once the vegetables are all cooked, add the cream and puree the whole mixture.  When the soup is pureed, set it aside and keep it warm.

IMG_3996

The Shrimp

1/2 lb shrimp, peeled and deveined

2 TBSP olive oil

1 TBSP ginger

1 TBSP garlic

red pepper flakes to taste

1 TBSP lemon juice

sour cream

chives


Saute the first ingredients together until the shrimp is cooked.  Then add the lemon juice and mix well.

IMG_4000

I think dancing around the shrimp brought out all the flavors.

IMG_4002

Quality control.  We had to make sure it came out all right before serving, right?!

IMG_3998

A cool, crisp white blend was the perfect addition to make the lunch complete.

IMG_4008


Thank You to All Those Who Serve

With today being Veteran’s Day, I am just going to give a big THANK YOU to all those who serve and all those who have served and to all those who put their life on the line everyday to keep us all safe.

My daddy in his Australian Army uniform – circa 1940 WWII, before being shipped off to fight in North Africa. This picture was taken outside of Melbourne, Australia, where he was from.  Thank you Daddy, and to everyone else who fought to make the world a better place.

Daddy

Pumpkin Spice Cookies

I love cookies.  I also love anything and everything pumpkin.   And it is prime pumpkin season, so of course, I am going to combine these two great flavors to make something really special, especially just in time for Thanksgiving.  One of our fellow blogger friends, My Life as A Mom, posted about her pumpkin spice cookies back in October.  Ever since I saw her post, I have been “Jonesin'” to make these incredible looking seasonal cookies.  I just knew I would be making these in the very near future, although I was hoping to have made them long before today.   They did get made today though, and they are every bit as scrumptious as I knew they would be.   So hats off and kudos to My Life As a Mom for this delicious inspiration.  I love these cookies.  The only things I would do differently would be to bake them a little longer since I prefer crunchier cookies to soft cookies, and chill them in the refrigerator for about 30 minutes before baking to have them set, but other than that, they are just perfect.

IMG_3976

Pumpkin Spice Cookies

2 3/4  cups flour

1 tsp baking powder

1 tsp baking soda

1 tsp cinnamon

1 1/2  tsp of either pumpkin pie spice or 1/2 tsp nutmeg, 1/2 tsp allspice and 1/2 tsp ginger

1/2 tsp salt

1 stick butter, softened

1 cup pumpkin puree

1 large egg

1 tsp vanilla

1 1/2 cups sugar

IMG_3970


Preheat the oven to 350* F

Spray you cookie sheets with cooking spray


Mix all your dry ingredients together and set aside.

Blend the butter and sugar together until light and creamy.  Then add the egg, pumpkin and vanilla.  Mix well.  Add 1/3 of the flour and mix until just incorporated, then repeat until all the flour is mixed into the dough.

IMG_3972

Once the dough is made, fit a pastry bag with a fluted tip and fill the bag about 2/3 full with the dough, then pipe the dough in a 2×2 circle onto the prepared cookie sheet.

IMG_3974

Spice Topping

1 tsp cinnamon

1 tsp sugar

1 tsp of either pumpkin pie spice or 1/2 tsp nutmeg, 1/2 tsp allspice


Mix everything together and add about 1/3 tsp to the cookies.  Chill in he refrigerator for about 30 minutes before putting them into the oven.  Bake for about 12-15 minutes for softer cookies or about 18 minutes if you like crispier cookies.  Let cool for about 5-7 minutes on the cookie sheet before placing them on a cookie rack to continue to cool.

IMG_3975

The end result – DELICIOUS!!!  It’s hard to stop at just one, or two ….

IMG_3980


Baked Parmesan Halibut with Tomato Buerre Rouge

Halibut is one of my absolute favorite types of fish.  It is a thick whitefish with a steak-like quality to it.  The best halibut is found in very cold waters.   However, living in Denver, fresh halibut is hard to come by, and when it is easily obtainable, it is usually too expensive to buy, so unfortunately, I do not get to eat it nearly as often as I would like.  When I do purchase it and get to eat it though, it is always a special treat to me, and I always make the most of it by preparing it in a very tasty way.  This time was no exception.  I added a crispy coating and baked it, then topped it with a delicious dill buerre rouge, or a dill red butter sauce, that just brought the dish to life and made the flavors really pop.  I complimented the meal with some creamy scalloped potatoes and Brussels sprouts cooked with apples and bacon and pumpkin Parmesan bread that i took out of the freezer.  Savory Sweet Pumpkin-Parmesan Bread  I finished the dish with a crisp chardonnay that had hints of citrus, apples and melon.  I was in seafood Heaven.

IMG_3968

Baked Parmesan Halibut

1 lb halibut or white fish or your choice

1 cup corn flake cereal

2 TBSP grated Parmesan cheese

1 tsp dried dill

salt & pepper to taste

1/3 cup milk

1 egg

IMG_3950

Mix all the dried ingredients together in a food processor until you have a nice crumbly texture.

IMG_3951

Pat dry the fish.  Mix the egg and the milk together.  Dip the fish in the egg mixture and coat well, then dip it into the corn flake and Parmesan mixture and coat well on both sides.

IMG_3952

Place the fish in a baking dish or on a baking sheet and bake at 450*F for about 10-12 minutes, or until the crust is golden brown and the fish flakes off easily with a fork.

IMG_3953


Dill Buerre Rouge

1 tomato, diced small

1/2 cup dry white wine

1 TBSP garlic, minced fine

1 shallot, minced fine

4-5 TBSP butter divided

salt & pepper to taste

1 tsp fresh dill

IMG_3955

In a very hot skillet, melt 1/2 the butter and saute the garlic and shallots, until they are soft and translucent, or about 5 minutes.  Add the wine, and completely cook off all the liquid.  This will reduce the acidity in the sauce.  Once the liquid is all cooked off, add the tomato and salt & pepper.  Continue to cook, at a medium heat for about 7-10 minutes, or until most of the tomatoes have broken down and are well incorporated into the sauce.  If you need to add more wine, add a bit more as needed, but make sure to completely cook the liquid off again.

IMG_3957

IMG_3960

IMG_3963

Once the tomatoes have broken down and are now part of the sauce, add the rest of the butter and incorporate well.  The tomatoes do not have to be completely liquified.  In fact, I love the rustic flair where there are still some chunks of tomato left in the sauce.  It gives the sauce more texture and character.  Add the fresh dill right at the very end, after the sauce is completely cooked.  Serve it over your fish and top with a sprig of fresh dill for garnish.

IMG_3964

IMG_3967


P’s for the Pups

Fall is the perfect season for pumpkins.  They are great for decorations, but they are also very healthy and delicious to eat as well.  Not only are they healthy for us, but they are very healthy for our dogs too.  Both the “meat” of the pumpkin and the seeds are very healthy and good for dogs to eat.  If you are going to give them the seeds though, they should be roasted and not raw, since raw seeds can go rancid very quickly.  Roasted pumpkin seeds for dogs are high in Omega 3 fatty acids which act as a natural remedy for parasites such as roundworms and tapeworms.  They can also help dislodge kidney stones, and are also beneficial to your dog’s urinary tract.   Because pumpkins are high in fiber, and are good for your dog’s digestion, they help with both diarrhea and constipation.  And if your dogs are on the pudgy side, like my Lucie, adding pumpkins to their diets helps with weight loss as well.  Pumpkins are 90% water, so adding pumpkin to the diet can help hydrate your dogs too.  You can use canned pumpkin puree or whole pumpkins that have been peeled and cooked.  Do not let your dogs eat the skin or the core though.  Not only are pumpkins healthy for your dogs, but dogs love them because they taste so good.

As most of you know, I make the wet food for my two Saint Bernards all the time.  I give them a wide variety of foods high in protein and low in fats.  I make them the same quality of foods that I make for myself and my husband.  I usually make a batch that will last for most of the week.  They are very healthy, with shiny coats.    I will take this as a positive sign that they like their food, although they don’t exactly have the most discriminating tastes.   There is some controversy about whether or not to give dogs raw food or cooked foods.  I personally believe their foods should be cooked, not raw, only because of the risks of salmonella or trichinosis, or any other parasitic food risks that are out there, but if making your own dog food, each person has to make that decision themselves, and do what they feel is best for their own dogs.  The argument against cooking their food is that dogs in the wild eat raw meat.  And though this is true, the difference is that the wild dogs are actually hunting their own live prey and are catching their food, rather than having it butchered and prepared by humans, and therefore, there is much less risk for the parasitic or foodborne illnesses.  This week, Lucie and Vinnie are feasting on a lot of P’s.  I made their food with ground beef, and added peas, potatoes, pumpkin, parsley, and peanut butter, along with a dash of cinnamon.  (I told you I would find a use for my pumpkins that I used for my fall decorations. From Sesame Chicken to Stir-Fry Pork)  Other than the cinnamon, I did not add any other spices or seasonings.  So with all the P‘s listed above, the most important P in their food was protein, and lots of it.  Dogs in general, but especially the larger breed dogs, need a lot of protein in their diets.  Lucie and Vinnie have no complaints about how mommy makes their food.  They love every bite of it and gobble everything up within seconds.

Fritzie is helping me prepare everything.

IMG_3924

I cooked all the vegetables in canola oil for about 10-15 minutes, or until the pumpkins and potatoes were mostly cooked and translucent.  Then I added the parsley and cinnamon.

IMG_3926

After mixing everything together, I added the lean ground beef, and continued to cook everything until the meat was completely cooked as well.

IMG_3928

Once everything is completely cooked, it is time to add the peanut butter.  The peanut butter not only adds both flavor and additional protein, but also acts as a binder to hold everything together.

IMG_3930

Vinnie (left) and Lucie (right) enjoying a spoonful of peanut butter.

IMG_3936

Mom, we’re hungry.  It’s time to eat.  NOW PLEASE!

IMG_3946