I have created this site to help people have fun in the kitchen. I write about enjoying life both in and out of my kitchen. Life is short! Make the most of it and enjoy!
Author: ajeanneinthekitchen
I have worked in the restaurant and catering industry for over 35 years. I attended 2 culinary schools in Southern California, and have a degree in culinary arts from the Southern California School of Culinary Arts, as well as a few other degrees in other areas. I love to cook and I love to feed people.
When I made my Southwestern baked beans, Southwestern Baked Beans, I made a lot, as usual, which means I had a lot left over. HMMMMM! I know. This is SOOOOO unlike me. 🙂 So I took all the leftover beans out of the freezer and turned them into chili con carne. Then I served the chili over a baked potato, topped with sour cream and cheese for Larry, and Fritos. I like my chili topped with Fritos too, which is a very Southern way of eating chili. I served it with a very smooth, red velvety blend on the side to make the meal complete.
I had to laugh at Larry last night when he said “[I] don’t eat leftovers”. What do you mean??? I eat leftovers ALL the time AND I reinvent them into something completely different than what they were before. He seems to enjoy my recreations all the time, but I guess my re-creative efforts are going unnoticed.
From baked beans to chili con carne. Con carne means with meat, and to me, that’s the only way to eat chili. Chili con carne is the official state dish of Texas, and as most of you already know, I am 1/2 Texan. My mother was born and raised in Southeast Texas. Chili is classic American comfort food. Even though it varies from place to place — namely in the Southwest and Midwest — people everywhere agree that this hearty dish isn’t just a stew, topping, or bulky soup: It’s chili. As purists would have it, traditional red (chili con carne) hasn’t changed much over the years. It still consists of meat, red chili peppers, and spices—no beans, rice, pasta, or other fillers, aside from vegetables, according to ICS criteria. I like it with beans too though. Beans and meat together with the different chilies just make the meal. The addition of beans makes the meal heartier and adds texture and flavor too.
The earliest description of chili comes from an 1828 journal. Recounting a visit to San Antonio, J. C. Clopper writes about it as “a kind of hash with nearly as many peppers as there are pieces of meat – this is all stewed together.” The International Chili Society, which holds the World Championship Chili Cook-off, divides chili into the following categories: traditional red, chili verde, homestyle chili, and veggie chili. I love green chili, or chili verde, and red chili, but veggie chili is chili without meat and/or beans is just soup to me.
Historians often cite Texas as the birthplace of chili con carne. But how did chili crop up in Texas? Chili became popular campfire fare among cowboys on the cattle trail (most of whom were Mexican) and gold-seekers (called forty-niners) on their way to California. In short, beef, fat, chile peppers, and seasoning were combined into blocks, dubbed “chili bricks,” which were stored in saddlebags. Plunging part of a chili block into a pot of boiling water transformed it into a convenient, filling meal.
Southwestern Chili Con Carne
Since EVERY chili recipe is different, I am not going to give you an actual recipe this time. I am just going to tell you how I made it – this time. 🙂
4 cups cooked Southwestern baked beans
1-1 1/2 lbs cubed steak
flour
2 large tomatoes, diced
1 red bell pepper, diced
1 yellow bell pepper, diced
1 onion, diced
1-2 TBSP garlic
salt & pepper to taste
1 cup red wine
1 cup broth
olive oil and butter
Coat the beef cubes with flour and salt & pepper. Get a large skillet or pot very hot, add the butter and olive oil, then brown the meat.
Add the peppers and onions and continue to cook until softened. You may need to add more olive oil.
Deglaze the pan with the wine, then add the rest of the ingredients. Mix together thoroughly, bring to a boil, then cover and reduce the heat to a simmer. Continue to cook for about 30-40 minutes, or until most of the liquid has evaporate
I know the Great Blogger’s Bake-Off 2023 is coming up, and I just posted a reminder for everyone to send in their best baking recipes, The Great Blogger’s Bake-Off 2023, however, I am ineligible to participate. I am the judge, and that would definitely be a little suspicious, and a conflict of interest, although to be truthful, there are many of you who are far better bakers than me. 🙂
But as you all know, I LOVE to bake and I bake a variety of goodies every week. My latest baking adventure led me to make some toffee oat cookies.
These were all gobbled up in minutes, and yet again, I missed my opportunity to eat some. That’s perfectly OK though, I make all my goodies to share with others, and the more everyone else eats, the less I eat. Trust me, I certainly DO NOT need the calories. 🙂 I can enjoy them vicariously through others.
Toffee Oat Cookies
Preheat the oven to 375* F or 191 * C.
3/4 cup or 1 1/2 sticks softened butter
1 cup firmly packed brown sugar
3/4 cup sugar
2 eggs
1 1/2 tsp vanilla
1 1/2 tsp chocolate extract, optional
2 1/4 cups flour
2 1/4 cups old fashioned oats, uncooked
1 tsp baking soda
1 tsp baking powder
1/2 tsp salt
1 package English toffee bits
Combine the dry ingredients together and set aside.
Mix the butter and sugars together until creamy, then add the eggs 1 at a time, mixing in between. Add the vanilla and chocolate extract if using. If you are not using chocolate extract, use 3 tsp of vanilla instead. Add the flour mixture and mix just until everything is blended together.
Fold in the toffee bits.
Drop about 1 TBSP of cookie dough onto an ungreased cookie sheet and bake for about 15 minutes, or until the cookies are set and the edges are lightly golden.
These cookies are going to disappear very quickly, so eat them while you can, before it’s too late.
Have a great day and make everyday great. Stay safe and stay well. ‘Til next time.
We love that you are picking a bake that suits you! That is what this year’s theme is all about. Be you!!! Pick a bake that tells us something about you and what you love.
We have just two weeks until THE 2023 “EXPRESS YOURSELF” GREAT BLOGGERS’ BAKE OFF, which will be held:
26 & 27th August 2023
So please send a baking photograph (or any questions you have) to:
crushedcaramel@gmail.com
This is open to EVERYONE. Anything goes. We love to see all of your fantastic and creative baking skills. I will be judging this year’s contest once again. I LOVE judging the contest and I LOVE seeing all of your beautiful and fun creations. So Everyone, let’s get baking!!!!! 🙂
Once again, I am writing on something completely different today. I apologize for this little deviation and rant, and break from my norm. I had planned on writing something else for today, but something happened that really pissed me off and got my ire up. I am not one to be bullied or to be taken advantage of. I had just have to vent and get this off my chest.
I am so sick and tired of this ungrateful society we live in! I am so sick and tired of all these people who think they are entitled to things, and if they don’t get exactly what they want, when they want it, then they rant and scream and throw a temper tantrum and expect others to cave in to their demands. What has happened to common curtesy? What has happened to “thank you”? What has happened to our society? What has happened to our world?
Last week I posted something as a favor to someone, to help them out, or so I thought. Despite the technical difficulties on my end, I could not publish it exactly the way this person expected, but the post received a lot of positive feedback and comments, which I would think would still be considered a successful post. I even mentioned it in my post it that I could not get it to come out exactly how it was intended, and I apologized for it, but left the links so people could go to it if they wanted. This morning I received an email from this person expressing how unhappy they were about my post and demanded that I take it down because “a lot of effort had gone into it and [I ] should have posted it exactly the way [they] wanted it to be”. Too bad, so sad. I did my best. Grow up! If my best isn’t good enough, well then so be it. Find some else to help you out. But DO NOT be so ungrateful for a favor and then demand that I take it down just because it wasn’t what you were expecting or hoping for! This person is just being a bully and acting like a spoiled and entitled brat, and I WON’T stand for it, especially on my own blog, on my own platform! So, sorry, NOT SORRY! This person can kiss my A$$! I guarantee you, I AM NOT GOING TO REMOVE IT! Rarely do I get this riled up, but when I do, watch out! I have a temper and I have plenty of fight in me. When I am backed into a corner, I come out fighting, and I fight hard, and either I win or we both go down! Either way, someone will be bloodied in the end. And most of the time, it’s NOT ME!
OK! Now, I have that off my chest, I apologize once again for my rant, but sometimes it just has to happen. Let’s all try our best to enjoy the rest of the day and hopefully make it a good day, despite all the negativity that surrounds us. ‘Til next time.
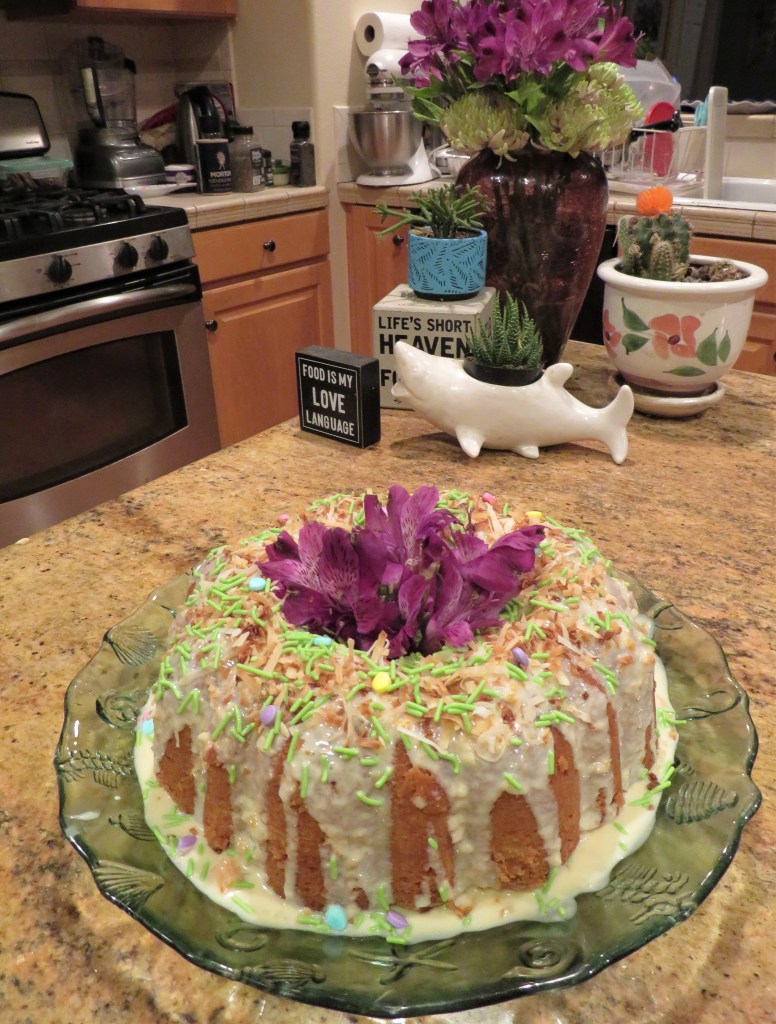
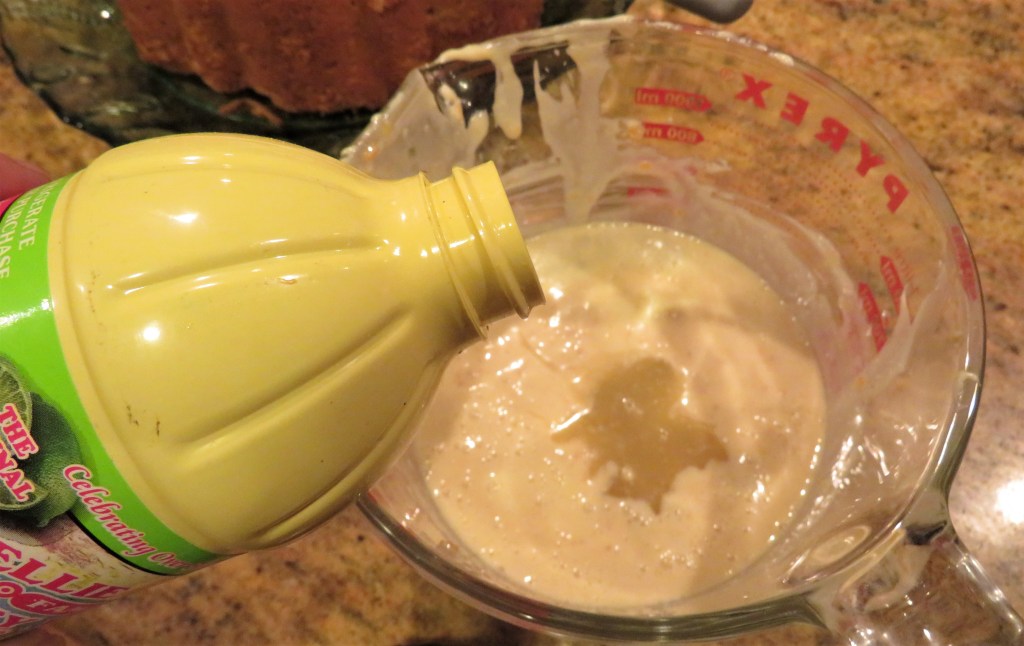
In case you haven’t noticed, sometimes I have a really quirky sense of humor. I made a lime and coconut cake, and I just couldn’t resist having a little fun with it, both with baking the cake and, as you can see, writing about it too. 🙂
This deliciously tropical lime and coconut cake was a HUGE hit today. So many people commented on it and asked for the recipe. So, here it is. As you can see, I mixed the lime with the coconut and baked it all up.
Lime and Coconut Cake
I used both plain dried coconut and toasted coconut and key lime juice. The key lime juice is a little sweeter than the Persian lime juice, and it also has a real distinct flavor.
Preheat the oven to 325* F or 163 * C.
Spray cooking spray into a bundt pan.
3 cups flour
1/4 tsp salt
1/2 tsp baking powder
1/2 cup shortening
1 cup butter, softened
3 cups sugar
6 large eggs
1/2 cup butter milk – I use the dried buttermilk that I mix with milk
5 oz of sour cream or yogurt
1/3 cup key lime juice
1 tsp vanilla
1 tsp lime extract
1/2 cup dried coconut flakes.
Combine all the dry ingredients and set aside.
Mix the lime juice with the buttermilk.
Mix the shortening, butter and sugar together until creamy. Then add the eggs 1 at a time, beating in between each addition. Add the vanilla and the lime extract.
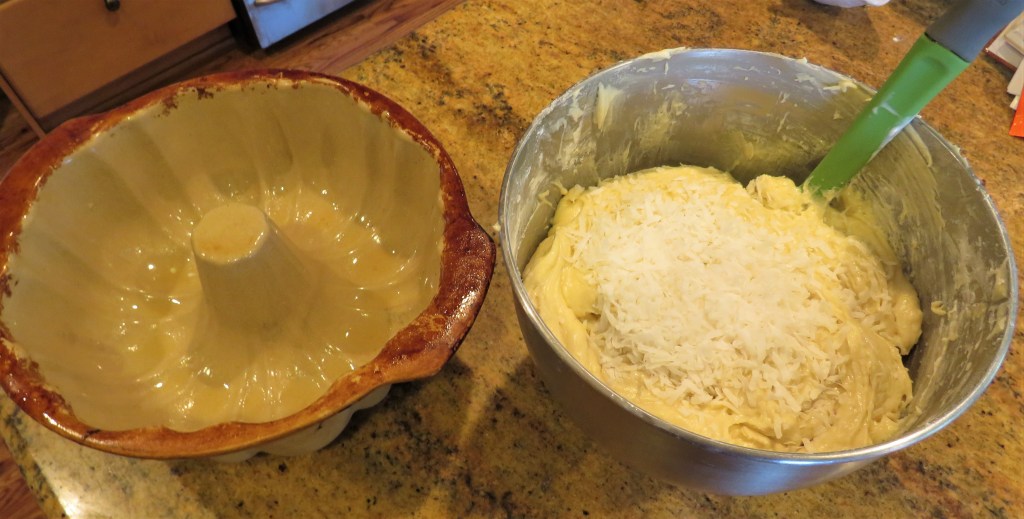
Add 1/2 of the flour mix, 1/2 of the sour cream or yogurt and 1/2 of the buttermilk and lime combination. Mix until everything is combined, then repeat until all the ingredients are mixed together thoroughly. Fold in the dried coconut.
Spoon the batter into the prepared pan and spread evenly.
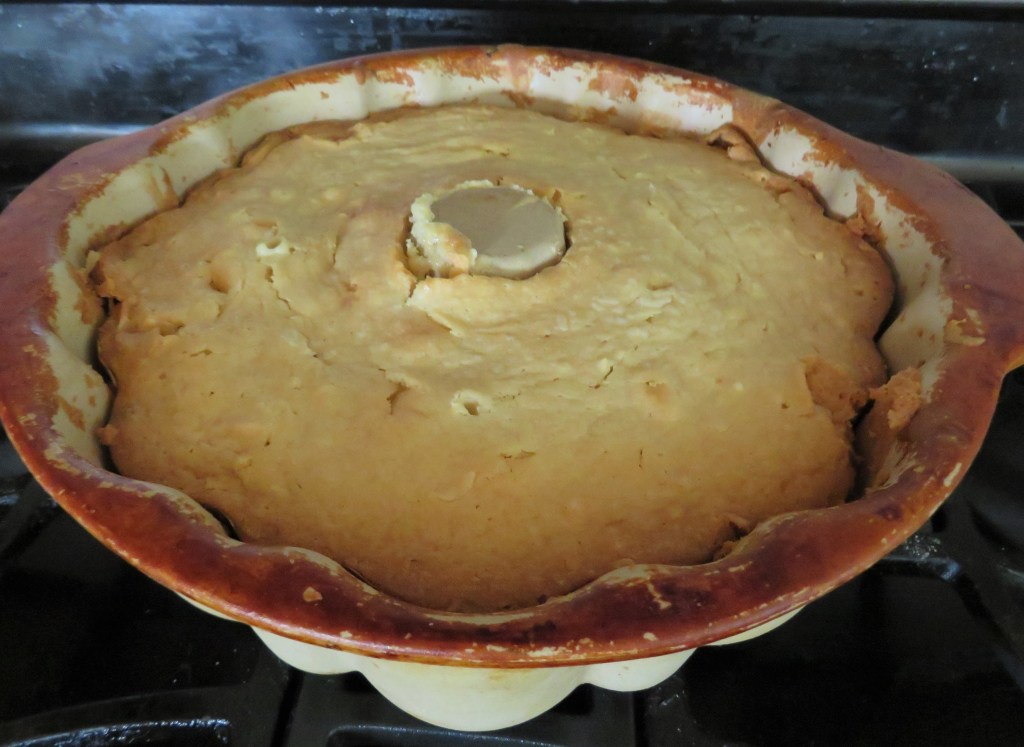
Bake for about 1 1/2 hours or until the cake is set and a toothpick comes out clean when inserted in the middle.
Allow the cake to cool completely before taking it out of the pan and icing it.
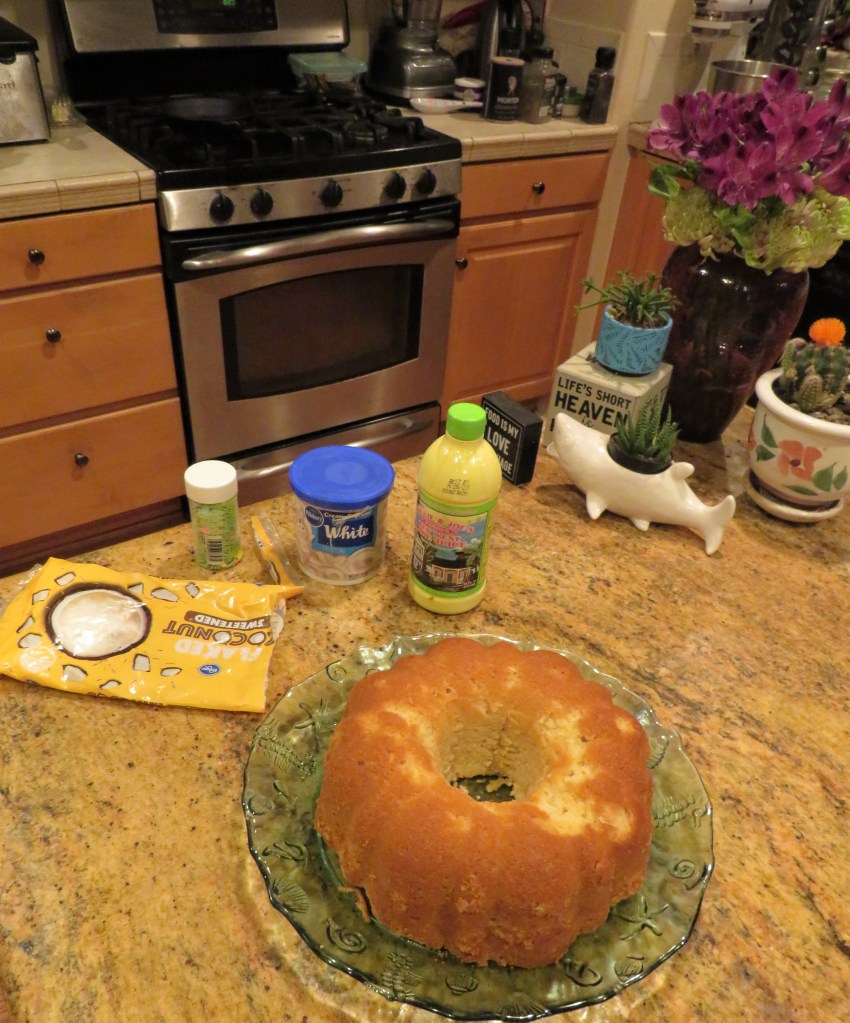
Toast about 1/3 cup of coconut until just lightly golden. I usually do it in a dry pan directly on the stove top. It only takes a couple of minutes.
I had some prepared white icing mix that I mixed with 1/4 cup of lime juice, and poured it over the cake, but you can also make your icing too. I was going to, but I remembered I had the prepared icing leftover and used that instead. You should know by now, I am “the Queen of Leftovers” and waste not want not. 🙂
Pour the icing over the cake, allowing it to run down the sides. Sprinkle the toasted coconut all around the top and add colored sprinkles if you like, to make it more fun and festive.
The Icing
1 cup powdered sugar
1/4 cup key lime juice
1/2 tsp lime zest, optional
colored sprinkles, optional
Mix it all together then pour over the cake. Unless you are going to serve it right away, place the cake in the refrigerator to let the icing set. Then slice away.
All I heard this morning were a lot of oooh’s and awwww’s, as well as a lot of very nice compliments. Once you make this cake, I promise you, it is going to disappear very quickly. So if you want to enjoy it too, set your piece aside before slicing it up for others, otherwise, you will be like the coconut – toasted.
Have a great day and make everyday great. Stay safe and stay well. And always, mix the lime with the coconut and bake it all up. 🙂 ‘Til next time.
Larry and I love fresh seafood, but living in Denver, “fresh” seafood usually means frozen, which is fine too. We are known more for beef and wild game that for seafood. We’re landlocked, after all, located in the Rocky Mountains. So unless we are eating trout and bass, both of which are delicious by the way, then chances are, we are not really getting “fresh” seafood. But we still eat and enjoy our seafood no matter what.
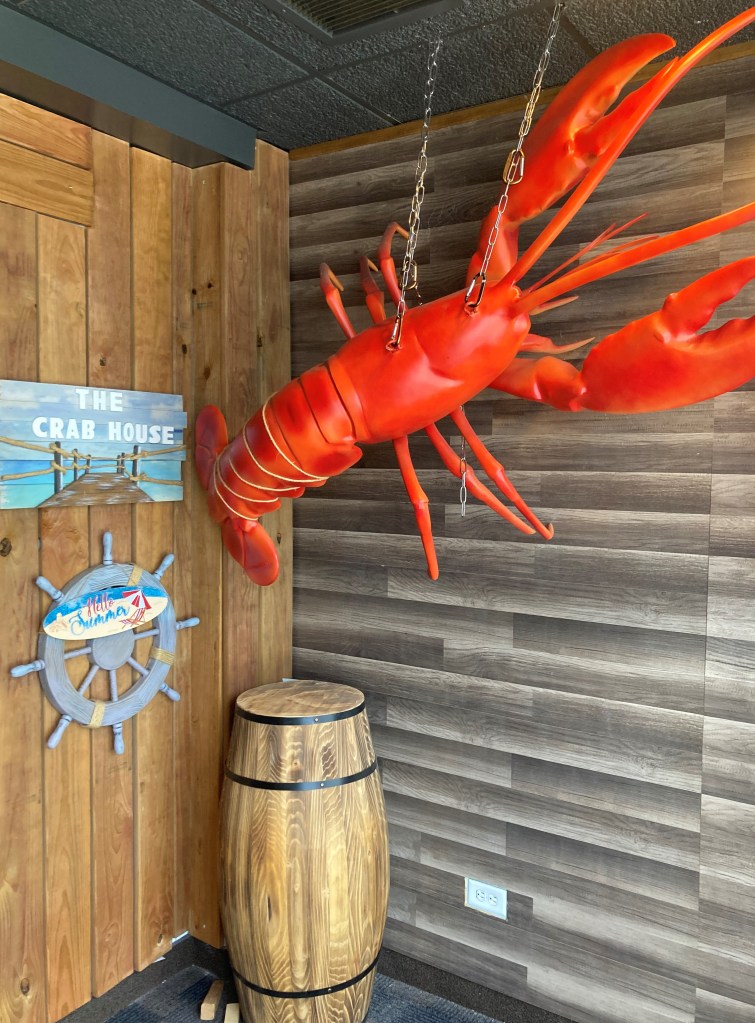
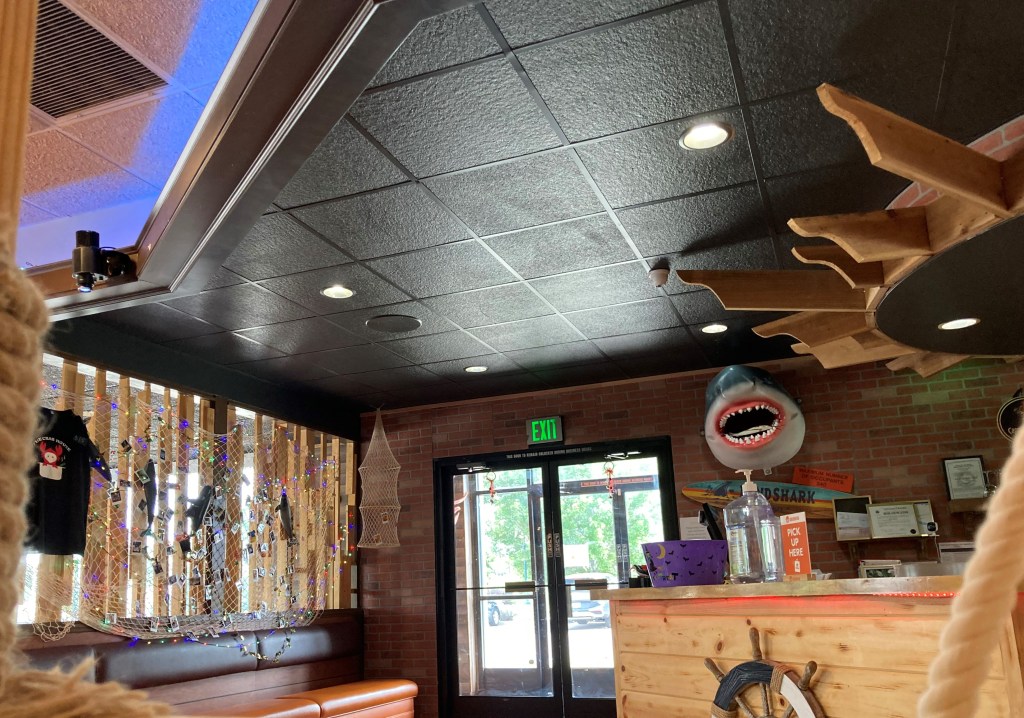
Last night, we were out running errands and opted for an early dinner and tried a new seafood restaurant near our house, called The Crab House.
We did what we normally do when trying out a new restaurant. We ordered a few different menu items to share. The food was good, but MESSY, which made it a little difficult to eat. We knew it was going to be messy when they gave us bibs, plastic gloves, and a bucket, plus there was butcher paper on the tables.
We started off with a bowl of clam chowder. It was good. We always add pepper to our New England clam chowder. We both like the pepper.
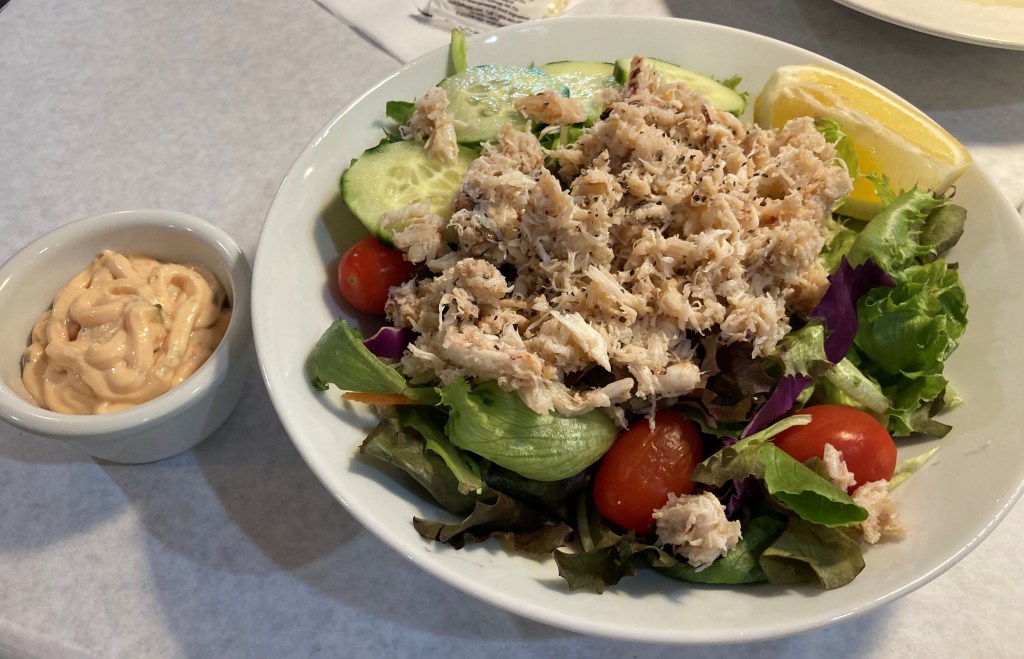
We also ordered a crab salad, which was delicious and was topped with a ton of crab meat.
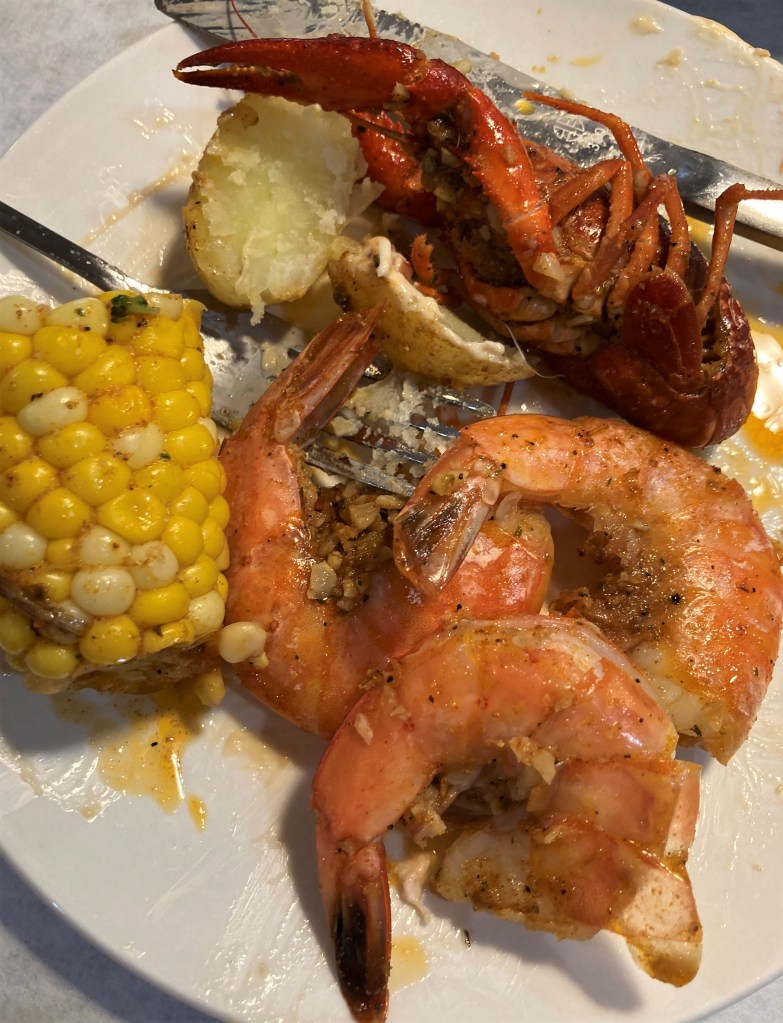
And then we ordered a Cajun shrimp and crawfish boil. It was loaded with large prawns/shrimp and crawfish, boiled together with corn and potatoes in a very flavorful spicy Cajun sauce.
Like I said, everything was delicious and full of flavor, and the staff was very pleasant and helpful, but it was MESSY! Messy often means it tastes really good too, which is certainly did in this case as well. Back in my waitress days, many, many moons ago, I used to tell people things always tasted better when they were messy. We enjoyed our messy meal and our evening.
The Crab House is located at 1190 1st Avenue, Broomfield CO. You can walk in like we did, or you can order it to go. Either way you’ll be in for a very tasty, but very messy Cajun meal. Laissez le bontemps roulez, or let the good times roll.
Have a great day and make everyday great. Life is an adventure. Be adventurous and get out of your comfort zone a bit. You never know what you’ll discover. And who knows, you just may enjoy yourself a bit. 🙂 ‘Til next time.
I see squirrels all over the place. They always look like they are having so much fun, and are always so playful and curious. I also see Magpies all the time too. I love their beautiful, vibrant colors. What I don’t usually see though, is them playing together. I also rarely see more than one magpie at a time. But this time, there were 4 magpies and one squirrel, and they were all together, in a parking lot of all places too, just scrounging for nibblies. Of course I only had my phone with me, since I was out running errands, so the quality of the pictures is not great at all. I also didn’t want to get to close to them and scare them away. I wish I had my real camera with me, but sometimes we have to just use what we can. Sometimes we just have to improvise and hope for the best.
Life is just full of surprises. You never know what you’re going to see or find. Be prepared for the unexpected. Make the most out of everyday. Life is good. 🙂
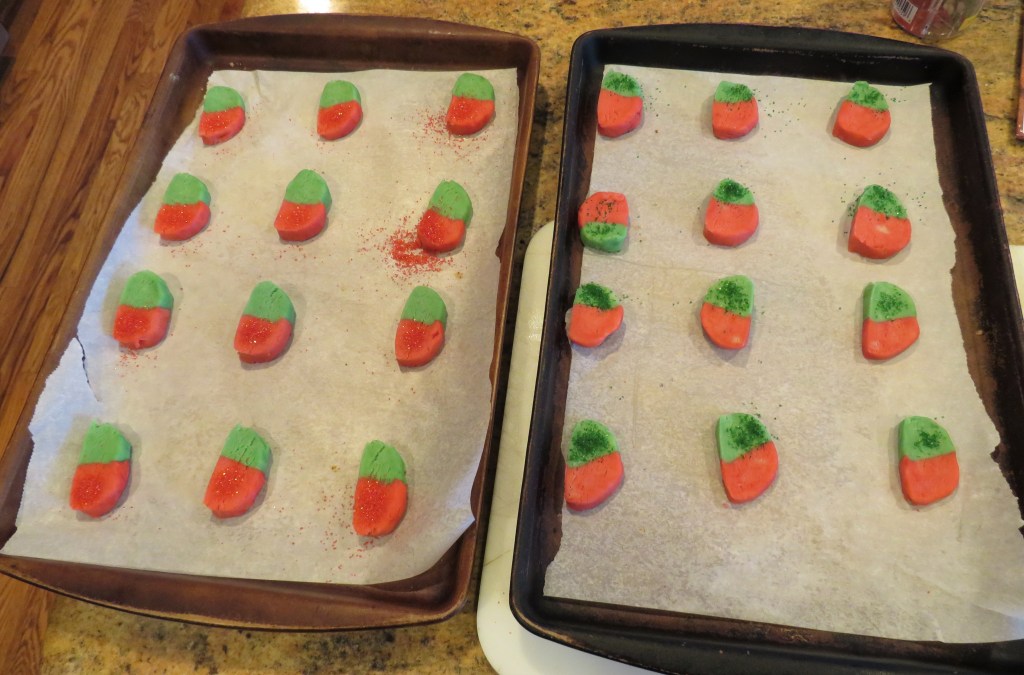
It’s that time of week once again. It’s cookie time. As you know, I am always trying to come up with something tasty yet different. I don’t like serving the same old, same old. After all, variety is the spice of life you know. 🙂 This time, I made some two-toned butter cookies.
These cookies are very easy to make, but working with the food coloring, especially the red, well it looked like I had been part of crime scene. My hands were covered with red food coloring.
As usual, after following the recipe, I found it didn’t work and I needed to tweak it a bit. The original recipe did not call for an egg, but I had to add an egg since the dough was not binding together, no matter how much I worked with it. Once I added the egg it worked just fine. Also per usual, I did not get the yield I was hoping to get either, but that is typical. The recipe said I was supposed to get about 5 dozen, and I only got about 4 dozen. Oh well. I’m used to this. It happens all the time. I am always pleasantly surprised when I get the actual amount the recipe says I will get. This is a bonus. This is why I never give a yield amount. The yield will always be different for everyone.
Two-Toned Butter Cookies
1 cup or 2 sticks softened butter
1 egg
1 cup powdered sugar
1 tsp vanilla
2 cups flour
2 colors of food coloring
two colors of colored sugar
Mix the powdered sugar and butter together until smooth and creamy. Then add the egg and vanilla and mix again. Slowly add the flour and mix until it is all blended together.
Split the dough in 1/2 and mix in one of the colors into one 1/2 and the other color into the other 1/2. Knead the doughs until the colors have thoroughly worked into the dough.
Roll the colored dough into logs about 8 inches long and wrap in plastic. Refrigerate for at least one hour before slicing.
Preheat the oven to 350* F or 190* C.
Line your baking sheets with parchment paper.
When the dough is ready, split each log in 1/2 then press the two colors together firmly and shape into a log again.
Let the dough stand for about 15 minutes, then slice into 1/4″ rounds and place on the baking sheets. Sprinkle a little of the colored sugar on 1/2 of the cookies. I alternated, using both red and gree sprinkles.
Bake for about 15 minutes or until the edges are lightly browned and the cookies are set. Let cool for about 5 minutes, then remove and place them on a baking rack to cool completely. Then plate them up and serve.
Have a great day and make everyday great, and colorful. Stay safe and stay well. ‘Til next time.
You all know how I love to feature guest chefs, though I haven’t had any in awhile. Hint, hint!!!!! But I am also up for sharing other great ideas about food or kitchens too.
Today I am giving you something a little different yet again. One of our very own bloggers, Erin Reynolds of diymama.net wrote a piece on how to best redesign your kitchen. She offers all kinds of advice about new goodies and gadgets that would help transform your everyday kitchen into a dream kitchen. I have a nice kitchen, and though I have a big kitchen, it is NEVER big enough. (Maybe I just have too much stuff 🙂 ) I would love to have a new kitchen like the ones Erin is talking about in her article. I will do my best to copy her article and show it to you here, however, you can also check it out on her link below as well or follow her to see what she’s up to.
Redesigning Your Kitchen with Meal-Prep in Mind: Where Function Meets Style
In today’s fast-paced world, meal preparation can often feel like an arduous task. However, with the right kitchen design, this necessary activity can be transformed into an enjoyable and productive experience. A meal-prep-friendly kitchen facilitates easy access to essential tools, offers ample workspace, and promotes efficient food preparation. By redesigning your kitchen to cater to these aspects, you not only ensure functionality but also introduce a significant degree of convenience into your daily routine. Here are some tips, courtesy of A Jeanne in the Kitchen.
Adding a Large Sink
One of the essential components of a meal-prep-friendly kitchen is a large sink. A spacious sink makes it easier to wash fruits, vegetables, and cookware, especially those large pots and pans that are integral to meal preparation. Moreover, it ensures your countertop remains clutter-free. When choosing a sink, opt for durable materials like stainless steel or granite composite. The style can range from under-mount for seamless countertop transition to apron-front for a touch of rustic charm.
Installing a Dishwasher Drawer
Incorporating a dishwasher drawer in your kitchen redesign can provide substantial space-saving and convenience benefits. This handy appliance makes cleaning up after meal prep a breeze and saves you time and effort. When choosing a dishwasher drawer, consider the size and configuration that best fits your kitchen layout. Opt for models that offer flexibility in wash cycles and capacity for efficient operation.
Creating a Prep Island
A prep island serves as a versatile addition to any kitchen, providing extra workspace for meal preparation and organization. With an adequately designed prep island, you can keep your ingredients and tools within reach, making the cooking process smoother. When incorporating a prep island into your kitchen, consider integrating storage solutions such as drawers and shelves. This allows for convenient storage and easy access to frequently used items, further enhancing your meal-prep experience.
Adding a Range Hood
Adding a range hood above your kitchen’s cook surface comes with a host of benefits. First and foremost, it improves ventilation. By removing smoke, steam, and odors, it keeps the air in your kitchen clean and helps prevent the buildup of grease and grime on your walls and cabinets. It also contributes to a cooler kitchen environment by venting out the heat produced during cooking. Moreover, a range hood enhances lighting over the cooktop, allowing you to see your food better and ensuring safer cooking. Lastly, it adds a touch of style and sophistication to your kitchen. With various designs available, from sleek contemporary models to classic vintage styles, a range hood can be a significant aesthetic upgrade for your kitchen.
Purchasing a Double Oven
For meal-prep enthusiasts and larger families, a double oven can be a game- changer. Having two separate ovens allows simultaneous cooking at different temperatures, thereby saving time and improving efficiency. However, a double oven can require substantial space. To integrate this feature into your kitchen, consider vertical stacking or placing them side-by-side under the countertop, depending on your kitchen’s layout and size.
Utilizing Deep Drawers
Deep drawers offer an excellent alternative to traditional cabinets for storing pots, pans, and larger cookware. These drawers provide ease of access, prevent clutter, and make organization effortless. To optimize drawer space, consider implementing dividers or adjustable inserts, which can help categorize utensils and cookware according to your preferences.
Renovating Your Kitchen for Functionality and Accessibility
When renovating your kitchen for meal-prep efficiency, you must personalize the design according to your unique cooking habits and requirements. By identifying features that will simplify your meal preparation and prioritizing functionality and accessibility, you create a more efficient kitchen. Always establish a well-defined budget before engaging contractors, ensuring that your renovation plan aligns with your financial expectations and doesn’t lead to overspending. Hiring a capable contractor will help to remove the guesswork out of remodeling your kitchen and making difficult decisions like where to place outlets.
Keeping Your Kitchen Clean
Keeping your kitchen clean can be made simple and cost-effective with DIY cleaners. Homemade cleaning solutions, often made from everyday household items like vinegar, baking soda, and lemon, can be just as effective as store- bought cleaners at tackling grime and grease. For instance, a mixture of vinegar and water serves as an excellent all-purpose cleaner, while baking soda mixed with a little water can act as a potent scrub for stubborn stains. Lemon juice is great for deodorizing and removing hard water stains. These DIY cleaners not only help keep your kitchen sparkling clean but are also environmentally friendly, reducing the number of chemicals introduced into your home environment.
Prepping For a Business
Meal prepping can be a fantastic stepping stone towards starting your own food-based business. As you master the art of meal prepping, you learn to plan menus, manage ingredients, and cook efficiently — all vital skills for running a food business. You also gain a deep understanding of nutrition, portion control, and food safety. Additionally, through meal prepping, you might discover unique recipes or healthy food combinations that could differentiate your business in the market.
Sharing your meal prep journey on social media can even help build a potential customer base who appreciates your cooking style and philosophy. Eventually, this passion and expertise can inspire and equip you to turn your love for food into a profitable venture. The journey to creating a meal-prep-friendly kitchen involves thoughtful design choices and careful consideration of your needs. By installing a large sink, incorporating a dishwasher drawer, adding a range hood, utilizing deep drawers, installing a double oven, and keeping your kitchen clean, you can greatly enhance your meal preparation process.
Remember, a well-designed or renovated kitchen isn’t just about aesthetics; it’s about creating a space that serves your needs and facilitates your lifestyle (and potentially your business). So, embark on your kitchen redesign journey with these tips in mind and create a space that brings joy to your daily meal preparation.
To discover or rediscover how to have fun in the kitchen, visit A Jeanne in the Kitchen today!
These are all fabulous ideas. Erin put a lot of effort into this article and she has great advice. She’s got me thinking it may be time for an upgrade myself. 🙂 Thank you Erin for all these fantastic kitchen ideas and hints. Great job!!!!
Again, if you want to see more about what Erin is up to and would like to follow her, you can reach her at Erin Reynolds of diymama.net. I’m sure she would love to hear from you.
Have a great day and make everyday great. Stay safe and stay well. ‘Til next time.
I just love seeing my little Red-Winged Blackbirds. Like with most birds, the males are always the ones that are more brightly colored and the females tend to be more muted. I see them all the time, but I never get tired of seeing them. They always brighten my day. This year, I have seem more than normal too. But I have seen a lot more birds, and different birds, in general this year too. I LOVE it!!!!