Ahhh breads! One of the great loves of my life. I could eat bread, any kind of bread, all the time. All I would need is butter to go with it would be enough butter, and life would be oh so good (although, life is really pretty darn good as it is). :)
I had some sourdough starter that need to be used so I attempted to make some ciabatta with it. It was my first attempt at making ciabatta. It came out good, though not nearly as light or fluffy as I had hoped, but still good. I guess that just means I need to make some more. :)
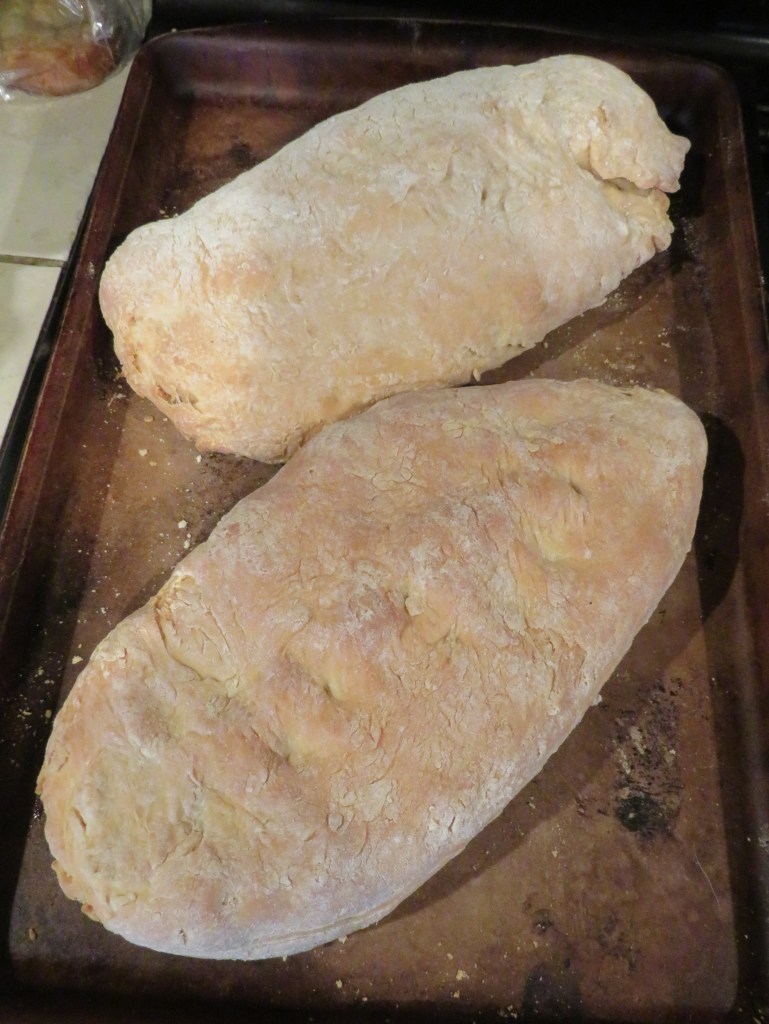
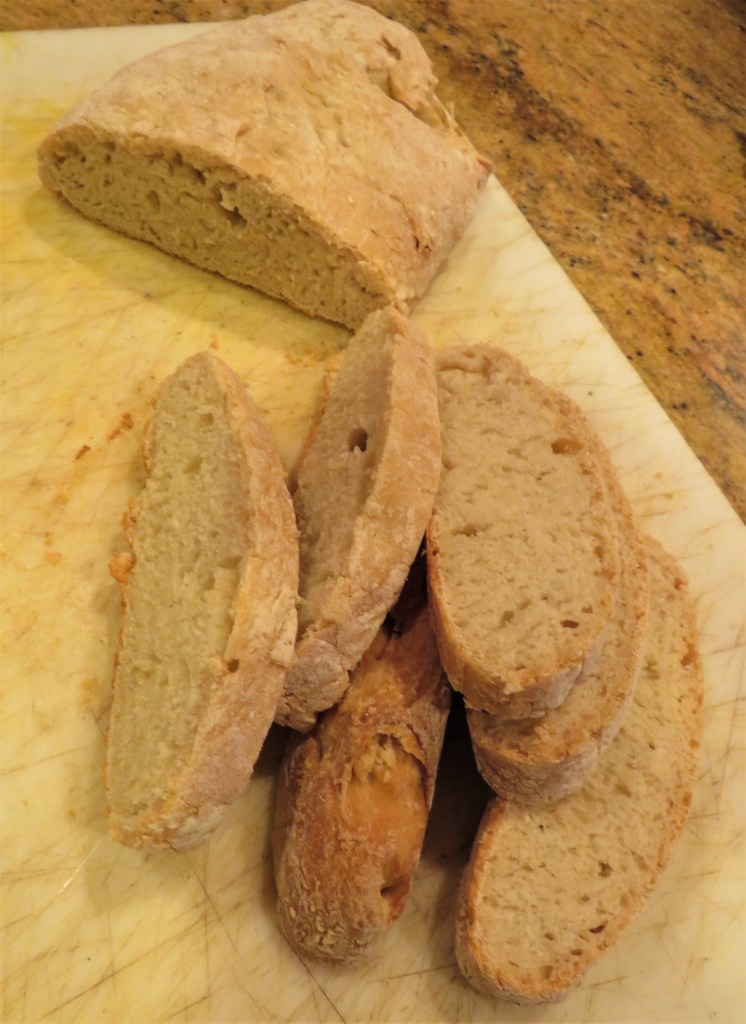
Ciabatta bread is made with a wheat flour that is slightly less refined than the one used for standard white bread, allowing a higher percentage of water in the dough. The dough is made using a ‘pre-mix’ of water, flour and yeast, which has fermented for long time. It is a very light bread with a high liquid content which gives it is open and porous texture. An authentic ciabatta requires a very wet dough and must be handled wit a very light touch. As you can see, I must have not had the right touch, and was too strong for my own good. My ciabatta was a lot more dense that it should be. But, it still tasted very good, and that’s really all that matters. Mine was more like a typical sourdough bread than a traditional ciabatta, and I did use a sourdough starter, which I think is what made mine so different and so dense. I LOVE sourdough bread, so it was still fine with me. :)
Ciabatta is a white bread that stems from a baker in Rovigo, Veneto, Italy. Ciabatta is an Italian bread that was first produced back in 1982 by Arnaldo Cavallari. Cavallari was a miller and baker near Venice. During this time the French baguettes were very popular and bakeries wanted to develop a product that would be able to compete with a baguette. Ciabtta was the Italian answer to the French baguettes. Ciabatta is known as the Italian slipper bread because it is said to resemble a well-worn slipper.
Ciabatta Bread
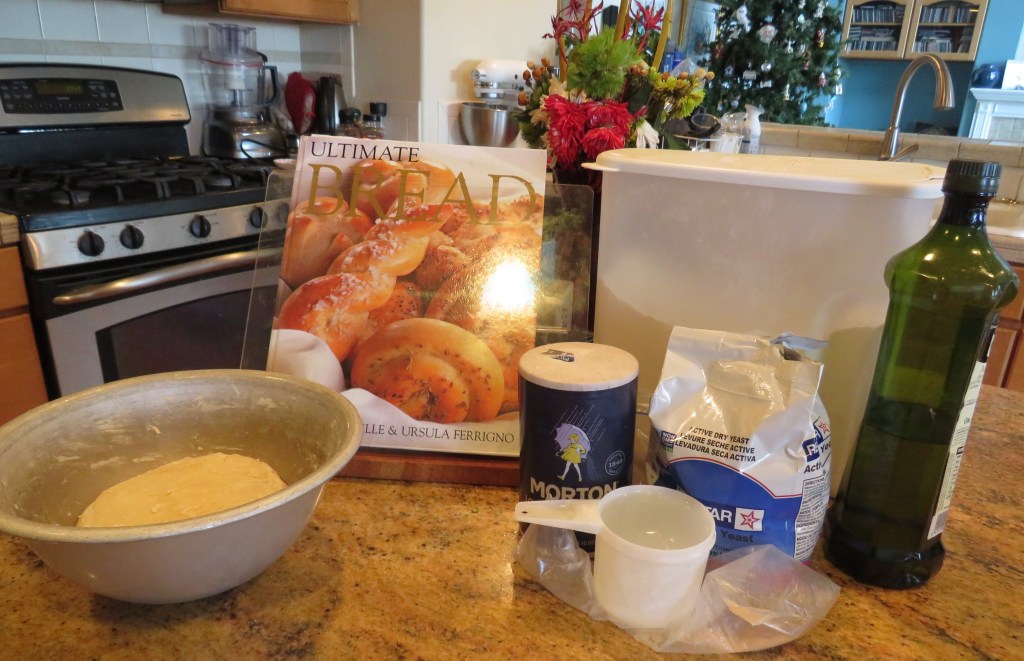
You need a starter for this bread. I used a heavier starter than what was called for, since my starter had already been fermenting for about 1 week and I needed to use it. The proper starter is only a quick starter and uses yeast, where mine had no yeast at all. I followed the recipe exactly, but I had a different starter. Lesson learned. The starter makes the difference. I have already made the mistakes. Learn from my mistakes and move on. I have already. My only real “mistake” was that I used the wrong starter. Silly me. I thought a starter was a starter and they were all basically the same. Nope. They’re different. Trust me. :)
The Starter
1/2 tsp dry yeast
2/3 cup water
3 TBSP milk
1/4 tsp sugar or honey
1 cup flour
Sprinkle the yeast into the water and milk. Let it stand for 5 minutes then add the sugar and stir to dissolve. Add the flour to form a loose batter. Cover the dough loosely and let rise for 12 hours or overnight.
Once the starter is ready, it is time to make your bread.
The Dough
1/2 tsp yeast
1 cup water
1/2 tsp olive oil
2 1/2 cups flour
1 1/2 tsp salt
Sprinkle the yeast on top of the flour and let it stand for 5 minutes, then add the olive oil and the starter and mix everything together well.
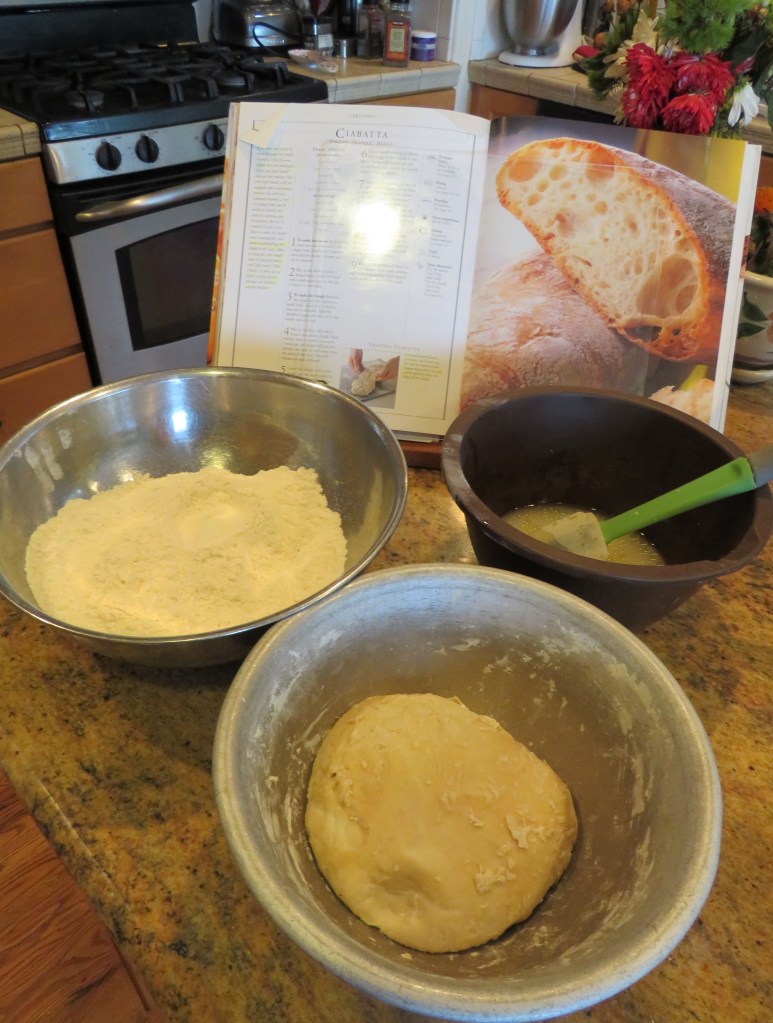
Add the flour and salt to form a wet, sticky dough. My first clue that my bread was going to be different should have been that my dough was firm, not wet and sticky.
Cover the dough with a towel and let rise for 3 hours or until it has tripled in size. Do not punch the bread down at all.
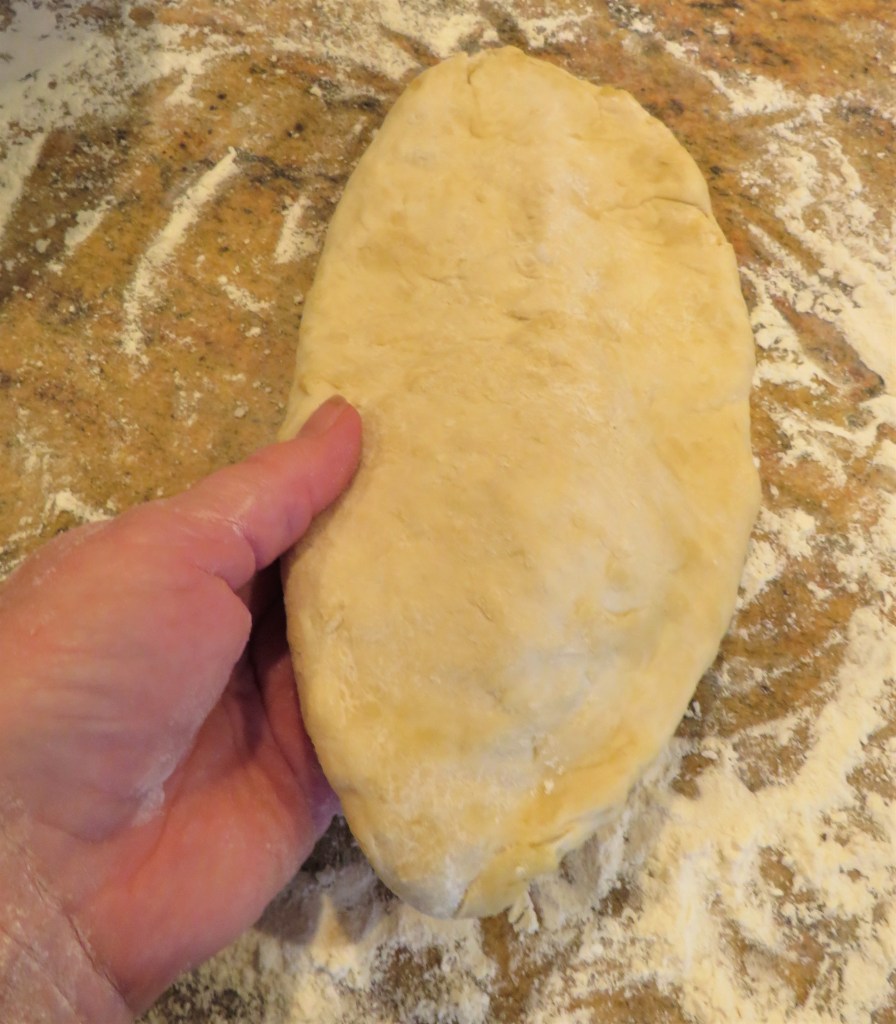
Divide the dough in half. Make sure your hands and the surface are well-floured when you are working with and plumping the dough. Pull and stretch the dough to form a rectangular loaf about 12 inches long. Neaten and plump the dough by running your fingers along the sides and gently tucking the edges under the dough as you go.
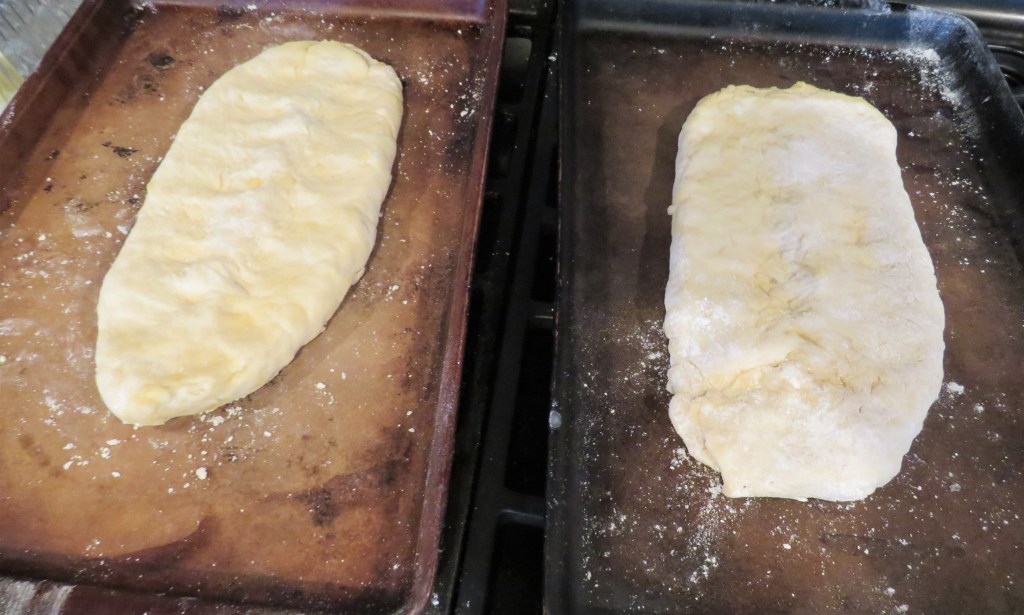
Place the dough loaves on well-floured baking sheets and let proof again, uncovered for about 20 minutes, while the oven is coming to temperature. The dough will spread and rise during this proofing period.
Preheat the oven to 425*F or 220*C.
Bake the bread for about 30 minutes, or until it is golden brown and hollow when tapped at the bottom. You can spray some water into the hot oven a couple of times during the first 10 minutes of the baking if you like. The spray will create steam that will help make the bread crustier on the outside. This is optional though.
Allow the bread to cool for at least about 10 or so minutes before slicing. Then enjoy. Even though my bread did not come out the way I was hoping, it still came out very good and very tasty. I know people that will throw away their “mistakes” in the kitchen if they don’t turn out perfect. NEVER do this. Use them as a learning experience and move on. My idol, Julia Child, said “Never apologize” and “Learn to cook – try new recipes, learn from your mistakes, be fearless, and above all, have fun”. I couldn’t agree more. :)
Happy New Year everyone. May 2024 bring happiness, good health and prosperity to all. ’Til next time.

I wouldn’t say no to a slice
LikeLiked by 1 person
Merci. It was still good. 🙂
LikeLiked by 1 person
This is not an easy process, but the result is worth it, eve as a learning experience.
LikeLiked by 1 person
Yep. Exactly. 🙂
LikeLiked by 1 person
😻
LikeLiked by 1 person
🙂 🙂 🙂
LikeLiked by 1 person
Oh yum! Even if your bread did not turn out as you might have wanted, you can learn for next time, and it will be even better then! X
LikeLiked by 1 person