Making Muffaletta

If you are from the south, and particularly from New Orleans or Louisiana in general, you know what muffaletta is. Most people are unfamiliar with it though. But I am about to change that for you.

Muffaletta is an Italian-American sandwich that was made famous in the French Quarter of New Orleans. Sicilian immigrant Lupo Salvadore created this now famous sandwich at the Central Grocery in 1906, which is one of New Orleans oldest markets and is still thriving today. Lupo noticed Sicilians shopping for various ingredients found on the sandwich and trying to put them together, but making a total mess of it. He decided to do it for them and sold the muffaletta in his shop. He created his own recipe for the olive salad that made the sandwich incredibly popular.

The name muffaletta, or one of its many spelling variations, derives its name from Sicilian dialect that means ‘soft and spongy bread’. This soft round bun is so versatile and many locals use it as a sandwich to fill with local hams and cheeses. Muffaletta is usually served hot, when all the flavors melt together. But some people like it cold too. I like it hot.

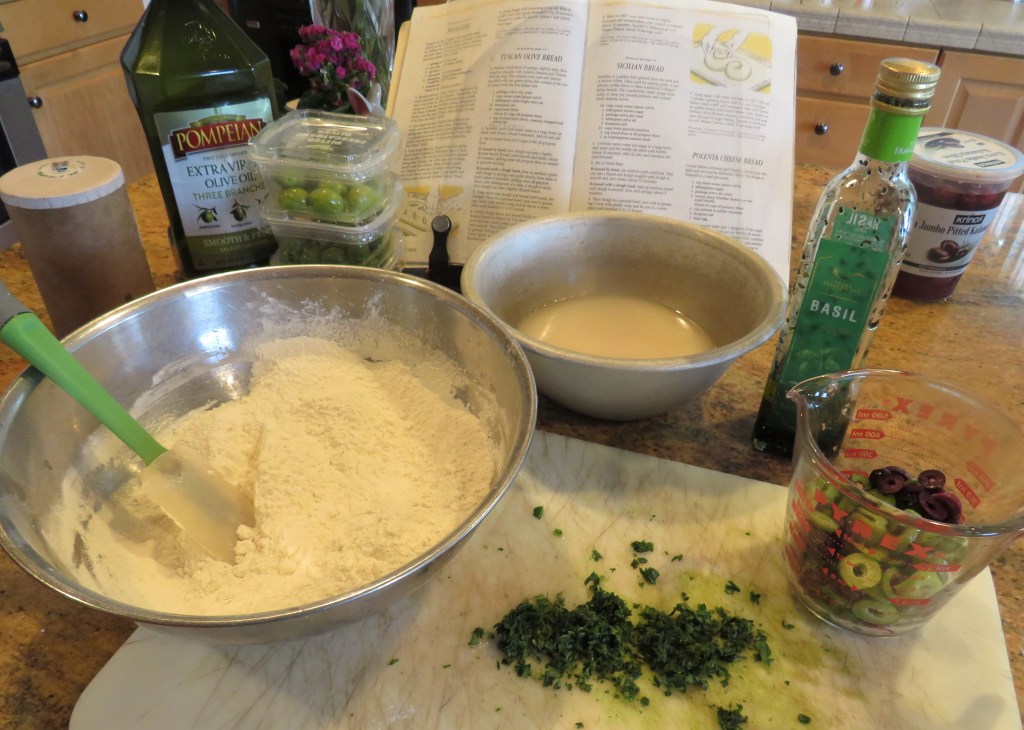
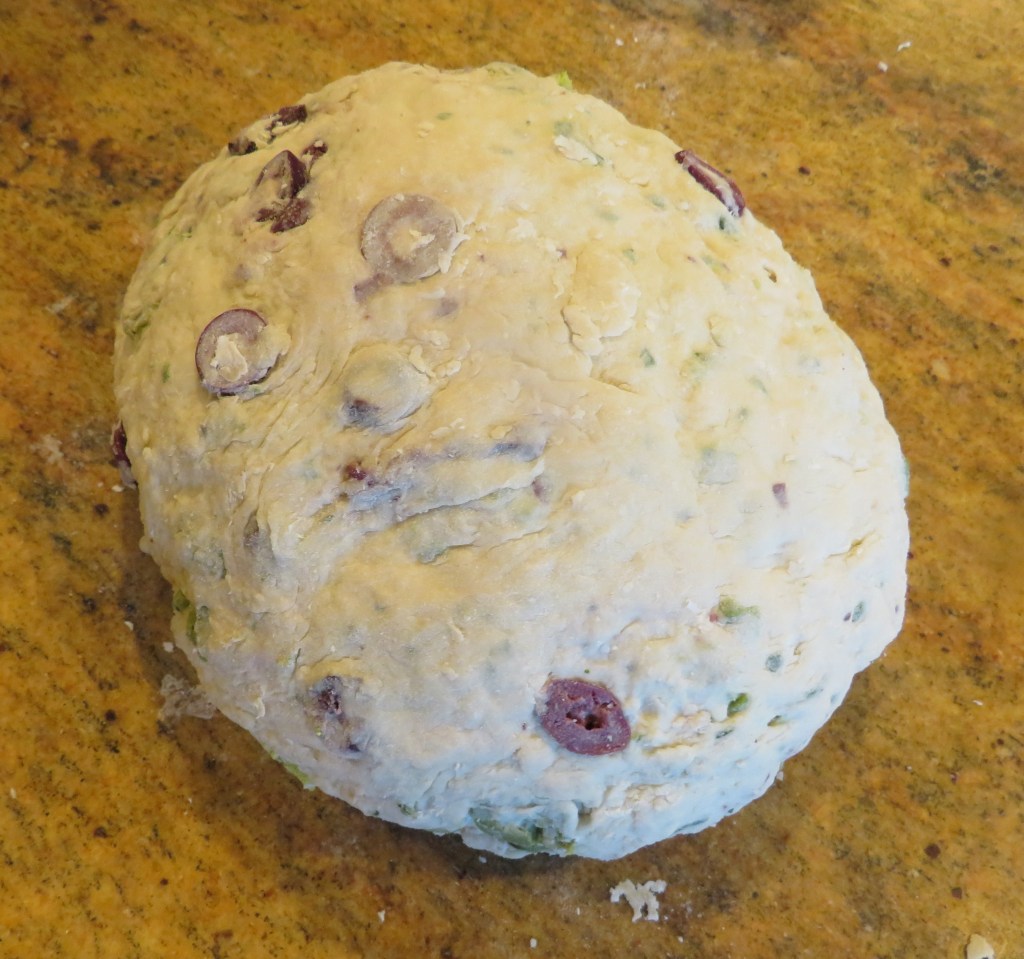
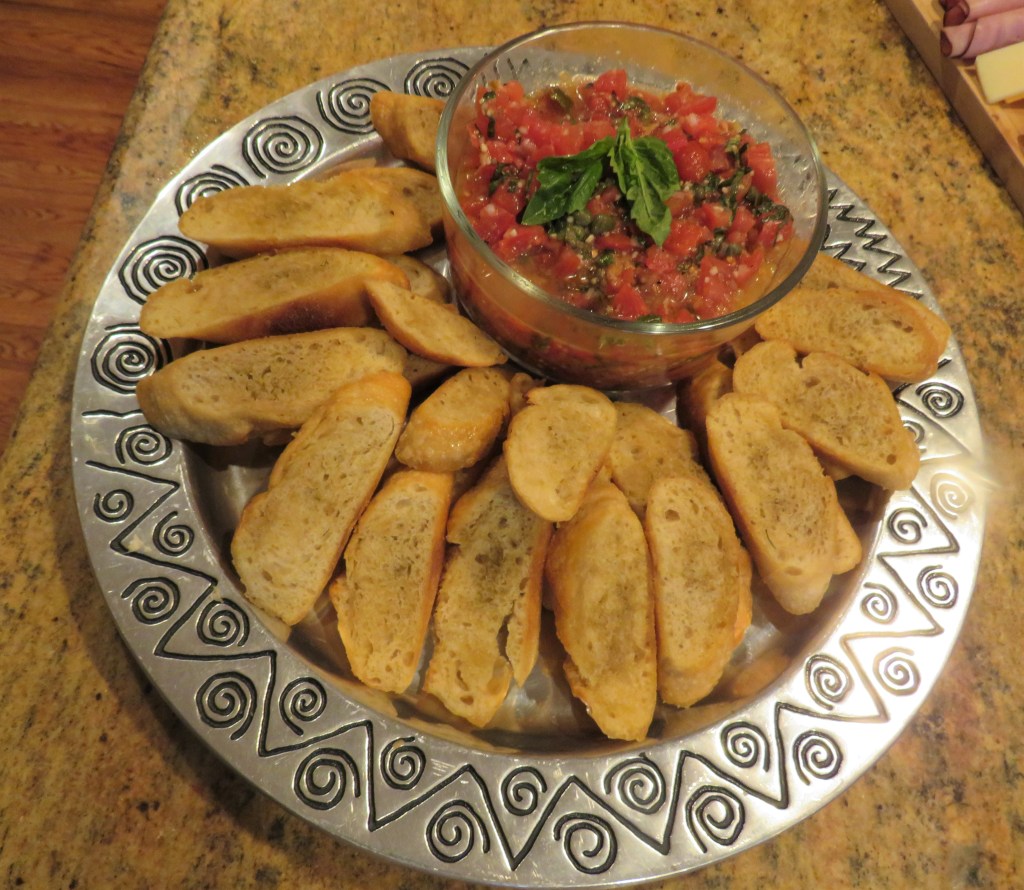
Yesterday I gave you a teaser, telling you I was going to make something interesting out of my olive bread. Herbed Olive Bread Today, I give you the muffaletta I made with it. I had various lunchmeats leftover from our latest InVINtions trip, Bruschetta, and making muffaletta was just the perfect idea on how to use it up.

First, I hollowed out one of my round loaves of olive bread, saving the filling for croutons. Then I brushed the remainder of my latest batch of orange vinaigrette all over the inside of the bread. Oranges and olives go great together, by the way.

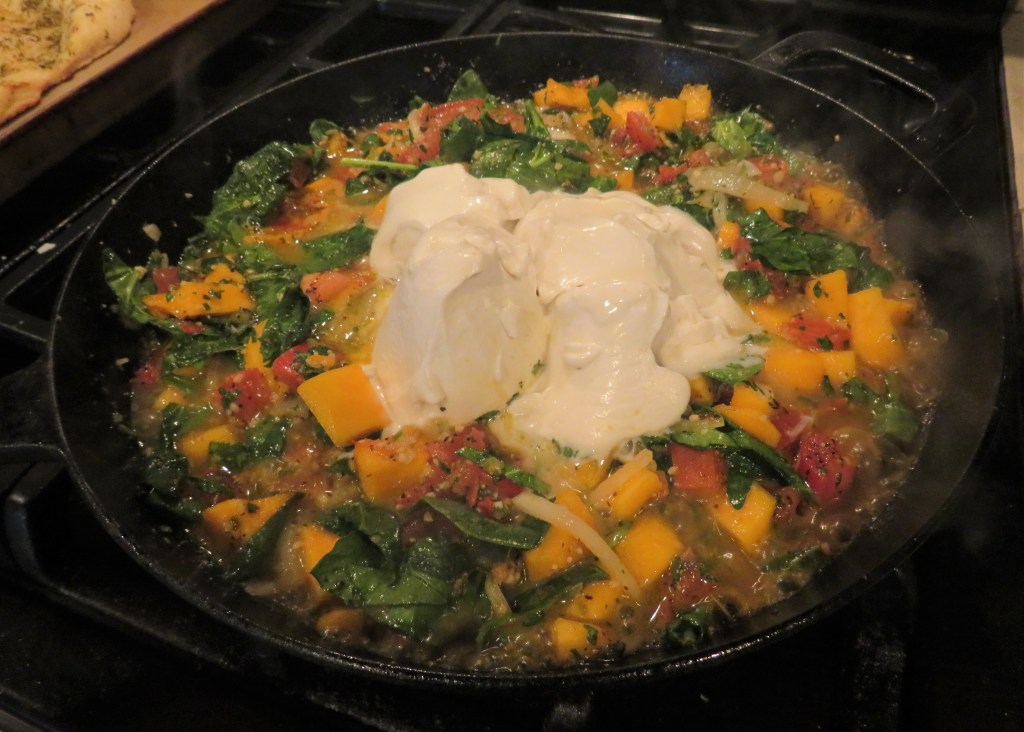
Then I roasted peppers and made some spinach with garlic and onions.

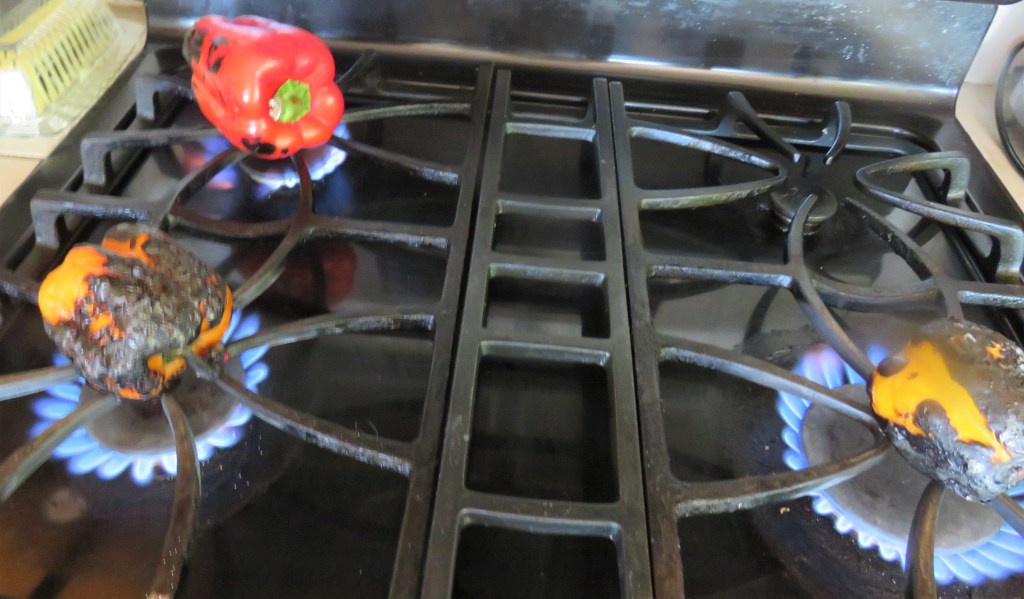
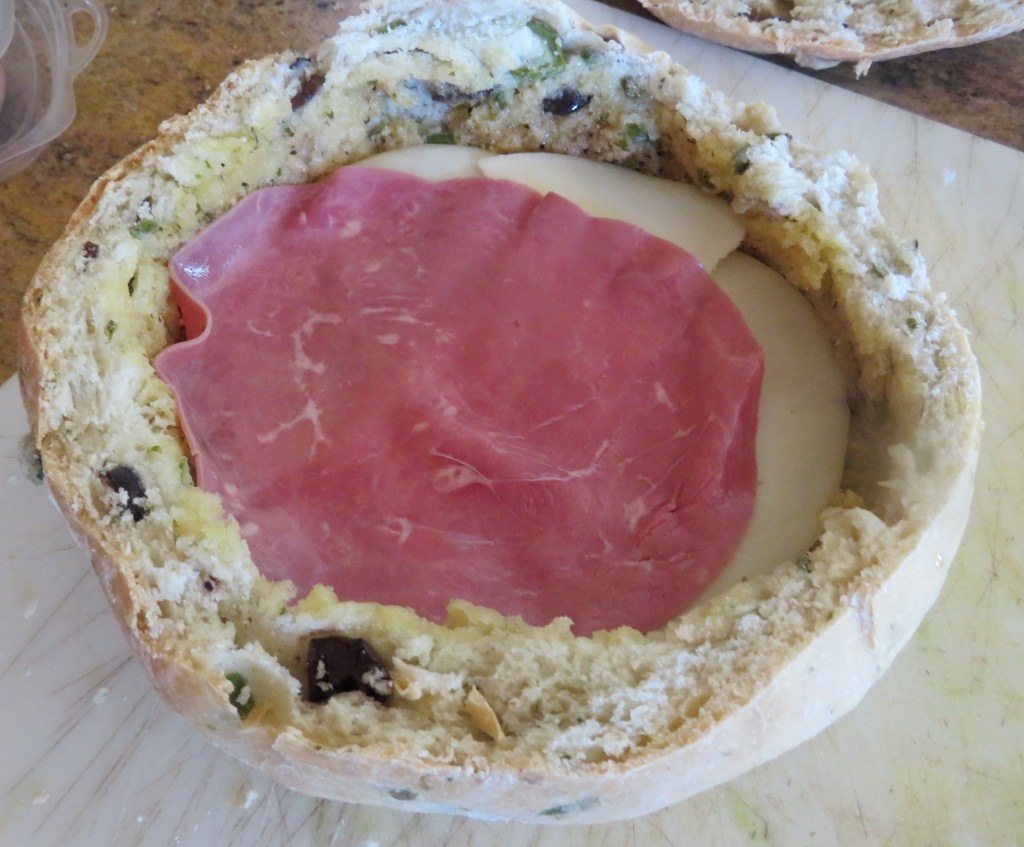
After the peppers were roasted, sweated, peeled and seeded, and the spinach was ready, it was time to start the layering process to make the sandwich. First was some Provolone cheese, followed by layers of beef, turkey and ham.

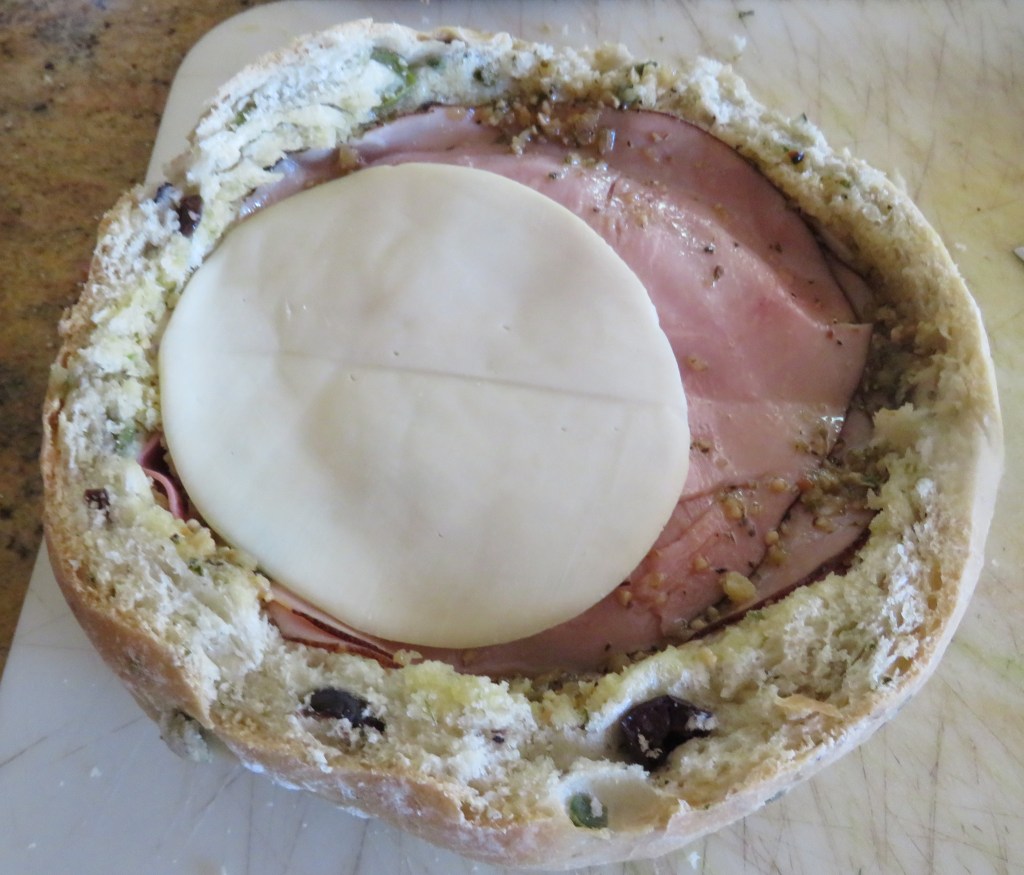
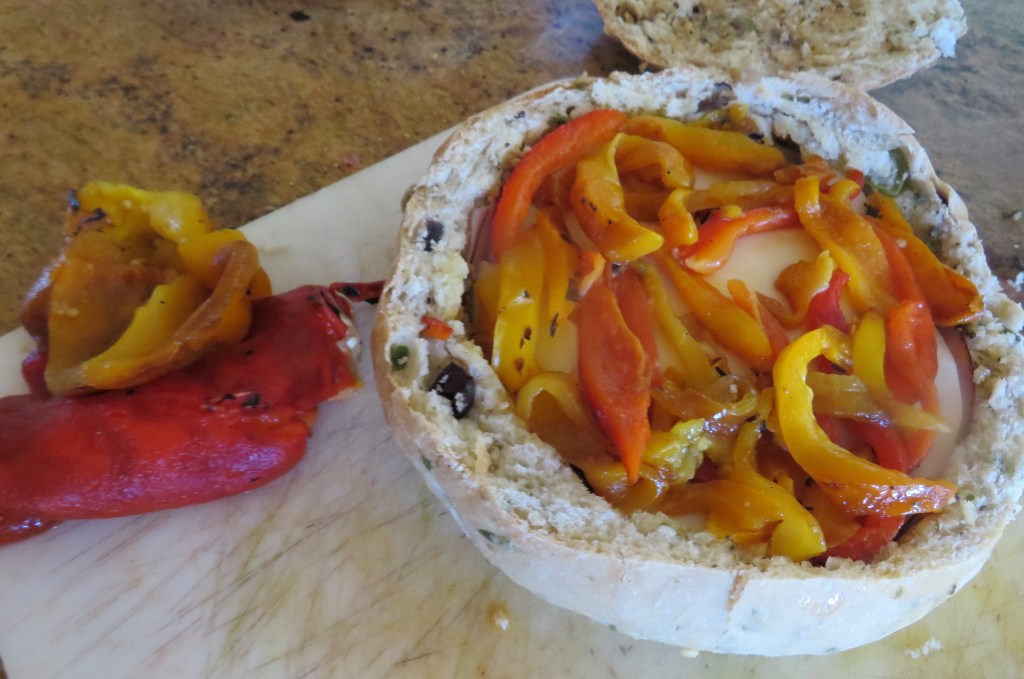
Next came another layer of Provolone cheese, followed by the sliced pepper strips, finished with a topping of the spinach and onions. I added another brushing of the orange vinaigrette on the top of the bread, then wrapped it all up in foil and put it in the oven to melt all the flavors together.

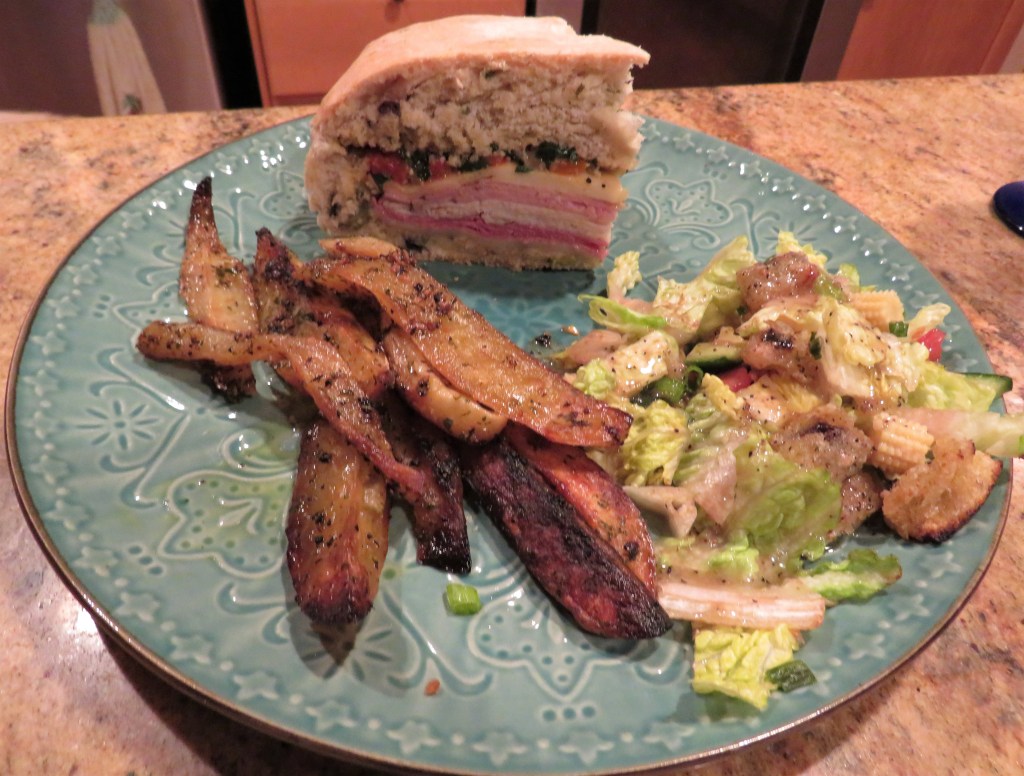
I baked it at 375*F or about 191*C and cooked it all for about 30 minutes. I wrapped it in foil since the bread was already baked and I did not want it to brown any more. Delicious! I GAR-UN-TEE Y’all are goin’ to love this one. 🙂

When you eat muffaletta, you are getting your whole meal all in one, in one sandwich. It’s got your vegetables and salad already packed into the sandwich. So with every mouthful, you get a little bit of everything. As with any recipe that has been around for a long time, there are many, many different variations. This is but one of many endless possibilities. Enjoy and laissez le bontemps roulez!

Have a great day and make everyday great. Be adventureous,but stay safe and stay well. ‘Til next time.

Nature Walks – Swim Lessons For The Goslings

The other day we saw the goslings for the first time of the season, and now they are already swimming. Before swimming though, mom and dad were going over the rules and teaching them some dry land stuff. You need to learn to walk before you can learn to swim.

Now, onto the swimming lessons.

Have a great day and make everyday great. ‘Til next time.

Herbed Olive Bread

I love making bread. There is something very therapeutic and relaxing about it. That being said, I decided it was time to bake some bread again. And I had something specific in mind for something I am going to make tonight. You will just have to wait a little longer to see what that will be though. A little anticipation is a good thing. 🙂

Yesterday’s bread which will be part of tonight’s dinner, as well as last night’s, was an herbed olive bread. I have made many different versions of olive bread, but I think this one is my favorite, at least so far. This is a Tuscan bread that can easily be a meal in itself, with a little cheese and wine on the side.

Herbed Olive Bread

I like mixing and matching my olives, and rather than chop them like a tapenade, I prefer to slice them. This way you can really see the olives in the bread, and they are so colorful and pretty.

1 package or 2 1/4 tsp dry active yeast

2 cups warm water

4 1/2-5 cups flour

1 1/4 tsp salt

1 TBSP olive oil +more for oiling the bowl

1 cup sliced olives

2 TBSP fresh basil, chiffonade, or 2 tsp dried basil

2 TBSP fresh oregano, chopped, or 2 tsp dried oregano

Sprinkle the yeast over the water, whisk together and let set for about 10 minutes or so, until it becomes frothy.

Combine the flour, herbs, olives and salt together. You can use regular all-purpose flour or a combination of all-purpose and bread flour, equal portions of both. I just used all-purpose flour this time. Make a well in the center of the flour mixture.

When the yeast water is frothy, add 1 TBSP of olive oil to the mix. This time, I used basil olive oil.

Mix everything together and knead until you have a smooth, elastic dough and shape into a ball. Cover and let rise for about 1 1/2 hours in a warm spot. Let the dough rise until it has doubled in size.

When the dough is ready, punch it down and divide into two equal portions. On a lightly floured surface, roll the dough into two balls once again and place on a slightly oiled baking pan. Dust the dough with a light topping of flour, cover and let rise again for another hour.

Preheat the oven to 400* F or 190*C. Bake for 30 minutes or until lightly browned. Remove and let cool for about 10 minutes before slicing. Then either dip it in olive oil or lather it up with butter, and enjoy.

Bread is the food of life. Take your daily bread and enjoy. 🙂 Have a great day and make everyday great. Stay safe and stay well. ‘Til next time.

Nature Walks – Meet The Goslings

Yesterday when we we taking the dogs out for a walk, we met our first batch of goslings for the season. As always, they are so darn cute. They are just little tiny babies too, only a couple of days old. I will get as many pictures of them as I can, because we all know they will grow up way to soon. But because we had the dogs, it was hard to stay and take a lot of pictures, or even take very good pictures. Dorrie and Juneau were on a mission. They had to go. But here is the first batch of the baby pictures.

Mom and dad were both so proud. They had five babies with them, all staying very close to mom.

Have a great day and make everyday great. Stay safe and stay well. ‘Til next time.

Bruschetta

It was time for our monthly trip to InVINtions, A Toast to InVINtions! which meant it was time for more nibblies. I tend to make the same thing all the time, because charcuterie trays are easily transportable and go well with wine tasting. But I get bored, and don’t like doing the same thing all the time. So this time I changed it up a bit. I still did make a cheese and meat platter, and still brought a tray of dolmas (stuffed grape leaves), olives, artichoke hearts and baby corn, but I also made some bruschetta to take along too.

The history of the bruschetta dates back to the Etruscan age: while occupying the land between Rome and Tuscany, they began dressing the local, salt-less bread (best when it’s a day old and a little bit stale) and baking slices in ovens or grilling their leftover bread over open fires. In fact that word bruschetta literally means to roast over coals.

The primary ingredient in Bruschetta is tomatoes and as you already know tomatoes are extremely good for health. They are packed with Vitamin C, Vitamin K1, folate and potassium. Moreover, they are also a rich source of antioxidants such as Chlorogenic Acid that is known to help lower blood pressure.

Bruschetta is the Italian version of pico de gallo. It is a simple, poor man’s food, which is simply delicious. These rustic, simple foods are hands down, my favorite foods to eat and enjoy, and to prepare. The simplicity in the kitchen always wins and the bruschetta is one of those simple dishes that is also rich in flavor and authenticity. A delicious appetizer, a poor dish that is a must in restaurants throughout Italy.

Bruschetta

Preheat the oven to 400* F or 205*C.

1 baguette, sliced at an angle

olive oil for brushing the baguette

Slice the baguette into thin slices, slicing it an an angle. Generously brush the olive oil on both sides of the bread. Bake for about 20-25 minutes, then flip all the pieces over and continue to bake for an additional 20 minutes or so, until the bread slices are lightly golden brown and crisp. Let cool. Once they brushetta or crostini slices have cooled, you can store them in an airtight container too.

5-6 tomatoes, diced

1 TBSP capers

1 shallot, diced fine

1 TBSP garlic

3-4 TBSP olive oil

1-2 TBSP lemon olive oil, optional

1 TBSP lemon juice

salt & pepper to taste

5-6 fresh basil leaves, chiffonade

I love tomatoes, and there are so many wonderful varieties available, so I love to mix and match my tomatoes. I almost always use a variety of different tomatoes, and my bruschetta was no different. I had an heirloom, some vine ripened tomatoes and some small cherry tomatoes that all got thrown into the mix, after dicing them into a small dice. Everything is all mixed together well, and then chilled until ready to use. I love using anything lemon with tomatoes too. The lemon flavors just really make the flavors of the tomatoes come to life.

As I mentioned above, I made a bunch of nibblies to take along with us. There were only five of us attending, but of course I made enough food to feed a small army. That’s just what I do. Believe it or not though, we made quite a dent in all the food. 🙂

Food is life. If you eat well, you are living well. Life is good, and even better when enjoyed with good food and good friends. Have a great day and make everyday great. Stay safe, stay well, and enjoy life to the fullest. ‘Til next time.

African Coconut Chicken And Vegetables

You all know I am a very adventurous eater, and will eat and make almost anything. I love international and ethnic foods from all over too. I get my inspiration for my dishes from many places, including many of you. Though I may get my initial inspiration from you, or many various recipes in cookbooks, I rarely follow the recipes exactly as they are written. It’s just how I am wired. I just can’t do it. I always have to take those recipes and make them my own by adding my own unique twists. 🙂 One such recipe is from one of our one, yet again. My inspiration for my African coconut chicken comes to me from Randy, at Cook Fork Plate, https://cookplatefork.com/. Thank you Randy for this delicious and exotic idea. 🙂

This is my version of Kenyan coconut chicken, known as Kuka Paka. I started off following Randy’s recipe, but of course, I just couldn’t help myself, and well, ….. I made it my own, as I always do. But that’s what chefs do. We all do. There is NOT a chef out there who will not take the opportunity to put his/her own personal touches to any dish or recipe.

African Coconut Chicken and Vegetables

The biggest change I made to the recipe was the addition of a lot of vegetables often used for many different African recipes and dishes. I added more spices as well. I also served it over angel hair pasta rather than rice. I also used some of my leftover Costco rotisserie chicken that was already cooked.

2 lbs chicken breast, cut into pieces

salt & pepper to taste

red pepper flakes to taste

1 TBSP garlic

2-3 jalapenos, diced fine

1 TBSP ginger

2 tsp coriander

1 tsp cumin

3-4 tomatoes, diced

2 cups baby spinach, chopped

tiny teardrop tomatoes, optional

1 can coconut milk

2 TBSP lemon juice

1 cup chopped cilantro

2 cups pumpkin, peeled and diced

1/2 onion, sliced very thin

olive oil for cooking

coconut oil, optional

lemon balsamic vinegar, optional

Get a large skillet very hot, then add the oil(s). I have coconut oil I added as well. It really made the flavors pop, but I realize not everyone has access to specialty olive oils and they can be a challenge to find.

Add the onions, garlic, jalapenos, red pepper flakes, cumin, salt and pepper and pumpkin to the hot oil(s) and cook for about 5 minutes, stirring frequently. Cook until the onions are translucent and the pumpkin is mostly tender.

Add the spinach and the chopped tomatoes and mix together thoroughly.

Add the coconut milk and mix well.

Then add the chicken and incorporate into the mixture. I used cooked chicken, but if you are cooking the chicken yourself, brown it on all sides first, then add it to the mixture. Bring to a boil, then cover, and reduce the heat to a simmer and continue to cook for about 20-25 minutes, stirring often.

Towards the end of the cooking process, add the chopped cilantro, lemon balsamic vinegar and the tiny teardrop tomatoes, if using, and just cook long enough for them to heat up. Then serve. You can serve this delicious sauce over either rice or pasta. This time I chose angel hair pasta.

My friend Lauren asked what made this an African dish. It is the combination of the spices, the vegetables and the coconut milk. These combinations are found in many of my African recipes from my African cookbooks. I served it all over angel hair pasta, with some tomato focaccia on the side, and a cool, crisp Spanish white on the side. I figured a good Spanish white wine would go perfectly with the African spices, and indeed, it did. 🙂

Once again, many thanks Randy. This was a delicious dinner that was inspired by you and your recipe. 🙂

Have a great day and make everyday great. Stay safe and stay well. ‘Til next time.

Nature Walks – Doves In The Trees

Well, it’s a good thing I have so many pictures from previous days’ walks, because today, it is pouring down rain. No outside walking for me.

We have a lot of doves all around right now. We have a variety of different kinds of doves, but what we see most often are the Mourning Doves. Here are some of my recent dove sightings.

Because of the shadowing of this one, at first I was so excited, I thought I had come across another osprey or smaller bird of prey. But once I got home, and blew up the picture on my computer screen, I was a little disappointed to find that it “was only a dove”, though still beautiful.

Mother Nature is so beautiful, no matter what she has to offer. I appreciate all that Mother Nature brings my way, no matter what it is. There is beauty in everything.

Middle Eastern Dinner – Part 6 – The Beverages

Today concludes my Middle Easter Dinner Party series. I have presented everything I made for the party, which was a deliciously, successful and fun evening. I have one last recipe for you from my party. The beverages.

Believe it or not, NOT everyone enjoys wine. I know! I was shocked too! All joking aside though, of course I had wine, and lots of it too. But I also offered a deliciously refreshing Lebanese spritzer as well, for all the non-alcoholic drinkers.

This cool, refreshing cucumber and mint spritzer was delicious. If the weather had been a little more cooperative, and NOT dropping 5 inches of snow on us, it would have been even more appreciated than it was. It would be perfect on the dog days of summer, when the mercury is on the rise. I made two versions. One had ginger and the other did not. Both were all gone very quickly and enjoyed by all.

Lebanese Cucumber and Mint Spritzer

This cool and refreshing drink is so easy to make and only requires a few basic ingredients. The recipe called for lemon juice, which I didn’t have enough of at the time, so I used lime juice instead. I like lemon juice a lot, and use it for so many different things, but I much prefer lime juice anyway. So, from here on out, it is lime juice for me. 🙂 I am giving you the proportions I used to fill my large pitchers. You can adjust it for individual portions as needed.

1 1/2 32-oz bottles of club soda

2 cups, or more as needed regular water

1/4 cucumber, sliced very thin

1 cup sugar

1 TBSP ginger

10+ fresh mint leaves

2 TBSP lime juice or lemon juice

You can make a simple syrup with the sugar and lime or lemon juice and cucumber, but why? I liked it so much better just by adding everything together and mixing it all up, drinking it fresh.

Combine the lime juice, sugar, ginger and regular water and mix well. Pour into the pitcher. Add the club soda and mix well again. Then add the mint and the sliced cumbers. Chill until ready to use. Do not make too far in advance, because it will deplete the effervescence of he club soda. I did not mix the sugar, lime juice ginger and water at first, and when I added my club soda, it fizzed all over my counter. No big deal, I just had to clean it up. But why waste any of this delicious drink if you can help it, right?! 🙂 This is kind of like the non-alcoholic Lebanese version of the Cuban Mojito. 🙂

This is a wrap for my Middle Eastern dinner party. As you know, I have plenty more recipes and fun things coming your way. And their will ALWAYS be more dinner parties too. I feed people and love to entertain. That’s just what I do. 🙂

Have a great day and make everyday great. Stay safe and stay well. ‘Til next time.

Nature Walks – American Wigeons, Ducks Of Another Feather

We are so blessed and so lucky to live where we do. We have so much wildlife literally right in our backyard. And so much variety too. Some more of our local duck species are The American Wigeons. These have a fun nickname too. They are often referred to as the “golf course ducks” because they are often found on the waters of local and suburban gold courses. We see them in the “burbs” mostly in the winter months, though there are still quite a few around these days too.

The males have a bright green stripe right over their eyes.

The females do not.

Have a great day and make everyday great. Stay safe and stay well. ‘Til next time.

Middle Eastern Dinner – Part 5 – Spicy Cilantro Potatoes

Everyone loves potatoes. I know I sure do! They just may very well one of the most international foods around. Everyone has their own specific recipes and twists to this beloved favorite too. These beloved tubers go by many names – potatoes, pappas, patata, pommes, and in the Middle East they are known as batatas, just to name a few.

One of the dishes I made for my Middle Eastern dinner was spicy cilantro potatoes, or batata harra. Batata harra are fried potatoes tossed in a spicy, garlicy herbed olive oil. You can enjoy them on their own, or with a cool lemon or yogurt sauce.

Spicy Cilantro Potatoes

I used baby red potatoes for this recipe. Any kind of potato will do, but I was making them for a large group, and I thought these were a better choice. Besides, they look pretty. 🙂

2 lbs baby red potatoes, washed and quartered

4 TBSP olive oil

2-3 TBSP chili olive oil, optional

salt and pepper to taste

red pepper flakes to taste

1-2 TBSP garlic

1/4 cup fresh chopped cilantro

Bring about half the oil(s) to about 375* F or 190*C in a large saucepan. Add the potatoes, and fry until they are golden brown. If you are cooking a lot of potatoes, you may need to cook them in smaller batches to ensure more even cooking.

Combine the remaining oil(s), garlic, salt, pepper, red pepper flakes and cilantro together and mix well.

When the potatoes are lightly browned all around, immediately toss together with the oil and cilantro mix. Serve immediately after. These are best when served hot.

I love potatoes of all kinds. I think they are right up there with bread. I could easily live on potatoes and bread. And lucky for me, potatoes are extremely versatile, and there are endless possibilities on how to prepare them.

These were yet another big hit and all disappeared. This is great, but I was hoping there would be some leftover for another time. I guess I will just have to make some more. 🙂

Have a great day and make everyday great. Stay safe and stay well. ‘Til next time.