I have created this site to help people have fun in the kitchen. I write about enjoying life both in and out of my kitchen. Life is short! Make the most of it and enjoy!
I know, you are all SHOCKED that I like to cook and that I like to experiment with different products. I know, you’re all STUNNED!!!!! 🙂 🙂 🙂
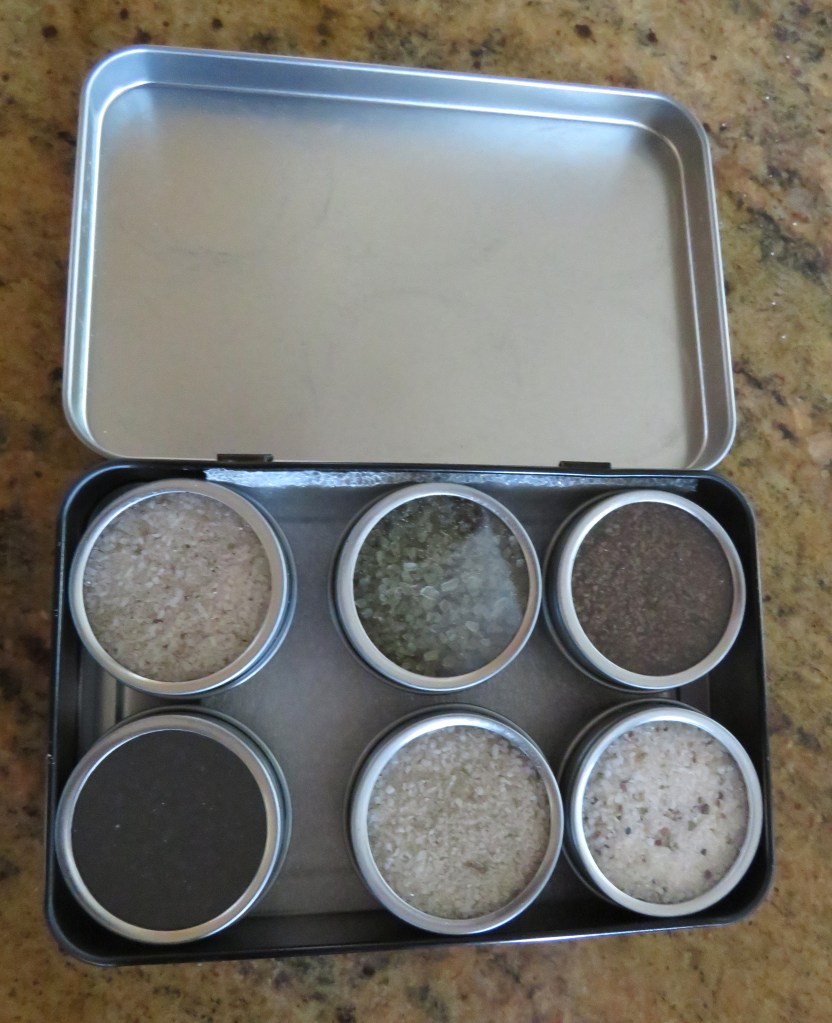
My friends all know me all too well. You all know what I like, sometimes even before I do. 🙂 One of the fun things I got as a Christmas gift is a tin of infused salt samplers with different flavors infused salts. The samples in the pack are all new to me. I haven’t used any of them yet, but my curiosity and my taste buds are definitely aroused. I can’t wait to start playing with them.
There is a pepper salt, bamboo jade, smoked bacon chipotle, Hawaiian black lava, rosemary and garlic medley tin inside the little box. What kind of good things can I use all these for????? HMMMMM!!! Let me play around a little to see what I can come up with. 🙂
The pepper salt, rosemary salt and the garlic medley salts are easy. Those will go with just about anything I cook, since I use pepper and garlic in just about everything. The others are a bit more challenging, but as always, I am up for the challenge. 🙂
Google suggests, as you might expect, Asian and/or seafood dishes for the Hawaiian bamboo jade salt. It utilizes a unique combination of organic bamboo leaf extract and Hawaiian sea salt that provides a unique flavor experience, with a hint of sweetness, earthiness and saltiness.
The Hawaiian black lava salt is a premium finishing salt infused with activated charcoal, offering an earthy flavor and a striking visual contrast. Because it dissolves and leaves a black residue when cooked, it is best used as a garnish after preparation. It is suggested to use on all kinds of grilled meats, seafood or vegetables, but once again, it is also suggested to let your imagination run wild with new and creative dishes to use it with. I like that idea. I can definitely do that. 🙂
The smoked bacon chipotle salt adds a little smokiness and heat to meats, potatoes, vegetables or even deviled eggs. I am getting together with Mike and Lauren later tonight, and Mike is smoking some ribs. I already have some ideas in mind for using the smoked chipotle and bacon salt for a side dish to take with me when I go. 🙂 I will definitely keep you posted on how I decide to use it. 🙂
Have a great day and make everyday great. Merry Christmas and Happy Holidays. Stay safe and stay well, and celebrate the holidays with friends, family and loved ones. ‘Til next time.
Yesterday, I shared some of the world’s savory Christmas dinners with you. Christmas Foods From Around The World – Part 1 – Savory Dishes But you can’t have a Christmas dinner without sweet treats for dessert, right?! So today, I will share some the world’s sweet treats that accompany the savory dinners from around the world.
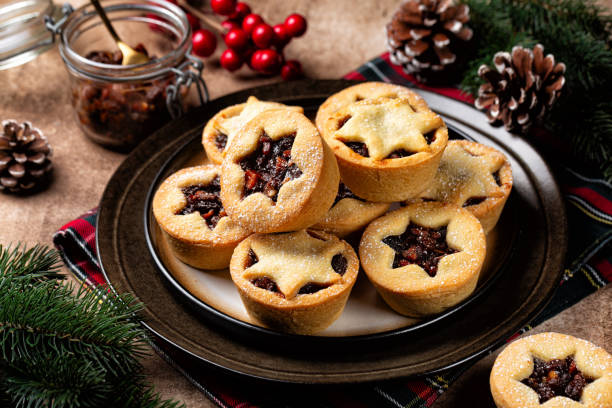
Once again, starting with parts of the English speaking world, The UK and the USA like to enjoy fruit cake or Christmas pudding and mince pies. A mince pie (also mincemeat pie in North America, and fruit mince pie in Australia and New Zealand) is a sweet pie of English origin filled with mincemeat, being a mixture of fruit, spices, and suet. The pies are traditionally served during the Christmas season in much of the English-speaking world. They were made from 13 ingredients to represent Jesus and his disciples and were all symbolic to the Christmas story. As well as dried fruit such as raisins, prunes and figs, they often included lamb or mutton to represent the shepherds and spices (cinnamon, cloves and nutmeg) for the Wise Men, though no meat or meat products in the modern versions. Mince pies served with brandy butter are the traditional way to elevate this classic British treat. Brandy butter, a hard sauce made with butter, powdered sugar, and brandy, remains solid until served atop warm fruit mincemeat pies. The rich, creamy butter then melts into a delicious buttery sauce.
2. Germany has always been known for its love of sweets and sweet breads, so it is no wonder that they would love sweet bread as part of their Christmas traditions too. In Germany, Stollen or fruit bread and Zimtsterne cookies, or cinnamon stars, are their go-to Christmas treats that are enjoyed by all. When I was a little girl, our neighbor and my mom’s best friend, Edith and her family were German. She and her husband Willhelm were both from Germany. They had Christmas Stollen every year. Edith was an excellent cook too, particularly for all the traditional German foods that she would graciously share with us on a regular basis.
3. In the South Pacific regions of both Australia and New Zealand, pavlova is a favorite Christmas tradition. Pavlova is a meringue based dessert that is often topped with fruit. A pavlova is a type of meringue dessert, but the key difference is texture: a classic meringue (like cookies) is crisp and crunchy all the way through, while a pavlova has a crisp shell and a soft, marshmallowy, chewy center, achieved by adding cornstarch and an acid (vinegar/lemon juice) to the egg white mixture and baking it differently. Believe it or not, even though I am 1/2 Aussie, I have NEVER made a pavlova before. I keep saying I will, but haven’t yet. Maybe there will be an attempt at making one in my very near future. Who knows?! 🙂
4. The Italians are also known for good food, good breads and good sweet breads. They have their own version of a Christmas sweet bread and that is panettone. Panettone is special due to its laborious, multi-day creation using a natural sourdough starter (lievito madre), resulting in an incredibly light, airy, and flavorful sweet bread with a distinct dome shape, rich buttery taste, and complex aroma from candied fruits and raisins, symbolizing Italian holiday tradition, patience, and artisanal skill. Panettone is technically a sweet, enriched bread, not a cake, though its moist, fluffy texture often makes people think of cake; it’s a traditional Italian holiday treat made with a long fermentation, eggs, butter, and candied fruits, known as “big bread” (panettone) in Milan. It’s leavened like bread (often with sourdough starter) but has rich, cake-like ingredients and a distinctive dome shape. So in a way, it is the best of both, a cake and bread.
5. The Caribbean Islands are known for their rum and their rum cakes, the “boozier” they are, the better. Each Island has its own special version of a rum cake, and they all tend to think their version is “the best”. Rum cakes come in many types, varying by flavor (coconut, pineapple, key lime, chocolate, coffee, fruitcake), rum used (spiced, dark, coconut), additions (pecans, raisins, citrus zest), and style (moist Caribbean pound cake, light sponge cake, mini cakes, gluten-free). Key distinctions include traditional Caribbean fruitcakes, lighter cakes with citrus or tropical flavors, richer chocolate versions, and even creative takes like Mojito or spiced rum cakes. Rum cakes also go by the names of Cake de Ron or simply Drunken Cake too.
6. Poland likes to make a Makowiec or a poppy seed roll for their Christmas celebrations. I never knew they were Polish, but I love poppy seed cakes and rolls. I always thought they were Danish because there was a Danish bakery we used to go to every now and then when I was growing up that specialized in poppy seed rolls.
7. Once again coming from the Goa, India region, the Goans like to make a Bebinca, or a layered coconut milk cake, for their Christmas celebrations. Bebinca is a traditional, rich, multi-layered Goan dessert cake, often called the “Queen of Goan Desserts,” made from flour, sugar, ghee (clarified butter), coconut milk, and egg yolks, with layers flavored by nutmeg and sometimes caramel. This labor-intensive sweet is known for its distinct thin layers, often stacked 7 or more high, symbolizing the hills of Portugal, and is a staple for festive occasions in Goa, India. Unlike flaky or syrup-soaked desserts, bebinca is a dense, layered pudding-like cake with caramelized richness courtesy of ghee and the aromatic hint from nutmeg. Its long shelf life also makes it a perfect souvenir for tourists visiting Goa, allowing them to take home a taste of the region.
8. I will conclude our tour of worldly sweet Christmas treats with some Brazilian desserts, and showcase the Rabanada or Brazilian French toast and Pavê or trifle. Rabanada is traditional Portuguese and Brazilian deep-fried dessert, similar to French toast but richer, made from day-old crusty bread soaked in a sweet milk/custard mixture, dipped in egg, fried until golden and crispy, and then rolled in cinnamon sugar or drizzled with syrup. It’s especially popular during Christmas in Brazil and Portugal, often served as a festive treat, sometimes with port wine or honey, and known for its crispy exterior and soft, custardy inside.
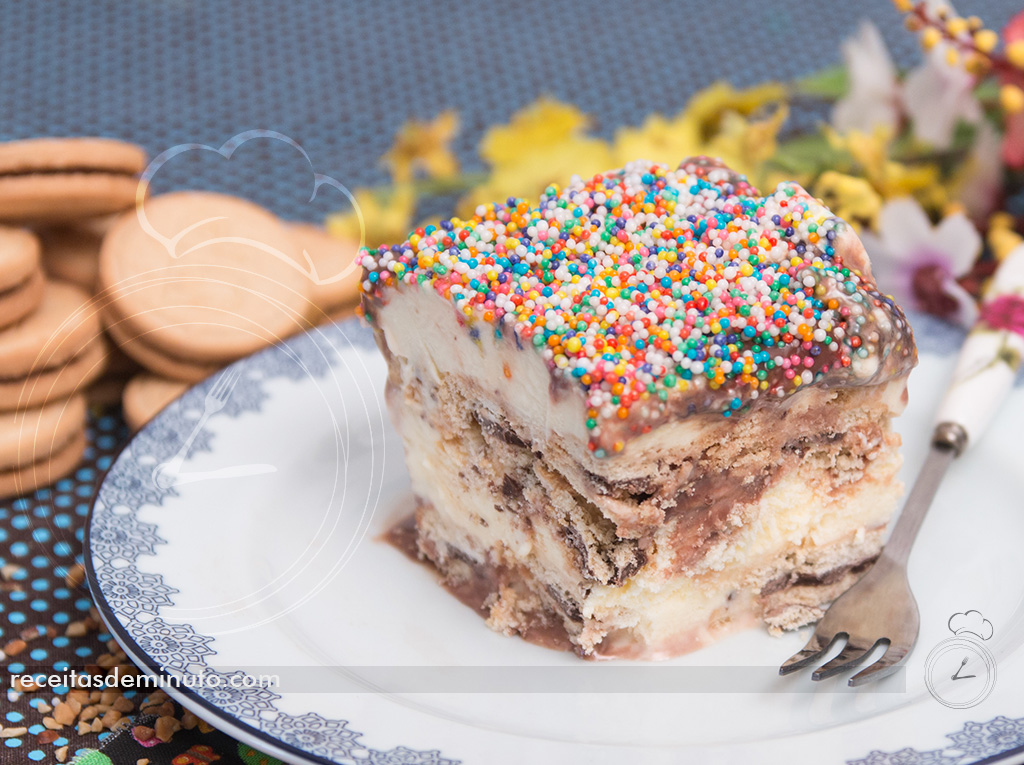
Pavê is (Portuguese pronunciation: [pa’ve]) is a traditional Brazilian dessert mainly from south and southeast regions that consists of alternating layers of biscuits (ladyfingers or corn starch biscuits) and a cream made using condensed milk. It is similar in structure to the tiramisu. Pavê is a Brazilian dessert that resembles a tiramisu, but oh so much better! They are wonderful no-bake layered desserts, usually made with a combination of cookies or biscuits and different creams and fruits or chocolate. Unlike the tiramisu, the pavê doesn’t usually have coffee and it has only a hint of liquor.
If you don’t already have your holiday menus planned, maybe I have inspired you with some different and worldly holiday traditions. I don’t know about you, but I am definitely inspired to try some of these new ideas. 🙂
Merry Christmas and Happy Holidays, no matter how or where you celebrate them. All that matters is that you celebrate the holidays with family, friends and loved ones. Stay safe and stay well. ‘Til next time.
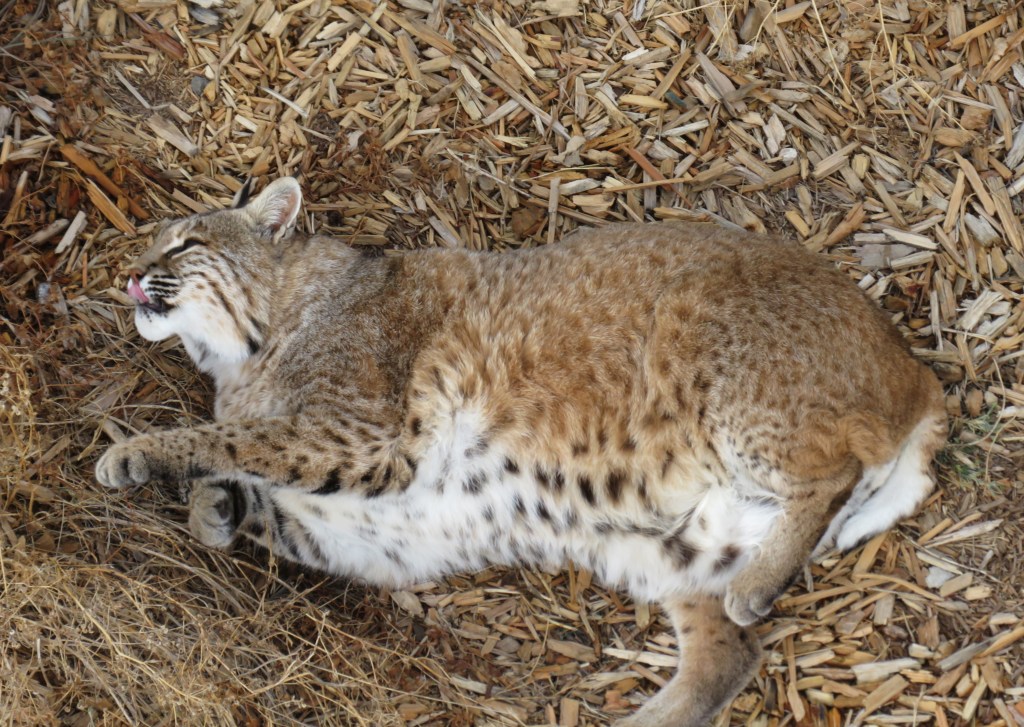
On our last visit to the Wild Animal Sanctuary, we had to cut it short due to inclement weather. We did get to see a few animals before leaving though. We saw a lot of the foxes, who were just sleeping all around, trying to keep warm.
Most of the “kitties” we saw were sleeping or resting too.
Most of the bears we normally see when visiting were hibernating in their protective hideouts. They all look so peaceful when they sleep.
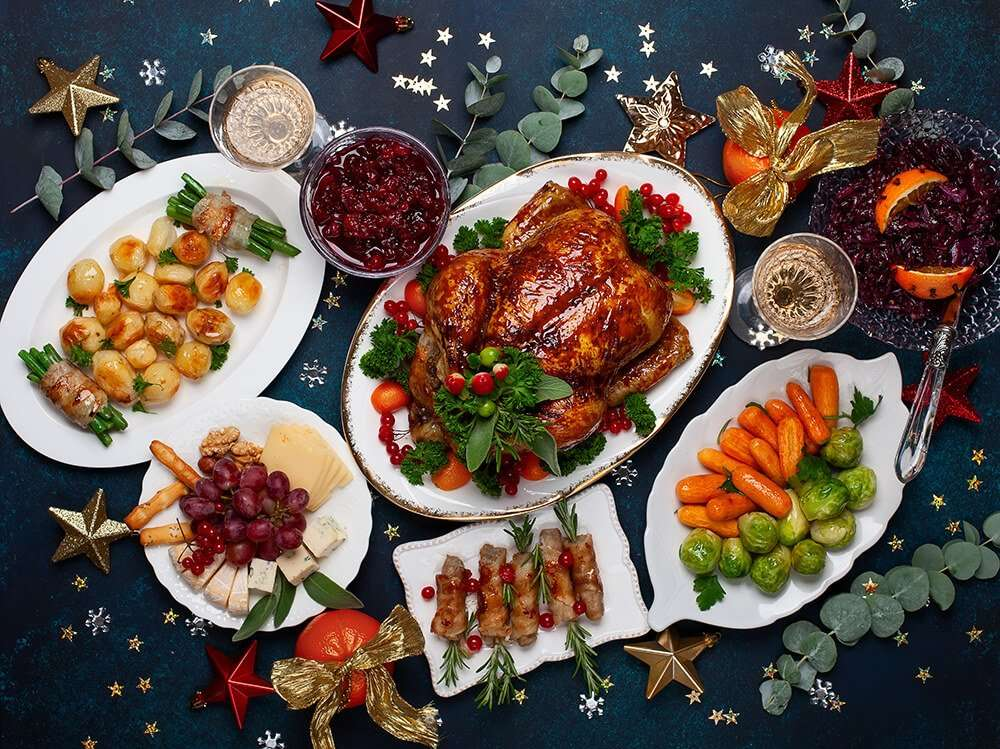
Since it’s the Christmas and Holiday season, and many of us will either be cooking for family, friends and loved ones, or will be guests at others’ holiday tables, I thought it would be fun to see what traditional Christmas/Holiday foods people eat around the world. Let’s see what others from around the world will be eating for Christmas dinner, shall we? 🙂
In many of the English speaking countries of the world, such as the United States and the UK, many people will be eating ham, roasts or turkey with potatoes and stuffing and vegetables. We had an early Christmas dinner that featured both a smoked prime roast and smoked turkey An Early Christmas Dinner Celebration. I will be hosting Christmas dinner again, on Christmas Day, this time featuring a ham as the center piece.
2. Seafood is a big Christmas tradition in Italy, with the “Feast of the Seven Fishes” that is the highlight. The Feast of the Seven Fishes is a traditional Italian-American Christmas Eve dinner featuring multiple courses of fish and seafood, stemming from Southern Italian Catholic fasting traditions that abstained from meat before Christmas Day. Celebrated as La Vigilia, it’s a festive, meatless meal with various seafood dishes, often including clams, shrimp, cod (baccalà), mussels, and calamari, with the number “seven” symbolic but flexible, with some families serving more. This is usually the Christmas Eve feast for many Italians and Italian Americans. I have had the pleasure of enjoying the celebrations of The Feast of the Seven Fishes before. Not only did we enjoy seven types of fish, but there was so many other delicious Italian foods all around the table that truly made it a feast in every sense of the word.
3. Tamales and posole (hominy stew) are served around Mexican tables. Tamales and pozole are cherished Mexican Christmas traditions, bringing families together for festive feasts, especially on Christmas Eve (Noche Buena). Making them is a communal labor of love, involving assembly lines to spread masa (dough) and fillings (like pork/chicken) onto corn husks for steaming, while pozole, a hearty hominy stew (red, green, or white), offers comforting warmth, often served alongside with garnishes like lettuce, radish, lime, and avocado. These dishes, rooted in ancient Mesoamerican culture, symbolize tradition, family bonding, and good fortune for the New Year. I shared many Christmas Eve dinners with my best friend Andrea and her family while still in California, and everyone would be a part of the whole tamale making process. When the tamales were done, we would all enjoy the fruits of our labors, along with fun festive musica and stories, and lots of laughter and love. I would always bring the desserts too. I have many deliciously happy memories from these days. 🙂
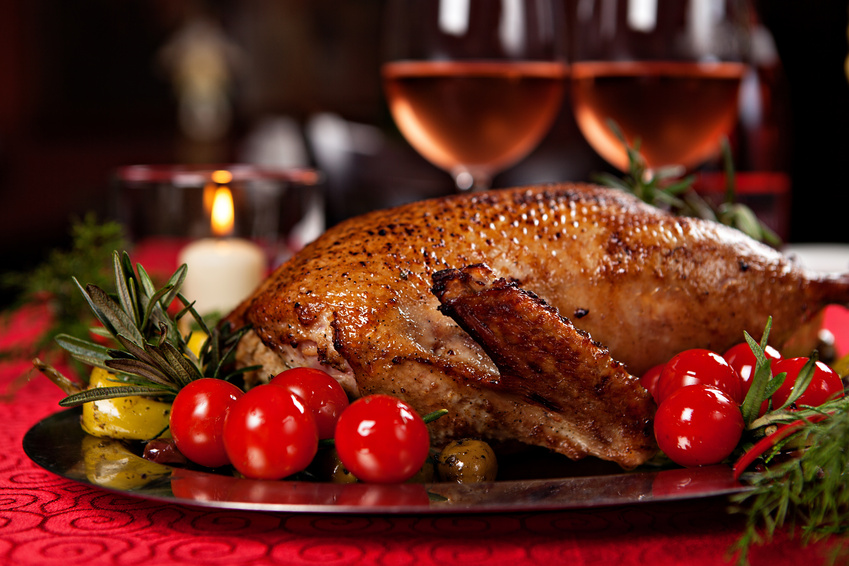
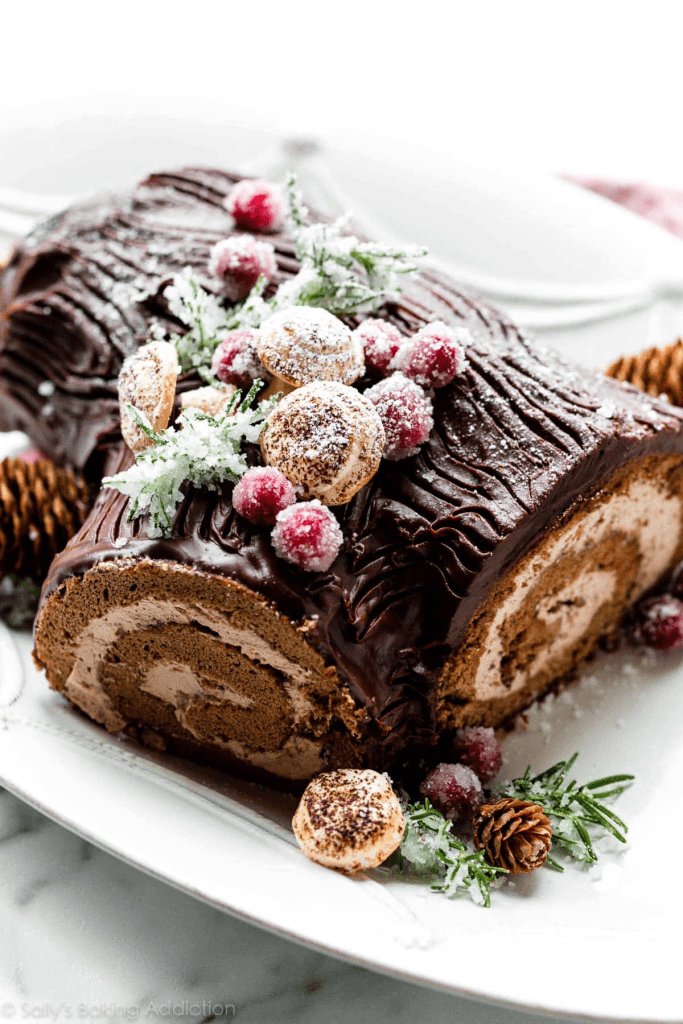
4. The French like to feast on oysters and capon for their main Christmas meal, with a Buche de Noel for Christmas dessert. Capons, oysters, and Bûche de Noël are classic components of a lavish French Christmas (Réveillon) feast, representing the traditional savory main course (roasted capon), a decadent starter (oysters), and the iconic dessert (Yule log cake), symbolizing festive indulgence and European holiday traditions. A capon is a castrated rooster, known for its tender, flavorful meat.
5. The Scandinavian countries enjoy Ribbe (pork ribs), Pinnekjøtt (cured lamb) and Lutefisk (lye-cured cod) for their Christmas celebrations. This dates back to the old Catholic traditions of Norway and the other Scandinavian countries, when restriction of meats required fasting on various designated days and weeks. Fish and porridge were the substitution foods. During the four Advent weeks preceding Christmas, dry fish was most widely available, and lutefisk became identified with Christmas because of these circumstances.
6. The Canadian Province of Quebec is French, but they have their own Christmas and holiday traditions. They dine on a meat pie known as tourtiere. The word tourtiere is derived from the word “tourte,” or the French name for the now-extinct passenger pigeon, which was once a filling ingredient for this savory meat pie. Today it is a savory French-Canadian meat pie, traditionally from Quebec, filled with minced pork, veal, or beef, and potatoes, seasoned with spices like cinnamon, clove, and thyme, and baked in a flaky crust. It’s a festive dish, especially popular for Christmas and New Year’s Eve celebrations, and is enjoyed year-round in many parts of Canada and New England. Larry and Maureen actually enjoyed dish this while we were in Quebec earlier this year at Chateau Frontenac. Great Eats In the Great North – Part 7 – Chateau Frontenac
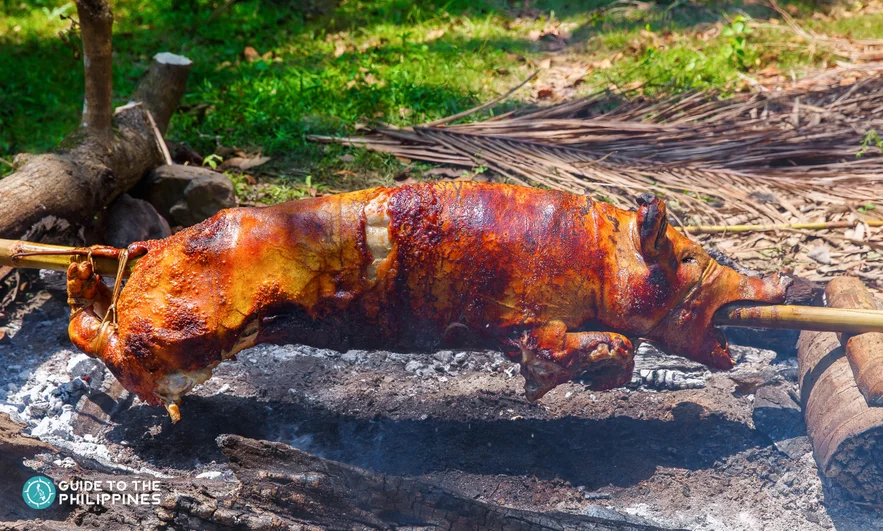
7. In the Philippines, the savored Christmas dish is the lechon, or a whole roasted pig. The name “lechon” is said to have come from the Spanish word “lechona” which means “suckling pig.” This indicates that the first version of this dish is what is locally called lechon de leche.
Whole pigs are spit-roasted slowly over charcoal for hours, and when done right by masters called “lechoneros,” the meat inside is rendered tender and juicy and the skin is crisp like candy and caramelized to a perfect orange brown sheen.
Unlike other roast pig dishes of other cuisines, the Philippines’ lechon is known for its skin. The perfect lechon skin is cooked evenly and remains smooth and shiny. The best ones feature skin that remains crisp for several hours!
8. In Goa, India, people enjoy Sorpotel or a pork curry for Christmas. The people of Goa have a lot of Christian roots originally coming from Portugal. Goan Sorpotel is a traditional, spicy, and tangy pork curry of Portuguese origin, considered a festive delicacy in Goa, India. It is a complex, labor-intensive dish made with pork meat and offal (liver, heart, tongue) that is simmered in a rich, vinegary sauce and traditionally served with sannas (steamed rice cakes) or Goan bread.
Wherever you are from, wherever and however you are celebrating the holidays, the most important ingredient to any meal, especially Holiday meals, is LOVE. Celebrate the holidays in your own traditions with family, friends and loved ones. Stay safe and stay well. Merry Christmas and Happy Holidays. ‘Til next time.
I see bunnies and squirrels all year long, but sometimes I see them more frequently than other times, especially the bunnies. I tend to see more bunnies when the weather is cooler. I love seeing both of them though. They are always fun to see. The squirrels are always so entertaining and full of personality too.
Right now the squirrels are busy gathering up goodies to store for the winter (that hasn’t really come yet).
Have a great day and make everyday great. Everyday is a gift. Enjoy them while you can.
I am in between Holiday and Christmas celebrations right now, and am still in a Southeast Texas frame of mind. So I made some gumbo. Gumbo is a dish that is rich in tradition, with influences from many different cultures. And even though it is known for being a Louisiana dish, Southeast Texas and Louisiana share a lot of the same cultural influences. They are kissing cousins in many ways.
Gumbo is a thick soup that could be considered the defining dish of South Louisiana, and yet, there is no standard recipe, as the dish straddles both Creole and Cajun cuisines, racial lines, and, in more recent times, even the boundaries of Louisiana. By the time of the Louisiana Purchase in 1803, gumbo had become deeply ingrained in the local diet. The dish was prevalent among Cajuns, Creoles, and people of color, no matter their socioeconomic station. Gumbo’s varied history reflects the evolution of agricultural production and creolization, a hybridized blending of multicultural traditions, in Louisiana. Gumbo’s history is a rich cultural fusion, originating in 18th-century Louisiana as a blend of West African, French, Spanish, and Native American culinary traditions, with its name likely coming from the Bantu word for okra, “ki ngombo”. Key ingredients like okra (West African thickener) and sassafras (Native American filé powder) were combined with French roux and local seafood, evolving from a humble stew into Louisiana’s iconic state dish, documented in print by 1802 and appearing in cookbooks by the 1820s and 1880s.
Gumbo started as a resourceful dish, combining available ingredients like seafood, meats, and vegetables. The choice between okra, filé, or roux defined different regional styles (e.g., okra in African tradition, roux in French, filé in Native American). The base of onions, celery, and bell peppers became a foundational flavor element. Creole gumbo (New Orleans) often includes tomatoes and is sometimes richer; Cajun gumbo (rural Louisiana) uses a darker roux and can be more rustic. Today, gumbo is the official state cuisine of Louisiana, celebrated for its cultural significance and diverse variations. As with many dishes that have evolved over time, there are many different variations of gumbo, and a lot of those variations come from what is available locally and seasonally. It can be made with seafood, wild game, sausage, meat, vegetables, or any combination thereof. Even the spices and the thickening agents vary, as do the colors of the roux.
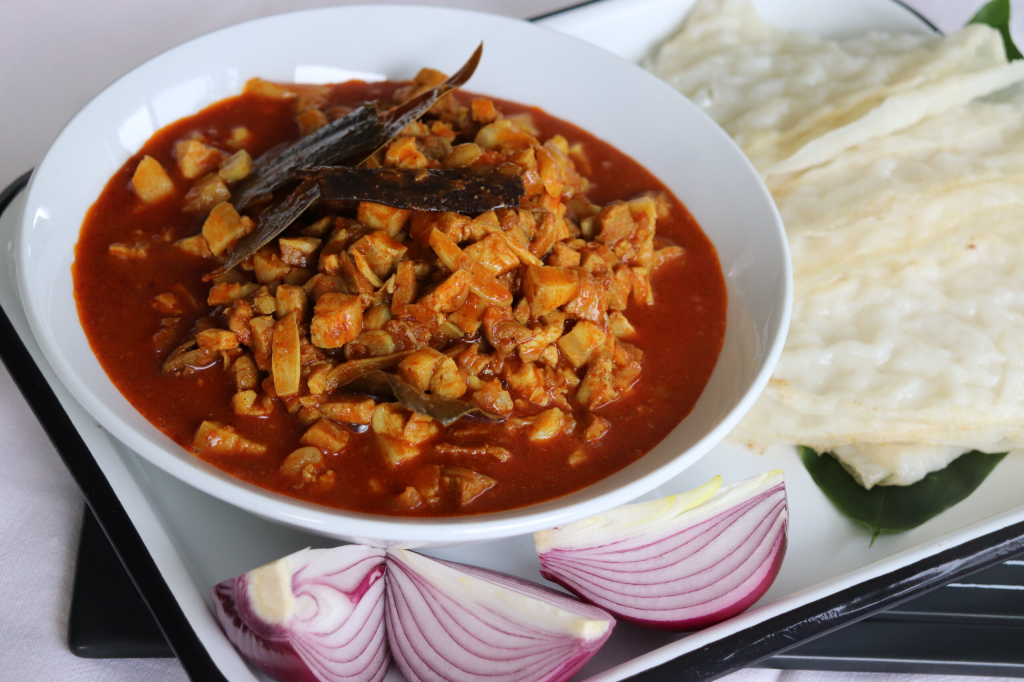
Gumbo with Shrimp and Andouille Sausage
I have eaten and enjoyed many different styles of gumbo, but my favorites tend to be the lighter colored and thicker styles. The roux is not browned as much, which tends to make the gumbo thicker and not as much of a nutty flavor.
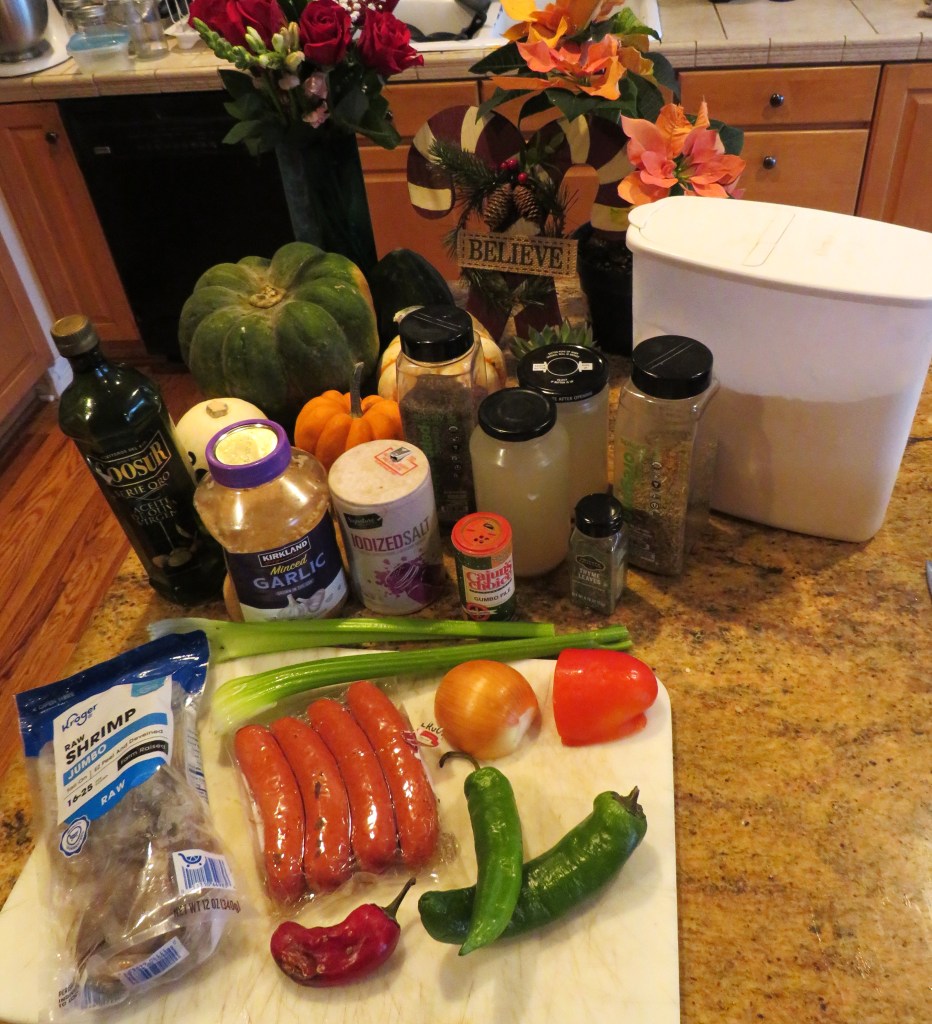
I made this particular gumbo with both shrimp and Andouille sausage, and of course the “Holy Trinity” of Cajun/Creole food, celery, peppers, and onions, plus garlic and various Cajun/Creole spices.
1-1 1/2 lbs large shrimp, peeled and deveined
1-1 1/2 lbs Andouille sausage, cooked and sliced
2-3 celery ribs, sliced
1 onion, diced
1 green bell pepper or 2-3 Anaheim peppers, diced
1 red bell pepper, diced
1-2 jalapeno or red jalapeno peppers, diced fine
1-2 TBSP garlic
6-8 cups chicken stock
2-3 TBSP flour
2-3 TBSP olive oil and butter
salt & pepper to taste
1 TBSP Cajun/Creole spice
2-3 tsp dried oregano
2 tsp dried thyme
Cook the shrimp in a hot pot with the oil and butter until completely pink. Then remove from the pot and set aside.
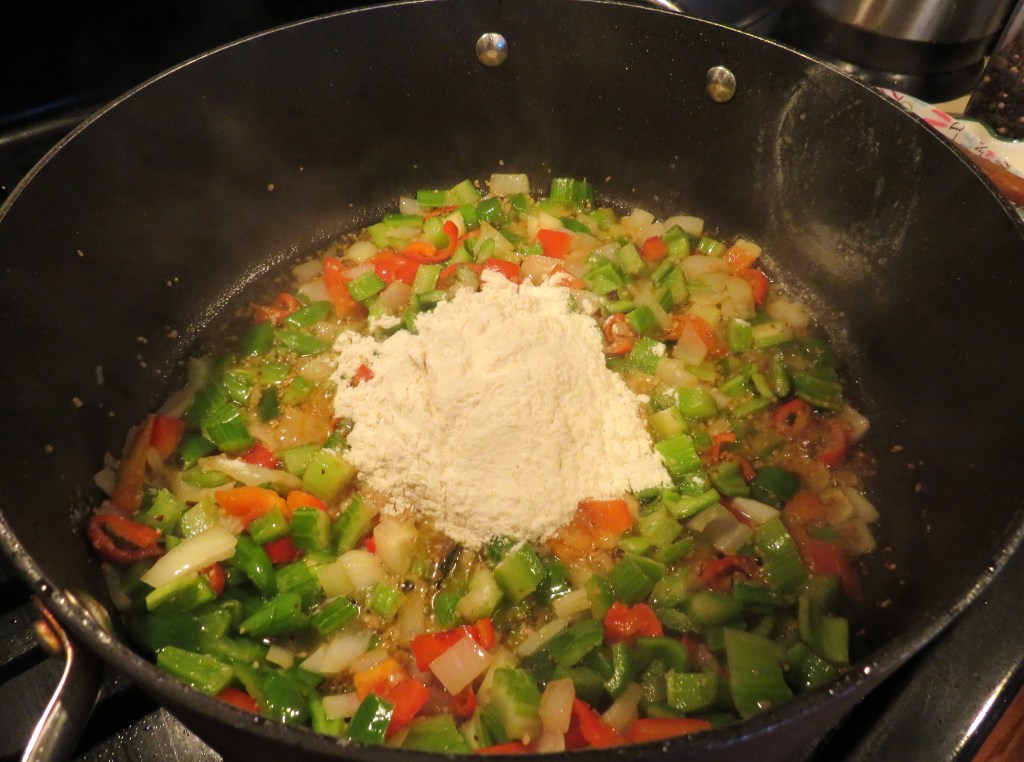
Add the peppers, onions, celery and garlic and more oil and butter if needed. Cook for about 3-5 minutes or until the onions are translucent and the vegetables are softened a bit.
After the vegetables have softened a bit, add the flour and incorporate well into the mixture. The amount of time you cook the flour will determine the color and intensity of the roux. The longer you cook it, the darker it will become, and the more intense the nutty flavor. This is purely a personal choice depending on how you like it. There is no right or wrong way.
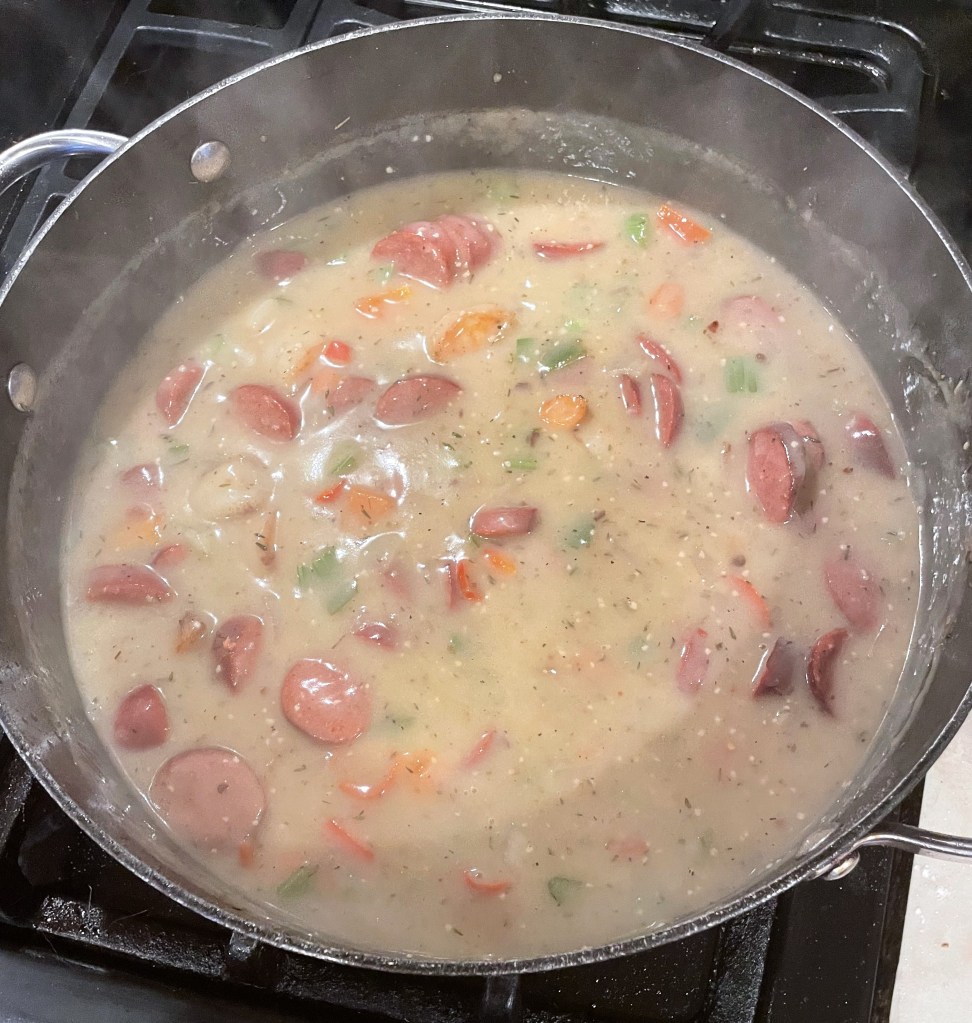
Once the roux is to the color and intensity you desire, add the chicken broth and seasonings and mix together well. Bring to a boil.
Reduce the heat to a simmer and add the cooked shrimp and the Andouille sausage. Cover and simmer for at least 1-2 hours, stirring frequently.
Serve hot, in a bowl, with cooked rice and red beans if you like, with cornbread, biscuits or warmed bread on the side. I GAR-UN-TEE y’all are going to love this one. 🙂
Have a great day and make everyday great. Have a very Merry Christmas and a Happy Holiday season. Stay safe and stay well. ‘Til next time.
Every year Larry and I host our annual ornament exchange party. It’s always a lot of fun. The concept is similar to a “white elephant” party, but instead of bringing gag gifts, that are often in poor taste and insulting (in my humble opinion), I have everyone who wishes to participate, bring a wrapped ornament instead. Then we can swap and “steal” to our heart’s content. The more “stealing” that takes place, the more fun the game and the party is. This is the only instance where I actively encourage a lot of “stealing”. We have been hosting this party for years and have no plans on stopping anytime soon. We had a houseful once again this year, with about 40+ guests in attendance. And yes, it was a fun, fun party. 🙂
I make my party a potluck party, where people can bring any kind of dish they want to bring to share with everyone else. Again, there is always so much food that this too is optional. Larry likes me to make main dishes since most people tend to bring either salads, appetizers or desserts because they are more easily transportable than main dishes. This year I made some green chili, that I served both as green chili on its own and then I made into some green chili pies. Colorado Green Chili
As usual when I host a party, I get very busy and don’t often take as many pictures as I intend to, but you get the drift. Both were a big hit.
I also made some turkey tetrazzini with the leftover turkey from the night before. This too received rave reviews from everyone. Turkey tetrazzini is a turkey and pasta casserole with a breadcrumb and Parmigiano cheese topping that is baked in the oven.
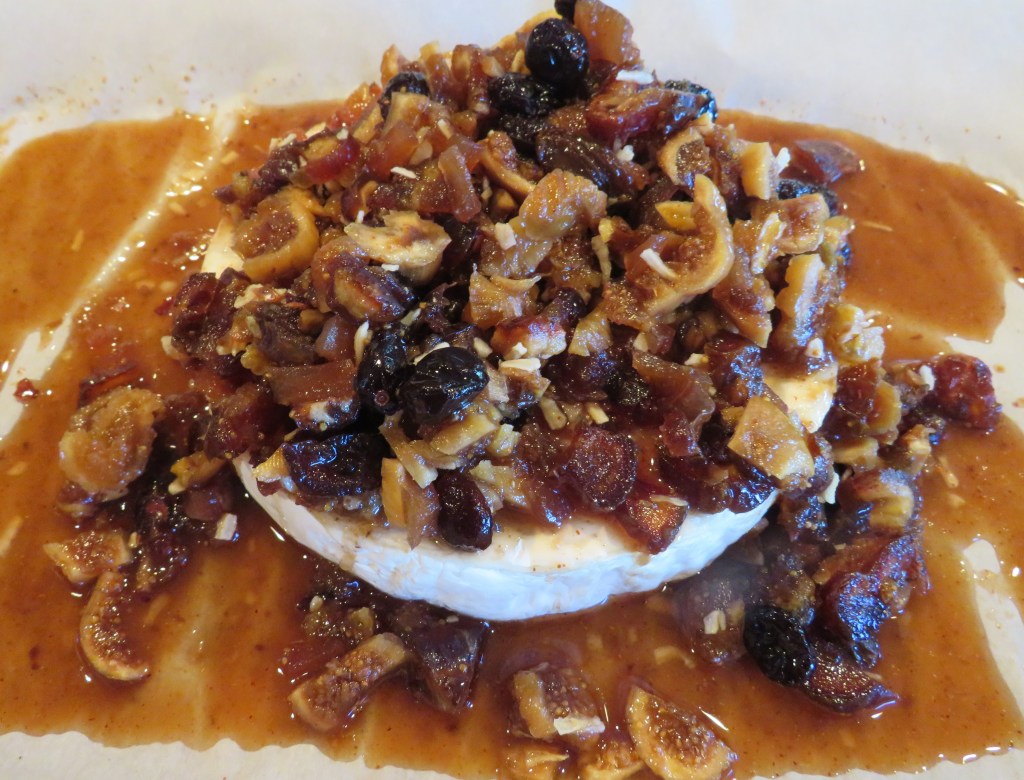
I also provided a baked brie topped with cranberries, figs and dates that I served with crostini slices. That was another big hit as well. Everything disappeared very quickly. These are just the dishes I provided. We had lots and lots of other delectable dishes that our guests brought that were also gobbled up quickly. Needless to say, NO ONE went home hungry. 🙂
These are some of the desserts on the table for everyone to enjoy. I always have lots of goodies around for everyone to enjoy too.
Karen was taking pictures of the day’s events, so these pictures are courtesy of Karen. I was busy playing hostess and didn’t see the pictures until after the party. 🙂
This is my favorite neighbor, Luke. He was a big help when it came time to start the game.
Let the games and the “stealing” begin. 🙂
As you can see, everyone was smiling and having a great time. We had plenty of good food and good times. 🙂
Happy Holidays and Merry Christmas everyone. Stay safe and stay well. ‘Til next time.
WOW!!!! What a busy weekend of fun holiday celebrations. On Friday, my friend Karen flew in from California for our annual ornament exchange party. This was her first experience with our ornament exchange parties. I thought it would be fun to have an early Christmas dinner in her honor. We had a small Christmas dinner celebration with Karen, Mike, Lauren and Larry and I. I cooked a traditional Christmas dinner that included smoked turkey and smoked prime rib with homemade horseradish sauce Merry Christmas – 2022, courtesy of Larry and his smoker; scalloped potatoes; roasted vegetables; Yorkshire pudding and a chocolate mint cake for dessert.
Everything came out delicious. I think this was Larry’s best meat smoking effort yet. Both the turkey and the prime rib were just perfect. They were so moist and tender and just full of flavor.
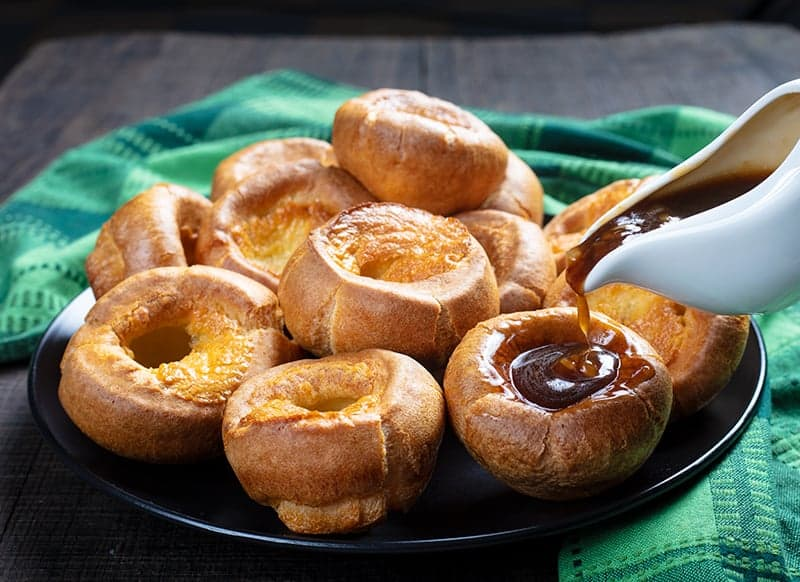
I wanted to make Yorkshire pudding because Karen is British, originally being from England. And I’m 1/2 Aussie, so I thought it would be very fitting. But I confess, as much as I’ve heard about Yorkshire pudding, I never really knew what it was; until now. It’s really just popovers topped with beef gravy or beef drippings. We had both. Karen brought her special English gravy mix and made that and I had the drippings from the beef. I have been making popovers for decades, without really knowing I was making traditional Yorkshire pudding, though I prefer butter to gravy on mine.
Yorkshire pudding originated in northern England in the 18th century as a “dripping pudding,” a savory dish made by cooking a batter in the fat that dripped from a spit-roast meat. It was an economical way to make use of every part of the roast. The first recipe for this dish, published under the name “Dripping Pudding,” appeared around 1737. The dish gained widespread recognition when the first recipe for “Yorkshire pudding” was published in Hannah Glasse’s 1747 cookbookThe Art of Cookery Made Plain and Easy. The “Yorkshire” name likely came from the region’s association with coal fires, which produced the high heat needed for a crispy batter. Over time, the dish became a staple, no longer exclusively tied to the meat drippings, and evolved into the modern version served today, often alongside a roast dinner. In America, Yorkshire puddings are called popovers. While they share a similar batter, the key difference is that popovers are traditionally made with butter, while Yorkshire puddings use meat drippings like beef fat. The American version is often made with butter and cooked in deep-sided muffin tins. A fun fact about Yorkshire pudding – The largest Yorkshire pudding ever made measured 46.46 square meters and was cooked in Skipton, North Yorkshire in 1996. That’s the equivalent of more than 10 double decker busses – just think about the amount of gravy you could put in that!
Yorkshire Pudding
We followed Jamie Oliver’s way of making the Yorkshire pudding this time, by putting the canola oil in the muffin tins first then pouring the batter directly into the hot oil. This was a new way of making it for me. 🙂
Heat the oven to 450*F or 230*C.
4 eggs
1 cup flour
1 cup milk
1/2 tsp salt
2 TBSP melted butter (for popovers) or canola oil for Yorkshire pudding
Mix the batter together and let rest for at least 30 minutes, at room temperature. If you can make your batter the day before you plan to make them, even better. Refrigerate the batter over night.
Pour about 1 centimeter of oil into each of the muffin tins, and place in the oven for about 10 minutes to get very hot.
Once the oil is very hot, evenly pour the batter directly into the hot oil. Fill the tins between 1/2 and 3/4 of the way full. Place in the oven and DO NOT open until the batter is golden brown and quadrupled in size, and popping over, or for about 15-20 minutes.
Serve immediately with the beef drippings, gravy, or in my case, butter. You are never too old to learn new things and new ideas. I learned a few new things by making these. 🙂
Merry Christmas and safe and Happy Holidays to all. ‘Til next time.
Karen just left and I am just now editing all the pictures we took. We all had a great time and our ornament exchange party and dinner party were both deliciously fun. I will be back on track again tomorrow. Hang tight just a little longer. 🙂
We hadn’t been to the Wild Animal Sanctuary in a while, and we were both going through withdrawals. On a whim, we decided to go pay it a visit. NOT one of our smartest decisions, since it was bitterly cold and super windy. The skies were black and a storm was definitely coming in, and coming in fast. This was the only time we’ve been where we actually had to cut our visit short, due to inclement weather. But on a positive note, we saw quite a few bald eagles, and I got some great shots of them. I’ve never seen them this close before. They are so proud and so majestic.
Have a great day and make everyday great. Stay safe, stay well. Merry Christmas and Happy Holidays. ‘Til next time.