Macadamia Crusted Flounder

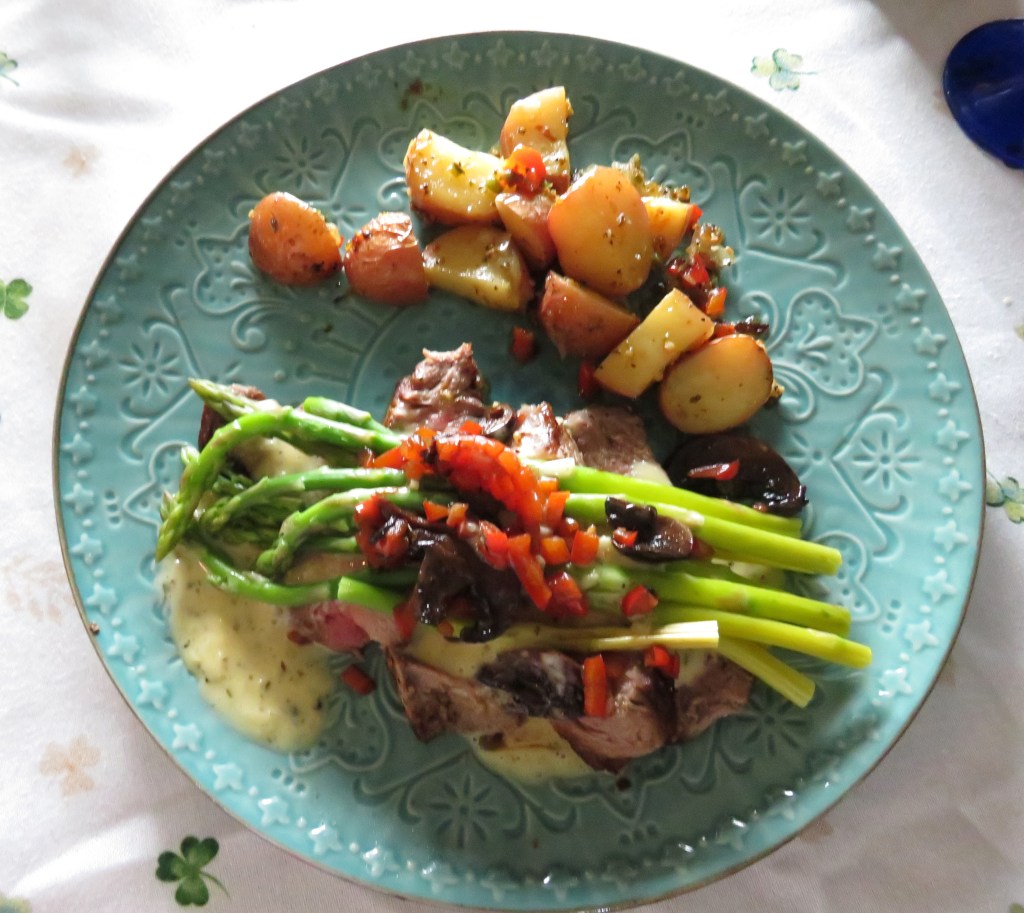
It was a fishy kind of day – flounder that is. I crusted it with macadamia nuts then pan-fried it. I had some of my bearnaise sauce leftover Chateaubriand With Bearnaise Sauce so I used it to dress up my flounder. Then I served it over a bed of wild rice and used more of my leftover asparagus as well. Once again, it was a perfect combination.

I like food with character. Part of that character comes from adding a crust to certain foods. You can make a crust out of breadcrumbs or nuts or even cheese and/or herbs and spices. I do them all on a regular basis. But this time, I ground up some macadamia nuts to make my crust.

Crusting food has been around since the ancient times. It was a way of preserving foods for longer periods of time, as well as adding extra flavor and crunch to foods. Breading or adding a crust of some kind can also act as a thickener to soups and stews too. There is some form of crusting meats, fish or vegetables found in almost every culture – like Tempura foods, which are Japanese; chicken Parmigiano, which is Italian; or Schnitzel, which is German.

Macadamia Crusted Flounder

You can use any kind of nuts you like. I almost always have a variety of different nuts on hand at all times. I just chose macadamia nuts this time. You can also bread any kind of fish you like too. The method is the same regardless of the type of nut or fish you choose to use. You can also play around a little with the seasonings. This time, I just made it very simple. Sometimes, simple is best.

3/4-1 cup macadamia nuts

1/3 cup flour

salt & pepper to taste

1/4-1/2 tsp cayenne pepper, or to taste

1 egg

dash of milk

flounder filets, patted dry

Place the nuts, flour and seasonings in the food processor and blend until the nuts are ground fine.

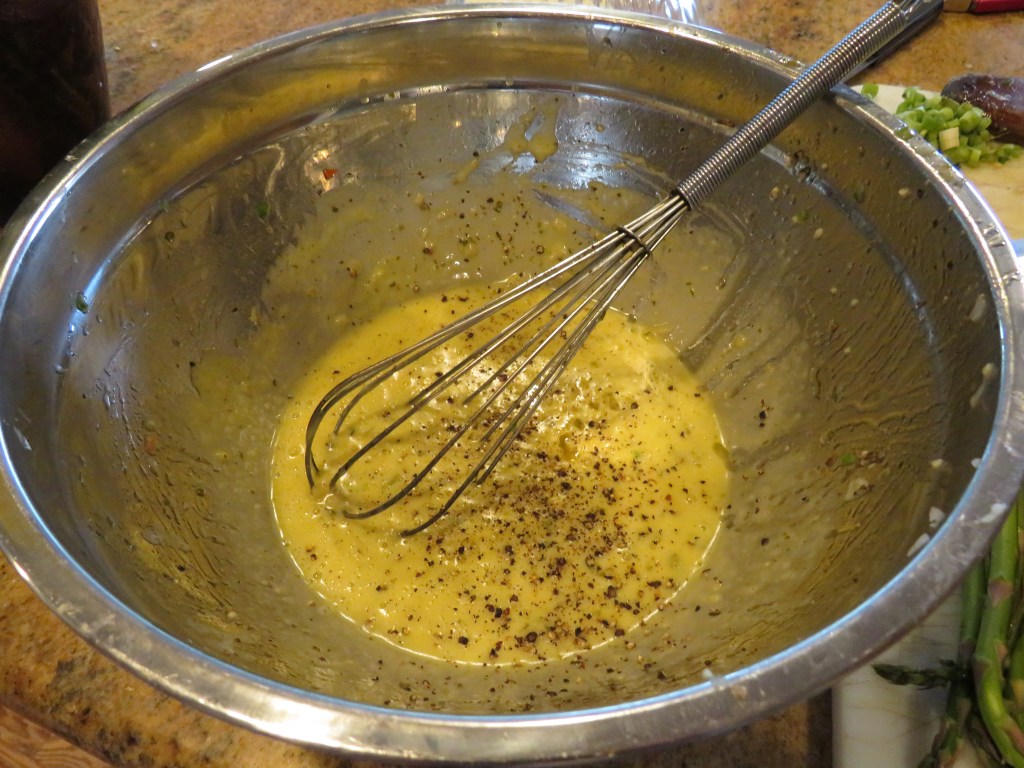
Whisk the egg and the milk together and set aside.

Place the ground nut mixture in a separate bowl.

Pat the fish dry with a paper towel.

Dip the fish into the egg mixture to coat thoroughly, then press firmly into the nut mixture. Generously coat both sides of the fish.

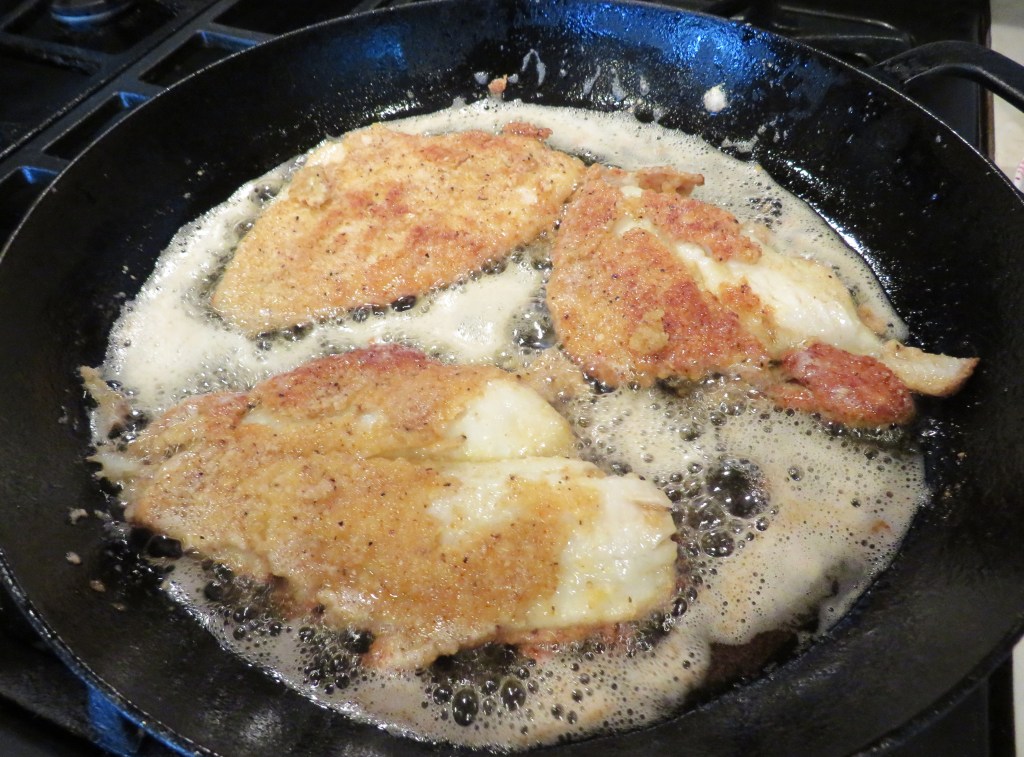
Get a large skillet very hot, then add some olive oil and butter. Carefully place the fish into the skillet without crowding. Cook at a medium-high heat for about 3-4 minutes per side, or until golden brown and a nice crust has formed.

Serve with whatever side dishes and sauce you like. It is delicious and easy-peasy; my kind of meal. 🙂

The bearnaise sauce went very well with the fish. I served it with white wine on the side. One of our own again, that we just bottled not too long ago. This time it was a nice, cool, crisp Pinot Grigio.

Even fishy days can be great days. It all depends on the kind of fish. Have a great day and make everyday a great day. Stay safe and stay well. ‘Til next time.

Roasted Potatoes with A Kick

Larry and I like our foods with a kick. Sometimes we like a lot of heat, while other times, a little is just fine. When I made my Chateaubriand Chateaubriand With Bearnaise Sauce I made some spicy roasted potatoes to go with it. They were a nice a compliment to the steak. 🙂

Spicy Roasted Potatoes

1 lb new red potatoes, cut in 1/2 or quarters, depending on their size

1/2 cup onion, diced

1-2 jalapenos, diced fine

1 TBSP garlic

1/2 red bell pepper, diced

salt & pepper to taste

2 TBSP butter

2 TBSP olive oil

2 TBSP hot honey

green onions, sliced

Preheat the oven to 425*F or 218*C.

Spray a deep baking dish with cooking spray.

Combine the potatoes, onions, red bell peppers, jalapenos, garlic, salt & pepper and toss together with the melted butter and olive oil. Roast for about 30 minutes or until the potatoes are browned around the edges.

When they are browned and crispy, add the hot honey, mix together well, and place back in the oven for an additional 5-10 minutes.

Top with the green onions right before serving. These are not super spicy, but they have just enough of a kick to wake up your taste buds a bit. 🙂

I love potatoes any which way I can get them. I am always trying something new with them too. Versatility is on of the many charms potatoes have. You can fix them in so many different ways, and they go with everything. I think potatoes are perfect food. 🙂

Have a great day and make everyday great. Stay safe and stay well. ‘Til next time.

Chateaubriand With Bearnaise Sauce

As you all know, I am a true foodie, and I love all kinds of foods. I tend to go towards more of the modern fusions, particularly if they have a spicy kick to them, but every now and then, I go back to the classics. Just like with artists of all kinds, and I do believe chefs fall into the artist category too, you have to know the basics before you can re-create something into a different style. I went back into classic mode when I made my Chateaubriand, complete with a delicious bearnaise sauce.

“Chateaubriand, also known as filet mignon, most often refers to the center-most indulgent portion of the beef tenderloin. The meat from this region is almost silky meat”. (p. 80 All About Roasting – A New Approach to a Classic Art, by Molly Stevens)

The Chateaubriand, a dish named after the French writer and statesman François-René de Chateaubriand, is a thick cut of beef tenderloin, traditionally cooked and served with a sauce, usually a bearnaise sauce, and is believed to have been created by Chateaubriand’s personal chef, Montmireil, in the early 19th century. The chateaubriand is a fillet mignon roast and a truly magnificent cut of meat renowned for its decadent and tender bite. This highly-prized cut of beef is cut from the tenderloin and has often been referred to by several names: the fillet mignon roast, a tenderloin roast, or a beef tenderloin.

I must have been channeling the traditionalists when I prepared my chateaubriand, because I even served it with the traditional side dishes too. 🙂 It is typically served for two and is often grilled or broiled, cooked rare or medium-rare, and accompanied by roasted potatoes, asparagus, and red wine. This is exactly what I did too. Imagine that?! Stranger things have happened. 🙂

Chateaubriand with Bearnaise Sauce

Start off with a tender roast about 2 1/2-3 lbs in size. Season generously with coarse salt and fresh ground black pepper on both sides and let rest in the refrigerator for at least 4-5 hours, or more if you can.

When ready to cook the meat, preheat the oven to about 400* F or 218*C, then get a large skillet VERY hot, and add olive oil and butter. Cook the meat for about 3-4 minutes per side to get a nice crust all around.

When the meat is nicely crusted all over, place it in the oven for about 25-30 minutes, to cook to a delicious medium rare, or an internal temperature of about 125-130*F or 52-57* C.

While the steak is in the oven, prepare the bearnaise sauce. A bearnaise sauce is in the same family as a Hollandaise Sauce, only it has minced shallots, white vinegar, white wine and tarragon added as well.

Bearnaise Sauce

Timing and proper whisking technique is key to making a good Hollandaise or bearnaise sauce. You have to add everything at the right temperature, while whisking the whole time to make sure your egg yolks don’t scramble in the process.

1/4 cup minced shallots

1/4 dry white wine

1/4 cup champagne or white wine vinegar

fresh ground black pepper

2-3 tsp dried tarragon and 3-4 fresh tarragon sprigs

1 1/2 sticks melted butter

2 egg yolks

salt to taste

Combine the shallots, white wine, white wine vinegar and the dried tarragon in a small pan. Bring to a simmer and continue to cook until most of the liquid has evaporated and there is only about 2 TBSP of liquid left. Add the fresh tarragon right at the very end of the cooking process.

Whisk the egg yolks. There are various methods of combining everything together, and all work just fine. I mixed my shallot mixture with the melted butter, then tempered it all into my eggs, while whisking it all together at the same time. I prefer my sauce in the rustic style, so I actually like to keep my shallots in the mix. The classic way though is to strain them so you have a smooth sauce. Both are fine. It is just a matter of personal preference. I also added a bit more pepper to the mix as well.

If you are confident enough in your skills, you can whisk everything together directly on the stove, over the heat. This is what I do. If not, you can use a double boiler and place the egg mixture over the boiling water while whisking in the butter mixture. You want a delicate, smooth, creamy, buttery sauce WITHOUT scrambling the eggs.

When the meat and the sauce are done, spoon the sauce over the meat and serve. The meat will be so tender and will just melt in your mouth. It will be like pure velvet to the mouth and to the senses. Serve with a red wine and enjoy. I served it with our very own Pinot Noir that we just made and bottled. Bon Appetite!

Have a great day and make everyday great. Stay safe and stay well. ‘Til next time.

Nature Walks – Daffodils For The First Day Of Spring

Yesterday, March 20th, was the first official day of spring in the United States. The first of our spring flowers have already come out too, in honor of spring. They were bright yellow daffodils, coming out like a bright ray of sunshine.

Not a daffodil, but another bright yellow flower in bloom.

Happy Spring everyone! 🙂

Lemon Zeppole

Zeppole, or Italian donuts, are a Southern Italian delight. They are especially popular in Naples. It is a particular favorite to enjoy around the beginning of spring, and on March 19, or St., Joseph’s Day or Father’s Day in Italy. Zeppole are deep-fried sweet dough that are traditionally filled with custard, ricotta, or chocolate, and topped with powdered sugar, more custard, and a cherry. There are many different variations and flavors of zeppole made today.

The reason these fried (or baked) treats are enjoyed on St. Joseph’s Day is because it is believed that after St. Joseph fled to Egypt with Mary and Jesus, he started to sell pancakes to provide for his family, therefore, tying sweets and desserts like zeppoles to his name.  Another popular theory is that he was a saint of carpenters and craftsmen, and there was the “Carpenter’s Feast,” where wooden toys were sold for children to enjoy. Once St. Joseph’s Day became Father’s Day in Italy, the roles reversed, and the children gave their father’s a gift. Zeppole, or zeppola, comes from the word zeppa, which is a wood wedge used for adjusting the heights of furniture. Since St. Joseph was a carpenter, this links zeppoles to St. Joseph himself. Zeppole have been around since the days of the Ancient Romans, but they became known as the zeppole we know them as today around the 18th century.

I made these delicious treats without knowing anything about them, until now. I was just flipping through my Mediterranean cookbooks, looking for a delicious and different Mediterranean dessert to make to go with my Mediterranean meal. 🙂 I love doing deep dives into history about foods though. (I love all history really though). I love to learn everything I can about the foods that I cook and enjoy.

Zeppole With Lemon Curd

I made these as large “cakes”, but you can make them any size you like. I also topped mine with lemon curd rather than filling them. They came out oh so good!!!!! They were a big hit for sure. Normally I would have made my own lemon curd, but I already had some that I used instead. I also used yogurt instead of ricotta cheese. Mascarpone cheese would work well too, but mine was frozen, so yogurt it was.

1 1/2 cups flour

1 TBSP + 1 tsp baking powder

1/4 tsp salt

2 TBSP sugar

2 eggs

2 cups either ricotta cheese, mascarpone cheese or plain yogurt

1 cup milk

2 tsp orange zest

1 tsp vanilla

canola oil for frying

powdered sugar

lemon curd

Combine all the dry ingredients together.

Beat the eggs and sugar. Add the cheese or yogurt, milk and vanilla and mix well. Then mix in the dry ingredients and mix until smooth. Cover with plastic wrap and refrigerate for at least 1 hour before frying.

When ready to fry, add about 2 inches of canola, or other high fat oil, into a deep pot and bring to about 350*F or 180*C.

Carefully spoon the batter into the hot oil and fry for about 2-3 minutes or until golden brown. Carefully flip them over if necessary to brown equally.

Place them on a paper towel when removing from the oil to absorb the excess oil. Allow them to cool completely before adding a dusting of powdered sugar and the lemon curd (or chocolate, or filling of your choice). If you want to, you can insert the lemon curd into the donuts after they have completely cooled too.

These zeppoles are so light and crispy and they just melt in your mouth. The lemon just really made them pop too. I don’t eat a lot of donuts, but these are definitely a winner. 🙂

Have a great day and make everyday great. Stay safe and stay well. ‘Til next time.

Nature Walks – Colorado Gulls

I have lived in Colorado now for 25 years. When I first moved here, from Southern California, I was so shocked to find seagulls here. I thought they had gotten lost and flew off coarse. But no. There are actually a few different types of gulls that call Colorado home. The ones I saw the other day were the Ring-Billed Gulls. They were just swimming alongside all the other water fowl, having a great time, without a care in the world.

Home is wherever your heart is. Be true to yourself and follow your heart.

Mediterranean Short Ribs

Larry had taken some short ribs out of the freezer for the week’s meat rotation. As always, I like to look for new and different ways to prepare things, and I found a delicious Mediterranean recipe for them.

Mediterranean Short Ribs

These ribs were so tasty, with hints of both sweet and sour elements.

Preheat the oven to 375* F or 191*C.

Spray a baking dish with cooking spray

3-5 short ribs, cut the meat off the bone and into large chunks

2 TBSP coarse salt

3 TBSP pepper

1/4 cup olive oil

1 onion, diced

8-10 garlic cloves, sliced very thin

2 apples, peeled and diced

1 TBSP sumac

1/2 cup white vinegar or flavored white balsamic vinegar – I used honey ginger white balsamic vinegar

1/4 cup honey or spicy honey

Season the meat with salt & pepper and toss together in olive oil. Brown the meat completely in a large skillet.

Combine the apples, onions, garlic and spices together and add to the meat once it is completely browned. Cook for about 3-5 minutes, stirring often.

Transfer everything to the prepared baking dish and cover with aluminum foil. Bake for about 2 hours, or until the meat is tender, checking occasionally and stirring after about 1 hour.

Serve with your favorite Mediterranean side dishes and enjoy. The meat was tender and juicy, and the mixture of the onions and apples was just a perfect compliment to the pork. Serving pork with apples has been a very long tradition, going back 1000’s of years.

Have a great day and make everyday great. Stay safe and stay well. ‘Til next time.

Nature Walks – Cormorants In Love

I try to get in long walks as much as possible, and I like to vary my walks too. I always see different things, no matter where I walk, even if walking in the same spots. I just never know what I am going to see, or even if I am going to see anything. Yesterday, I went to another near-by park in Northglenn. The park was pretty with a big lake, lots of picnic areas and a large play area for kids.

There was a Cormorant couple on the lake that was very obviously in love (or at least for the season). They were oblivious and I don’t think they even knew I was there. I was able to get quite a few good shots of the two love birds. They were side by side the whole time.

It was a pretty park, but it has a darker side too, like so many places do today, unfortunately. There is a large homeless population that also likes to hang out in the park, as well as a lot of drug users. I found a bunch of scattered pills in the grass, right next to the lake.

No matter where you are or what you are doing, stay aware and stay safe. Sadly, we live in a very scary, unsafe world.

Irish Soda Bread

Soda bread is a staple in Irish cooking and Irish kitchens. It is a simple, hearty bread, made with just a few simple, basic ingredients. Of course, there are different variations, but the most popular version is the basic version. It’s served first thing in the morning as part of a full Irish breakfast, with tea in the afternoon, and alongside beef or lamb stew or any number of other Irish specialties at dinner. It is a simple bread that is good anytime of the day, served alongside any dish or just eaten by itself.

Traditionally it has just four ingredients: flour, baking soda, salt, and buttermilk. The baking soda and buttermilk react to cause the dough to rise. I made the traditional version for St. Patrick’s day, only I also added some melted butter to my buttermilk, to give it a richer taste. In Ireland, soda bread is often made from stone-ground whole-wheat flour, though white flour versions are available. Stateside, we generally enjoy white soda bread made with all-purpose white flour. In both countries, soda bread is generally shaped into a round loaf. The last step in making any loaf of soda bread is to cut a cross in the top of the dome of dough. According to Irish legend, this is to “let the devil out,” but the technique actually serves a practical purpose: The deep slash allows the dough to cook evenly from crust to inner crumb, creating the velvety texture we all adore.

If you’re new to bread making, Irish soda bread is a great place to start. It’s among the easiest, most forgiving home-baked goods, and it’s one of the quickest breads to go from mixing bowl to table. Since there’s no yeast involved, it’s nearly impossible to mess it up. In fact, the less you handle the dough, the better.

Traditional Irish Soda Bread

This is definitely a a case where simple is the best. I used only 5 ingredients for this delicious, versatile bread, and no yeast. Since I detest buttermilk on its own, I buy the dried buttermilk and mix it with milk right as I am using it. I like mixing it with milk vs. water, because it is richer, creamier and has more texture.

Preheat the oven to 425* F or 218* C.

4 cups flour

1/2 tsp salt

1 tsp baking soda

1 cup buttermilk

2-3 TBSP melted butter

Mix all the dry ingredients together. Mix the melted butter into the buttermilk then add to the dry mixture and mix everything together to form a soft dough.

Turn it onto a lightly floured surface and quickly knead together until it forms into a soft dough. Shape the dough into a round loaf then cut a deep cross into the top of the bread. DO NOT over handle the dough or it will be tough. The less handling, the better.

Place the dough onto a baking sheet and bake for about 30-40 minutes, or until it is lightly golden and hollow when tapped on the bottom. Let cool slightly then slather some butter and/or jam on top and enjoy. Slainte!

Have a great day and make everyday great. Stay safe ands stay well. ‘Til next time.

Nature Walks – The First of The Turtles

It’s still kind of early to be seeing a lot of turtles, but they are beginning to appear. I saw the first of my Red-Eared Sliders for the season the other day. They were out sunning themselves and enjoying the beautiful day just like I was. 🙂