Cinco de Mayo

Here in the United States, particularly in areas with large Hispanic populations, Cinco de Mayo is a big annual celebration.  It has become a very fun and festive day, celebrating the foods, music and culture of Mexico.  It has also become a big drinking “holiday”, equivalent to St. Patrick’s Day.  On March 17, everyone, no matter what their background, becomes Irish for a day.  The same is true on Cinco de Mayo, where everyone becomes Mexican for a day, on May 5th.  The Cinco de Mayo traditions started in California, in 1863, in response to the resistance to the French rule in Mexico.  Miners up in Columbia (now known as Columbia State Park) started firing guns and setting off fireworks, as well as singing patriotic songs and making speeches upon hearing the news of the victory.  However, celebrating the day really started to come become popular in Los Angeles, CA around the 1940’s, during the rise of the Chicano movement.  From there it started to move around the country, but did not really become a mainstream day of celebrations in the United States as a whole until the 1980’s when marketing started popularizing it, and associating it with drinking beer.

With all the celebrations that occur in the United States, however, Mexico does not really celebrate it much.  To most Mexicans, it is just another day.  The only places in Mexico where Cinco de Mayo is really celebrated on a large scale are Puebla, Veracruz, and sometimes Mexico City.  It is observed and celebrated in Puebla, where the victorious battle between the Mexican army and the French army took place, on May 5, 1862.  However, the celebrations are vastly different in Puebla than they are here in the United States.  In Puebla and Veracruz, the celebrations are more ceremonial and are honored with military parades and re-enactments of the Mexican-French battle.  The event leading to the Mexican and French revolution was when Mexican President Benito Juarez issued a moratorium stating that all payments of all foreign debts would be suspended for 2 years because the Mexican Treasury was nearly bankrupt.  Britain, France and Spain all sent their naval forces to Veracruz demanding payment.  Britain and Spain negotiated with the Mexican Government and withdrew, but France saw this as an opportunity to establish a French empire in Mexico.  On May 5, 1862, The Mexican army, which was less than half the size of the French army, and was not well equipped, defeated the heavily armed and much larger French army.  Hence, the celebrations on that day, although the victory was very short lived.  A year later, the French came in again, with 30,000 troops and once again defeated the Mexican army.  This victory was also short lived though.  In 1867, President Benito Juarez entered Mexico City and installed a new government.  The significance of Cinco de Mayo was more for helping shape the United States though than it was for Mexico.  If Mexico had not won in 1862, France would have aided the Confederacy in the U.S. Civil War, and the United States would be very different than how we know it today.

I will honor the day with Mexican food, but then I celebrate most things with food.  That’s just what I do.  I feed people.

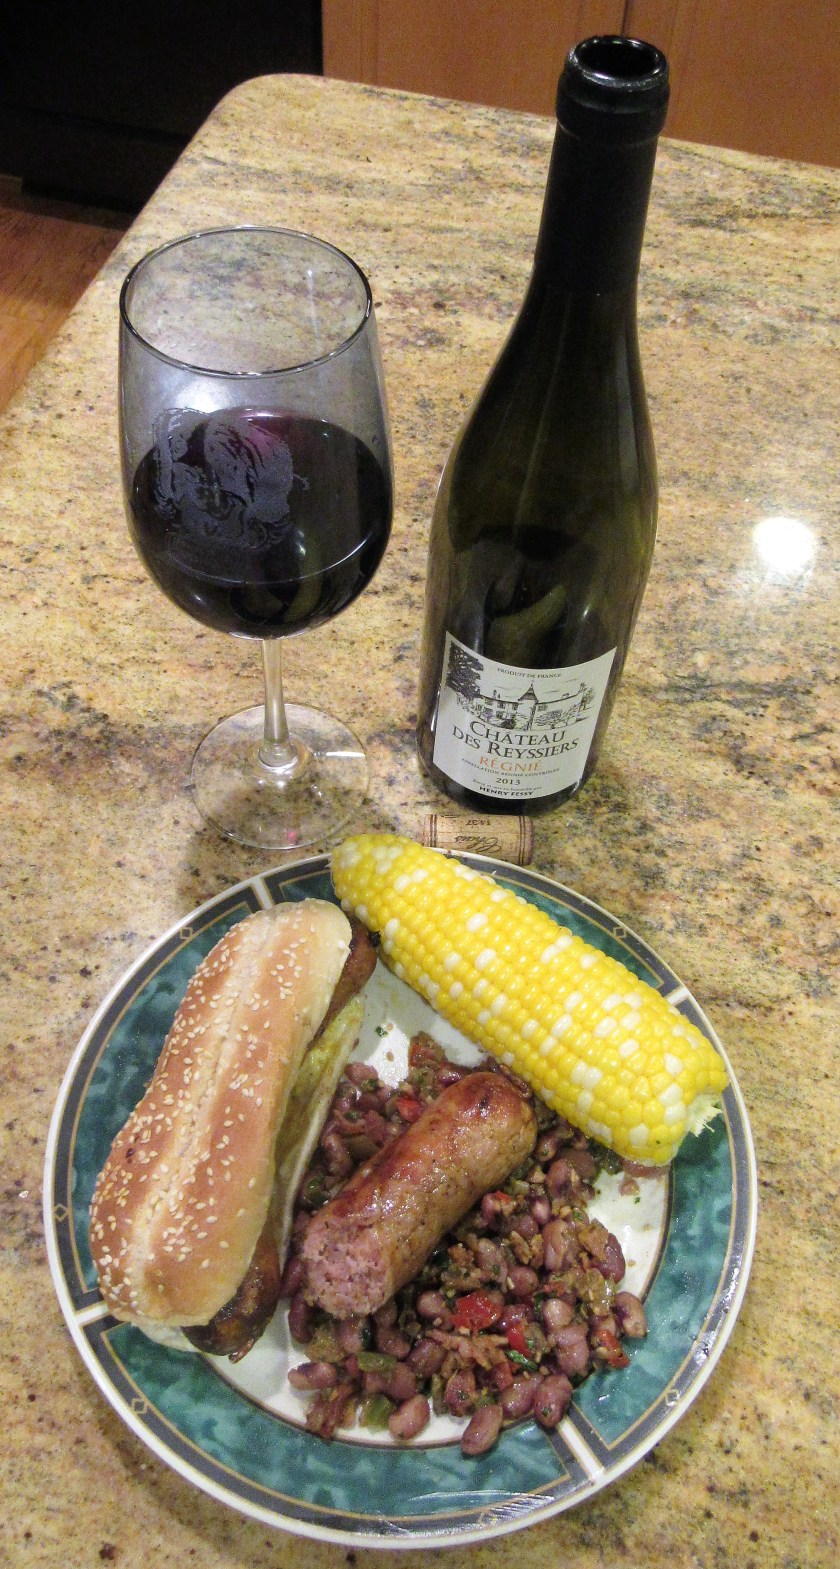
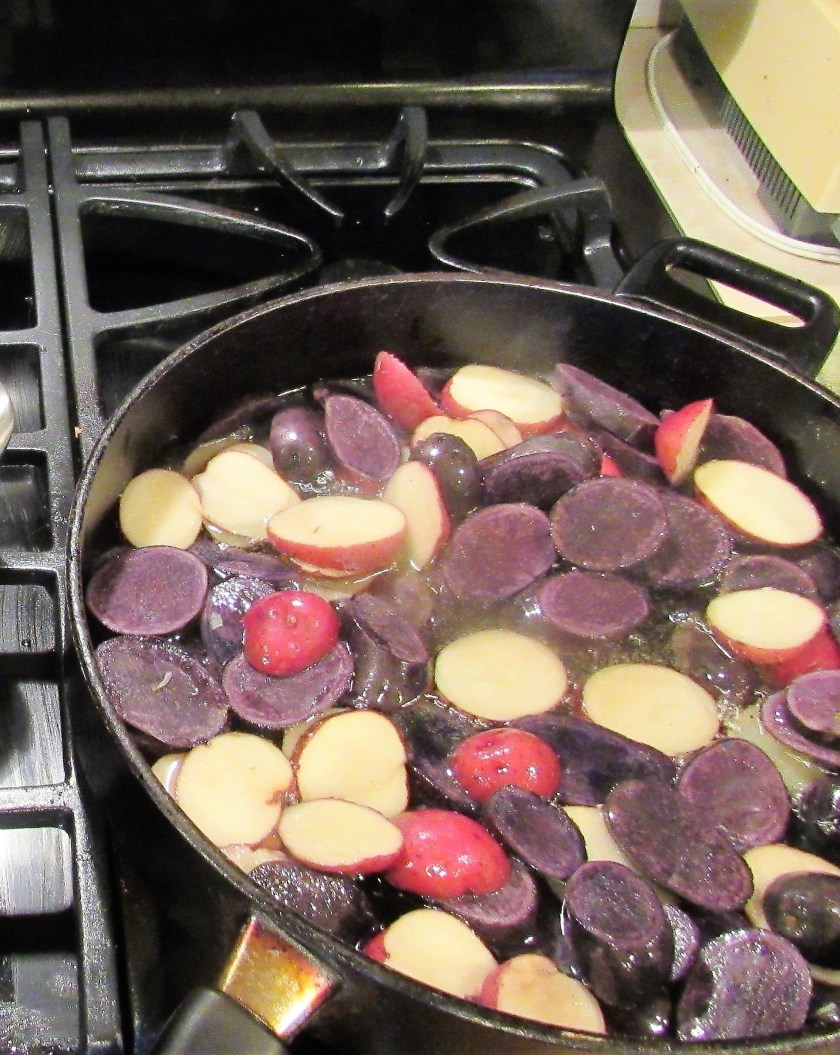
We are dining on a spicy, blackened pork roast, with Mexican spices, Mexican street corn, pumpkin biscuits and garlic mashed potatoes (not Mexican, I know, although potatoes are originally from South America), and a bold red blend as my wine choice to complete the meal.

IMG_0927

The dry rub for the pork was a mixture of cumin, crushed Aleppo chilies, ground Ajo Amarillo chilies, oregano, thyme and paprika.  I had the rub on the pork for about 8 hours before we seared it and roasted it.  It came out very flavorful, moist and tender.

IMG_0916

Mexican Street Corn

IMG_0925

I grilled the corn on the cob and rolled the cooked corn cobs in the spicy, creamy mixture.

2 oz of either cotija or Parmagian cheese

1/4 cup mayonnaise

3 TBSP sour cream

3 TBSP cilantro, chopped fine

4 tsp lime juice

1 large clove garlic, minced fine

2 tsp chili powder

1/4 tsp black pepper

1/2 tsp cayenne pepper or to taste

4 tsp olive oil

1/4 tsp salt

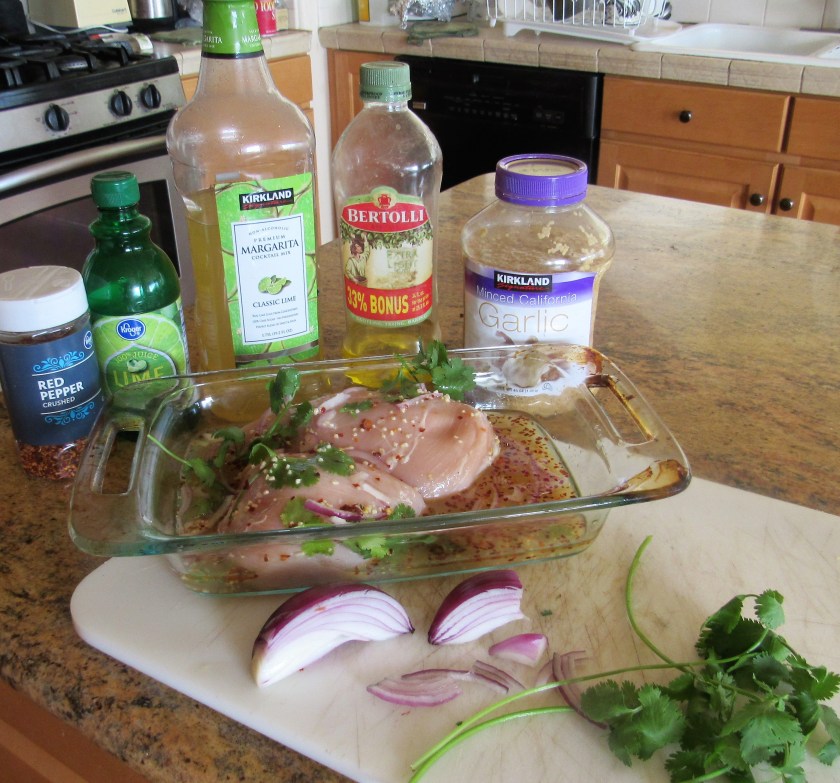
Mix everything together except the cheese and roll the hot corn cobs into the creamy mixture.  Once the corn cobs are coated, then roll into the cheese.  This mixture would also be very tasty as a marinade for chicken as well.  Desfruitas y que tengas un buen celebracion grandiote.


*** The crushed Aleppo chilies, ground Ajo Amarillo chilies are from Savory Spice, a locally owned and operated spice shop here in the Denver Metro area.


My Sous Chef for the Day

Today was a special day in the kitchen.  My beautiful niece Kalani was my sous chef for the day.  We were working on a project for her HUG class, otherwise known as human geography.  I remember it as social studies, but I guess I am dating myself though.  Her project was to make some ethnic food to share with her class and write a report on it.  I did this for my students too way back when I taught 2nd grade, many moons ago.  We decided to make dishes that could either be served cold or at room temperature.  Plus she is vegan, and since she was the one doing all the work, we wanted to make something she could enjoy as well.  We decided on tabbouleh and hummus with baked pita chips.  She did a great job.  She can be my sous chef anytime she wants.  Besides it gives us time to have a little fun together as well.

My Sous Chef Kalani hard at work, making her tabbouleh.

IMG_0902

IMG_0905

Every good chef has to sample their end results.

IMG_0907

Kalani displaying her tabbouleh.

IMG_0910


And her hummus.

IMG_0912

I wish I didn’t have to be in this one, but that was part of the assignment.  The Chef had to be in at least one picture with the Sous Chef.   So if her teacher has to see it, I guess all of you do too.  It’s only fair.  My apologies.  Just focus on Kalani and her dishes, not me.

IMG_0914

Tabbouleh

Tabbouleh is a dish found all throughout the Arabic countries and the Mediterranean.  It is a very essential part of any classic mezze spread.  Traditionally, it used to be only made by and eaten by women.  Today though, this has changed.  This dish is very healthy and low calorie and is eaten by everyone.  Here in the United States, we serve it with pita bread and hummus, but in the Middle East, it is usually eaten wrapped either in lettuce or grape leaves.  Every region has its own version.  Some versions have more cous cous and others have more parsley.  Some use cumin, others don’t.  As with all of my dishes, make it how you like it and enjoy.

4 cups finely chopped parsley

3 tomatoes, small dice

1 red onion, chopped fine

3 TBSP fresh mint, chopped fine

salt & pepper to taste

2/3 cup lemon juice

1/2 cup olive oil

3/4 cup cooked bulgar wheat or cous cous (I used cous cous)

1 heaping TBSP garlic

toasted pine nuts (optional.  I love pine nuts, so I always use them when making tabbouleh).

Toss everything together and serve either chilled or at room temperature.


Hummus

Hummus is another essential dish found in any mezze spread.  We used canned garbonzo beans or chick peas rather than the dried beans.  It is a huge time saver, and the boiling time can make or break how your hummus turns out.  Besides the boiling time, you must be fearless with your use of garlic and lemon juice.  Make it as bold as you dare.

2 cans garbonzo beans, drained and rinsed or you use and can cook the dried ones if you prefer

2/3 cups tahini (sesame paste)

1 cup lemon juice or to taste

5 cloves minced garlic or to taste

salt to taste

1/4 cup olive oil, plus more to drizzle on top

chopped parsley, paprika and/or cumin for topping (optional)


Put everything together in the food processor and blend well until everything is smooth and creamy.  Top with parsley, paprika and/or cumin and drizzle with a little additional olive oil.


Baked Pita Chips

I cut pita bread in triangles and coated with olive oil, then I baked them at 350* F for about 15-20 minutes, turning them over half way.


It’s Not Really a Potato After All

I always thought that sweet potatoes were part of the potato family.  I mean they look like potatoes and have a lot of similar characteristics as potatoes, and they can be used and cooked in a lot of recipes that call for regular potatoes.  I often cook them together too.  But they are actually NOT part of the potato family at all.  There are a starchy root vegetable from the bindweed family.  Potatoes are part of the nightshade family.  Who knew?  They are very healthy, containing a bunch of vitamins and minerals including calcium and selenium, as well as vitamins B and C.  They are also full of the antioxidant known as beta-carotene, which converts vitamins to energy once they are consumed.  It is believed that sweet potatoes, as well as their cousin the purple potato (which we learned about earlier), help defend the body against free radicals, which may in turn, reduce the risk of cancer, particularly lung cancer.  Although the research studies are still inconclusive at the moment.   It is also believed that eating sweet potatoes can help prevent gastric ulcers, and they can also help improve blood sugar regulation for people with Type 2 diabetes.  However, on the down side, if people are prone to kidney stones, they may want to limit their intake of the sweet potato, since they contain oxalates which bind calcium and other minerals together that could cause kidney stones.   Overall though, eating sweet potatoes is a very good, healthy thing to do.

Sweet potatoes are very versatile and can be found all over the world.  I cook with sweet potatoes a lot.   I often use them when I make my dogs’ food as well.

Today, I made sweet potato latkes, which are very similar to their cousin potato latkes, only they have a bit more pizzazz.  Both are equally delicious, they just have a different style.

Frying them up.

IMG_0886

The ingredients.

IMG_0873

Putting everything together.

IMG_0878

IMG_0880

Sweet Potato Latkes

1 large sweet potato, peeled and shredded

2 jalapenos, chopped fine

1 heaping TBSP ginger, fresh or from a jar

salt, pepper & red pepper flakes to taste

cilantro, chopped fine

1/2 cup flour

2 eggs

cooking oil for frying

I use my food processor all the time, and I have an attachment that shreds, so I use this all the time as well.  Mix all your ingredients together.    The best way to mix them is with your hands.  Yes, you are going to get your hands dirty and sticky.  Sorry about that.  You want the mixture to be thick enough to form a ball and keep it’s shape, but not to firm or stiff.  Form into balls and press slightly to flatten them out.  I made mine about the size of a tennis ball, but you can make them any size you like.  Line a baking pan with parchment paper and place your sweet potato balls on the paper.  I like to refrigerate mine for at least 1 hour before cooking, so everything sets.  You don’t need much oil, but you do want it very hot before placing your sweet potato balls in the pan.  Brown them to a nice golden brown on both sides, for about 5-7 minutes per side.   I had some leftover chili-lime dressing that I put on top, but sour cream and chives would work well too.  I served these as a I side dish to my Thai basil-coconut shrimp.


Thai Basil-Coconut Shrimp

I love seafood of all kinds, but shrimp has always been one of my favorites, and it is so versatile too.  You can do just about anything with shrimp, and it can be interchanged into a lot of recipes that call for chicken as well.  Different sizes and varieties of shrimp and prawns are found all over the world, so there are many different ethnic ways of preparing it as well.  When I was a little girl, my grandfather had a marina right on the Sabine River, separating South East Texas from Louisiana, and he had live shrimp tanks there.  They would go out shrimping and fishing all the time.  But they didn’t just catch regular shrimp.  He and his fishing buddies caught the huge giant prawns that were almost the size of small lobsters.   Today, those giant prawns are hard to find, especially inland and in Colorado, but I still love, love, love shrimp, and we eat a lot of it.

I served my Thai basil-coconut shrimp over rice with green beans and sweet potato latkes. I served it with a light chardonnay with hints of apricots and honey, but a dry, semi-sweet Riesling or even a light Gerwertztreminer would go nicely with the meal as well.  The lighter, slightly sweet wines go really well with spicy dishes.  I served chardonnay because that is what I had, plus it is my favorite wine, but you can serve it with anything you like.

You can substitute chicken, scallops, or mix and match however you like.  You can even use tofu for vegetarians.

Putting it all together.

IMG_0882

IMG_0883

IMG_0889

Thai Basil-Coconut Shrimp

1 large shallot, thinly sliced

cooking or olive oil

3/4 cup toasted coconut

1 TBSP black sesame seeds

1 cup basil, chiffonade or rolled and sliced very thin

3 TBSP candied ginger, chopped fine

2 jalapenos, diced fine

1 can coconut milk

garlic

1-1 1/2 lbs shrimp, peeled and deveined

red chili flakes to taste

1-2 TBSP chili lime dressing

salt & pepper to taste

Toast the coconut in a small pan until it is golden brown and set aside.  Pan-fry the sliced shallots, ginger and garlic in just a little oil until the shallots are crispy and set aside.

Saute the shrimp.  Once cooked, remove from the heat and set aside.  Pour your coconut milk into the same pan you cooked your shrimp and shallot-ginger mixture in, making sure to incorporate all the bits at the bottom of the pan.  Add the chili lime dressing and mix well.  Add the shrimp and the rest of the ingredients except the toasted coconut and the basil.  Bring to a boil, then reduce the heat and let simmer for about 5 minutes.  Add the basil chiffonade, saving some for the topping when serving, and mix well into the dish.  Plate your shrimp, serving it over rice or noodles, and top with the toasted coconut and basil.  Delicious!


Roasting Peppers

I use roasted peppers and chilies in a lot of my dishes and recipes.  I love the flavor of fire roasted chilies and peppers.  For some reason, people think they are difficult to do, when in fact, they are actually very east to roast.  I have a gas stove, and would not trade a gas stove with open flames for anything.  I personally, am not a fan of electric stoves at all (most chefs I know also feel the same about electric stoves).  One of the many reasons, is because of the open flame.   I can put foods I want to fire roast directly on the flame, so they get nice and charred on the outside, and soft on the inside.  You can also put your peppers, chilies and whatever other foods you are fire roasting on a grill as well, especially if you are making them in larger batches.  Usually I only do 1 or 2 at a time, so it is real easy to do on the stove.  Make sure the whole pepper is completely blackened on the outside, which will take about 10-15 minutes or so.

IMG_0853

IMG_0855

Once the pepper is thoroughly blackened, remove it from the flame and wrap it in a plastic bag to let it cool and sweat for at least about 30 minutes.  This will loosen the skin which will make it very easy to remove.

IMG_0856

After the pepper has been sweated, it is real easy to peel the blackened skin right off with your fingers.  If the pepper is not completely cooked, the skin will be a little tougher, and may stick a bit, but it still comes off pretty easily.  Once you have removed all the skin, rinse off and use in your recipes as you like.

IMG_0866


Dinner on the Deck

Spring is here, and everything is starting to bloom and wake up from their winter’s nap.  Mostly, this is a very nice thing, but today, my allergies were killing me, so I could not enjoy it as much as I normally do.  But you know what?  I would never sacrifice this, even though I am very allergic to pollen.  You have to take the good with the bad, and the good definitely outweighs the bad by a lot.  We love eating outside, and we do it as often as we can.  Tonight was our first al fresco dinner of the season, with many more coming up ahead in the very near future,  We live on the first of 6 ponds, with a gorgeous view of the ponds and the Rockie mountains outside of Boulder, CO.  Usually we see all different kinds of water fowl, but the ponds were quiet tonight.  It was still a perfect night though.  No complaints here.  This is one of our favorite things to do.   It was so peaceful  and relaxing.  It is like stepping away from all of life’s confusion, even if only for just a short while.  After a nice, relaxing dinner on the deck, we feel refreshed and revitalized.

Tonight’s deck dinner was a margarita chicken salad served with a chili-lime dressing and jalapeno cornbread with honey butter.  I served a crisp, lightly-fruity chardonnay with the salad, that has hints of apricot and green apples.  The wine went along very nicely with the salad.


IMG_0870

IMG_0859


Margarita Chicken Salad

Marinating the chicken.

I let it marinade in my marinade for about 4 hours, then we grilled it.

The marinade was made from garlic, thinly sliced red onions red pepper flakes, cilantro, lime juice, sweet and sour margarita mix, tequila and olive oil.  It came out very flavorful and tender. These chicken breasts were huge and very thick, so we butterflied them to make sure they cooked through thoroughly.

IMG_0850

The Salad

romaine lettuce, chopped in large chunks or shreds

cooked chicken, (mine was marinaded in the above mentioned marinade.  You can substitute any kind of protein or vegetarian protein you like)

red onion, sliced very thin

shredded cheese (optional)

jicama, cut in matchstick size pieces

tomato, diced

roasted red pepper, medium dice

cooked beans (I used some of my leftover bayou beans)

green onions, cut thin

avocado slices

tortilla strips, sliced very thin and pan-fried

cooking oil for the tortilla strips


Layer your salad how you like it.  Slice the cooked chicken and place it on top of your salad mixture.  Top with avocado slices and fried tortilla strips and your dressing of choice.  I made a chili-lime vinaigrette.  The tortilla strips only take a few second to brown and crisp up.  You have to watch them very carefully, since they burn very easily.  Once they are fired to a light, golden brown, remove from the heat and oil and set aside.

IMG_0864


Chili-lime Vinaigrette

spicy Thai red chili sauce

garlic

cilantro, chopped fine

tequila

lime juice

olive oil

honey


Mix all the ingredients together until well blended and top your salad.


r


On The Bayou

This is the perfect meal to have while down on the bayou or when you are just having a relaxing day, hanging out with friends; grilled Andouille sausage rolls with creole mustard, sweet corn on the cob and bayou beans.  If you like beer, a nice cold one would be a good accompaniment to the meal.  If you prefer wines, like I do, a smooth red pairs well with the bold and spicy flavors of both the Andouille sausage and the bayou beans.

IMG_0816

Prepping the beans.

IMG_0807

Sauteing the peppers and onions.

IMG_0809

IMG_0812

Bayou Beans

Dried beans.  I used Anastasi beans, but kidney beans or any other dried beans of your choice will work as well.  Soak the beans in warm water for at least 1-2 hours.  Drain the beans and them and enough fresh water to completely cover the beans.  Bring to a boil and let boil for about 5 minutes, then reduce to a simmer, and cook for at least 2 hours.  Different types of beans will have different cooking times.  Drain and set aside.

dried beans of your choice

bacon

green and red bell peppers

jalapeno peppers

onion, small chop

garlic

salt & pepper to taste

Cajun spices

cumin

cilantro, chopped fine


Cook your bacon to your desired doneness, and set aside.  Saute all the remaining ingredients, except the cilantro, in the bacon grease.  You may need to add a little additional cooking or olive oil.  Saute until the vegetables are soft and translucent.  Chop or crumble your bacon and add the cilantro.  Combine all the ingredients with the beans.  You can serve either at room temperature or hot.  Both ways are just as tasty.  Sit back, relax and enjoy.  Laissez le bontemps roulez!


***The Cajun spice mixture is from Savory Spice, located in Denver, CO.


Laissez le Bontemps Roullez

Dinner tonight was a typical Cajun, meal cooked in the traditional Lousianne way.  We had jambalaya with jalapeno cornbread and honey butter.  Y’all are goin’ to love this, I gar-ron-tee it.  All that was missing was some Cajun zydeco music.

Long before jambalaya was trendy, it was the poor man’s food from down in the bayous of Louisiana.  It is a spicy rice dish made with little bits of this and little bits of that and basically whatever was leftover.   Jambalaya is very similar to the Spanish Paella.  It almost always has a variety of meats, like shrimp, Andouille sausage, and chicken, along with Cajun spices, red beans, bell peppers, garlic, jalapenos, onions, tomatoes and Tobasco sauce.  Mine is made in the traditional way, with all those delicious items, and the most important ingredient, a lot of love.  My mother was from Port Arthur Texas, and I had an aunt was was Cajun, raised in the bayous of Lousianne.   Cajun food is a staple in the South, particularly in South East Texas and Louisiana, so I was raised on this.  A Cajun cook never measures anything and my aunt was a huge influence on my love for cooking, so this is probably why I rarely measure anything when I cook.  I learned from a true Cajun.

IMG_0792

IMG_0803

IMG_0804

Jambalaya

shrimp, cooked

cooked Andouille sausage, sliced

cooked chicken, cubed

garlic

onions, medium chopped

red bell & green bell pepper, medium chop

jalapeno, diced fine

1 can kidney beans, using the juice as well

tomatoes, chopped medium

3 cups chicken broth

Tobasco to taste

salt & pepper to taste

oregano

cumin

marjoram

Cajun spices

I 1/2 cups rice

olive oil

Cook all your meats separately then set aside.

Saute all your vegetables in olive oil for about 7 minutes or until soft.  Make sure you are using a large skillet, cause this is going to make a lot.  Add your rice and stir, coating it well in the oil.  Add the rest of your ingredients, adding enough chicken broth to cover the top of all your ingredients.  Bring to a boil, then reduce to a simmer and cook until all the liquid is gone and the rice is cooked, which should be about 40 minutes or so.  Make it as spicy as you like.  This dish is supposed to have a major kick.   So grab a plate and fix it up.  Laissez le bontemps roullez or let the good times roll.


Chocolate + Zucchini= Gold

There are so many reasons to fall in love with and leave your heart in the city of San Francisco; the beautiful romance of the city; the mysterious Golden Gate Bridge; Fisherman’s Wharf; the beautiful view of the California coastline; all the wonderful food and wine; and of course, Ghirardelli Chocolate.   Ghirardelli Chocolate was established in San Francisco in the 1840’s, during the time of the California gold rush, by Domingo Ghirardelli, who came from Rapallo, Italy.  By the 1880’s the Ghirardelli Chocolate Company was one of the largest chocolate companies on the West, selling over 50,000 lbs of chocolate a year.  The ground chocolate was the product that was the staple of the Ghirardelli business.  The process of grinding the cocoa was a process Mr. Ghirardelli invented and patented himself.  Ghirardelli Chocolate was headquartered right in the heart of the city, overlooking the beautiful San Francisco Bay down below until 1966.  Today, this is one of the main tourist attractions when visiting the city.  The Ghirardelli corporate headquarters are now located in nearby San Leandro, CA.  Ghirardelli is one of the only premiere chocolates made in America.  Most of the other premiere chocolates hail from Europe.

I lived up in San Francisco many moons ago and I worked at a large Public Relations firm while there.  Ghirardelli Chocolate was one of the many food clients that we represented.  There were many perks associated with that job, one of which was I got to be amongst the first to try some of their new products and recipes that our firm created in our own test kitchen.  I think it was while working at this job that my love affair with cookbooks really started to blossom.  I have a very old, but well loved cookbook from Ghirardelli Chocolate and my Gold Rush Chocolate Zucchini cake was inspired from this old treasure.


Making the chocolate gold.

IMG_0781

IMG_0782

IMG_0786

The rich, luscious chocolate zucchini Gold Rush Cake.

IMG_0789

Chocolate Zucchini Gold Rush Cake

1 1/2 cups vegetable oil

1 2/3 cups sugar

4 eggs

1/3 cup Ghirardelli cocoa powder

2 tsp baking soda

2 tsp cinnamon

1 tsp salt

3 cups shredded zucchini (you can also substitute shredded carrots if you prefer)

3/4 cups Ghirardelli semi-sweet chocolate chips

Chopped nuts are optional if you like.  I did not put nuts in my cake though.


Mix the oil and sugar together until well blended.  Add the eggs, one at a time and blend well.  Mix all the dry ingredients together and add 1/2 at a time to the egg and sugar mixture and mix well. Gently fold in the zucchini and chocolate chips and nuts if you are using them, and incorporate well into the batter.  Pour into a prepared baking pan with a little cooking spray and flour.  I used a bundt pan, which is going to having a slightly longer cooking time, but you can also use a 9×13 baking dish if you prefer.  For a bundt, bake at 350*F for about 1 hour or until a toothpick comes out clean when inserted into the cake.  If you are using a 9×13 baking dish, the cooking time will be about 50 minutes.  Cool and remove from the pan.  Once the cake is cooled, you can frost and decorate it.


Chocolate Frosting

3 cups powdered sugar

3 oz of either mascarpone cheese or cream cheese, softened.  (I used mascarpone this time).

3 TBSP heavy whipping cream

2 tsp vanilla

1/8 tsp salt

2/3 cup Ghirardelli cocoa powder

2 TBSP butter

Mix everything together in a mixer and spread over the cake.  You might need to use a little warm water to dip the spreader in while spreading the frosting on the cake.  Decorate as you desire.  The result will be chocolate zucchini gold.  There is gold in them thar cakes from San Francisco.

*** If you are making a carrot cake instead of a zucchini cake, use the same frosting only eliminate using the cocoa powder.


Eat Your Purple

We have all heard how important it is to eat our greens and vegetables.  In general, the more vegetables a person eats, the healthier they will be.  No questions or disputes about that.  But did you know that eating purple is really good for you too?  Well, it is.   There are many health benefits found in the purple pigmentation or anthocyanin, found in purple fruits, vegetables and purple potatoes.  The American Chemical Society found that eating purple potatoes may lower your blood pressure; may prevent blood clots; can reduce inflammation; can help with liver dysfunction; can help reduce the risks of eye diseases and infections; and can help eliminate constipation and irregularity.  And for athletes, particularly those preparing for a big race by loading up on carbs, eating potatoes, especially the purple potatoes, actually provides more carbs and nutrients than eating pasta, without as many negative side effects, while also being easier to digest.  Potatoes in general are full of potassium, but apparently the purple pigmentation allows for the purple ones to store and produce even more potassium than other potatoes.  They are the most nutrient dense of all the different varieties of potatoes.

Purple potatoes are found mostly in Peru and Bolivia, and have been around since at least 1817.  They are part of the nightshade vegetables, also known as the Solanaceae family, along with tomatoes, eggplants and peppers. Purple potatoes have many names, including purple majesty, purple viking, and the purple Peruvian.  So in summary, yes, definitely eat your greens, but eat your purple too.

Preparing everything for purple and red potatoes lyonnaise.

IMG_0774

IMG_0776

Potatoes Lyonnaise

Note to self … if using purple potatoes, cook them separately from other potatoes, since their cooking time is a little different.  You do not want them to become mushy by over cooking them.

2 lbs potatoes – your choice of variety, or mix and match as I did

vegetable or canola oil for frying

1 TBSP olive oil

1-2 large shallots, sliced very thin

2 TBSP butter

1-2 heaping TBSP garlic

salt and pepper to taste

chopped parsley

Saute the shallots and garlic with the olive oil and butter, stirring frequently.  You want the shallots and garlic to be a light golden brown and crispy.  Remove from the heat and set aside.

Rinse and clean the potatoes and put in a large pan.  Cover with water and bring to a boil  and simmer for about 10 minutes.  Drain the water and let cool slightly.  Heat the cooking oil in a large skillet.  Once the oil is hot, add the potatoes, in batches.  Let them pan fry for about 10 minutes or until crisp.  Toss together with the cooked shallots and garlic, along with salt & pepper to taste and fresh chopped parsley.  You can also add cooked ham or bacon as well, if you want, to make them a little hardier.