From Basic to Bold

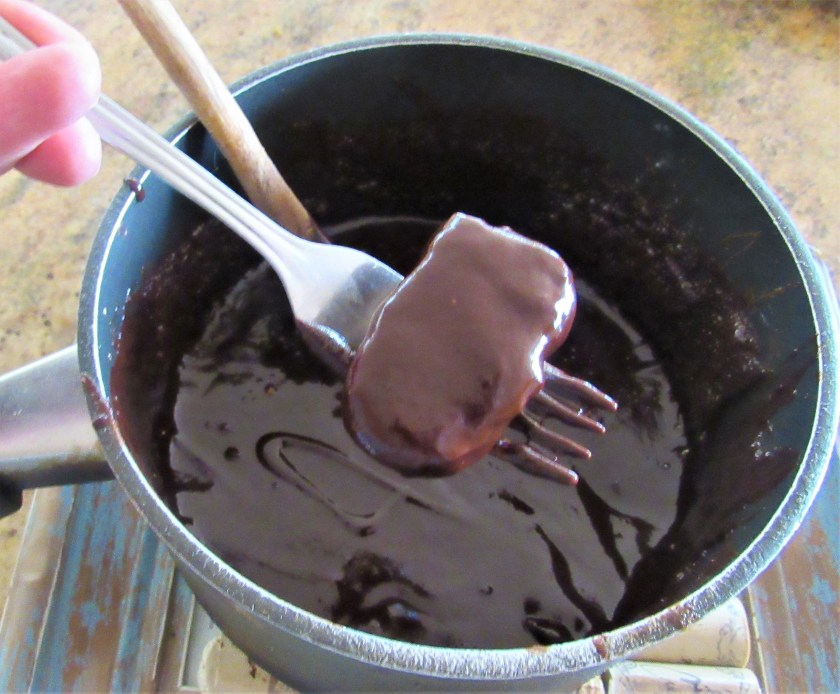
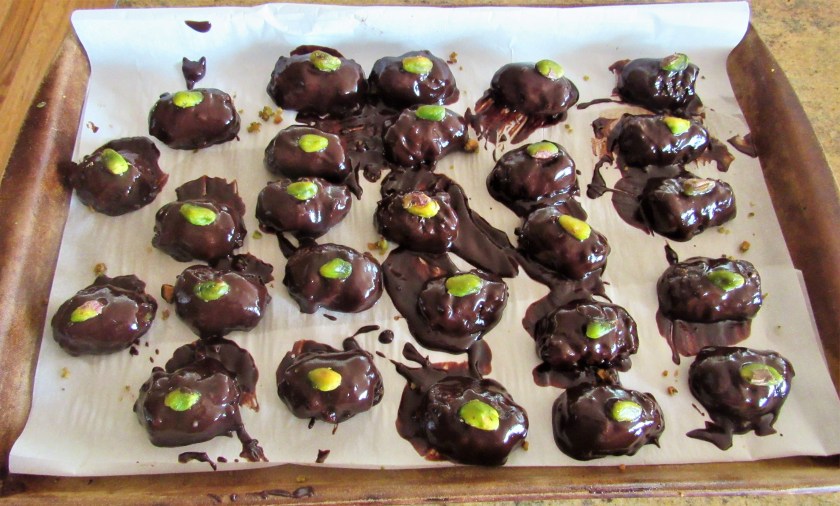
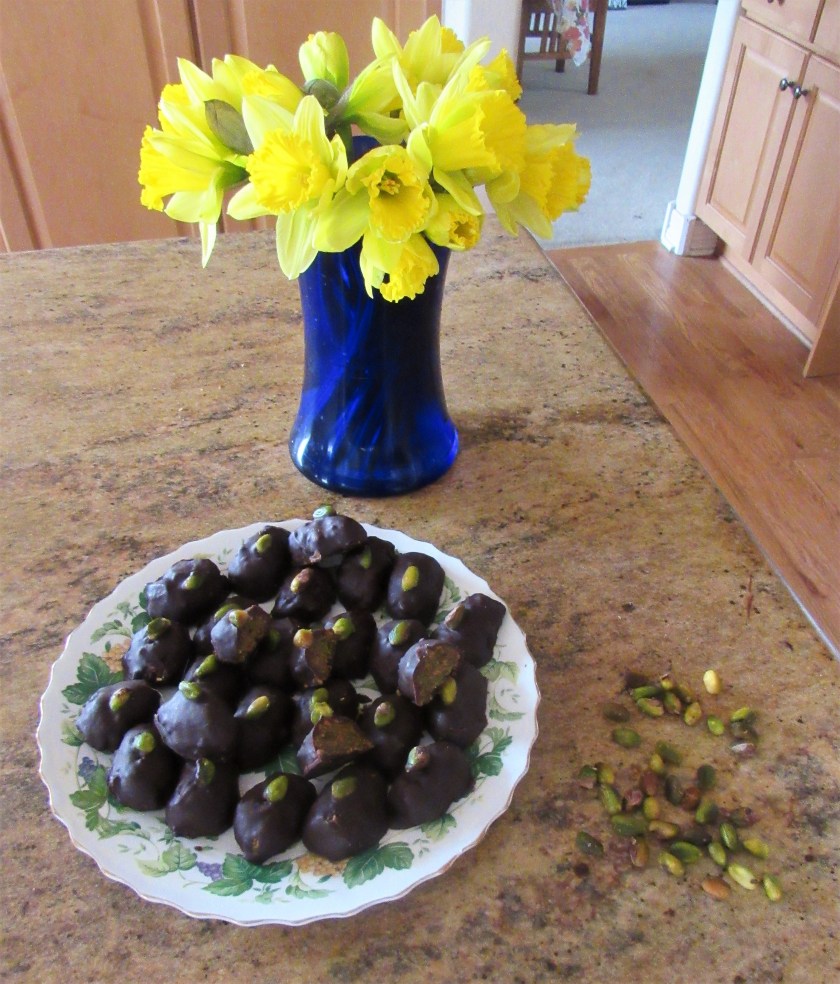
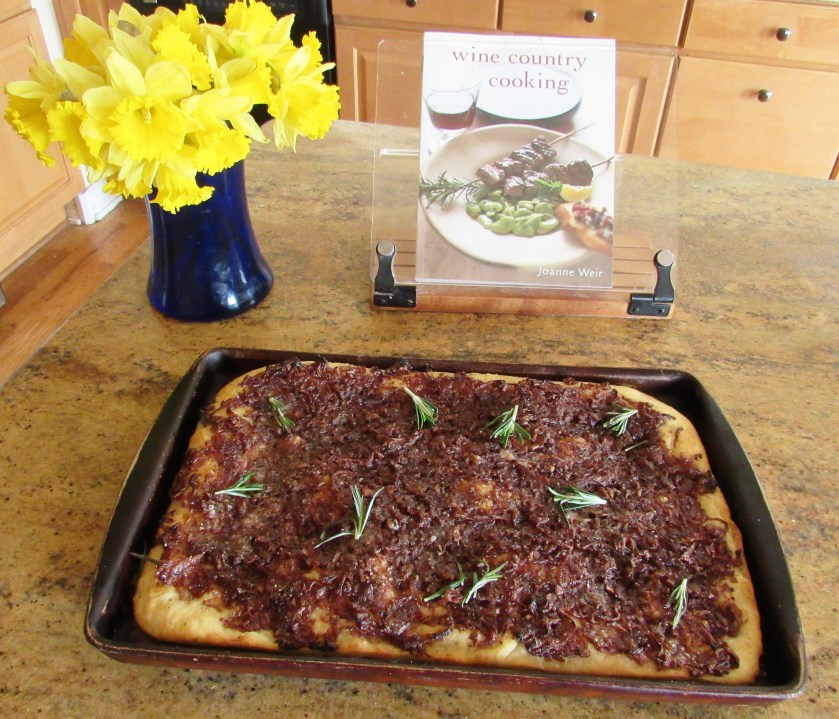
There is nothing wrong with eating good, basic food.  We all do it, all the time.  It tastes just fine on its own, and we are quite happy with it as is.  But …. there is also nothing wrong with walking on the wild side and turning that same good basic food into something BOLD and EXCITING either.  I love walking on the wild side, not just with my foods, but in life in general.  I love to walk that fine between the two sides, which allows me to enjoy the best of both worlds.  With food, it is easy to liven things up by adding a big, bold, zesty sauce to something, or to turn up the heat a bit by adding some peppers or hot sauce, or to even just shake things up by doing something different and adding a new twist.  I thrive on this.  I do it all the time.  To me, I’m just having fun and playing.   I did just that with my ham and some corn on the cob to add a new twist to two great foods.

Ham and corn on the cob are American staples and favorites all over the country.  I love both of them too.  But I also love to make and serve them in new ways as much as I can also.

IMG_6367

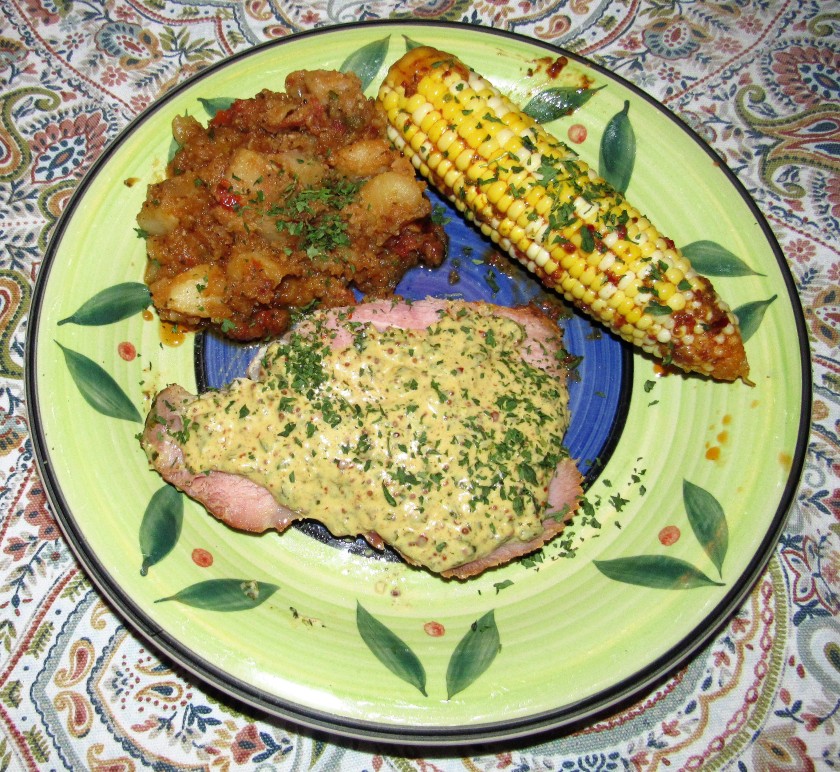
I often serve ham with some kind of a mustard sauce.  To me, ham and mustard goes together like peanut butter and jelly.  They are two great tastes that go well together.  However, just because I serve ham and mustard sauces together quite often does not mean that I don’t also vary the sauces.  This time, I made a triple mustard sauce with garlic and jalapenos.  It gave the sauce just enough of a kick to wake up the taste buds, without turning up the heat sensors to much either.

Spicy Garlic and Triple Mustard Cream Sauce

IMG_6352

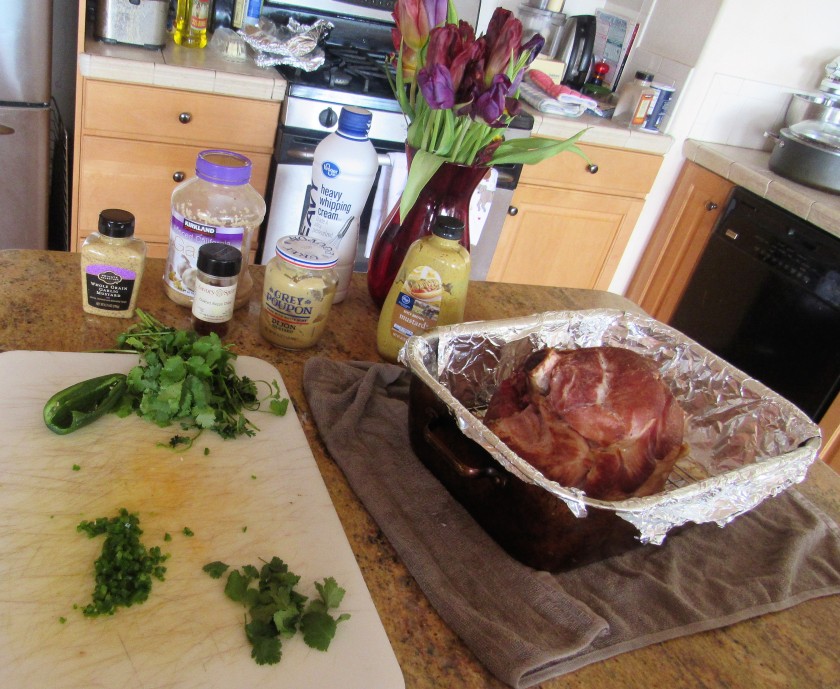
1/2 cup Dijon mustard

2 TBSP whole grain mustard

2 TBSP cup spicy brown mustard

1 TBSP garlic

1 large jalapeno, diced fine

2 tsp dried Aleppo chilies, optional

1/4 cup fresh cilantro, chopped fine.

3/4 cup heavy whipping cream


Mix everything together except the heavy whipping cream.

IMG_6354

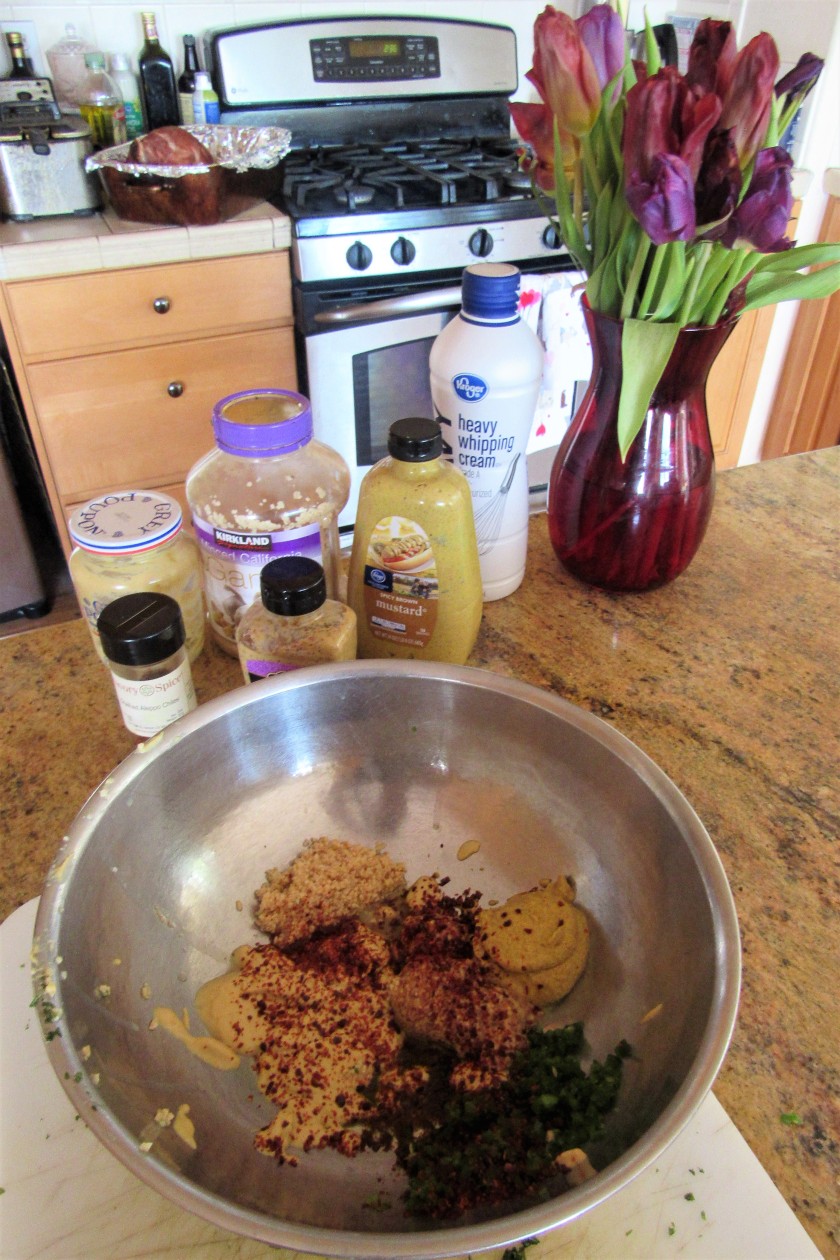
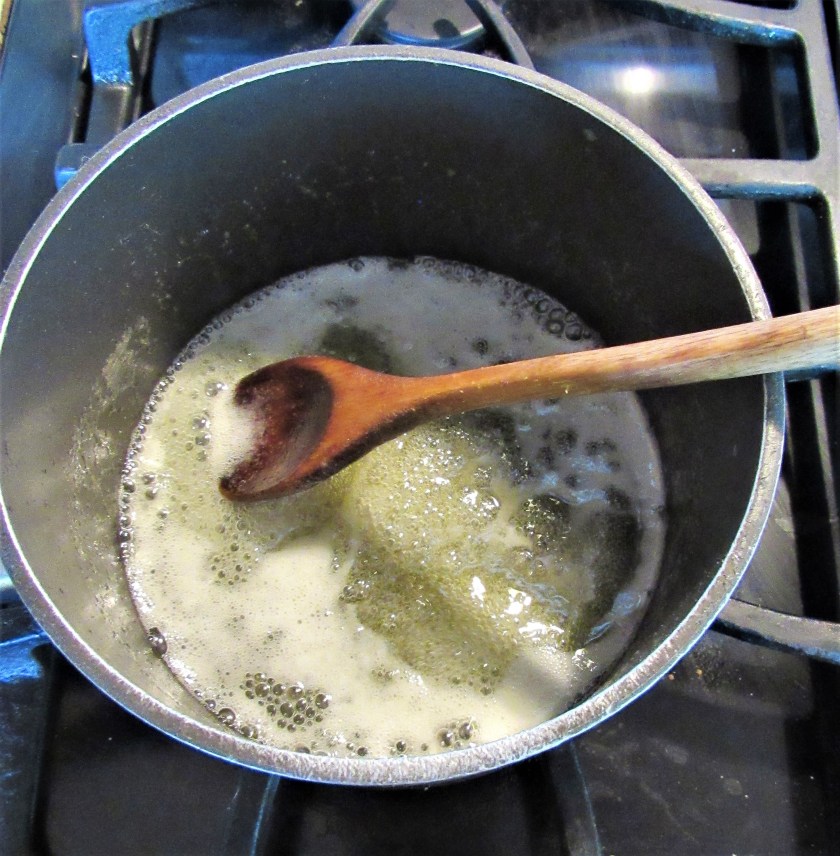
Heat the cream in a skillet until it just starts to boil, then add the mustard mixture and combine well.  Reduce the heat to a simmer, and continue to cook, stirring constantly, for about 3-5 minutes.  Then serve over ham, pork or chicken.  Although I love mustards, especially the three I chose to use, sometimes that much mustard flavor can be a bit overwhelming, even for me, so I like to cut that by adding cream to the sauce.  If you prefer the strong mustard flavors all on their own, add the cream, or not, to your liking.

IMG_6356

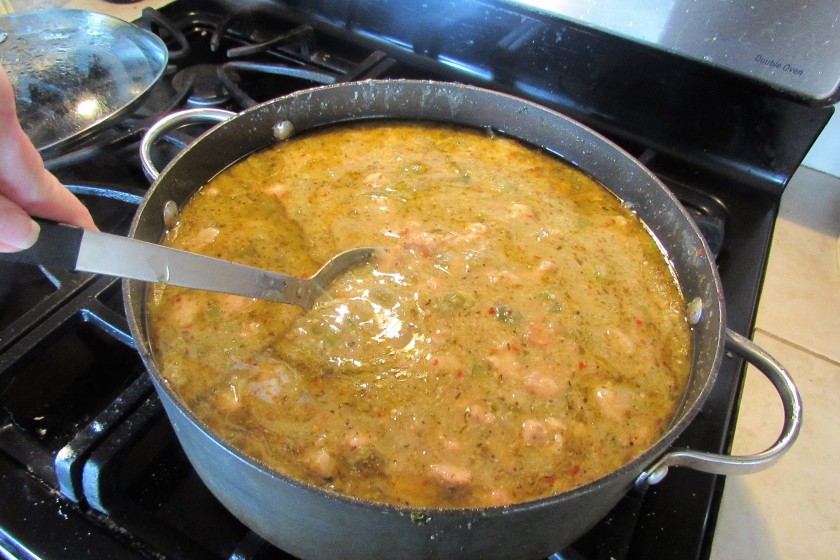
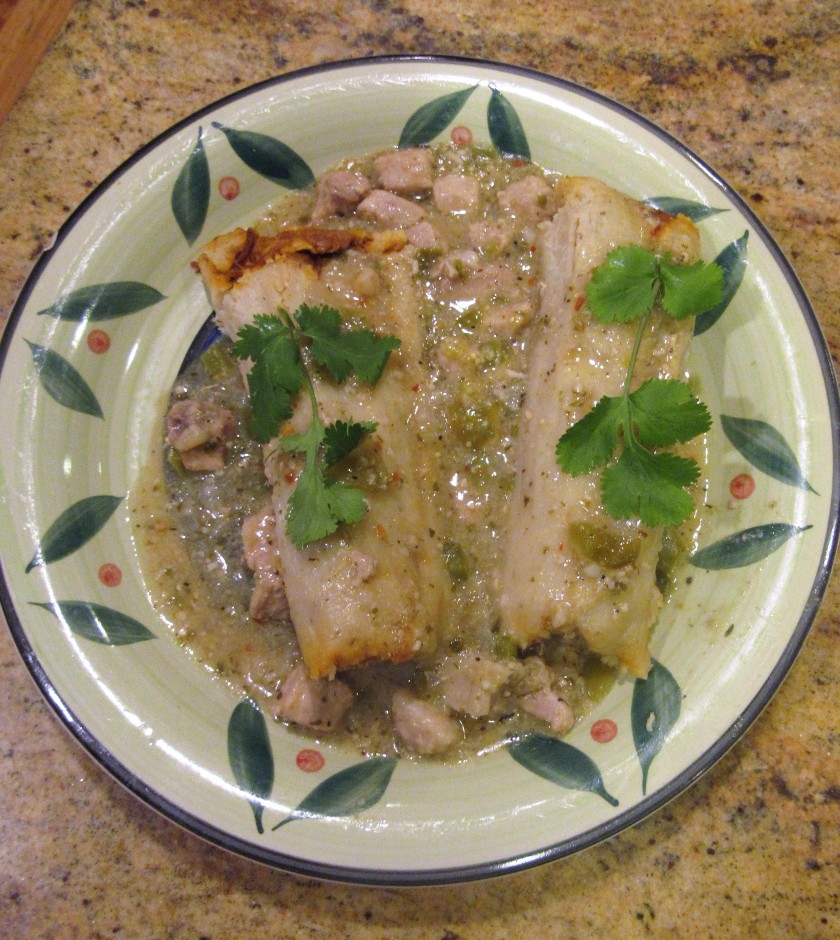
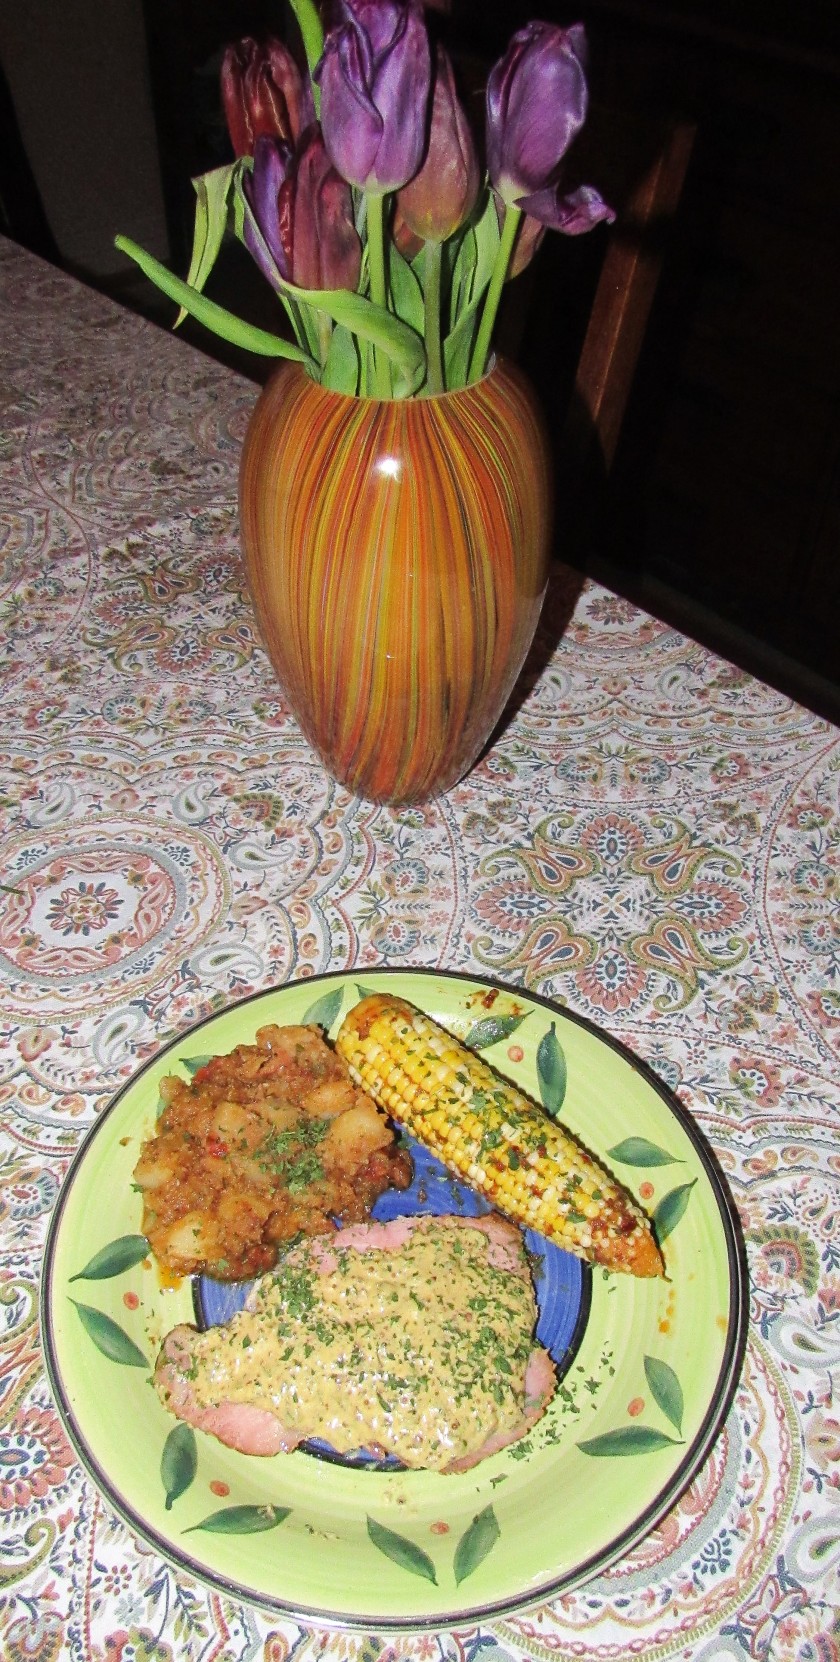
I served my ham with the spicy garlic mustard sauce with the left over patatas bravas from Easter, Happy Easter/Passover and spicy corn on the cob flavored with chili lime butter, along with a glass of a cool chardonnay with hints of apples and melons.
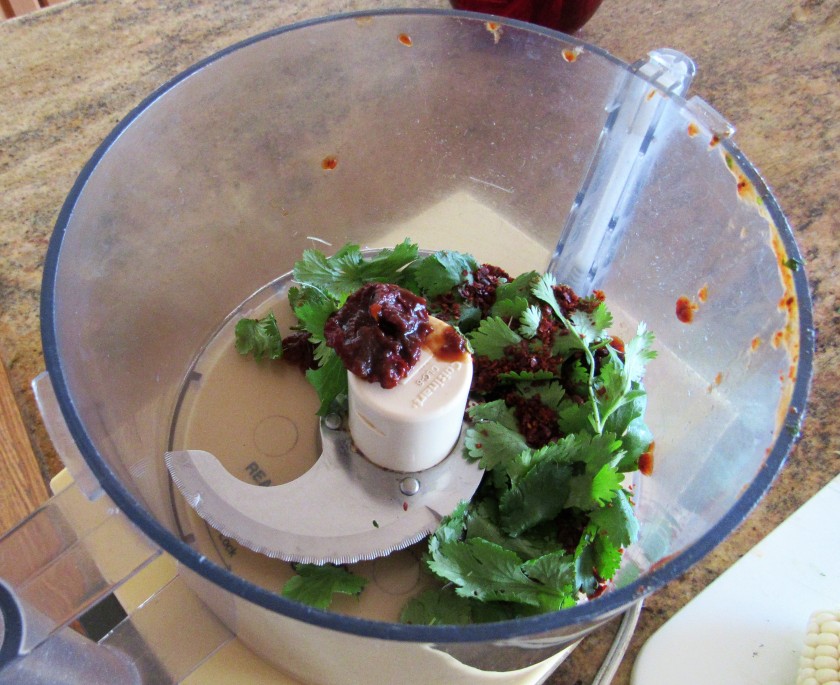
Chili Lime Butter

IMG_6359

1 stick of cold butter, cut into large chunks

1-2 TBSP fresh cilantro

1-2 TBSP lime juice

1 tsp dried Aleppo chilies

3-5 chipotle peppers with sauce


Mix everything together except the butter, either in a mixer or a food processor, until everything is combined well.  Then add the butter and mix again, making sure all the butter is incorporated into the mixture.  If you add the butter with all the other ingredients before blending them together first, the acidity of the lime juice will break down the butter.

IMG_6360

IMG_6361

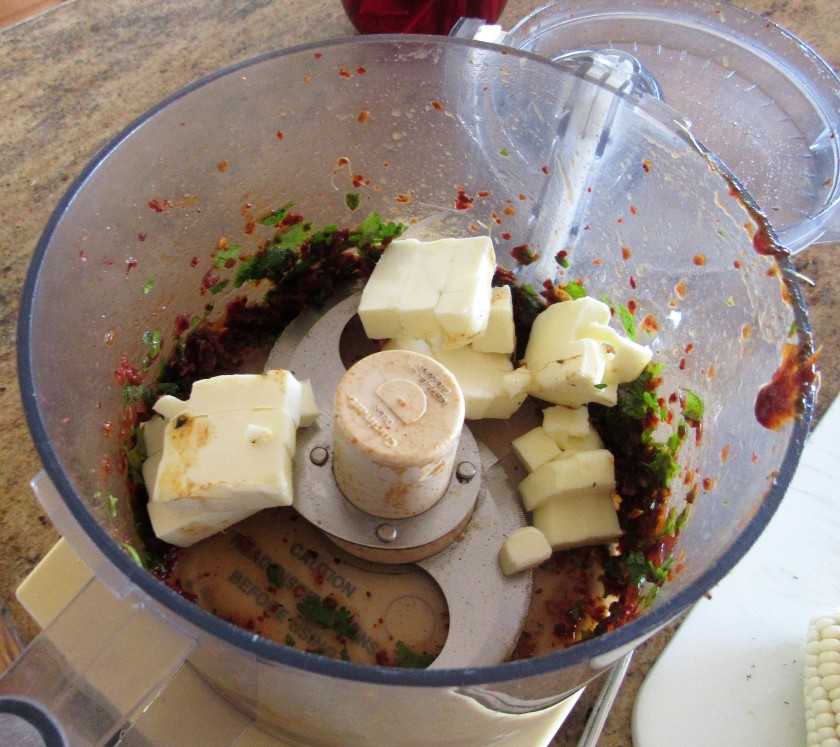
Once you have made the compound butter, wrap it in plastic wrap and let it set in the refrigerator for at least 30 minutes before using.

IMG_6362
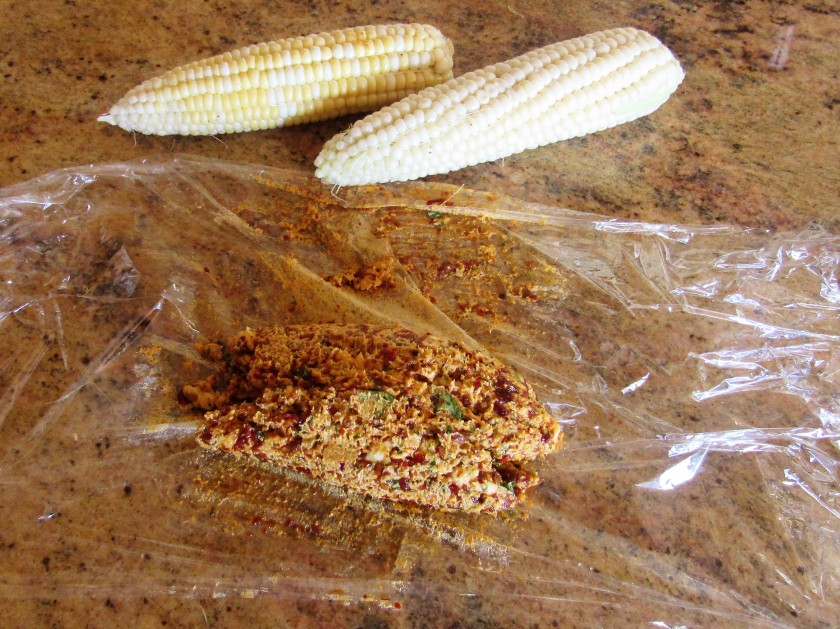
Once the compound butter as set, use it to add some kick and pizzazz to your favorite foods.  I used it on corn on the cob.  I rubbed the spicy butter all over the corn and then wrapped the corn in aluminum foil and baked it in the oven for about 20 or so minutes, until the corn was done.  You could also do the same thing and cook the corn on the grill as well.  When the corn is cooked, carefully unwrap it from the foil and pour off all the melted butter back onto the corn, to make sure none of the flavor escapes.

IMG_6364

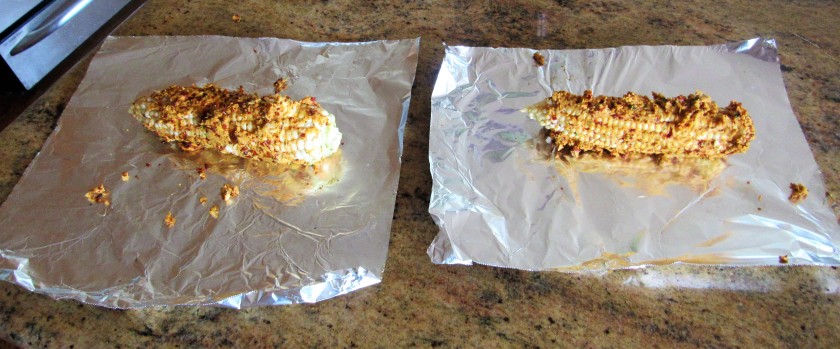
Once the corn is ready, enjoy it as a side dish to your meal.

IMG_6368


Paprika Shrimp

As most of you probably already know, I love shrimp.  I agree with Bubba, from the movie Forrest Gump, “shrimp is the fruit of the sea”.    There are so many different ways to cook and prepare it and each one is just as delicious another.

0d10ec1d26328c9b61820bf5b6c5c629


I tried a new shrimp dish, that was again, very tasty.  It was yet another cool, chilly night, and usually when I think of shrimp dishes, I equate them with warmer days and lighter foods.  This new recipe was definitely a good one to prepare on a chilly night though, since it not only tasted really good, but it also warmed me up from the inside out.  It was just what we needed.  It is very similar to a stroganoff, but instead of using beef, I used shrimp.  It was a simple dinner served over white rice, with green beans, warmed bread and a glass or two of a cool, crisp fume blanc on the side.

IMG_6349

Paprika Shrimp

IMG_6336

1 onion, diced fine

1 TBSP garlic

1-2 cups mushrooms, sliced

1 lb large shrimp or prawns, peeled and deveined

3 TBSP butter

1-2 TBSP olive oil

2 TBSP flour

2 tsp paprika

1 cup dry white wine

3/4 cup cream (if using heavy whipping cream, also add about 1/2-3/4 cup of milk as well)

1/2 cup sour cream

1-2 tsp Tobasco sauce, or to taste

salt to taste


Saute the onion, garlic and mushrooms in a combination of both butter and olive oil until the onions are soft and translucent.  Then remove from the pan and set aside.

IMG_6337

In the same pan, adding more oil and/or butter, add the shrimp and cook until done and they are pink all over.  This will take about 3-4 minutes or so.

IMG_6338

Add the cooked vegetables and the flour, paprika and salt.  Mix everything together well, then add the wine.

IMG_6341

Bring everything to a boil, stirring constantly until the sauce thickens, then add the cream, the sour cream and the Tobasco sauce and combine well.  Usually, when cooking with wine, I add the same wine I am drinking with the meal.

IMG_6348

When the sauce is done and everything is ready, serve it over white rice and enjoy.

IMG_6350


Flatbread, Focaccia or Pizza?

Flatbreads were first introduced to the world back in the days of the Ancient Egyptians and Ancient Sumerians from Mesopotamia, which is now known as Iraq.  The Sumerians discovered that edible grains could be ground and made into a paste, then baked or hardened, and then eaten.  Those baked grains became known as what we call flatbreads.  These flatbreads were then topped with a variety of toppings, some simple and others complex.  These flatbread varieties can be eaten as a meal on their own, like pizza, while others are usually eaten as a side dish or an accompaniment to the main meal, like focaccia.

Flatbreads, focaccia and pizza are different names for bread dishes that are very similar and are close cousins.  They are all breads made with flour, salt and water that have been rolled, flattened and then baked.  Flatbreads and focaccia are often the same thing with different names, although, true flatbreads do not use any yeast at all, like matzah bread or even crackers.  These are known as unleavened breads.  Breads that contain yeast are leavened breads.  The main differences between focaccia and pizza are that pizza doughs often contain less yeast and are usually flatter than focaccia, and traditionally, pizza is most often made with cheese and either tomatoes and/or tomato sauce, where as focaccias usually do not have cheese or tomato products as a main ingredient.  But there is no right or wrong way to make any of these flatbreads. Top them with whatever you like and enjoy them in all their different flavors.

For Easter, I made another flatbread/focaccia, upon Priscilla’s request.  Happy Easter/Passover  This one was topped with caramelized onions and garlic.  I added fresh rosemary in the dough mix as well.  The combination of the fresh rosemary and the caramelized onions and garlic was definitely a winner.

IMG_6294

Flatbread with Roasted Shallots and Garlic

IMG_6271

These few simple ingredients made this wonderful, bold and flavorful flatbread.  This recipe does not call for a “sponge” specifically, but it still lets the yeast, flour and water set, which makes a starter.  A sponge and a started starter are the same thing.

The Dough

2 1/2 tsp dry active yeast

2 1/2 cups flour, separated

1 cup warm water

1/4 cup olive oil

2 tsp fresh rosemary, chopped fine


Mix the yeast, 1/2 cup of the flour and 1/2 cup of the water together and let sit for 30 minutes.  You want it to be bubbly and frothy.

IMG_6273

Once it has become frothy, add the remaining flour and water, the olive oil and the rosemary.  Mix everything together thoroughly and then knead on a lightly floured surface until the dough forms into a soft ball, which will take about 8 minutes on average.  Rub olive oil all over the bowl and over the dough, then over and and let it rise for 1 1/2 hours, or until the dough doubles in size.

IMG_6275

While the dough is rising, cook the shallots and garlic to make the topping.


Shallot and Garlic Topping

2 TBSP olive oil

25 small shallots or 10-12 large shallots, peeled and sliced very thin

2 heaping TBSP garlic

2 TBSP sugar

2 cups dry red wine

salt to taste


Saute the shallots and garlic in the olive oil until the shallots are soft and translucent, or about 10 minutes.  Then add the sugar to caramelize the shallots, cooking for about 4 more minutes.  Add the wine, cover and reduce the heat to a simmer.  Continue to cook about 20 minutes, or until all the liquid has evaporated.

IMG_6276

IMG_6277

Once the shallot and garlic mixture is cooked, and the liquid has all evaporated, let the mixture cool.


Preheat the oven to 500* F

Once the dough has doubled in size, it is time to flatten it out onto an ungreased baking sheet, dimpling it with your fingers.

IMG_6285

IMG_6287

Evenly spread the shallot mixture on top of the dimpled dough, and bake for about 15-20 minutes or until the edges are lightly golden brown.


Once the focaccia/flatbread is done, let it cool for a few minutes before eating.  This is best when eaten warm.  Mangia!

IMG_6292


Happy Easter/Passover

I admit I am not the most religious person around, but I do respect the Holy traditions of those who are.  I was raised in a Christian home, with Christian values.  Those values still guide me today and have shaped and molded me into who I am.  Even though I do not practice or follow any formal religions, I am still very much a believer and do my best to live by the Golden Rule – Do unto others as you would have done unto you.  Easter and Passover are two very important holidays to Christians and Jews around the world.  Both were just celebrated by millions of people worldwide.  Though they are different, they also have their similarities, as do many other Judeo/Christian beliefs and traditions.  Both holidays are thought to be among the Holiest of days to both religions.  In both religions, the holidays are celebrated by feasting with loved ones and honoring God.

To Christians, Easter represents the resurrection of Christ. It symbolizes a new beginning, and sins of the past are forgiven to create a relationship with God.  It is not completely known how the word Easter came to be, but it is believed to parallel the German word Ostern.  Some also say the word itself dates back as far as the 8th century, and comes from either the words Eostre or Eostrae, which were names used for the Anglo-Saxon goddess of fertility.

Passover, or Pesach in Hebrew, commemorates the story of the Isrealites who departed from ancient Egypt during the times of extreme famine in Canaan.  During these times, Jews were persecuted by the ancient Egyptians and were blamed for all the hardships and woes that Egypt was suffering from during those times.  After their exodus and journey, the Jews landed at the foot of Mount Sinai.  The Passover Haggadah is the story of the Holy man or the Blessed one who saves his followers from their enemies.  The Passover celebration is the celebration of the birth of the eternal nation.

We celebrated and feasted with friends who are really family.  We went to our friends’ Jonathon and Priscilla’s house.  There were 12 of us all gathered together to take part in the Easter festivities.  Priscilla made a lot of the food, her friend Laura made a lot of the food, and I made a lot of the food.  We brought it all together and shared it with all.  As always, the food was delicious, the house was beautifully decorated, and the company was fantastic.  Who could ask for a better way to celebrate?

My culinary contributions for our Easter celebration were Patatas Bravas Patatas Bravas,  citrus almond cookies Another Batch of Cookies, cranberry pistachio cookies Cranberry Pistachio Cookies, chocolate pistachio bites Chocolate Pistachio Bites and focaccia with caramelized shallots and garlic.  We also had 2 different kinds of quiche, ham, a delicious Spring salad, cake and mimosas.

IMG_6328

IMG_6330

IMG_6331

IMG_6332

We had a wonderful Easter celebration.  I hope you all did as well.


Bottling the Wine

We all had a good time bottling our wine that we made a few months ago.  We made a barrel of an Australian red blend of both grenache and syrah at out favorite local winery, InVINtions, A Creative Winery.  Let’s Make Wine  After letting the wine set for a few months to ferment and age, it was finally time to bottle it up.  We made a barrel of wine, which makes 28 bottles.  We split the barrel three ways, with our friends Janet and Bob and Jaala and Gabe.  Jaala and Gabe were not able to be apart of the bottling session this time around, but they were there with us in both spirit and “spirits”.  My friend Elizabeth had never bottled wine, and since we have done it many times, we extended an invitation to her as well.  It’s much more fun when doing it with a group of friends.  Janet and I both brought goodies to eat  Asparagus Cheese Puffs  which we enjoyed as we sipped our wine both before and after the bottling process.  As usual, we brought enough food that none of us were hungry for anything else after.  No dinner needed.

Our label.  We chose to go with a simple “Tree of Life” label.

IMG_6325

Tasting, visiting and enjoying the day before the bottling process begins.

IMG_6300

Let the bottling begin.

IMG_6301

IMG_6306

IMG_6316

The Corking.

IMG_6304

IMG_6307

Sealing the bottles and adding the labels.

IMG_6318

IMG_6314

The finished bottles.

IMG_6324

Proudly displaying our freshly bottled wine.

IMG_6322

I hope you all enjoyed our wine making.

I hope everyone out there has a Happy Easter or a good Passover.  If you do not celebrate either of those holidays, I hope you all have a great day.


Asparagus Cheese Puffs

Later on this afternoon, we are going to bottle our wine that we made a few months ago.  Let’s Make Wine  Of course we we will be sampling as we bottle, because that’s half the fun, right?!  And we will need munchies since after all, we can’t bottle AND drink wine all on an empty stomach.  We almost always bring munchies with us even we are just tasting, but now we will be “working” too, so I made something a little extra special for today, to keep our strength up and to help us get through our arduous bottling task.   I made some asparagus cheese balls, or as they are known in French, gougeres, to enjoy while we are bottling our wine.  To the French, gougeres are a favorite appetizer to pair with wines, especially white wines (although this time we made a batch of red).  The French people know both wine and food better than anyone else, so I thought it was a good idea to follow their advice.

IMG_6295

Asparagus Cheese Puffs or Gougeres

IMG_6280

1/2 lb asparagus, cut into very small pieces, about 1/4 in size

3/4 milk

5 TBSP butter

1/2 tsp salt

3/4 cup flour

1 tsp cayenne pepper or to taste

3 large eggs

1 cup shredded pecorino cheese

1/2 cup shredded Parmigiano cheese


Preheat the oven to 400* F


Boil water to a rapid boil and add the cut asparagus.  Let boil for 1 minute, then drain the asparagus and set aside.

Mix the flour, salt and cayenne pepper together and set aside.

Add the milk and the butter to a saucepan and bring to a boil.  Turn the heat off and add the flour mixture and stir with a wooden spoon until the mixture thickens and forms into a ball.

IMG_6281

IMG_6282

If you have ever made a pate a choux, or eclairs, you are looking for the same consistency.  Transfer the mixture to a mixer and add 1 egg at a time, mixing thoroughly after each egg.

IMG_6284

Once everything is all combined, let it cool and set for about ten minutes.  Then add both the asparagus and the cheese and mix everything together, combining well.  Spray mini muffin pans with cooking oil and drop about 1 TBSP of the mixture into each muffin cup.

IMG_6289

IMG_6290

Bake for about 25 minutes or until the puffs are golden brown and light and fluffy.  Serve either warm or immediately after removing them from the oven.  Bon Appetit!

IMG_6295

Another Batch of Cookies

With Easter being right around the corner, it is time to make, eat and enjoy cookies.  I was not planning on making another batch of cookies so soon, however, we are getting together with friends on Easter Sunday to celebrate and cookies were a welcomed and requested menu item.  We are doing a joint brunch where everyone brings a portion of the meal.  I was already planning on taking both my chocolate pistachio bites Chocolate Pistachio Bites and my cranberry pistachio cookies Cranberry Pistachio Cookies and my dear friend Priscilla said she would like another kind of cookie to offer as well.  No problem.  I love making cookies, almost as much as I love eating them.  I decided to make some lemon-almond cookies for this batch.  Yes, I know there is a nutty-lemony theme in the cookies and sweets I am bringing, but lemons and nuts are also some of the many wonderful flavors of Spring, and I love them both.  Today’s batch of cookies is called citrus crisps.  They are very light and delicate cookies that just melt in your mouth.  Delicious!

IMG_6269

Citrus Crisps

IMG_6256

1 cup sugar, divided

1/4 cup lemon juice

1/2 stick butter at room temperature

2 TBSP heavy whipping cream

1/2 tsp lemon extract

1 TBSP lemon zest

1/2 tsp baking soda

1 cup cake flour

1 cup almond meal – I used my almond meal from Living Tree Community Organic Foods. More Treats from Living Tree Community Foods


Mix all the dry ingredients together well and set aside.

IMG_6259

Mix the lemon juice and 1/4 cup of sugar into a saucepan, bring to a boil and let boil for 1 minute.  Then add the butter and continue to boil until the butter is completely melted.

IMG_6263

Add the rest of the sugar, lemon extract and the flour mixture and mix well until everything is well blended and you have a dough that is medium stiff in consistency.  Wrap the dough in plastic wrap and chill in the refrigerator for an hour.

IMG_6264

Preheat the oven to 350* F .

Once the dough has set, roll it out onto a lightly floured surface to about 1/8-1/4″ thickness.  Cut into any shapes you like.  I decided to make my cookies into flower shapes as another way to honor Spring.  Once the cookies are cut, place them on an ungreased cookie sheet.  You can top them with either turbinado sugar or colored sugar if you like.  I used colored sugar.

IMG_6267

Bake the cookies for about 10-15 min, or until the edges are lightly golden.  Let cool for about 5-7 minutes before placing them on a cookie rack to continue to cool completely.  Then …. let the cookie eating process begin.

IMG_6268


Cranberry Pistachio Cookies

I LOVE, LOVE, LOVE cookies; all kinds of cookies.  NO cookie will ever be left uneaten in my house.  So I am always on the lookout for new cookie recipes to try.  If I can find recipes for healthy cookies, SWEET!!  Even better.

Since I had some leftover peeled pistachios from when I made my chocolate pistachio bites Chocolate Pistachio Bites  I decided to look for a cookie recipe that would use those up.  As you are probably well aware by now, I hate to throw food away.  I will ALWAYS come up with delicious ways to use up my leftovers if I can (all hail to the Queen of Leftovers).  When I came across this recipe, it was just perfect.  It would use up my leftover pistachios and it has cranberries, which I also love.  So it is actually a very a healthy cookie recipe.  How could I not make them, right?!  🙂  Not only did I find a new, creative way to use my pistachios, but I also had some left over lemon glaze that I was able to top my cookies with, to make them really pop and come to life.

Cranberries, like pistachios, are loaded with health benefits.  Both are packed full of fiber, vitamins and minerals.  One cup of cranberries contains about 16% of the daily recommended intake of fiber and about 19% of the recommended amount for Vitamin C.  Because cranberries are so high in Vitamin C, they are also good for the immune system and help prevent or lessen the effects of diseases and illnesses.  Cranberries also contain a ton of anti-inflammatory agents as well as a host of anti-oxidants, which help prevent cancer.  As far as fruits go, cranberries rank among the lowest for sugar content.  They also contain a lot of manganese, which helps regulate the body’s blood sugar levels too.  So by making cookies with BOTH cranberries and pistachios, I also made a very healthy snack that I do not have to feel guilty about eating.  The only problem I have with these cookies, is NOT eating them all up at once.

IMG_6253

Cranberry Pistachio Cookies

IMG_6242

1 cup almond flour meal – I used some of my flour from Living Tree Community Foods Organic Foods More Treats from Living Tree Community Foods

1 cup almond flour

1 cup reg. flour

2 eggs

1 cup sugar

1 cup coconut oil, melted

1/2 cup chopped pistachios

1/2 cup dried cranberries, chopped

1 tsp baking soda

2 tsp vanilla

lemon glaze, optional


Lemon Glaze

2 cups powdered sugar

2 TBSP milk

1 TBSP lemon extract


Mix everything together and drizzle over your favorite cookies or cakes.


Preheat the oven to 350 * F

Combine the flours, almond meal and baking soda together and set aside.

IMG_6243

Mix the eggs, sugar, and vanilla together in a mixer, then slowly add the melted coconut oil, and continue to mix until everything is well blended.

IMG_6244

Add the flour mixture 1/2 at a time.  Mix everything together just enough to make sure all the ingredients are thoroughly combined.  Once the liquids and the flours are combined to make the cookie dough, add the chopped pistachios and cranberries, and fold into the dough.

IMG_6245

Make cookie balls of about 1 TBSP each and place them on an ungreased cookie sheet, about 2 inches apart.  I like to flatten my cookies down a bit once they are placed on the cookie sheet.  Bake for about 12-15 minutes, or until the cookies are lightly golden around the edges.

IMG_6248
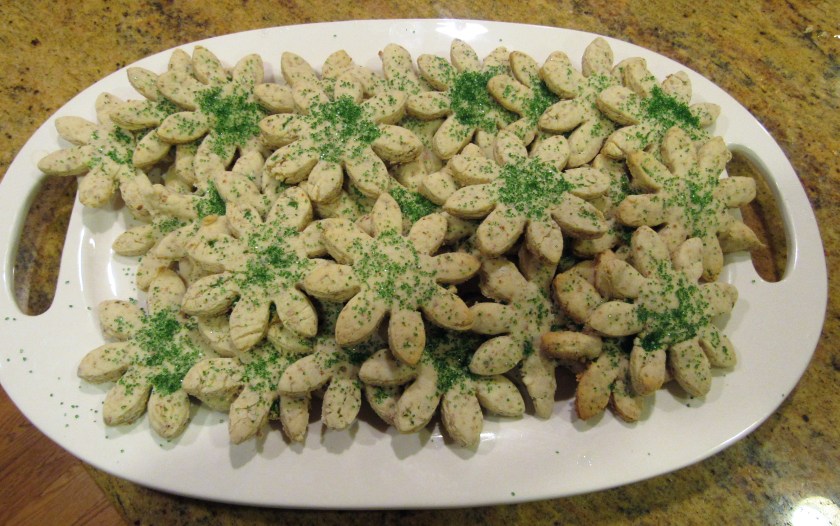
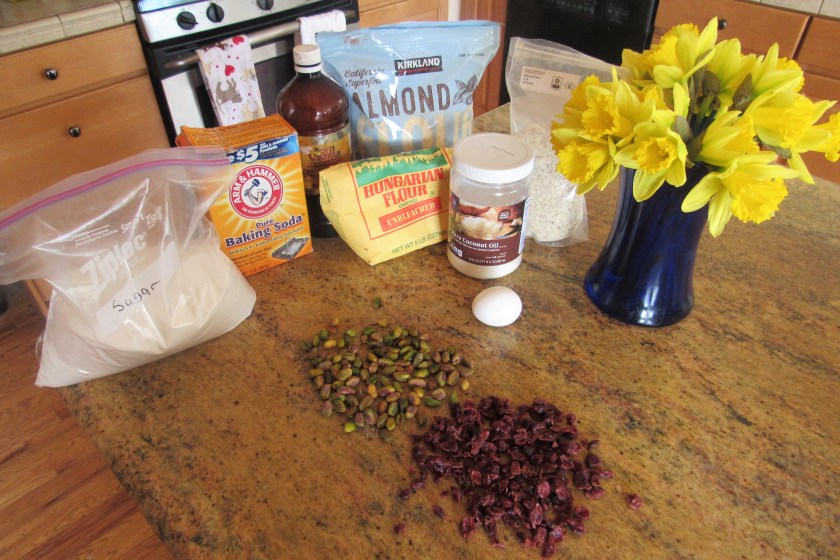
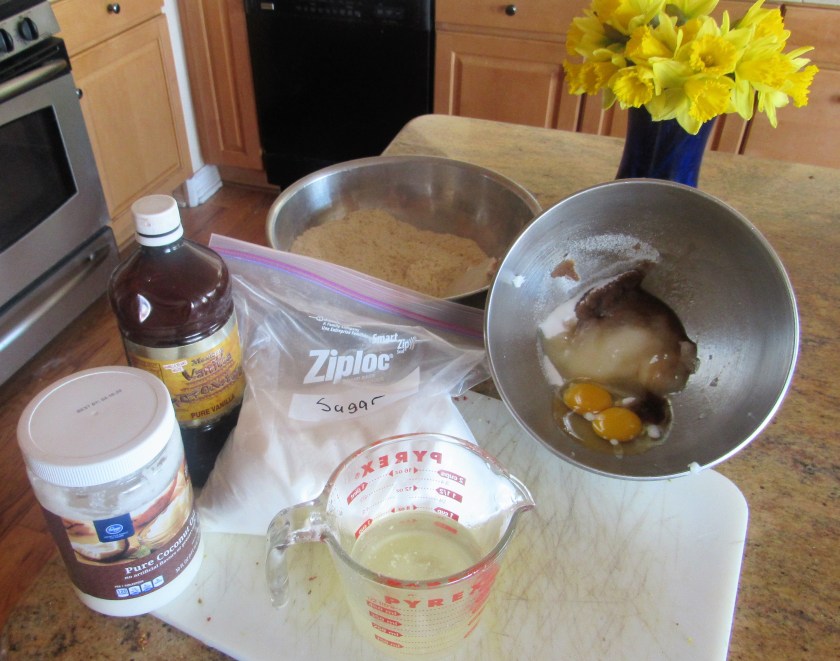
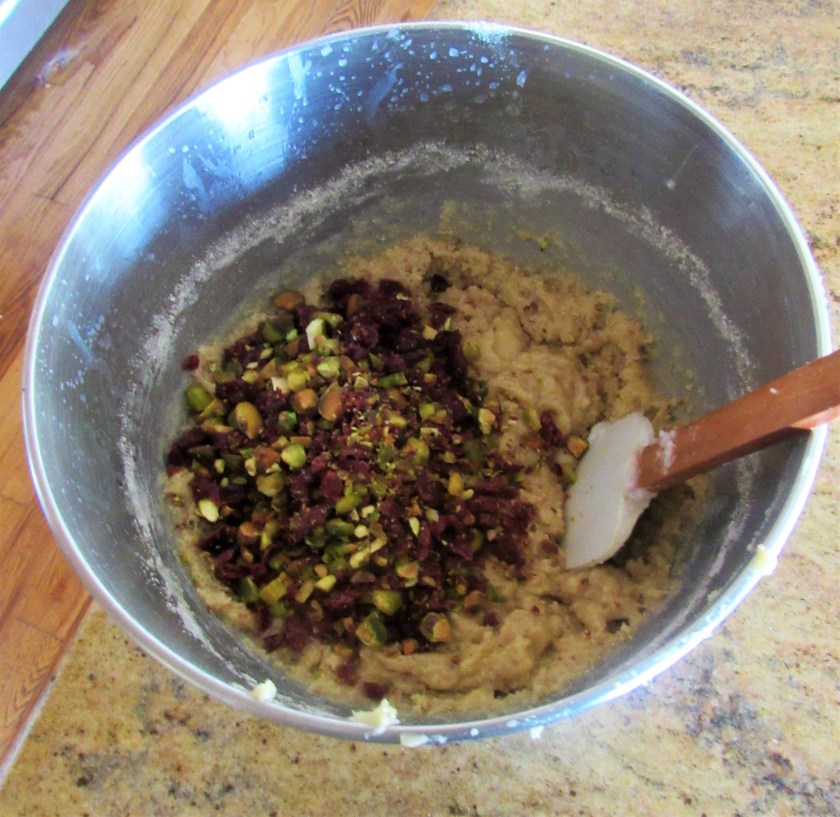
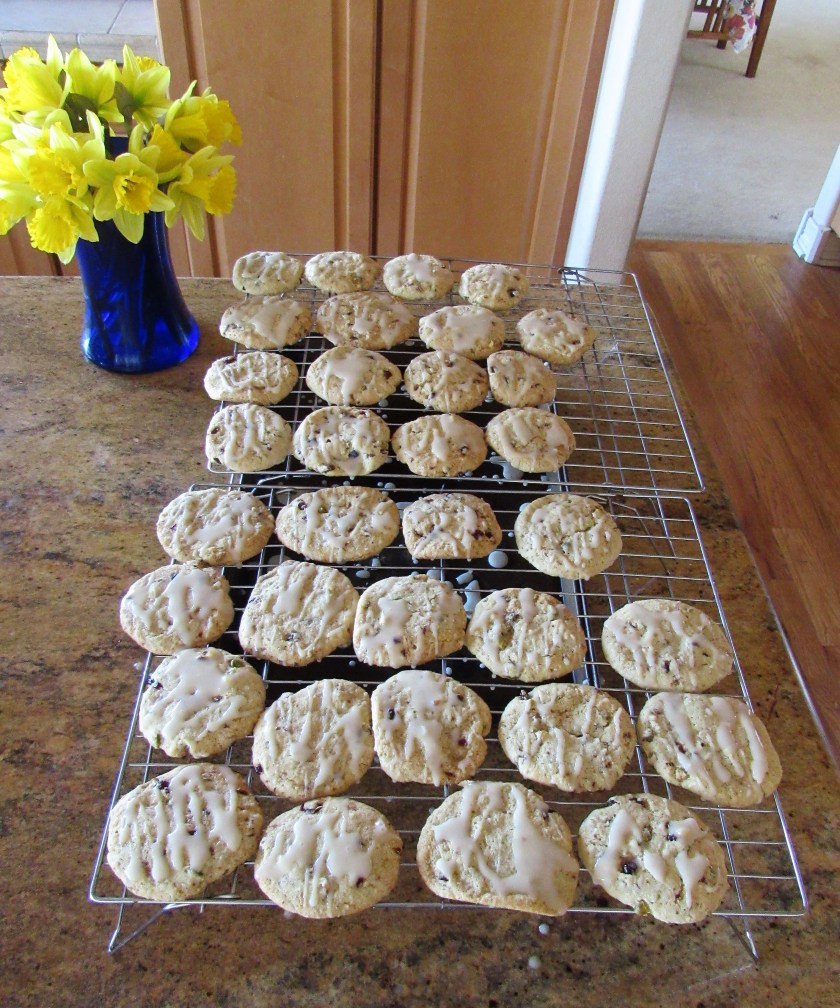
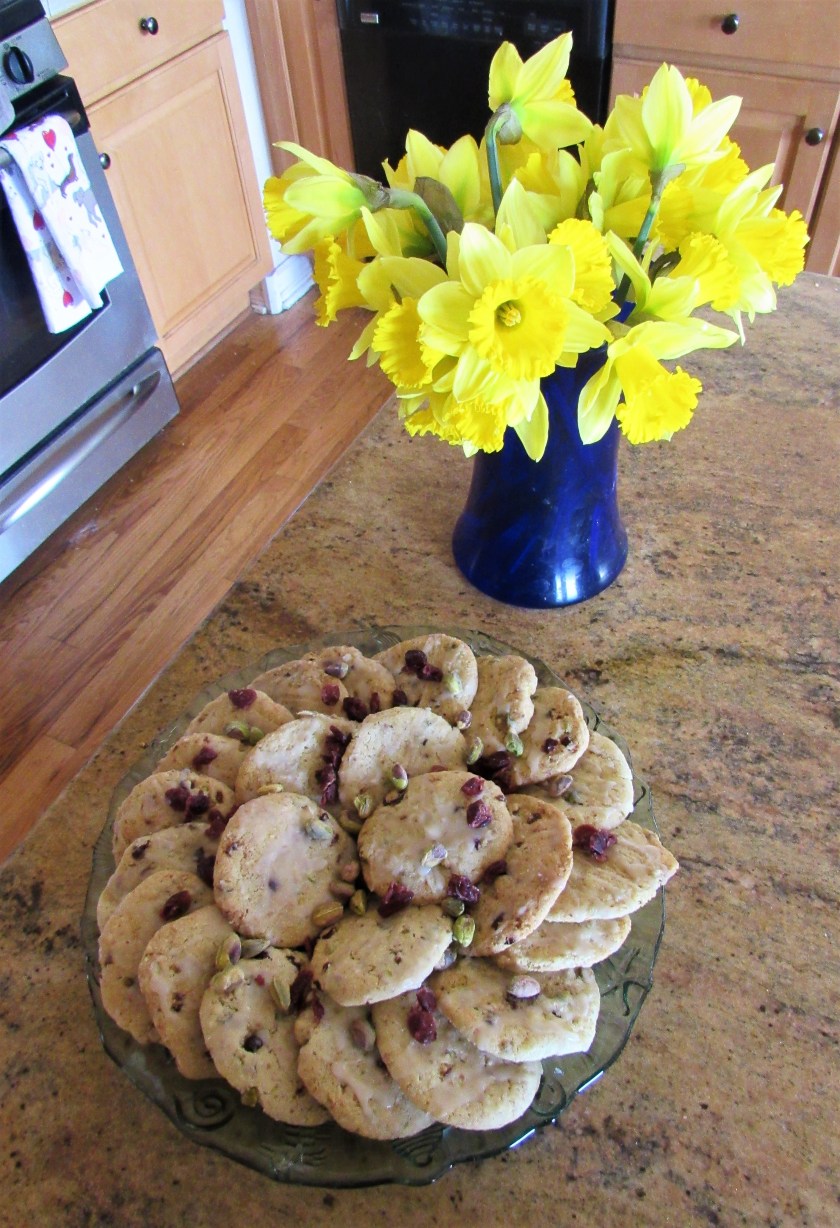
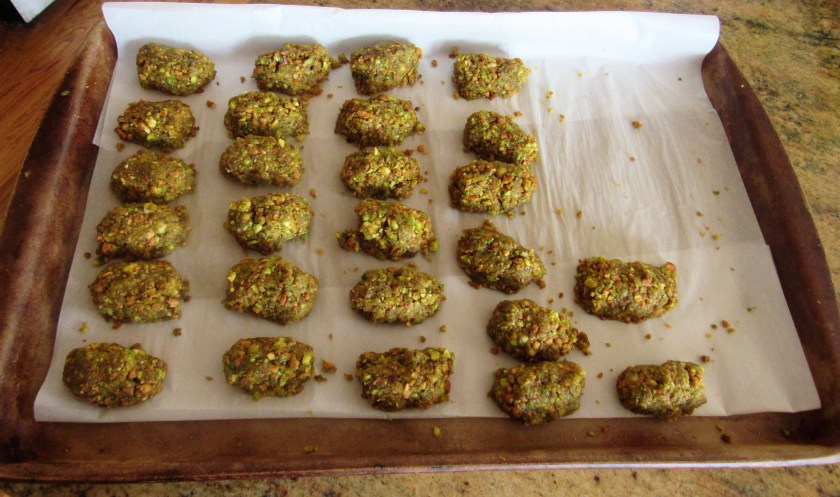
Once the cookies are removed from the oven, let them cool for about 5 minutes, then place them on a cookie rack, allowing them to cool completely, before icing them (if you choose to use icing).  I had some leftover lemon glaze that was a perfect flavor combination for these already delicious cookies.

IMG_6250

At last – Cookie Time!  Try stopping at only one or two or three.  🙂  Enjoy!

IMG_6254


Chocolate Pistachio Bites

All nuts are considered to be a healthy snack.  In general, they are loaded with a lot of minerals and vitamins, are good sources of protein and fiber, and have high ratios of beneficial fatty acids and antioxidants.  Pistachios are high on the top of the list for healthy nuts.  Pistachios are among the world’s oldest nuts too.  They are even mentioned in the Old Testament of the Bible as a healthy food source.

When I saw this simple recipe for these chocolate pistachio bites, I knew I just had to make them right away.   I saw these tasty, healthy treats on my blogging friend nadiiag’s website FitnessBlog.  You should check out her page.  She has a lot of great ideas and tips about health and nutrition.  Believe it or not, these chocolate pistachio bites are actually pretty healthy snacks too.  I also added some heavy whipping cream into the chocolate when I melted it to give the chocolate a shiny coating, and to make it as a ganache.  By adding the whipping cream, it made it a little less healthy, but not by much.  There is so little whipping cream, that it did not affect the healthy benefits of these snacks.  If you want to make these vegan, and still want to make them with a ganache coating, just substitute soy or coconut milk for the whipping cream.  The consistency will be a little different, but they will be healthy and vegan, if that is what you are looking for.

IMG_6240

Chocolate Pistachio Bites

There are ONLY 3 ingredients in these healthy little treats, 4 if you include the water.

IMG_6227

2 cups of pistachios or 15 oz of pistachio paste

2 bars of baker’s chocolate – I used semi sweet, but you can use any kind of chocolate you like

1/2 cup of heavy whipping cream, or soy or coconut milk


I made my own pistachio paste by boiling some water to a rapid boil, then adding the pistachios and boiled them for 1 minute.

IMG_6228

After 1 minute, drain the nuts and put them in an ice cold bath of cold water and ice cubes to shock them.

IMG_6229

Drain the nuts again.  The reason for boiling and shocking the nuts is to get rid of the skin around the nuts, so they are softer and to make them as “green ” as possible.  After the nuts have drained, “skin” the nuts by rubbing them in between your thumb and forefinger, or by rubbing them together in your hands, and the skin will come right off, very easily.  Though this was not hard to do, it was more of a pain in the neck than I anticipated.  But, look how “green” the pistachios are for doing it.  I guess the end results make it all worthwhile.  🙂  Sometimes I just get these crazy ideas into my head that sound good and fun at the time, and then once I get started I just kind of shake my head and say to myself “what was I thinking?”.  But once I start something, I always see it through to the end.  This time I am really glad I did too.

IMG_6230

IMG_6231

Once you have all the nuts “skinned”,  put them all in a food processor and process until they are ground into a fine paste.  Save some of the nuts to place on top of the chocolate covered candies.

IMG_6232

Shape the paste into little nuggets with your hands.  Get about 1 heaping tsp full of nut paste and squeeze and press it together.  Then shape it how you like.  I made mine into nuggets about 1 1/2 x 1 1/2 in size.  Place the nuggets in the refrigerator for at least an hour to chill and set before dipping them into the chocolate.

IMG_6234

Melt the chocolate together with the heavy whipping cream (or soy or coconut milk), stirring constantly, until all the chocolate is melted and it is smooth and shiny.  Then dip the nuggets into the chocolate by placing them on a fork.  Make sure to completely coat the nugget.  Place the coated nuggets onto a piece of parchment paper and place a whole pistachio on top.

IMG_6236

IMG_6237

Once all the nuggets are covered, place them in the refrigerator once more.  Let them chill and set for at least 2-3 hours before serving.

IMG_6238

Once the nuggets have set, cut away all the excess chocolate from the edges and plate them up to serve and enjoy.  These are healthy little treats that you do not need to feel guilty about for eating.

IMG_6239


Green Chili Day

I normally do not like to reblog things too much, especially foods and recipes I have already made and created.  However, there are always exceptions to everything.  This is one of those exceptions.  My husband switched jobs 4 years ago, and when he did, he started a new tradition.  He brings in green chili and tamales for everyone he works with to celebrate his work anniversary.  It seems to be a popular tradition.  Every year, the pot of green chili gets bigger and bigger and it always comes home empty, so I guess they like my green chili.  Time for Green Chili  The tamales he buys, though I can easily make them.  I love to make tamales, however, they are very time consuming to make, and I usually do not have the time to make them for everyone he works with.  So a compromise is made.  I make the green chili, the tamales he buys and everyone is happy.

IMG_6223

IMG_6226