Georgia Boys BBQ – The Best BBQ in Town

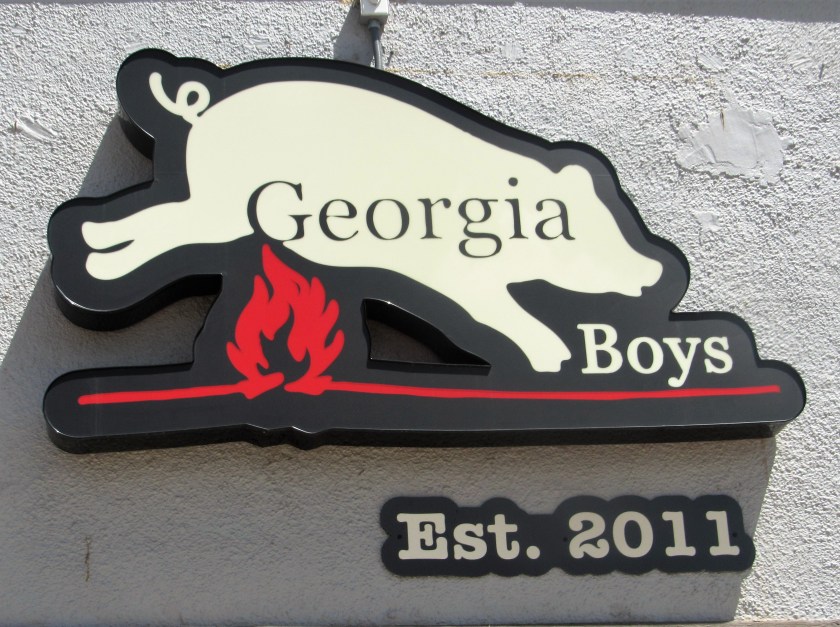
BBQ.  Smoked and grilled meats.  Dry Rubs.  All the fixin’s.  These are some good ole’ down home foods that are a part of Americana, and are what’s cookin’ at Georgia Boys BBQ.   Wherever people own grills and/or smokers, and prepare their meats in these fashions, these are all part of the traditions, particularly the Southern traditions.  Everyone has their favorite style or recipe, some of which have been passed along through the generations.  You don’t dare mess with someone’s BBQ recipe.  Oh no.  Them’s fightin’ words.  So, I would never in a million years try to change anyone’s ideas on their BBQ style, however, I do love a good, old fashioned Southern style BBQ.  After all, my momma was from South East Texas, so I have had many good BBQ’s in my day.  In my humble opinion though, Georgia Boys BBQ, is one of the best we have here in the North Denver Metro area, especially their burnt ends.  Their burnt ends are the BEST!  YUM-MY!

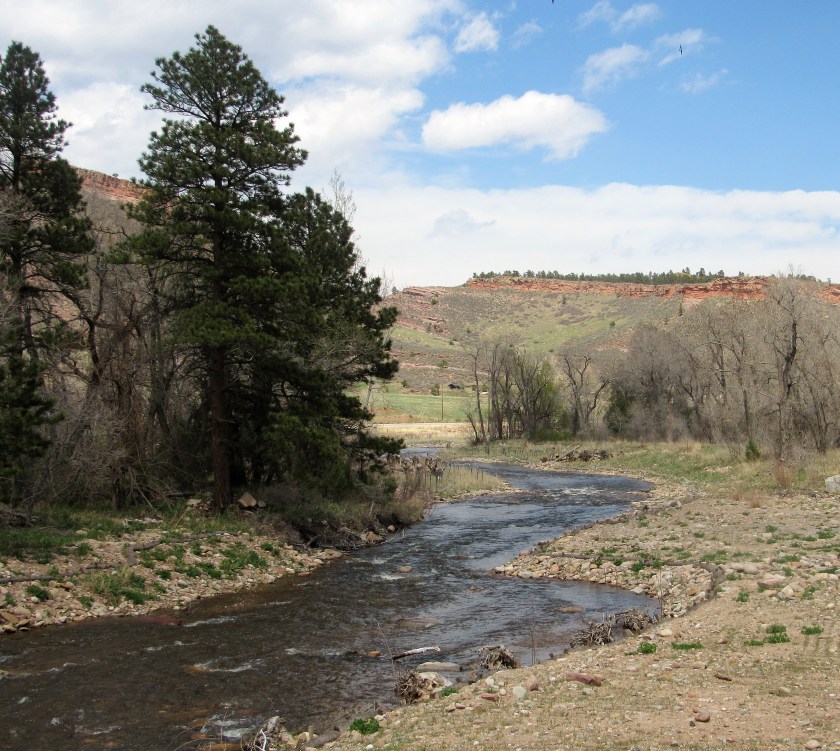
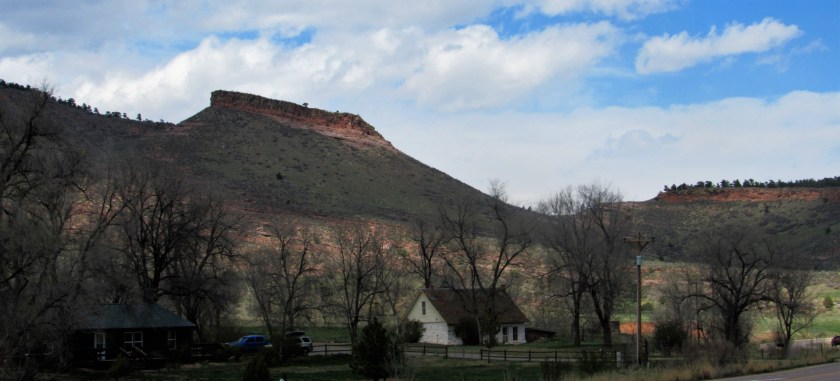
We started yesterday’s driving adventure Out for a Drive with lunch.  We were in the mood for BBQ, and my husband had never been to Georgia Boys before.  I had been to their old location, but had not visited their new location.  When we do our weekend adventures, we often like to try places we have never been before.  But we also go back to places we really like, so going to Georgia Boys fit both of those requirements.  This is NOT the place to go if you are vegan or vegetarian, or don’t like getting messy with your food.  Georgia Boys is all about the meat.  The mess just comes with the territory of eating BBQ.  This is also NOT the place to go if you are counting calories.  When visiting Georgia Boys, just throw that calorie counter out the window for the day.  Just sit back and enjoy.  It’s all finger lickin’ good.

IMG_6404

IMG_6403

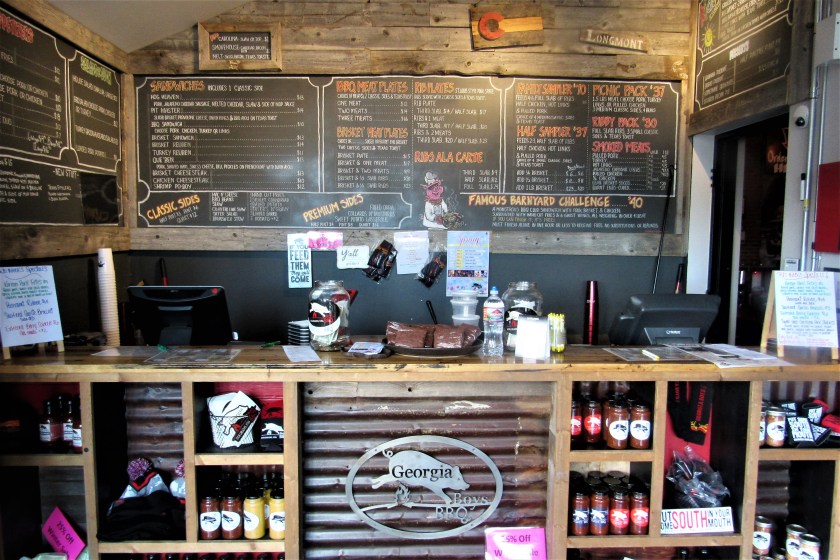
The inside decor is very rustic, inviting and fun and is full of personality.

IMG_6405

IMG_6406

IMG_6407

Sasha showing off all the libation choices offered at the full bar.

IMG_6411

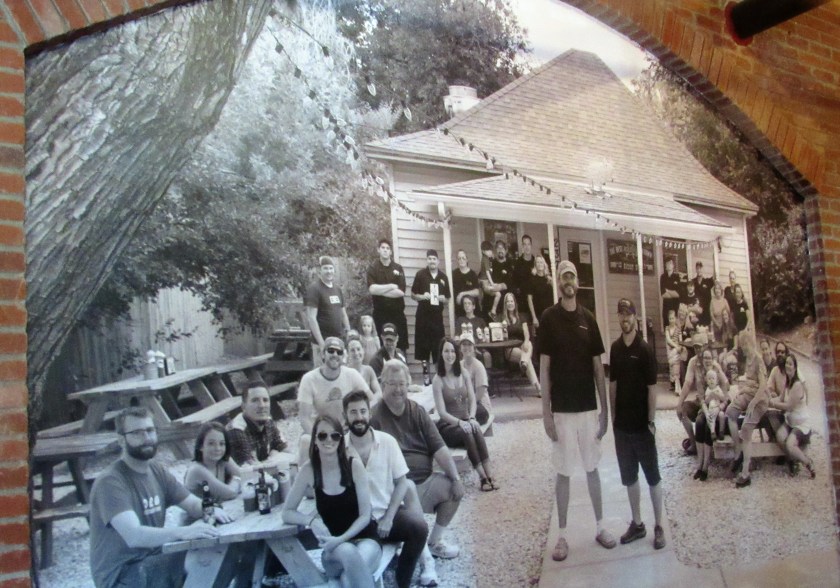
This is all that is left of the original Georgia Boys of Longmont.  But by popular demand, this little house could no longer take care of the ever growing base of satisfied customers, and a bigger “house” was needed.  I kind of miss this little house though.

IMG_6410


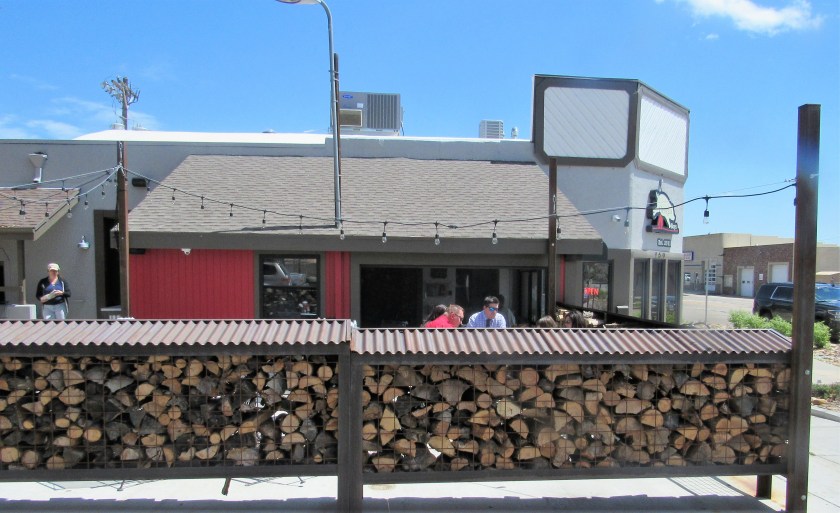
As fun and inviting as it is inside, it was just way too nice of a day to be stuck inside.  We chose the patio option.

IMG_6413

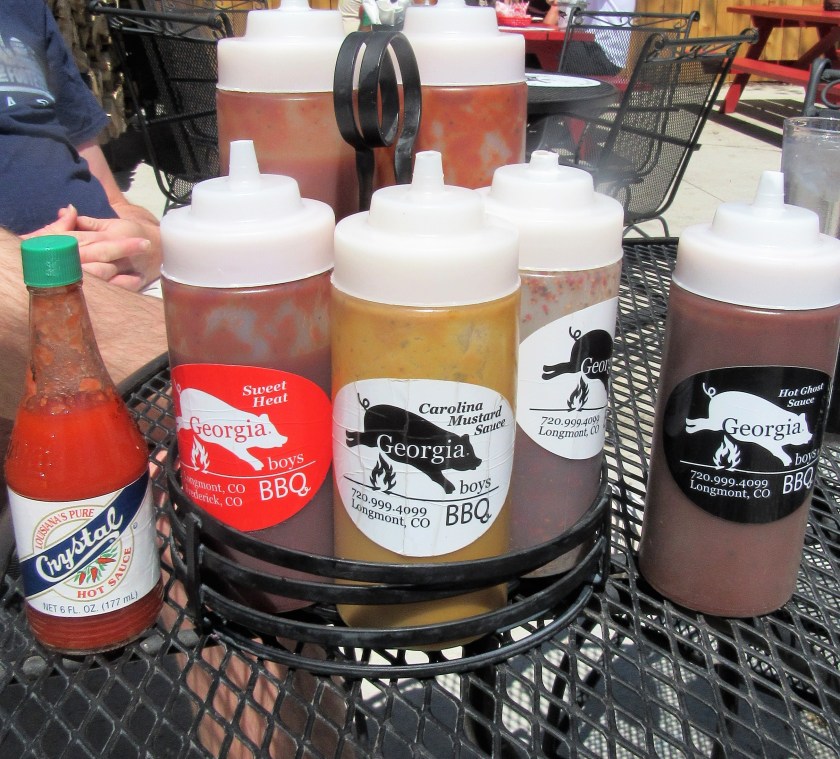
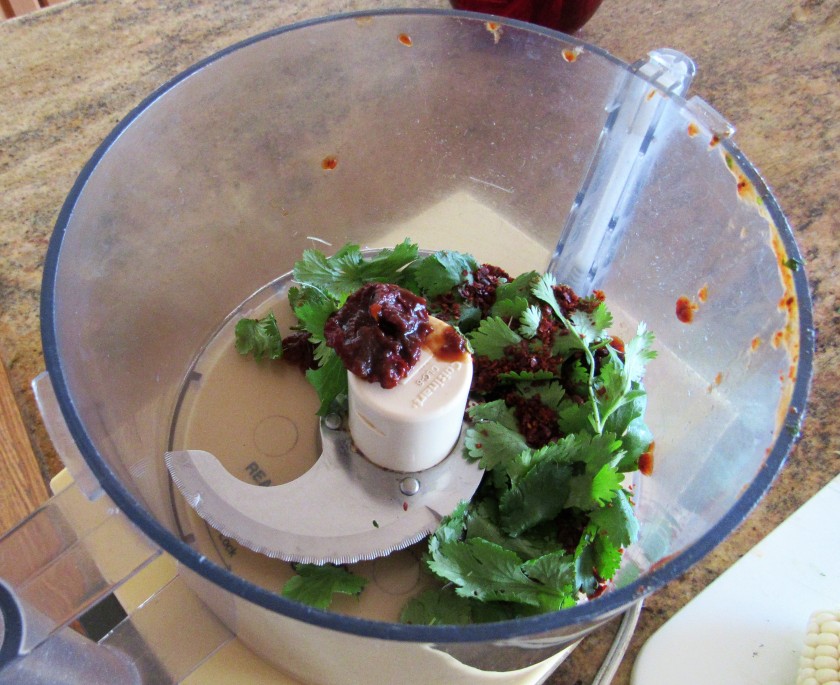
The sauces.  They range from sweet and mild to hot and wild.  Pick the one, or more, that best suits your personality.  Mix and match to your heart and taste buds’ content.

IMG_6414

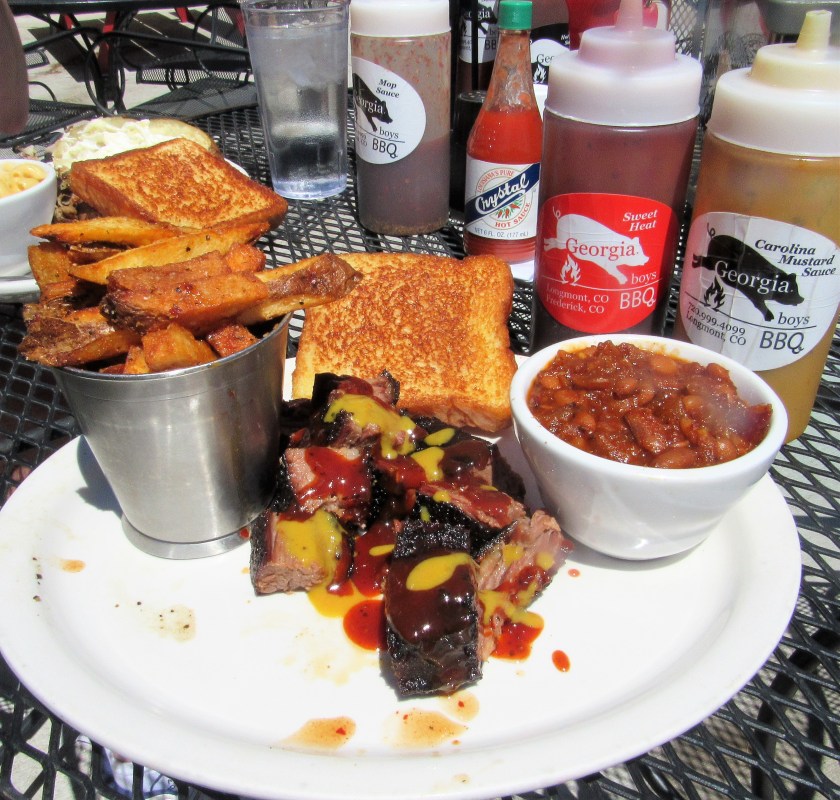
Let the feast begin!  Larry ordered the pulled pork AND the burnt ends, with a baked potato and homemade mac & cheese and the Texas toast on the side.  That’s a ton of food.  Believe it or not though, Larry at it all.  Every little last bite on his plate was GONE, GONE, GONE!

IMG_6415

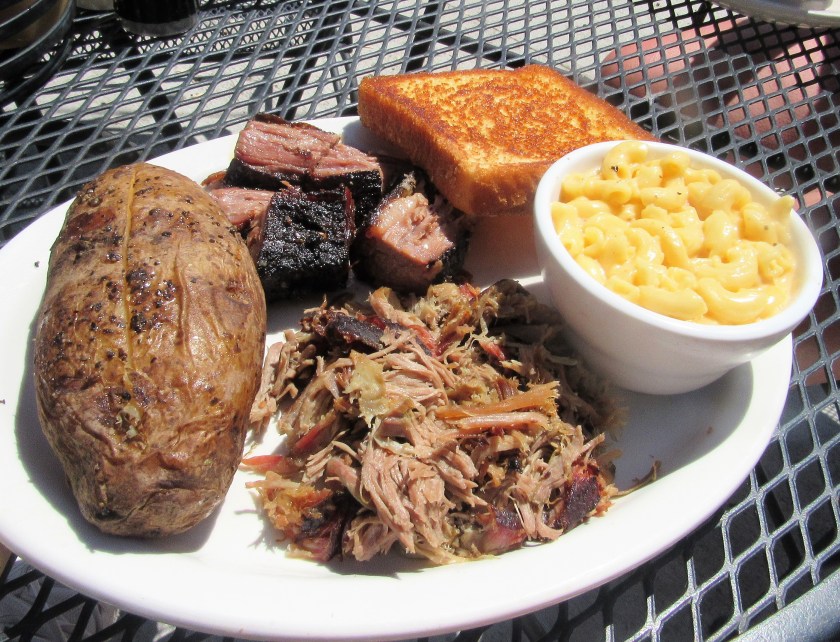
I had more of the “diet” plate, going for just the burnt ends, the seasoned home fries, the Texas toast and the baked beans.  As you can see, I like to mix and match my sauces.  I chose a combination of both the sweet heat and the Carolina mustard sauce.  I am after all, a “saucy” kind of girl.  I was good, and barely made it through 1/3 of my meal.  It was not because I did not want to eat it all though, I just had no room left to do so.

IMG_6417

Georgia Boys BBQ is located at 250 3rd Avenue, Longmont, CO.  Next time you are in town and get a hankerin’ for some of the best BBQ around, you should definitely stop by and give them a try.  Go for a virtual taste test by checking out their website at http://www.georgiaboys.com.

Out for a Drive

This is a bonus post, just because it was too good not to share.  Because it is such a beautiful and gorgeous day, we just had to take advantage of it and go for a nice drive. We started off with lunch in Longmont (more on that later), and then took the back way into Lyons, coming out through Boulder Canyon and Boulder.  Spring is definitely in bloom, and everyone from hikers to fisherman to moose were out enjoying the day.  These are just some of the beautiful sights we have to offer, here in the North Denver/Boulder areas of Colorado.  We live right in the middle, between both Boulder and Denver.  We are only about 15-20 away from each of them.  So all these beautiful sights are just a hop, skip and a jump away.

The sights of Lyons.  Lyons is only about 45 minutes or so from where we live.  It is on the way up to Estes Park.

IMG_6419

IMG_6421

IMG_6422

IMG_6424

Making the loop back down through Boulder Canyon.

IMG_6431

IMG_6433

IMG_6429

Beautiful, colorful trees on the CU Boulder Campus.  These trees are in bloom everywhere.  They are breathtaking.  I wish i knew what they were called.

IMG_6436

IMG_6437

But today’s highlight was ……  We found her just grazing peacefully right by he road.

IMG_6425

IMG_6427

These are just some of the many reasons why we live in and love Colorado.


Shrimp Kebabs with Tomato Vinaigrette

Our menus depend a lot on what the weather is like.  When it is cooler or cold outside, I make heavier, heartier foods that will warm us up from the inside out.  When it is warmer, I make lighter foods that won’t weigh us down.  Well, with the weather Colorado has been having lately, we are all over the place.  The last time I made shrimp it was cool and crisp outside, but my husband really wanted something with shrimp.  No problem.  I made the paprika shrimp that came out great.  Paprika Shrimp  I had bought a 2-lb bag of the large 13-15 count shrimp and only used 1/2 of it for the paprika shrimp, meaning I still had 1/2 the bag left to use.  I could not refreeze it since it was already thawed, so we had shrimp twice this week.  Oh darn!  Fortunately we love shrimp.  It is one of our favorite seafoods.  This time, however, the weather had changed dramatically once again, and now it was in the mid 70’s.  I needed to make a dish that was lighter this time around.  Since I had a lot of tomatoes, I decided to make a tomato herb vinaigrette to use as a marinade for the shrimp and made kebabs.

IMG_6390

Vinaigrettes are very easy to make.  Just mix everything together and in only a couple of minutes you have made a delicious vinaigrette.

Tomato Herb Vinaigrette

3-4 tomatoes, cut in large dice

1 TBSP garlic

salt and pepper to taste

1-2 tsp sugar

1/2 cup olive oil

1/3 cup red wine vinegar

5-7 fresh basil leaves

1 tsp each fresh thyme and oregano – dried is fine too

Mix everything together in a food processor until everything is blended and liquified, and voila!  Your vinaigrette is made.

IMG_6391

IMG_6392

You can use it as either a marinade for chicken, fish or vegetables, or as a a dressing for salads.  It’s very tasty, very healthy and very easy to make.  It’s a win/win all the way around.  I used it as a marinade for my shrimp kebabs, but I have plenty left over for a delicious salad too.  Because of the acidity in this vinaigrette, or most vinaigrettes for that matter, if using it as a marinade, particularly for shrimp or seafood, do not let it marinade for longer than about 30-60 minutes or it will break down the delicate proteins of the shrimp and seafood, and will “cook” them before you actually apply any heat.  If using it as a marinade for chicken, it can marinate for about 4 hours and it will still be fine.  You actually want those proteins to break down because it will also act as a tenderizer.

IMG_6395

I grilled them shrimp and served it over lentils, topping it with more sauce.  I served it alongside some asparagus topped with more tomatoes, mushrooms, garlic and onions (one of mys favorite ways to eat my asparagus), warmed bread and a glass of chardonnay.  It was the perfect way to end the day.  Although the flavor of the shrimp and lentil combination was delicious, I probably should have chosen something different than red lentils, because everything on the plate was red.  It’s all about the presentation, you know.  🙂  But it all tasted great, and in the end, the taste is really what matters most.

IMG_6398


Mediterranean Light

Orzo is a very popular type of pasta that is used in all parts of the Mediterranean.  It is a short cut pasta, that looks like large grains of rice.  It is cooked in many different ways, and can be eaten alone, in a soup, as a salad, or in a casserole, as well as many other ways.  Orzo also goes by many names.  In Italy, it is known as orzo or risoni, but it is also known as kritharaki in Greece, which means little barley; arpa sehriye, or the barley noodle, in Turkey; pinones in Spain; Ptitim in Hebrew, which means flakes and the Arabic translation means songbird tongue.  Who knew?   All I know is that it is very tasty, delicious and is very versatile too.

The people of the Mediterranean not only like to cook with this versatile little pasta, but they also enjoy cooking and eating it with a lot of vegetables and fresh herbs and spices too.  The more vegetables the better.  This is exactly how I like to cook as well.  Mediterranean style cooking has always been one of my favorite ways to cook.  It is always full of fresh flavors and is a very healthy cooking style.  It has often been said the Mediterranean diet is one of the healthiest diets out there.  I truly believe this.  We eat a lot of Mediterranean style foods and dishes.

It was a Mediterranean night last night.  It was a perfect Spring evening, not too cool and not to warm either.  There were no heavy sauces to weigh us down, but our meal was loaded with freshness and flavor.  I served lemon-herb chicken with sauteed vegetables over a bed of orzo mixed with spinach, tomatoes, garlic and toasted pine nuts.  I also added some crispy sourdough bread and some chilled chardonnay, making the meal a perfect light meal for a beautiful Spring evening.

IMG_6386

First, I made a lemon-herb vinaigrette to marinate my chicken.  I let it marinate for about 4 hours before grilling it.  This is a simple, easy vinaigrette to make, as most are, and only requires a few simple ingredients.

IMG_6370

1 TBSP garlic

1/3 cup white balsamic vinegar

1/4 lemon juice

1/3-1/2 cup olive oil

black pepper to taste

1-2 tsp each of fresh herbs of your choice – I used basil, sage, lemon verbena and thyme this time.  I switch my herbs around depending on what I have on hand at the time.  Mix everything together well and serve.  You can use it as either a dressing for a salad or as a marinade for chicken or fish.

IMG_6372

To make my orzo, I followed the directions on the package to cook it, then added spinach, garlic, shallots, tomatoes and toasted pine nuts.  Chiffonade the spinach, or cut it into thin strips, slice the shallot into very thin slices, and saute together along with the garlic and salt and pepper to taste, cooking for about 3-4 minutes.  Dice the tomatoes into a small dice.  When the orzo is cooked, add the cooked vegetables, tomatoes, and toasted pine nuts and mix everything together well.

IMG_6376

IMG_6378

I only used a portion of the spinach mixture and the tomatoes for the orzo.  I sauteed sliced mushrooms in olive oil and added them to the spinach, along with some artichoke hearts and the rest of the tomatoes.   Because I did not want either the tomatoes or the artichoke hearts to break down, I added them at the very end, when all the other vegetables were completely cooked, and just incorporated them into the mixture.  Add salt and pepper as needed or to taste.

IMG_6379

I like to layer my foods.  It is an old restaurant style of presentation, that still looks beautiful.   I started with a layer of the orzo, then added my grilled chicken, topped with mozzarella cheese.  I topped it all off with a layer of the artichoke vegetables, then some more toasted pine nuts.  Enjoy with a glass of your favorite wine and … Delicious!

IMG_6388


From Basic to Bold

There is nothing wrong with eating good, basic food.  We all do it, all the time.  It tastes just fine on its own, and we are quite happy with it as is.  But …. there is also nothing wrong with walking on the wild side and turning that same good basic food into something BOLD and EXCITING either.  I love walking on the wild side, not just with my foods, but in life in general.  I love to walk that fine between the two sides, which allows me to enjoy the best of both worlds.  With food, it is easy to liven things up by adding a big, bold, zesty sauce to something, or to turn up the heat a bit by adding some peppers or hot sauce, or to even just shake things up by doing something different and adding a new twist.  I thrive on this.  I do it all the time.  To me, I’m just having fun and playing.   I did just that with my ham and some corn on the cob to add a new twist to two great foods.

Ham and corn on the cob are American staples and favorites all over the country.  I love both of them too.  But I also love to make and serve them in new ways as much as I can also.

IMG_6367

I often serve ham with some kind of a mustard sauce.  To me, ham and mustard goes together like peanut butter and jelly.  They are two great tastes that go well together.  However, just because I serve ham and mustard sauces together quite often does not mean that I don’t also vary the sauces.  This time, I made a triple mustard sauce with garlic and jalapenos.  It gave the sauce just enough of a kick to wake up the taste buds, without turning up the heat sensors to much either.

Spicy Garlic and Triple Mustard Cream Sauce

IMG_6352

1/2 cup Dijon mustard

2 TBSP whole grain mustard

2 TBSP cup spicy brown mustard

1 TBSP garlic

1 large jalapeno, diced fine

2 tsp dried Aleppo chilies, optional

1/4 cup fresh cilantro, chopped fine.

3/4 cup heavy whipping cream


Mix everything together except the heavy whipping cream.

IMG_6354

Heat the cream in a skillet until it just starts to boil, then add the mustard mixture and combine well.  Reduce the heat to a simmer, and continue to cook, stirring constantly, for about 3-5 minutes.  Then serve over ham, pork or chicken.  Although I love mustards, especially the three I chose to use, sometimes that much mustard flavor can be a bit overwhelming, even for me, so I like to cut that by adding cream to the sauce.  If you prefer the strong mustard flavors all on their own, add the cream, or not, to your liking.

IMG_6356

I served my ham with the spicy garlic mustard sauce with the left over patatas bravas from Easter, Happy Easter/Passover and spicy corn on the cob flavored with chili lime butter, along with a glass of a cool chardonnay with hints of apples and melons.

Chili Lime Butter

IMG_6359

1 stick of cold butter, cut into large chunks

1-2 TBSP fresh cilantro

1-2 TBSP lime juice

1 tsp dried Aleppo chilies

3-5 chipotle peppers with sauce


Mix everything together except the butter, either in a mixer or a food processor, until everything is combined well.  Then add the butter and mix again, making sure all the butter is incorporated into the mixture.  If you add the butter with all the other ingredients before blending them together first, the acidity of the lime juice will break down the butter.

IMG_6360

IMG_6361

Once you have made the compound butter, wrap it in plastic wrap and let it set in the refrigerator for at least 30 minutes before using.

IMG_6362
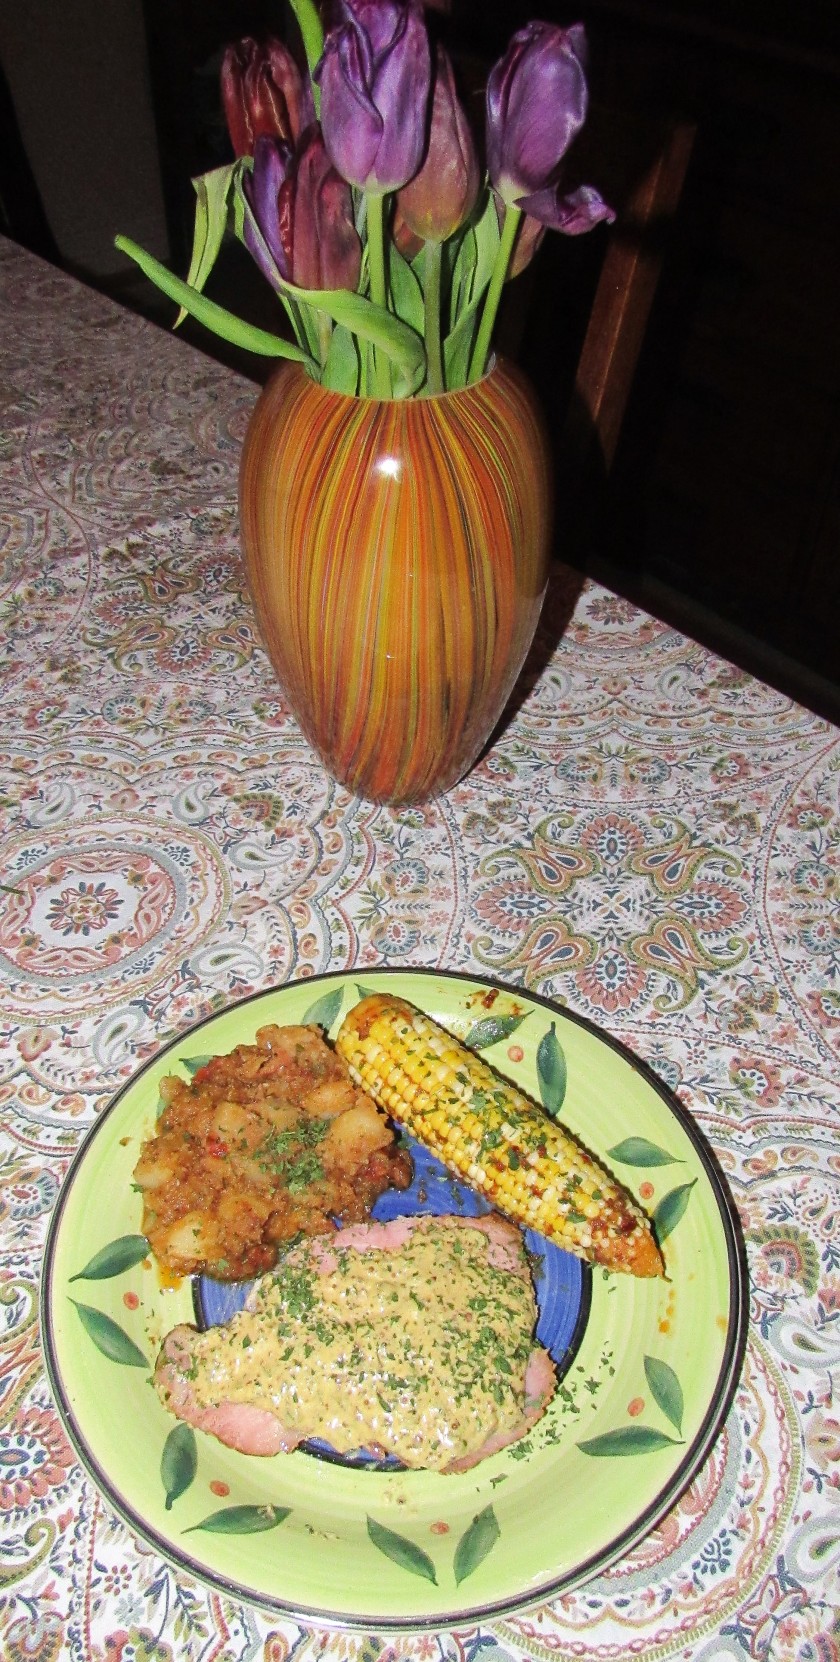
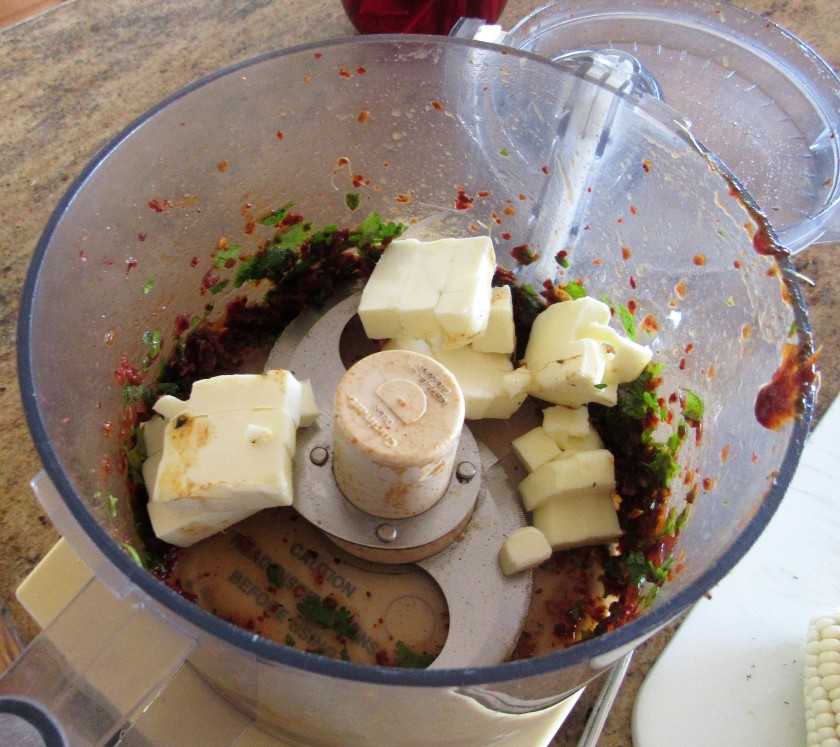
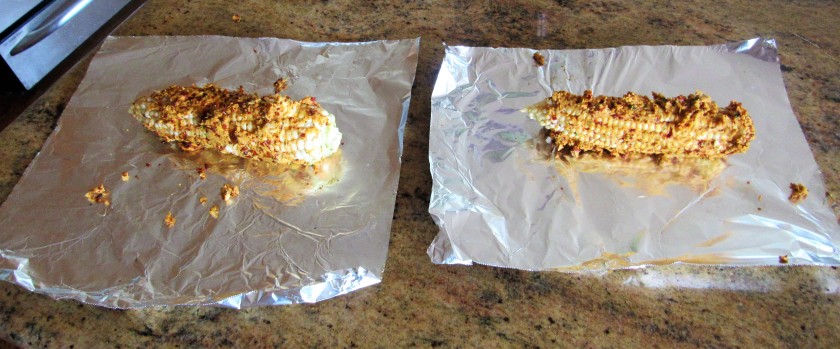
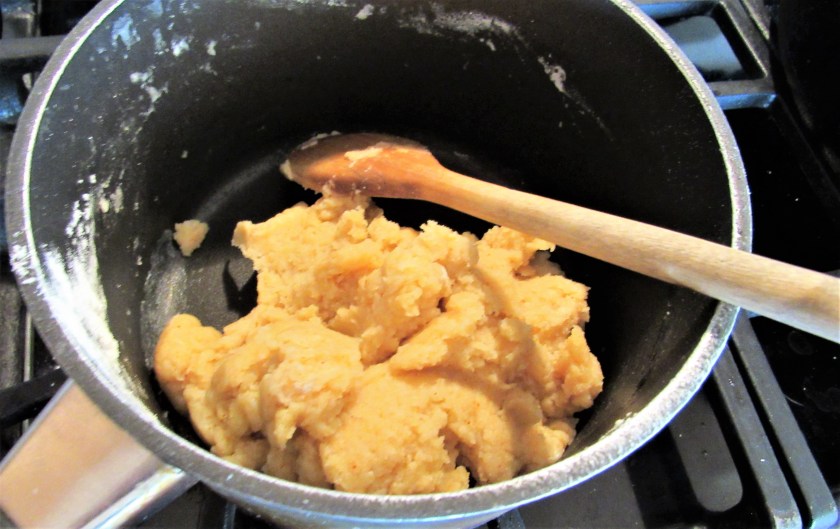
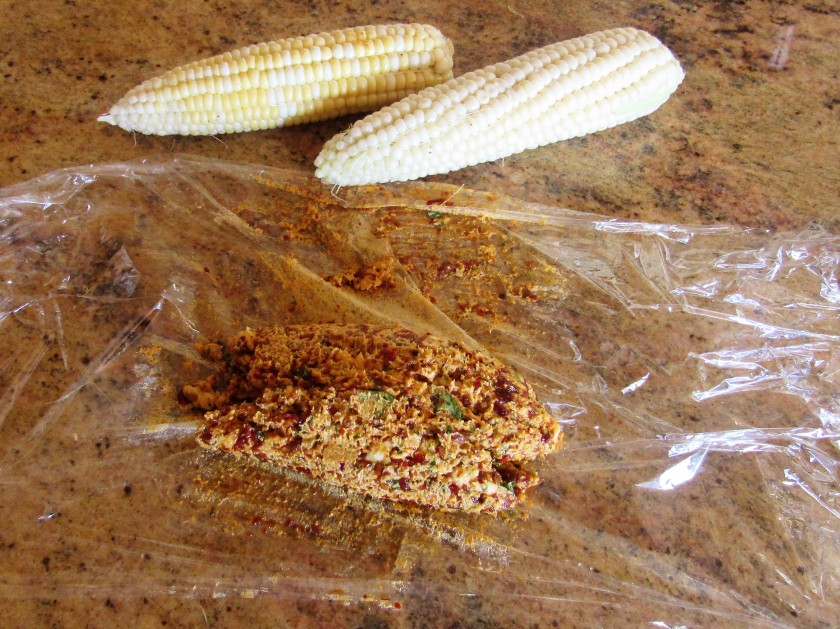
Once the compound butter as set, use it to add some kick and pizzazz to your favorite foods.  I used it on corn on the cob.  I rubbed the spicy butter all over the corn and then wrapped the corn in aluminum foil and baked it in the oven for about 20 or so minutes, until the corn was done.  You could also do the same thing and cook the corn on the grill as well.  When the corn is cooked, carefully unwrap it from the foil and pour off all the melted butter back onto the corn, to make sure none of the flavor escapes.

IMG_6364

Once the corn is ready, enjoy it as a side dish to your meal.

IMG_6368


Paprika Shrimp

As most of you probably already know, I love shrimp.  I agree with Bubba, from the movie Forrest Gump, “shrimp is the fruit of the sea”.    There are so many different ways to cook and prepare it and each one is just as delicious another.

0d10ec1d26328c9b61820bf5b6c5c629


I tried a new shrimp dish, that was again, very tasty.  It was yet another cool, chilly night, and usually when I think of shrimp dishes, I equate them with warmer days and lighter foods.  This new recipe was definitely a good one to prepare on a chilly night though, since it not only tasted really good, but it also warmed me up from the inside out.  It was just what we needed.  It is very similar to a stroganoff, but instead of using beef, I used shrimp.  It was a simple dinner served over white rice, with green beans, warmed bread and a glass or two of a cool, crisp fume blanc on the side.

IMG_6349

Paprika Shrimp

IMG_6336

1 onion, diced fine

1 TBSP garlic

1-2 cups mushrooms, sliced

1 lb large shrimp or prawns, peeled and deveined

3 TBSP butter

1-2 TBSP olive oil

2 TBSP flour

2 tsp paprika

1 cup dry white wine

3/4 cup cream (if using heavy whipping cream, also add about 1/2-3/4 cup of milk as well)

1/2 cup sour cream

1-2 tsp Tobasco sauce, or to taste

salt to taste


Saute the onion, garlic and mushrooms in a combination of both butter and olive oil until the onions are soft and translucent.  Then remove from the pan and set aside.

IMG_6337

In the same pan, adding more oil and/or butter, add the shrimp and cook until done and they are pink all over.  This will take about 3-4 minutes or so.

IMG_6338

Add the cooked vegetables and the flour, paprika and salt.  Mix everything together well, then add the wine.

IMG_6341

Bring everything to a boil, stirring constantly until the sauce thickens, then add the cream, the sour cream and the Tobasco sauce and combine well.  Usually, when cooking with wine, I add the same wine I am drinking with the meal.

IMG_6348

When the sauce is done and everything is ready, serve it over white rice and enjoy.

IMG_6350


Flatbread, Focaccia or Pizza?

Flatbreads were first introduced to the world back in the days of the Ancient Egyptians and Ancient Sumerians from Mesopotamia, which is now known as Iraq.  The Sumerians discovered that edible grains could be ground and made into a paste, then baked or hardened, and then eaten.  Those baked grains became known as what we call flatbreads.  These flatbreads were then topped with a variety of toppings, some simple and others complex.  These flatbread varieties can be eaten as a meal on their own, like pizza, while others are usually eaten as a side dish or an accompaniment to the main meal, like focaccia.

Flatbreads, focaccia and pizza are different names for bread dishes that are very similar and are close cousins.  They are all breads made with flour, salt and water that have been rolled, flattened and then baked.  Flatbreads and focaccia are often the same thing with different names, although, true flatbreads do not use any yeast at all, like matzah bread or even crackers.  These are known as unleavened breads.  Breads that contain yeast are leavened breads.  The main differences between focaccia and pizza are that pizza doughs often contain less yeast and are usually flatter than focaccia, and traditionally, pizza is most often made with cheese and either tomatoes and/or tomato sauce, where as focaccias usually do not have cheese or tomato products as a main ingredient.  But there is no right or wrong way to make any of these flatbreads. Top them with whatever you like and enjoy them in all their different flavors.

For Easter, I made another flatbread/focaccia, upon Priscilla’s request.  Happy Easter/Passover  This one was topped with caramelized onions and garlic.  I added fresh rosemary in the dough mix as well.  The combination of the fresh rosemary and the caramelized onions and garlic was definitely a winner.

IMG_6294

Flatbread with Roasted Shallots and Garlic

IMG_6271

These few simple ingredients made this wonderful, bold and flavorful flatbread.  This recipe does not call for a “sponge” specifically, but it still lets the yeast, flour and water set, which makes a starter.  A sponge and a started starter are the same thing.

The Dough

2 1/2 tsp dry active yeast

2 1/2 cups flour, separated

1 cup warm water

1/4 cup olive oil

2 tsp fresh rosemary, chopped fine


Mix the yeast, 1/2 cup of the flour and 1/2 cup of the water together and let sit for 30 minutes.  You want it to be bubbly and frothy.

IMG_6273

Once it has become frothy, add the remaining flour and water, the olive oil and the rosemary.  Mix everything together thoroughly and then knead on a lightly floured surface until the dough forms into a soft ball, which will take about 8 minutes on average.  Rub olive oil all over the bowl and over the dough, then over and and let it rise for 1 1/2 hours, or until the dough doubles in size.

IMG_6275

While the dough is rising, cook the shallots and garlic to make the topping.


Shallot and Garlic Topping

2 TBSP olive oil

25 small shallots or 10-12 large shallots, peeled and sliced very thin

2 heaping TBSP garlic

2 TBSP sugar

2 cups dry red wine

salt to taste


Saute the shallots and garlic in the olive oil until the shallots are soft and translucent, or about 10 minutes.  Then add the sugar to caramelize the shallots, cooking for about 4 more minutes.  Add the wine, cover and reduce the heat to a simmer.  Continue to cook about 20 minutes, or until all the liquid has evaporated.

IMG_6276

IMG_6277

Once the shallot and garlic mixture is cooked, and the liquid has all evaporated, let the mixture cool.


Preheat the oven to 500* F

Once the dough has doubled in size, it is time to flatten it out onto an ungreased baking sheet, dimpling it with your fingers.

IMG_6285

IMG_6287

Evenly spread the shallot mixture on top of the dimpled dough, and bake for about 15-20 minutes or until the edges are lightly golden brown.


Once the focaccia/flatbread is done, let it cool for a few minutes before eating.  This is best when eaten warm.  Mangia!

IMG_6292


Happy Easter/Passover

I admit I am not the most religious person around, but I do respect the Holy traditions of those who are.  I was raised in a Christian home, with Christian values.  Those values still guide me today and have shaped and molded me into who I am.  Even though I do not practice or follow any formal religions, I am still very much a believer and do my best to live by the Golden Rule – Do unto others as you would have done unto you.  Easter and Passover are two very important holidays to Christians and Jews around the world.  Both were just celebrated by millions of people worldwide.  Though they are different, they also have their similarities, as do many other Judeo/Christian beliefs and traditions.  Both holidays are thought to be among the Holiest of days to both religions.  In both religions, the holidays are celebrated by feasting with loved ones and honoring God.

To Christians, Easter represents the resurrection of Christ. It symbolizes a new beginning, and sins of the past are forgiven to create a relationship with God.  It is not completely known how the word Easter came to be, but it is believed to parallel the German word Ostern.  Some also say the word itself dates back as far as the 8th century, and comes from either the words Eostre or Eostrae, which were names used for the Anglo-Saxon goddess of fertility.

Passover, or Pesach in Hebrew, commemorates the story of the Isrealites who departed from ancient Egypt during the times of extreme famine in Canaan.  During these times, Jews were persecuted by the ancient Egyptians and were blamed for all the hardships and woes that Egypt was suffering from during those times.  After their exodus and journey, the Jews landed at the foot of Mount Sinai.  The Passover Haggadah is the story of the Holy man or the Blessed one who saves his followers from their enemies.  The Passover celebration is the celebration of the birth of the eternal nation.

We celebrated and feasted with friends who are really family.  We went to our friends’ Jonathon and Priscilla’s house.  There were 12 of us all gathered together to take part in the Easter festivities.  Priscilla made a lot of the food, her friend Laura made a lot of the food, and I made a lot of the food.  We brought it all together and shared it with all.  As always, the food was delicious, the house was beautifully decorated, and the company was fantastic.  Who could ask for a better way to celebrate?

My culinary contributions for our Easter celebration were Patatas Bravas Patatas Bravas,  citrus almond cookies Another Batch of Cookies, cranberry pistachio cookies Cranberry Pistachio Cookies, chocolate pistachio bites Chocolate Pistachio Bites and focaccia with caramelized shallots and garlic.  We also had 2 different kinds of quiche, ham, a delicious Spring salad, cake and mimosas.

IMG_6328

IMG_6330

IMG_6331

IMG_6332

We had a wonderful Easter celebration.  I hope you all did as well.


Bottling the Wine

We all had a good time bottling our wine that we made a few months ago.  We made a barrel of an Australian red blend of both grenache and syrah at out favorite local winery, InVINtions, A Creative Winery.  Let’s Make Wine  After letting the wine set for a few months to ferment and age, it was finally time to bottle it up.  We made a barrel of wine, which makes 28 bottles.  We split the barrel three ways, with our friends Janet and Bob and Jaala and Gabe.  Jaala and Gabe were not able to be apart of the bottling session this time around, but they were there with us in both spirit and “spirits”.  My friend Elizabeth had never bottled wine, and since we have done it many times, we extended an invitation to her as well.  It’s much more fun when doing it with a group of friends.  Janet and I both brought goodies to eat  Asparagus Cheese Puffs  which we enjoyed as we sipped our wine both before and after the bottling process.  As usual, we brought enough food that none of us were hungry for anything else after.  No dinner needed.

Our label.  We chose to go with a simple “Tree of Life” label.

IMG_6325

Tasting, visiting and enjoying the day before the bottling process begins.

IMG_6300

Let the bottling begin.

IMG_6301

IMG_6306

IMG_6316

The Corking.

IMG_6304

IMG_6307

Sealing the bottles and adding the labels.

IMG_6318

IMG_6314

The finished bottles.

IMG_6324

Proudly displaying our freshly bottled wine.

IMG_6322

I hope you all enjoyed our wine making.

I hope everyone out there has a Happy Easter or a good Passover.  If you do not celebrate either of those holidays, I hope you all have a great day.


Asparagus Cheese Puffs

Later on this afternoon, we are going to bottle our wine that we made a few months ago.  Let’s Make Wine  Of course we we will be sampling as we bottle, because that’s half the fun, right?!  And we will need munchies since after all, we can’t bottle AND drink wine all on an empty stomach.  We almost always bring munchies with us even we are just tasting, but now we will be “working” too, so I made something a little extra special for today, to keep our strength up and to help us get through our arduous bottling task.   I made some asparagus cheese balls, or as they are known in French, gougeres, to enjoy while we are bottling our wine.  To the French, gougeres are a favorite appetizer to pair with wines, especially white wines (although this time we made a batch of red).  The French people know both wine and food better than anyone else, so I thought it was a good idea to follow their advice.

IMG_6295

Asparagus Cheese Puffs or Gougeres

IMG_6280

1/2 lb asparagus, cut into very small pieces, about 1/4 in size

3/4 milk

5 TBSP butter

1/2 tsp salt

3/4 cup flour

1 tsp cayenne pepper or to taste

3 large eggs

1 cup shredded pecorino cheese

1/2 cup shredded Parmigiano cheese


Preheat the oven to 400* F


Boil water to a rapid boil and add the cut asparagus.  Let boil for 1 minute, then drain the asparagus and set aside.

Mix the flour, salt and cayenne pepper together and set aside.

Add the milk and the butter to a saucepan and bring to a boil.  Turn the heat off and add the flour mixture and stir with a wooden spoon until the mixture thickens and forms into a ball.

IMG_6281

IMG_6282

If you have ever made a pate a choux, or eclairs, you are looking for the same consistency.  Transfer the mixture to a mixer and add 1 egg at a time, mixing thoroughly after each egg.

IMG_6284

Once everything is all combined, let it cool and set for about ten minutes.  Then add both the asparagus and the cheese and mix everything together, combining well.  Spray mini muffin pans with cooking oil and drop about 1 TBSP of the mixture into each muffin cup.

IMG_6289

IMG_6290

Bake for about 25 minutes or until the puffs are golden brown and light and fluffy.  Serve either warm or immediately after removing them from the oven.  Bon Appetit!

IMG_6295