Asparagus and Pepper Tart

The other day when I was busy cooking and baking “with my Italian Nonnas” Channeling the Italian Nonnas one of the things I made was an asparagus tart. But was it really a tart or was it a quiche? Well, technically, I suppose in this case, it could be either. Here are the main differences between tarts and quiches. They are similar but they are also very different too. A tart can be either sweet or savory and may or may not have a custard-based filling. Tarts can have pie-like fruit fillings instead. A quiche is always savory and always has a custard-based (egg and milk) filling. Quiches can also have other savory ingredients added to them, like ham, cheese, or anything else you like to add as well.

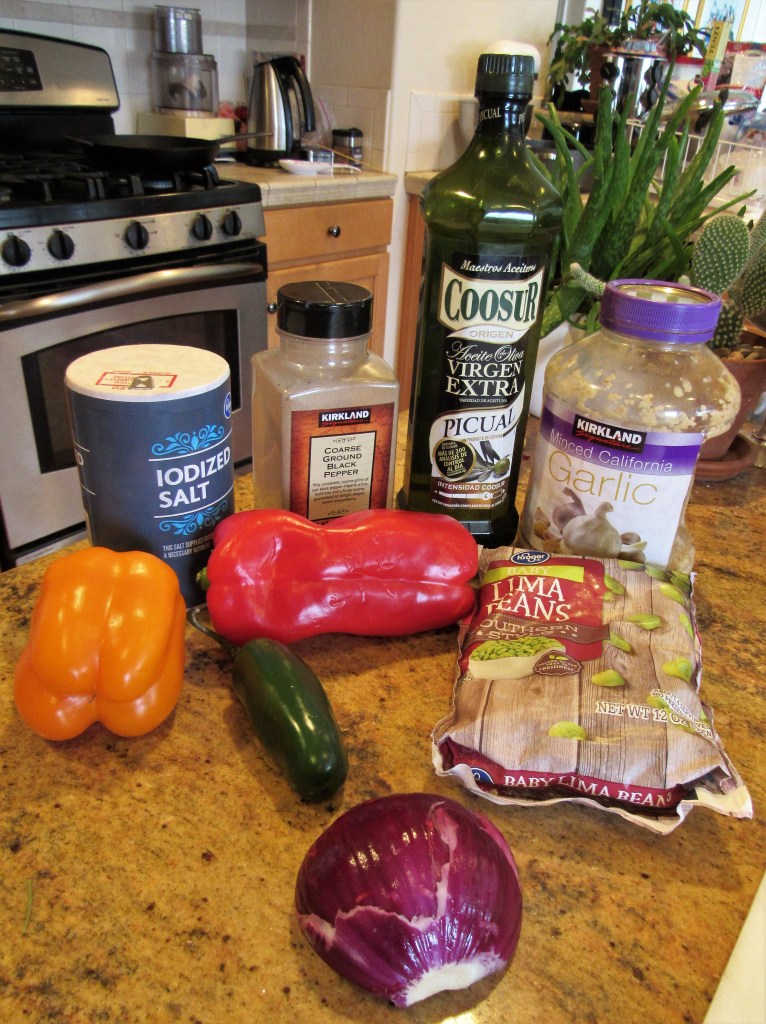
I made this tart with asparagus, red peppers, garlic and red onions. It was a huge hit and disappeared very quickly.

Asparagus and Pepper Tart

I started off with my basic dough Mile High Crab Quiche and then went from there.

My basic go-to dough, although this time I added pepper into the dough mix as well

2 cups asparagus spears, par cooked and blanched

1/2 red pepper sliced into thin strips

1/4 red onion, sliced very thin

1 TBSP garlic

3-4 eggs

1/4 cup heavy whipping cream

salt & pepper to taste

4 slices Swiss cheese, or light cheese of your choice

crushed peppercorns to taste

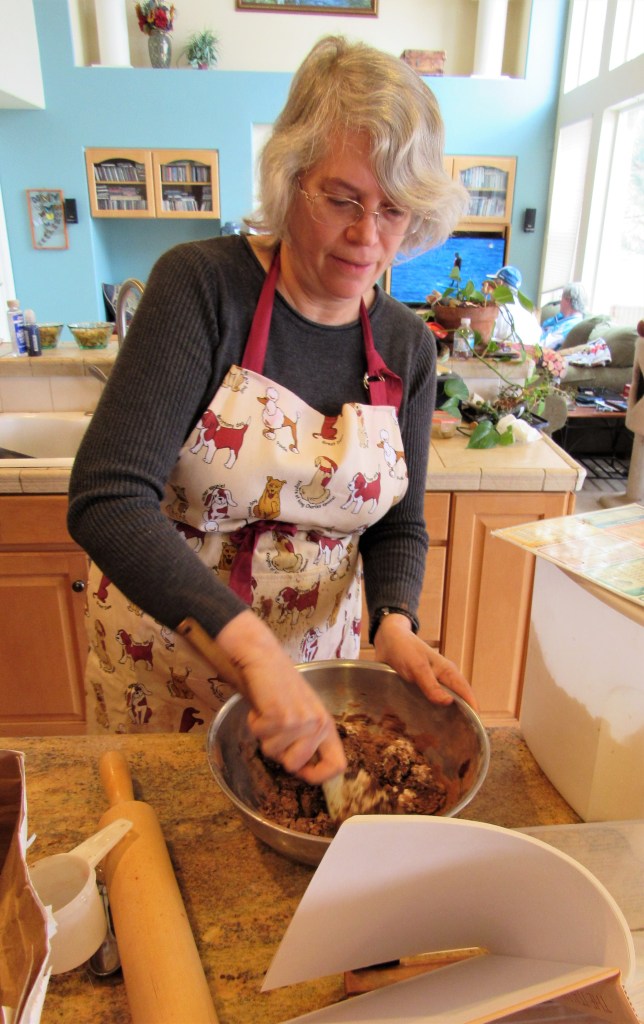
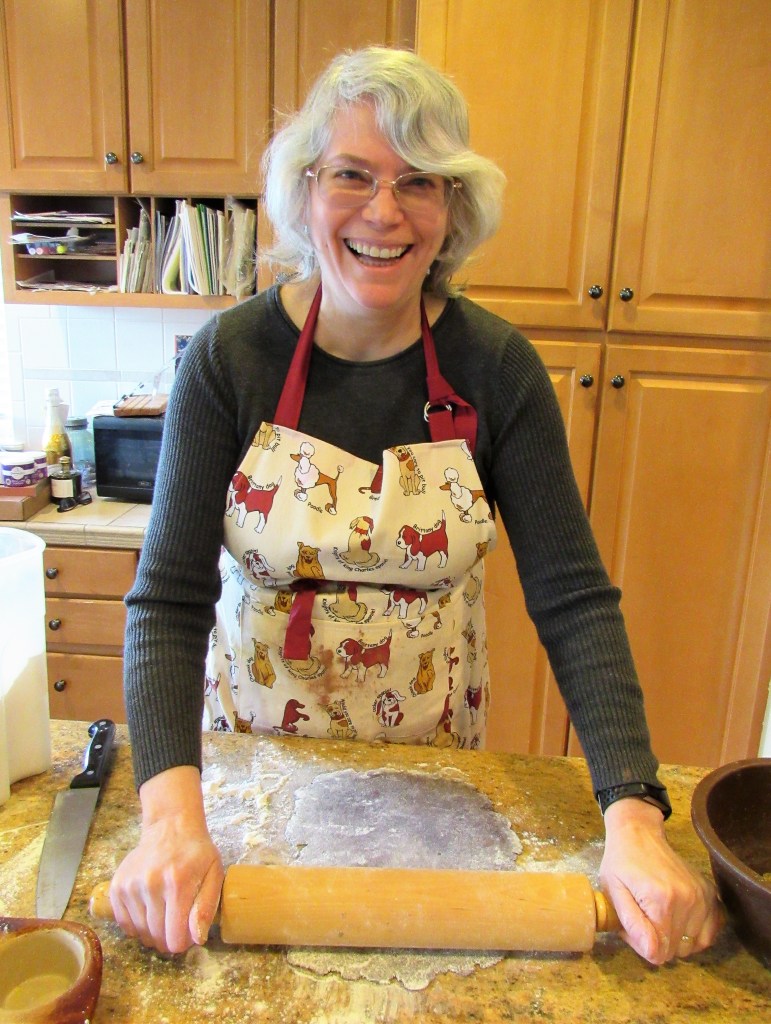
When you make your dough, let it set in the refrigerator for at least 30 minutes before rolling it out. Then on a lightly floured surface, roll it out to fit in your tart pan. Firmly press the dough into the pan.

Preheat the oven to 400* F or 200* C.

Par cook the asparagus then blanche it in ice cold water so it will not continue to cook.

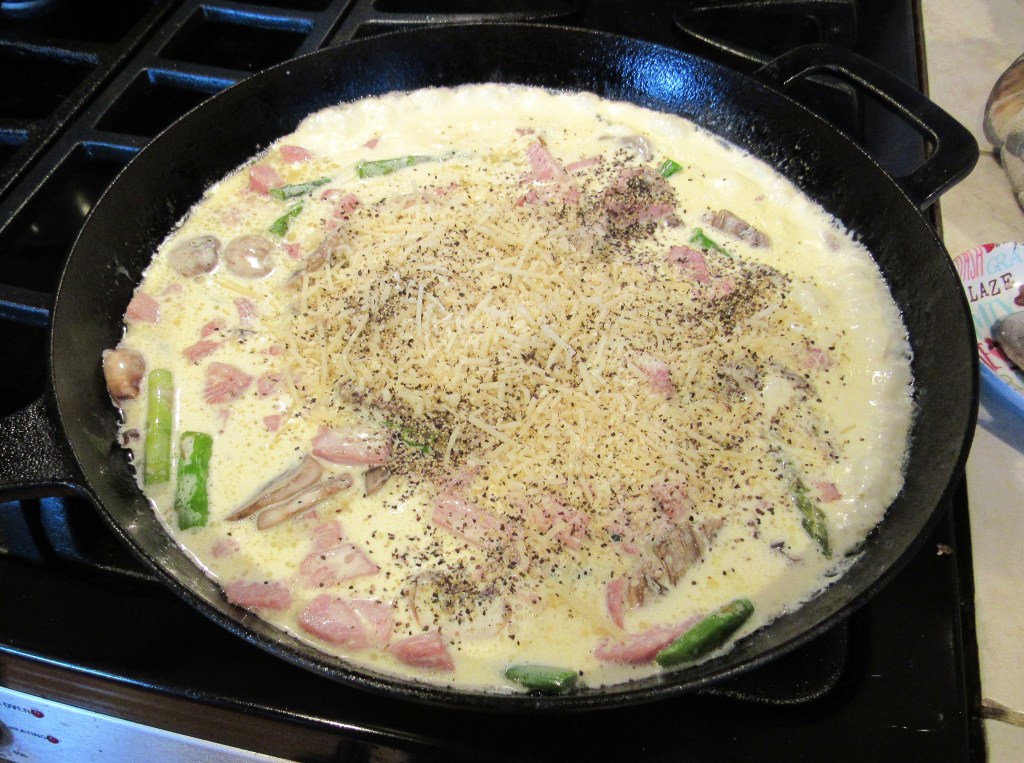
Saute the peppers, onions and garlic in olive oil until they are tender.

Add the cheese to the dough, making sure to cover the whole bottom.

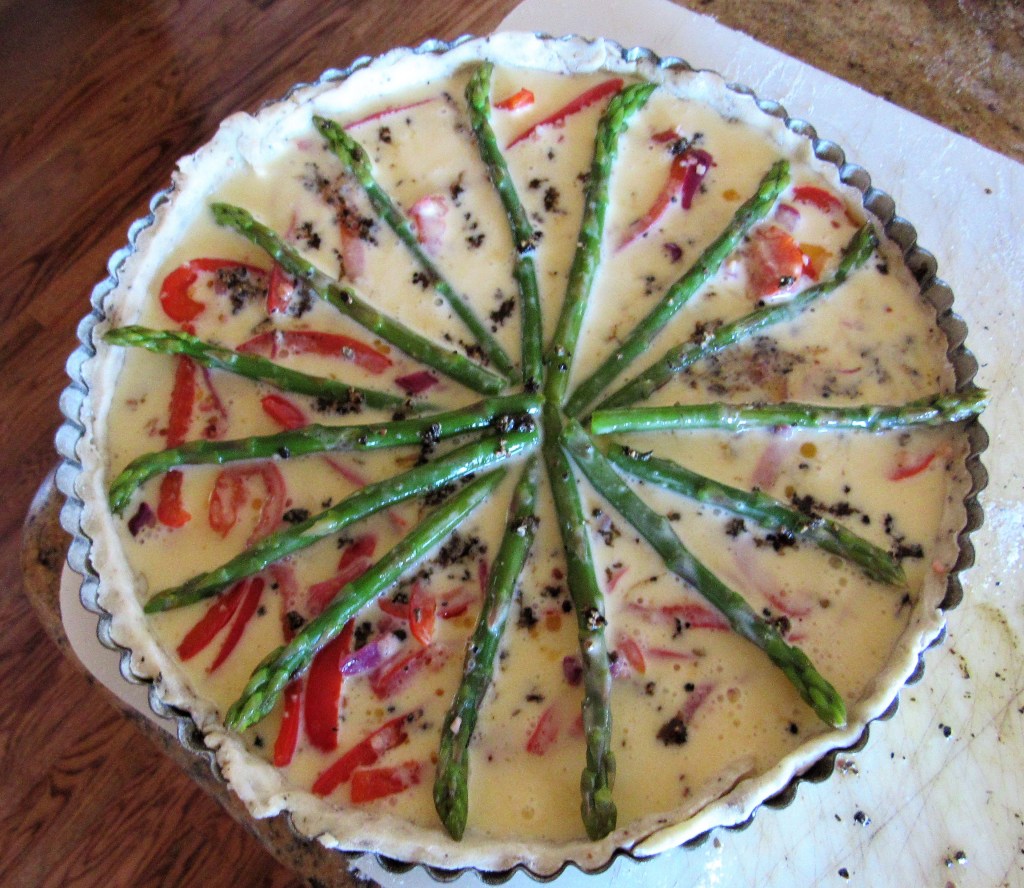
Add the peppers and onion mixture then arrange the asparagus spears all around on top of the peppers.

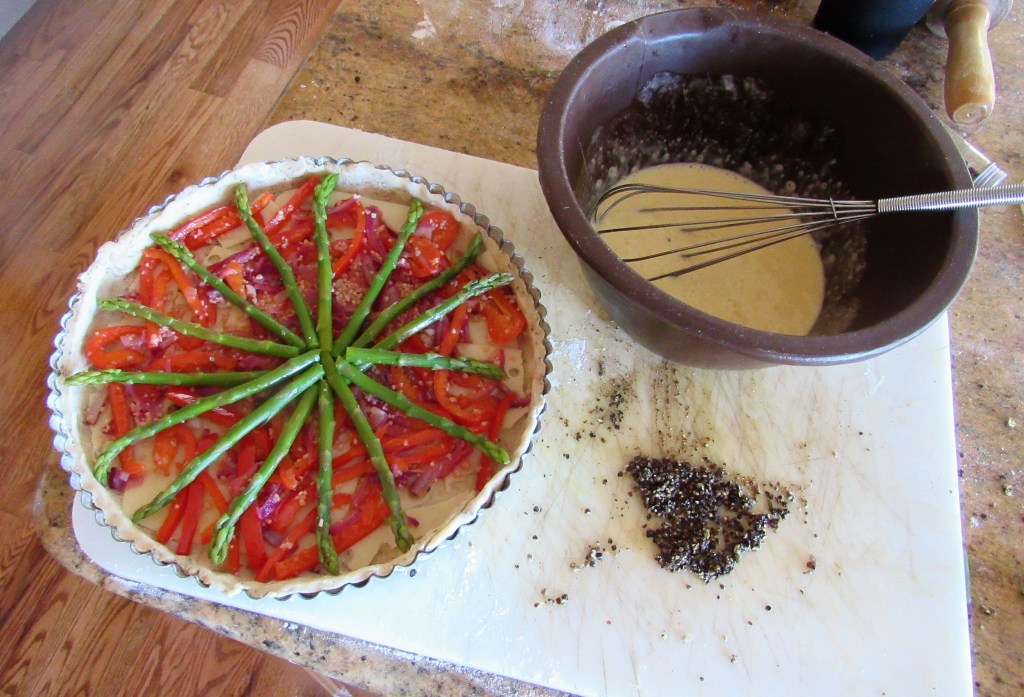
Mix the eggs, cream and salt and pepper together and carefully pour over the vegetables to fill the pan. This is optional, but I wanted to use some of my new peppercorns I received from Julia as part of my birthday present. Another Birthday Surprise . The package had 6 different types of peppercorns, and for this recipe, I chose to use the rainbow peppercorns. I crushed them and sprinkled them around on top of the egg mixture.

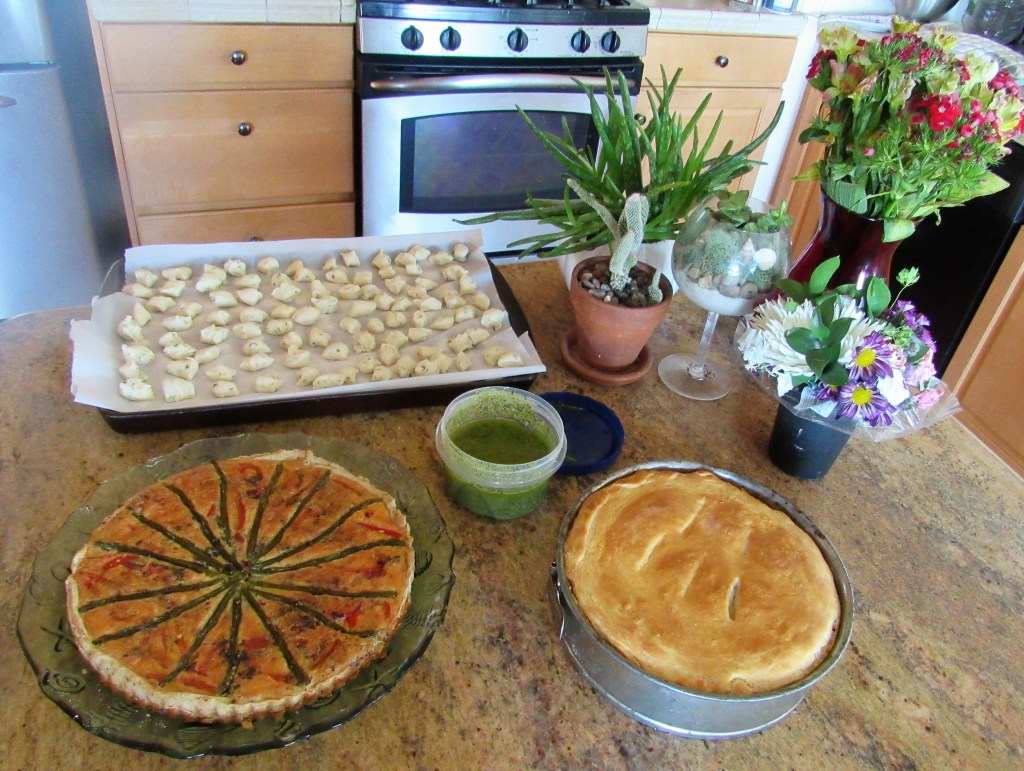
Once the tart is ready, carefully place it in the oven uncovered and let it bake for about 30-40 minutes or until the dough is golden and the eggs are done. Let the tart cool before cutting into wedges. You can eat this at any time, for breakfast, brunch, lunch or dinner or just something in between.

Stay safe, stay well and stay warm Everyone. ‘Til next time.

We All Need A Little Help From Our Friends

The outdoor hockey game turned out to be a big bust. Mother Nature decided she didn’t like outdoor hockey and started melting the ice. They boys were a little disappointed. But we girls, on the other hand, had a blast!!!!!!

Priscilla, Julia and I all love to cook and experiment with things in the kitchen. So while the boys were waiting and hoping the game would resume, we were busy playing and having fun in the kitchen. I had made my torta rustica, gnocchis with pesto and an asparagus and pepper tart (for another occasion, but I still made it all at the same time), and the plan was to make some chocolate cannoli for dessert. Channeling the Italian Nonnas. Well, silly me, I didn’t read the directions on how to make the cannolies beforehand, and didn’t realize that in order to actually make the cannoli shapes I needed cannoli tubes. None of us had ever made cannolies before, so none of us realized this small, minor detail, but we quickly learned how to improvise and made a fun, festive dessert enjoyed by all. We all put our thinking caps on and came up with a great “Plan B”. Did we want to deep fry the cannolis? Did we want to bake them? How did we want to shape them? We tried making them in different shapes. We fried a few and baked a batch. Both Priscilla and Julia pulled out their phones and started looking things up, and at last … we came up with a great plan. We all agreed we liked them baked in a muffin pan, as little cannoli cups, best. So, that was our final, delicious result. We had so many laughs coming up with and executing “Plan B”.

We made a lot of dough, but we all decided on only making a small batch and I just froze the rest for another time.

Julia made the dough and shaped it into circles that she then rolled out very thin. Priscilla was in charge of making the filling. I was the photographer for the most part.

Chocolate Cannoli Cups

The Dough

2cups flour

1/2 cup + 3 TBSP cocoa powder

1 1/2 cups sugar, divided

4 TBSP butter, at room temperature

1 cup almond rum or dry marsala

The Filling

1 cup heavy whipping cream

2/3 cup mascarpone or ricotta cheese

2/3 cup raisins, optional – We did not put raisins in this time

1 cup chopped pistachios, divided

1 cup semi sweet chocolate chips, the mini ones work best

Combine all the ingredients for the dough together, using only 7 TBSP of sugar, reserving the rest for the filling. Mix everything together until it form into a soft dough, then refrigerate for 15 minutes to allow it to set.

For the filling, start by whipping the cream to a firm peak. Then fold in the rest of the ingredients, including the rest of the sugar. Put the filling into the refrigerator until you are ready to use it.

Since we baked our cannoli cups, I preheated the oven to 425* F or 200* C then I sprayed my muffing pans with cooking spray.

Cut the dough into thirds, and use only one third at a time, keeping the rest wrapped in plastic to keep it moist until you are ready to use it. Julia was busy rolling and cutting while Priscilla and I were busy filling.

We were playing with the shapes, deciding on what worked best.

Place the thin dough rounds in the muffin pan and bake for about 12-15 minutes, or until they are crisp. Allow them to cool completely before adding the filling.

To fill the cups, add about 1 heaping tsp of filling to each cup and spread it out to evenly fill the cup. Top each cup with some chopped pistachios. Enjoy!!!!!!

When you come to my house, and particularly if you love to cook and play around in the kitchen, be prepared for me to actually put you to work. I mean, after all, that’s half the fun of it right?! 🙂 We all had so much fun just playing around in he kitchen, and the boys actually enjoyed the meal much better than they enjoyed the game (which was delayed for 8 hours in between periods so the ice could freeze over again).

Live! Love! Eat!

Stay safe, stay well, and stay warm Everyone. ‘Til next time.

Channeling the Italian Nonnas

We are having some friends over to watch the outdoor hockey game with our team the Avalanche. It started out as just the boys wanting to watch the game and we girls were going to do something on our own. But since we all love to cook, we decided on just having everyone come over. The boys are still going to watch the game and my kitchen is big enough for all of us to cook together. For whatever reason, I was in an Italian frame of mind and I was channeling the Italian nonnas or grandmothers I never had. I am not Italian, although my friend Priscilla is Italian, from Argentina. She has always said I must have Italian in me by the way I feed people. So maybe it is through osmosis. 🙂

I was busy cooking Italian delicacies all day, and I’m not through yet. I made my torta rustica Fun, Festive Christmas Lunch, some gnocchi with my leftover mashed potatoes and a lemon pesto to go with them Gnocchi with Chicken, Vegetables and Pesto, and an asparagus tart (more on that later). We girls are going to try our hands at making some chocolate canolies for dessert. Neither Priscilla or I have ever made them before. I have no idea how they are going to turn out, but I know we will have a lot of fun making them. Julia, have you ever made them before?

To borrow Wolfgang Puck’s famous phrase – Live! Love! Eat!

Stay safe, stay well and stay warm everyone. ‘Til next time.

Nature Walks – Sunshine and Snow

Colorado is known for both its sunshine and its snow, and quite often, we have both at the same time. Everyone knows about the Rocky Mountains and Colorado is famous the world over for its great skiing conditions. But most people don’t realize we are also known for our beautiful bright blue skies and lots of sunshine too. We average over 300+ days of sunshine per year, even with all the snow we get. This is exactly what I had on yesterday’s walk. The air was cool and crisp, but the skies were bright blue and the sun was shining brightly up above. It was a beautiful and perfect day.

There were lots of ducks and geese all about. The cool Canadians.

The Mallards.

Two Goldeneyes swimming side by side. The black and white one is a Common Goldeneye and the one with the brown head is a Barrow’s Goldeneye.

And the squirrel playing in the tree.

Make the most out of everyday and make everyday count.

Korean Style Pork Chops

We were having pork chops and Larry said he wanted something Asian, which meant I started looking through my recipes and I came up with one that just needed to be tried. We were both so happy with this particular recipe too. It is definitely a “do-over”. When I was looking for a recipe to cook, I had no idea clue about its background. It just sounded really good. Turns out, it was a fusion with Korean influences.

I am not that well versed with Korean foods, though I am learning about them. One of my favorite things about writing my blog is that I learn so much about so many different foods from around the world. The marinade I used for the pork chops was where the Korean influences came into play. This same marinade would also be very good on chicken, beef, salmon or ahi tuna too. It is a big bold sauce, with big bold flavors, so you have to use it for something that can handle all these big flavors.

Korean cuisine is largely based on rice, vegetables and meats (at least in the South). Ingredients and dishes vary by province. Many regional dishes have become national, and dishes that were once regional have proliferated in different variations across the country.  The Korean Royal Court once brought all of the unique regional specialties together for the royal family. Foods are regulated by Korean cultural etiquette. Meats of all kinds are used sparingly for the general population though, because they are so expensive and are a premium.

Eating in Korean, as with many traditional Asian countries, is very ceremonial. There are traditional prayers said before eating a meal and prayers said after the meal. If you feel confident in your Korean, you can say ‘jal meokkessumnida’ (잘 먹겠습니다 ) before the meal — similar to the Japanese itadakimasu, it roughly translates to ‘I will eat well’. After the meal, you can say ‘jal meogeosseumnida’ (잘 먹었습니다) to signal that you have indeed eaten well and are happy. When dining with Koreans, the motto is don’t waste your food. Only take what you can eat. Do not take more than you can eat and leave it on your plate to go to waste. It is considered rude to leave food on your plate. In Korean culture, it is respectful to clean your plate.

Korean Style Pork Chops

3-4 lbs of pork or meat of your choice

1/2 cup hoisin sauce

1/4 cup brown sugar

1/4 cup soy sauce

1 TBSP garlic

1 TBSP ginger

2 TBSP rice vinegar

1 TBSP sambal sauce or Asian chili paste

Mix everything together and thoroughly coat your meat. Let it marinade for at least 2 hours before cooking. The meat will be full of flavor and very tender.

You can grill or roast your meat. It was snowing pretty heavily when I made this, so roasted it in the oven. I didn’t feel like going out and grilling in the snow. When the meat is done, spoon some of the sauce on top of the meat and serve it over rice with green onions and cilantro. I added some sliced green onions on top of the meat as well. I also served it with some green beans with mushrooms, peppers and shallots.

Just adding the extras.

My wine choice was a smooth, but bold red zinfandel. It went very well with the bold flavors of the sauce.

‘Jal meogeosseumnida’ (잘 먹었습니다) – we ate well and we were happy.

Stay safe, stay well and stay warm Everyone. ‘Til next time.

Roasted Sweet Potato Steak Fries

Sweet potatoes and yams are more or less interchangeable to me. I know they are different, but they are close enough for me that those subtle differences don’t really matter much to me. Sweet potatoes, as mentioned in their name, tend to be sweeter than yams, whereas yams tend to be more starchy and dry Yam are firmer than sweet potatoes, which are softer. But I am not alone in using these two tuber, root vegetables as the same thing. Most people, and most stores actually, call sweet potatoes “yams”. Sweet potatoes were first referred to as yams by the African slaves who had already been calling the ‘soft’ sweet potatoes ‘yams’ because they resembled the yams in Africa. Thus, ‘soft’ sweet potatoes were referred to as ‘yams’ to distinguish them from the ‘firm’ varieties.

A true yam is a starchy edible root of the Dioscorea genus, and is generally imported to America from the Caribbean. It is rough and scaly and very low in beta carotene. Over 50% of the sweet potatoes found in the United States are grown in North Carolina. Yams are grown all over the world , although 95% are still grown in West Africa.

Whether you call them “yams” or sweet potatoes, it doesn’t really matter. All I know is both are very tasty and very nutritious. I love them both. I made some sweet potato steak fries to go along with our fried chicken and Southern Succotash that were a big hit. Some Southern Succotash They were all great Southern flavors that went together very well.

Roasted Sweet Potato Steak Fries

3 sweet potatoes, peeled and cut into thick strips

2 TBSP olive oil

1 TBSP maple syrup

1 tsp dried ginger

1 tsp cinnamon

a little fresh ground nutmeg

salt and pepper to taste

Preheat the oven to 375* F or 190* C.

Mix all the ingredients together then toss the sweet potato strips into the mixture, making sure to thoroughly coat the fries.

Spread the fries onto a baking dish in a single layer and roast for about 30 minutes. Add a little parsley on top when they are done, and enjoy them while they’re hot.

Stay safe and stay well Everyone, and for those of you in the current ice belt, stay warm too. LOTS and LOTS of layers. ‘Til next time.

Another Birthday Surprise

I love it! It’s been almost two weeks since my birthday, and I am still getting birthday surprises. This time I received a wonderful box filled with gourmet salts and peppercorns from our friends Julia and Bruce.

My birthday box contained a variety of exotic peppercorns, some Maldon sea salt flakes and fleur de sel. Fleur de sel, or flowers of salt, and sea salt are both derived from seawater and are processed by hand.  Fleur de sel are the distinctive pyramid-shaped crystals that rise to the top during the evaporation process. Salt Spring Sea Salt is made with the finest hand-harvested fleur de sel crystals and infused with locally sourced ingredients. Fleur de sel  is a salt that forms as a thin, delicate crust on the surface of seawater as it evaporates. It is now used as a finishing salt to flavor and garnish food.

Maldon is a delicate salt that is less bitter than most regular salts and it too is used as a finishing touch for more delicate foods. It is used to top vegetables, butter, caramel, or grilled meat, just before serving. The Maldon salt is taken from seawater found in estuaries in Essex County, England. Fleur de Sel is usually a light gray color because of the minerals it contains, whereas Maldon is white, like table salt.

Thank you Julia and Bruce. I can’t wait to try all of these delectable salts and peppers. That was so sweet of you both.

Baby Juneau is Growing Up So Fast

Juneau is already 10 1/2 weeks old. She has more than doubled in size since we got her. Can you believe it? She is into EVERYTHING. She has her moments where she is very angelic (mostly when she is sleeping) and then she has her wild child moments. Here are some recent pictures of how quickly she is growing up.

Being this cute all the time is very hard work and can be very tiring too.

Some Southern Succotash

Succotash is as American as it comes. It was introduced to the colonials by the Native Americans and has been served at American tables ever since. The name “succotash” comes from the native word “msickquatash” which meant a pot of simmering corn with other ingredients added. The Native Americans ate it as a meal by itself, and often added dried meats as well as the “3 sisters”, which were corn, beans and pumpkin or squash. Today, succotash is usually eaten as a side dish. It is most often made with lima beans and corn and squash.

We were having fried chicken for dinner, which I most often equate with my southern roots, and I made southern side dishes to go with it. One of those side dishes was my southern succotash. I think the Native Americans would approve of this version too.

This colorful version of succotash was loaded with all kinds of good things. Of course I used corn and lima beans, but instead of squash, I added red and orange bell peppers, a jalapeno, red onions, garlic, oregano, thyme, marjoram and of course, salt & pepper.

Southern Succotash

1-2 cups corn

1-2 cups lima beans

1/4 red onion, diced fine

1/2 each red pepper and orange bell pepper, diced fine

1 jalapeno, diced fine

salt & pepper to taste

1 TBSP garlic

1 tsp dried oregano

1 tsp dried thyme

1 tsp dried marjoram

butter and olive oil for cooking

I started off by par cooking the lima beans in boiling water, cooking them for about 5-7 minutes. Then I sauteed everything together in a combination of both olive oil and butter until the vegetables were tender but still had a little crispiness left to them.

Once everything was done, it was time to enjoy some good ol’ southern comfort food.

Stay safe and stay well Everyone. ‘Til next time.

Pasta Carbonara with Ham and Vegetables

I still have some ham that I am using up from the last time I cooked a big bone-in ham. I hadn’t made a pasta carbonara in quite awhile, so I decided it was time to make some for dinner.

Carbonara sauce originates from Rome, or Bologna to be more exact. A 96-year old chef named Renato Gualandi is the creator of this creamy sauce made with cream, eggs and hard cheese, such as Pecorino or Parmigiano Reggiano, or a combination of both, black pepper and basil. It is usually made with cured pork, bacon or ham. Often times it is made with peas too, but this time I added mushrooms and asparagus instead. Gualandi made his trademark dish in Italy, in 1944, using only ingredients that were available in town, mostly coming from army rations of dried foods and a little meat. Gualandi admitted he wanted to create something new, that could bring together Italian and Anglo-Saxon cuisine; with a bit of help from Slovenian culinary tradition (he said to have been inspired by a soup popular in Isdria, callled “spikrofi”), he concocted a sauce for spaghetti made of bacon, cream, processed cheese and dried egg yolk, topped with a sprinkle of freshly ground pepper. Gualandi’s velvety signature dish became an overnight sensation that is still enjoyed around the world today.

To go with our pasta carbonara, I heated up some ciabiatta and made an olive oil and balsamic vinegar dip, using some of my gourmet oil and vinegar I received as a Christmas present My Fun Christmas Loot and of course, a smooth, velvety chardonnay to complete the meal. Delicious!

Carbonara Sauce

6 oz pancetta, bacon or ham, chopped

2 cups cream

2 large egg yolks

1 1/2 cups either Parmigiano-Reggiano or Pecorino cheese, or a combination of both

1-2 tsp black pepper

4 TBSP basil, chiffonade

I also used mushrooms and asparagus, which I cooked first in olive oil, along with the ham. I par cooked the asparagus first, then added it to the mushrooms and ham.

Once the ham, asparagus and mushrooms were cooked, I mixed the egg yolks and cream together and added it to the ham mixture.

Mix thoroughly then add the cheese and black pepper. Cook for just about 1-3 minutes, stirring constantly. You do not want to scramble the eggs. You are really only cooking the sauce long enough for the cheese to kind of melt a bit.

Add this creamy sauce over some cooked angel hair pasta and top it with the basil. I like it nice and peppery, so I added more pepper as a topping as well. This smooth, velvety sauce will literally just melt in your mouth. !Buon Appetito e Mangia!

Stay safe and stay well Everyone. ‘Til next time.