I have created this site to help people have fun in the kitchen. I write about enjoying life both in and out of my kitchen. Life is short! Make the most of it and enjoy!
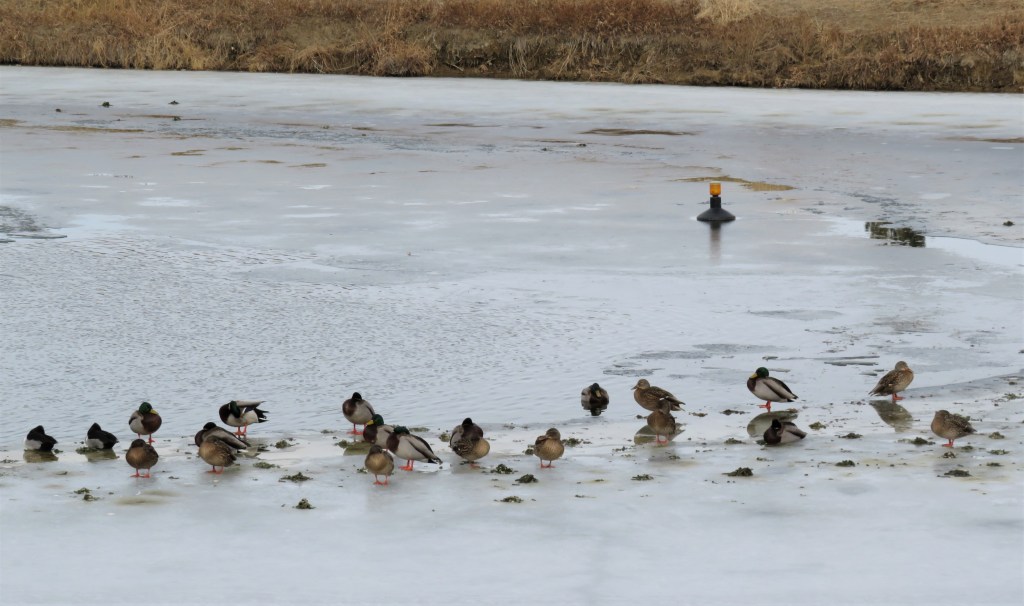
Our lakes have been pretty quiet lately. Our lakes are partially frozen over at the moment and that may have something to do with our limited amount of “visitors”. There are a few ducks and gees around though. Some have ventured out into the colder waters while others have decided to host their duck party on the thin ice patches.
Who knows? Maybe they are telling us we all just need to chill out.
A fricassee is a stew with fried pieces of meat that has been browned in butter and is cooked in a white sauce. A fricassee is a rustic meal that is enjoyed all over Europe and beyond. This particular version is a Hungarian version, made popular from the Hungarian Magyars.
The Magyars were historically nomadic travelers, who watched over their herds on the plains. Meats were their primary food sources. Beef, particularly dried beef, was a staple for the Magyars. It was cooked in a large cast-iron kettle known as a bogracs and that is how they made their goulashes and tarhonya or egg barley. Beef is the number one meat in traditional Hungarian dishes, closely followed by pork. Chicken, lamb and veal are eaten too, though lamb and veal are considered more of a delicacy and are usually only eaten around Easter. Chicken is usually served for Sunday dinners.
Pork was what was first in line in our latest meat rotation, and you all know how much I love to try new things and experiment with new, fun recipes. So I rummaged through my culinary library and found a Hungarian recipe for a pork fricassee, or a recipe for Becsinalt Borju. That is a mouth full. This is one instance where English is much better than when in it is spoken in its native tongue. 🙂
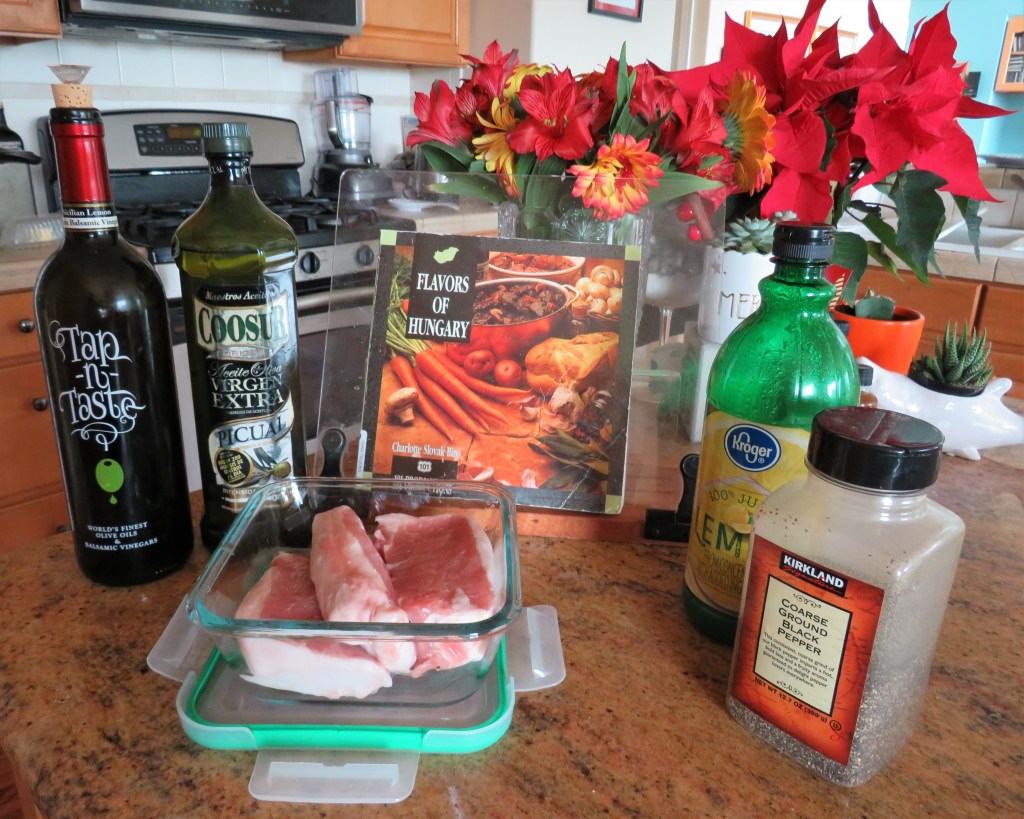
Of course, I changed things around a bit and personalized the dish. Would you really expect anything less? The original recipe calls for veal, but we never eat veal, so pork it was. That was one change. I also marinated my pork with lemon juice, olive oil, lemon balsamic vinegar and black pepper first, which made it very tender and flavorful. I marinated the pork for about 4 hours before cooking it.
As I mentioned, I marinated my pork first, then sliced into thick slices before cooking it.
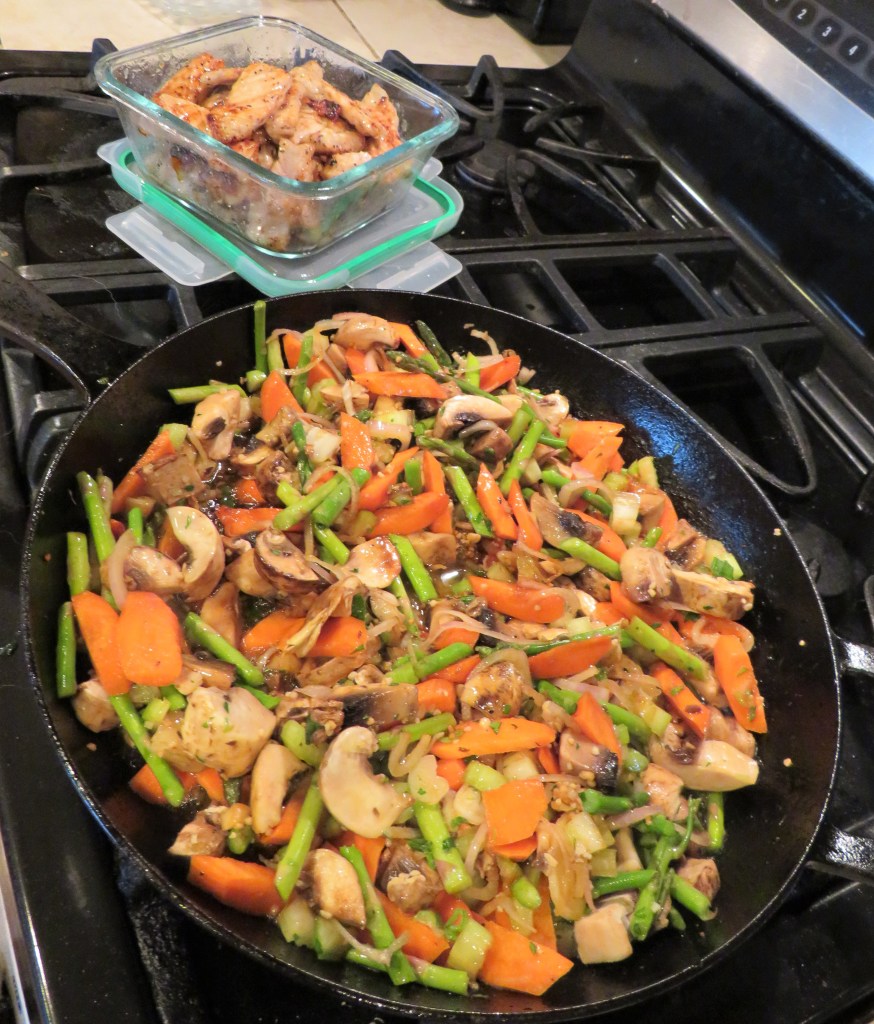
Get a large skillet very hot and add the butter, then add the pork with the marinade and cook until it is thoroughly cooked, and just lightly browned around the edges.
Once the pork is cooked remove it from the skillet and set aside, then add olive oil to the mix and cook all the vegetables except for the green onions and parsley, for about 5-7 minutes.
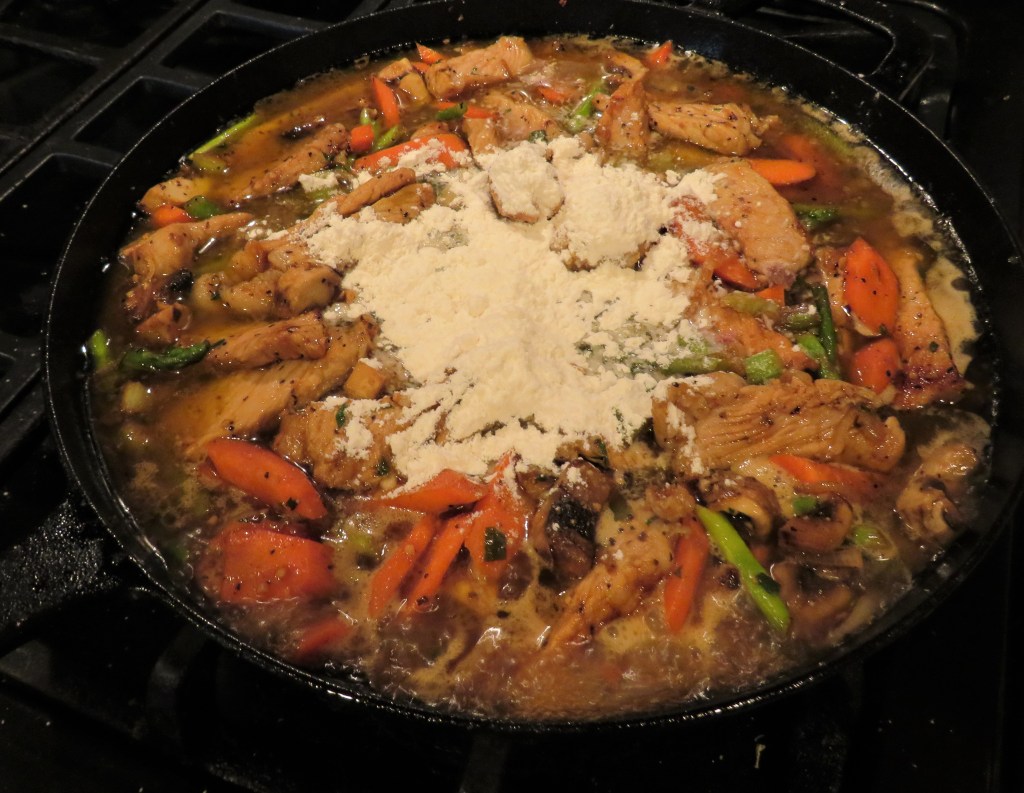
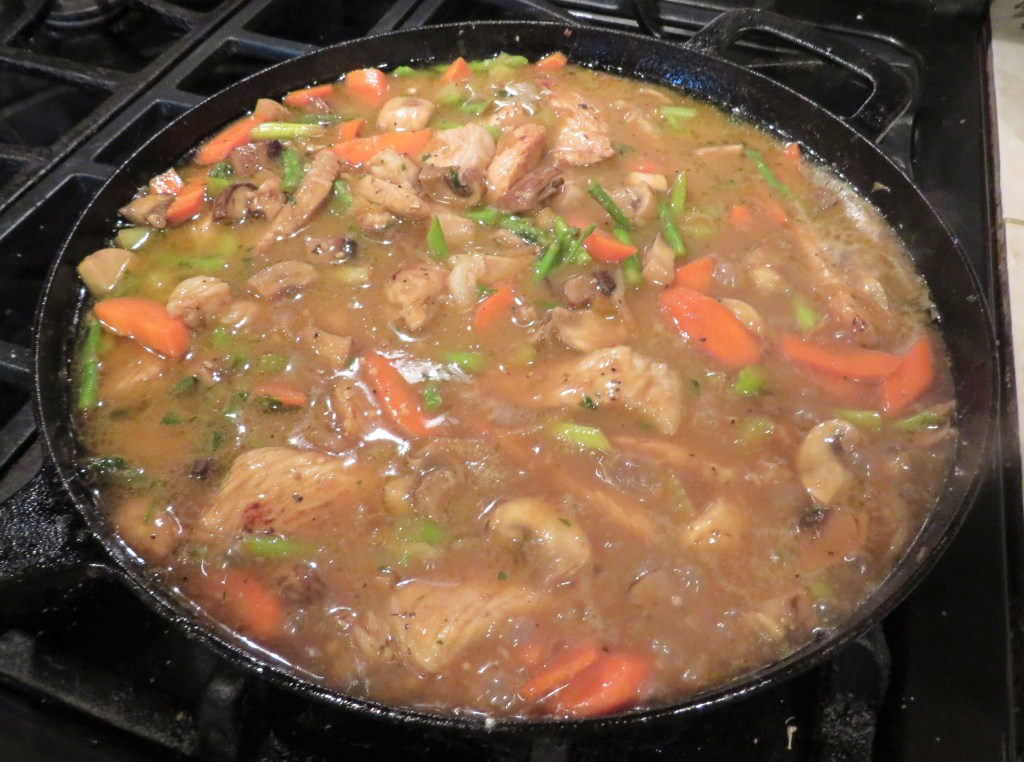
Add the broth, flour and seasonings and re-add the pork and combine together well. Bring to a boil, then cover and reduce the heat to a simmer. Continue to cook for about 40 minutes, stirring occasionally.
Add about half the green onions and parsley and the lemon juice right before serving and mix together thoroughly. Add the remainder of the green onions and parsley right before serving. You can serve this over either rice, mashed or boiled potatoes or even pasta. I served it over rice this time, with some warmed ciabiatta bread and a crisp, citrusy chardonnay on the side. Finom, or delicious.
Stay warm, stay safe and stay well Everyone. ‘Til next time.
We took Juneau to the vet this morning and she is now CONE FREE! Her stitches were all removed and the vet says she is looking great. She is free to be her wild self again. Poor Vinnie.
This is the Juni Bug as a very lady-like conehead.
And now, she is cone free and stitch free. She is once again ready to terrorize her brothers and sister, as well as the rest of the world.
Why mom? Why did you have to set her free? Poor Vinnie.
I love Mexican food. I grew up with great Mexican food in Southern California. I love to eat it and I love to make it too. One day, quite a few years ago, I was talking to someone and they asked me what my favorite local Mexican restaurant was. My response was “my kitchen”. They quickly asked where that was, thinking it was an actual restaurant, and we all laughed when I said, “No, I mean my actual kitchen at home”. I thought they were going to invite themselves over for dinner that night.
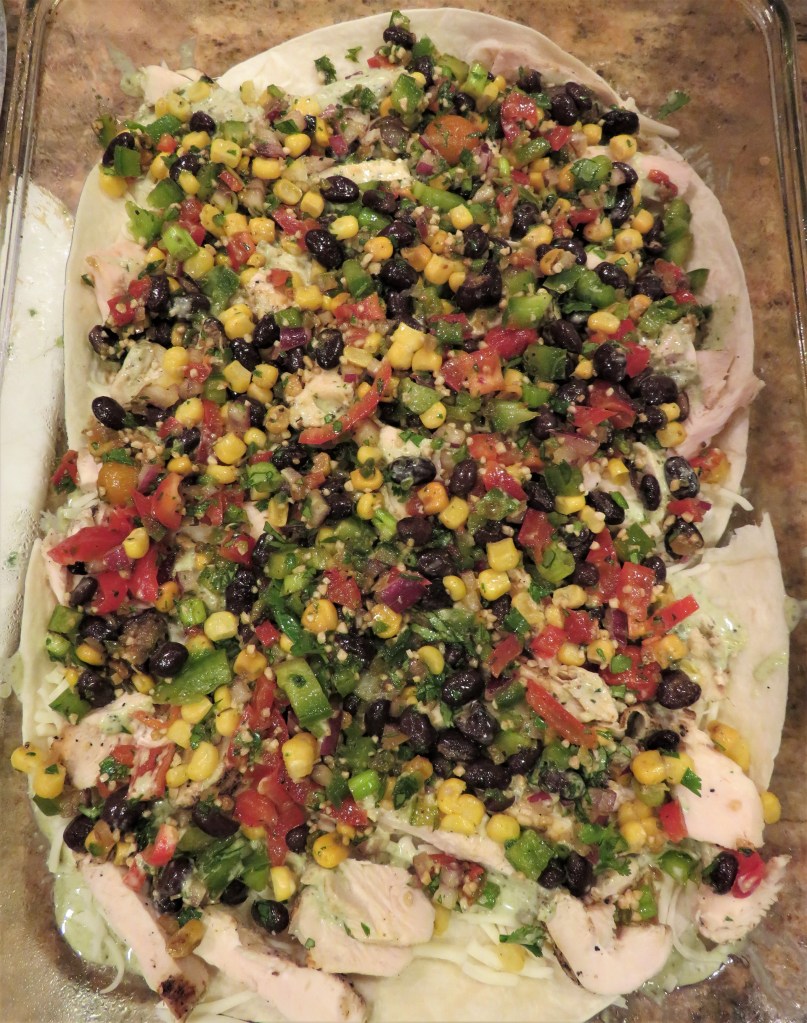
Many moons ago, back in my restaurant and catering days, I prided myself and my staff for doing our best to make different ethnic foods as authentic as we could. I still do that today. I love all kinds of ethnic foods, and when I make them myself, which I do often, I want to recreate them either as I originally enjoyed them, or make them even better if I can. My latest authentic Mexican recreation was some loaded chicken enchiladas with a creamy tomatillo sauce. Originally, they were just going to be simple enchiladas that were going to use up my leftovers, but then they turned into oh so much more. I did still get to use up a lot of my leftovers though. That always makes me happy. 🙂
It really depends on my mood when I make my enchiladas. Sometimes I roll my enchiladas and sometimes I layer them. This time I decided to layer them. I served them with a spinach side salad topped with a cilantro-lime vinaigrette.
I thought I had everything I needed for my enchiladas, and for the most part, I did. But when it came time for the sauce, I realized, I did not have tomatillo sauce. No worries. I improvised, something I have become quite a pro at. I did have a small bottle of a tomatillo topping, but it was not nearly enough for what I needed, so I “doctored it up” and expanded on it.
Larry had made some tequila lime chicken the other day (though he NEVER uses enough flavorings when he cooks) and that was the basis for my enchiladas. I also has some Cubano black beans with corn and jalapenos that I added to the mix as well, along with some additional peppers, garlic, cilantro and red and green onions.
MakeshiftCreamy Tomatillo Sauce
1 bottle of tomatillo marinade
1-2 TBPS spinach pesto or regular pesto
3/4 cup heavy whipping cream
Combine everything together well.
Preheat the oven to 350* F or 175* C.
Spray cooking spray into a 9×13 baking dish.
Add a layer of the creamy tomatillo sauce (or regular tomatilla suace) on the bottom of the pan, followed by a layer of tortillas. I used the large flour tortillas, but you can also use corn if your prefer. Any size will do as long as you cover the whole bottom of the pan. Then start the layering process – cheese, chicken, bean mixture, tortillas, sauce and repeat until the pan is full.
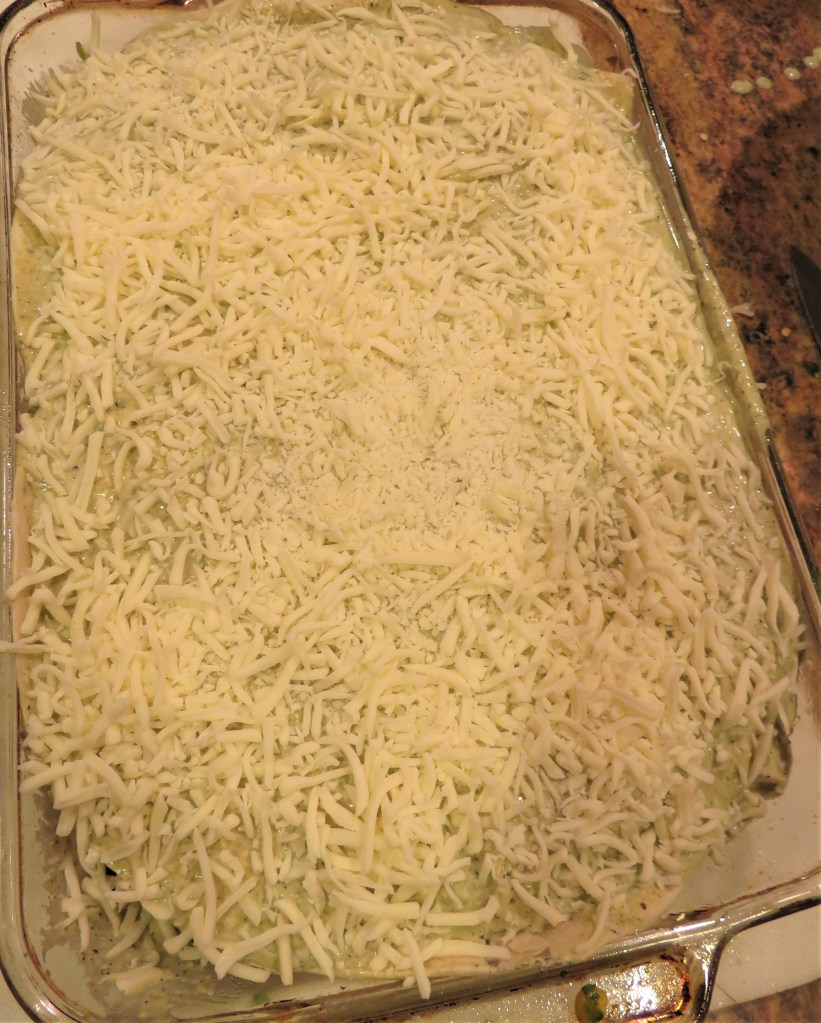
When the pan is full, add another layer of sauce or salsa on top as well as another layer of cheese. I used Mozzarella because that is what I had, but you can use whatever cheese you like. I would recommend a white cheese though because I think it goes better with the chicken and tomatillo sauce.
Cover with aluminum foil and bake for about 1 hour or until the internal temperature reaches about 165* F. Then uncover and continue to cook until the cheese starts to form a light crust, or about 10-15 minutes. Before serving, top it with some tomatoes, green onions, and/or olives, or any combination thereof as you like.
This is a very rich dish, so I served it with a light spinach salad on the side. I topped it with a lime-cilantro vinaigrette. Normally I would serve this with a margarita on the side, but since it was cold, and margaritas seem more of a summer or warm weather drink for me, I chose a light, crispy, citrusy chardonnay instead.
Who says you can’t dress up leftovers? Play with your food. Make it fun. I always do. 🙂
Stay warm, stay safe and stay healthy. ‘Til next time.
We had a very mild fall and winter up until New Year’s Eve, then … BAM! We have already had more snow in these first 10 days of January than we have had in the last two Januaries. The good thing about snow here in Colorado though is that it doesn’t stay long at all. Snow today, gone tomorrow. That’s our norm. When we have cold snowy days, it is always the perfect weather for a nice warm bowl of soup to help take the chill off.
I told you that for New Year’s Day we had black-eyed pea salad Black-Eyed Pea Salad and I had made a ham for New Year’s Eve. Due to unforeseen circumstances though, we did not host our planned New Year’s Eve get together, which means we had a lot of both leftover. So I did what comes naturally to me, and I reinvented them. I turned them into soup.
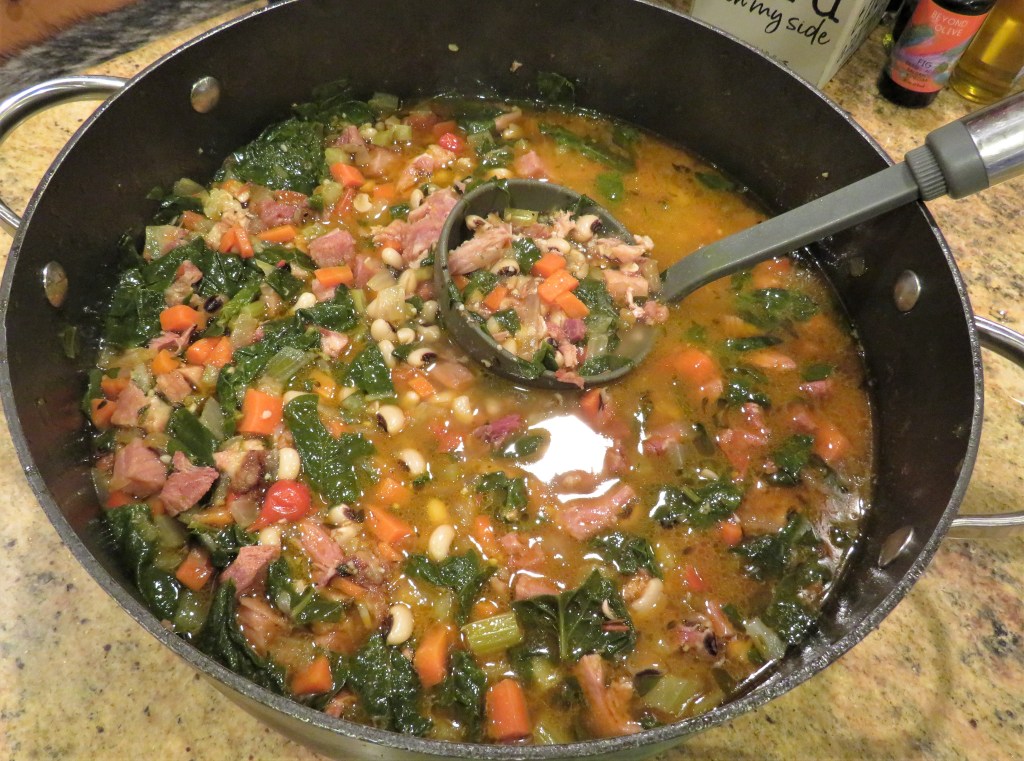
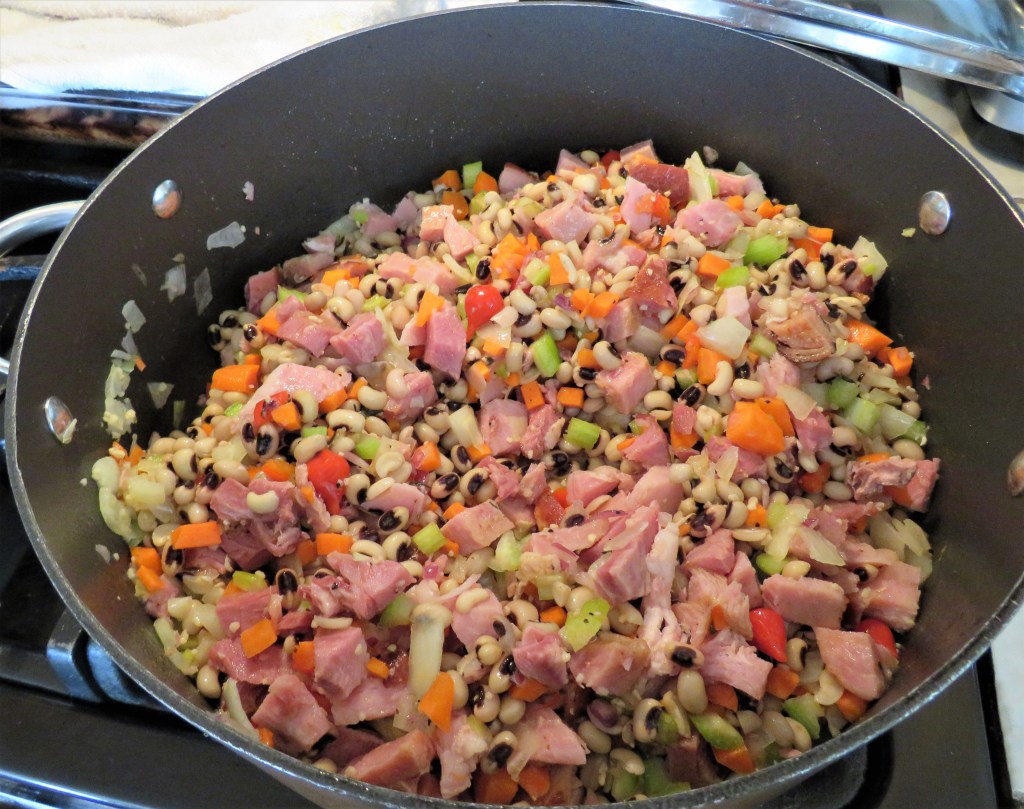
I like making rustic style foods. When I make soups, I like them to be full of “stuff”, but then this is actually true with just about everything I make. I like “stuff in my stuff”. This rustic ham and bean soup was definitely full of stuff too. If you are not a ham person, you can make this same soup with either meatballs or chicken too.
Rustic Ham and Bean Soup
You can use any kinds of beans, but since I had my leftover black-eyed salad, I used black-eyed peas. I used what I had already made ( used the rest of the salad) and then of course, added more of everything. Larry says I have a gift of taking leftovers and recreating them to make even more leftovers than what I started with. This is very true. And I do believe it is a gift. No one will ever starve at my house. 🙂
2- lbs cooked ham, cubed
1 onion, diced
1-2 large carrots, peeled and diced
2 large celery stalks, diced
2-3 bay leaves
1-2 TBSP garlic
2 cups dried beans (I used black-eyed peas) or 1 can of beans, drained and rinsed
6 cups broth, either vegetable, ham or chicken broth (I used a combination of vegetable broth and ham broth I made from the ham bone)
3-4 medium tomatoes or 5-6 smaller tomatoes, diced
3-4 cups fresh baby spinach, stems removed and chopped
salt & pepper to taste
5-6 sprigs fresh thyme
1 tsp cayenne pepper or to taste
olive oil for cooking
Parmigiano or mozzarella cheese for topping, optional
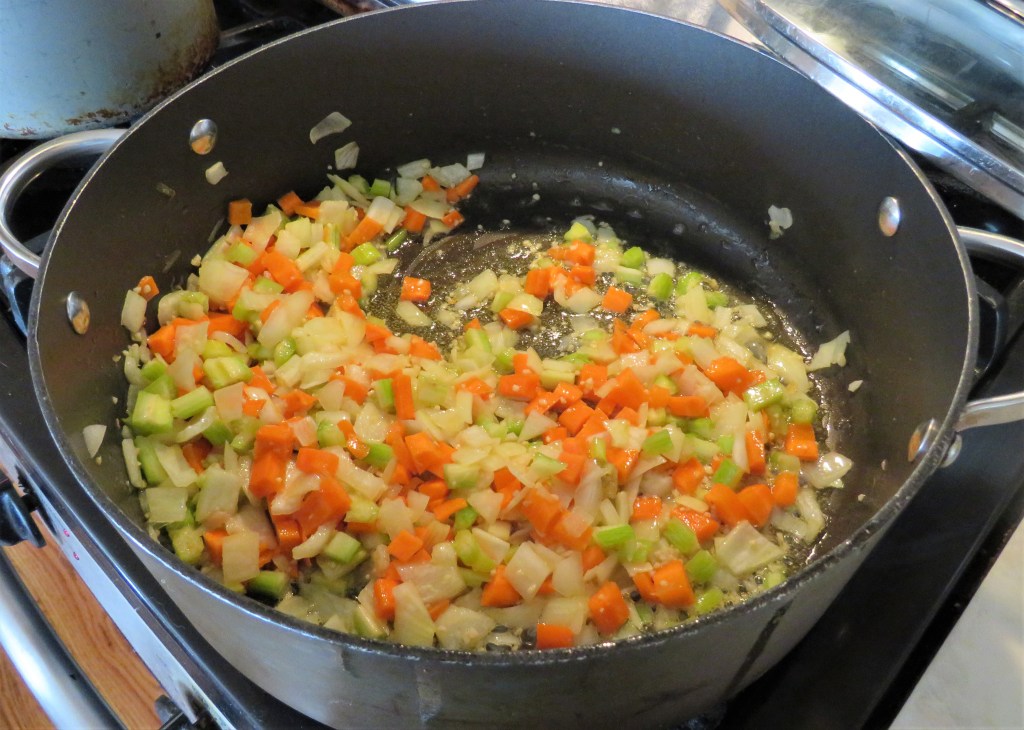
Add the olive oil to a large soup pot and get it nice and hot. Add the carrots, celery, bay leaves, garlic and onions to the oil and saute for about 5-7 minutes, or until tender and the onions are translucent.
Add the ham and black-eyed peas and mix together.
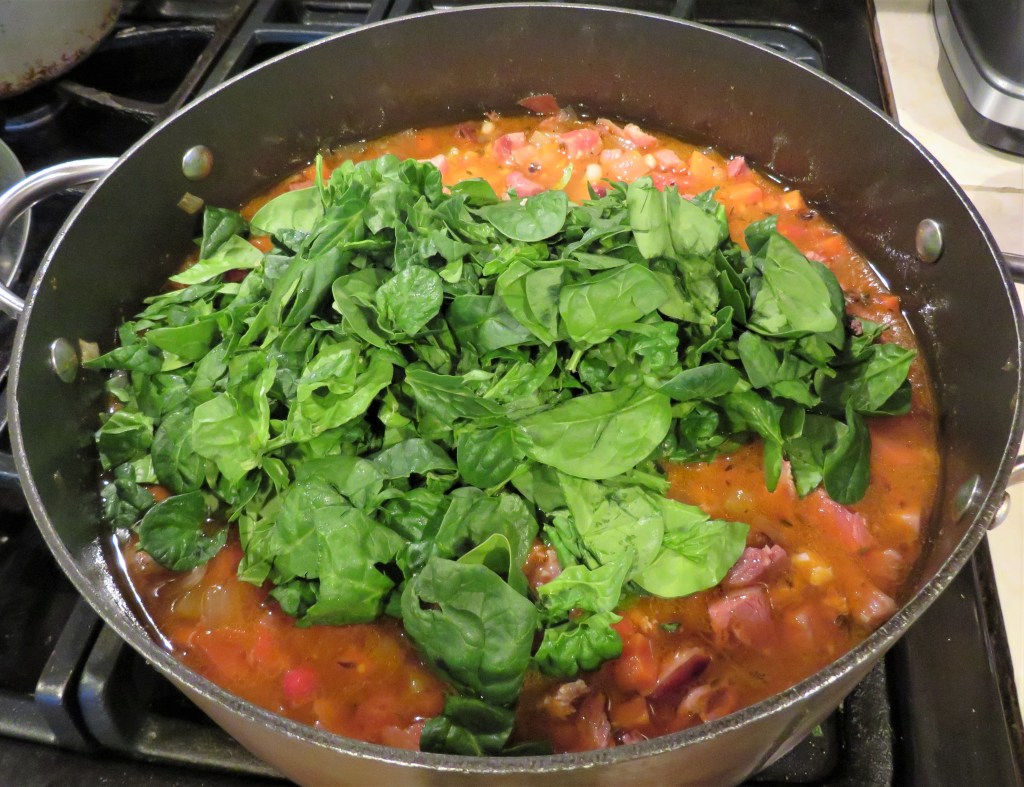
Then add the broth, tomatoes and seasonings. Cover and bring to a boil, then reduce the heat to a simmer and continue to cook for about 1 1/2 hours, stirring occasionally.
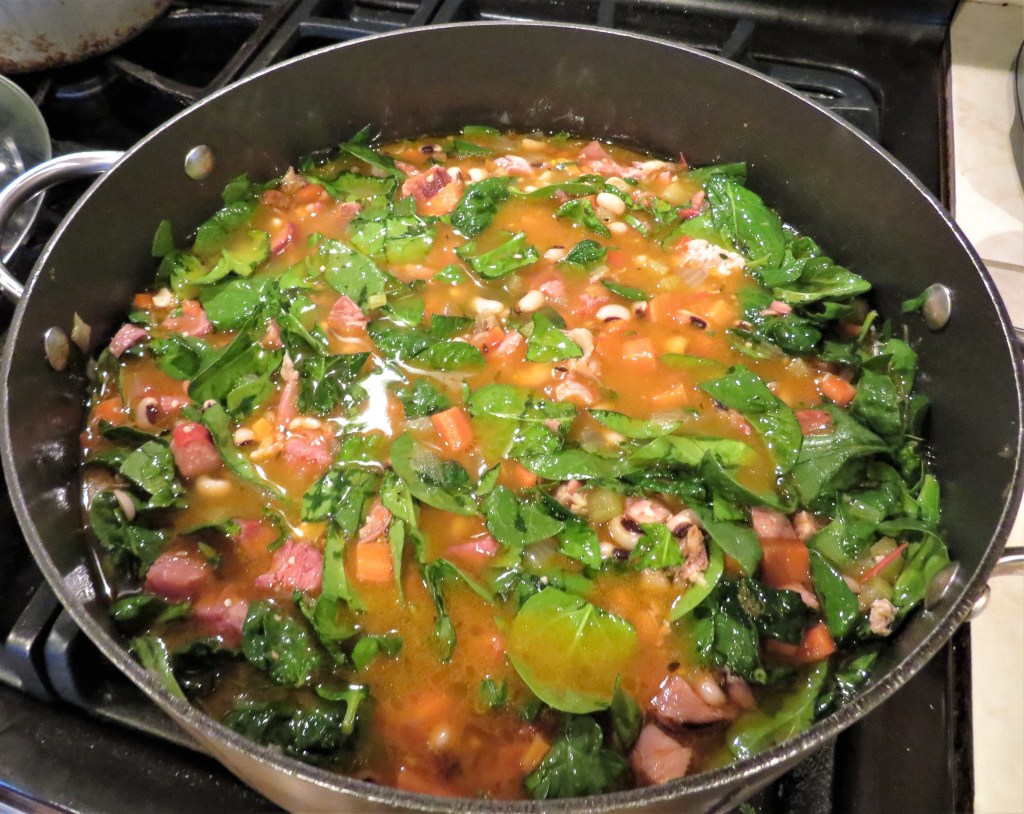
Add the spinach at the end. Mix it thoroughly into the soup mix, then serve. You can top the soup with either Parmigiano or mozzarella cheese if you like.
We had a delicious meal of soup and the rest of the New year’s pretzel buns Pretzel Buns to warm us up on a cold and snowy night. I served it with a rich, buttery chardonnay on the side.
Stay warm, stay safe and stay healthy. ‘Til next time.
It’s Sunday, which means more goodies for the church coffee cart. Every Sunday I offer something completely different. Sometimes I buy the goodies I serve, but I try to make most everything if I can. The way I look at it, it’s a good way to get to try a lot of new recipes without having a bunch of sweets around for me to eat. This time, one of the selections I made was a delicious batch of cherry Linzer squares that I served along with some mini cinnamon rolls and more of my black chocolate & peppermint cake Black Chocolate and Peppermint Cake. One of the ladies commented that I must really like cherries since I make things that feature cherries quite often. I do. I LOVE cherries. 🙂
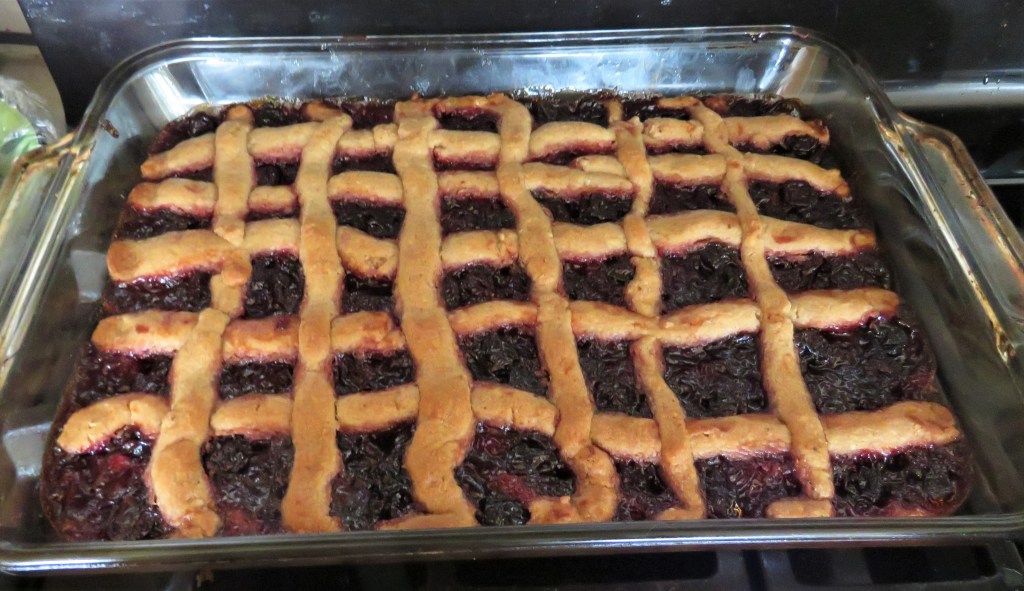
The Linzer torte is one of the oldest cakes in the world and has been around since 1696. The Linzer torte is a traditional Austrian pastry, that is a form of shortcake topped with fruit preserves and sliced nuts and is decorated with a latticed design on top. The recipe was created by using nuts, mostly almonds or hazelnuts, in the crust and the topping because at the time, nuts were more readily available than wheat or flour.
The name Linzer simply means it comes from the town of Linz, Austria. These tortes are usually singled layered tortes or pies. Linzer tortes are a holiday treat in the Austrian, Hungarian, Swiss, German, and Tirolean traditions, often eaten at Christmas. Linzer tortes came to America during the 1850’s as part of the Austrian and German traditions that were brought with the immigrants who came over to the United States at that time.
I have made made many versions of Linzer tarts or tortes or cookies over the years. I love them. They are so tasty and festive. This time, I made them as bite-sized bars which are easier to serve when serving a lot of people. Usually I make them with raspberries, but this time I used cherries instead. Both are favorites of mine.
Cherry Linzer Squares
Preheat the oven to 350* F or 175* C.
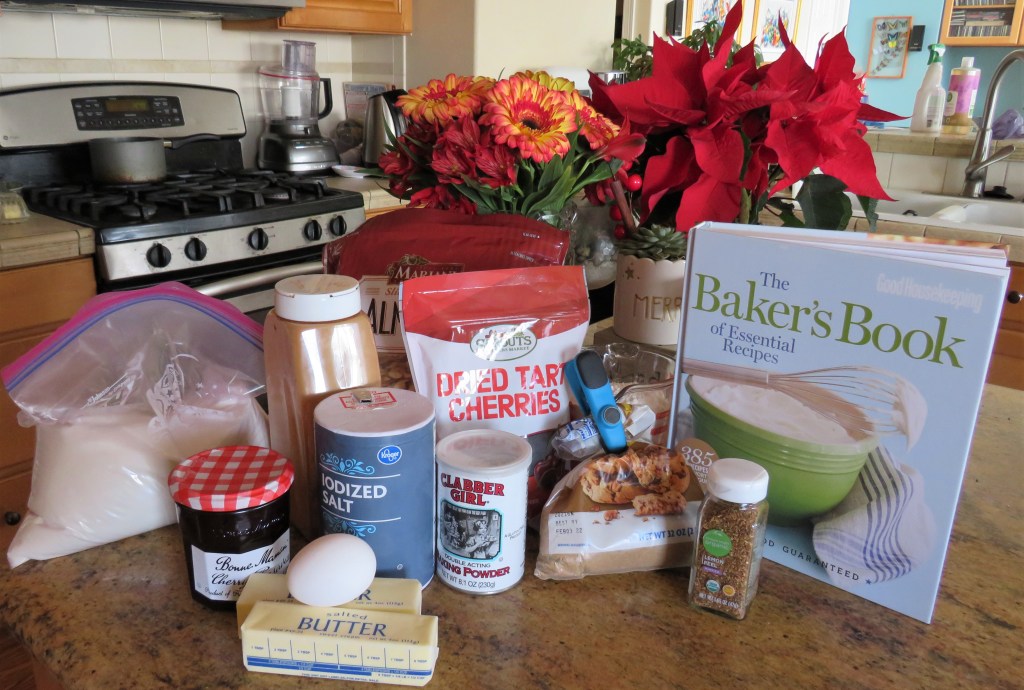
1/2 cup dried tart cherries
2 TBSP water
1 3/4 cups flour
1 tsp cinnamon
1/2 tsp baking powder
1/4 tsp salt
1 cup almonds or hazelnuts
1/2 cup sugar
3/4 cup or 1 1/2 sticks softened butter
1/2 cup brown sugar, firmly packed
1/2 tsp lemon peel
1 egg
1 12-oz jar cherry jam or preserves
powdered sugar for dusting
Add the water to the cherries and place in the microwave to cook on high for 1 minute. Then let sit for a few minutes before using.
Combine the flour, cinnamon, nuts, sugars and lemon peel in a food processor and blend until the nuts are finely ground and it resembles a fine sand.
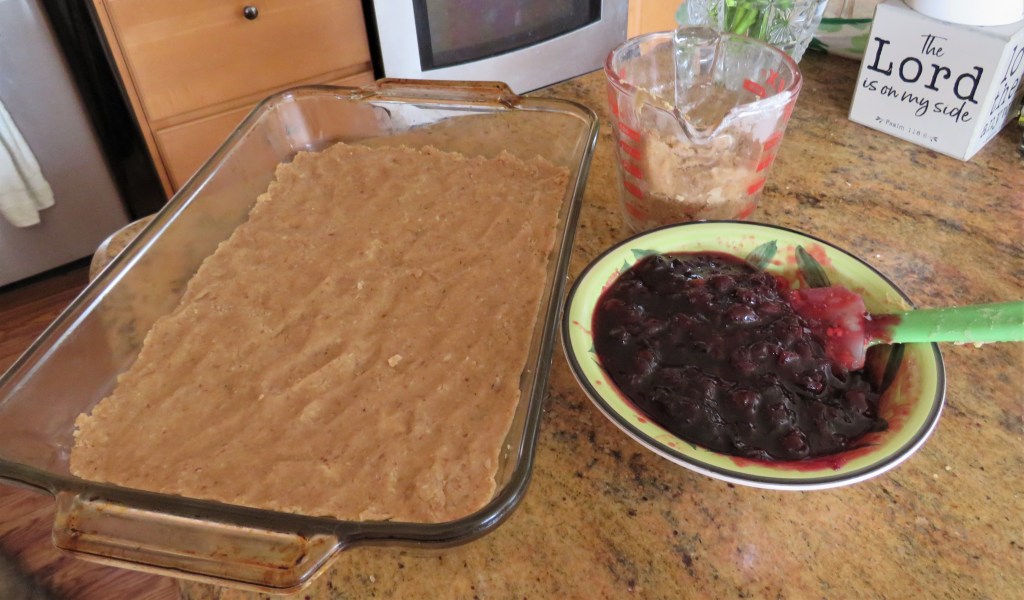
Add the egg and the butter and blend again until it all forms together as a dough. Divide the dough into two. Firmly press about 2/3 of the dough into a 9×13 baking pan to completely layer the bottom of the pan.
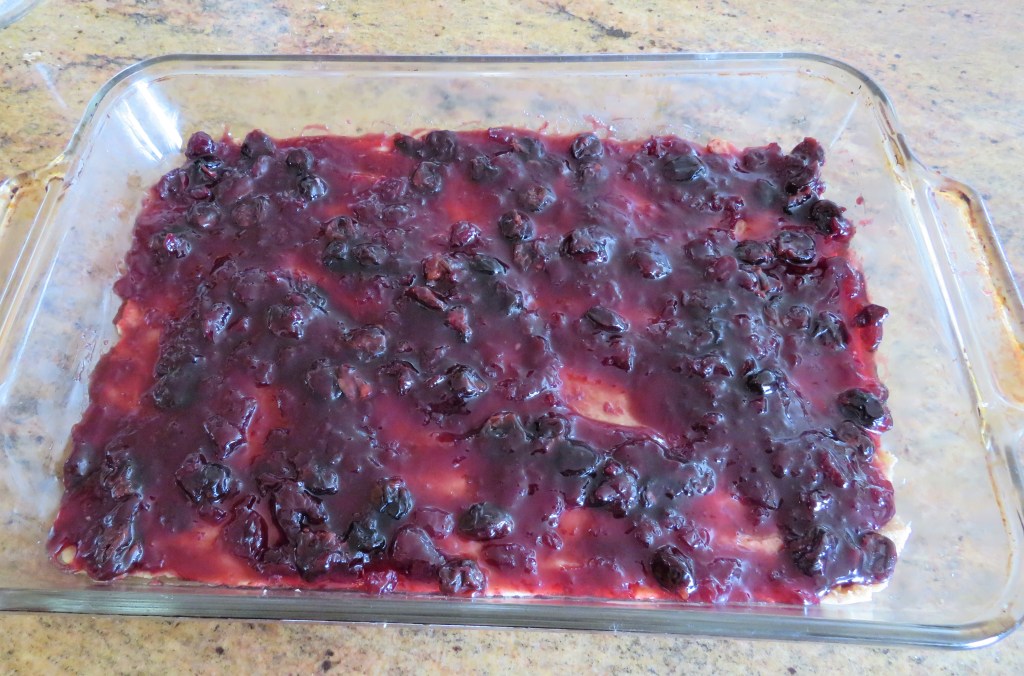
Mix the cherries with the cherry jam and spread evenly over the crust layer on the bottom.
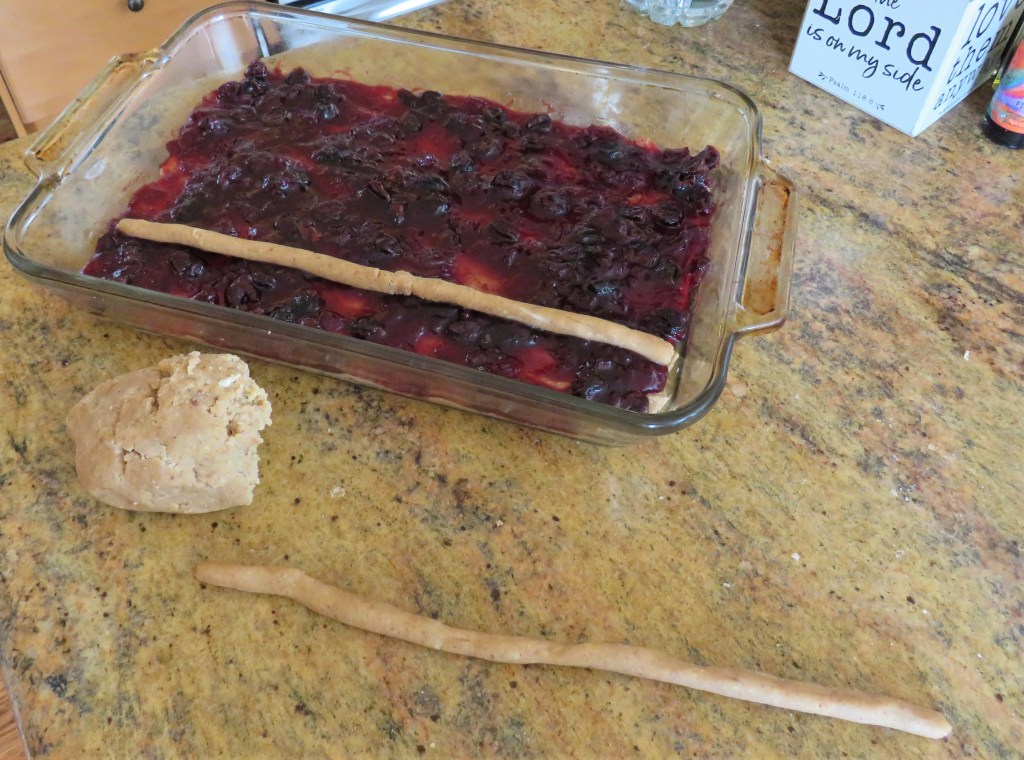
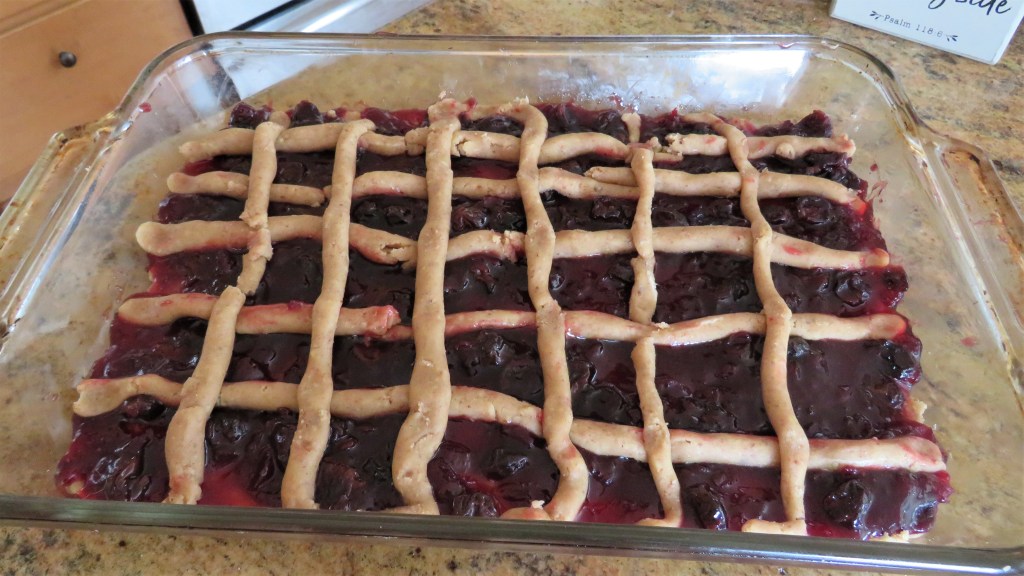
With he remaining dough break off small balls of the dough and gently roll them out into long ropes. Add the dough ropes to the top of the fruit preserves in a lattice design.
Bake for about 35 minutes or until the dough rope are lightly browned.
Allow the bars to cool then slice and allow to cool completely again before dusting with powdered sugar.
Whether you make these as a tart or a torte or as cookies or as a bar, with either cherries or raspberries, or another fruit of your choice, these are going to be a bit hit with everyone. Mine all disappeared this morning. There were none left to bring home. I take this a s a very good indicator that they were enjoyed by all.
Enjoy your days and make the most out of everything that you do. Stay safe and stay well. ‘Til next time.
Andalusia is a province on the Iberian Peninsula that occupies mostly the Southern tips of Spain, Portugal, as well as some parts of Southern France, Andorra and Gibraltar, which is actually British though located at the tip of Southern Spain. The Iberian Peninsula is the westernmost part of Eurasia. This area has been inhabited by humans for at least 1.2 million years, so it has a very rich and diverse culture, from many lands and many people. And it still flourishes today.
Life on the Iberian Peninsula, and especially the Andalusian areas, are heavily influenced from the early Romans and Greeks, the Spanish and Portuguese, as well as the Muslims of North Africa. These multi-cultural influences are found in everything from their architecture to their music and to their foods. I find all of that truly fascinating, since I love history and learning new languages and learning about different cultures, but I especially love these influences on all of the foods of the area. I do love food, just in case you hadn’t noticed. 🙂
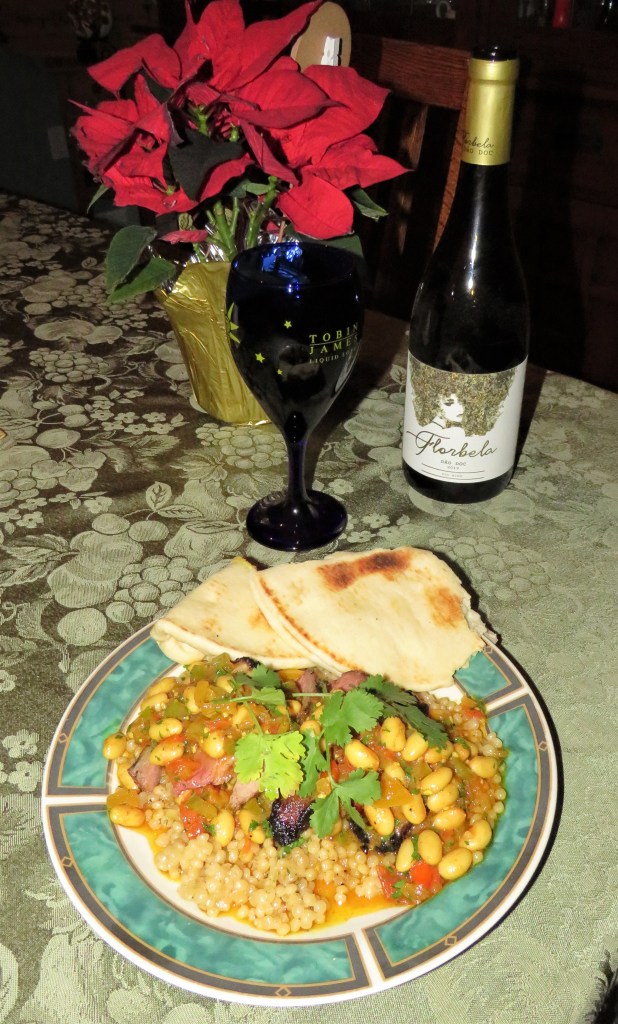
I love all foods, from most parts of the world, but one of my favorites types or styles of food is Mediterranean food. It is also one of the healthiest diets around as well. When I last cooked lamb An Indian Curried Lamb I only cooked half of the lamb. It was time to cook the rest of it. Since I prepared it Indian style last time, this time I chose to prepare it differently, and made it Andalusian style. The recipe I chose, and semi-followed, goes back about 700 years, getting its flavors from both the Moors and the Spanish inhabitants of the area. I’d say this recipe has aged very well and has stood the test of the times. It was delicious and full of different and flavorful layers of goodness.
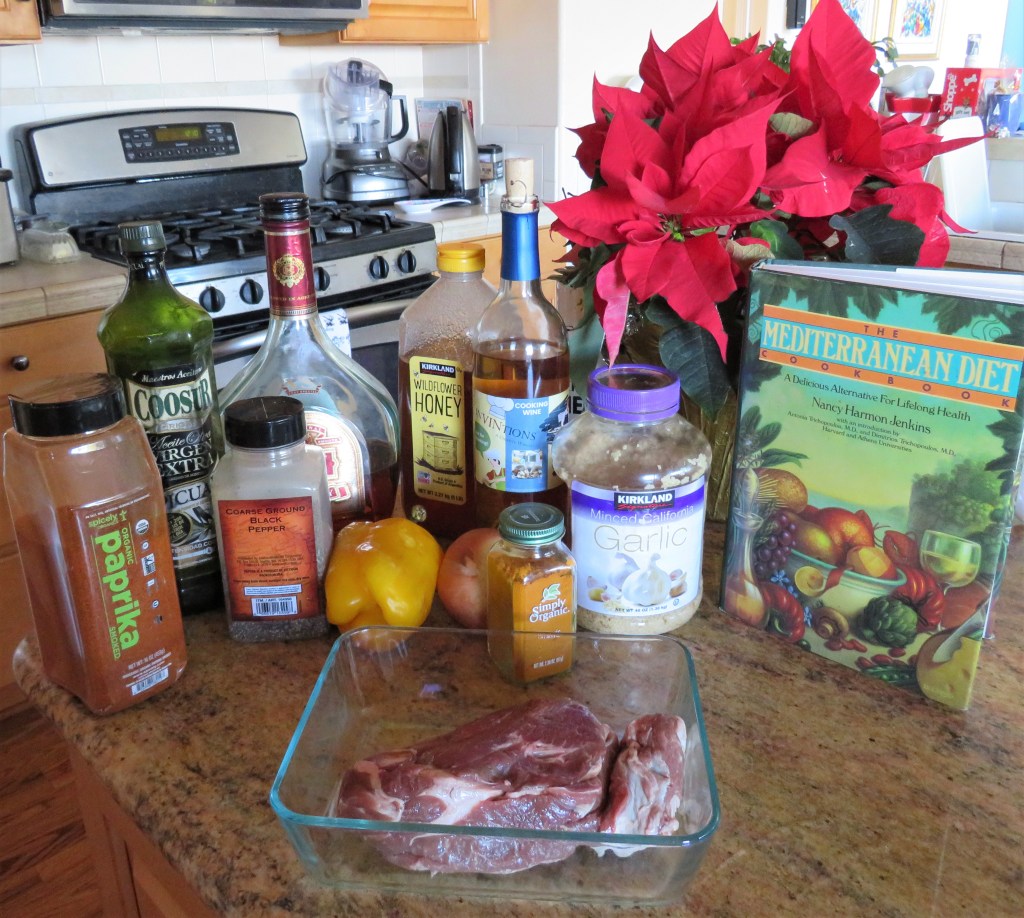
Andalusian Lamb
5 lbs lamb (I used a roast, but the recipe calls for shanks)
olive oil
2 onions, diced fine
1/2 yellow bell pepper, 1/2 green bell pepper, diced fine
2 TBSP garlic
1 1/2 tsp either saffron threads dissolved in water, or dried saffron or turmeric – I used the turmeric
1 TBSP paprika
1 1/3 cup dry white wine
1/4 cup brandy
salt & pepper to taste
4 tomatoes, diced
1 can cannellini or white beans, drained and rinsed
1 TBSP chopped fresh cilantro
I marinated the lamb in the sauce and then grilled it, but you can also slow cook it in a Dutch oven too. For the sauce, combine the brandy, wine, turmeric and paprika together. Add the lamb and marinate for at least 3-4 hours before cooking. This made the lamb very tender and full of flavor. If you prefer, especially if you are using shanks instead of a roast, you can skip the marinating portion and cook everything together.
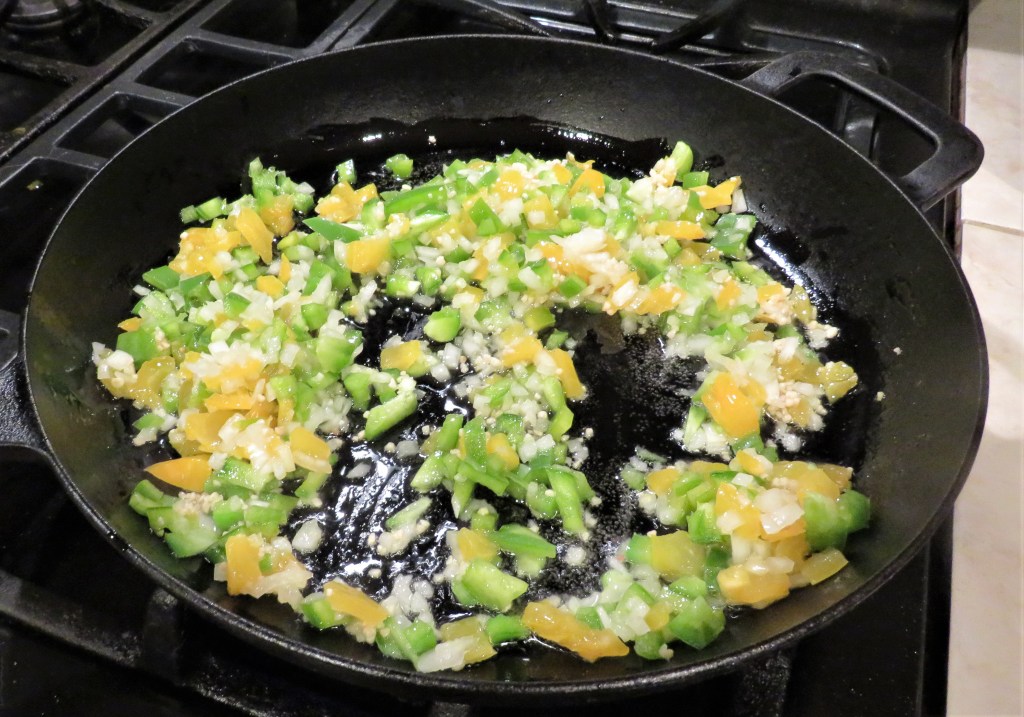
Saute the onions and peppers together in the olive oil for about 5-7 minutes, or until the onions are translucent and they are soft.
Add the tomatoes and the marinade (more of my own additions) and the salt & pepper. Combine thoroughly, cover and bring to a boil, then reduce the heat and continue to cook for about 30 minutes, stirring frequently.
Add the beans and the cilantro around the last 5-7 minutes of the cooking process.
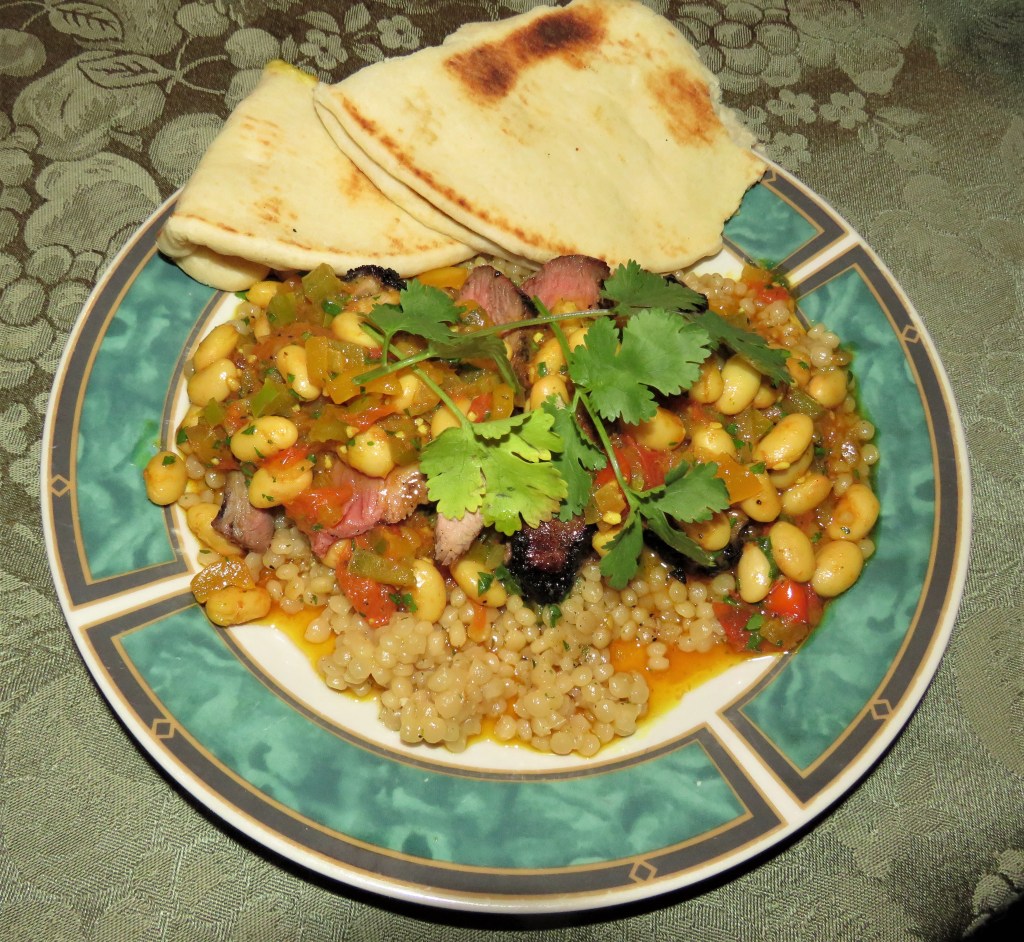
When everything was done, I served it all over some pearled couscous. I layered it all, like I usually do, with the couscous first, a little sauce next, then the grilled lamb, and then topped it all with more sauce. To accompany the meal and make it complete, I served it with some warmed pita bread and a smooth velvety Portuguese red wine. !Delicioso!
Explore the world and travel to far off exotic lands, even if only through the foods we eat. Life is short; live life to the fullest with everything you do. Stay safe and stay well. ‘Til next time.
If you have ever worked in restaurants, you would know that there are always little tricks of the trade to ensure the food is full of flavor. You would also know that “waste not want not” is a motto that is firmly adhered to in every restaurant, particularly all the good ones. So how can you get the most bang for your buck while bringing out the best flavors too? One simple little trick is to make a fond from the meat leftovers in the pan that naturally occur when browning meats.
Fond is the delicious caramelized bits of meat found on the bottom of the pan or skillet after browning or searing meats. One of the best ways to use this fond is to add a liquid broth or wine to deglaze the pan. Juices are also used. Usually you want something with some acidity, that’s why both wine and lemon juice are so prominently used for this purpose. The fond, combined with the liquids and spices are the basis for most sauces that are used to accompany meats.
What makes the fond so tasty? It is a chemical reaction known as the Maillard reaction, named after the French chemist who first described this reaction over 100 years ago. The Maillard reaction occurs when the amino acids in the meat proteins break down and the naturally occurring sugars are released when exposed to intense heat. This produces new flavor compounds which are then incorporated into the sauce once the fond has been dissolved. This flavorful sauce is then added as an accompaniment to the meats when served.
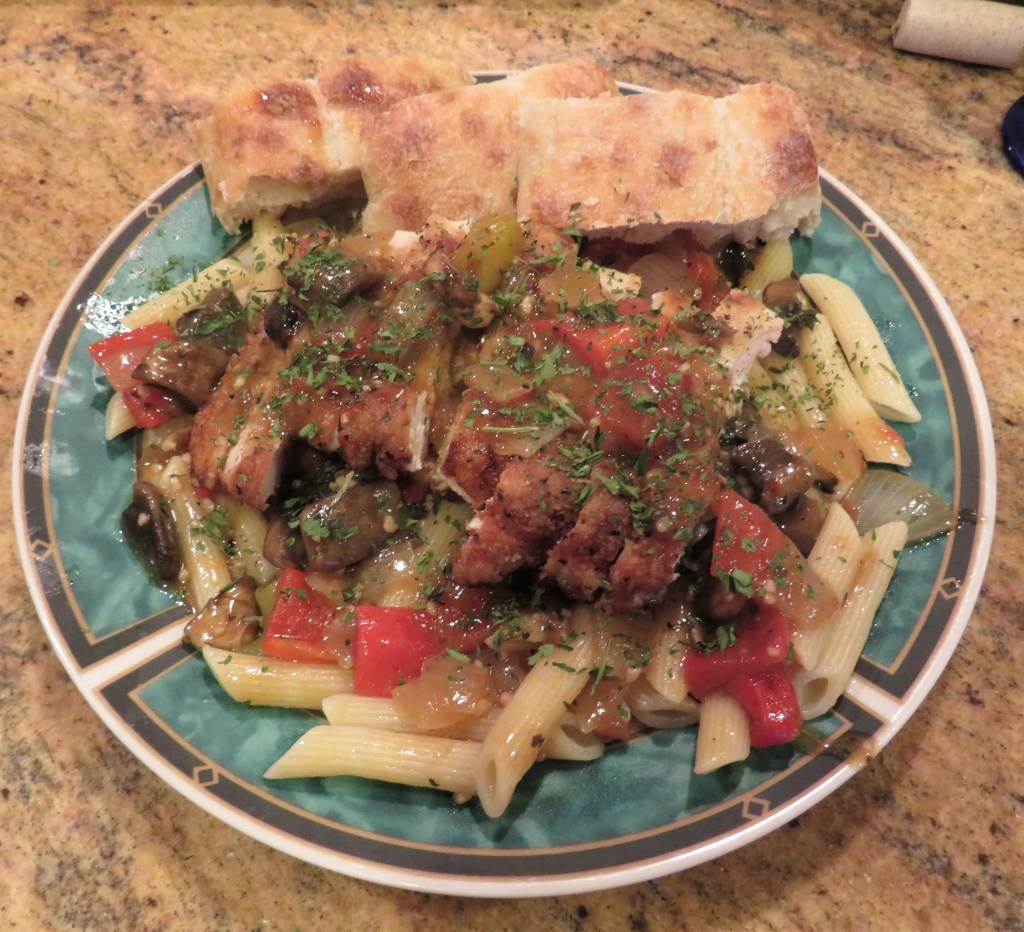
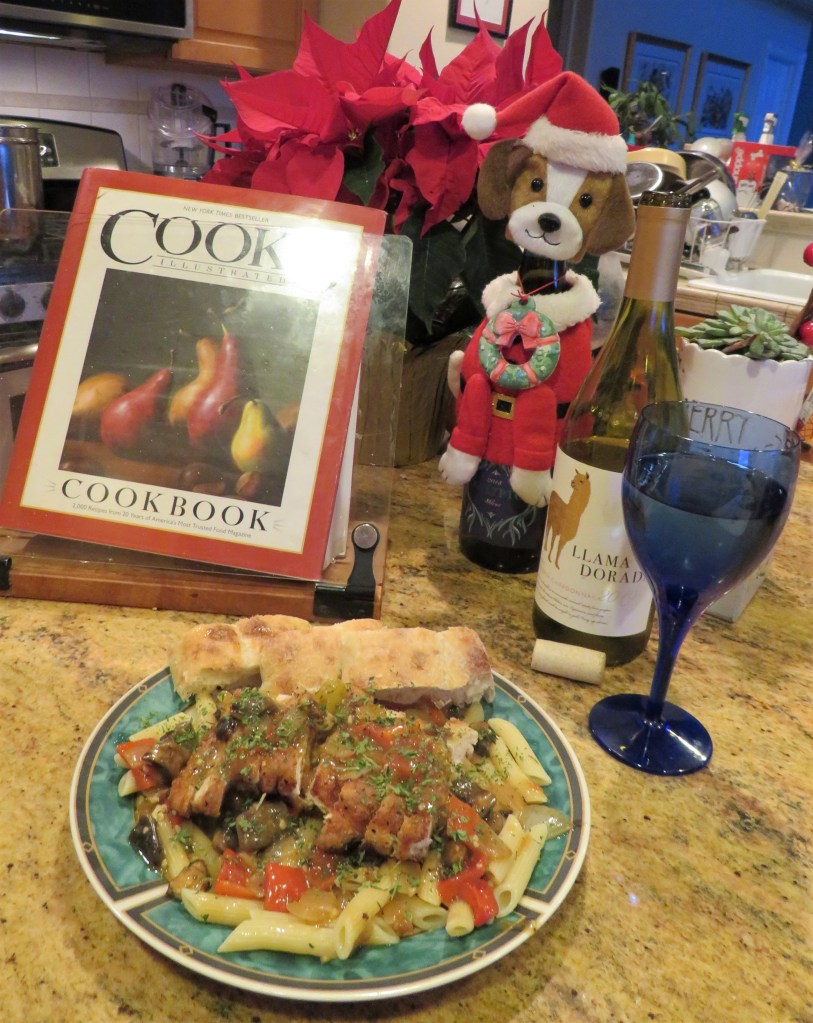
I am a saucy kind of girl, applicable in all ways, so I am always deglazing my pans and skillets to make sauces for my meats. Meat by itself is good, but meat when served with a sauce is always better. My latest saucy meat was breaded and pan-fried chicken with a wine, roasted pepper and garlic sauce. No surprise there though. I use wine and garlic for just about everything. I also use roasted peppers quite often too. I served it over penne pasta with some warmed ciabiatta on the side and of course, more white wine to help wet my whistle.
Breaded Chicken with Wine, Roasted Pepper and Garlic Sauce
1- 1 1/2b lbs chicken breast
butter and olive oil for cooking
1/3-1/2 cup flour
salt & pepper to taste
1 tsp paprika
1 egg
dash heavy whipping cream
1 TBSP garlic
1 onion, medium dice
1 red bell pepper, roasted, peeled and diced medium
1 1/2 cups sliced mushrooms
3/4 cup chicken broth
1/2 cup dry white wine
1-2 TBSP sherry
fresh thyme
2-3 TBSP butter
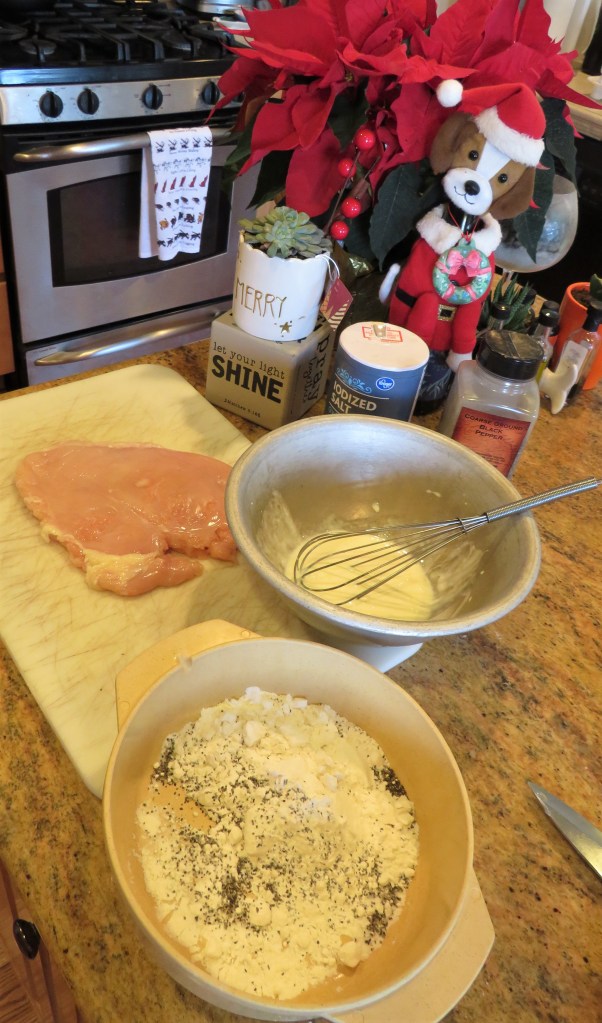
Combine the flour and salt & pepper. In a separate bowl, combine the egg and and cream. Wrap the chicken in plastic wrap, then with a meat tenderizer, pound the chicken into a thin piece, to about 1/4 inch in thickness. Pat the chicken dry with a paper towel, then coat it in the egg mixture. Shake off the excess liquid and dip the chicken into the flour mixture and coat it completely. Get a skillet very hot, add the olive oil and some butter and cook the chicken for about 5 minutes per side, or until crispy and golden brown. Once the chicken is done, remove it from the heat and set aside.
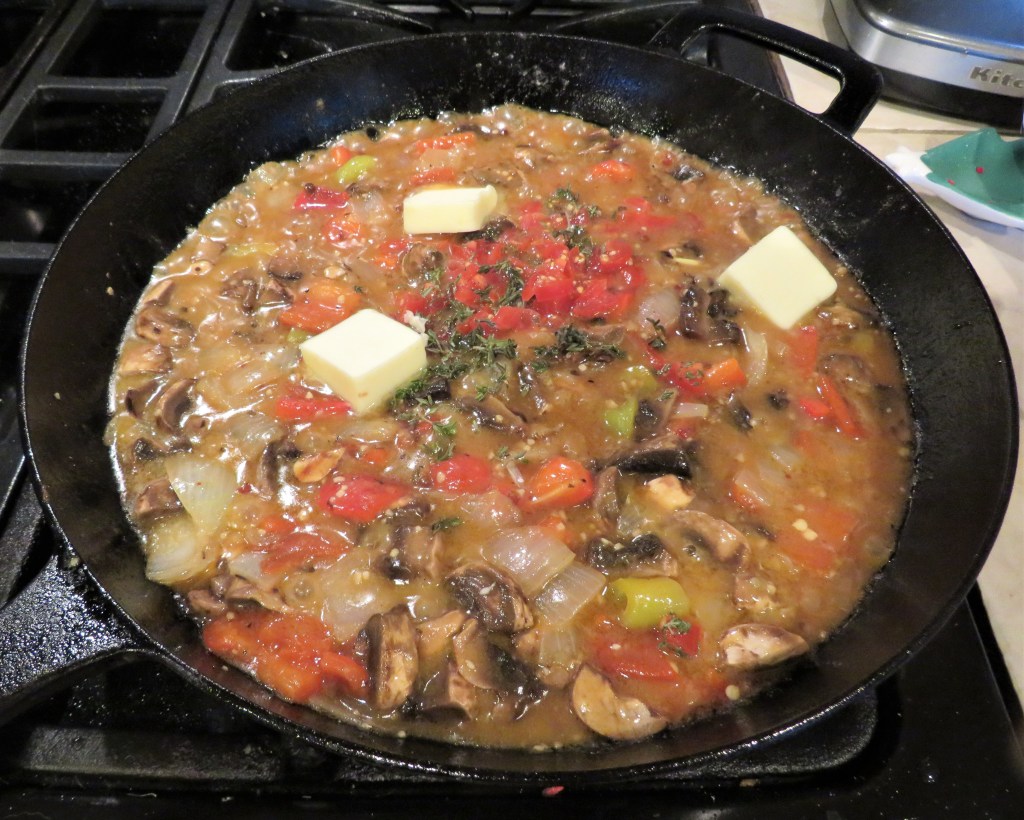
The fond for the sauce is next. Add the mushrooms, garlic, onions and paprika. Cook for about 5 minutes, or until the onions are translucent. I also added some of the flour mixture to thicken up the sauce a bit. This is optional.
Add the wine, chicken broth and roasted peppers and combine thoroughly. Bring to a boil, then reduce the heat to a simmer and continue to cook for about 10 minutes, stirring frequently.
Add the butter and the fresh thyme as a finish to the sauce.
When the sauce is ready, reheat the chicken by adding it to the sauce and let it heat thoroughly. Remove the chicken and slice it into thin strips. I served it over cooked penne pasta, but rice would work as well. I like to add a little sauce to the pasta first, then the chicken, and lastly I finish it with more sauce on top. I hate dry foods. Like I said, I like things saucy.
Life is much more fun when you make it saucy. Foods always taste better this way too. 🙂 May the new year keep you safe and keep you well. ‘Til next time.
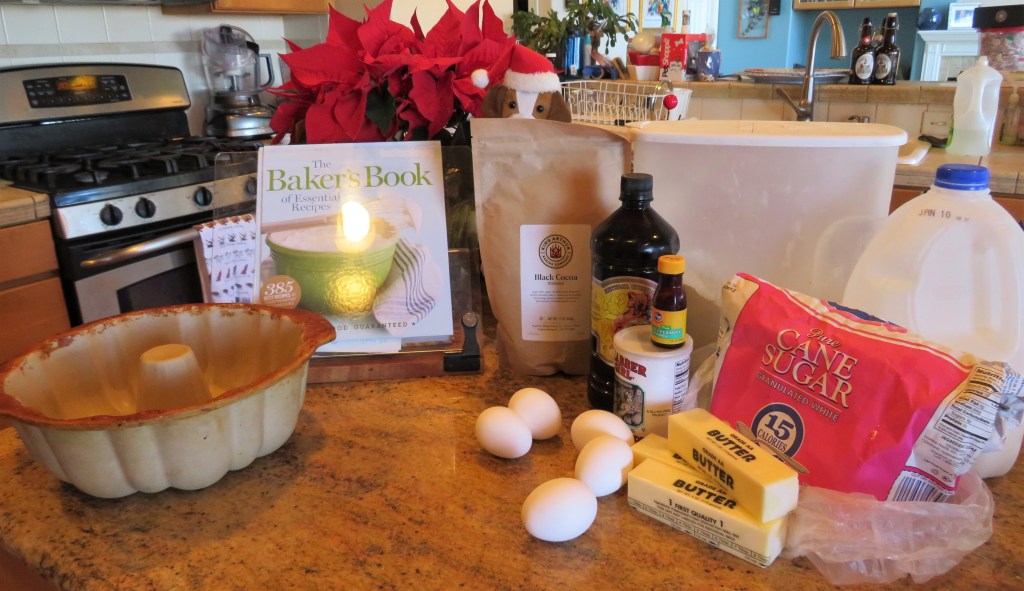
Julia http://retirementrvdream.wordpress.com/ gave me a fun selection of goodies from King Arthur Flour Company for as a Christmas gift. King Arthur has some fantastic products. I am quite familiar with a lot of them, but the things Julia selected were all very new to me. I had never heard of cinnamon nibs, which now I am wondering how I have gone so long without knowing about. The other fun goodies were a bag of black chocolate cocoa powder, as well as a bag of Bensdorp cocoa powder, which I still have yet to use. Again, I had never heard of black cocoa powder before. This is all new to me too. I just love learning about new products and learning how to use them. It just makes my day. I know, I am a geek when it comes to the kitchen. 🙂
If your curiosity is peaked like mine was about black cocoa powder, then here are some fun facts. Black cocoa powder is an “ultra Dutched” process to make cocoa powder. Dutched cocoa powder (this also includes black cocoa powder) is cocoa powder that has been treated with an alkaline solution to neutralize the acidity. Alkalizing cocoa makes it darker in color, milder in flavor, and dissolves easily into liquids. Dutched cocoa powder is neutral and because of that, it does not react with baking soda, so it’s often used in recipes that call for baking powder. The darker or blacker the cocoa powder means more alkalizing processes have occurred. This also makes for a very smooth chocolate taste, and removes some of the bitterness of the dark chocolate.
Regular processed cocoa powder and Dutched black cocoa powder.
The black chocolate does not react with baking soda, so if a recipe calls for baking soda, add some baking powder if using the black chocolate. The black chocolate is almost completely fat free as well, so in order to keep your finished products moist, you might want to mix the black cocoa with a normal or non-Dutched cocoa powder as well.
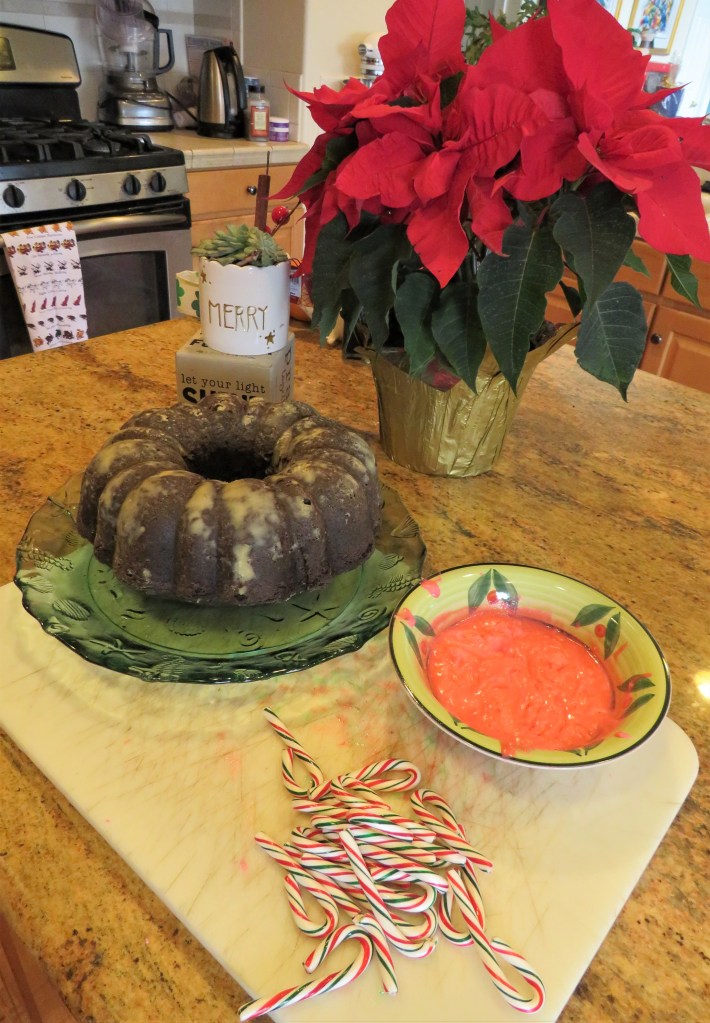
The first thing I made with my new black cocoa powder was a black chocolate and peppermint cake. Peppermint and dark chocolate are a perfect fit and so was the black chocolate and peppermint.
Black Chocolate and Peppermint Cake
Preheat the oven to 350* F or 180*C .
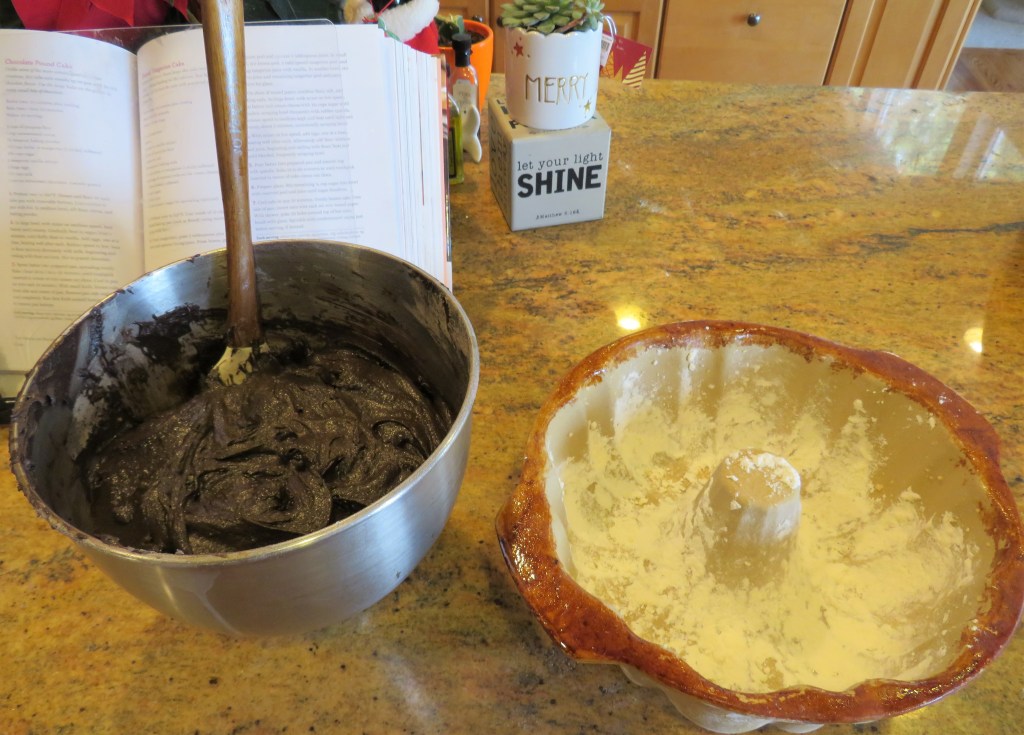
butter and lightly flour a bundt cake pan.
3 cups flour
1 cup black cocoa powder, or 1/2 cup of black coca powder and 1/2 cup regular cocoa powder
1/2 tsp baking powder
1 1/2 cups or 3 sticks of softened butter
2 3/4 cups sugar
2 tsp peppermint extract for a strong peppermint flavor or 1 tsp peppermint extract and 1 tsp vanilla for a milder flavor
5 eggs
1 1/2 cups milk
powdered sugar icing
crushed candy canes, optional
Mix the flour and dry ingredients together and set aside.
Cream the butter and sugar together, then add the eggs and mix in between each addition. Add the vanilla and/or peppermint extract and mix together again.
Alternate between the flour additions and the milk, adding 1/2 at each time and mixing after each addition.
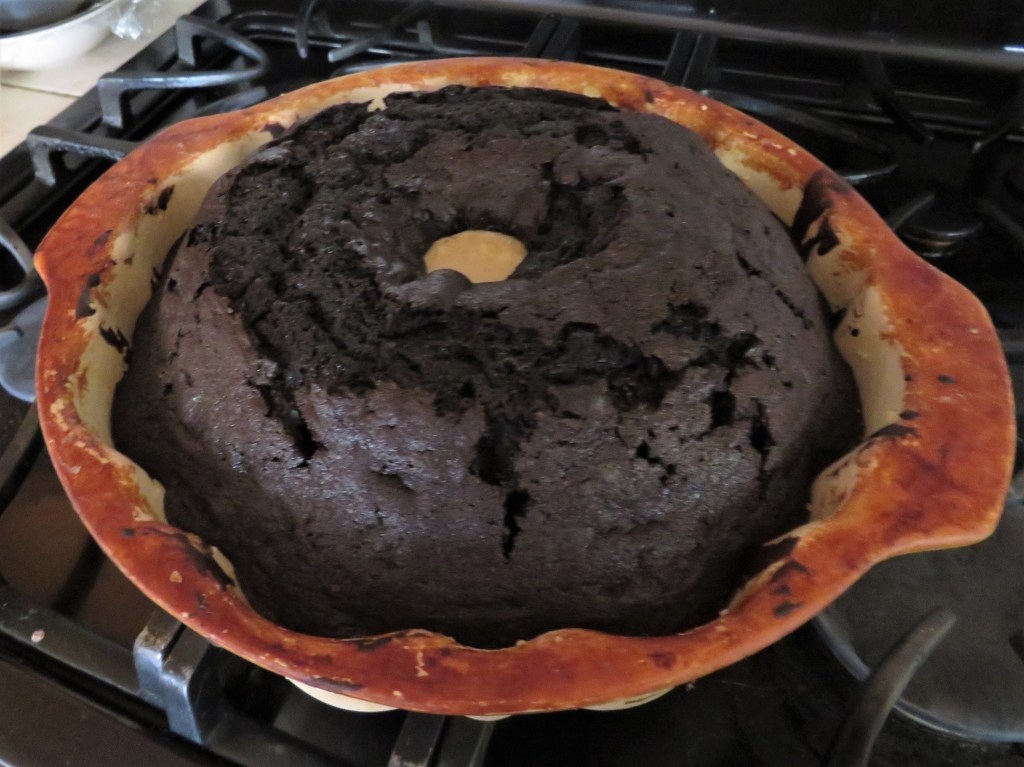
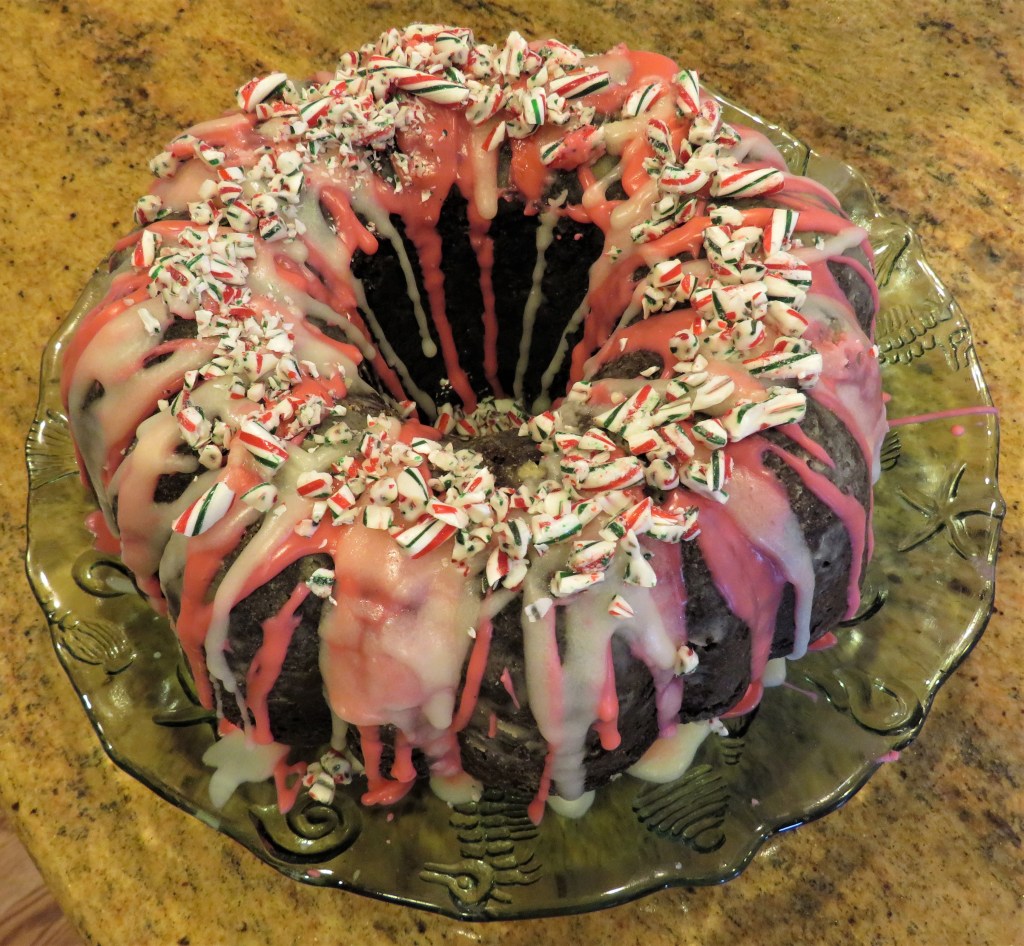
The batter will be a dark black in color. Carefully spoon or pour the batter into the prepared bundt pan and bake for 1 1/2 hours or until a toothpick comes out clean when entered into the center of the cake.
Allow the cake to cool before removing it from the pan, and then cool completely before adding the icing.
When we helped Janet with her Christmas gingerbread cookies, It’s Beginning To Look A Lot Like Christmas – 17 Janet gave me all her leftover icings from the day, knowing I would find a good use for them. I did too. I used the red and the white icings to top my cake. First I added a layer of the red icing, then added a layer of the white. Before the icings set, I crushed some candy canes and sprinkled them on top of the icings to make my cake really fun and festive.
I am always learning about new things. Never stop learning. Never be afraid to experiment. That’s what keep life fun and interesting. Thank you Julia for always introducing me to so many new and fun products and ideas. I am always learning new things from you. I am glad we have so much fun together, both in and out of the kitchen.
Happy New Year to all. May the new year keep keep you safe and well. ‘Til next time.
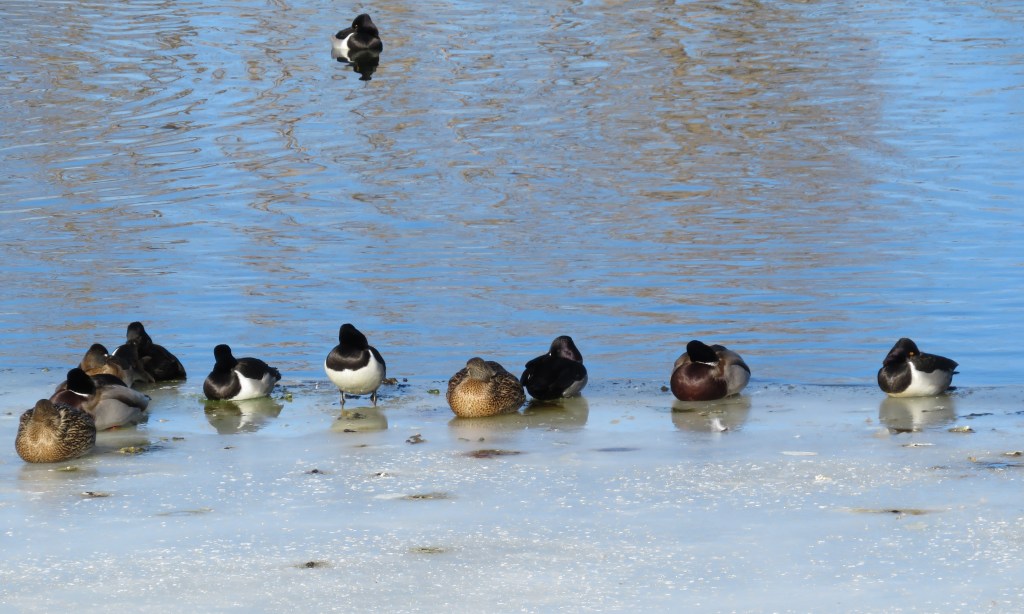
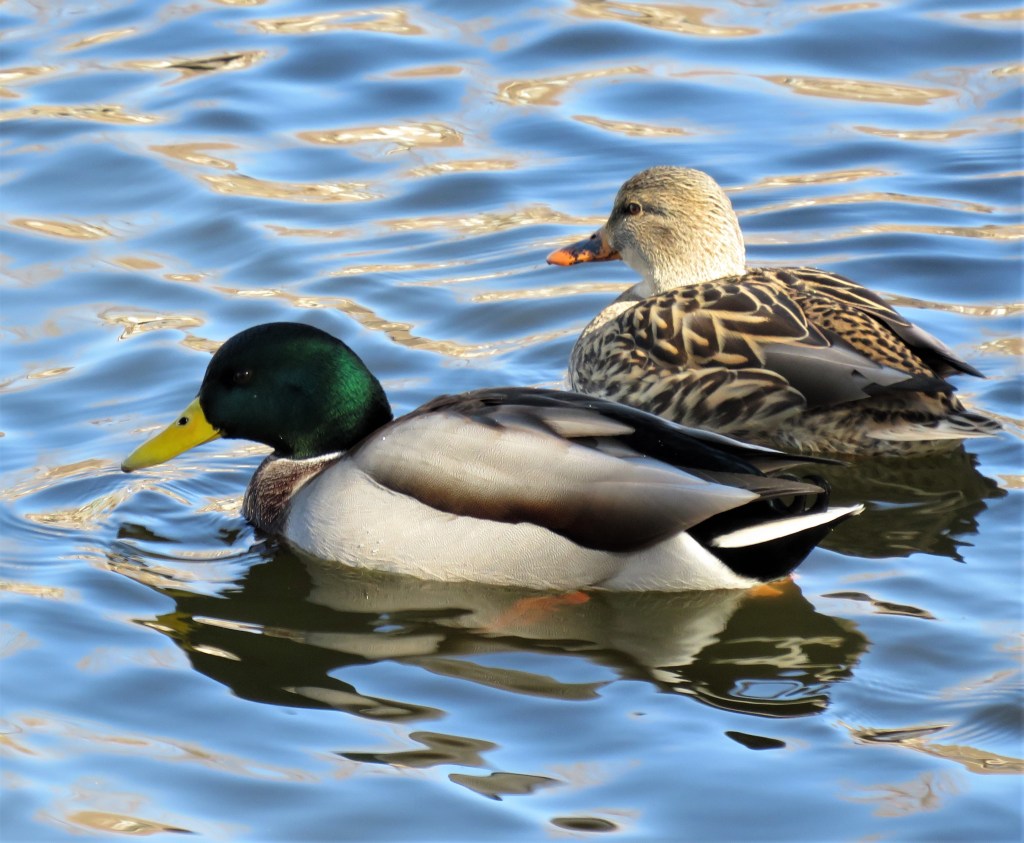
We are so fortunate to have such a wide variety of wildlife literally in our backyard. Some have their seasons, while others are residents who call our lakes home. We have many different types of water fowl we see see on a regular basis too.
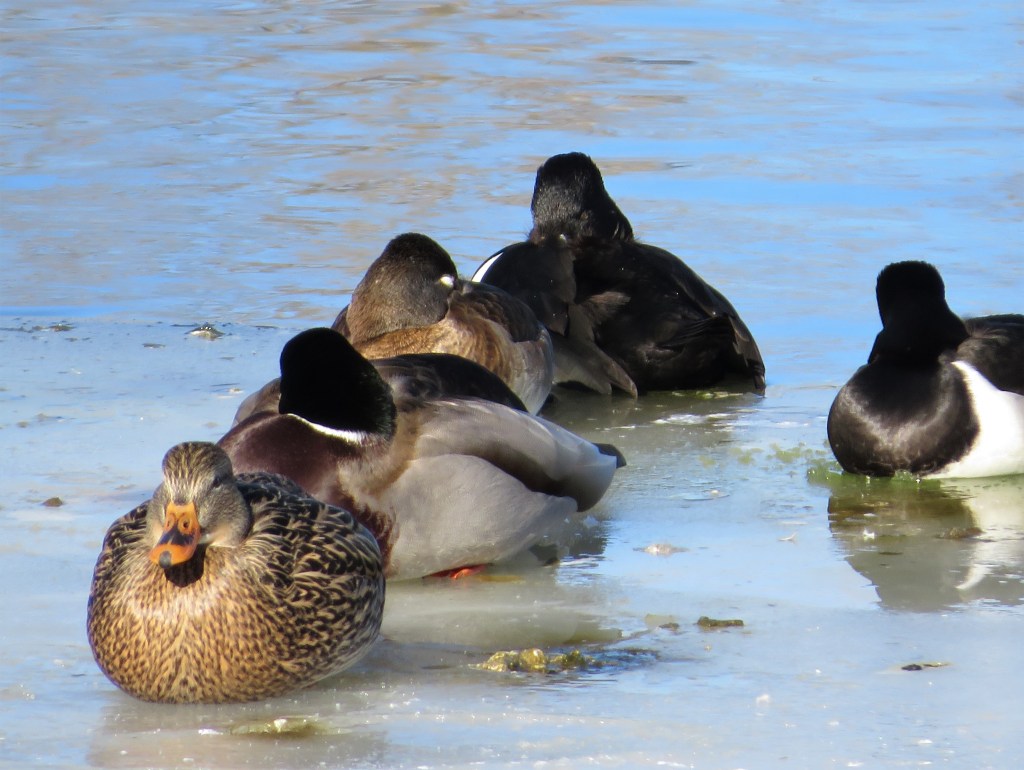
Our mallards are residents whom we see on most days.
Aside from our beautiful mallards, we also have many other kinds of ducks too. Sometimes we see them, sometimes we don’t. Often they are all together and other times they like to be by themselves.
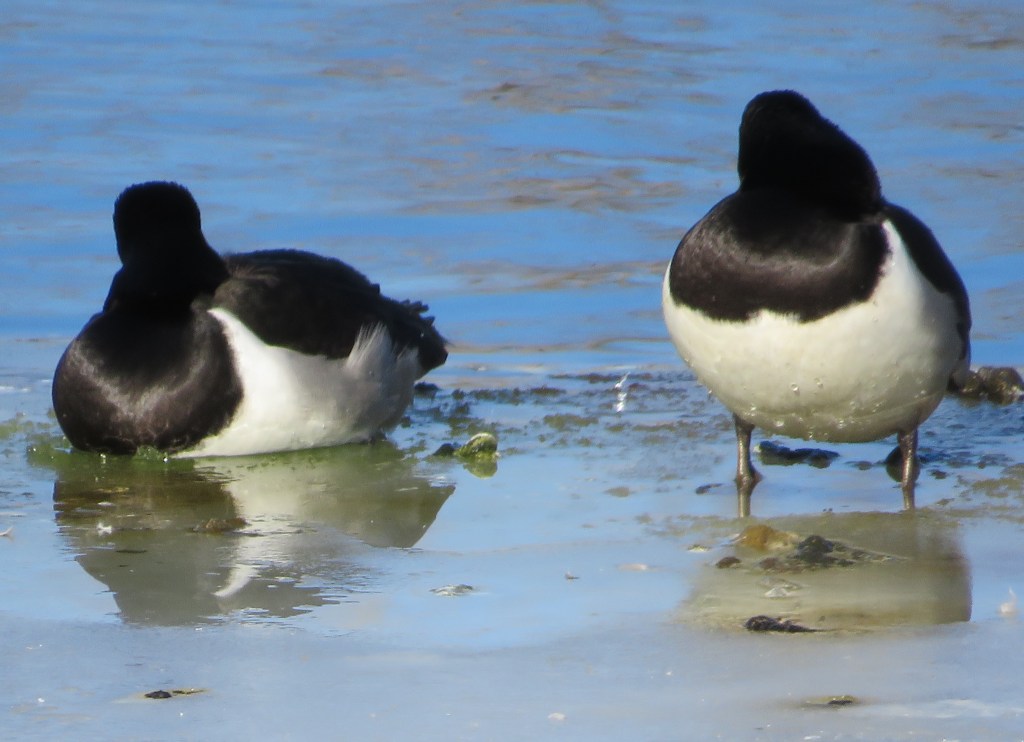
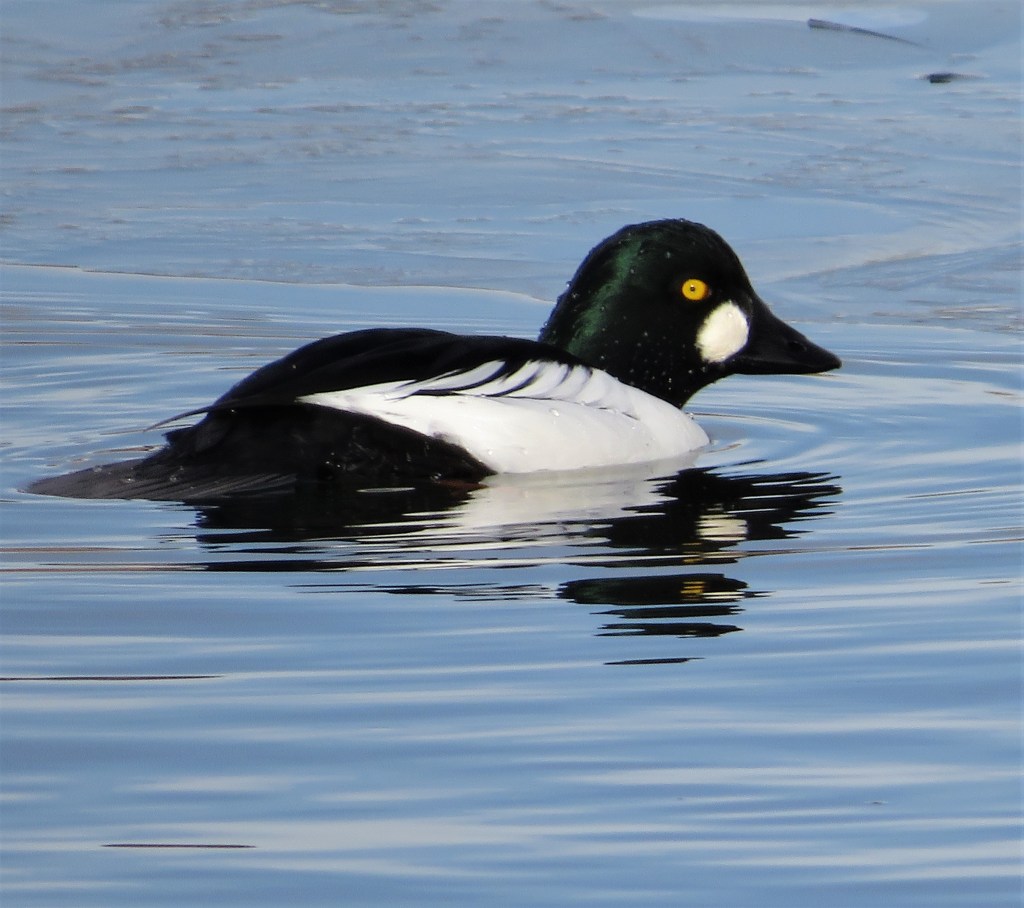
Some of our other ducks include Common Golden-eyes;
Wood Ducks;
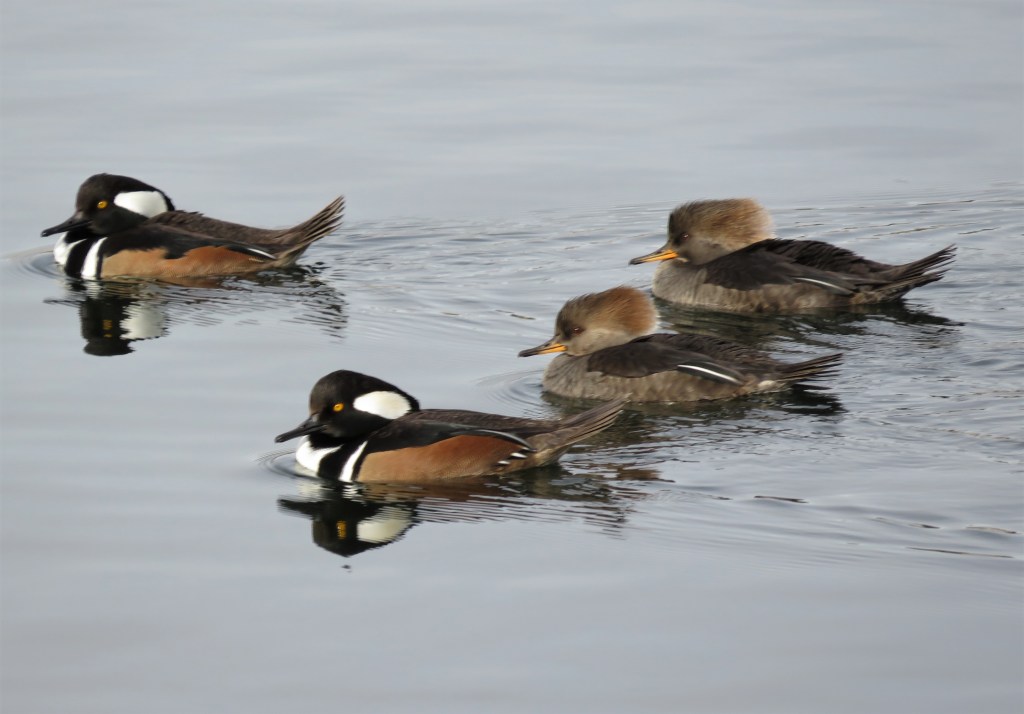
Hooded Merganzers;
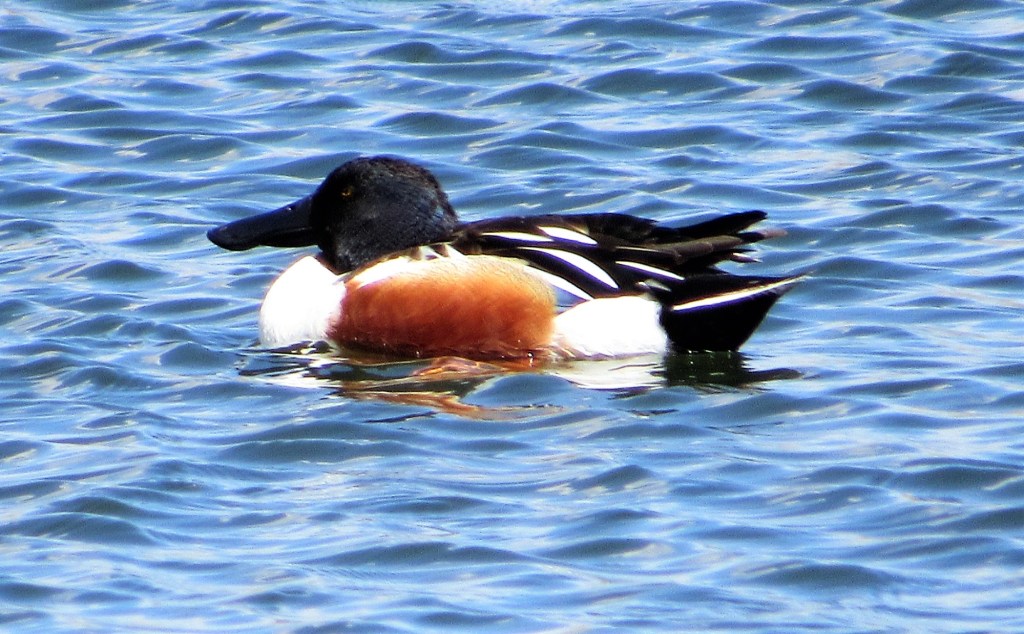
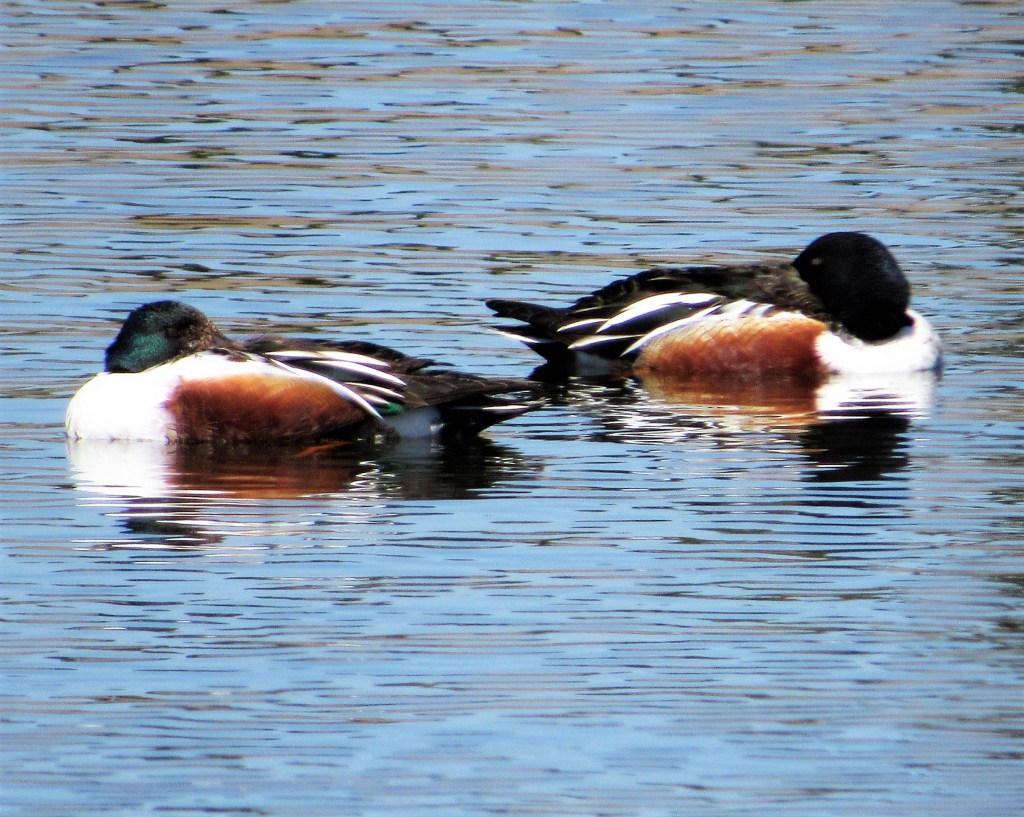
and sometimes we see Northern Shovelers too.
These are just a small sampling of the beautiful ducks and water fowl we see here on our lakes. I always have my camera ready because I just never know who I am going to see.