I have created this site to help people have fun in the kitchen. I write about enjoying life both in and out of my kitchen. Life is short! Make the most of it and enjoy!
Mediterranean foods are some of my favorite foods. As much as I love all kinds of food, the Mediterranean diet is the one I follow most closely. It is a diet that is based on consuming lots of fresh fruits, vegetables, legumes, nuts, olive oil, fish, chicken and lean meats. It also limits processed foods and sweets. I have been eating like this for most of my life. I love all of the differences between the foods from the different Mediterranean regions too. Right now, I am in a Greek frame of mind, with my Greek green beans Greek Green Beans and now my Greek salad.
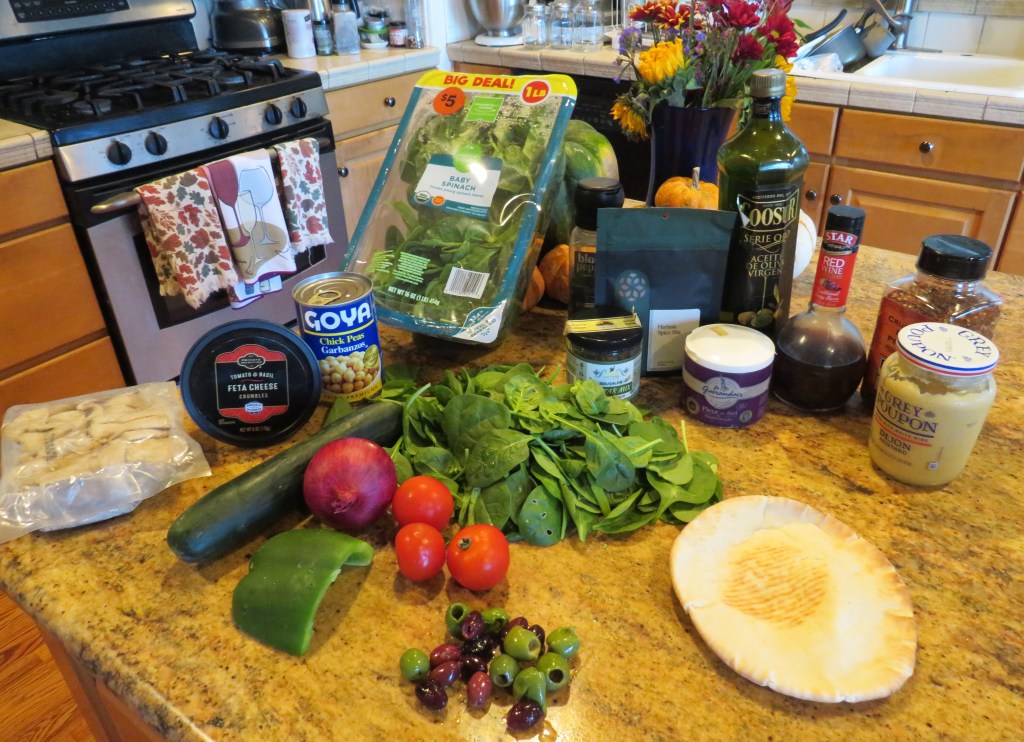
Greek Salad
I created this deliciously healthy salad as another way to use up our gyro meat. I love gyros, but I wanted something different. Gyro meat is traditionally made from lamb or pork, but modern Greek-American versions often use a ground mixture of lamb and beef. It can also be made from other meats like chicken. The meat is typically seasoned and cooked on a vertical rotisserie, then shaved into thin slices to serve. We buy the Costco version, where all that is already done for us. 🙂
1 lb cooked gyro meat
2-3 cups fresh spinach, stems removed
2-3 tomatoes, diced or cut into wedges
1/2 cucumber, sliced very thin
1 can garbanzo beans or chickpeas, drained and rinsed
1/3 cup mixed olives, sliced
1/2 green bell pepper, diced
1/4 red onion, sliced very thin
1-2 pita slices, cut into triangles and fried
feta cheese, optional
Layer the salad over a bed of spinach.
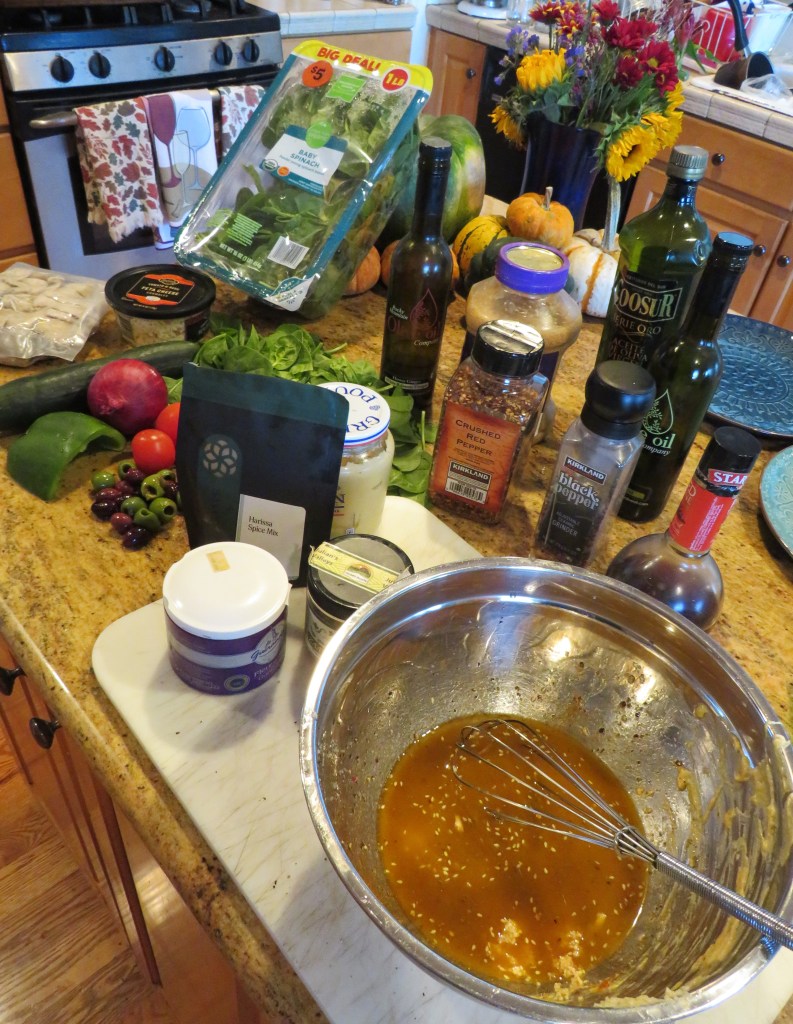
Za’atar Vinaigrette
1/2 cup olive oil
1/3 cup red wine vinegar
1-2 tsp lemon olive oil, optional
1-2 tsp lemon vinegar, optional
1/4 tsp red pepper flakes, or to taste
1-2 tsp Harissa seasoning
1 tsp Dijon mustard
1-2 tsp garlic
1-2 tsp Za’atar seasoning
salt & fresh ground black pepper to taste
Whisk everything together well and let rest. Whish everything together once again right before serivng.
When ready to serve, top the salad with a Za’atar vinaigrette and feta cheese, if using. Add the fried pita chips all around. Enjoy! απολαμβάνω or apolamváno!
Have a great day and make everyday great. Stay safe and stay well. ‘Til next time.
Green beans are a well-loved vegetable all over the world. And every culture has their own way of making them. A very popular way of making green beans, particularly in the Mediterranean regions, is to braise them in olive oil. The history of green beans braised in oil goes back centuries, with traditional preparations like Greek Lathera and Lebanese Loubieh bi Zeit (both meaning “green beans in oil”) using olive oil for slow simmering, often with tomatoes and onions. I made a Greek version, or FasolakiaLadera, not too long ago. As with anything that has been around for centuries and has spread over the world, there are many different versions. They were deliciously different. We loved them.
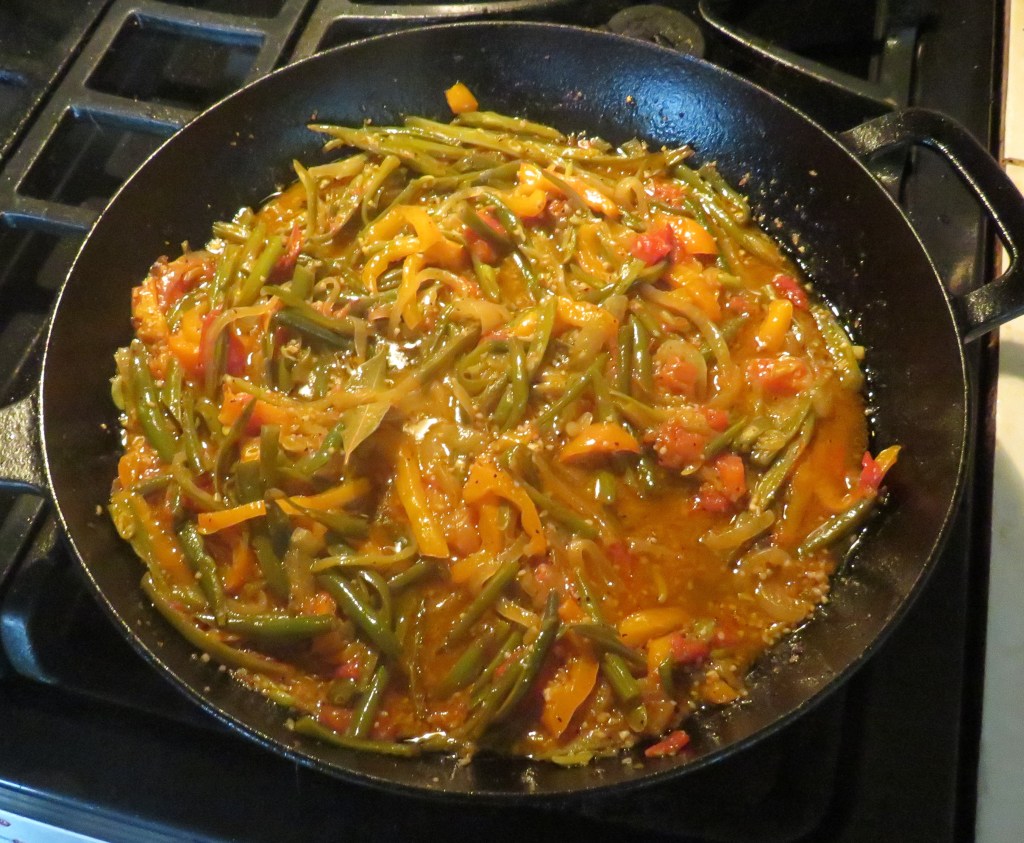
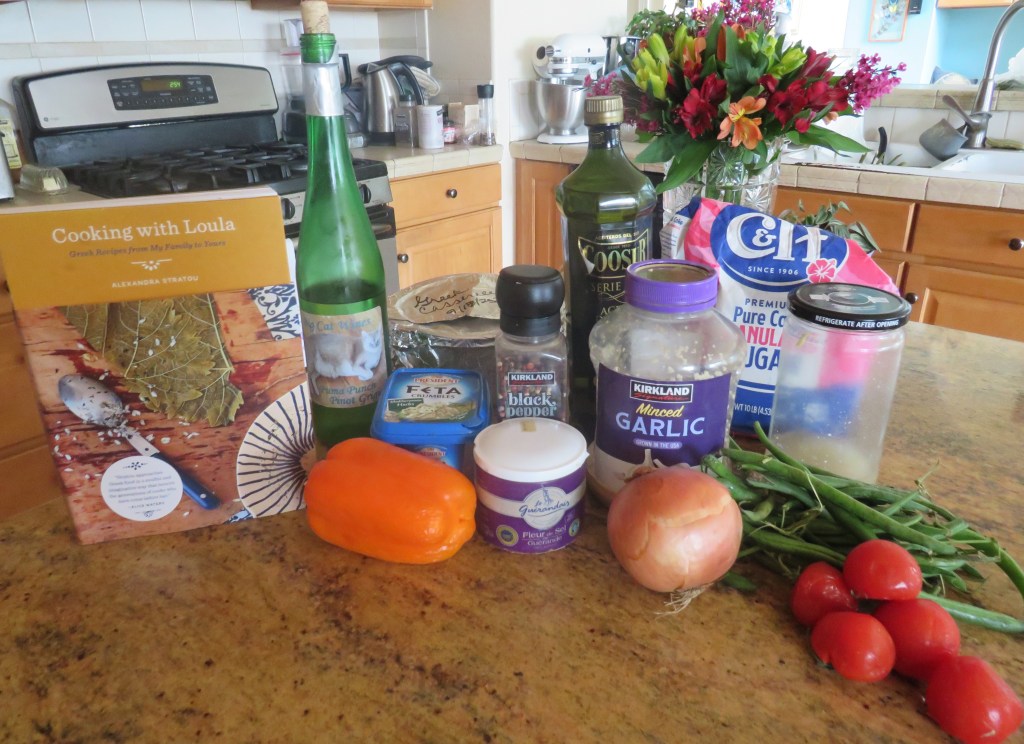
Greek Green Beans (Fasolakia Ladera)
This Mediterranean dish is both hearty and simple at the same time. I served it as a side dish, but traditionally in Greece, it is served as a meal by itself, with Feta cheese spread over a thick hearty bread. Greek Fasolakia is a typical peasant dish rich in vegetables, and traditionally vegan! These stir-fried vegetables are part of the ancient tradition of Greek braised vegetables called Lathera, and served as the main dish or a light lunch, or among other small plates during the Greek Mezes. Lathera or Ladera comes from the Greek word Lathi, meaning oil. Traditionally, the recipe calls for green peppers, but I liked the addition of color by using an orange pepper. Plus, I didn’t have a green pepper at the time, which made it even easier to substitute another pepper. 🙂
1/3-1/2 cup olive oil
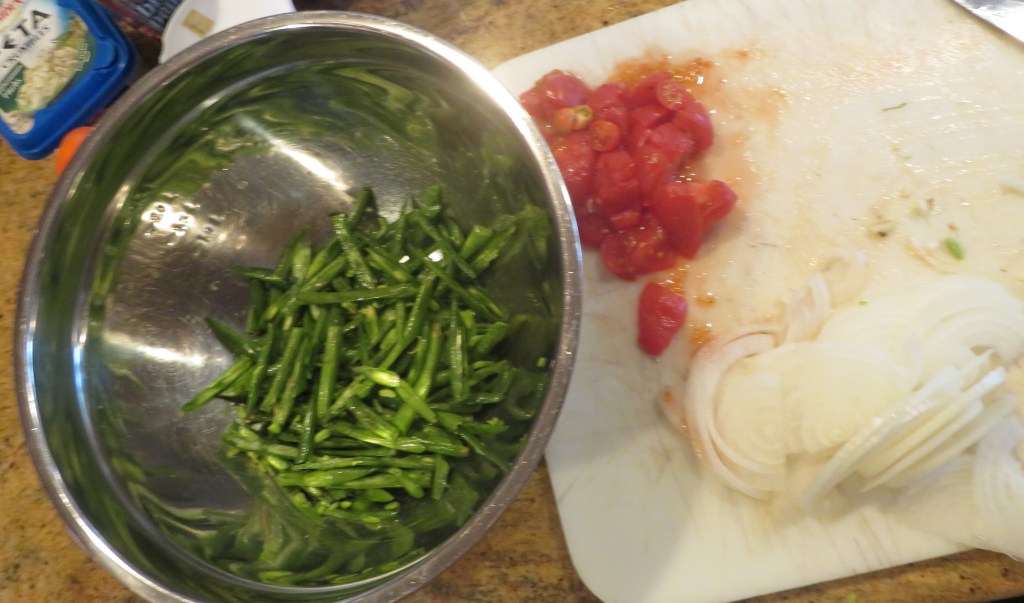
1 onion, sliced very thin
1 large pepper, sliced thin
1 TBSP garlic
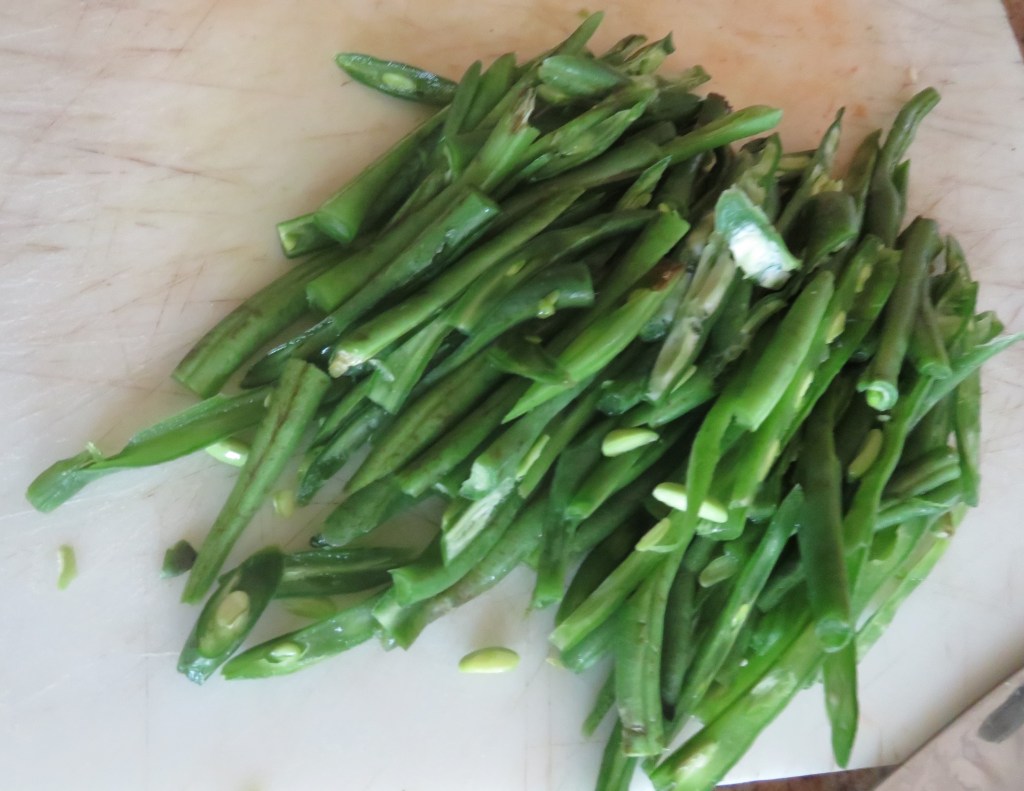
2 lbs green beans, trimmed and cut into very thin strips
salt & pepper to taste
3/4 cup dry white
2 cups diced tomatoes
2 cups chicken broth
1 tsp sugar
1 bay leaf
feta cheese, optional
thick hearty sliced of bread, optional
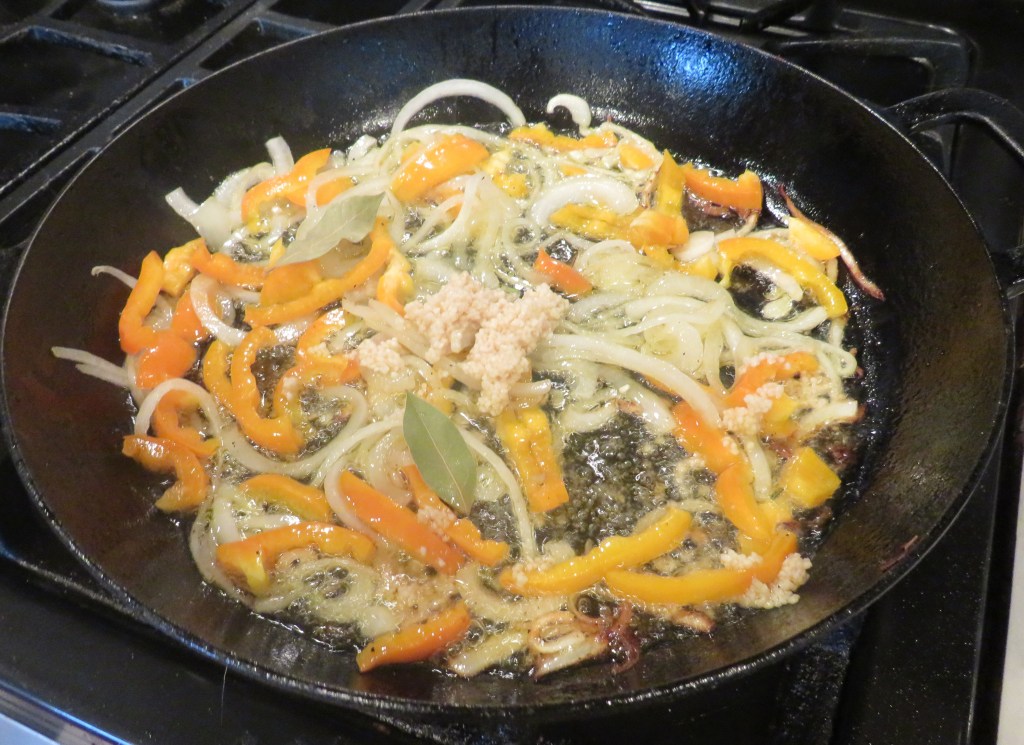
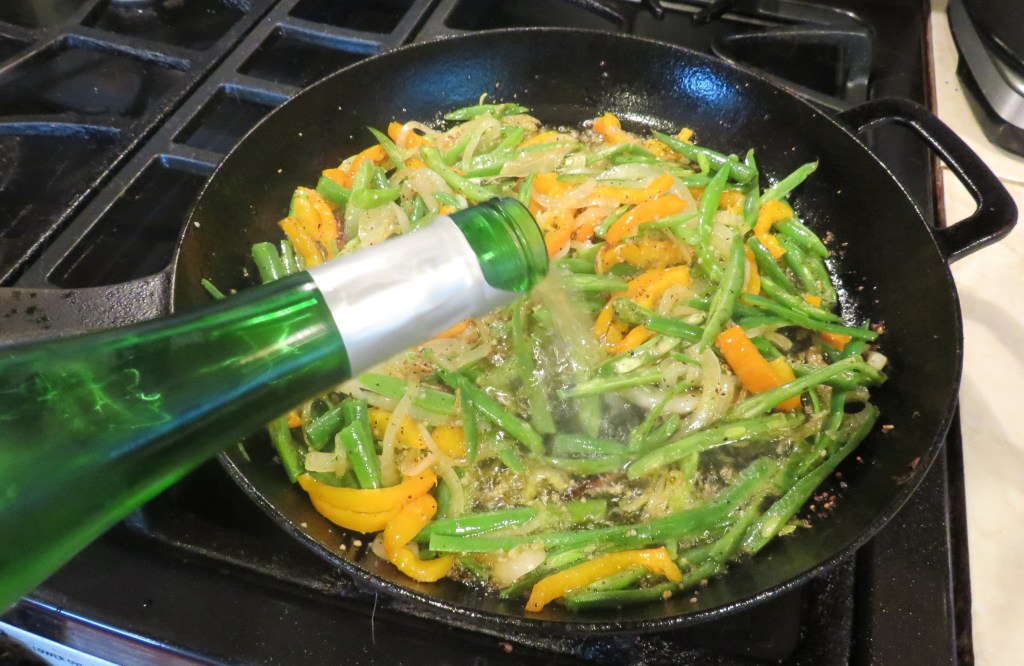
Get a large skillet or pot very hot and add the olive oil. Then add the onions, garlic, bay leaf and salt & pepper and peppers, and cook until the onions are translucent.
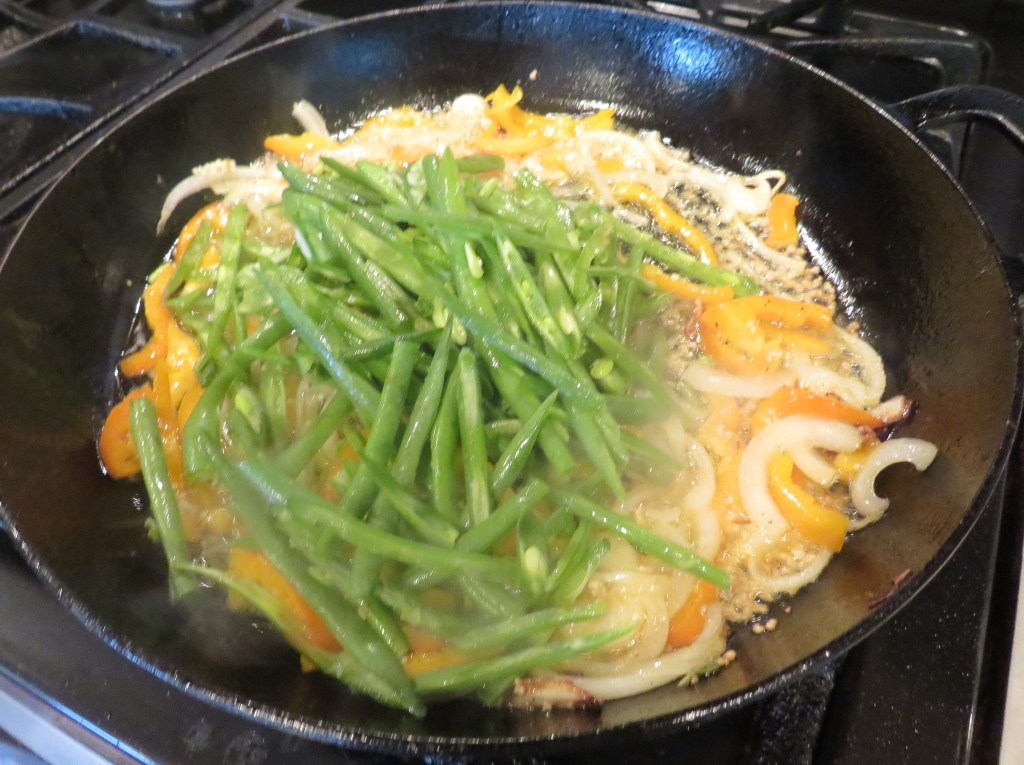
Add the green beans, cover and sweat until they are dark green.
Add the wine and reduce until the liquid has evaporated. Then add the tomatoes and cook for about 8-10 minutes, stirring occasionally.
Add the chicken stock and sugar. Bring to a boil, then reduce the heat and simmer uncovered for about 40-45 minutes, stirring often.
I served this as a side dish to something else, but traditionally, this is served with Feta cheese mixed in and served over bread. Both ways work, and both ways are good (though NO cheese for me). “Ahh Taki,[ it ]looks Greek to me”, My Big Fat Greek Wedding.
This dish and recipe may be centuries old in Greece and the Mediterranean regions, but it was a new dish for Larry and I. We really liked it a lot, and I think you will too. 🙂
Have a great day and make everyday great. Stay safe and stay well. ‘Til next time.
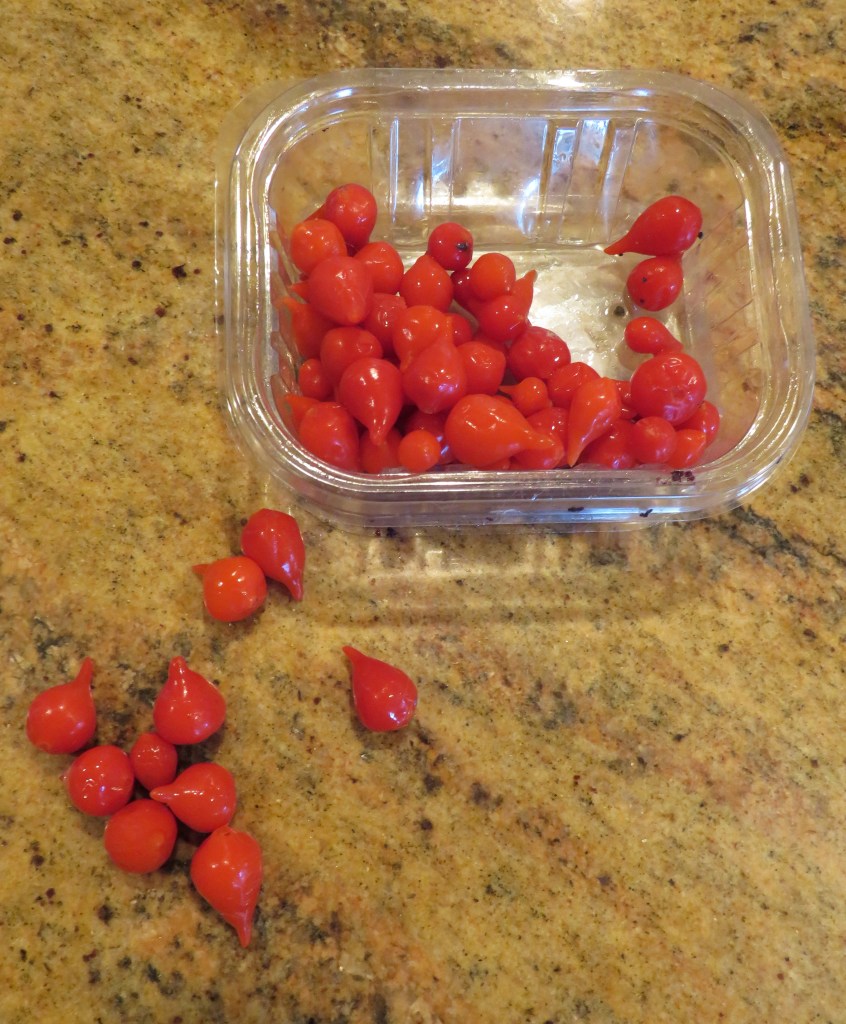
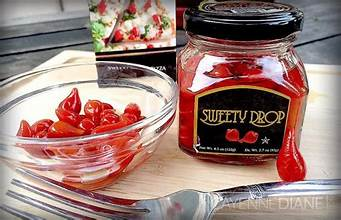
I discovered the tiny, red teardrop Peruvian peppers a few years ago and have been using them ever since. I just love them. I use them for all kinds of dishes. But it dawned on me that not everyone knows about these little treasures or what they are.
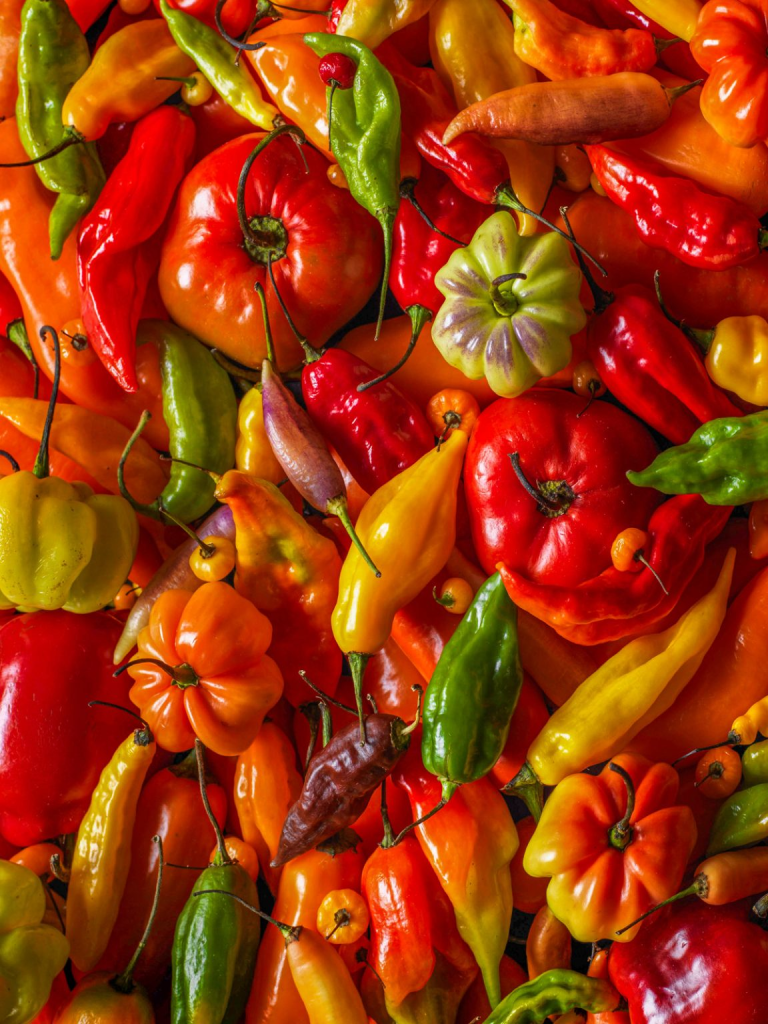
Peruvian peppers, also known as aji, Sweety Drop peppers, Incan Red Drops, Biquinho, or Roquito peppers, have been in Peru and modern day Bolivia since about 7500 B.C. They are closely related to the Chupetinho peppers from Brazil, which are also sweet, tart and smoky, and a kiss of heat. Peppers in general are one of the oldest cultivated crops in the Americas, with Peru being a center of diversification where all five domesticated Capsicum species were grown and consumed before the arrival of Europeans.
These little gems are “relative newcomers” in the pepper world though, comparatively speaking. Today, Peru has a high diversity of peppers, with around 300 varieties, and they remain an essential part of its cuisine. You can find the sweety peppers in red and yellow. The red sweeties are a little sweeter than the yellow ones, but not much, and are slightly healthier too.
Sweety Drop Peppers are tiny, teardrop-shaped peppers originating from the highlands of the Peruvian Andes, known for their vibrant red or yellow color, unique sweet and tangy flavor profile, and crunchy texture. The name “Sweety Drop” is primarily a marketing term coined by the companies that first introduced these peppers to the global market. It accurately reflects their dominant sweetness and distinctive teardrop shape, making them easily identifiable to consumers. These peppers offer a versatile ingredient for culinary applications, ranging from appetizers and salads to main courses and even desserts. Unlike some peppers that pack intense heat, Sweety Drops provide a more subtle, nuanced flavor experience. Think of them as the candy of the pepper world, offering a playful burst of taste without the fiery afterburn. They gained popularity for their delightful combination of sweetness and slight acidity. The sweetness is dominant, reminiscent of ripe cherries or bell peppers, but it’s complemented by a refreshing tanginess.
Sweety peppers are mild peppers, with a Scoville Heat Unit (SHU) rating close to zero. The higher the SHU, the hotter the peppers will be. These little sweeties are a good source of Vitamin C, antioxidants, and fiber and are also low in calories and fat. Though they are healthy and packed with nutrients, they are rarely eaten in large quantities, making their nutritional impact minimal. These little peppers, like other chili peppers, are rich in antioxidants, especially vitamin C, which is crucial for strengthening the immune system, promoting healthy skin, and shielding the body from oxidative stress. Red peppers are generally considered the healthiest because they are the most ripe and contain the highest levels of certain nutrients, but peppers in general are considered to be healthy foods. While they share the characteristic of sweetness, Sweety Drop Peppers are distinct from bell peppers or other sweet peppers. Their unique teardrop shape, crunchy texture, and specific flavor profile set them apart. The tanginess is a defining characteristic not found in other sweet pepper varieties.
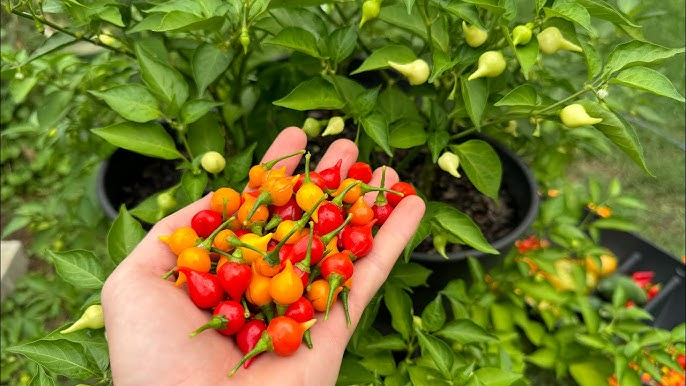
Sweet peppers like the sunshine. You can grown them at home as long as they get enough sunshine to make them happy. They require a sunny location, well-drained soil, and a warm climate. Seeds can be purchased online or from specialty gardening stores, but be aware that seed availability may sometimes be limited. These little peppers are most often served pickled or brined, but you can easily pickle your own Sweety Drop Peppers too. You’ll need fresh peppers, vinegar, water, sugar, salt, and any desired spices, just like you would need for pickling any kind of pepper or vegetable. While possible, freezing Sweety Drop Peppers is not generally recommended, as it can affect their texture, making them less crisp. If you must freeze them, consider using them in cooked dishes where the texture change will be less noticeable. Freezing is not the ideal preservation method.
These little sweetie peppers are gaining in popularity all over the world. If you don’t have them yet, they will most likely be coming your way soon. Just be patient. Once you discover them, you will fall in love with them just like I did. 🙂
Have a great day and make everyday great. Stay safe and stay well. ‘Til next time.
It’s been a while since I’ve shared fun facts with you, so I thought it was a good time to do so. 🙂 I love learning and sharing all kinds of things, and especially fun trivia. It lightens up our day, gives us some “food for thought” and brings a smile to us all.
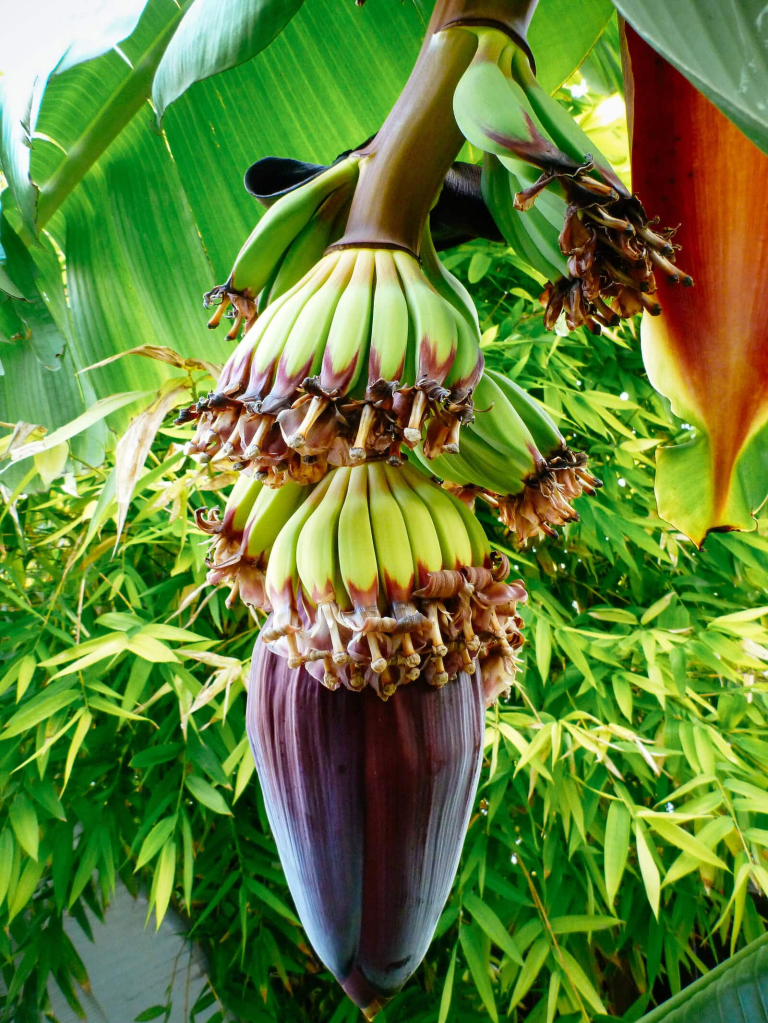
Banana trees are really giant herbs and not trees. Banana plants are botanically classified as giant herbs, not trees, because they lack a woody stem. What looks like a trunk is actually a non-woody “pseudostem” made of tightly packed leaf sheaths. The banana fruit itself is technically a berry that grows from this large herb.
The word “salary” is derived from the Latin word “sal,” meaning salt, because Roman soldiers were once paid in salt. In ancient Rome, it was salt and not money that was used for commerce or trading. The soldiers who worked for the Roman empire got a handful of salt in return as their payment each day. This is where the common saying of “being worth one’s salt” comes from. Soldiers who did a good job were worth the salt they earned.
The first vending machine dispensed holy water, not snacks. In the first century A.D., a Greek engineer developed a device that would disperse holy water with the weight of a coin because too many people were stealing the holy water from the temples.
Scientists can turn peanut butter into diamonds due to its high carbon content. Dan Frost, a research scientist at the Bayerisches Geoinstitut, University of Bayreuth, Germany. He placed some peanut butter between two diamonds (this is called the “stiletto heel effect”) and compressed the nutty stuff. Why the diamonds? They’re incredibly hard, thanks to their closely-linked carbon atoms, and can withstand the necessary amount of pressure for the experiment, which is about 1.3 million times that of our atmospheric pressure. The result is a diamond where a peanut used to be, albeit a paltry and not entirely pure one. “A lot of hydrogen was released that destroyed the experiment,” Frost told the BBC, “but only after it had been converted to diamond.”
The first recipe ever discovered was for a type of beer. Foodies have been enjoying beer since they first invented the language to talk about it. Ancient Egyptian brewers, who were known for their herbal wine, were making fortified beer around 2,575 B.C., but some historians speculate that beer might have been developed in different parts of the world by different peoples simultaneously. Still, while much of this dating is based on the educated compilation of known facts, concrete (or rather, clay) evidence was discovered from the Sumerians of ancient Mesopotamia. The oldest recorded recipe for beer-making is immortalized in a poem-slash-drinking song preserved in cuneiform on clay tablets from 1,800 B.C. called “Hymn to Ninkasi.”
So if you are playing trivial pursuit and these questions come up, now you will know you will have the answers. I am more than happy to help with trivial stuff like this. 🙂
Have a great day and make everyday great. Stay safe and stay well. ‘Til next time.
The Northern Flickers are here year round, though I do tend top see more during the fall than I do at other times during the year. And sure enough, I have been seeing more Flickers around again.
They are always welcome, anytime they want to show up. They are such pretty, distinctive birds. 🙂
Yet again, I was inspired by another recipe sent from you. This one came to me from the Reluctant Poet at https://thereluctantpoetweb.wordpress.com/. Thank you so much for this delicious idea. Of course I changed it and made it my own, but the inspiration came from you. I added vegetables and served it over wild rice, with potstickers on the side.
Stir-fries have been popular in China and all throughout Asia since the Han Dynasty (206 BC–220 AD). They became became even more popular during the Ming Dynasty (1368–1644) for their speed and fuel efficiency. When the Chinese came to America, they brought their stir-fry cooking techniques with them, using local ingredients to add to their traditional dishes. Stir-fries became very popular in The United States after WWII, and they have been popular here ever since. They became known as “stir-fries” in English around 1945.
Asian Steak and Vegetable Stir-Fry
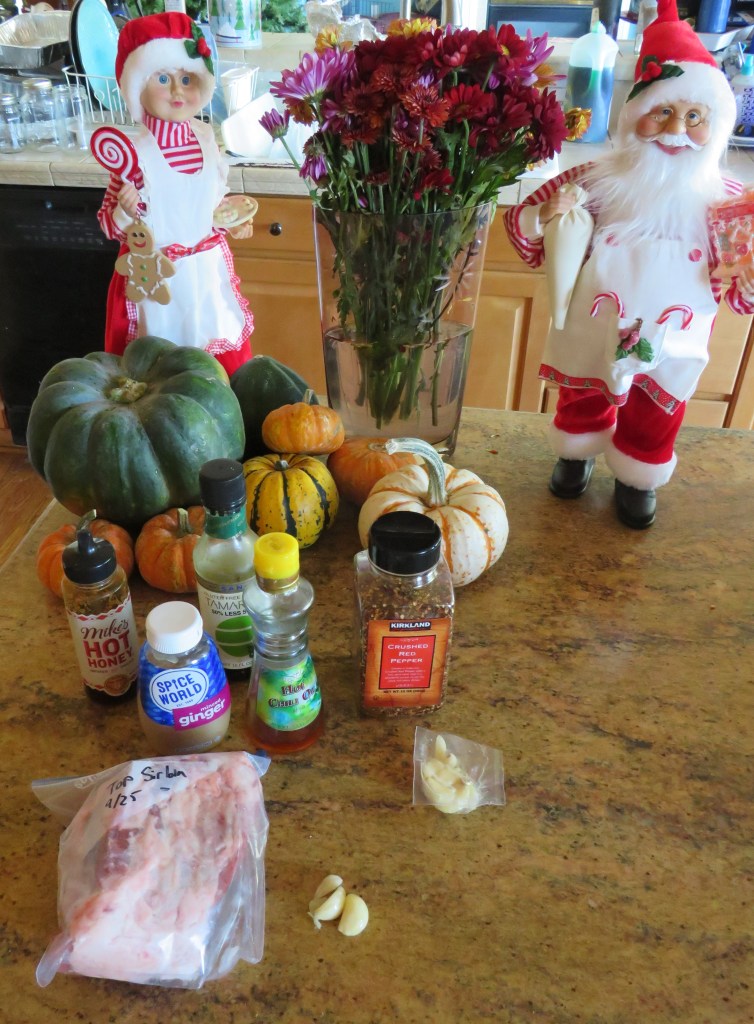
I marinated my steak cubes for about 4 hours before cooking.
1 1/2 lbs steak, cubed
1/4 cup soy sauce
1 TBSP hot honey
3-4 cloves garlic, sliced very thin
1 tsp ginger
1/4 tsp red pepper flakes, or to taste
2 TBSP sesame oil
1-1 1/2 cups broccoli florets
1 cup sliced mushrooms
1 cup pumpkin, peeled and cubed
1 jalapeno sliced very thin
toasted sesame seeds for topping
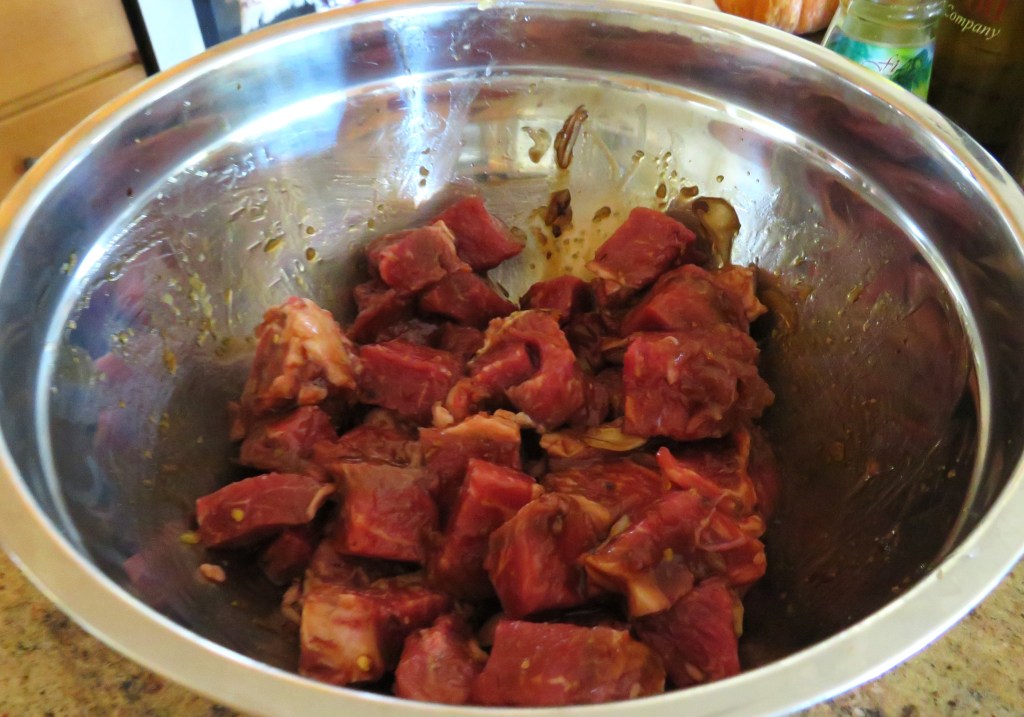
Mix the garlic, ginger, soy sauce, honey, red pepper flakes and some of the sesame oil together. Cube the steak and toss in with the marinade. Let the steak marinate in the refrigerator for at least 1-2 hours before cooking.
Cut the vegetables how you like them.
In a hot wok or large skillet, add the rest of the sesame oil, and olive oil if needed, and sear the steak cubes for about 2-3 minutes, or until completely browned. Once the meat is cooked, remove it from the heat and set aside.
Add the vegetables and more oil if needed, and cook until the vegetables are al dente, about 5-7 minutes, stirring frequently.
Add the meat and the marinade to the vegetables and continue to cook for an additional 2-3 minutes, stirring frequently. Serve it over rice or noodles, top it with the toasted sesame seeds and add your favorite side dishes. You can’t go wrong with this delicious, healthy recipe. You can substitute, chicken, pork or tofu for the steak too if you prefer.
Have a great day and make everyday great. Stay safe and stay well. ‘Til next time.
I am not seeing too many Herons these days. For the most part, they have flown the coup, and are residing in their winter homes. But I did see one yesterday. He let me get a few good shots of him before flying away too. At first, he was resting at the top of the tree, scanning the area, looking for a good fishing spot.
Then off he went, to destinations unknown.
Have a great day and make everyday great. You just never know what surprises life has in store for you. Be open to all of them. 🙂
We had some leftover fried chicken last night for dinner, and I needed a good, healthy side dish to go with it. I decided to make an Italian bean & potato salad, which was the perfect choice. I loaded it up with all kinds of colorful goodness. Thank you to both The Ohio Cook at My Meals Are on Wheels at https://beatcancer2010.wordpress.com/ and Health Continuum at https://healthcontinuum.org/ for this delicious idea. I changed it a little, to make it my own, but that’s just what I do. 🙂
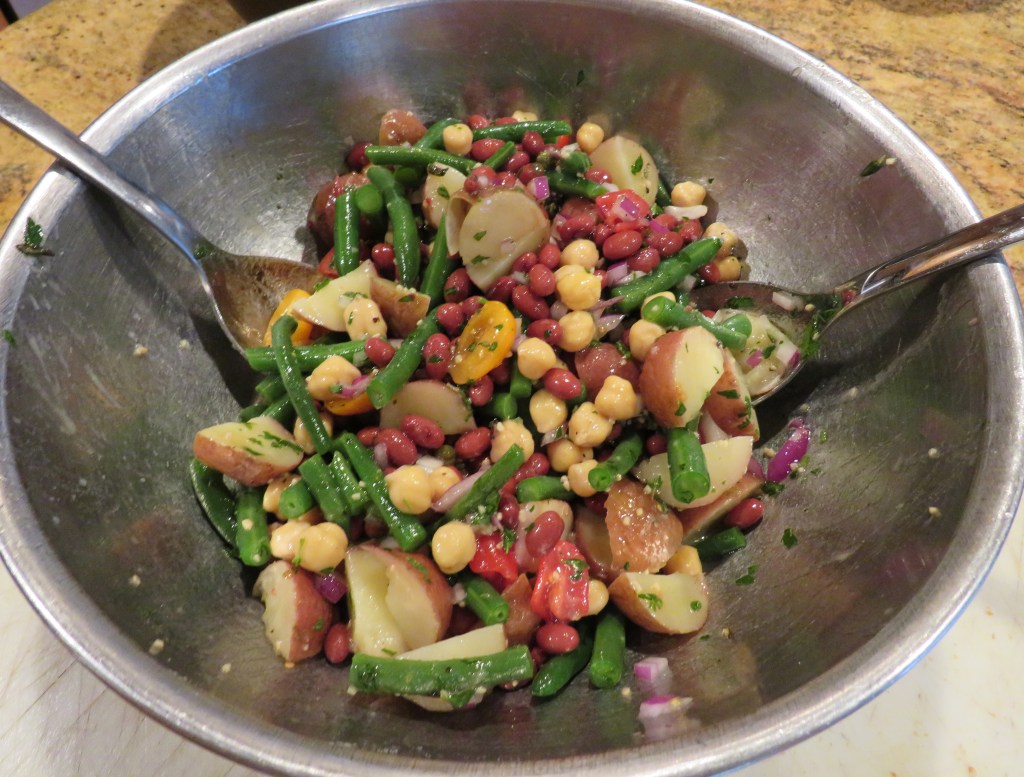
Italian Bean & Potato Salad
1 cup green beans or haricot verts, ends trimmed, cooked and cut into pieces about 1-1 1/2 inches in size
1 lb new potatoes, boiled and quartered
1/2 red onion, diced fine
1 can red beans, drained and rinsed
1 cup garbanzo beans, drained and rinsed
1 cup mixed cherry tomatoes, halved or quartered
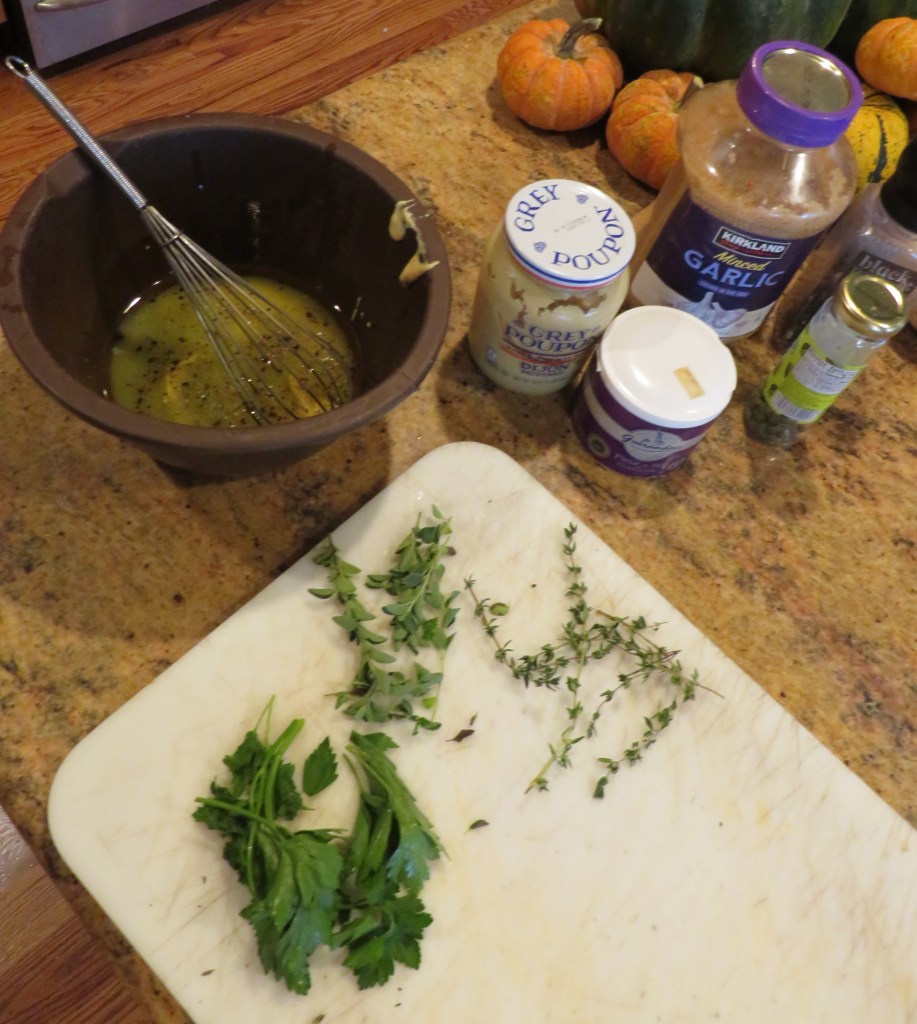
Lemon Vinaigrette
1/2 cup lemon juice
1/2 cup olive oil
1 tsp Dijon mustard
1 TBSP maple syrup
1-2 tsp garlic
salt & fresh ground black pepper to taste
1 tsp each fresh thyme and fresh orgeano, chopped
1/4 cup fresh parsley, chopped
Whisk everything together to make the dressing and set aside.
Boil the potatoes for about 12 minutes, then rinse and let cool for a bit.
Cook the green beans for about 5-7 minutes, then drain and cool. Once the potatoes and green beans have cooled a little, add to the rest of the ingredients and toss together well. Add the dressing, and toss again, making sure everything is well coated. Add enough dressing to give it all a lot of flavor without drowning the vegetables. You can serve either warm or at room temperature.
This quick, easy, colorful salad will go well with anything. If you want to make it more of a meal, add it all to a bed of lettuce, spinach or mixed greens and add some chicken, salmon or shrimp, and voila! You have now made it a meal. This just might be a new favorite salad of mine. 🙂
Have a great day and make everyday great. Stay safe and stay well. ‘Til next time.
Red beans and rice has been a staple in the deep south for generations, particularly in Louisiana and its bayous and Southeast Texas. Southeast Texas and Louisiana share the same cultures and cuisines. They are literally kissing cousins. Red beans and rice is a staple dish of Louisiana Creole cuisine with origins in African, Spanish, and French culinary traditions. My mother was from Southeast Texas and I grew up with red beans & rice. We are going back down to that region for Thanksgiving to spend the holiday with my cousins, so I thought it was time for some red beans & rice here at home too.
As I was cooking it, I send pictures to my cousin Donna. She said I “did it proud”. Her mother, my Aunt Gloria, was always cooking up good Cajun and Creole dishes. I learned from her. She would be busy cooking in the kitchen and I would sit up at the counter coloring in my coloring books, watching and learning from her all the time.
Every family and every household has a slightly different version of of this delicious Southern staple, so there is no one recipe. Traditionally, in Louisiana, and New Orleans specifically, red beans & rice was served on Mondays after the family had enjoyed a ham for Sunday dinner. It’s a hearty, flavorful Creole dish typically made with red kidney beans, sausage, and a blend of savory seasonings, traditionally served on Mondays.
Red Beans & Rice
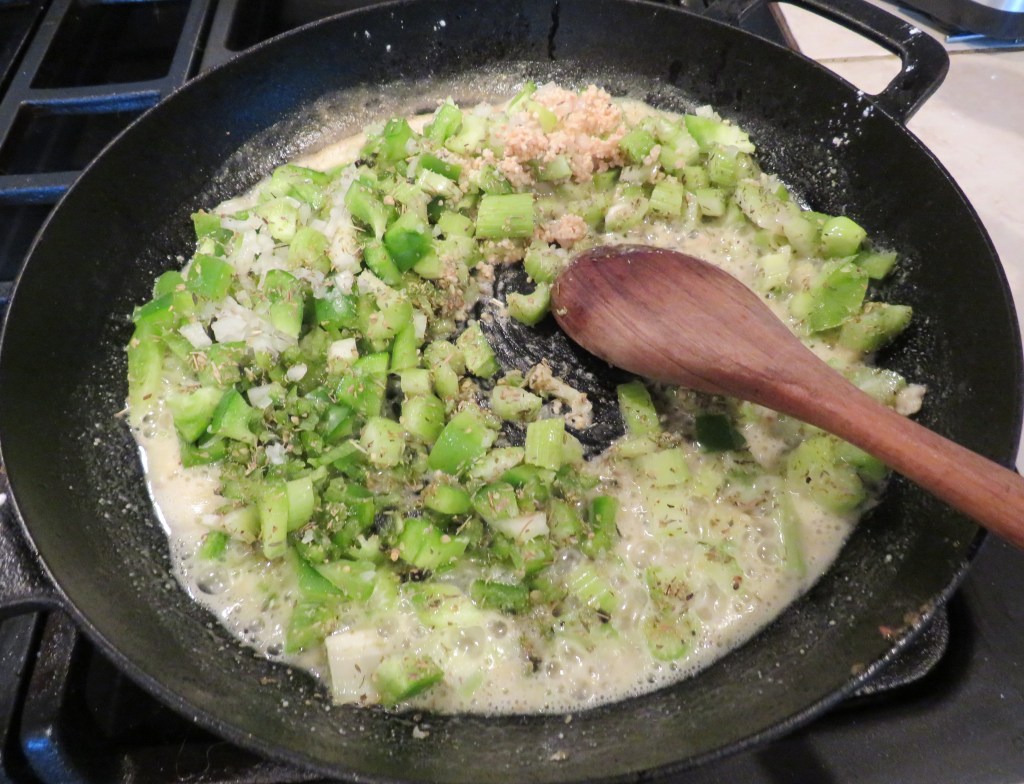
Of course I started out with the “Holy Trinity” of Cajun cooking, celery, onions, green peppers, and then I added garlic and jalapenos to it as well. No Cajun or Creole cooking would be complete or authentic without these ingredients.
1 green bell pepper, diced
1 onion, diced
3 celery stalks, diced
1 TBSP garlic
1-2 jalapenos, diced
1/2 cup flour
butter/oil for cooking
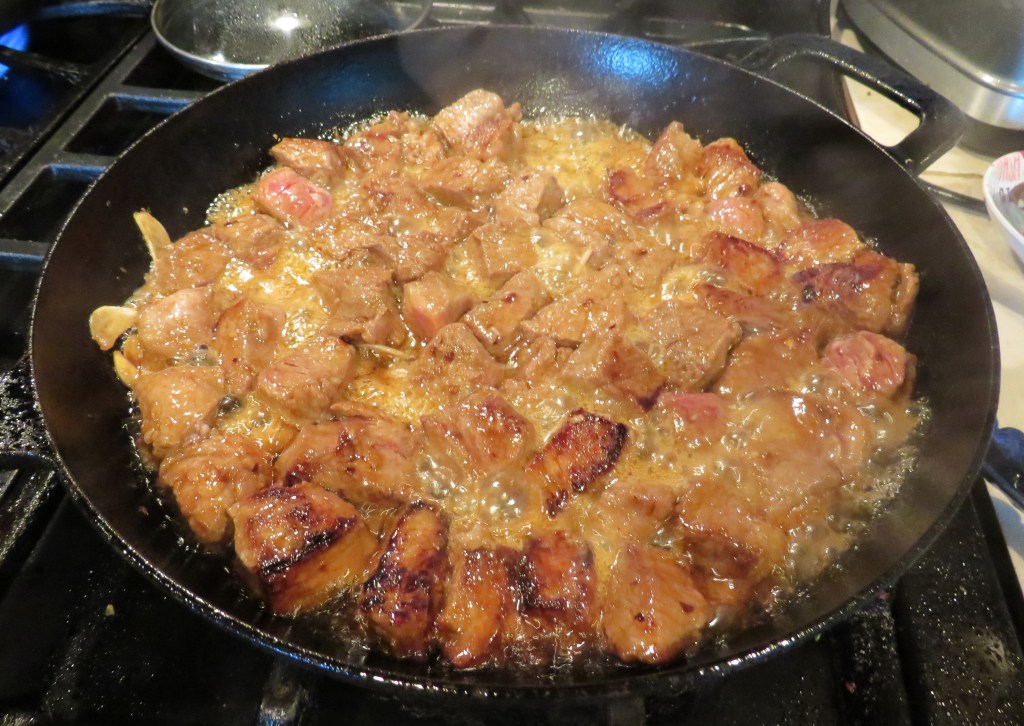
1-1 1/2 lbs Andouille sausage, sliced
1 can red beans
1-2 tsp dried oregano
1-2 tsp dried thyme
1-2 tsp dried marjoram
salt & pepper to taste
6 cups chicken stock
2 bay leaves
1-2 tsp Cajun seasoning
cooked rice
In a hot skillet or large pot, cook the vegetables, garlic and seasonings in oil and/or butter until softened, for about 5 minutes, stirring frequently. Add the flour and mix together thoroughly. You are making a roux. The longer you cook the flour, the darker the roux will get, which will change the flavor and texture of the dish. There is no right or wrong way. It is all dependent upon your own personal preferences.
Add the sausage and continue to cook until the sausage is cooked.
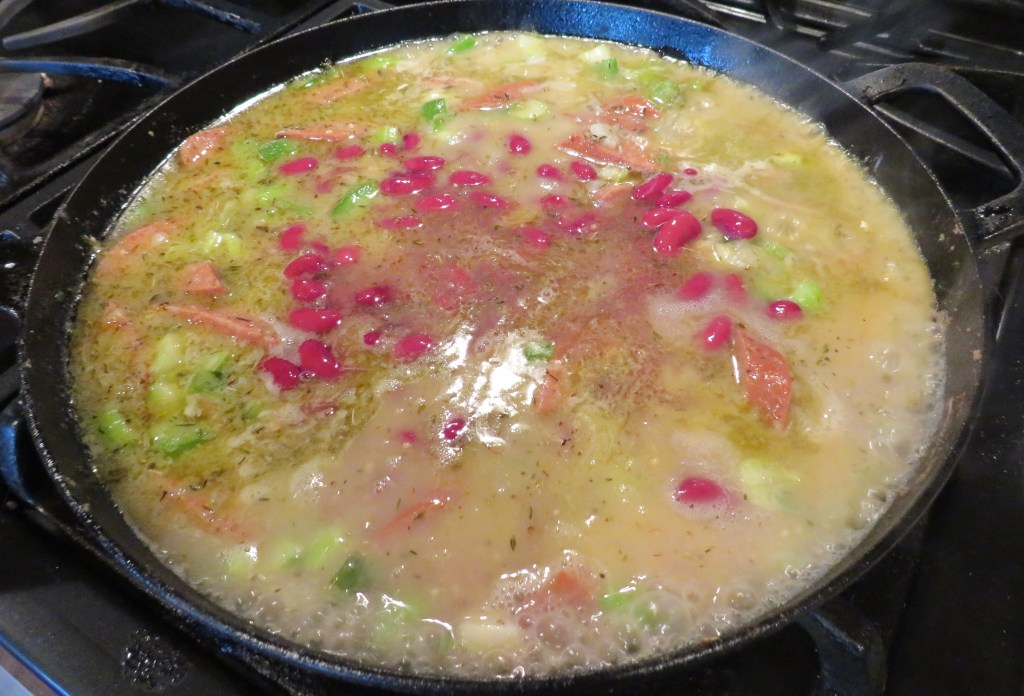
Add the chicken broth, and adjust the seasonings as needed. Bring to a boil then reduce the heat to a simmer. Now here comes the tricky part. You can slow cook the stew for up to 8 hours if you choose, but you can also cook it at a higher temperature for a lot less time too. Again, it all comes down to your own personal preferences. If you are are using dry beans, that you soak overnight, the cooking process will take longer too. If you use canned beans, it doesn’t take that long to cook.
Some people like to drain the beans first. I do not. I like the flavor and texture of the added “bean broth”. Add the beans around the last 30 minutes of cooking and mix together thoroughly.
When the stew is cooked, serve it in a bowl and add the cooked rice in the center. This can be a meal on its own, served with buttermilk biscuits, like I served it, or as a side dish to be served with fried chicken and greens, or any other Southern specialties. Any wine will go well with red beans & rice, but I chose a red wine to go more with the sausage.
Laissez le bontemps roulez! Have a great day and make everyday great. Stay safe and stay well. ‘Til next time.
Sometimes, the best way to honor those who served, and to those we lost is to remember the past.
Thank you to all the brave men and women who served and continue to serve today. You are all heroes in my eyes and in my heart.
This is my daddy in his Australian Army uniform, circa 1940. He was a very young lad when he was shipped off to fight in North Africa, and returned home a man.
In Flanders Fields
BY JOHN MCCRAE
In Flanders fields the poppies blow
Between the crosses, row on row,
That mark our place; and in the sky
The larks, still bravely singing, fly
Scarce heard amid the guns below.
We are the Dead. Short days ago
We lived, felt dawn, saw sunset glow,
Loved and were loved, and now we lie,
In Flanders fields.
Take up our quarrel with the foe:
To you from failing hands we throw
The torch; be yours to hold it high.
If ye break faith with us who die
We shall not sleep, though poppies grow
In Flanders fields.
May we never forget those who fought for our freedoms. May we always honor those who sacrificed and those who gave their all.