The Tea Sandwiches

Tea sandwiches are just much a part of a tea party as are the scones. Both go together very well. Originally, both the scones and the tea sandwiches were kept very basic and simple. When tea sandwiches were first introduced to the afternoon teas, they were butter bread and very thinly sliced cucumbers, and that’s it. Both the scones and the tea sandwiches have come a long way since their simple beginnings.

In a traditional tea, the crusts are cut off the bread. The crusts are removed to help eliminate the unnecessary filling when there are plenty of cakes and other goodies offered that we want to enjoy as well. I confess, this time I did not cut the crusts off my sandwiches, which was brought to my attention by a well-loved, British friend of mine who will remain unnamed, because there was going to be too much waste, but normally I do. 🙂

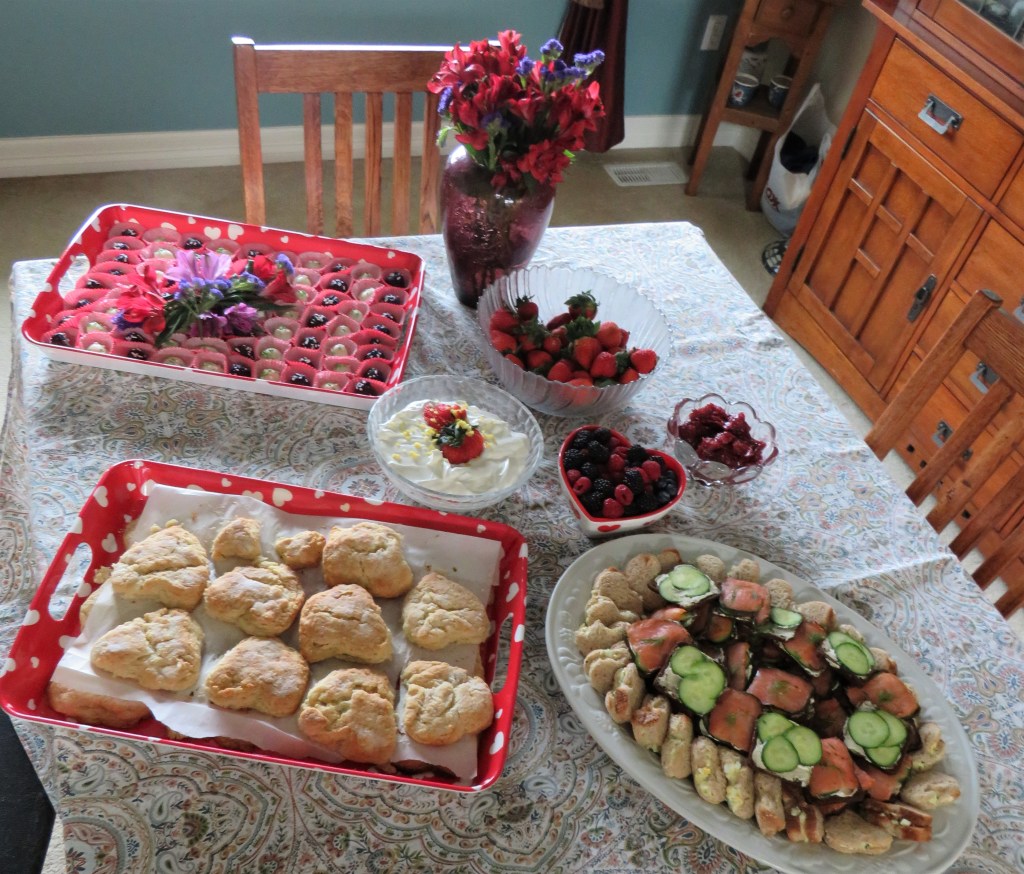
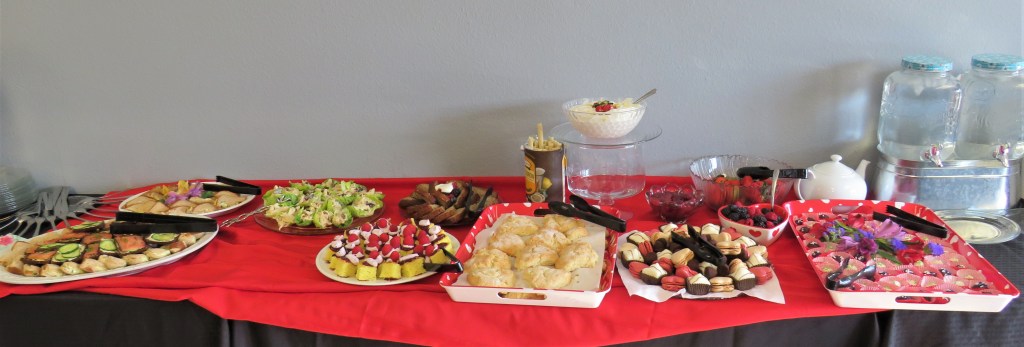
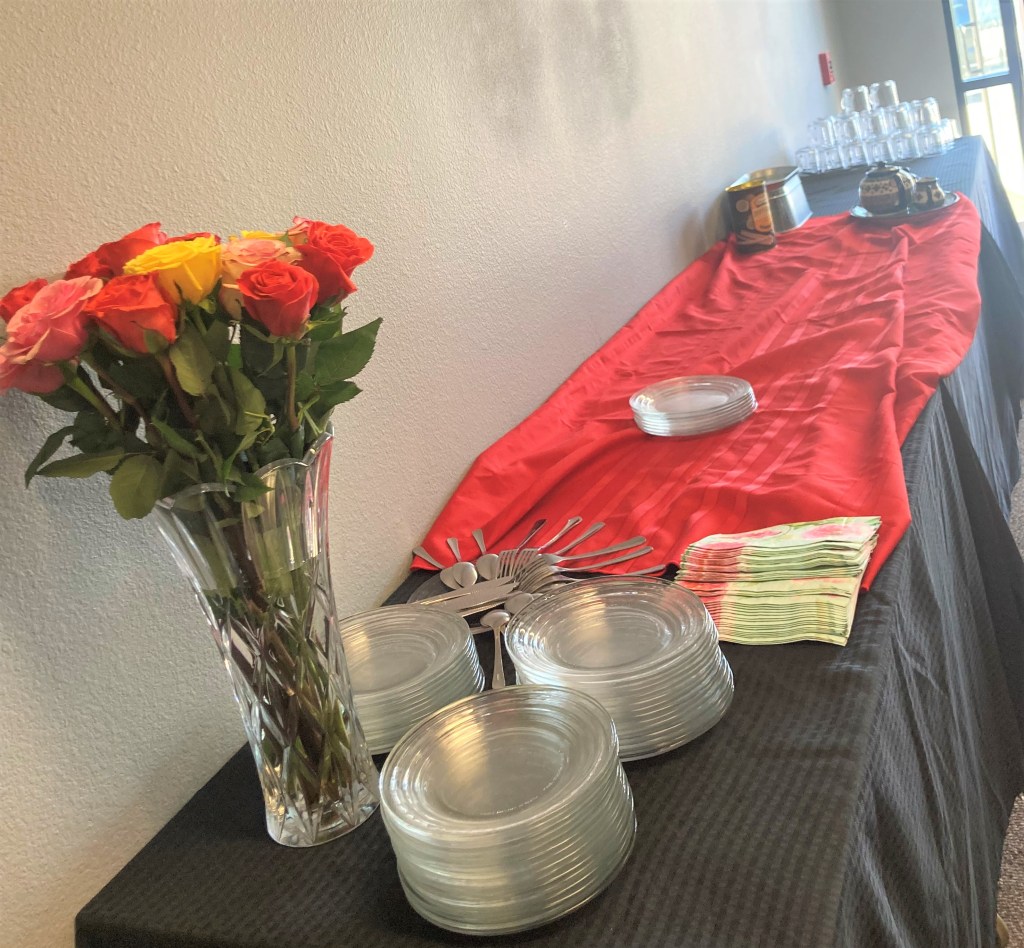
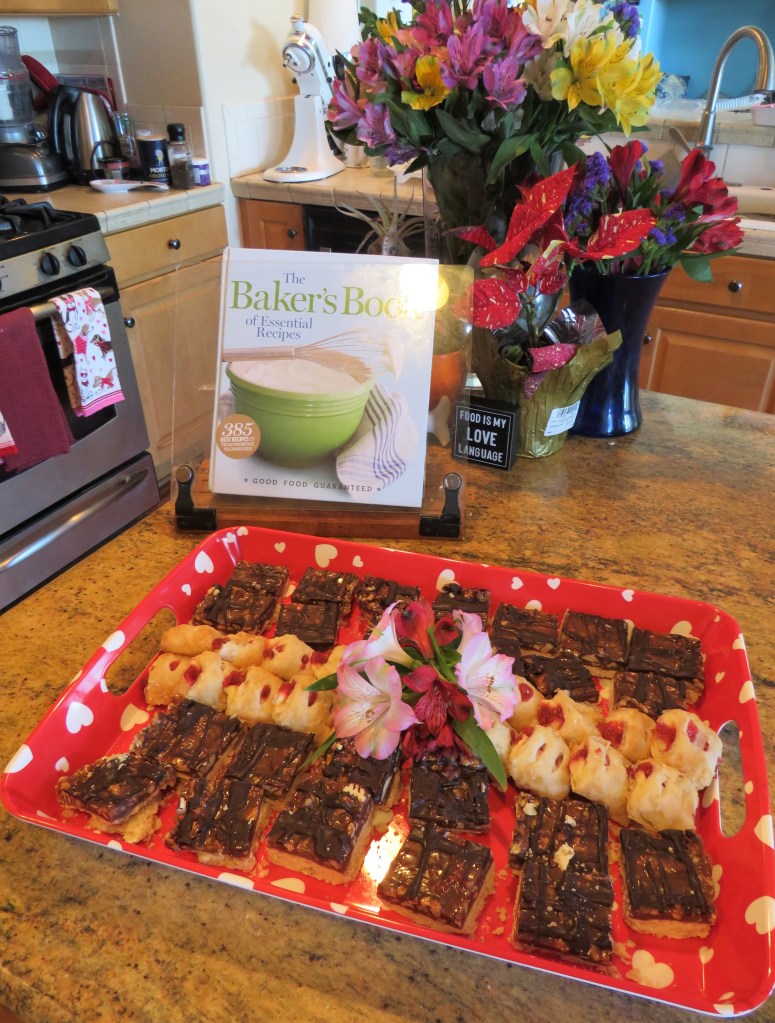
The tea sandwiches were typically the first course of a three course tea, served along with baked goods such as scones and sweets like tartlets or chocolate. Our tea party certainly met all the requirements to be labeled as a ‘traditional tea”. We had scones, we had tea sandwiches, we had scones, we had Devonshire clotted cream, we had a variety of different cakes and sweets, and we had chocolate. And of course we had a wide variety of different teas as well. Today, there really aren’t any rules, other than they must be small, bite-sized little sandwiches and nibblies.

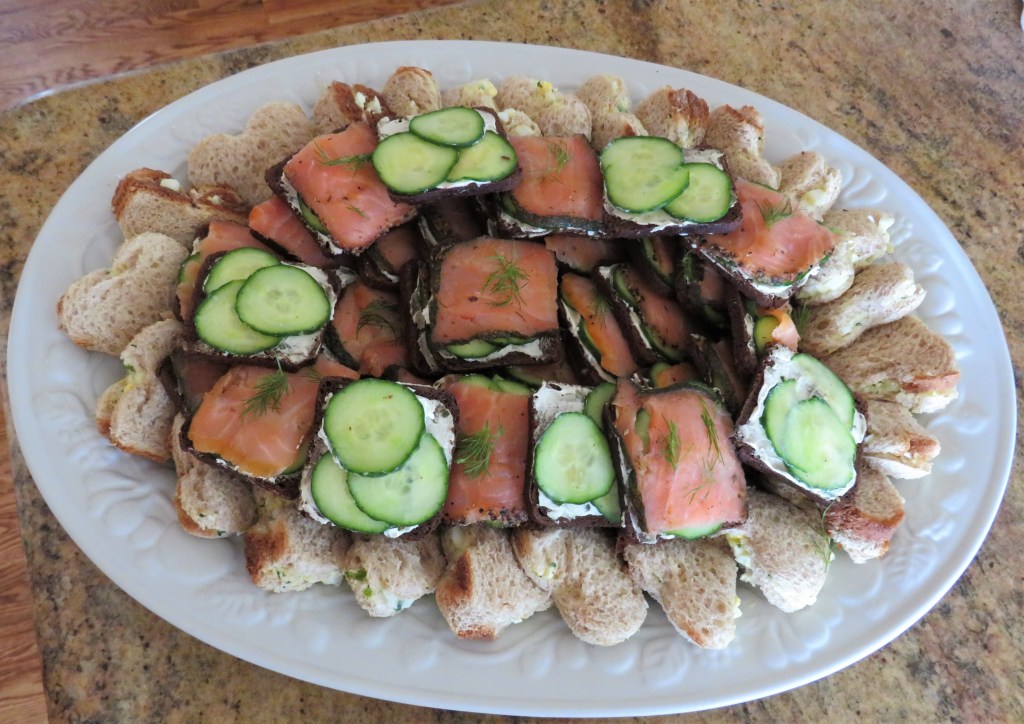
I made two kinds of little tea sandwiches for our tea. I made egg salad sandwiches and open-faced cucumber sandwiches with herbed cream cheese and smoked salmon.

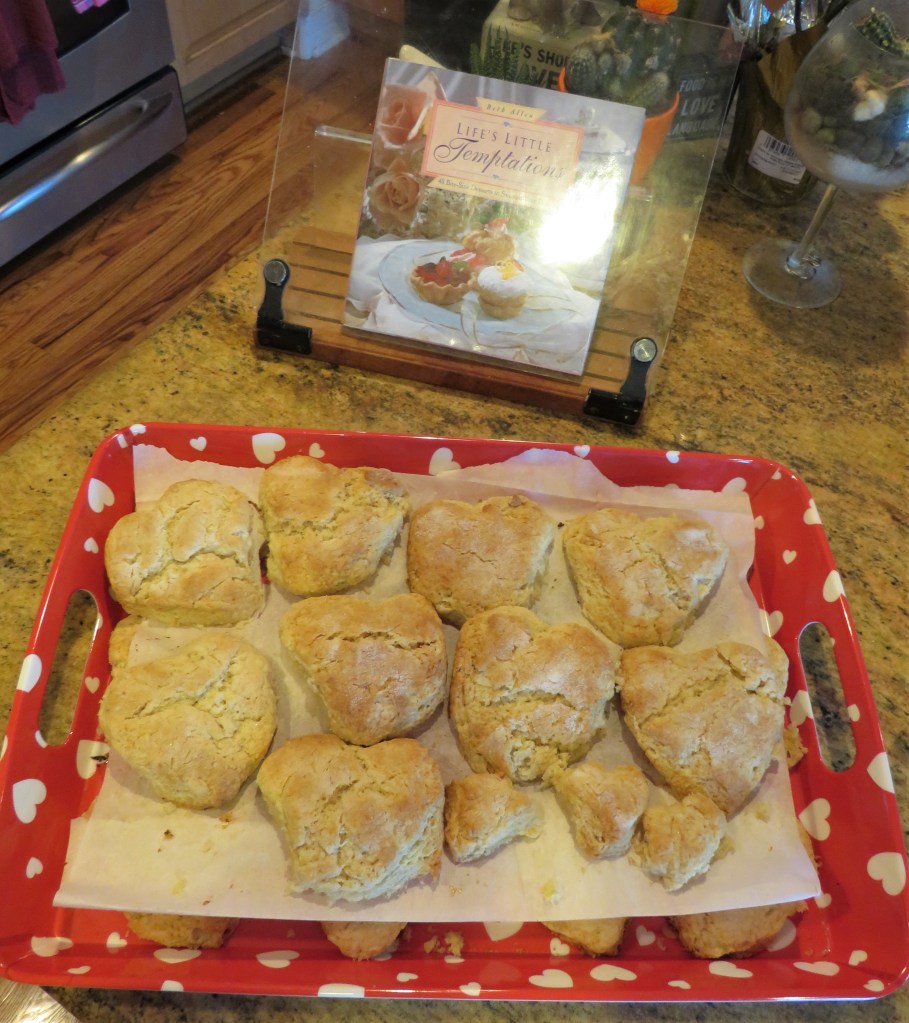
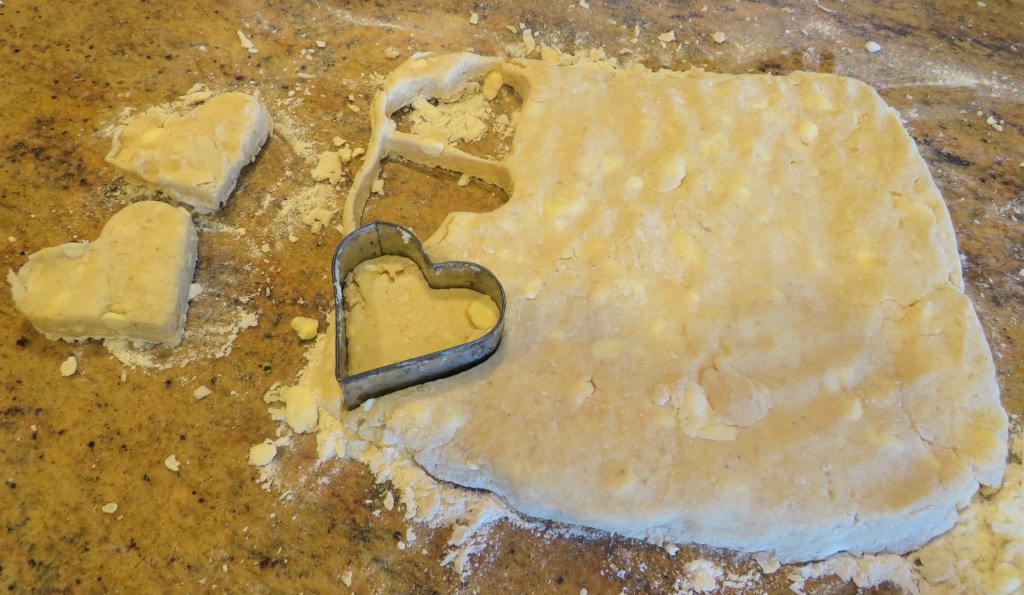
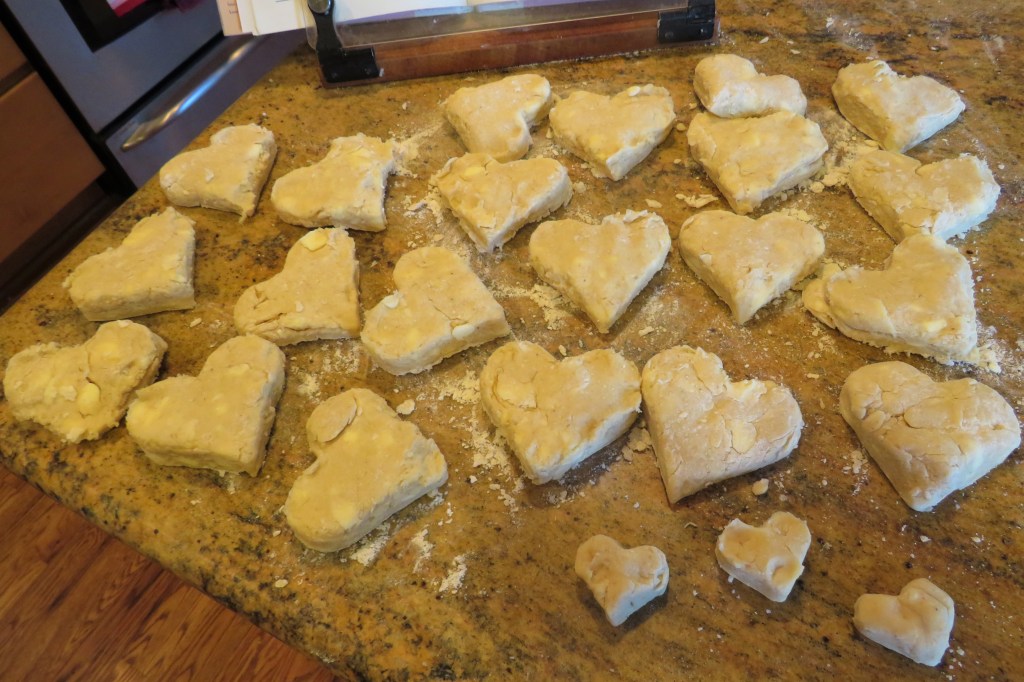
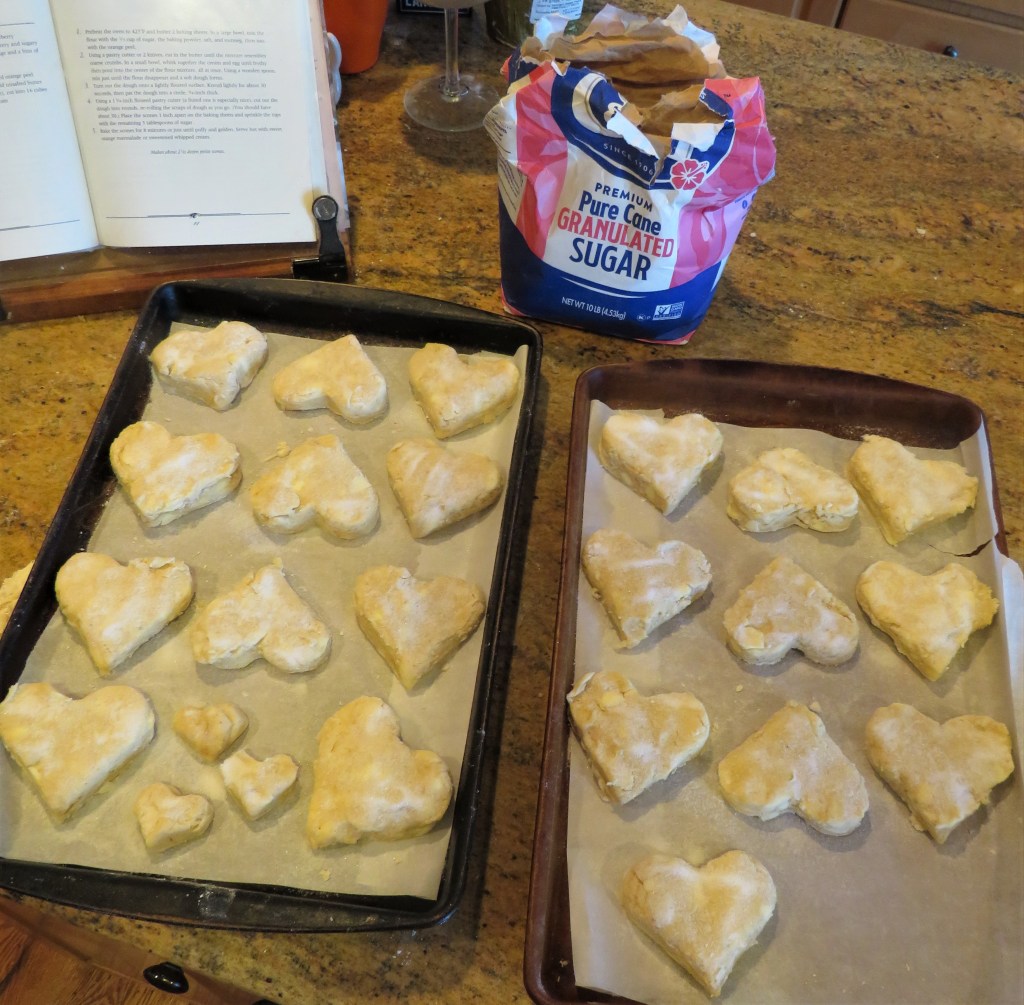
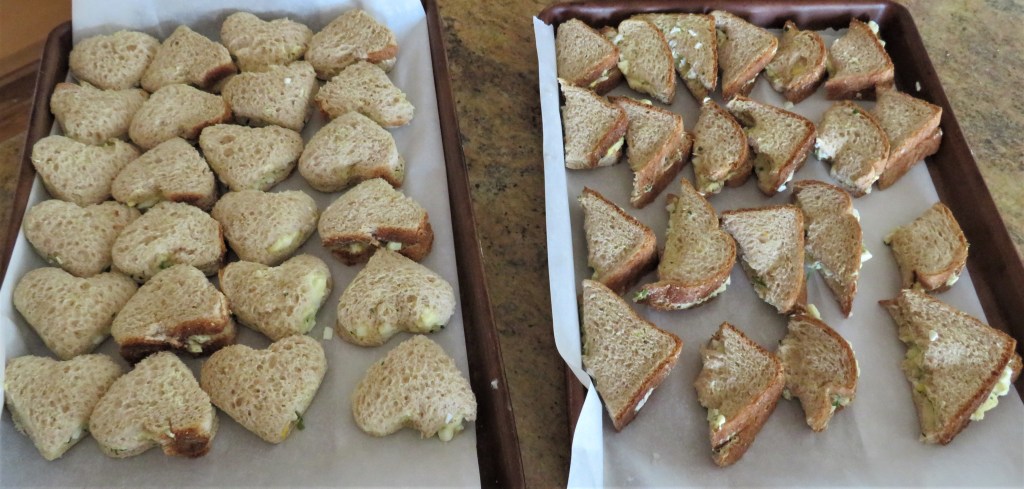
I had a little Valentine’s day them going on for the tea, so I cut my egg salad sandwiches into little hearts with a heart shaped cookie cutter.
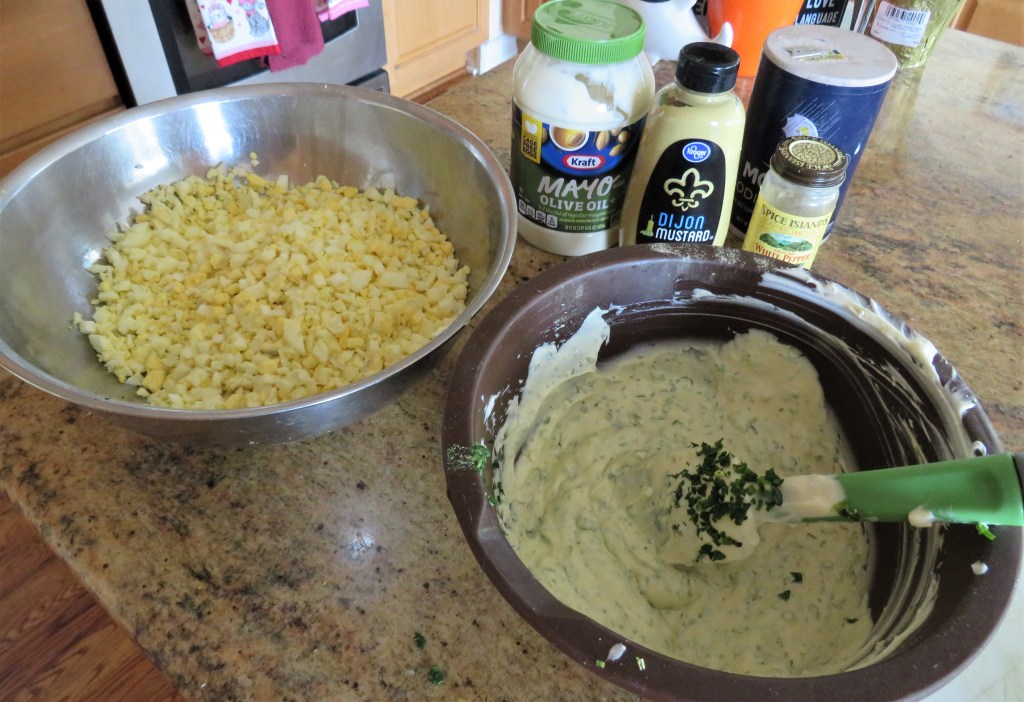
Egg Salad

6 hard boiled eggs

1 cup mayonnaise

1 TBSP Dijon mustard

salt & white pepper to taste

1 TBSP chives, cut very small

1 TBSP fresh parsley, chopped fine

thinly sliced bread of your choice, crusts removed

butter

I have found for boiling the eggs, this is the best, tried and true method. I NEVER vary from this. Fill a saucepan with the eggs, cover the eggs with water and about 1 TBSP of vinegar. Bring to a full rapid boil, and let boil for 12 minutes – 12 MINUTES ONLY. Then discard the water and let them soak in cold water for a few minutes before peeling.

Once the eggs are done, and peeled, chop them.

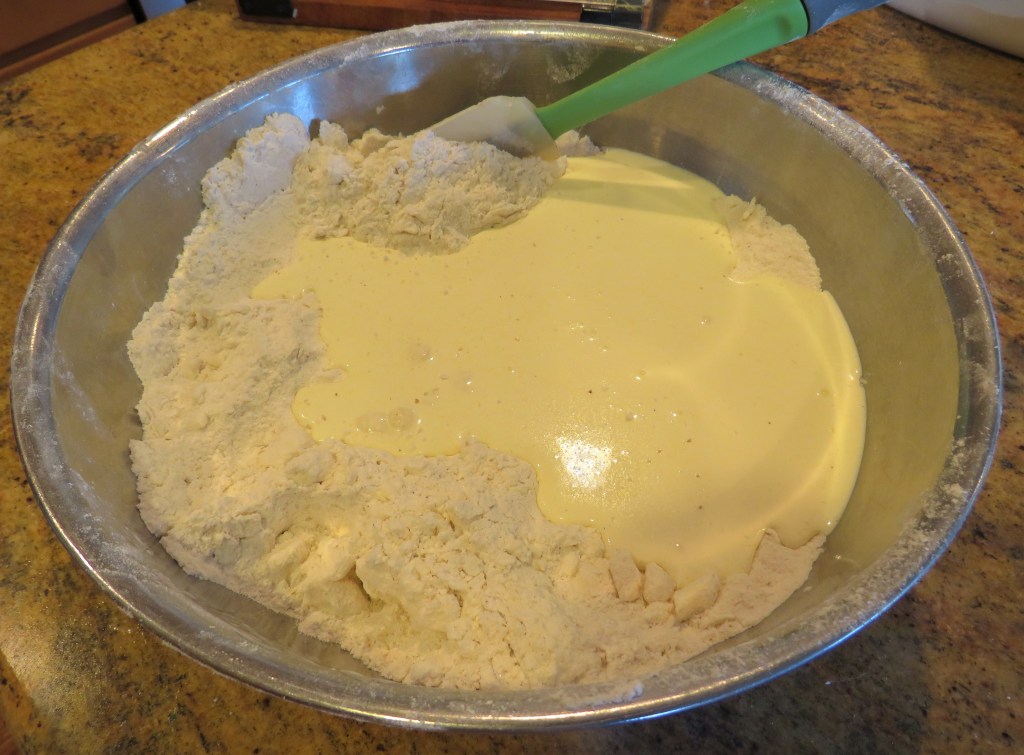
Combine all the ingredients then add to the eggs, and gently fold in together.

Butter the bread on both sides with a very light spread of butter to help prevent it from getting soggy. Them add the egg salad and cut into the shapes.

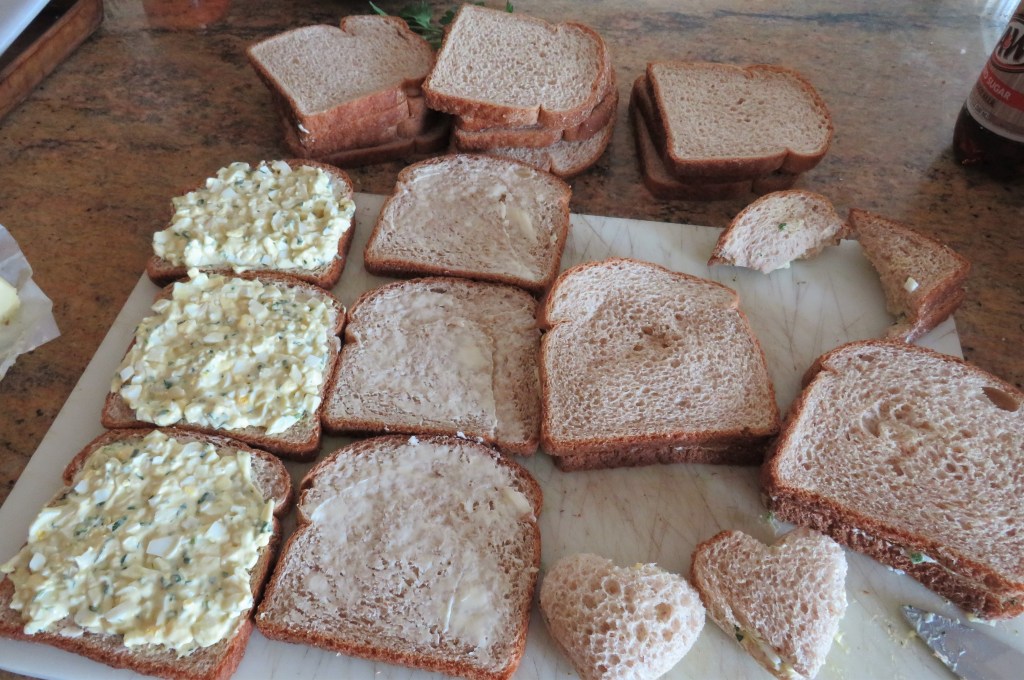
The triangles are the other parts of the sandwiches. They had to be used too. Waste not, want not you know.

The cucumber and salmon sandwiches were just as easy to make as the egg salad sandwiches. I purposely used two different kinds of bread for the different sandwiches.

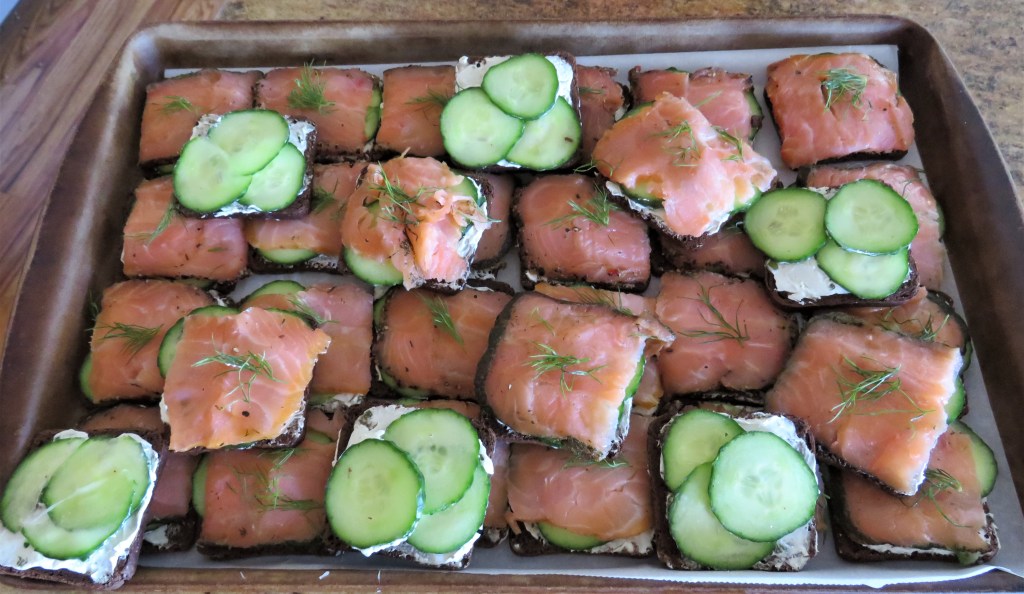
Cucumber Salmon Sandwiches

I used the small pumpernickel bread slices, herbed cream cheese, smoked salmon, English cucumber sliced very thin, and fresh dill.

Again, spread the cream cheese in a very thin layer. Cut the cucumber slices very thin and add on top of the cream cheese, then add very thinly sliced salmon on top. Top each sandwich with a tiny sprig of fresh dill.

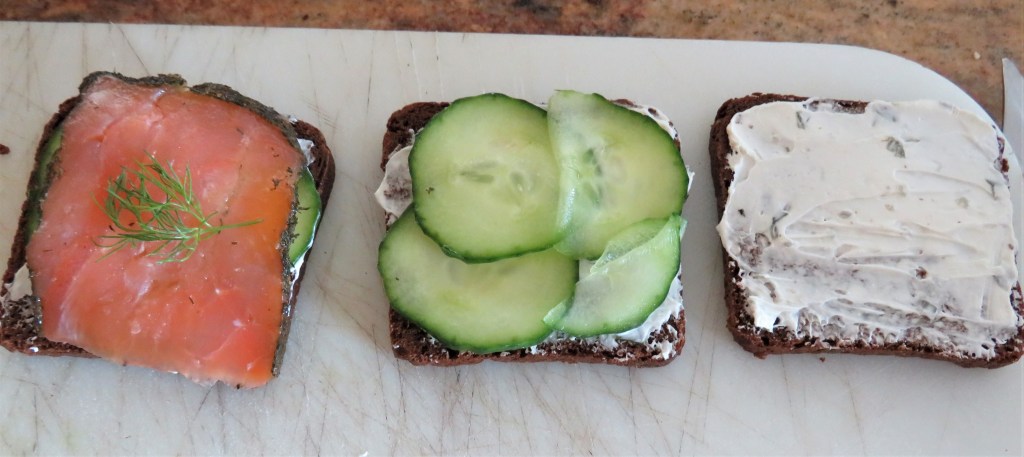
I ran out of salmon, which is ironic because at first, I thought I bought too much, so I actually had a few traditional cucumber tea sandwiches, that were not planned, but just happened.

For tea parties today, you can make them as simple or as fancy as you like. The only rules are just to keep everything small and bite-sized, and make them pretty. Serve a selection of tea sandwiches, scones, Devonshire clotted cream, tea cakes and chocolate, and you will have a perfect tea every time.

Have a great day and make everyday great. Stay safe and stay well Everyone. ‘Til next time.

The Tea Party

All week you have been seeing snippets of things I was making for our tea party. Today was the day. We had no idea how many people to expect, but we had 34 ladies show up. We were hoping for at least 12. I think there were a few more than just the 12 we were hoping for. 🙂 Everyone raved about the food and what a fun day it was. This was the first of these ladies only events, and I think it will be the first of many more yet to come.

You all know I made quite a bit of the food, but other ladies brought delicious treats too. It was a huge success. I made two different kinds of truffles, white chocolate lime and chocolate lavender Making Truffles; orange scones Orange Scones; Devonshire clotted cream; strawberries and mixed berries, and two kinds of finger sandwiches, egg salad and open faced cucumber with herbed cream cheese and salmon.

Here is what our table looked like when we started serving the tea. The tables were filled with all kinds of delicious treats, with many ladies contributing to the affair.

We started off with prayer, then let everyone loose on the food. As people were enjoying all the delicacies, they were also playing some ice breaker games to get to know each other better. Some people knew each very well and others were brand new to each other. But by the end of the day, everyone had made at least one new friend, and/or got to know someone better.

After the food it was time to get up and walk around, and still learn as much as we could about our new friends, with another game. As you can see everyone was talking to everyone.

Everyone had such a good time and thoroughly enjoyed themselves. We are already talking about the next one. But Wendy and I both decided we needed a bit of break first. 🙂

Make the most of everyday and make every day great. Stay safe and stay well Everyone. ‘Til next time.

Orange Scones

You can’t have a tea party without scones, right?! I means, scones are one of the key ingredients to a successful tea party. Scones have been eaten in Devon and Cornwall since the 11th century but it would take the advent of the railway network and refrigeration to popularize the cream tea – taking the hot drink with scones slathered in clotted cream and preserves. Day-trippers to the seaside in the early 20th century would take the tradition home with them and scones would soon become an afternoon tea staple.

I mentioned yesterday that we are having a tea party coming up on Saturday. Making Truffles Here are my scones I made for the day.

Traditionally tea parties tend to be in the afternoons, although today, they have evolved into more of a brunch celebration. Afternoon tea, that most quintessential of English customs is, perhaps surprisingly, a relatively new tradition. Whilst the custom of drinking tea dates back to the third millennium BC in China and was popularized in England during the 1660s by King Charles II and his wife the Portuguese Infanta Catherine de Braganza, it was not until the mid 19th century that the concept of ‘afternoon tea’ first appeared.

Afternoon tea was introduced in England by Anna, the seventh Duchess of Bedford, in the year 1840. The Duchess would become hungry around four o’clock in the afternoon. The evening meal in her household was served fashionably late at eight o’clock, thus leaving a long period of time between lunch and dinner. The Duchess asked that a tray of tea, bread and butter (some time earlier, the Earl of Sandwich had had the idea of putting a filling between two slices of bread) and cake be brought to her room during the late afternoon. This became a habit of hers and she began inviting friends to join her.

Traditional afternoon tea consists of a selection of dainty sandwiches (including of course thinly sliced cucumber sandwiches), scones served with clotted cream and preserves.

Since it is close to Valentine’s Day, everything (at least what I am preparing) is with a Valentine’s Day theme. My scones are heart shaped. The funny thing is though, when I made my scones, I used a heart-shaped cookie cutter that was about 1/2 the size of the scones. I had no idea they were going to grow as big as they did. No worries though, they came out so light and fluffy, with just a hint of orange and nutmeg to them. I will make some Devonshire or clotted cream to go with them (today’s plan) too. I am not sure if I am going to serve them with orange marmalade on the side, or raspberry jam, or perhaps both. I’ll let you know what I decide. 🙂

I make scones quite often. There are many different recipes, from many different sources. I am not picky. All I ask is that they are light, fluffy and delicious. These scones certainly pass the muster. Note to self with these gems though, is that they really do rise. They doubled in size from what I was expecting. So next time I make these, especially if I am cutting them into hearts again, use a smaller cookie cutter. 🙂

Orange Scones

Preheat the oven to 425* F or about 220* C.

Line your baking sheets with parchment paper.

2 cups flour

1/3 cup sugar + more for topping the scones

1 TBSP baking powder

1 tsp salt

1/4 tsp nutmeg

1 TBSP orange zest

1/2 cup or 1 stick of cold butter, cubed

3/4 cup heavy whipping cream

1 egg

Combine the flour, salt, nutmeg, orange zest and baking powder together and mix well. Add the cubed butter, and mash everything together until it all resembles coarse sand. Form a well in the center.

Mix the eggs and whipping cream together and pour into the well. Gently incorporate the flour mixture into the liquid. Mix just until the flour has been absorbed and a soft sough has been formed.

Turn the dough out onto a lightly floured surface and knead the dough into either a circle or a rectangle and pat it out with your hands until the dough is about 3/4 of in inch thick. Cut with cookie cutters in your desired shapes.

Place the scones on the parchment paper lined sheet pans then sprinkle the tops with the remaining sugar.

Bake for about 10 minutes or until they are lightly golden and puffy. Serve with either orange marmalade, or other jam of your choice, or clotted cream, or both. I will be serving mine with both.

My friend Wendy and I got all the tables set up yesterday. We kept it simple and elegant.

Stay tuned, I have more tea party goodies coming your way, and of course, you will see pictures of the whole party too.

Have a great day. Stay safe and stay well Everyone. ‘Til next time.

Making Truffles

When trying to find the origins of things, often there are conflicting ideas and notions on how, or where, or who created them. For the most part, it is anyone’s guess, but it still fun to learn about all the different ideas and theories behind the tasty treats we all enjoy. The same is true for the origin of the truffles chocolates.

One theory that has a lot of popularity is truffles and ganache were created by a culinary student who was studying under the famous chef, Auguste Escoffier. Rumor has it he attempted to create pastry cream when the hot cream spilled into a bowl full of chocolate bits. The material solidified after a while, and the student discovered that he could form it into a ball.

Another legendary folk tale is that on Christmas Day, 1895, in Chambray, France, French patisserie Louis Dufour came up with the notion for chocolate truffles. When he ran out of Christmas treat ideas to sell to his clients, he decided to try something different. He created a quantity of ganache and rolled it into a round ball before dipping it in melted chocolate. The chocolate-covered ganache was then rolled in cocoa powder. Yet another theory is that the chocolate ganache was first created in Switzerland. So who really knows.

A chocolate ganache is essentially a blend of cream and solid chocolate melted together to form a smooth, velvety substance. This ganache has evolved into the inner core and heart of the chocolate truffle in the present age. The truffle itself was a beautiful entrée, very expensive, and only the royals and the very affluent of France ate it. Giving this moniker to the new chocolate dish automatically raised it to that tier. The chocolate truffle has long been associated with luxury and wealth. 

The word “truffle” comes from a Latin word that means “Lump.” Because of their striking likeness, truffles are called after mushrooms with the same name. The first chocolates were manufactured in a primitive manner to resemble the lumps; truffle lumps, initially known as Truffles Chocolate, referring to the appearance and chocolate they are made of. The key ingredient to chocolate truffles is the ganache filling. Chocolates that do not have the ganache filling are NOT true truffles.

The original chocolate truffles were just plain balls of chocolate ganache dusted with cocoa powder. They were simple yet elegant at the same time. Today, there are many possibilities and endless variations, with many different flavor infusions.

Our church is having a ladies’ tea party this Saturday, and of course, I making a lot of the goodies we will be enjoying. Surprise, surprise, I know. 🙂 I will be making a variety of traditional tea delicacies, including two different kinds of truffles. I have made both before, and liked them so much that I thought it was time to make them again. I have made both white chocolate-lime truffles and dark chocolate and lavender truffles for our tea party. Time for Truffles, White Chocolate Lemon-Thyme Truffles (well, instead of the lemon-thyme, I did lime). The techniques are the same for both the white and the dark chocolate, though I have to say, I prefer working with the dark chocolate slightly more. I found the white chocolate hardens a bit faster than the darker chocolate, meaning I had to keep re-melting it in order to dip my ganache centers. But as you can see, they all worked out nicely, and everything was dipped.

The procedures are the same, and the basic recipe, whether using dark, or milk or white chocolate are the same as well. The main differences are in the flavor infusions that are used.

To make the ganache fillings melt the heavy whipping cream and flavorings together until they just start to simmer, then added the butter, and mix it all in together. Cook over a medium-high flame, making sure to stir constantly, in a slow, gentle manner. Once everything is blended together, let it steep for 15 minutes, then strain and throw away the used flavorings.

Add 1/2 of the chocolate morsels and again, gently stir into the mixture. Cook until all the chocolate is completely melted and you have a smooth, creamy mixture.

Place parchment paper onto baking sheet then carefully pour the chocolate mixture onto parchment paper and evenly spread into a thin layer to fill the pan.

Refrigerate for an hour and let it set. You do not want it to harden. You want the chocolate to still be soft and pliable. Once it is ready, spoon up about 1/2-1 tsp of the mixture and roll in your hands to make a soft ball. Make sure you wear gloves so the heat of your hands does not melt this delicate mixture.

Once the chocolate balls are formed, refrigerate again for at least one more hour. You can also place them in the freezer too. I found this makes them easier to work with and they do not melt so quickly when dipped in the chocolate.

To finish the truffles, melt the rest of the chocolate. I used a double boiler. Make sure no water gets into the chocolate. I also found the chocolate melts better with a dash of milk added as well. Stir constantly until it is smooth and creamy and all the chocolate has melted. Dip the ganache ball into the melted chocolate and completely coat, then remove with a fork and shake off the excess chocolate and place on another sheet of parchment paper. If you want, you can add colored sprinkles. Do this immediately after removing from the melted chocolate, as it hardens fast.

Once the truffles are dipped and decorated, refrigerate them once again to harden.

When they are set, plate them up in a pretty presentation and share them with your friends and family. They will all be amazed at your artful creations.

Every day needs chocolate. Chocolate makes everyday a great day. Stay safe and stay well Everyone. ‘Til next time.

A Mediterranean Meal

My friend Katelyn had given me a box of exotic spices that I was just dying to try out, but hadn’t had time to until just now. Some Fun New Gifts I made a delicious, exotic Moroccan/Mediterranean chicken dish with them. This is a typical dish you could find anywhere in Morocco or Greece, or any of the other Mediterranean countries.

All the countries surrounding the Mediterranean Sea have very similar cuisines and use a lot of the same ingredients and spices. They may differ from country to country and culture to culture, but the differences are very subtle indeed. They are far more similarities than differences. There were all kinds of fresh vegetables, spices chicken and couscous.

Mediterranean Chicken

cooked couscous or rice

3 cups fresh spinach, stemmed and chopped

1 TBSP garlic

1 onion, diced, medium

1 1/2 cups grape tomatoes, cut in half

1 cup mixed olives, sliced

1 can garbanzo beans, drained and rinsed

1 1/2-2 lbs chicken breast

2 tsp fresh oregano, chopped or 1 tsp dried oregano

2 tsp fresh thyme, or 1 tsp dried thyme

salt & pepper to taste

1 cup dry white wine

olive oil and lemon olive oil (optional)

1 tsp paprika

1 tsp saffron powder

1 tsp cumin

1 tsp Middle Eastern spices (optional)

Get a large skillet very hot and add the oils and spices. Cook for about 1-2 minutes or until they become very aromatic.

Add the onions and garlic and cook for about 5-7 minutes, or until the onions have softened and are translucent.

Add the spinach, tomatoes, olives and garbanzo beans, adjusting the seasoning as needed and cook for about 7-10 minutes, or until the spinach is wilted and cooked.

Add the chicken breast, keeping it whole, and the wine. Bring to a boil, then reduce the heat to a simmer and continue to cook for about 10 minutes, stirring frequently. My chicken breast was already cooked. If you are cooking your own, cook it first then remove and add again towards the end of the cooking process. You do not want to over cook the chicken and make it tough.

Remove the chicken breast and slice. Serve the vegetables over the couscous or rice, then add the sliced chicken and top with more of the vegetables. If you like, you can add some crumbled feta cheese or other goat cheese on top too. I served it with warmed pita bread and the same dry white wine I used for the sauce.

Bon Appetit! Enjoy! We sure did. 🙂

Have a great day Everyone. Stay safe, stay well and stay warm. ‘Til next time.

Blueberry Lemon Coffee Cake

There is something about the combination of lemons and blueberries that is just pure magic. Both flavors are delicious on their own, but when you pair them together, it is a burst of refreshing flavor that takes you to a completely new level of deliciousness. It’s like two great flavors that just pop and really come to life when combined. That being said, I did just that and combined my blueberries and lemons for this week’s coffee cake.

There are 5 major types of blueberries grown in the United States, though there are more varieties available too. In fact, there are about 150 different kinds of blueberries found throughout the world, but there are only about 15 strands that really stand out and make us take notice to their unique flavors and characteristics. The 5 major varieties of US blueberries are the lowbush, northern highbush, southern highbush, rabbiteye, and half-high. Of these, the northern highbush blueberry varieties are the most common types of blueberries cultivated throughout the world.

I admit, this is all new to me as well, but I love to learn about new things all the time, and I love to pass along all that new information to you as well. Most blueberries are small, but there are a lot of size and color variations to be found. Apparently the rabbiteye variety is known for its larger size. They can range from being about the size of a dime to the size of a nickel. Who knew blueberries could grow so large?

I must have bought the rabbiteye version the other day. They were huge, dime-sized, not nickel-sized though, but literally at least twice the size of the other blueberries that were available, sitting right beside them. Of course I chose the larger variety. They looked prettier.

When I made my cake, I had no idea about all of this new information. I just wanted to make a delicious cake to serve to everyone. It was indeed a popular choice too. I love blueberries, and all kinds of berries really, but Larry won’t touch a blueberry, or any other kind of berry other than strawberries, with a 10-foot pole. In fact, he is blueberry “phobic”. I’m surprised he even lets me have them in the house. 🙂

Blueberry Lemon Coffee Cake

1 3/4 cup sugar

1 tsp cinnamon

3 3/4 cup flour

2 tsp baking powder

1 tsp baking soda

3/4 tsp salt

1/2 cup or 1 stick softened butter

3 large eggs

16 oz of plain yogurt or sour cream

1 tsp vanilla

1 tsp lemon extract

1 cup blueberries coated in flour

Preheat the oven to 350* F or 190* C.

Spray a bundt pan with cooking spray.

Combine the butter and sugar together and mix until light and fluffy. Then add the eggs 1 at a time, and mix in between each addition. Add the vanilla and lemon extract.

Combine all the dry ingredients, then add 1/2 at a time, alternating with 1/2 of the yogurt or sour cream, mixing in between each addition, until everything is incorporated into the mix. I used yogurt this time, but I use them both. I haven’t found any difference between the two.

When the batter is done, gently fold in the blueberries. Coating the berries in flour helps prevent them from bleeding into the batter and turning everything purple. Then evenly spread the batter into the prepared cake pan.

Bake for about 1 1/2 hours, or until a toothpick comes out clean when inserted in the middle.

Allow the cake to cool completely before removing from the pan and adding the lemon glaze, if adding. Naked cakes are good, and there is certainly nothing wrong with serving a naked cake, but in my opinion, a glazed cake is much better. 🙂

Lemon Glaze

1 1/2 cups powdered sugar

2 TBSP lemon juice

1 tsp lemon extract

1 TBSP milk

Combine everything tgether then drizzle over the cake.

This fresh lemony blueberry cake is a refreshing burst of flavors you are definitely going to love. 🙂

Have a great day Everyone. Stay safe, stay warm and stay well. ‘Til next time.

Turtle Squares

If you like chocolate, caramel and pecans, then chocolate turtles are a must for you. A turtle is when all three of these great flavors are combined together to make a delicious sweet treat.

Chocolate turtles were first created in 1918 at the Johnson’s Candy Company, or so they say. It is also believed they were first created in San Francisco by candy chef Louis Gordon Hooper, around the same time. So take your pick. Who knows which one is the correct answer, and it really doesn’t matter that much. All that matters is that these sweet treats taste terrific. They got their turtle name because once everything was assembled together, with the chocolate and caramel piled on top of the pecans, they looked like turtles. Imagine that! 🙂

As with anything, there are always many variations, with new creations coming out all the time. I love anything that combines the flavors of chocolate, caramel and pecans. To me, that is a perfect combination. It’s sweet but not too sweet and soft and crunchy and salty all together in one bite. As I said, PERFECTION all in one bite. I turned my turtles into a bar and served them on yesterday’s coffee cart. One gentleman told me they were decadent and sinful, as he was finishing one up. Too “sinful” for church? Maybe, but no one seemed to mind too much. 🙂 They all disappeared within minutes of being displayed. The turtle squares were just one of a few popular items featured. I had a lot of goodies when I first put them out, and by the end of service, there was hardly anything left. This is exactly what I like to see every Sunday morning too. 🙂

Turtle Squares

I still had quite a bit of my caramels Video #18 – Making Caramels with Priscilla from my last batch that Priscilla and I made a while back, so rather that making more caramel, I used what I already had. Waste not, want not you know. 🙂

The Crust

3/4 cup or 1 1 /2 sticks softened butter

3/4 cup powdered sugar

1 1 /2 tsp vanilla

2 1/4 cups flour

1 1/2 cups chopped pecans

Preheat the oven to 350* F or 190 *C.

Spray a 9×13 baking pan with cooking spray.

Place all the ingredients together in bowl and mix until it all resembles coarse sand. Then pour it all into the prepared baking pan and firmly press it into the pan forming an even crust.

Bake for about 30 minutes or until the crust is set and is lightly golden around the edges.

While the crust is baking, coarsely chop the pecans.

When the crust is ready, remove it from the oven and evenly spread the chopped pecans over the crust.

Make your caramel spread. As I mentioned above, I just melted down my caramels that I already had made and added about 1/4 cup of heavy whipping creamy to make them melt faster and easier, as well as to make it a creamier sauce. But if you are making the caramel topping here is the recipe.

The Caramel Sauce

1 cup firmly packed brown sugar

1/2 cup honey

1/2 cup 1 stick of softened butter, cut into pieces

1/3 cup sugar

1/4 cup heavy whipping cream

2 tsp vanilla

2 squares or 2 oz of baking chocolate, melted

In a heavy saucepan, cook everything except the chocolate. Cook to a full, rapid boil, stirring constantly, then reduce the heat to medium high until it reaches 248*F or the firm ball stage, stirring constantly, using a candy thermometer, then carefully pour the melted caramel over the nuts.

Allow to cool for about 1 hour. Melt the chocolate then drizzle over the top of the caramel. I had some chocolate ganache that I used, which is just equal parts chocolate and heavy whipping cream melted together.

Place the mixture in the refrigerator for at least 1 hour before slicing so the chocolate hardens. This will make slicing it much easier too. Remove the bars from the pan and slice and share.

Have a great day Everyone. Stay safe, satay warm and stay well. ‘Til next time.

German One Night, Mexican Another

I love it when I can recreate from my leftovers, making something completely different than what I had before. I do that as much as I can. It’s become a fun little game for me. How can I creatively recreate it this time?

The other day when I made my German pork with red cabbage and apples, Still Cooking German I had enough leftover to recreate with them again. I didn’t have any more pork chops left, but that was OK. I totally recreated them into something completely different with just a few minor adjustments here and there. I went from this

to this in a matter of minutes.

I transformed a very traditional German meal and turned it into Mexican street tacos. We eat tacos like this all the time when we are down in Cozumel and/or the Mexican Riviera in general. They are oh so good.

We had some pulled pork in the freezer that I doctored up with some Mexican spices, onions and garlic, and them added some rice and corn and pan-fried corn tortillas to compete the meal.

With a wave of my magic wooden spoon, we had Mexican street tacos in an instant. !Delicioso!

Larry added cheese and sour cream to his. I would have added avocado to mine too if I had it, but this was kind of a spur of the moment meal, and I didn’t have any at the time. Oh well. Next time.

Sometimes the only thing you need to make a good, easy, quick meal is a little elbow grease and a lot of creativity. As I always say, play with your food. You just never know what you can create when you put your mind to it. 🙂

Have a great day Everyone. Stay safe, stay well and stay warm, especially if you are in cold areas like I am. ‘Til next time.

Elizabeth’s Birthday Dinner

My friend Elizabeth’s birthday was last week, but we didn’t get a chance to celebrate until last night. Better late than never, right?! This birthday celebration was a little different than most birthday celebrations though. Elizabeth was actually cooking her own birthday dinner, with my help of course. But we like to cook together and she always wants to learn new things, which makes cooking with her a lot of fun. Some might think cooking their own birthday dinner would be a drag, but we had a great time together, as we always do.

Usually when Elizabeth is the sous chef in my kitchen, we are not on a time crunch, but I had a special dinner planned that required a lot of prep work. And work we did too. She actually got a small taste of what it’s really like to work in a professional kitchen, with seemingly a million things going on at once; there is always a lot to do and not a lot of time to get it done. But she came through with flying colors, and we got everything done on time, before our first guests arrived too, though just barely. 🙂

Because we were so hurried, I didn’t get any pictures of the actual finished results, so you’ll just have to trust me that everything was enjoyed by all and we all had a great time. 🙂 The menu was chicken filled crepes with a creamed roasted red pepper coulis Chicken Crepes, buttery herbed melting potatoes Herbed Melting Potatoes, a green salad with tomatoes, olives and cucumber (provided by Janet), asparagus topped with bacon and Parmigiano cheese (provided by Lauren) and some chocolate pasta with macerated strawberries for dessert. Everything was a big success and we were all completely satisfied after. After dinner and dessert, we all played a game of Farkle. Bob skunked us all, and won by a huge amount, but we all had a lot of fun and a lot of laughs. 🙂

Before we started doing all our prep work, Elizabeth had to get some cuddles from my assistants, Vinnie and Juneau.

After cuddles, it was time to get to work. We are starting to make our crepe batter. We needed to make that and the chocolate pasta first since both had to rest in the refrigerator for a time before we could proceed any further with them.

After making the crepe batter, we started on the chocolate pasta. I got this idea from one of you (though I am embarrassed to say I can’t remember who at the moment. My sincere apologies.) and ETSY. I followed the recipe exactly, but believe it or not, I do not own a pasta maker, so it didn’t come out exactly as I was hoping, but it still tasted good. There is always room for improvement though. 🙂

Elizabeth is beginning to make her chocolate pasta dough.

Once we had the crepe batter and the chocolate dough prepared and in the fridge, it was on to the other components of the meal. We roasted our peppers and had to let them sweat too. Next came our chicken crepe filling. We cut up the chicken breast, and then sauteed some orange bell peppers, onions, garlic, herbs and seasoning, then combined them all together.

By the time we had the filling done, the crepe batter was ready and it was time to make the crepes. Our crepes were savory crepes, and the batter had garlic, sun-dried tomatoes and chives in it.

Once all our crepes were made, we had to fill them. Then we topped them with some of our sauce and a little jalapeno jack cheese before baking them up to perfection.

When the crepes were finished, we started on the potatoes. We had to brown them first in butter and olive oil, cooking them about 9 minutes per side. Then we added the garlic, herbs and chicken broth to roast them for an additional 30 minutes.

We still had to cut the pasta into strips and set the table, and the clock was ticking fast.

After cutting the pasta, we put it back into the fridge, where it stayed until we were ready to boil it up. When we were ready, i boiled it in boiling hot water for about 3 minutes, per the recipe.

Luckily I had the strawberries already made before hand. They were super simple and super tasty. It was a pint of strawberries sliced, combined with 2 TBSP of Grand Marnier, 1 TBSP sugar, 1 TBSP of chocolate orange port and 1 TBSP of orange zest, gently combined together and put back in the fridge until we were ready.

PHEW!!!!!!! What a relief! I had just finished setting the table and we had just finished everything (except for all the cleaning) before Janet, Bob, Mike and Lauren arrived. Success! We pulled it off, and we did it in style. 🙂

Janet and Bob arrived just a couple of minutes before Mike and Lauren, so we had a minute to take a picture in front of Janet’s colorful salad.

And this was the last picture before we sat down to enjoy our simple birthday feast. After we let our dinner digest a bit, it was time to start the dessert. Like I mentioned above, it didn’t turn out exactly as I was hoping, but it was still very good, and definitely different, especially when I added a bit of chocolate balsamic vinegar on top of the strawberries as a finishing touch.

Even Vinnie got dressed up for the occasion and was sporting a blue bow to say Happy Birthday to Elizabeth. 🙂

So from all of us, including all the fur babies, Happy Birthday Elizabeth. I hope you had a good time and enjoyed our celebration of you. 🙂

Still Cooking German

My problem is there are way too many good recipes and dishes out there just waiting to be cooked and tasted and not nearly enough time. I am always experimenting with new recipes and tweaking recipes that are already tried and true. And that is really fun and exciting for me. But when I find recipes we really like, it’s fun to go back and revisit them too. And every now and then, I just have to make the good, warm, delicious, comforting food we crave too. This time, it was another German cooking adventure, with another batch of Bavarian goulash. Rarely do I share my revisits, unless it has been awhile in between, and it has been awhile since I last made a goulash.

Yes, I have made Bavarian goulash many times, and yes, I have shared it with you too. A Time for Bavarian Goulash, Bavarian Goulash But, it has been awhile since my last time, and I don’t want you to forget about it. It is such a warm and comforting, delicious dish. It was a perfect recipe for a cold winter’s night too. I served it over creamy mashed potatoes with green beans on the side, followed with a rich, warm, full bodied red wine on the side. Goulash is NEVER served just by itself. It is almost always served with potatoes of some sort, and quite often mashed, although it is served over wide egg noodles a lot too. I have enjoyed it both ways, but I have to say, I prefer it over mashed potatoes.

Since I have shared this recipe with you a couple of times, I will not go into the actual recipe again, though I will remind you of the cooking procedures.

Once everything is cut and sliced the way you want it, coat the beef cubes in flour. Cook the meat in a very hot skillet with a combination of butter and olive oil for about 7-10 minutes, stirring frequently, until it is completely browned.

Add the mushrooms, garlic and onions and continue to cook for an additional 5-7 minutes, or until the onions are translucent.

Then add the tomatoes, tomato paste, red wine, beef broth and seasonings to the pot. Mix well and bring to a boil, then reduce to a simmer and continue to cook for about 1 1/2 hours, stirring often.

Once everything is ready, it is time to dish it all up and serve over either creamy mashed potatoes or noodles and enjoy. Delicious! Kostlich, especially on a cold, chilly night. This will warm you up from the inside out.

Have a great day Everyone! Stay safe, stay well and stay warm. ‘Til next time.