I have created this site to help people have fun in the kitchen. I write about enjoying life both in and out of my kitchen. Life is short! Make the most of it and enjoy!
Author: ajeanneinthekitchen
I have worked in the restaurant and catering industry for over 35 years. I attended 2 culinary schools in Southern California, and have a degree in culinary arts from the Southern California School of Culinary Arts, as well as a few other degrees in other areas. I love to cook and I love to feed people.
Pesto is one of my favorite sauces. I tend to make quite a bit each time I make it, then use it for many different dishes. It just goes so well with just about any dish.
It was a chicken night, and I had some pesto left from my last batch, so I used it with the chicken and did a chicken pesto bake. I also added some tomatoes, mushrooms, garlic and shallots to the batch and served it all over some fettuccine alfredo, that was also leftover. It was just enough for dinner for the two of us.
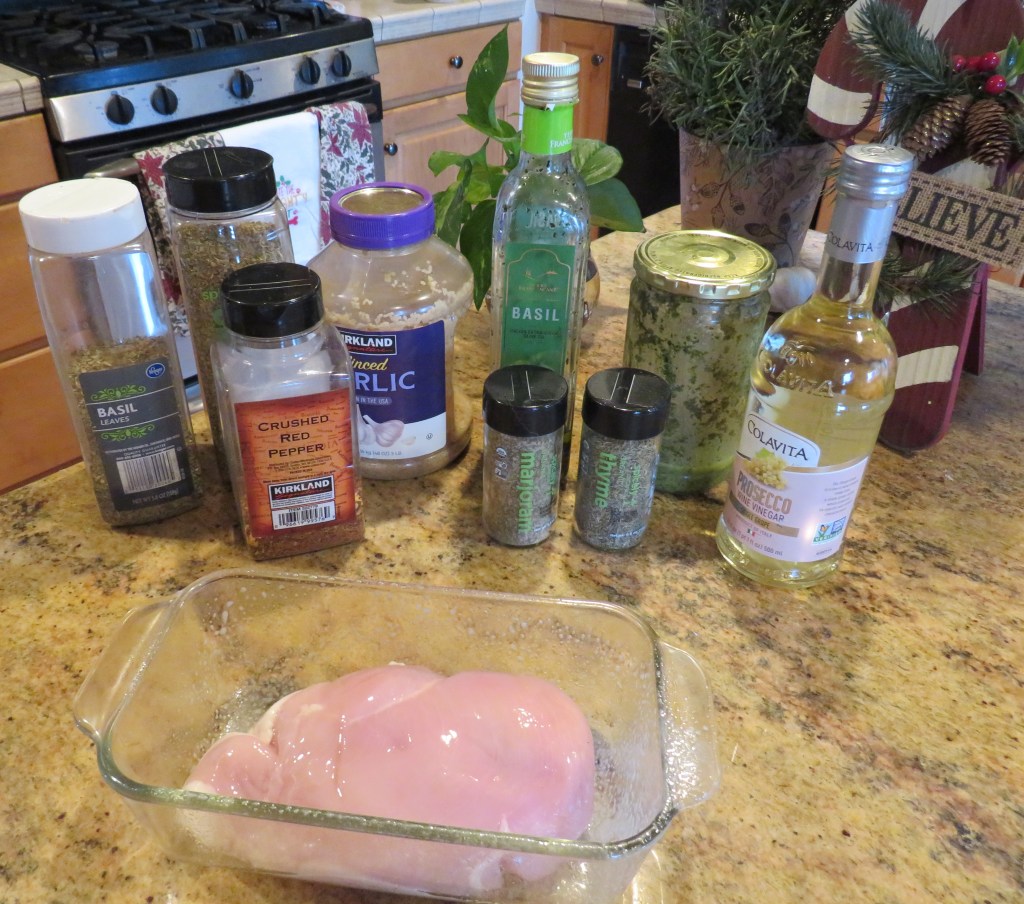
I marinated my chicken in a pesto vinegar mix first, for about 2 hours before cooking, so it was very flavorful and nice and tender.
Pesto Vinegar Marinade
1 TBSP olive oil or basil olive oil
1 TBSP white wine vinegar – I used Prosecco wine vinegar
2-3 TBSP pesto sauce
2 tsp garlic
2 tsp Italian seasoning – I used oregano, basil, thyme and marjoram
1/2 tsp red pepper flakes, or to taste
1-2 lbs chicken breasts
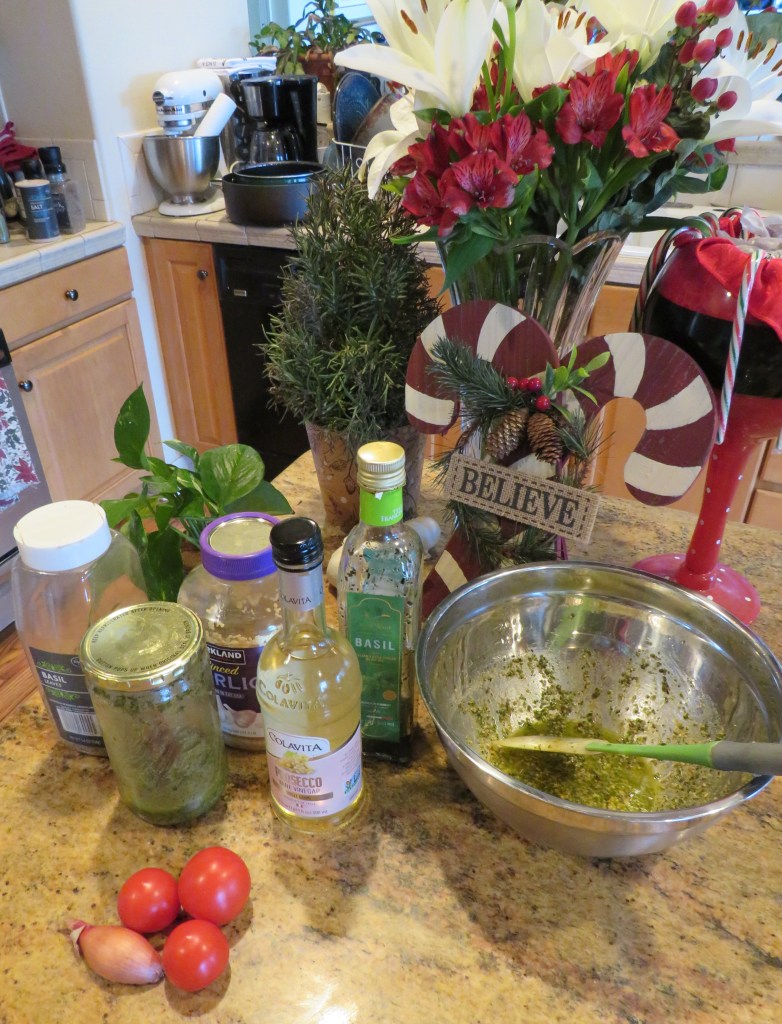
Combine everything together and coat the chicken. Cover and refrigerate for at least an hour before cooking.
Make more or reserve some of the sauce for topping the chicken later.
Preheat the oven to 425* F or 219*C.
Spray a deep baking dish with cooking spray.
Chicken Pesto Bake
marinated chicken breasts
1 cup tomatoes, either cherry, grape or Campari, cut in half – this time I used Campari
1-2 shallots, diced fine
1-1 /2 cups sliced mushrooms
1 TBSP garlic
salt & pepper to taste
more of the pesto vinegar sauce
1 1/2 cups shredded Mozzarella cheese
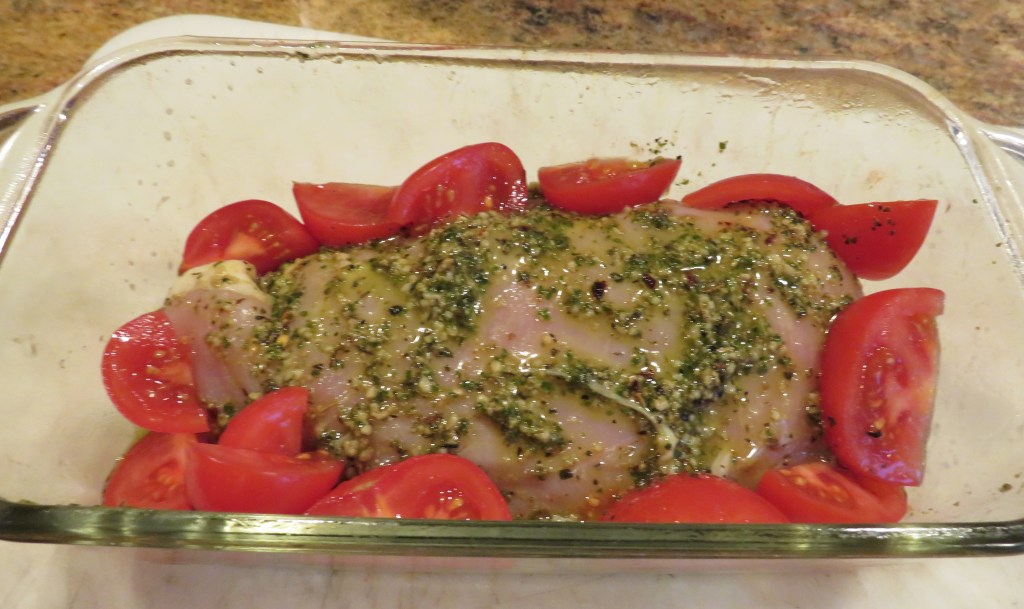
Cook the chicken for about 20 minutes or so or until it is cooked. Add the tomatoes and place around the chicken. Top with the mozzarella cheese and place back in the oven to continue to cook for another 20-30 minutes, or until the cheese is completely melted and has a slight crust to it.
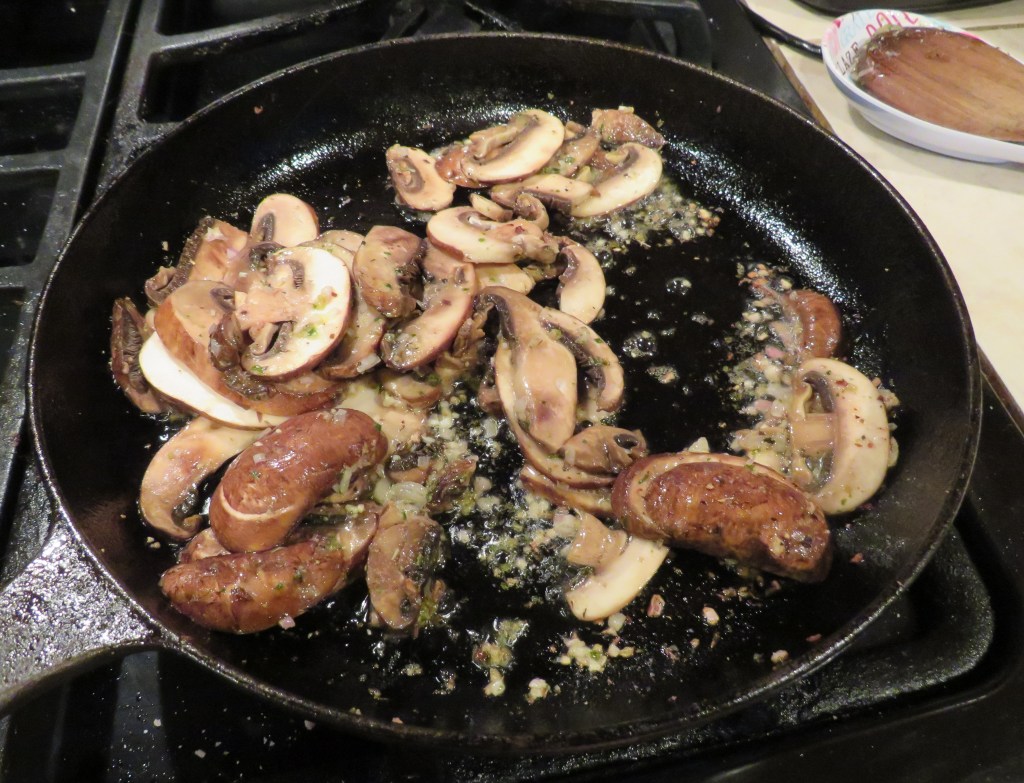
Saute the mushrooms, garlic and shallots with salt & pepper in olive oil and a little butter for about 5-7 minutes, or until they are cooked. Set aside and keep warm.
When the chicken is done, serve it over cooked pasta of your choice. I like to layer my foods. I think it makes a better presentation. It’s an old restaurant thing I guess. 🙂 So I started off with the pasta, added a dash of the pesto vinegar sauce, with the chicken next, then more sauce, finished with the mushrooms and tomatoes. I added some warmed ciabatta on the side and completed the meal with a cool, crisp white wine.
DELICICOUS!!!! It was quick, easy-peasy, and very festive with the green pesto sauce and the red tomatoes.
Have a great day and make everyday great. Happy Holidays and Merry Christmas. May this holiday season keep you safe and well. ‘Til next time.
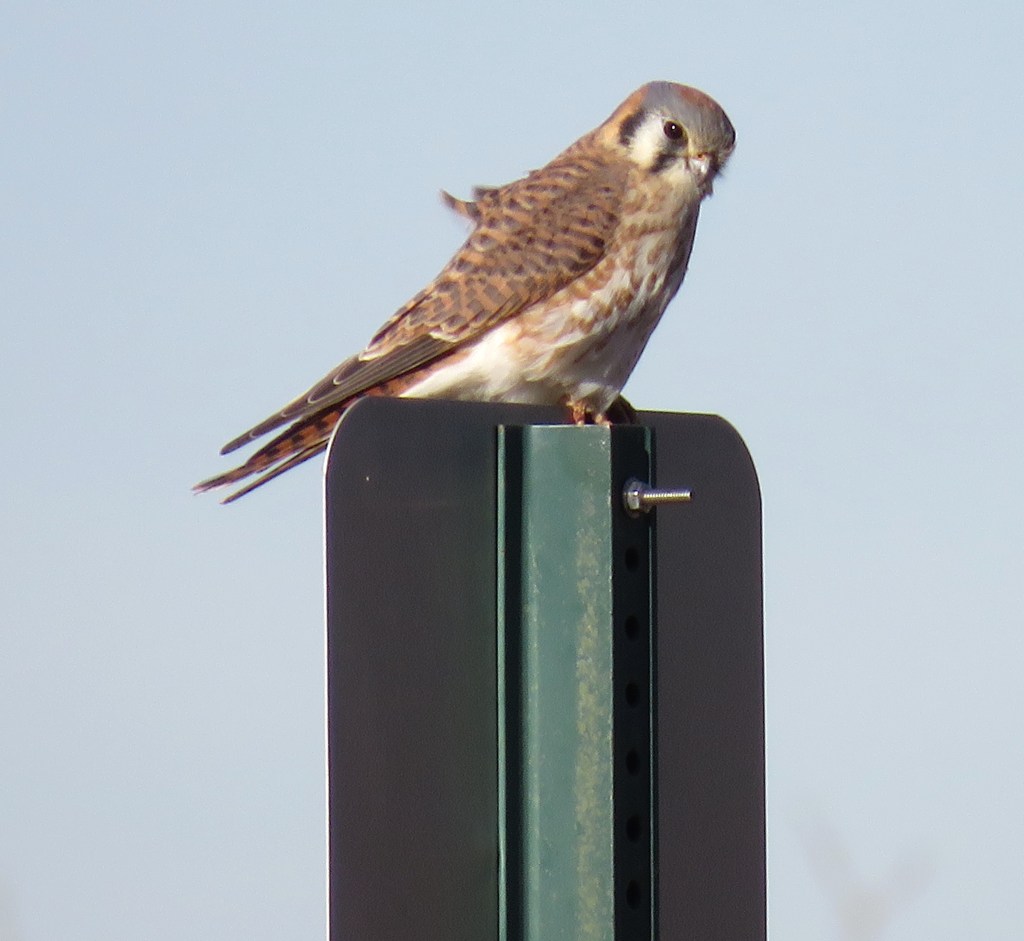
Today, out on my walk, at first I was a little disappointed because all of my “friends” were gone for the day. But as soon as I headed up towards the 3rd lake, on my way back home, I saw a beautiful American Kestrel just sitting on the sign, watching over the lake. He let me take quite a few shots of him too. And I was more than happy to do so. 🙂
Be ever on the lookout, just like the Kestrel. You just never know what you will see. Have a great day, and make everyday great.
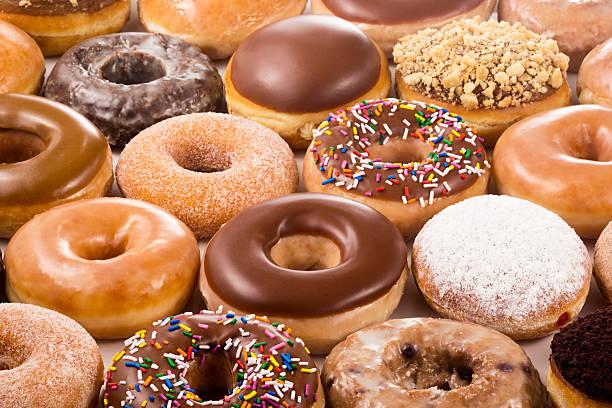
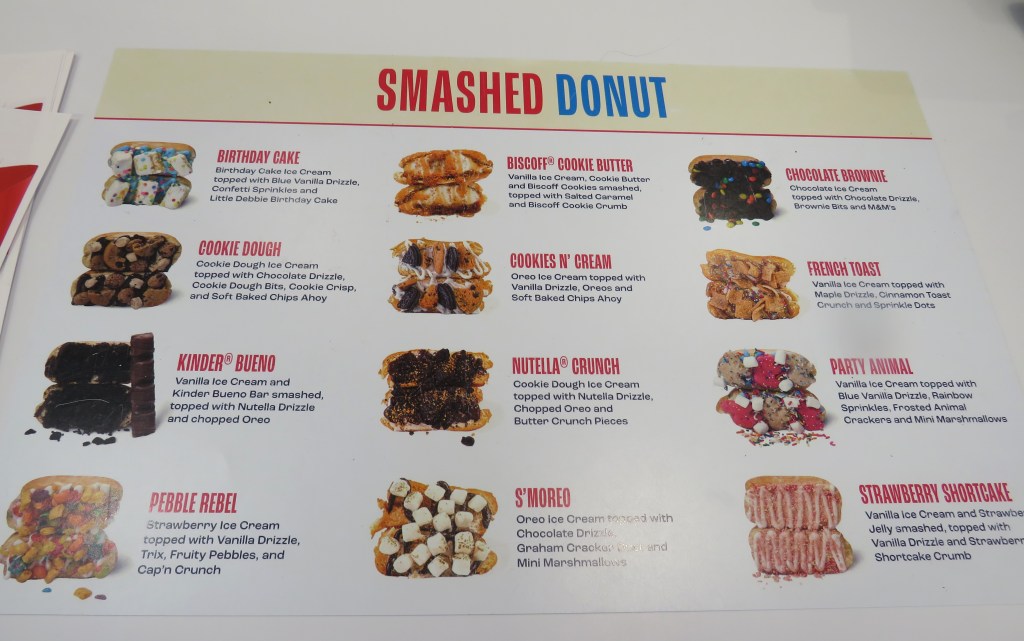
We are all familiar with donuts. They are round, fried or baked cakes usually topped with a sweet topping or filled with a sweet treat, or both. They date back to ancient times. They are popular all over the world, with many different cultures. Most donuts have a hole in the center of the dough, which allow for them to cook more evenly, without overcooking, especially when frying in hot oil.
Donuts made their way to America in the 17th century when the Dutch came over, and have been popular ever since. By the mid-19th century, donuts had become an American food, and they were seen as a symbol of comfort, ingenuity, and delight.
But the donuts of today have definitely evolved from what they were in their humble beginnings. Today, donuts are seen as culinary works of art.
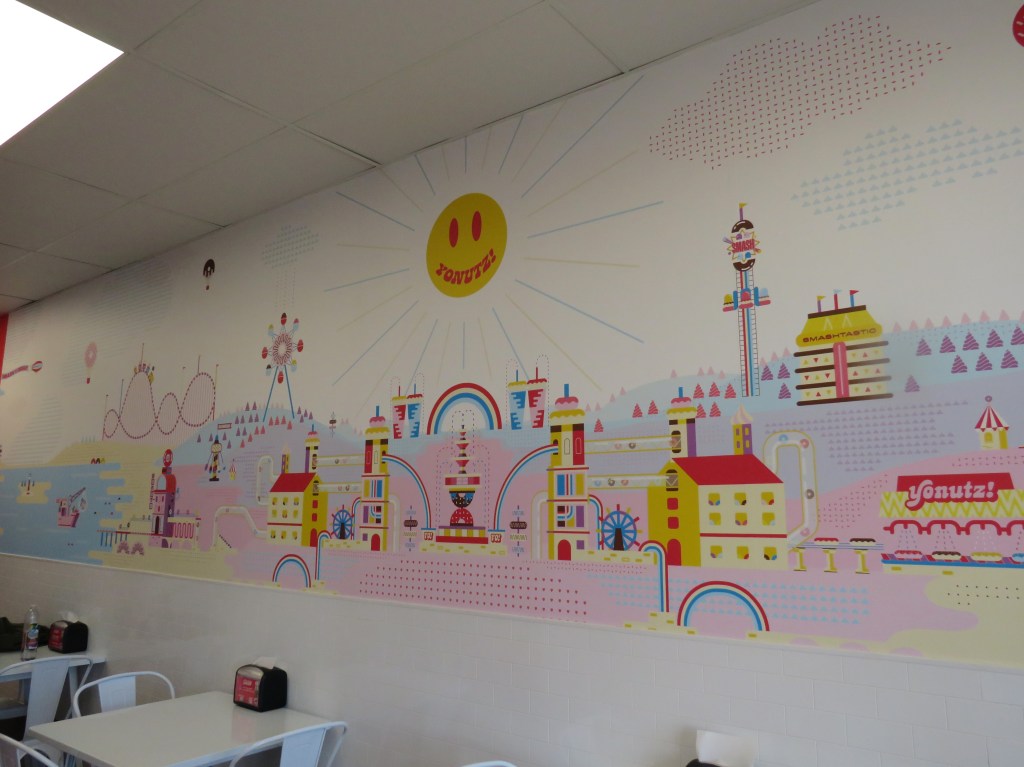
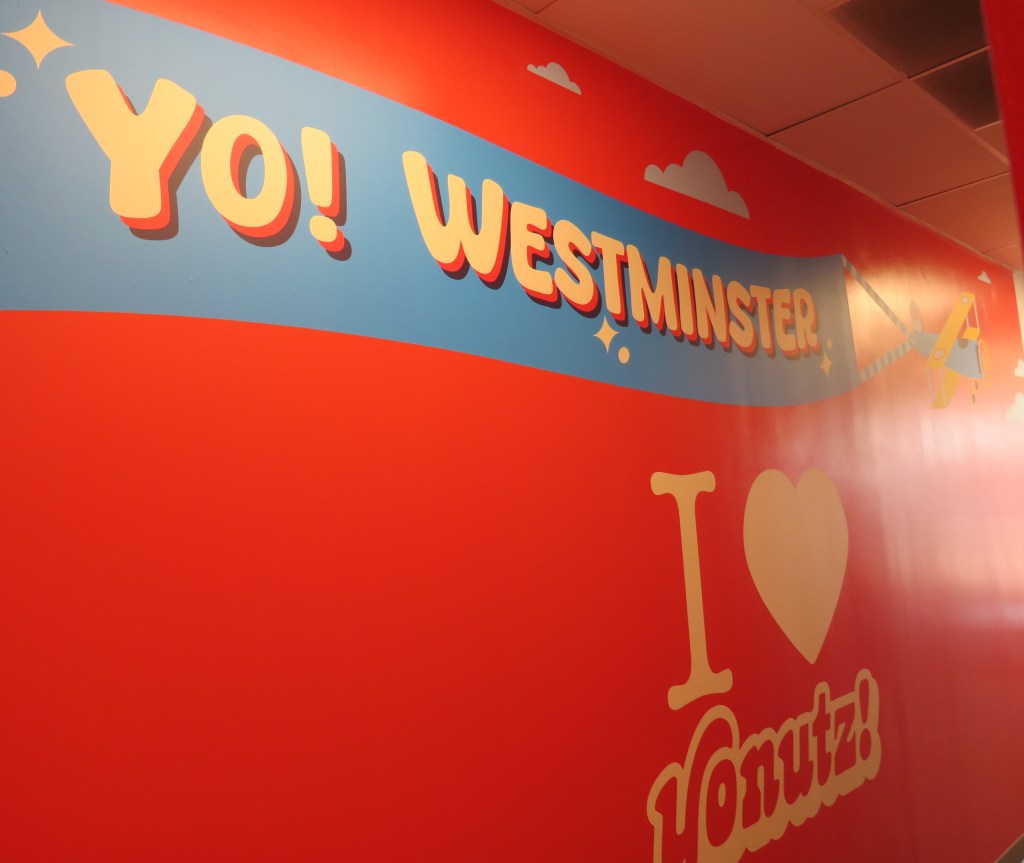
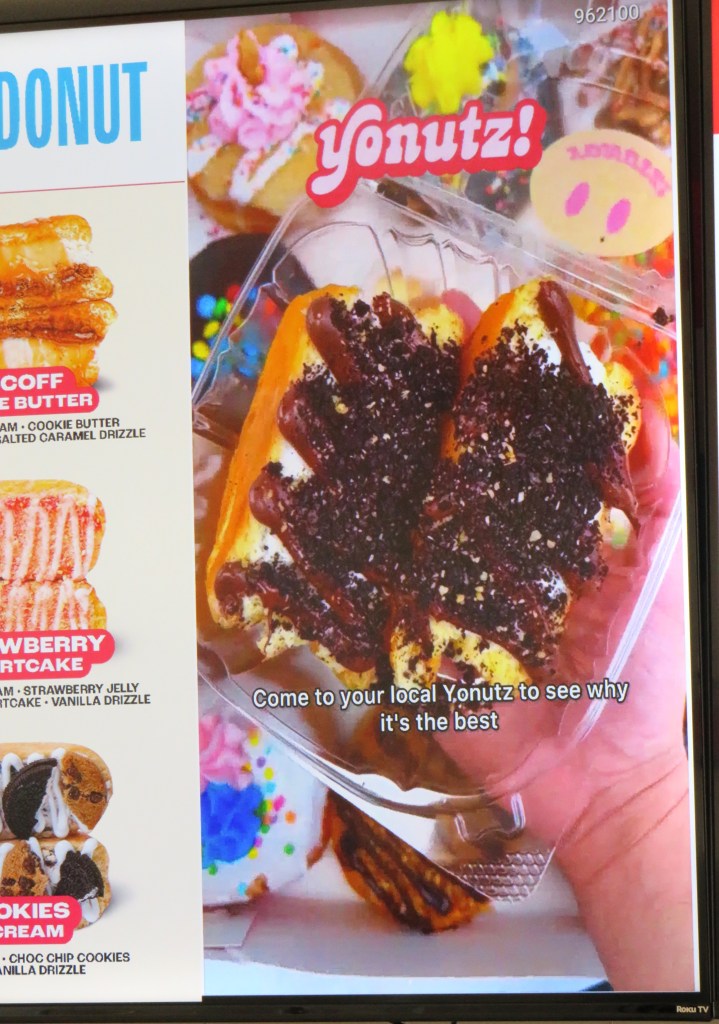
Yesterday, I was introduced to a completely new way of making donuts when I went to Yonutz! Donuts & Ice Cream.
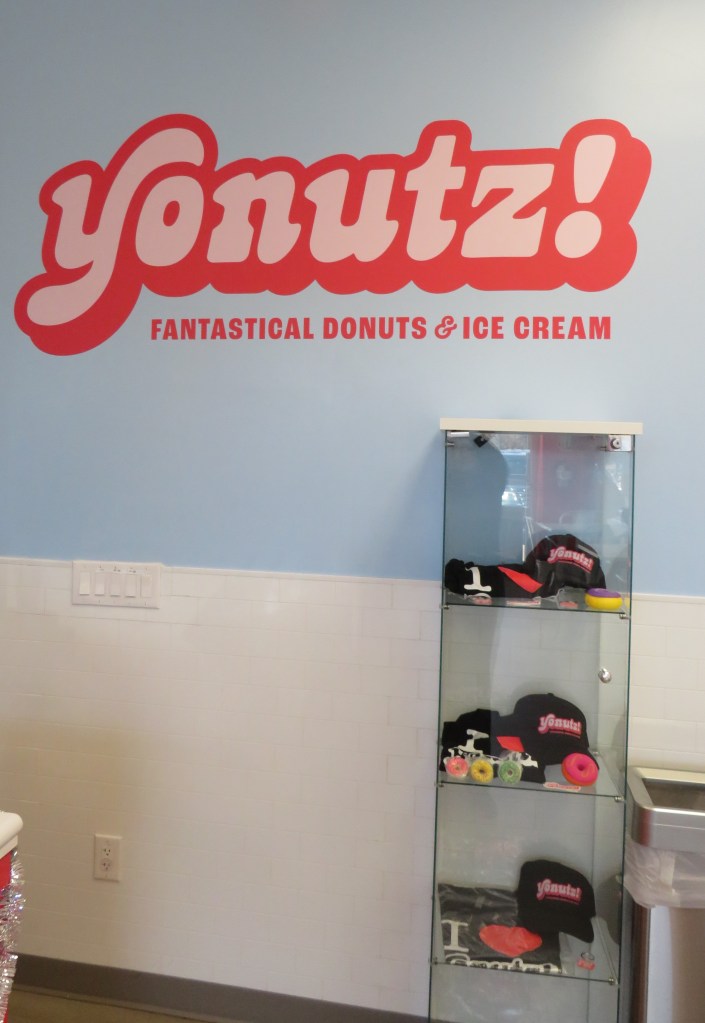
Yonutz! Donuts & Ice Cream is a franchise specialty donut and ice cream shop that started in Miami, Florida. “Yonutz is a Gourmet Donut and Ice Cream Concept that combines the staples of Donuts and Ice Cream along with some amazing fantastical desserts“. They got their start in 2019, on the show Shark Tank, and have been popping up all over the United States ever since, with one of the newest locations popping up in Westminster, CO, literally just down the hill from where I live. It is proudly owned and operated by Brian Domann and his family.
I met with Brian yesterday and learned so much about Yonutz Donuts. Brian is a delightful person, and we had a great visit. One of the questions I asked him was how he got started in the donut business. I loved his answer. Brian told me “[he has] always loved both donuts and ice cream, but more than his love for donuts and ice cream, he loves to see happy people, and both donuts and ice cream spread happiness”. It doesn’t get much better than that! Just look at Brian’s smile. You can tell he loves what he does. 🙂
We’ve all seen ordinary donuts, and there is absolutely nothing wrong with them. We love them.
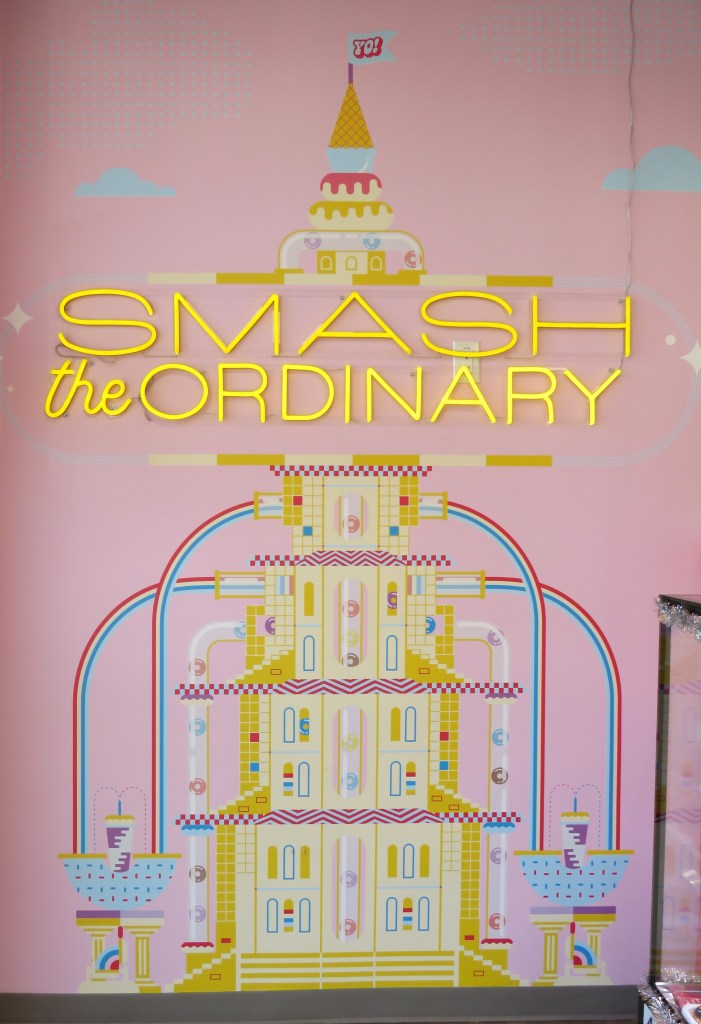
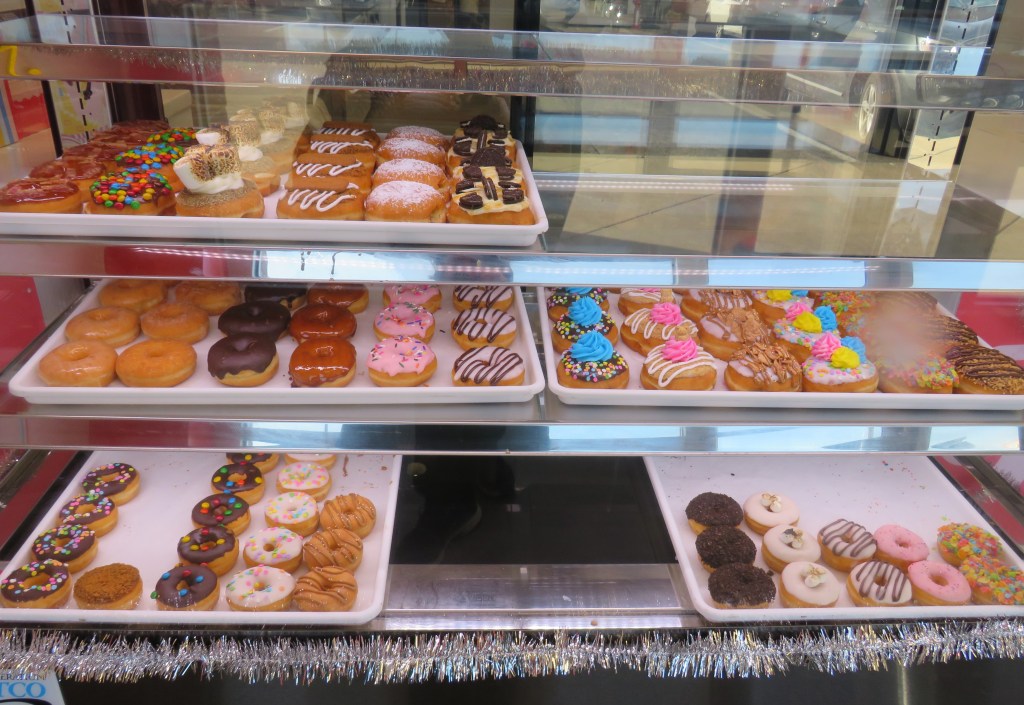
But why would we ever settle for ordinary when we can now have EXTRAODINARY?!!!!! Yonutz Donuts takes donut making to a whole new level.
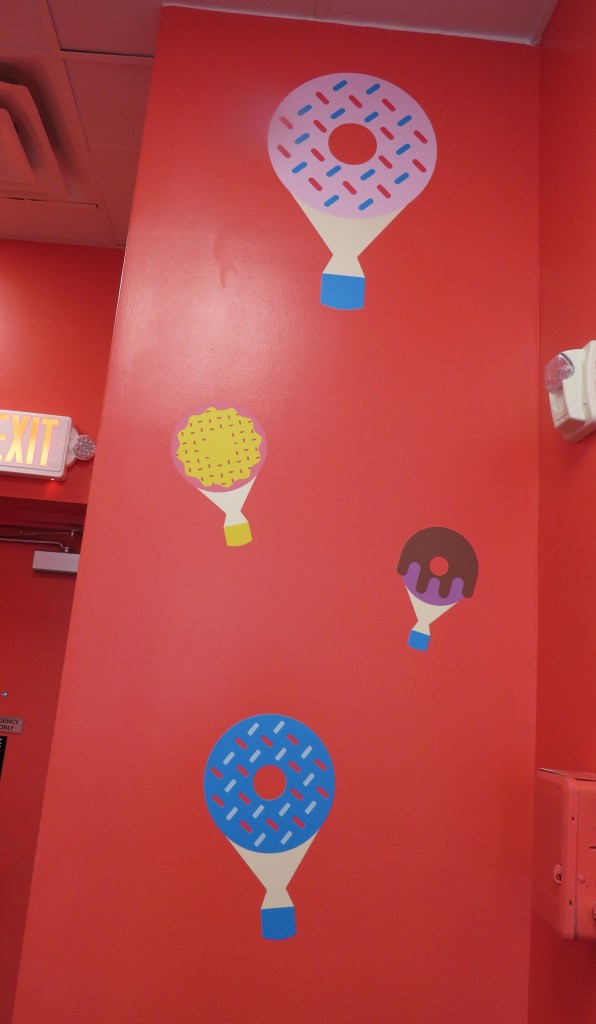
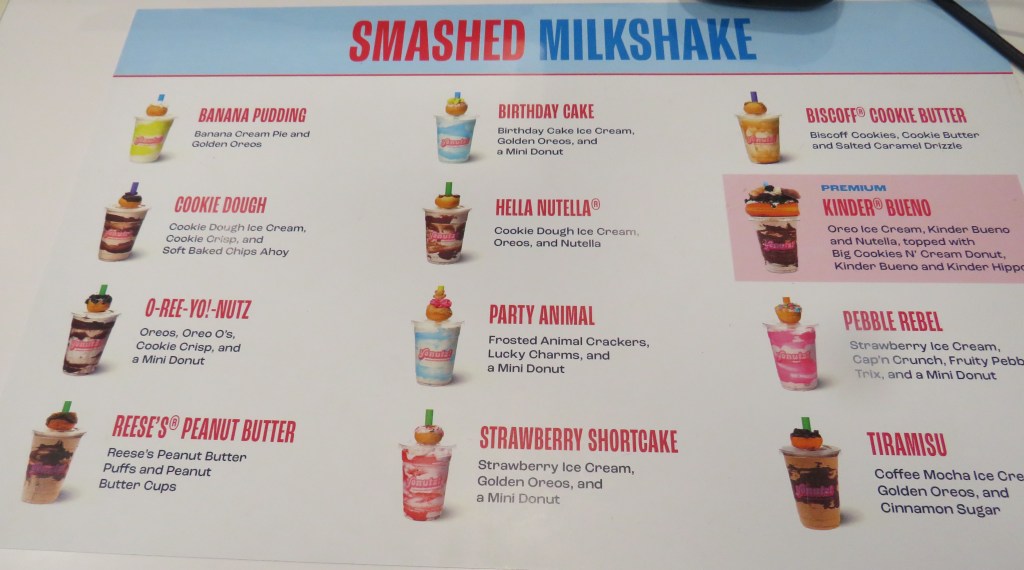
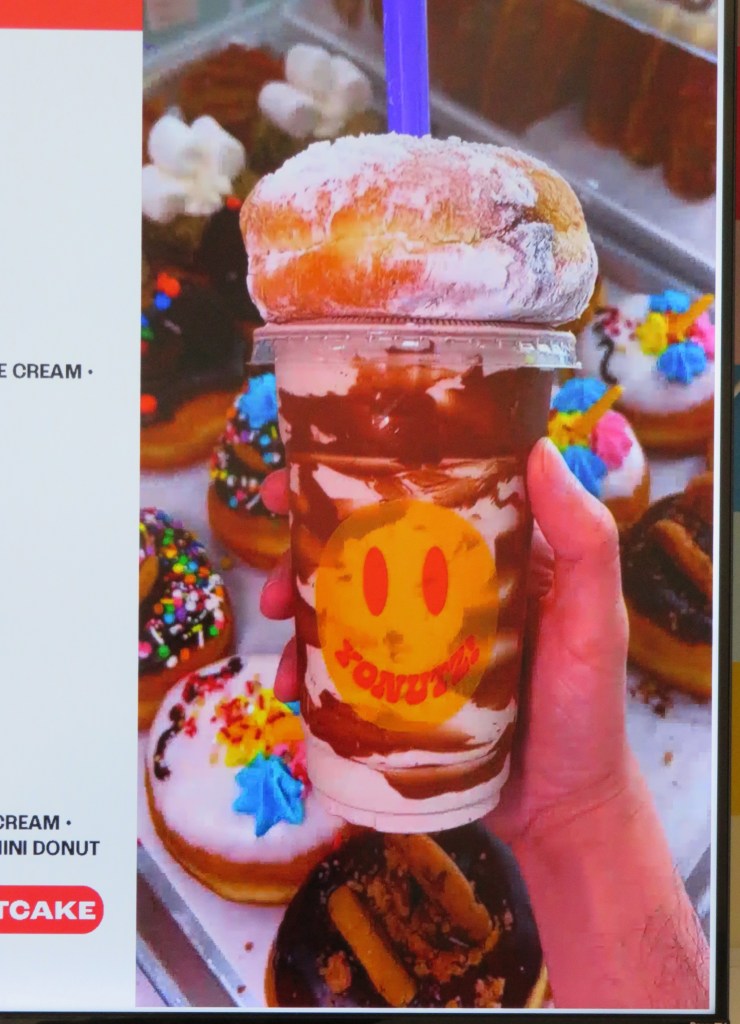
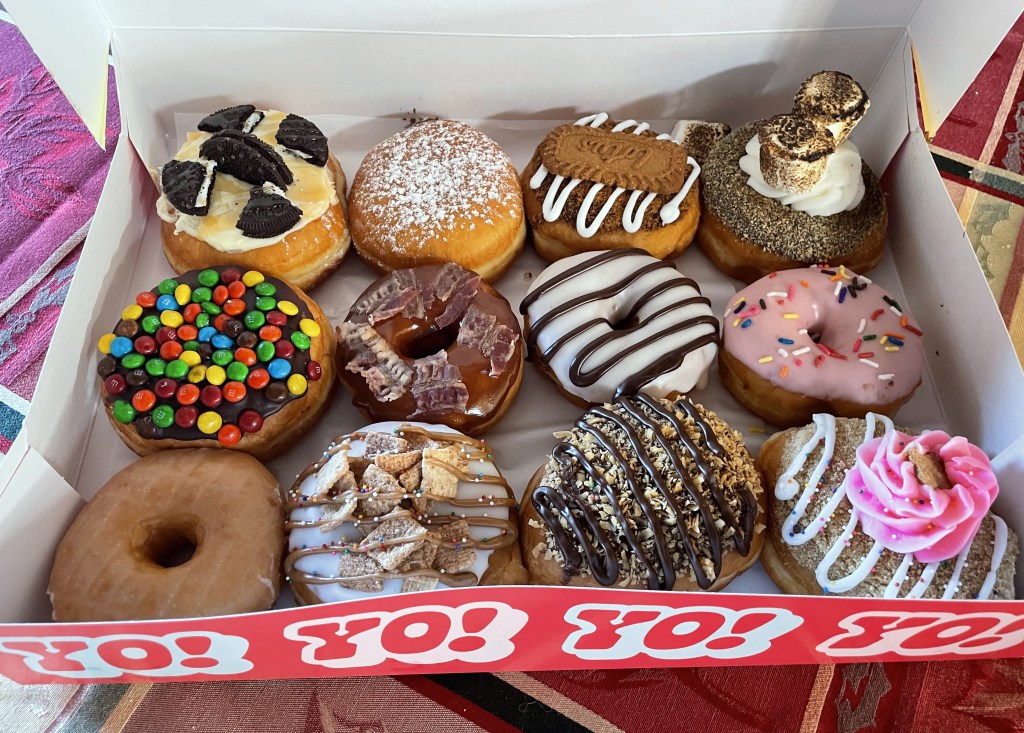
They are not only famous for their donuts, but also for their smashed donuts and for their donut shakes too. Smashed donuts? Donut shakes? I had never heard of these before. But you can get them at Yonutz! and the come in a wide variety of flavors too. I met with Brian around 10:15 AM, and the donuts had already sold out. The donut makers were in the back, busy making more donuts and refilling the display case as fast as they could. Every few minutes, another tray of delectable treats made its way out to the donut case.
Donuts in general are snacks that are enjoyed at any time of day. But because Yonutz are considered more as desserts than breakfast, Brian said these sweet treats are more popular later in the day.
And these donuts are definitely meant to be shared. They are great for parties, and office parties, or any celebration where people gather together. More and more people are having donuts as part of their wedding celebrations too. In fact, at our nephew’s wedding, that was just celebrated last week, donuts were on the cake table too. The donut has definitely come a long way since it was first created many, many moons ago.
When it was time to say good-bye to Brian, I walked out with a dozen very creative and delicious donuts too. Larry is taking them to Kansas, to share with his family. Though we did have to sample one first, so only 11 are making their way to Hays this time. 🙂 We tried the Samoan donut, the 3rd one on the bottom with the toasted coconut and chocolate drizzles. OMG! YUM!!!!!!
Brian and the brand new Yonutz! Donuts & Ice Cream has been open now for about 4 months, but will be having their grand opening celebration on Saturday, January 4th. It will be an all day celebration, but the Chamber of Commerce will do the official ribbon cutting ceremony around 10:00 AM. Larry and I both are already planning on attending, and if you are in the area, you should too.
Yonutz! Donuts & Ice Creamis located at 1975 West 120th Avenue, #800, in Westminster, CO. Drop in and say hi, and take a Yonutz donut or two, or a dozen or so, home with you. If you want to order some to share, or to cater a party, feel free to give Brian a call at (303) 261-8381 or contact Brian online at westminsterco@yonutz.com. They are open 7 days a week, from 9:00 AM-9:00 PM. I guarantee, you’ve never had donuts like the ones you will get at Yonutz!
As Brian would say, “spread some happiness” today and everyday. Have a great day and make everyday great. Stay safe and stay well. Merry Christmas and Happy Holidays. ‘Til next time.
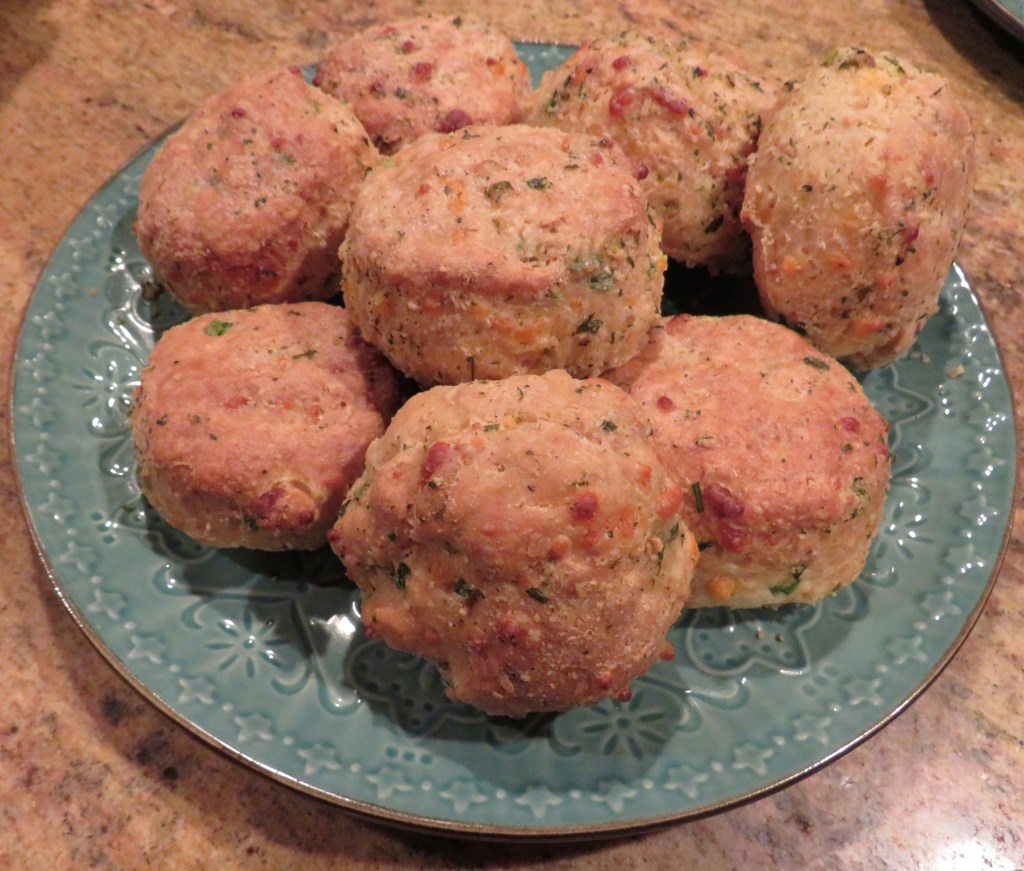
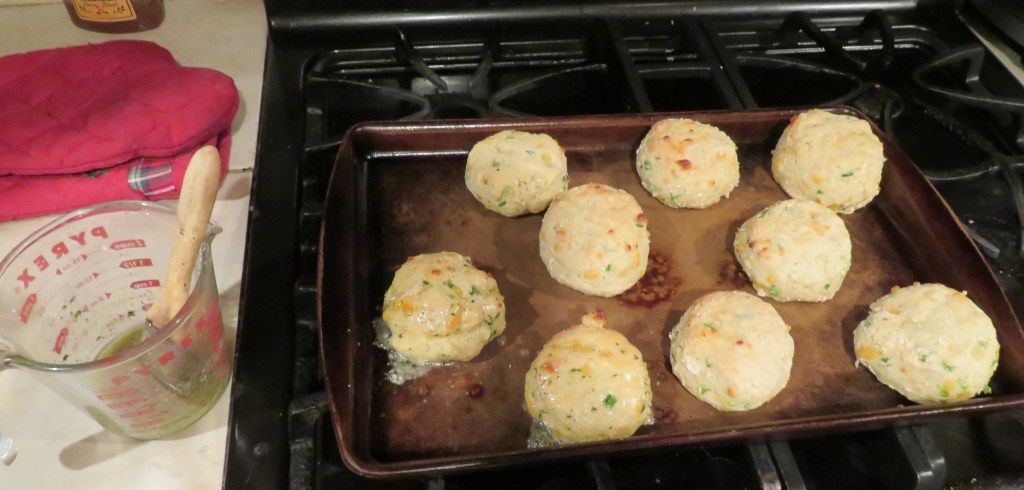
Once again I am trying to use up the leftovers in the fridge and freezer. This time I was using up the rest of the chili. Chili Time But I couldn’t just serve chili with nothing else to go with it, now could I?! So I made some cheese & garlic biscuits to go with my chili.
These biscuits were light and fluffy and so full of flavor.
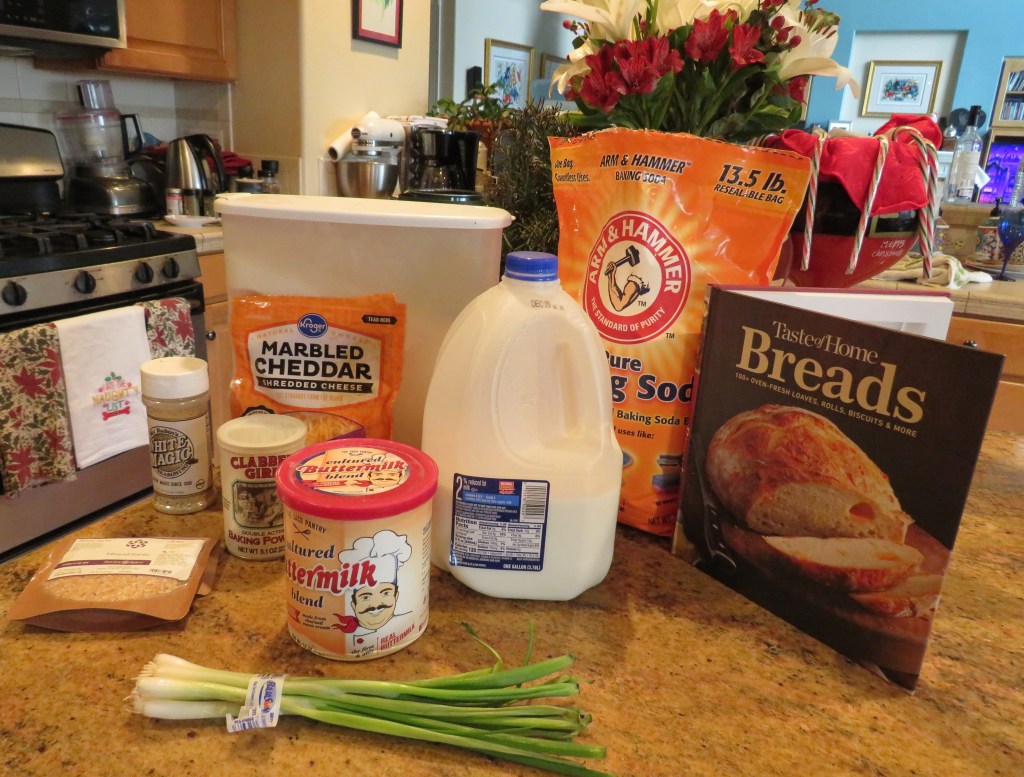
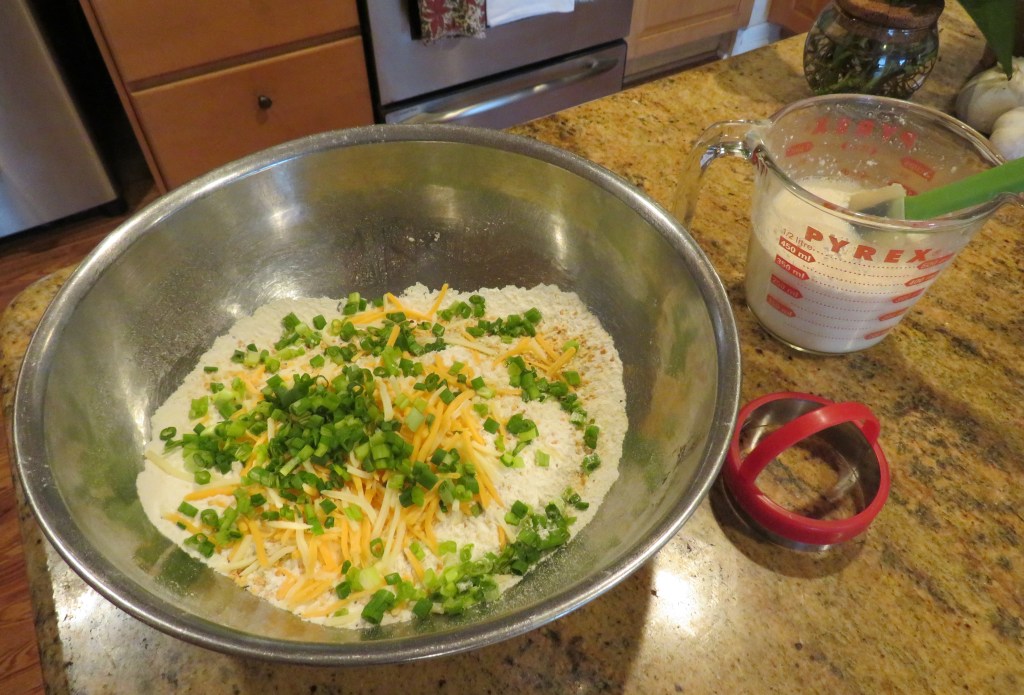
Combine all the dry ingredients together, including the cheese and the green onions and mix together well. Make a well in the center and add the buttermilk. I always use dried buttermilk that I mix with milk. This way it won’t go bad.
Mix from the inside out, and mix the dough just until everything is blended. DO NOT over mix or your biscuits will be tough. You can drop the dough onto the prepared baking sheet with a TBSP or you can cut them with a cookie cutter like I did. If you are using a cookie cutter, form the dough into a rectangle and lightly it roll it out. You want a thick, soft dough.
Bake for about 10-15 minutes, or until the biscuits are light and fluffy and golden brown. Immediately after removing them from the oven, coat them with the butter garlic spread and serve hot.
Butter Garlic Spread
1/2 cup butter, melted
1-2 tsp minced garlic
1 tsp ranch seasoning or White Magic Seasoning
1 tsp parsley
Mix everything together and brush over the hot biscuits.
After coating my biscuits, I put them back in the oven again to keep warm until just before serving them, so they browned a little more, which gave them a little bit of tasty crust on the outside too.
They went very well with the chili. They were a perfect accompaniment. But they will also make tasty little mini sandwiches too. Larry is going out to Kansas for the weekend to visit his family and he is going to make little ham or steak sandwiches (depending on what is leftover after I finish making my quiche and broccoli salad for him to take along with him) with these to snack on during his travels.
Have a great day and make everyday great. Stay safe and stay well, especially during this heavy travel time. Merry Christmas and Happy Holidays. ‘Til next time.
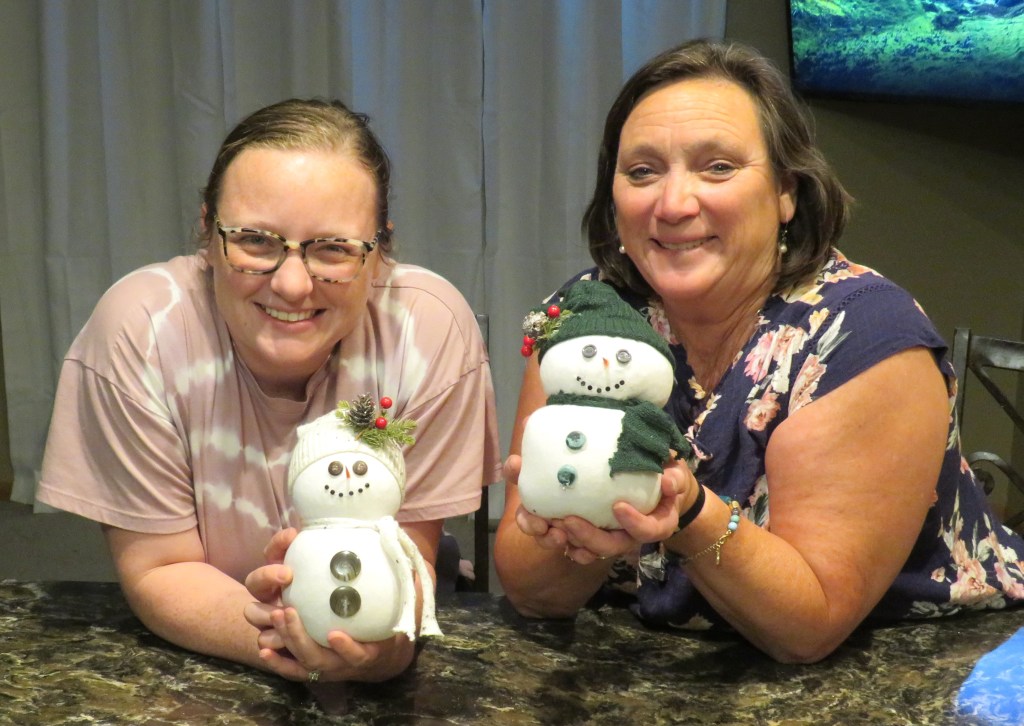
I love to do all kinds of crafts. My mother and I used to do crafts together all the time, so when I craft now, I am channeling my mother and our fun times together.
This year, I made a lot of snowmen for people’s Christmas gifts. My niece showed me how to make them back in June, and then she and I both made a whole bunch that we gave out to friends and family. Each one was different, with it’s own personality.
When I was making the snowmen, I bought a whole bunch of buttons in a variety of colors and styles. Well now that everyone has a snowman, and I can’t give them more snowmen, I had to come up with other fun and creative uses for all these buttons. I am already thinking ahead for Christmas gifts for next year.
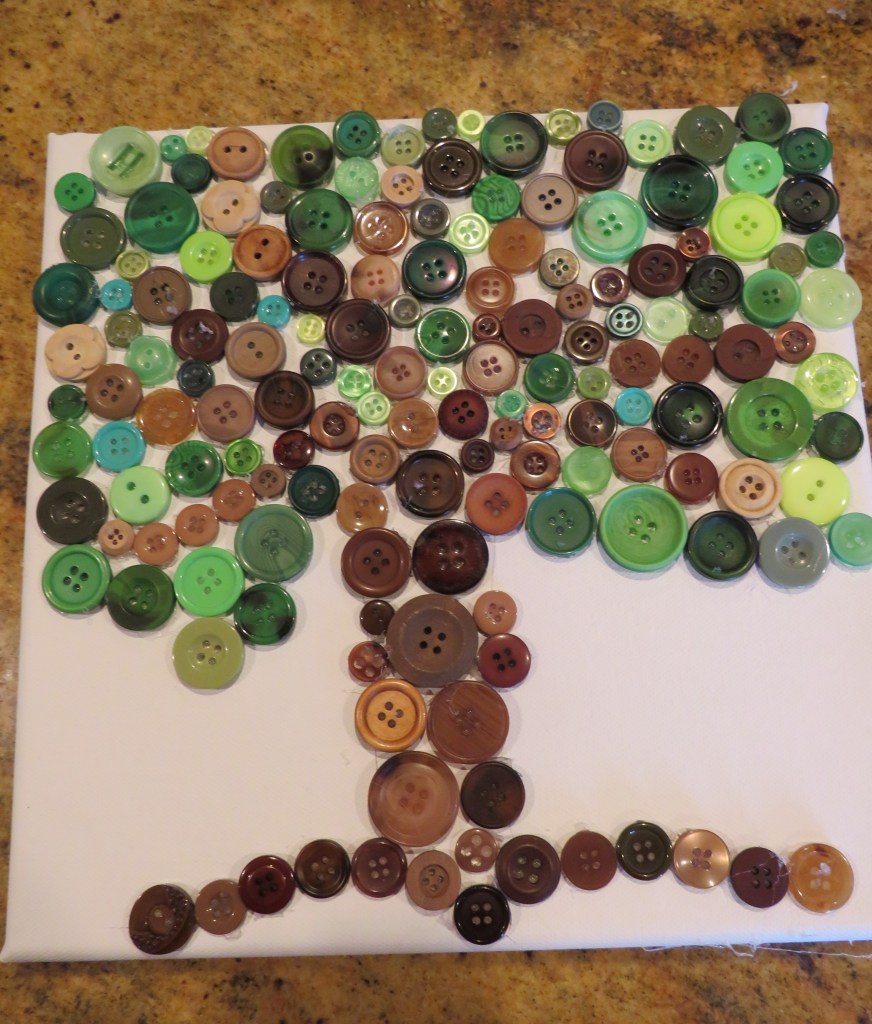
I just purchased a couple of creative button books from Amazon yesterday, and once they get here, I will have all kinds of fresh, new ideas. But in the interim, I made this button tree of life yesterday.
I started with a 10×10 canvas, a glue gun and a variety of both brown and green buttons. You can use whatever tickles your fancy and be as creative as you like. This was just my vision that I had yesterday. I’m sure tomorrow’s vision will be totally different. 🙂 When you are a creative person, you never really know what you are going to create. You just go with the muse and follow her inspiration where it leads you.
I drew a sketch of my tree on the canvas then made my tree trunk and branches first.
Then I filled in the leaves with the green buttons.
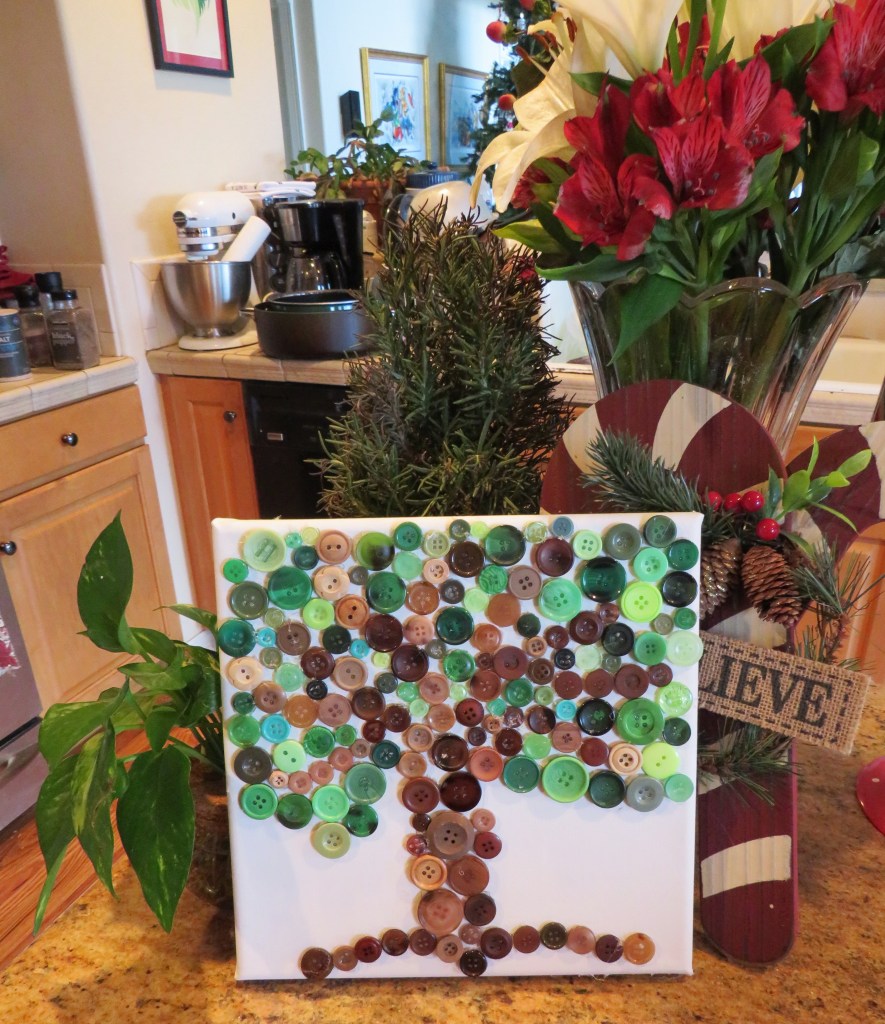
This is a fun and colorful way to use up all those extra buttons. It is also a nice way to think of my mom and all the fun crafts we used to do together. If you have kids or grandkids, this would be a great activity to do with them too.
Creativity comes in many different forms. Don’t be afraid to play around with it. Follow your muse wherever she leads you. Who knows what you will come up with. Have a great day and make everyday great. Stay safe and stay well. Merry Christmas and Happy Holidays. ‘Til next time.
Janet and Bob have this long family tradition of baking and decorating 100’s of cookies that they give to everyone they know at this time of year. We have been lucky enough to have been invited for about the last 7 or 8 years too. It is always a lot of fun, celebrated with pizza after all the cookies are done.
We decorated all the gingerbread cookies first. Janet bakes about 130-150 gingerbread cookies, of all different shapes. Then it is a family project to make all the different colored frostings. Once those are done, Janet gets out all her cookie decorations, and the decorating begins. We decorate all the cookies with the exception of the ugly sweaters, which are always saved for last. We all try to make them as ugly as possible, and the ugliest sweater wins. For some of us though, ugly just doesn’t come easy.
Emily, Janet and & Bob’s granddaughter, won the ugly sweater contest with this year’s ugliest sweater.
It’s a family affiar.
After the cookie decorating was done, it was time to box up all the cookies. These are all the different varieties of cookies that Bryan and his family made to give out.
There was a big production line filling up the cookie boxes, with Bryan in charge. We were all helping out in the production line. The boys were filling the boxes.
And the girls were making the boxes. Bob and I were on fudge patrol.
The finished boxes are loaded with all kinds of homemade goodness and love.
After the decorating and box filling tasks were completed, before the pizza arrived, we had time for pictures by the Christmas tree.
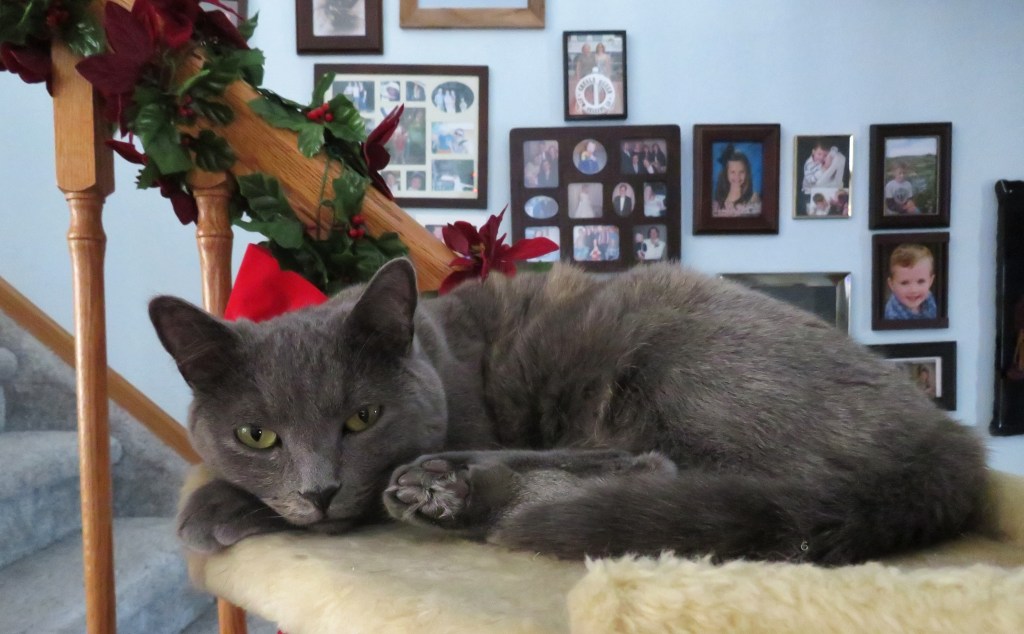
Even one of the cats wanted to be a part of the festivities.
This is always such a fun family tradition. We are so lucky to be included for all these years too.
Make your days merry and bright. Spend the days with those you love and do fun things together. Make lots and lots of happy memories. Merry Christmas and Happy Holidays. Stay safe and stay well. ‘Til next time.
Since I have been writing about wines these last couple of days, Make It A Wine Cocktail, Vegan Wines I thought it would be fun to end this little mini series with a wine game. Our friends Angie and Bryan gave us some more fun Christmas gifts, that of course we opened early. One was another delicious signed copy of a Mexican cookbook, called Elote Cafe Cookbook, by Jeff Smedstad. I can’t wait to try the recipes from this delicious book, but more on that at another time. They also gave us a new game called Wine Wars. Am I that predictable? Everyone who knows me knows how much I love to cook and how much I love my wines! 🙂 🙂 🙂
We played a round of Wine Wars the other day. It’s like trivia pursuit, only with wine questions.
We played with Mike and Lauren and teamed up, boys against the girls. At first Lauren and I had a commanding lead, then out of nowhere, the boys surged from behind and ended up kicking out butts and winning by a landslide.
First you roll the die to determine the color/category for questions. If you answer correctly, you get a wine bottle of that color to fill in the game board and you get to keep going. Whoever fills out the board first wins. It was a lot tougher than we thought. I might need to continue my wine learning education and journey. 🙂
As tough as it was, we all enjoyed the game very much though and are looking forward to the upcoming rematch in the very near future. We thought we knew a lot about wines, but we realized we still have so much more to learn.
Have a great day and make everyday great. Have fun no matter what you do. It’s not the “what” that matters, but the “who” that you do it with. Merry Christmas and Happy Holidays. Stay safe and stay well, and drink responsibly. ‘Til next time.
Yesterday I posted Ian Normandin’s post about vegan wines. Vegan Wines Today, I am giving you my article that I submitted to him, that he posted in the Arlington Wine & Liquor’s news letter, Ian Normandin at Arlington Wine and Liquor, https://www.arlingtonwine.net/. Ian asked me to write something about wine cocktails.
Here is my article that I submitted to Ian.
As we all know wine, and alcohol in general, have been around for many 1000’s of years. Making wine cocktails has been around for about the same amount of time too. People like to flavor their alcohols with all kinds of different flavors to make the alcohol taste better, while still achieving and enhancing the effects of intoxication.
A wine cocktail is a mixed drink where wine is the primary alcohol, with distilled alcohol or another mixer added. Most wines used in cocktails today are sparkling, fortified, aromatized, or distilled spirits made from wine. On top of the base ingredients, a cocktail can contain any number of liquids, fruits, infusions, dilutions, and different flavorings. Any kind of fruit can be used to make a wine cocktail, but the most common fruits used are citrus fruits, berries and stone fruits. Wine, or beverages made from wine, add complexity to the sharp taste of high proof spirits, and is an indispensable ingredient behind the modern bar. Wine cocktails as we know them today, were created in 1948 by Giuseppi Cipriani at Harry’s Bar in Venice.
Sometimes wine cocktails go by the names of aperitif, wine spritzers or wine coolers too. People are often misled, thinking that wine cocktails contain less alcohol than just plain wine itself. Sometimes this is true, but often the cocktails contain a higher amount of alcohol, like in the case of the Sidecar or French 75. A Sidecar is made from cognac, orange liqueur, and lemon juice, it’s believed to be named after the motorcycle attachment and traces its origins to London at the end of World War I.
People all around the world have their own versions of interesting wine cocktails. They have a very long and diverse history. In Ancient Greece, they liked to mix in a little honey and seawater with their wines. In China, they infused their wines with different herbs and various roots. The Hungarians have been adding a variety of spices and herbs, including wormwood, into their wines since the 15th century. The Minoan Cretans mixed beer, mead, and wine 3,000 years ago. The Spanish are famous for their many types of Sangria that incorporates fruit and other alcohols, such as brandy, into their wines. The French and Italians like to use Vermouth as a type of wine cocktail, since after all, Vermouth started as a fortified wine that was used for medicinal purposes. Italians also love their Limoncello, which is also a wine cocktail. Wine cocktails are popular all over the world and the possibilities are endless. All it takes is a little creativity and imagination.
The holidays are here, and are being celebrated around the world in many different ways. One way to ring in the Holiday “spirit” is by drinking mulled wines, also a form of a wine cocktail. Mulled wines are wines that have been warmed and are enhanced with fruits and spices. It is believed mulled wines were created in the 2nd Century in Rome. Today, they are popular around the world and go by many names. It is called mulled wine in England and the U.S. but goes by other names in other countries including Glühwein (Germany), Glögg (Norway and Denmark), bisschopswijn (The Netherlands), vin chaud (France), vinho quente (Portugal and Brazil), svařené víno (Czech Republic), Sıcak Şarap (Turkey).
Wine is definitely great on its own, but you can do so much more with wine too. So this Holiday Season do something a little different for a change and make it a wine cocktail instead.
Once again, many thanks Ian for allowing me to collaborate with you. I look forward to future collaborations.
Happy Holidays and Merry Christmas everyone. Stay safe, stay well, and drink responsibly. ‘Til next time.
I mentioned to you awhile ago that I was going to be collaborating with Ian Normandin at Arlington Wine and Liquor, https://www.arlingtonwine.net/ in my post A Very Pleasant Surprise. Ian and I both wrote articles about wines that we shared with each other and to share with all of you. Today, I am sharing Ian’s article about vegan wines with you. Thank you so much Ian and Arlington Wine & Liquor for this fun collaborative opportunity.
Here is Ian’s Article. It’s titled Exploring Vegan Wines: A Guide to Conscious Sipping
Exploring Vegan Wines: A Guide to Conscious Sipping
For many wine lovers, the perfect bottle is all about taste, aroma, and food pairings. But for vegans and ethically conscious consumers, the choice goes beyond the flavor—it’s about how the wine is made and what goes into it. Surprisingly, many wines aren’t vegan-friendly due to the use of animal-derived ingredients during the fining process, which clarifies the wine. This raises important questions about the production methods and ingredients in every bottle. As more people look for ethical, cruelty-free alternatives in their food and drinks, vegan wines have risen in popularity. But what makes a wine vegan, and how do you know which wines meet those standards? Let’s explore the world of vegan wines, the practices behind their production, and why they might be the perfect choice for your next bottle. Whether you’re hosting a dinner party or enjoying a quiet evening, choosing vegan wine is a way to align your values with your glass.
Why Aren’t All Wines Vegan?
At first glance, wine seems like a simple blend of fermented grape juice. But the winemaking process often involves a step called fining, which clarifies the liquid by removing sediments, proteins, and tannins. Traditionally, winemakers use animal- derived substances to achieve this, including:
Isinglass: Gelatin from fish bladders, often used in white wines. Casein: A milk-based protein for softening flavors. Albumin: Egg whites, popular in red wines to reduce tannic harshness. Gelatin: Sourced from animal bones or connective tissues, filtering unwanted particles.
These substances don’t stay in the final product, but their use means the wine isn’t vegan-friendly. For conscious consumers, this process raises concerns about ethical and dietary alignment.
What Makes a Wine Vegan?
Vegan wines are made without the use of animal-derived fining agents, which are often used to clarify and stabilize wines. Traditional fining agents like egg whites, gelatin, and isinglass (derived from fish bladders) are commonly used in many wines, but these are not suitable for vegans. Instead, winemakers of vegan wines turn to plant-based or mineral alternatives such as:
Bentonite clay: A natural substance that helps remove impurities from wine without affecting its taste. Activated charcoal: Known for its ability to filter out unwanted particles while maintaining the purity of the wine. Pea proteins: A more eco-friendly fining agent that’s becoming increasingly popular in the production of vegan wines.
Additionally, some winemakers skip the fining process altogether, embracing an unfiltered approach that results in natural, cloudy wines. These wines retain more of their original flavors and aromas, offering a more authentic and often more complex tasting experience.
Why Choose Vegan Wines?
By choosing vegan wines, you not only enjoy a delicious, ethically produced product, but you also support a growing movement toward sustainable, cruelty-free practices in the wine industry.
Ethical Alignment – For those committed to cruelty-free living, vegan wines ensure no animal products are involved at any stage of production.
Enhanced Flavor Profiles – Natural and unfiltered wines often have richer, more complex flavors. Vegan wines also tend to emphasize sustainability, resulting in better soil health and grape quality.
Environmental Sustainability – Many vegan wineries follow organic or biodynamic farming methods, reducing chemicals and promoting biodiversity.
Health Benefits – Without unnecessary additives or animal-derived residues, vegan wines offer a purer option for mindful drinkers.
How to Identify Vegan Wines
Unlike food products, wine labels don’t always clearly indicate whether animal-based fining agents were used in the winemaking process. This can make it tricky for vegans and ethically conscious consumers to determine if a wine aligns with their values. However, there are several ways to identify vegan-friendly wines:
Vegan Certifications: Look for official certifications such as the “Certified Vegan” logo or “Vegan Society Approved” stamp on the label. These markings are a reliable sign that no animal-derived ingredients were used in the production process. Keyword Searches: Apps like Barnivore provide helpful vegan wine directories, listing brands and wines that have been verified as vegan. You can easily search by brand or specific wine to confirm whether it meets vegan standards. Transparent Producers: Many winemakers are proud to label their wines as vegan-friendly. Some producers explicitly mention this on their bottles or websites, making it easier to find wines that align with your ethical preferences. By paying attention to these indicators, you can ensure that the wine you choose is both delicious and in line with your ethical and environmental values.
Top Vegan-Friendly Wineries to Explore
Below are some top vegan-friendly wines from around the world:
Avaline (USA): Co-founded by Cameron Diaz, Avaline offers clean, organic, and vegan wines made with minimal intervention and sustainably grown grapes.
Frey Vineyards (USA): Pioneers in biodynamic winemaking, Frey produces fully vegan wines, free from animal-derived fining agents, with a focus on organic farming.
Loveblock (New Zealand): Loveblock wines are sustainably crafted and vegan, reflecting their commitment to environmental and ethical practices.
La Crema (USA): Known for bold, unfiltered vegan wines, La Crema produces wines with rich textures and flavors, allowing the natural essence of the grapes to shine.
These brands offer great options for those seeking high-quality, ethical wines.
Perfect Pairings for Vegan Wines
The beauty of vegan wines lies in their versatility. Whether you’re hosting a dinner party or enjoying a solo indulgence, here are some ideas: For robust reds: Pair with grilled portobello mushrooms, lentil loaf, or vegan lasagna. For crisp whites: Complement with fresh garden salads, dairy-free cheeses, or roasted vegetable platters. For sparkling wines: Enjoy with fruit-based desserts or light appetizers like bruschetta.
The Future of Vegan Wines
Vegan wines are becoming an integral part of the wine industry, reflecting the increasing shift toward ethical and sustainable consumption. With more wineries adopting plant-based fining methods and offering transparent labeling, finding a quality vegan wine is easier than ever.
These wines aren’t just for those following a plant-based diet—they’re a choice for anyone who values sustainability, cruelty-free practices, and environmental responsibility.
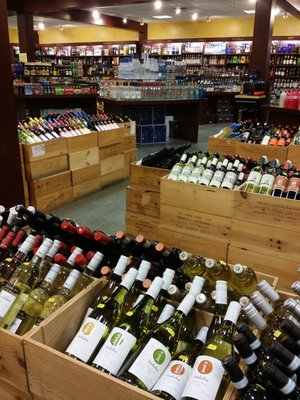
Thank you once again Ian for this very informative article. I know I learned a lot. I did not know that much about vegan wines. If any of you have questions, or would like to learn more about vegan wine options, please feel free to contact Ian Normandin atArlington Wine and Liquor,https://www.arlingtonwine.net/ . I know he would be more than happy to help you and will direct to the right wine choices for you and your guests. Or better yet, if you are in the Poughkeepsie, NY area, please feel free to visit the store directly, in person. Arlington Wine and Liquor is located at 718 Dutchess Turnpike Suite 3, Poughkeepsie, NY 12603. You can also go online or call them at (866) 729-9463.
Have a great day and make everyday great. Make your days and holidays even better with great wines too. Stay safe and stay well. Merry Christmas and Happy Holidays. ‘Til next time.