Fried Noodles with Stir-Fry Vegetables

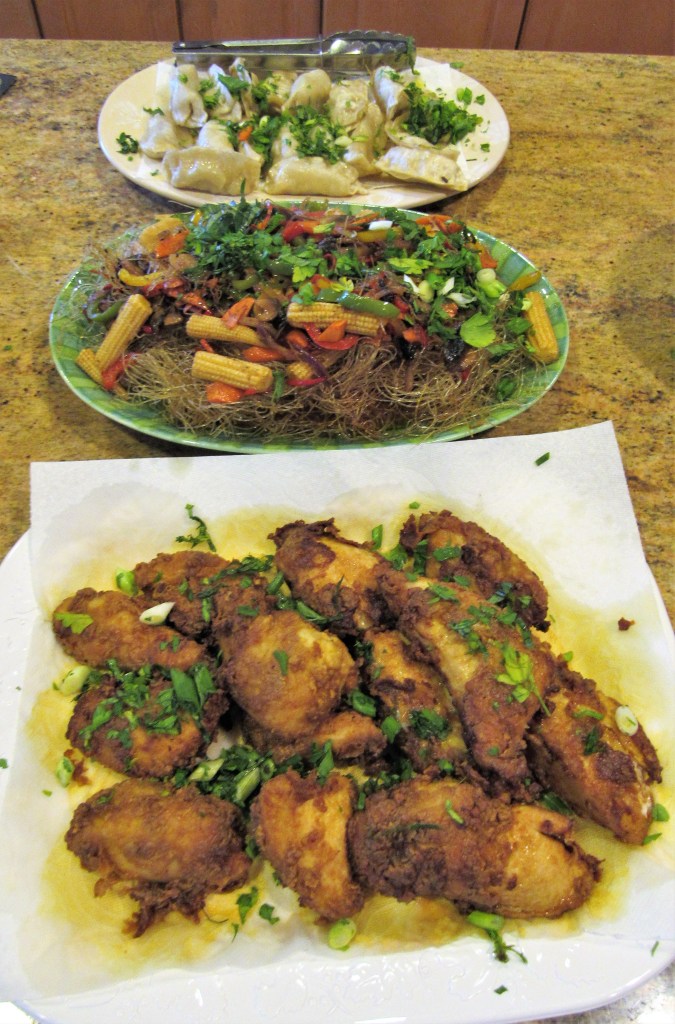
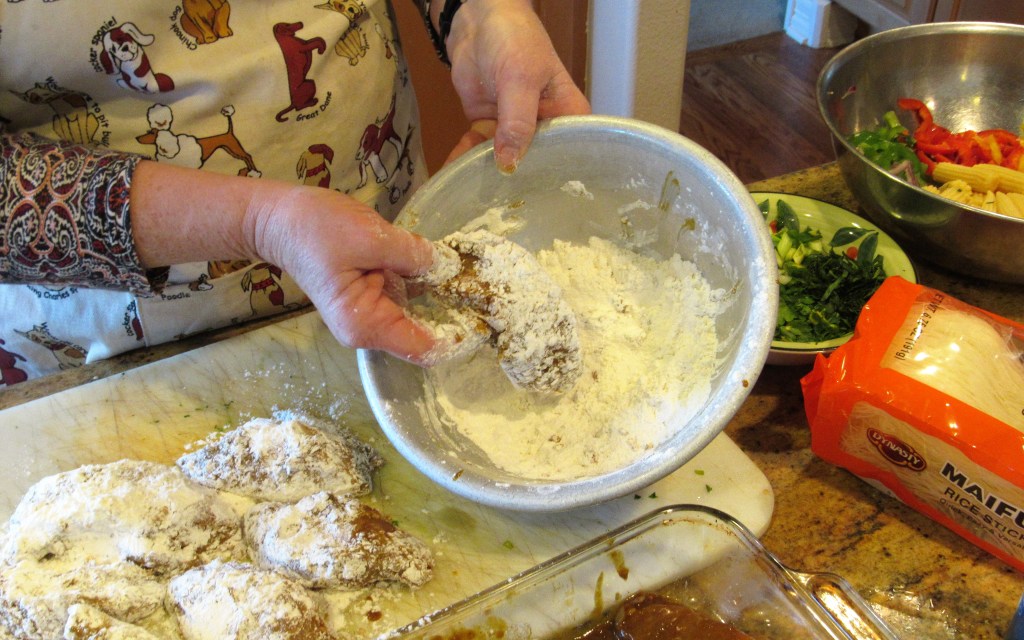
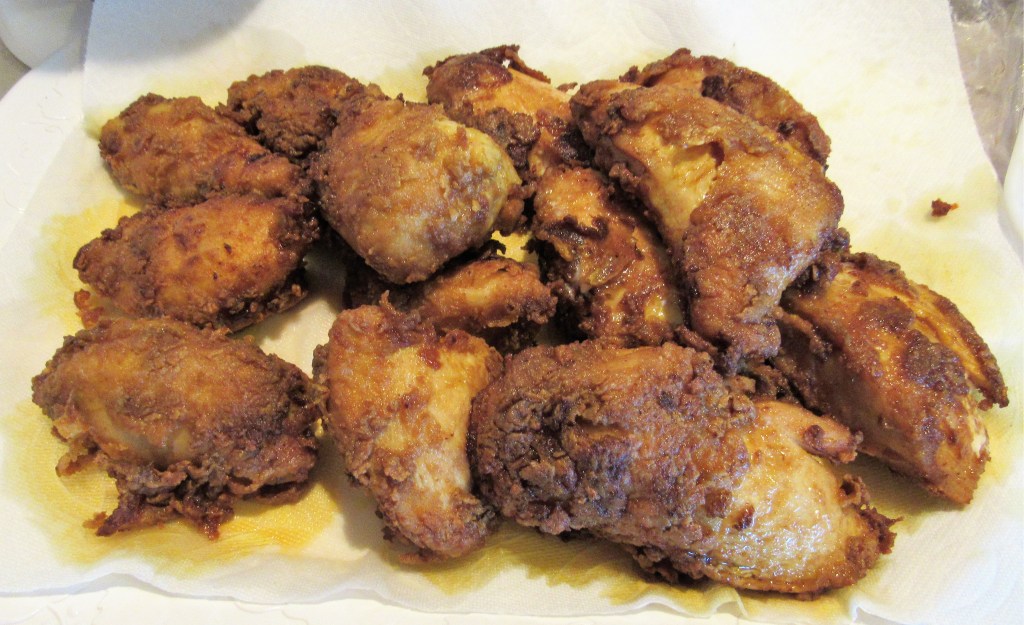
When I made my Panang style fried chicken, Panang Style Fried Chicken I had to have side dishes to go with it. One of the things I made was some fried noodles that I topped with stir-fry vegetables. The jury is still out on the fried noodles. Some of us liked them, the rest of us would have preferred just regular noodles, but, hey that’s the fun of trying new things, right?! You just never know what to expect. I also made some potstickers, but those were store bought, so I can’t take credit for those. 🙂

Fried Noodles with Stir-Fry Vegetables

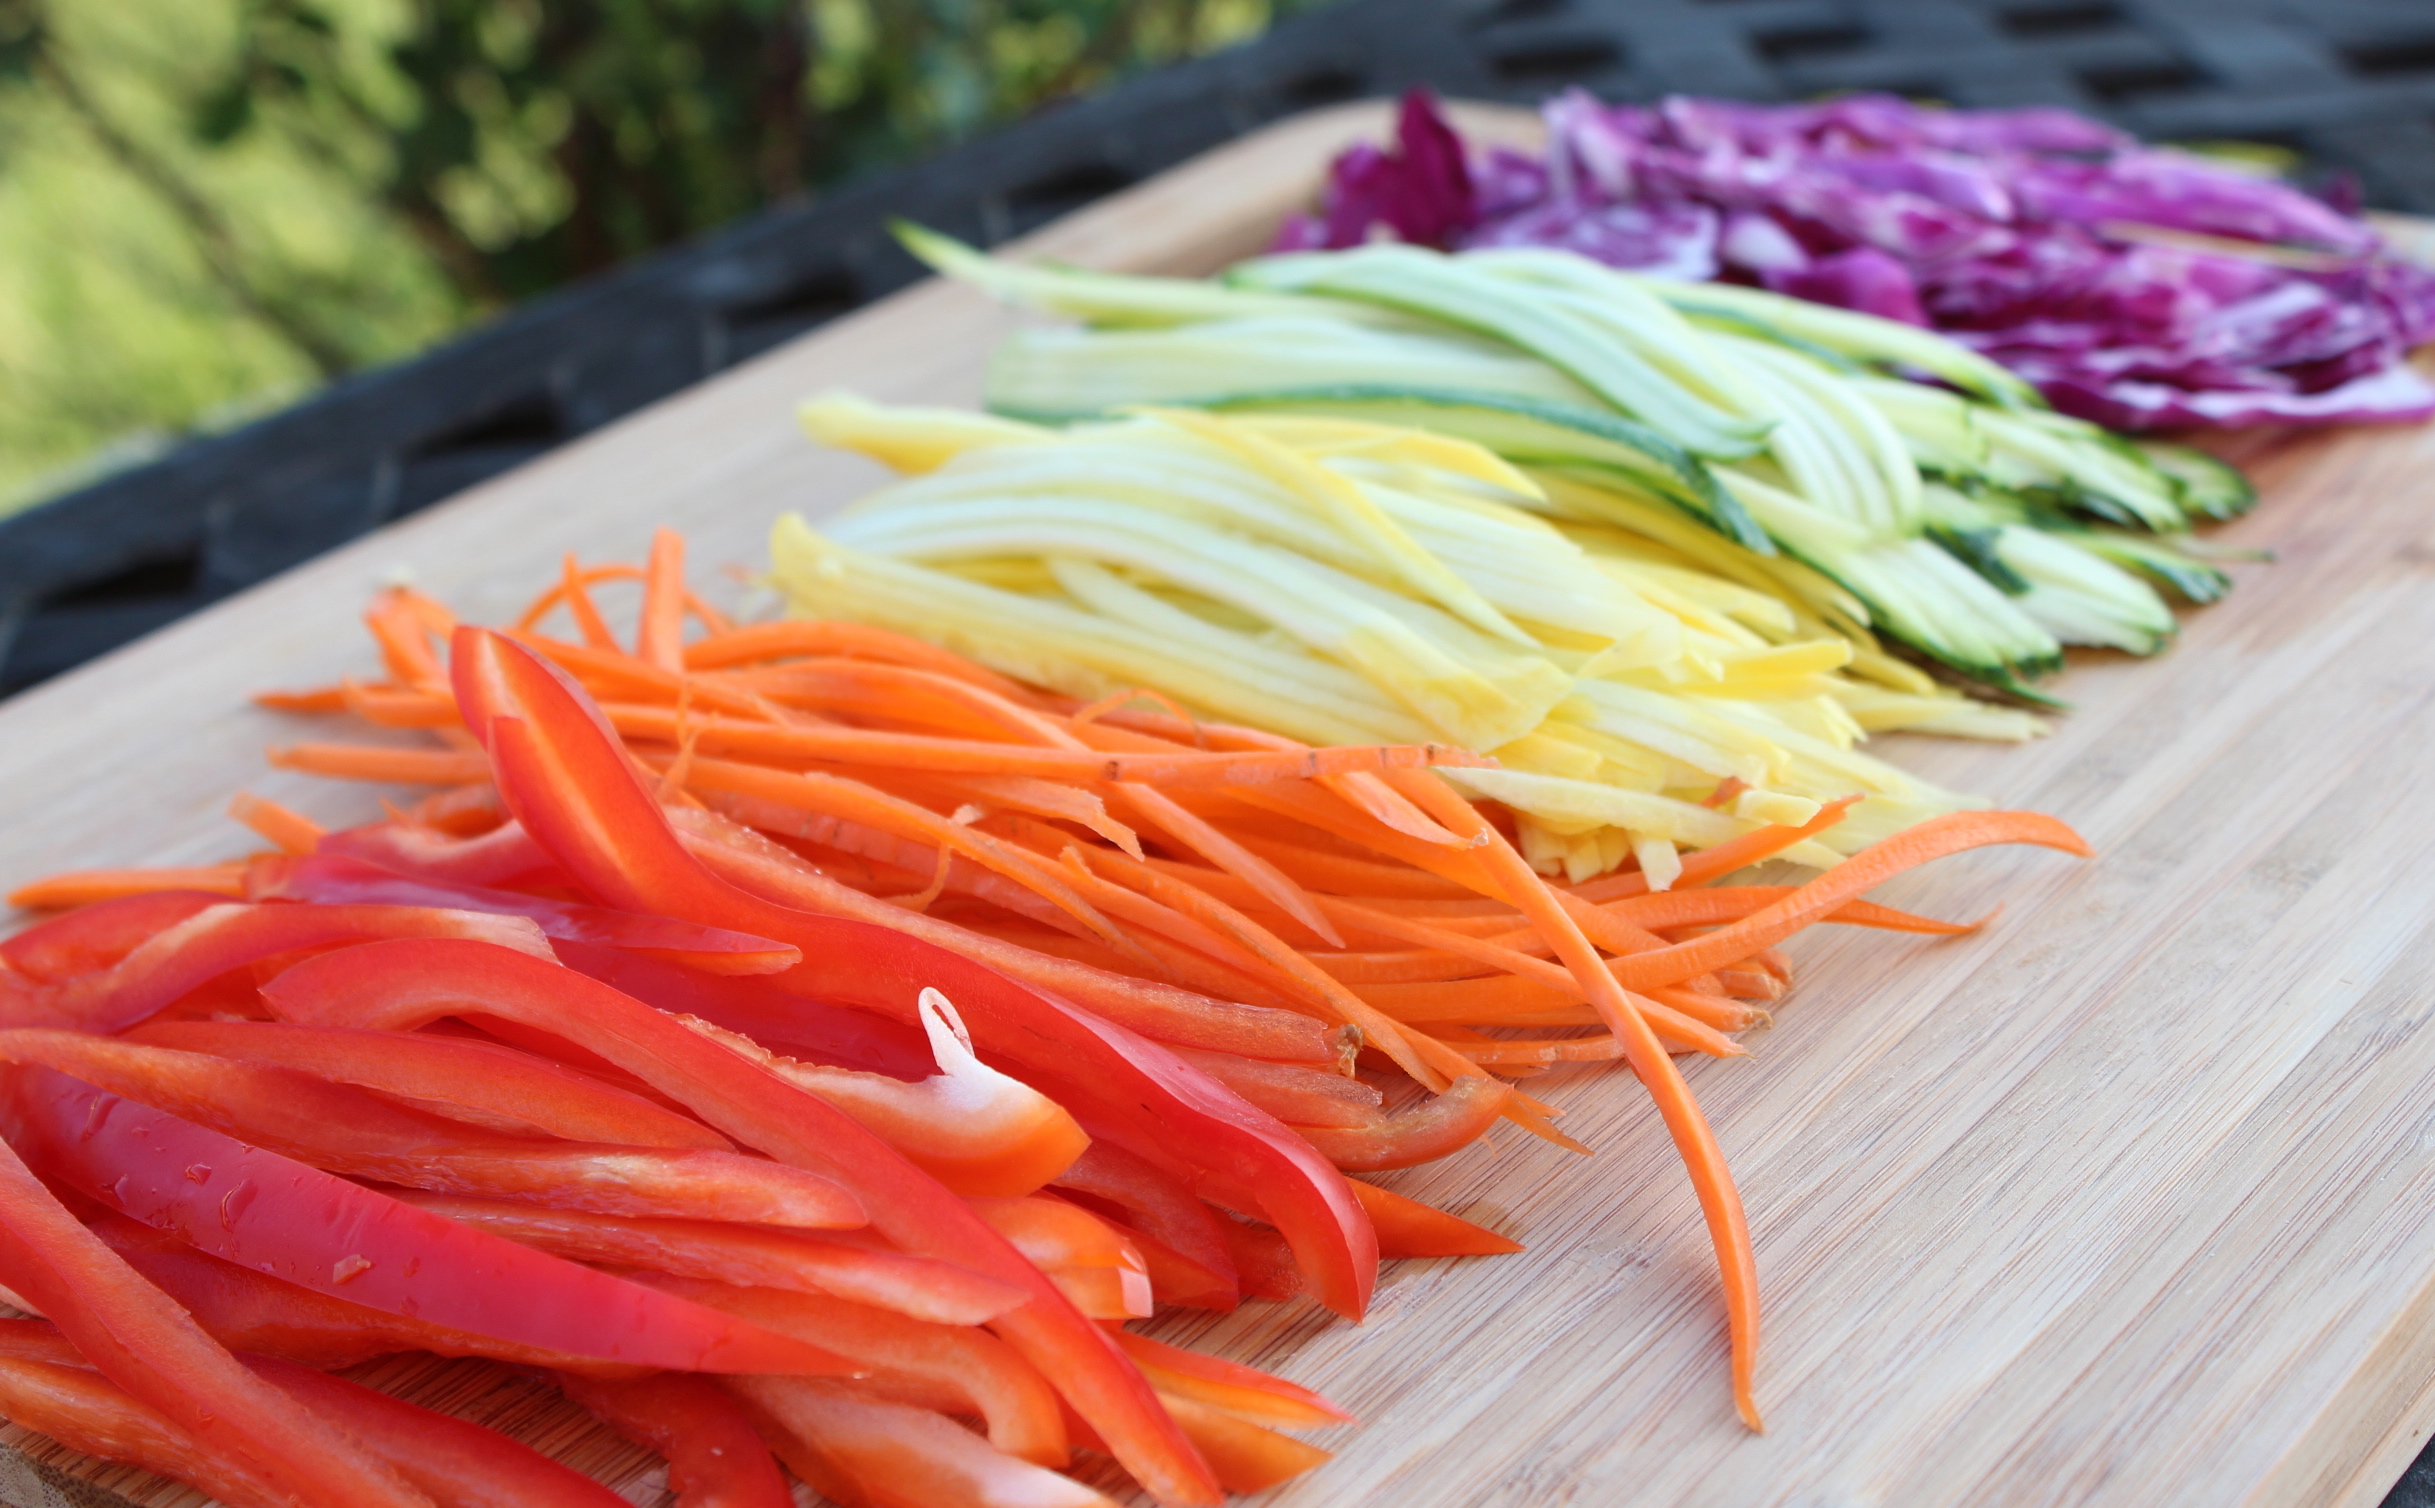
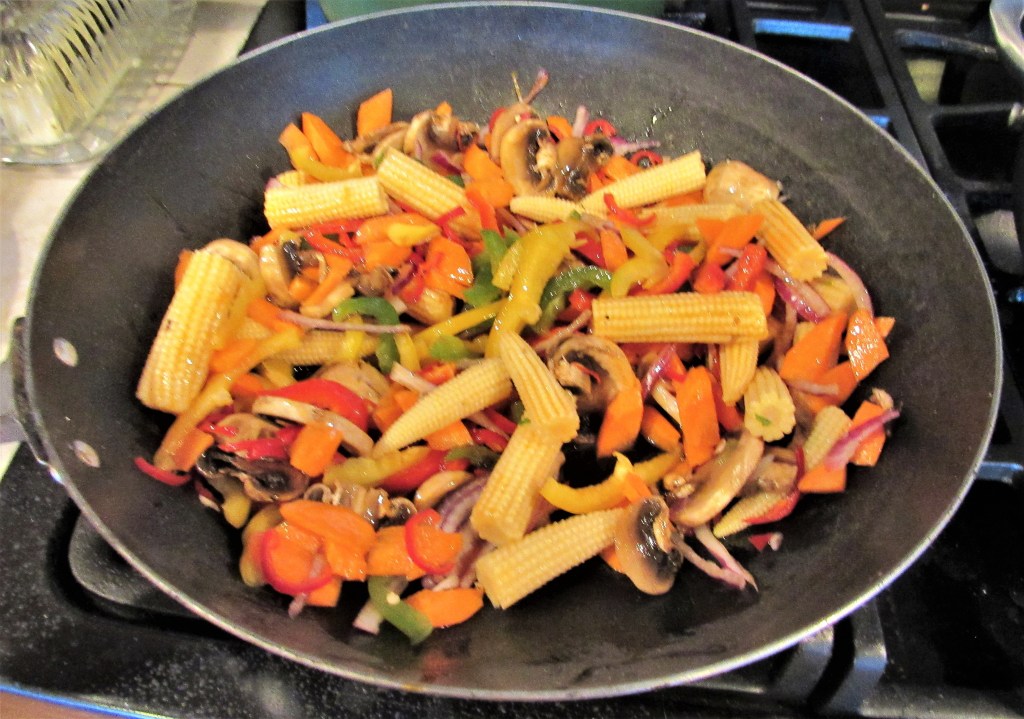
You can use any hearty vegetables you like, but I do my best to keep things as authentic as possible when I am cooking ethnic foods. I used baby corn, red, yellow and green peppers, onions, garlic, ginger, spicy red chili peppers, mushrooms and carrots. Then I topped them all with chopped cilantro, green onions and basil.

1 can baby corn, drained and cut in half

1/2 each green bell pepper, yellow bell pepper, red bell pepper, sliced thin

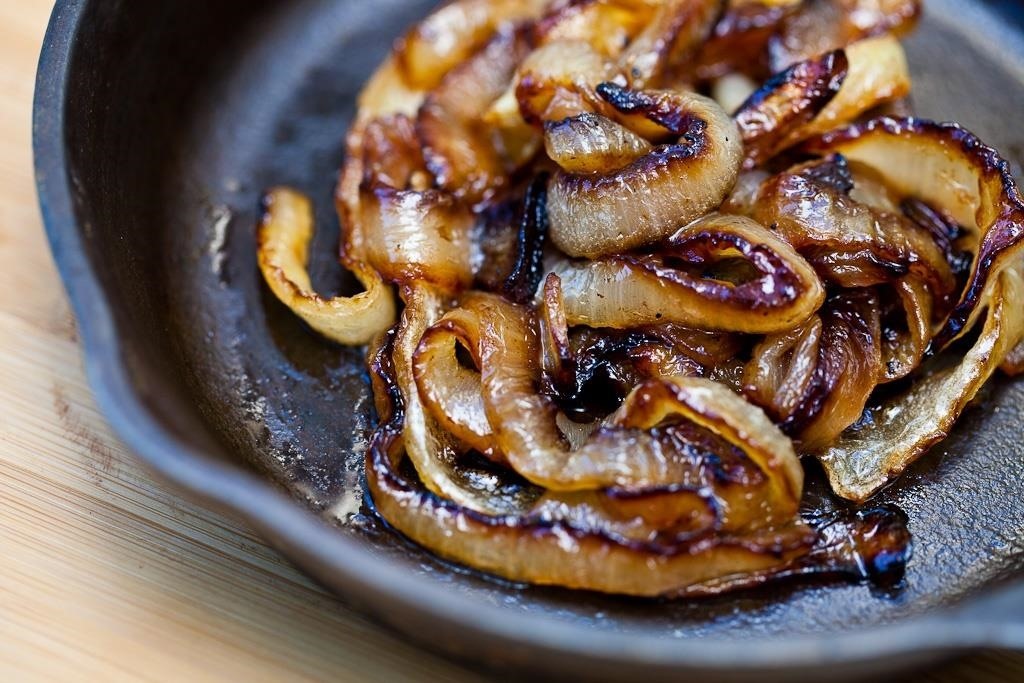
1/4 red onion, sliced very thin

1 1/2 cups mushrooms, sliced thin

2 carrots, sliced in thin Asian style or at an angle

1 1 /2 TBSP garlic

1 1 /2 TBSP ginger

1 tsp red pepper flakes, or to taste

sesame oil and vegetable oil for cooking

fresh cilantro, green onions and basil chopped for topping

I cooked them all in a wok in a combination of hot sesame oil and vegetable oil. Cook them at a high heat for about 5-7 minutes or until the vegetables are tender but still have a little crisp left to them.

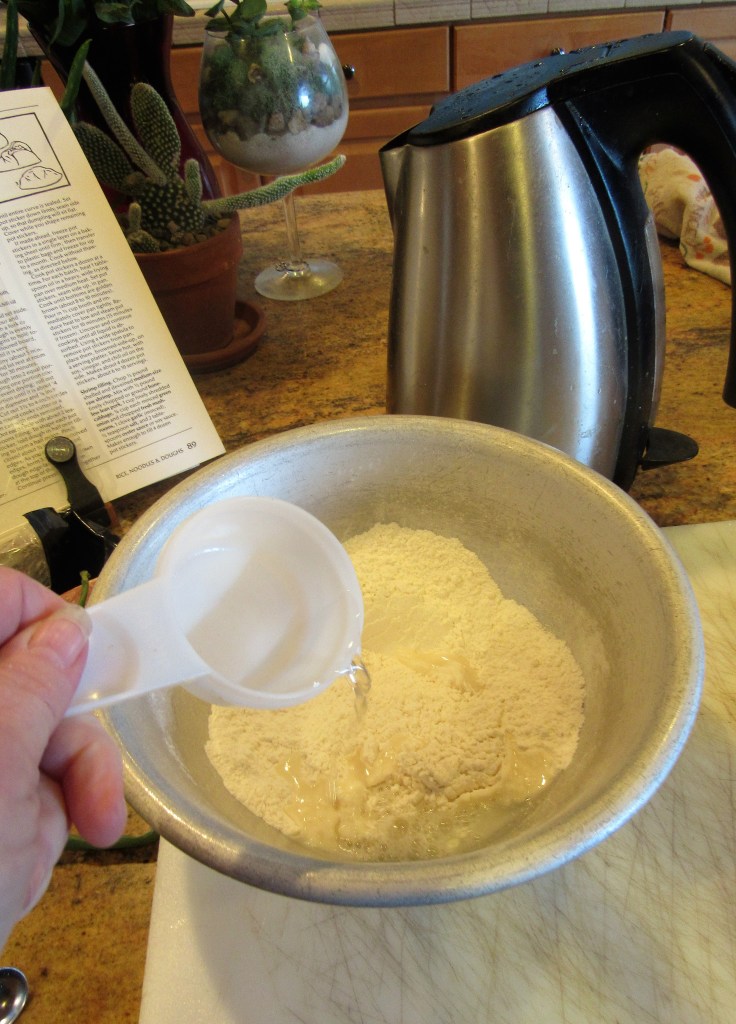
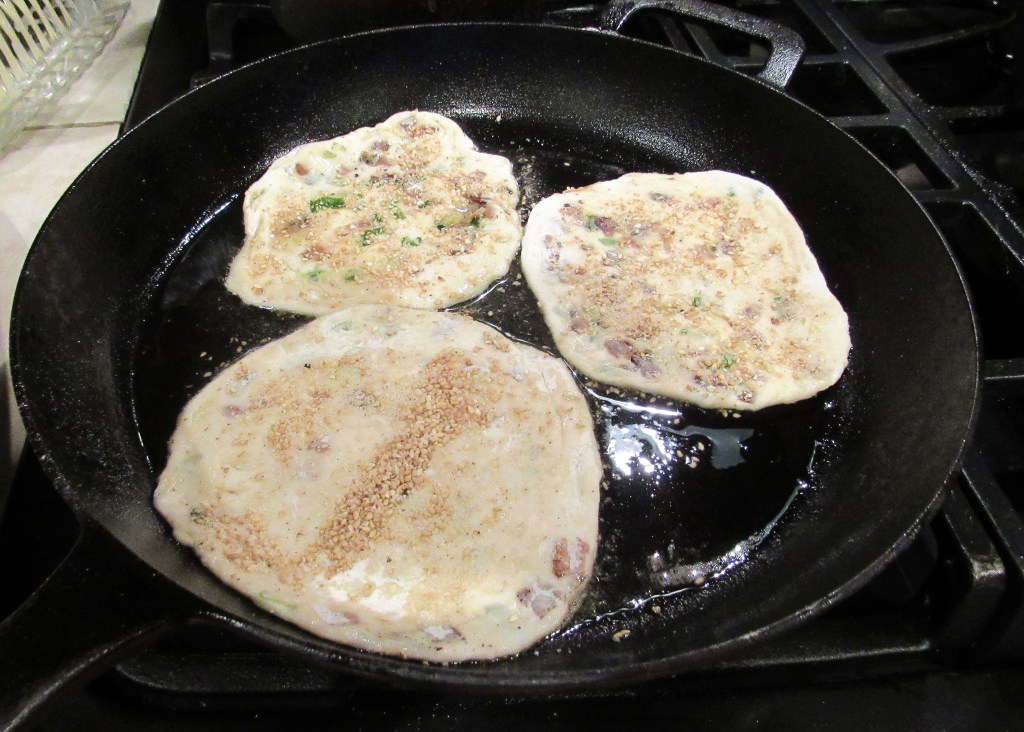
In another deep pan with hot oil, fry the noodles. I used thin rice noodles. Put them in the hot oil in small batches. The noodles only need to cook for a couple of minutes, then remove them. If you want them softer, place them in boiling water for a couple of minutes. That is what I am going to do next time. Larry and I both prefer the softer noodles rather than fried crunchy noodles, but Suzanne and Elizabeth both liked the crunchy noodles. So a little something for everyone. I had never cooked these noodles before and I followed the directions on the package. That’s what happens when I follow directions; things just don’t always work out as well as I plan them to. I am much better making up and following my own directions than I am at following the directions of others. (This is true with most things too though). 🙂

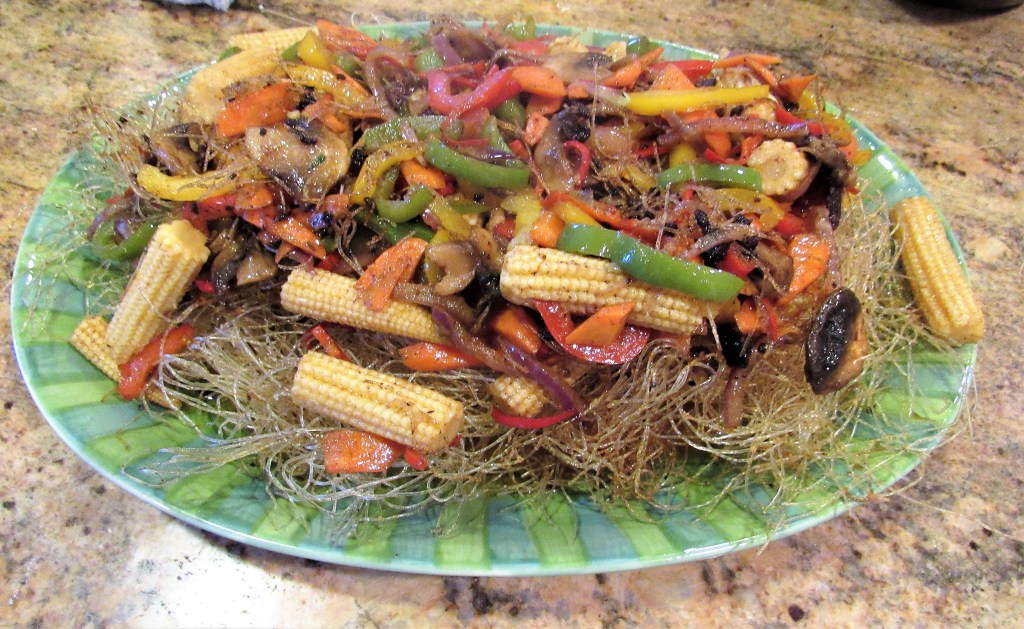
When the noodles and the vegetables were cooked, I plated them up, noodles first, the topped them with the vegetables. Right before serving them, I added the chopped green onions, basil and cilantro. The vegetables are very good on their own too.

Enjoy and a happy early Chinese New Year or Gung Hay Fat Choi.

Panang Style Fried Chicken

Ever since we brought Juni Bug into the family, everyone wants to come over and see the baby. We have become very popular lately. 🙂 Last night, my friend Elizabeth and and my friend Suzanne both joined us for dinner. It was a fun evening with good food, good friends and good fun, and of course, having a new puppy made it even better.

Usually when Elizabeth comes over, she is the one who is doing the cooking, since she wants to learn how to cook. She has an ever-growing list of things she wants to learn how to make. But this time, she was pre-occupied with Baby Juneau, so I did all the cooking instead. Elizabeth said she wanted to do something Asian, so of course, I obliged. Originally, she said she wanted Panang style shrimp. But we have already made that, so I decided to make something different. We made some Panang style fried chicken with fried noodles and vegetables and potstickers on the side. My orange cake was dessert. An Orange Cake. My friend Suzanne also wanted to meet the baby, so I invited her over as well. After dinner, we played games and had a lot of fun and a lot of laughs.

What is Panang style cooking? Panang (there are many spellings of Panang) style cooking is Thai style cooking that is usually made with a thick red curry sauce with bold, spicy flavors. Often times, it is is made with crushed peanuts and lime juice mixed in with the chilies and the curries. Panang curry originates from Thailand’s central region, but its popularity quickly spread as people moved to find work elsewhere. The earliest records date back to 1890, and call it phanaeng. There are two main theories on how the dish got its name. One is that it takes its name from the Thai word for cross, as in sitting cross-legged on the floor. Originally, Thai cooks would grill chicken by crossing the chicken’s legs and hanging it upright. They’d baste it continuously with a fresh, spicy paste to impart flavor, then add coconut cream before serving it. Another theory of how Panang style food gets its name is that it came from the city of Penang, on the west coast of Malaysia.

Panang Style Fried Chicken

This is very crispy, very flavorful way of cooking chicken. Part of what makes it so crispy is the “drying out” of the chicken before frying it. When done properly, this can take up to a full day or two before actually frying it. I did not do that this time, but next time I will. it was still delicious and a big hit with everyone.

3 lbs chicken pieces

salt to taste

1/4 cup soy sauce

1 TBSP curry powder

2 tsp dry mustard

3-4 TBSP coconut milk, mixed together well

2 TBSP ginger paste

1 tsp red pepper flakes, or to taste

1 1/2 TBSP brown sugar

1/2 cup flour

salt

1/2 cup cornstarch or rice flour

canola or peanut oil for cooking

Pat the chicken pieces dry with a paper towel, then rub the chicken pieces with salt.

Combine all the ingredients together except the flour, cornstarch and additional salt. Dip the chicken pieces into the mixture and coat completely. You can marinate the chicken for up to 2 days before cooking.

Drain the chicken pieces, shaking off the excess sauce and place the chicken on a baking sheet to dry. Let it dry completely for about 3 hours, or if you would like to speed up the drying process, blow it with a blow dryer until the chicken pieces are dried.

Mix the flour, additional salt and cornstarch together and completely coat the chicken pieces in the flour mixture.

Fill a deep pan with about 2 inches of oil and get to 350* F or 180* C. Then carefully place the chicken pieces in the hot oil, cooking it in batches. Cook the chicken until it is crispy and completely cooked, for about 15 minutes.

I sprinkled fresh basil green onions and cilantro on top of my chicken right before serving it.

The chicken and the meal itself were a big hit with everyone. The chicken was crispy and tender and full of flavor. This is most definitely a “do-over” dish.

Stay safe and stay well Everyone. ‘Til next time.

Nature Walks – A 2-Walk Kind of Day

I haven’t been cooking for the past couple of days, but I will be later on today. I will have some more yummy recipes coming your way tomorrow. I have been out walking though. I try to get in my walks everyday, or at least on most days.

Today, we did two walks. We took Vinnie out for a longer walk, then came home and “traded” dogs. Little Juni Bug can’t keep up with her brother yet, try though she may, so we take her out on separate walks. We tried taking them out together yesterday, but that didn’t work out so well. It won’t be too long before Juni Bug will be able to keep up with her big brother though.

The lakes have been quiet lately. But I always have my camera just in case. Even on the days when you don’t think you will see anything, there is always something to see, and quite often, even something new.

On recent walks, there have been more hawks,

more American Kestrels,

more ducks and geese,

and more Belted Kingfishers.

And today, we had some new visitors on the lakes as well. We had some snow geese. We have lived here 14 years, and this is the first time we’ve seen the snow geese. They were trying to blend in with the Canadians, but they weren’t doing such a good job of it.

But as much as I LOVE seeing all these beautiful critters that call our area home, my favorite critters are the ones I call my own.

Juni Bug is getting used to the snow.

Big Brother Vinnie and Little Sister Juneau looking out the window.

Life is short. Take it all in and enjoy each and every moment.

An Orange Cake

Still in my orange mood, I made an orange cake for dessert to go with my orange pork chops. Cooking Orange The cake was very moist and full of flavor, which is always a win/win for me. It was also a big hit with my friend Kathy who came over and helped us enjoy it.

The older I get, the less I actually enjoy really super sweet things, so this cake was perfect. It was sweet, but not super sweet. It was just perfectly sweet enough.

Orange Cake

2 cups + 2 TBSP flour

1 tsp baking powder

1/2 tsp salt

1/2 tsp baking soda

3/4 cup butter at room temperature

1 1/2 cups sugar

3 eggs, at room temperature

1 1/2 tsp vanilla

3 TBSP orange zest

3/4 cup yogurt

The Glaze

1 1/2 cups powdered sugar

4 TBSP orange juice

1-2 TBSP milk

Preheat the oven to 350* F or 180* C.

Spray a bundt cake pan with cooking spray.

Mix the flour, salt, baking powder and baking soda together and set aside.

Cream the butter and sugar together. Then add the eggs 1 at a time, and mix in between in addition. Add the vanilla, orange zest and yogurt and once again mix well. Then add the flour mixture and mix until everything is thoroughly combined without over mixing. Pour the batter into the cake pan and spread it evenly in the pan.

Bake for 45-60 minutes, or until the cake is golden and a toothpick comes out clean when inserted into the middle of the cake.

Let the cake cool completely before adding the glaze and the decorations.

Find a friend and enjoy the cake and the good company together.

Stay safe and stay well Everyone. ‘Til next time.

Juneau Likes Ice Cream

Larry is a big ice cream fan, and usually eats some every night after dinner. He has trained all the kids well, since now they like licking the bowl when he is done, and when he finishes the carton, he gives it to the kids as well. This was Juneau’s first time with the ice cream carton. I think she liked it!

She made sure she got every little last bit out of the box. She worked so hard at it that she exhausted herself in the process and finally fell asleep with her nose still inside the box.

Cooking Orange

Oranges were a gift, first presented to Europe by Hernando de Soto (ca. 1500- 1542), a Spanish conquistador. Senor de Soto was known for many things, most of which were not good. However, he is also known for introducing oranges and citrus fruits to the old world, which was at least one redeeming quality. It was Senor de Soto who brought the first orange trees to St. Augustine, Florida, and the rest is history. We all know Florida is the sunshine state, famous for its oranges and other citrus fruits that are eaten and enjoyed all over the world.

Oranges originated in Southeast Asia and were first cultivated there 6,000 years ago.  Cultivation in China began around 2400 B.C.  The Arabs introduced them to the Mediterranean region about 1000 A.D.  Today they are found in warm weather areas all over the globe.  The US and Brazil are the largest producers.  Interestingly, the word “orange” meaning the color, comes from the fruit and not vice versa.

There are three general categories of oranges: sweet, loose skinned and bitter.  Sweet oranges, such as the Navel or Valencia, are best eaten fresh and are prized for their juice.  Their skins are somewhat resistant to peeling.  Blood oranges are an interesting type of sweet orange, their sanguineous name arising from their crimson hue.  Loose skinned oranges, as the name implies, are easier to decorticate.  Mandarins and tangerines, (a sub-type of mandarin orange), are well known loose skinned varieties.  Their taste is slightly tarter than sweet oranges.  Finally bitter oranges, such as Seville or Bergamot, are sour and usually not eaten raw.  They are best for cooking, made into marmalade, candying their peels, and infusing liqueurs such as Curacao.

Oranges are very popular all around the world and are used from just eating by themselves to enhancing many dishes, both savory and sweet. Today, I did both and cooked something savory and sweet with oranges. When I say cooking orange, I am not meaning to necessarily cook orange foods, although that is interesting too. I am more talking about adding orange flavorings, orange juice and/or orange zest to foods. I was in kind of an “orangey” mood when it came time for dinner, so I first made orange pork chops and finished with making an orange cake. I did, however, cook some pumpkin, mixed with other vegetables, for the orange color as well though.

My orange pork chops were very easy to make and very tasty. They were also super tender, and practically melted in our mouths. I was inspired from an Italian cookbook, so the Italian name for my orange pork chops is Arrosto All’ Arancia. It always sounds so much more exotic and romantic in Italian than in English. Oh well, maybe I am just a romantic at heart.

Arrosto All’ Arancia

I used pork chops for this dish, but you can also use a pork loin too if you prefer.

2 lbs pork, either chops or loin

3 TBSP butter

olive oil

1 1 /2 cups orange juice

1 tsp orange zest

1 TBSP garlic

1 tsp chili poowder

1 tsp chocolate chili powder, optional

1 tsp dried orgeano

salt & pepper to taste

Mix all the ingredients together and marinate the pork for at least 1 hour before cooking. The longer you marinate it, the more flavorful and tender it will be be. I marinated mine for about 4 hours.

When you are ready to cook the meat, preheat the oven to 350* F or 180* C.

Melt some butter and oil in a hot skillet and sear the meat until it is browned on all sides. Then place it in the oven and roast until the internal temperature of the pork is 160* F. The times will vary depending on whether you are cooking a pork loin or pork chops.

When the pork is done, serve it alongside your favorite side dishes and top with some of the remaining juices. I served mine over white rice with some roasted winter vegetables on the side, finished with a delicious, buttery chardonnay. !Deliziosa! Buon Appetito!

Stay safe and stay well Everyone. ‘Til next time.

Nature Walks – Still Out Walking

I know, I have been busy posting pictures and videos of our new baby, Juneau. But I am still out walking too, and there are still so many wonderful sights to see. Yesterday, it snowed all day. Needless to say, I did not walk yesterday. At the moment, I am looking outside my window and everything is blanketed in a think blanket of white snow. If the sun keeps shining, it won’t last long, but at least I can enjoy it now. I love looking out my window and seeing this.

Here are some of things I have seen on some recent walks. It’s always an adventure.

Buds are already starting to show and the pine trees are sapping (I don’t even know if that is a word, but I like it).

I have seen more belted kingfishers out and about,

as well as a lot of red-tailed hawks.

We always see the bunnies. Usually they try to lie low, doing their best not to be seen at all, but I almost always see them.

The squirrels are always active and playful too.

So are the prairie dogs.

And I even saw a first time walker, our own Baby Juni Bug. She is not yet getting the concept of the leash, but she will. Soon, she will be joining us for our long walks through the open space.

It’s All in the Technique

Sometimes I have to step back a bit and realize that not everyone has a culinary background like I do. This means not everyone is familiar with some of the terms or techniques that I use on a daily basis. So today, I thought I would help with that, and offer some definitions and pictures of actual cooking terms and techniques we chefs use in the kitchen everyday.

Most cooking terms are in French, or have come from French chefs through the ages. Up until fairly recently, all the cooking gods and goddesses were formally trained in the French arts of the trade. I too have been trained by French chefs, as well as many other fantastic European and American master chefs. When I was in culinary school, I was lucky enough to be trained by a Dutch pastry chef, a couple of German master chefs, and my favorite chef instructor of all, Andre Aversegne, from Avignon, France. So I took what they could teach me and then, of course, I personalized it in my own way. Some of my instructors did not like this particularly much, and I was always in trouble of some kind. For instance, I love my chowders nice and thick. One day we were making chowders, and the chef instructor had us make it on the thin side. I didn’t like it and made it thick instead. He balked and told me that I needed to make it his way and to do what the customers wanted. My response to him was “if it is my restaurant, I will make it any way I like, and the customers either like it or they don’t”. I was punished by having to cut a 10 lb bag of onions, crying heavily the whole time. I was finally released from my duties because Chef Wentz was afraid I was going to cut my fingers off because I was crying so much. But then, Chef Aversegne always had a different approach. He would say ” Non, non Jeanne, dat iz not za way”, but he would let me do my thing to see how it would turn out, then he would say “Jeanne, diz iz good! Tres bien!” So as you can see, I have always been a rebel, and I am going to do what I am going to do. 🙂

Julienne -to cut ingredients, usually vegetables, into thin matchstick shapes, usually no more than a couple of inches long.

To Cook julienne or not to cook. That's the question.

Marinating meats – is a way to flavor meats and tenderize them at the same time, usually using some sort of acidic base mixed with seasonings and herbs.

How to Marinate Meat | Edible Paradise

Marinades are often made with variations of salt, sugar, oils and vinegars. The salt reduces the water content plus is form of preserving the meats (especially in the times before refrigeration). Sugar and oil smother the bacteria and the vinegar acts as a hostile environment for bacteria.

Deglazing – When pan frying, as we know, often times, food particles stick to the bottom of the pan. By adding something acidic to the pan, it removes these browned meat and vegetable particles and also acts as a flavor enhancement because it caramelizes them as well. As you know, I use a lot of wine and/or lemon juice when I cook for this very purpose.

Deglazing - what is it and why we do it | Lamb and Beef

Caramelizing – means to cook food slowly which allows the food’s natural sugars to come out and convert into a liquid. This browns the food and adds a sweet taste to it as well.

The Know-It-All's Guide to Caramelization « Food Hacks :: WonderHowTo

Stewing – is a method of slow cooking, usually used for tough cuts of meat. The meat is covered in a liquid or broth and is slow cooked over hours to both flavor and to tenderize the meats and/ore vegetables used.

Now We Know... the difference between braising and stewing

So now you know. I give you free reign to bragging rights. You can show off your cooking knowledge and your new-found skills to your family and friends and say “I learned this from ‘A Jeanne in the Kitchen'”. 🙂

Have fun, stay safe and stay well Everyone. ‘Til next time.

Virtual Shopping at Candies Collectibles

Back in October, when were in Texas, I discovered Candies Collectibles, owned and operated by my Aunt Janis’ sister. Candie’s Collectibles I guess that would make Candie my “aunt-in-law”. Anyway, family is family, no matter what names they are called. Candie offers a wide variety of unique, one-of-a-kind collectible items, specializing in retro jewelry, which is an absolute passion of mine. I receive Candie’s emails all the time when she has found something new and exciting, which is quite often since she is always on the lookout for new, fun things to offer. One of her latest finds were these beautiful, hand made wooden crosses.

I saw them, and initially thought of getting one for a friend of mine as a gift, which is still the plan. But I liked them so much, I decided to get one for me too.

But now, I face a dilemma. Which one do I give away and which one do I keep for myself. I like them both, and she has a whole bunch more from which to choose as well.

If you are like me, it is those fun and unusual finds that keep things interesting and add personality. If you like unusual finds, Candies Collectibles is the place to go. As you can see, if you find something you like, she will send it to you no matter where you live. So, stop on by and do some shopping, whether in person or virtually, and see what’s in store today. There is always something new and interesting to see. Who knows what you’re going to find. Everything changes from day to day.

Last time I was there, I bought some old vintage jewelry. I wore the brooch while we were in Kansas for Larry’s brother funeral and got rave reviews on it too.

Candies CollectiblesShe is located at 1600 Strickland Drive, Orange, TX 77630. You can also call her at (409) 216-7052. She will be more than happy to help you out with whatever you are looking for.

Green Onion Cakes

I have made a different version of green onion cakes before, but since I was making Chinese for dinner, and I like to have everything as authentic as possible, I made yet another version to go with my beef and broccoli stir-fry. Beef and Broccoli Stir-Fry These are very tasty and easy to make.

These Chinese green onion cakes are from the Northern China regions, which means I am guessing they would be a part of the Peking styl of cooking, especially since they are a wheat product, and the Northern region is known for its wheat. These green onion cakes are thin, unleavened chewy breads, similar to tortillas, only they are pan-fried, like what you would do for street tacos. In China, they are used in lieu of rice, but I served them on the side and still used rice as well.

Green Onion Cakes

1 cup flour

1/2 tsp salt

1/2 cup boiling hot water

4-5 strips of bacon, cooked and crumbled

2-3 green onions, sliced thin

3 TBSP sesame seeds

oil for cooking

Mix the flour with the salt and and the boiling hot water and mix just long enough for the mixture to stick together and hold. Form it into a ball, cover and let it set for at least 30 minutes before rolling it out.

While the dough is resting, cook the bacon. Reserve the bacon grease for later.

On a lightly floured surface, roll out the dough into a rectangle. Then sprinkle the green onions and bacon all over the surface of the dough.

Tightly roll the dough into a log and seal the ends.

With a serrated knife, slice into rounds, and again, seal the ends. Then press with the palm of your hand to flatten the rounds out. Roll with a rolling pin until they are flat pancakes, about 1/8 inch thick.

Brush both sides of the pancake with the remaining bacon grease and sprinkle sesame seeds on both sides as well.

If you have extra bacon grease, add some cooking oil and get very hot. Once the oil is hot enough, carefully place the pancakes into the hot oil and cook for about 2-3 minutes per side. Then they are ready to eat and enjoy.

I ate mine taco style, whereas Larry just had his as a side dish. However you eat them though, I know you are going to love them.

Stay safe and stay well Everyone. ‘Til next time.