I have created this site to help people have fun in the kitchen. I write about enjoying life both in and out of my kitchen. Life is short! Make the most of it and enjoy!
Author: ajeanneinthekitchen
I have worked in the restaurant and catering industry for over 35 years. I attended 2 culinary schools in Southern California, and have a degree in culinary arts from the Southern California School of Culinary Arts, as well as a few other degrees in other areas. I love to cook and I love to feed people.
Sometimes its fun to just step back a bit and not work to hard. Sometimes, the old tried and true sayings from the kitchen are all that needs to be said. All of these hold true in my kitchen, some more so than others.
This is certainly how I was raised.
These are my rules that I strongly enforce everyday. Don’t believe me, just ask Larry.
This one is certainly true in my kitchen.
Oh yeah!
This one is so true, because I absolutely hate throwing food away if I can help it.
This is my kitchen on any given day.
Have a great day Everyone. Make the most of everyday. Stay safe and stay well. ‘Til next time.
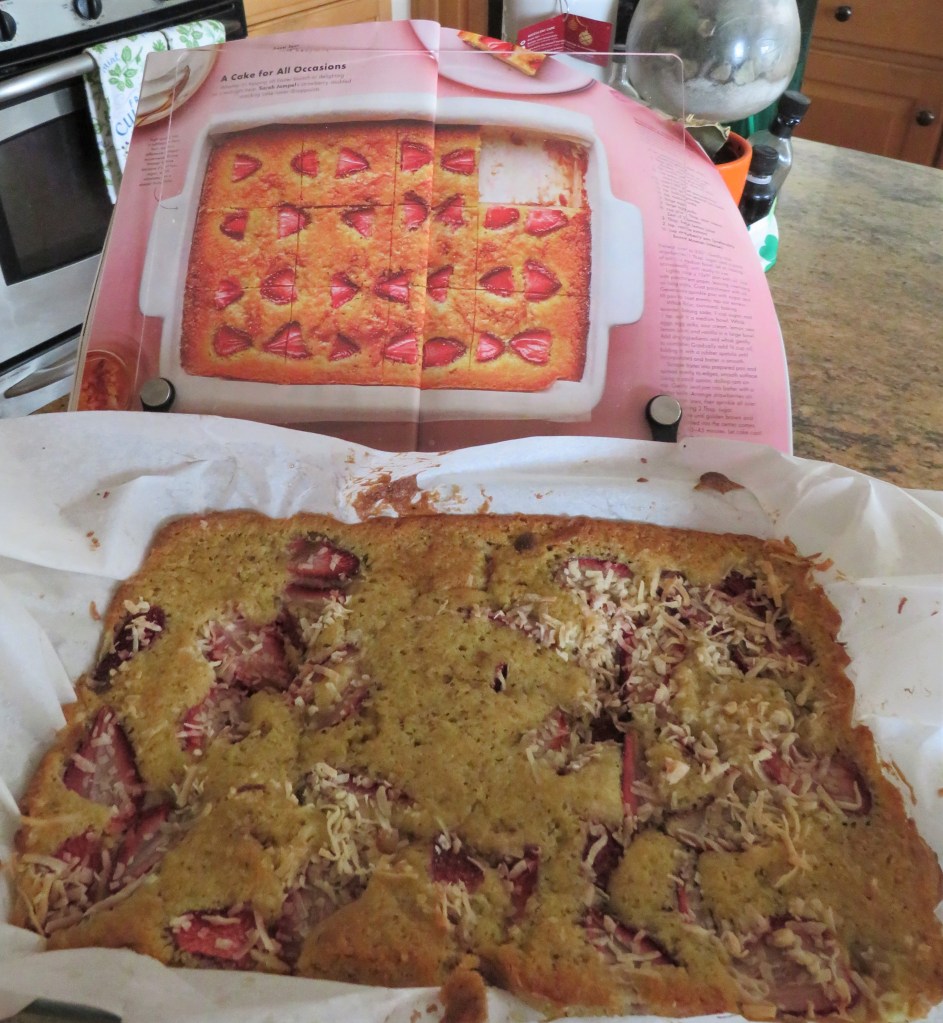
I like using a lot of fruits for my desserts during the warmer seasons. Plus I am always on the lookout for new and different ideas for my coffee cart. I saw a recipe for a strawberry cake, but I wanted to add bananas too, because I had some strawberry-banana yogurt. Then I thought of making it even more tropical by adding coconut to it as well, again, since my yogurt was made from coconut milk. There was a bit of a theme going on, all based on that one container of yogurt. 🙂 I haven’t tried it yet, but I just know it will be good.
Strawberry-Banana- Coconut Cake
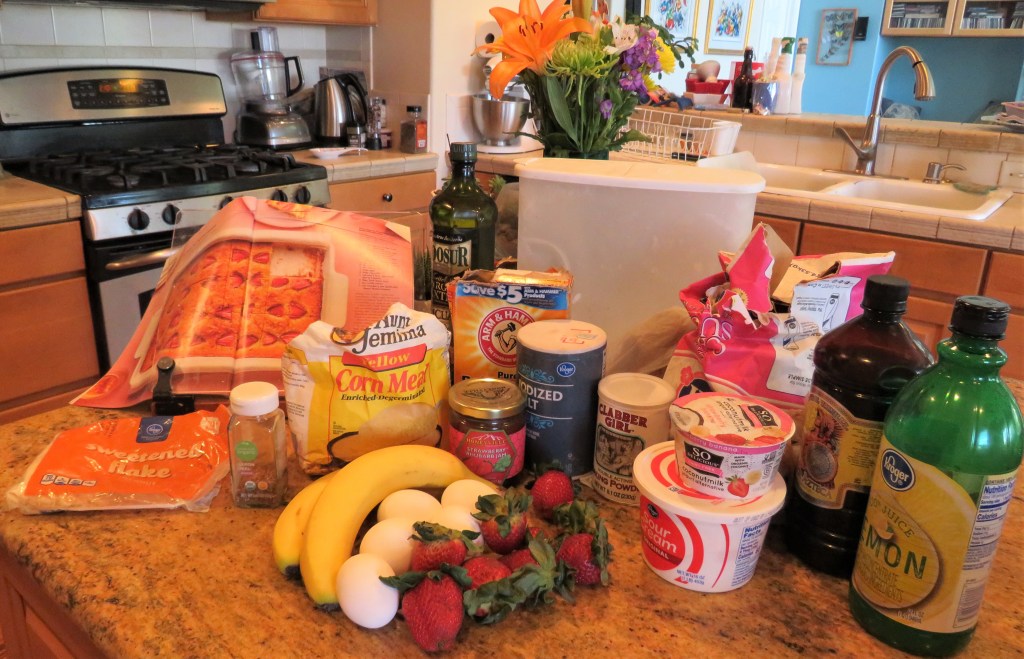
You can use either yogurt or sour cream, but I used strawberry-banana yogurt.
8 oz sliced strawberries, stems removed
1 banana, sliced thin
3 TBSP + 1 cup sugar, divided
3/4 cup olive oil
1 1/2 cups flour
1/2 cup cornmeal
1/2 tsp baking powder
1/2 tsp baking soda
3 eggs
2 egg yolks
1/2 cup + 2 TBSP yogurt or sour cream
1 tsp lemon zest
3 TBSP lemon juice
2 tsp vanilla
1/2 cup strawberry jam
coconut
Preheat the oven to 350* F or 180* C.
Spray a 9×13 baking sheet with cooking spray and line it with parchment paper. Make sure you have some extending over the edges of the pan too. Spray the parchment paper with cooking spray as well.
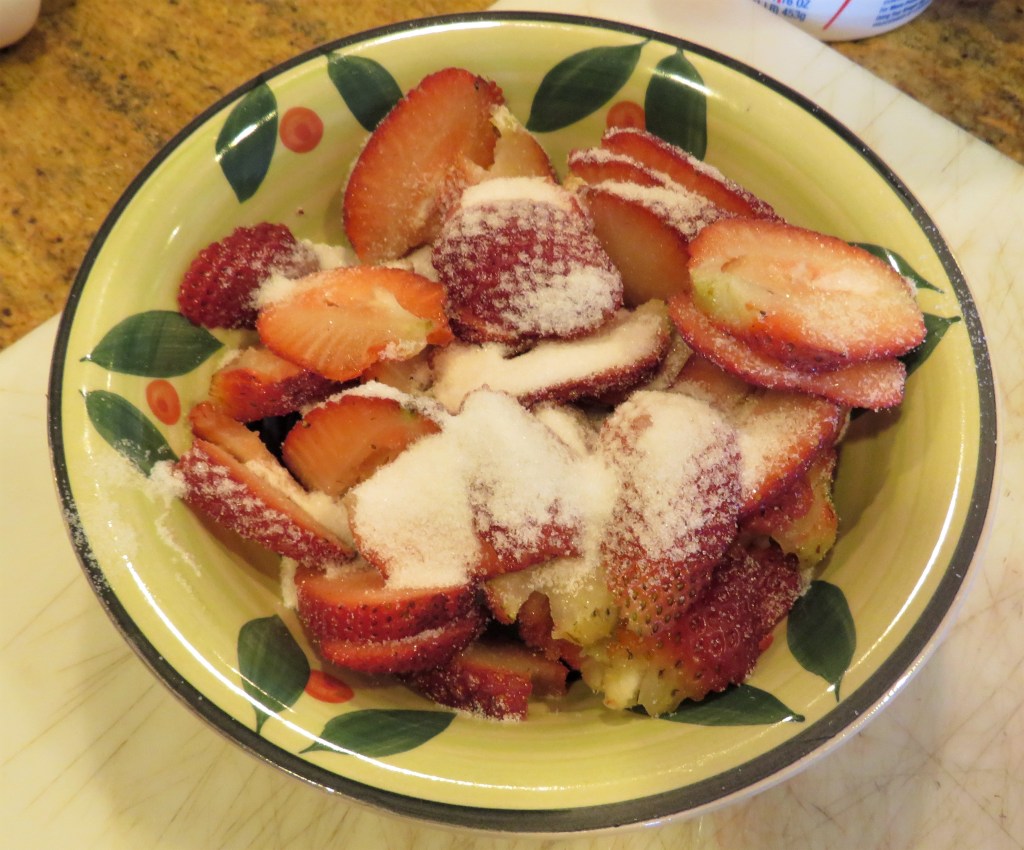
Sprinkle the strawberries with 1 TBSP of sugar and a pinch of salt and set aside.
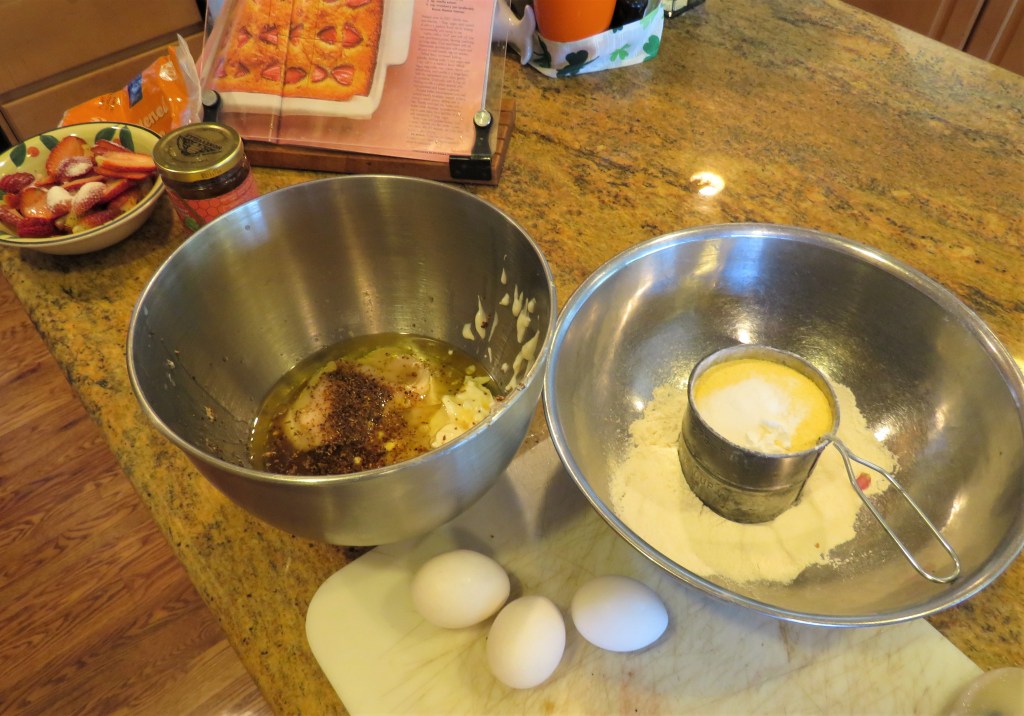
Mix all your dry ingredients together and set aside. Combine all the wet ingredients and the remaining sugar together and mix until well blended then add the dry ingredients 1/2 at a time, blending in between each addition.
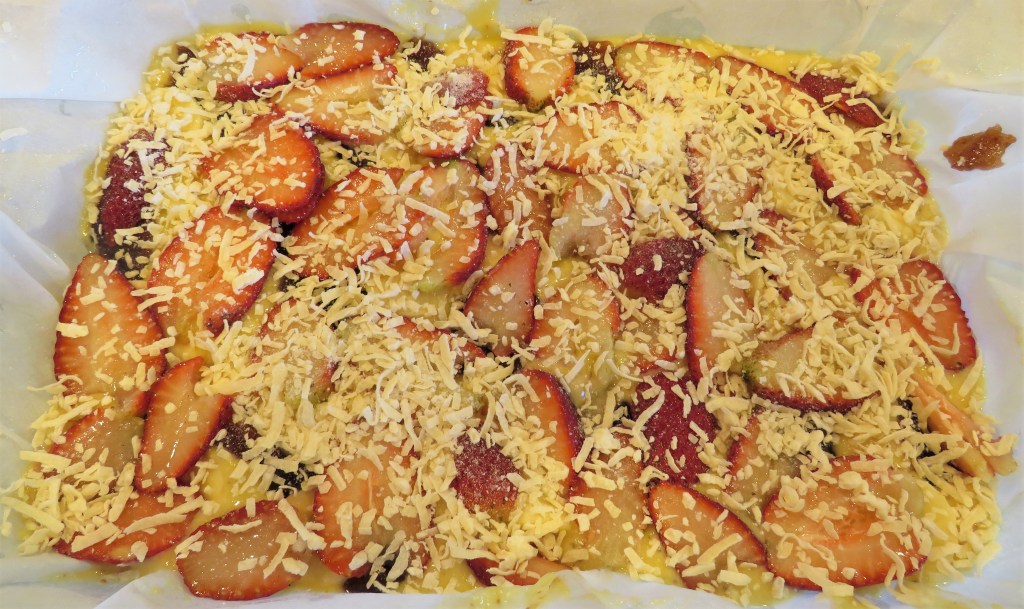
Carefully pour the batter into the prepared pan and evenly spread out.
Add dollops of the jam all around the batter. Add a layer of the banana slices on top of the jam.
Add the sliced strawberries and then sprinkle the coconut on top of the strawberries.
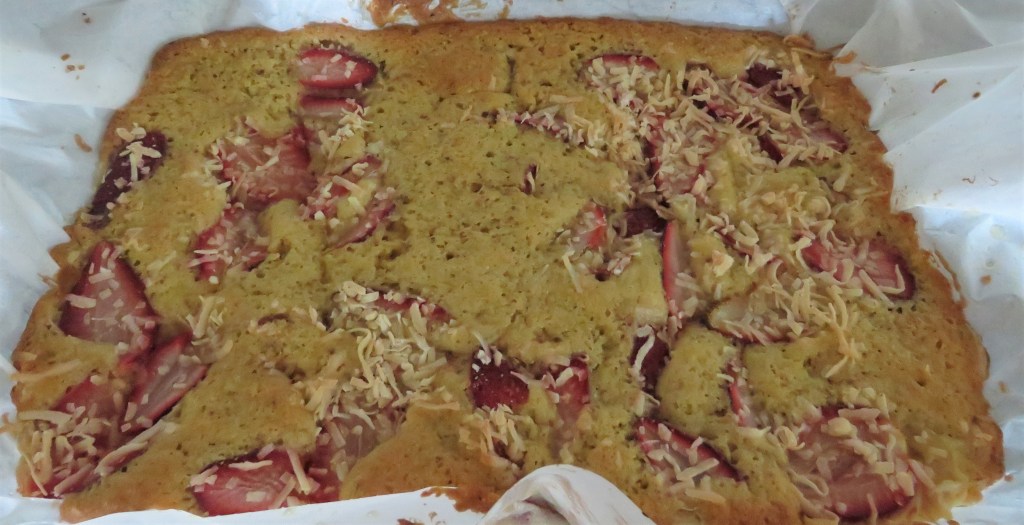
Bake for about 40-50 minutes, or until the cake is done and nice and golden brown. Dust with powdered sugar once the cake is completely cooled (optional) and slice.
My cake wasn’t cooled yet, so I had not dusted it with the powdered sugar or sliced it yet.
In no time at all, your taste buds will take you down to the tropics with this fruity cake. Enjoy your Caribbean trip with each and every bite.
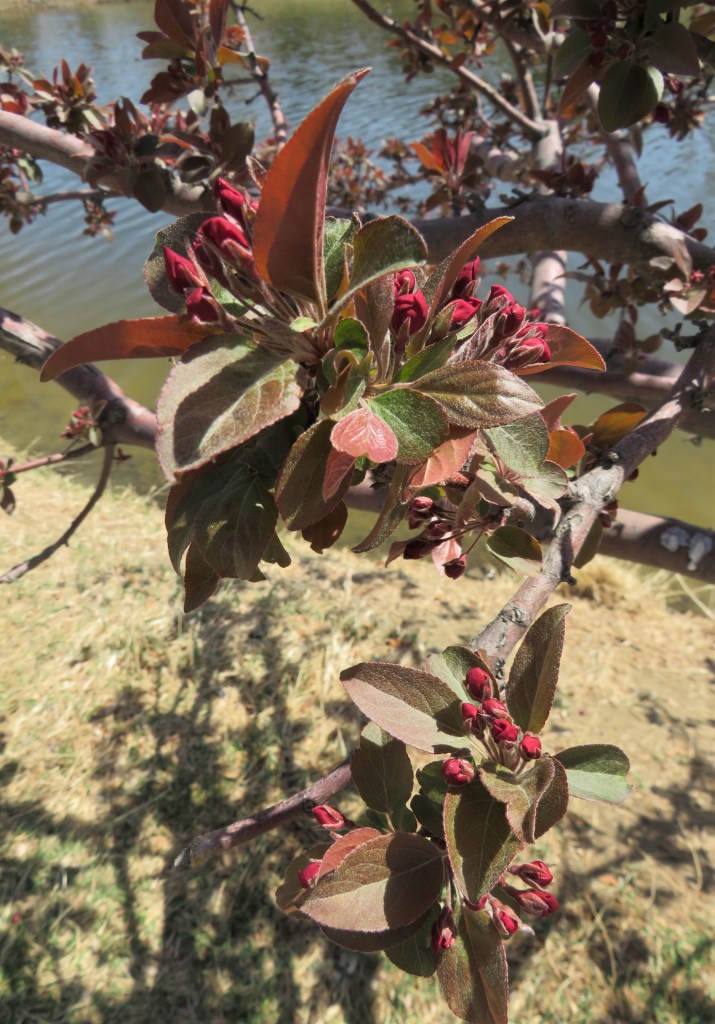
Today is Earth Day. Mother Earth is celebrated the world over as we give thanks for all that she has provided. Mother Earth is a pretty amazing place. She has so many wonders and beauties that she gives to us freely and abundantly. So let’s honor Mother Earth, not just today, but everyday.
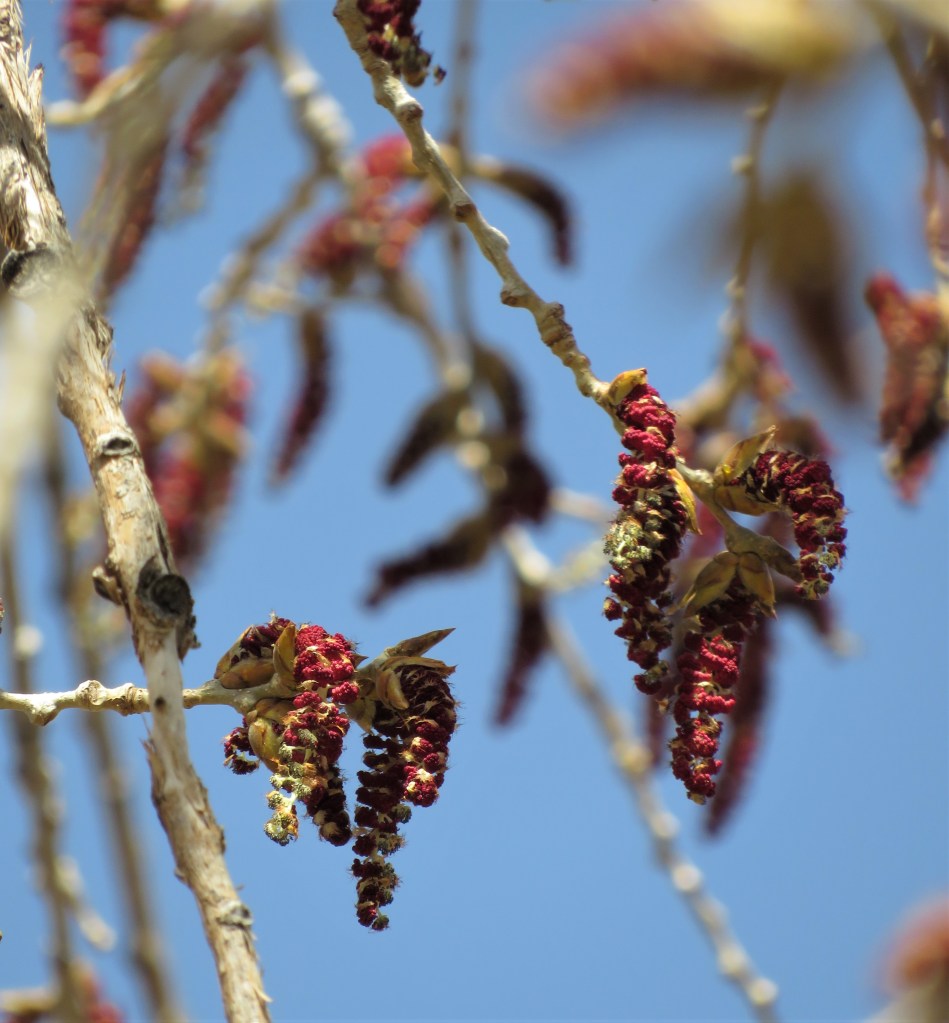
Here are some early Spring buds and blooms that help show all the beauty that abounds.
Thank you Mother Earth for providing such a beautiful place we call home. Thank you for all the fruits and foods you provide us daily. Thank you for the water we drink. Thank you for the lands. Thank you for all the birds and the bees, and all other creatures on both land and in the seas.
I have been cooking my whole life. My mother took a picture of me helping her cook when I was just 3 years old. (I wish I still had hat picture). So, you would think I would know a lot about cooking, and I do. But here is ALWAYS something new to learn.
I love potatoes. I love them just about every way they are cooked too. I cook them often, in many different ways. One of our favorite ways to eat potatoes is roasting them. I make good roasted potatoes too. But I just discovered an even better way of roasting them. I learned this new method from watching America’s Test Kitchen videos. I learn a lot from them. I find them to be very informative and easy to follow.
This new method of making perfect, crisp roasted potatoes is to boil the cut potatoes first in some water with 2 TBSP of white vinegar and a dash of salt. They only thing new for me was the first step of boiling them with the vinegar. I never knew about this step before, but apparently the vinegar causes the potatoes to form a thin crust, which helps them hold their shape. It also helps the potatoes absorb the salt and other flavorings as well. Using vinegar for the potatoes also helps when frying them too. It draws out the starch, making them more rigid and less likely to stick together. The cooks fry them twice, first blanching them until slightly limp in peanut oil heated to 325 degrees, and again in 375-degree oil to crisp and brown them.
Bring the potatoes to a full and rapid boil, then reduce the heat a bit and let them boil for 10 minutes. Then drain them and let them cool slightly.
Preheat the oven to 500* F or about 260-270* C.
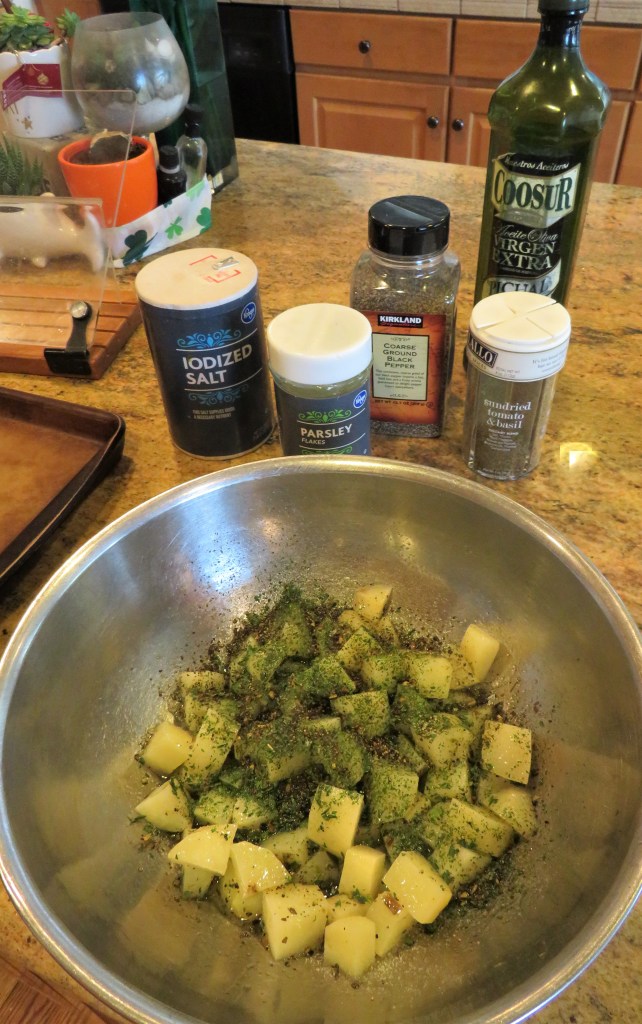
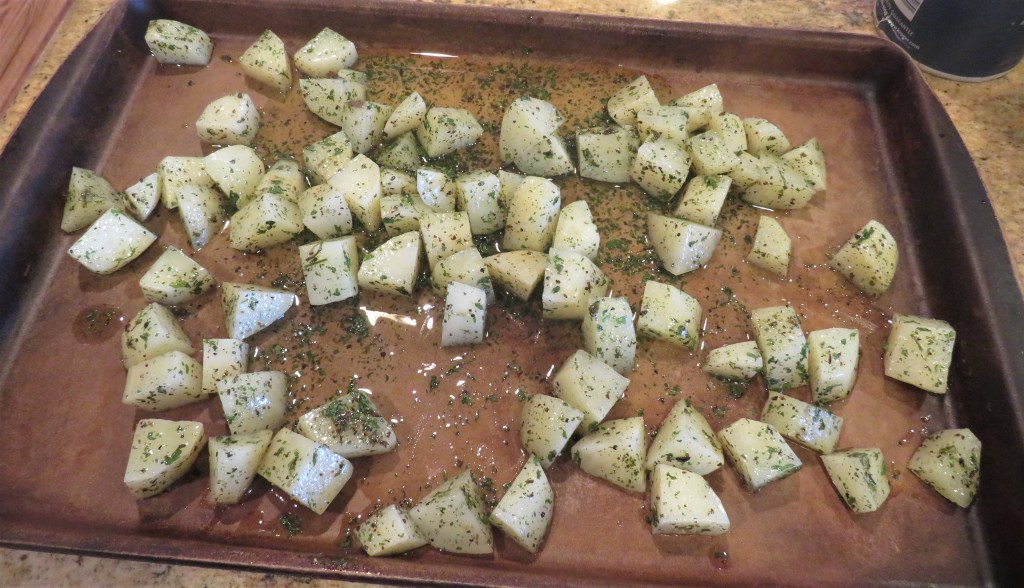
Once the potatoes have been drained and slightly cooled, toss them in olive oil, salt, pepper and whatever other spices and herbs you like to use and completely coat them. Spread them in a single layer onto a baking sheet.
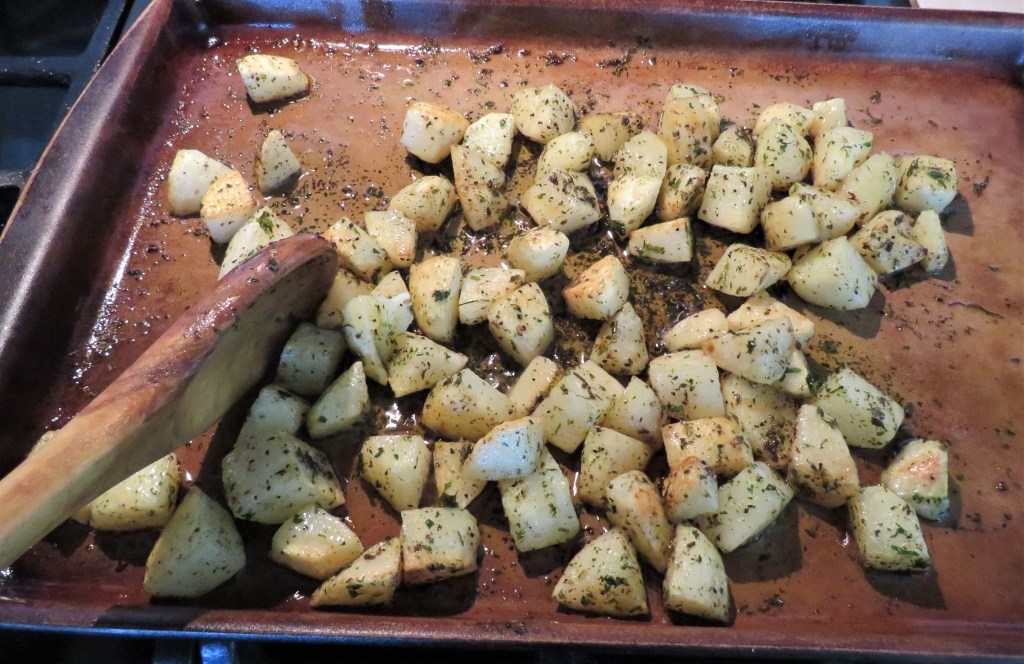
Roast them for about 20 minutes, then stir them and roast again for another 20 minutes, or until they are nicely browned and crispy.
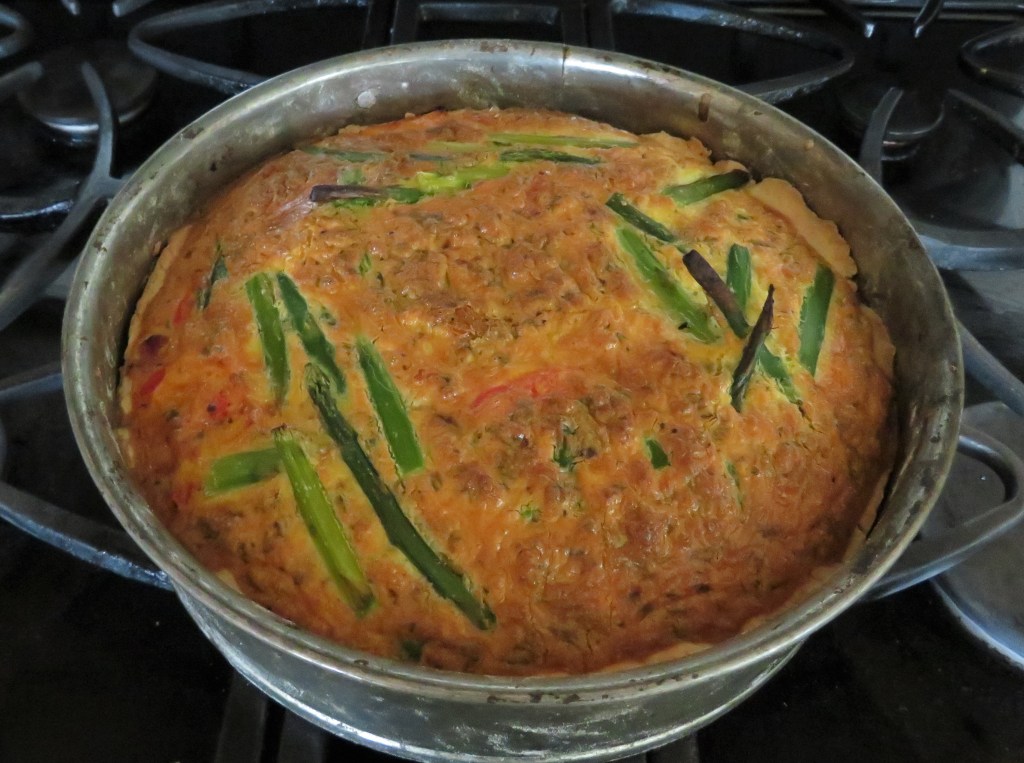
I served my potatoes with a ham, pepper and asparagus quiche. Delicious.
I will use this new method for roasting my potatoes from here on out too. Who knew? So see, old dogs can learn new tricks. 🙂 There is ALWAYS something new to learn, no matter how much you already know or how much experience you have. Always be open to learning new things. You’ll be amazed at the results when you do.
Stay safe, stay well, and always keep an open mind. ‘Til next time.
I think I must have been Spanish in past lives. When we went to Spain a few years ago, I absolutely fell in love with the whole country, its culture and especially the food. I would be a very happy camper if I was ever lucky enough to live in Spain and to call Spain home.
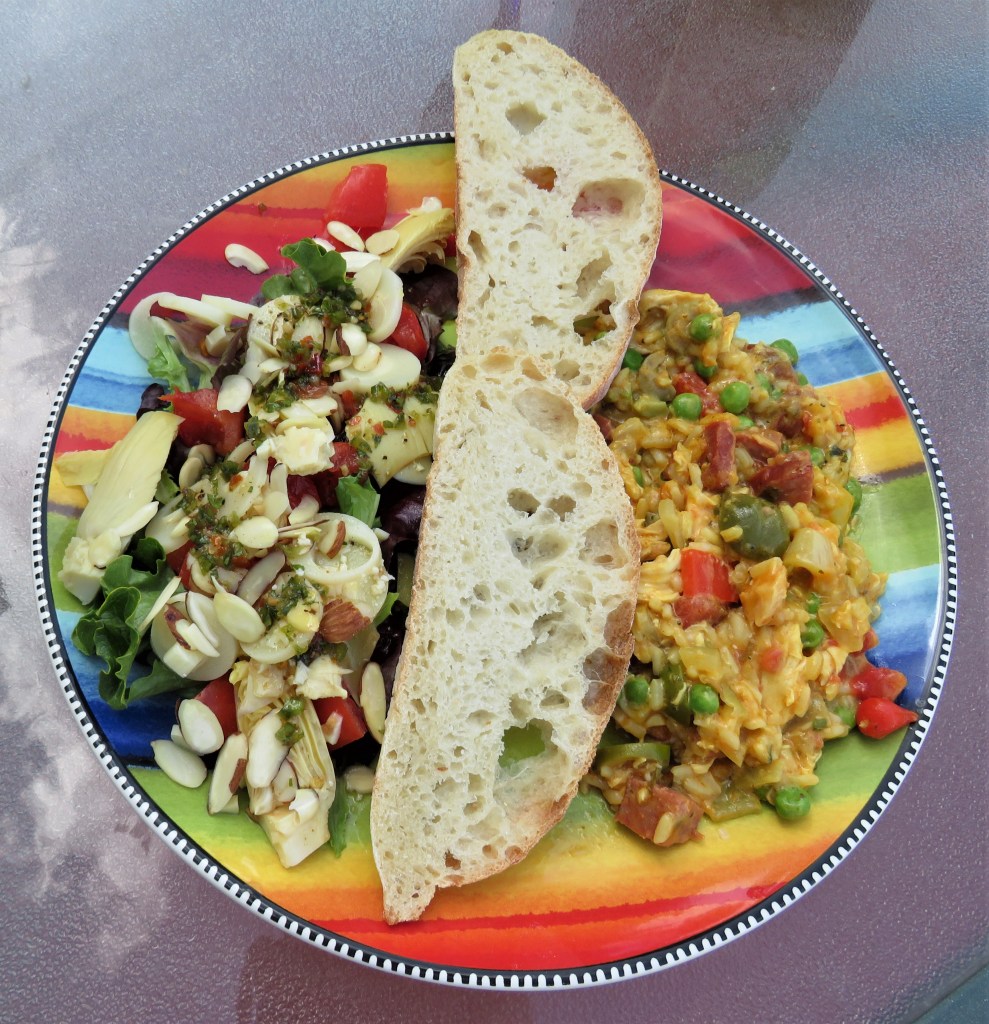
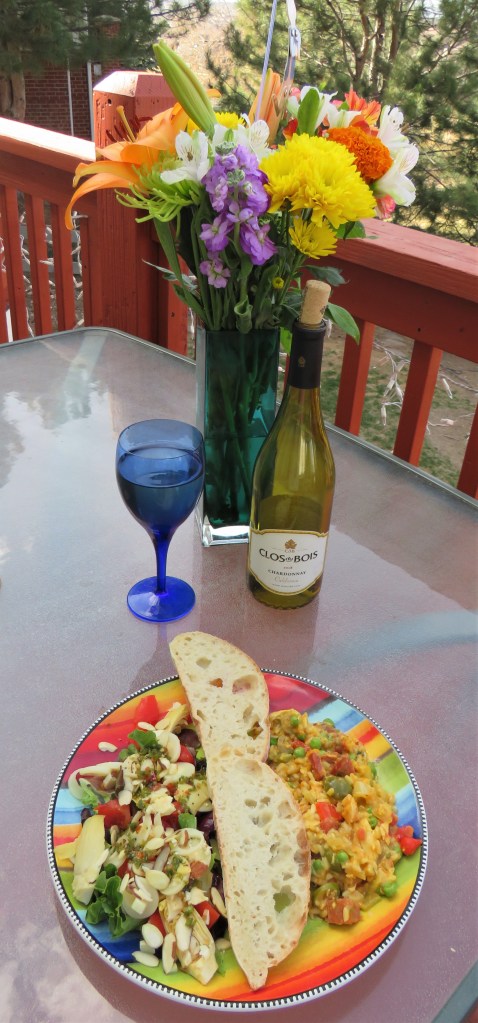
My latest Spanish culinary adventure led me to a delicious chicken paella styled casserole. And the best part …. you guessed it. I got to use my leftovers! I even served it Spanish style, with warmed ciabatta with an olive oil dipping sauce, and a cool Spanish salad on the side. I would have served it with a cool Spanish Albarino wine too, but it was not chilled.
Paella was originally the food of he people. It was “farmer’s food”, made with rice and whatever else was on hand at the time. It varies from region to region. Sometimes it is made with chicken and/or sausage, sometimes it is made with wild game, sometimes it is made with different seafood, and sometimes, it is vegetarian. There are so many endless possibilities of how to make and perfect a good paella.
Paella is also known as a very social dish. It is perfect for all kinds of gatherings and occasions. In Spain paella is still unique. Not only do families congregate on mass to eat paella in restaurants, but it is often cooked at weekends at holiday homes in ‘bodegas’ or ‘txokos’ (large dining areas where families gather) or at beach or mountain picnic sites. There are many paella competitions all over Spain and very often a giant paella is the centerpiece for many fiestas.
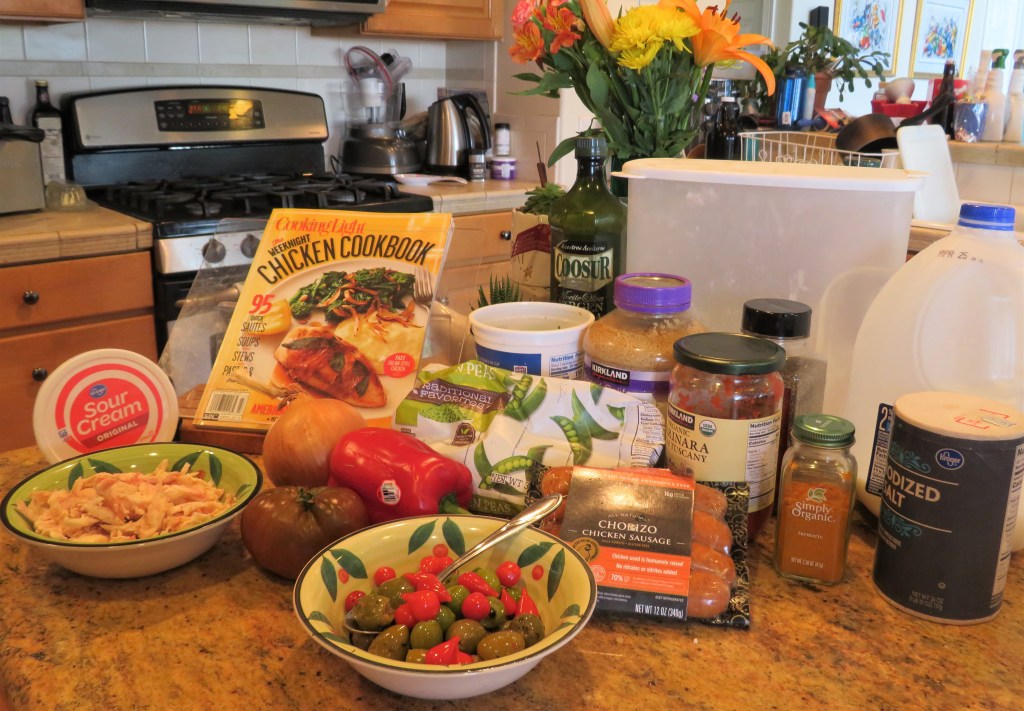
Chicken Paella Casserole
1 1/2-2 lbs cooked, shredded chicken
1 cup cooked sausage or chorizo
1 cup onions, diced medium
1 large tomato, diced medium
1 heaping TBSP garlic
salt & pepper to taste
cayenne pepper and/or red pepper flakes to taste
1 red bell pepper, diced medium
3 cups cooked rice
1 cup frozen peas
1/3 cup Peruvian peppers, optional
1/2 cup olives – I love mixing my olives, so I used 3 different kinds, including some Spanish olives
1 1/2 cups milk
1/4 cup tomato paste or marinara sauce
2 TBSP flour
1 tsp turmeric and/or saffron
1/3 cup sour cream
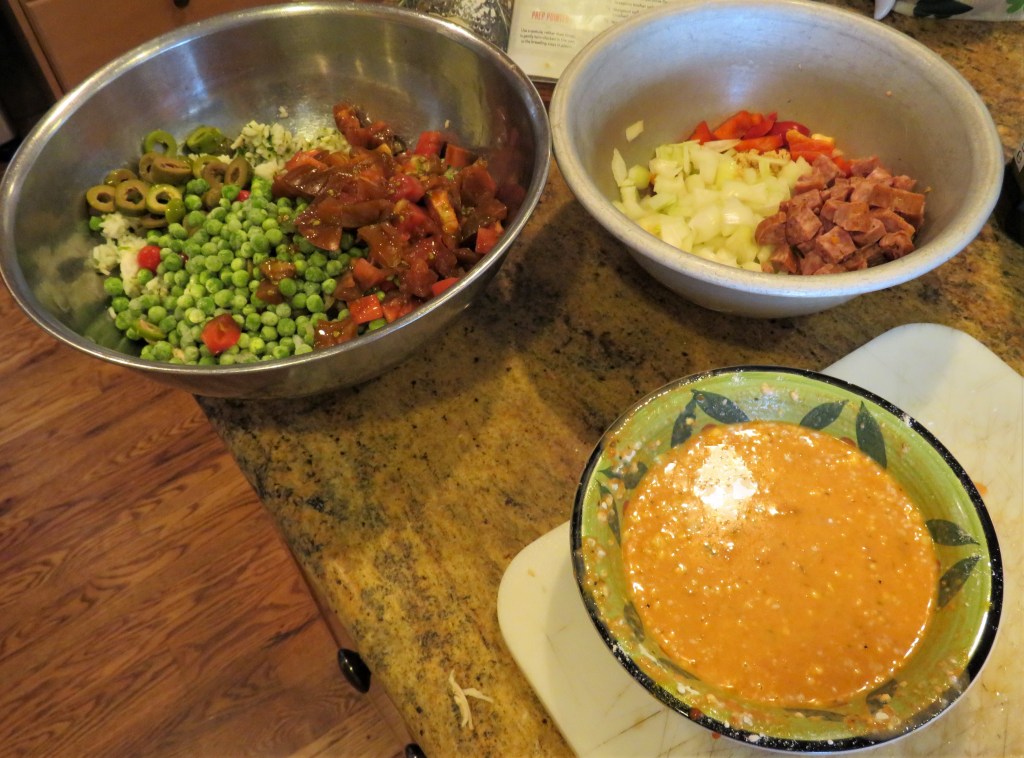
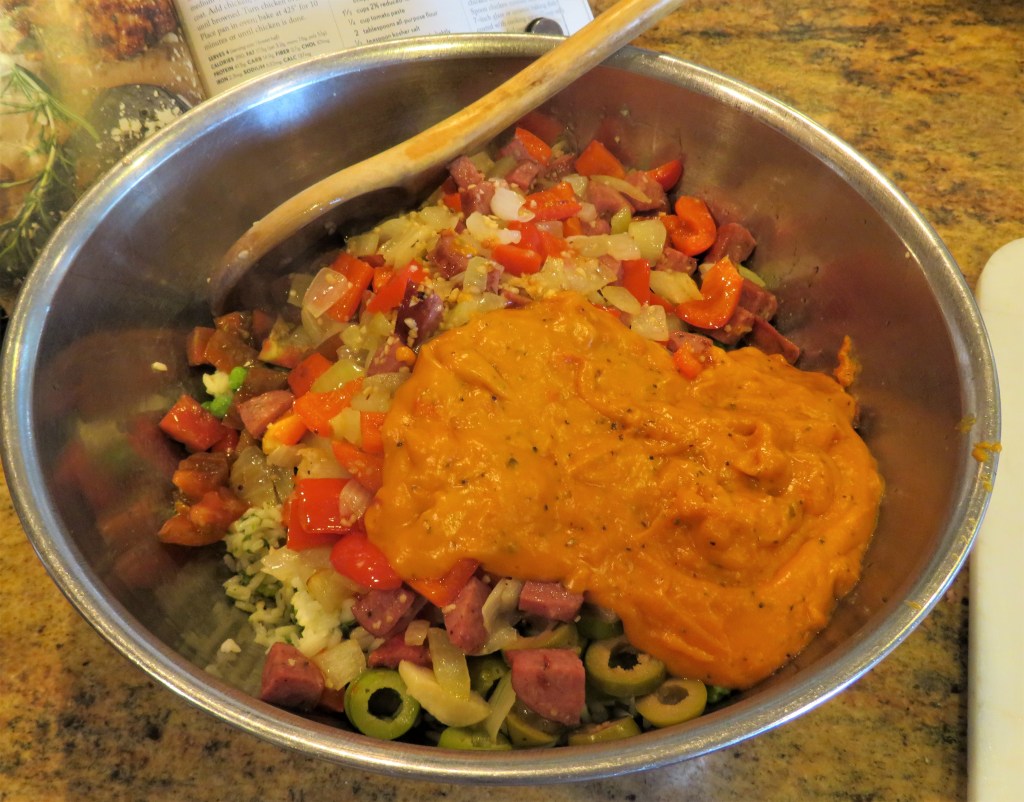
Combine the cooked chicken with the olives, rice, tomatoes and peas and set aside.
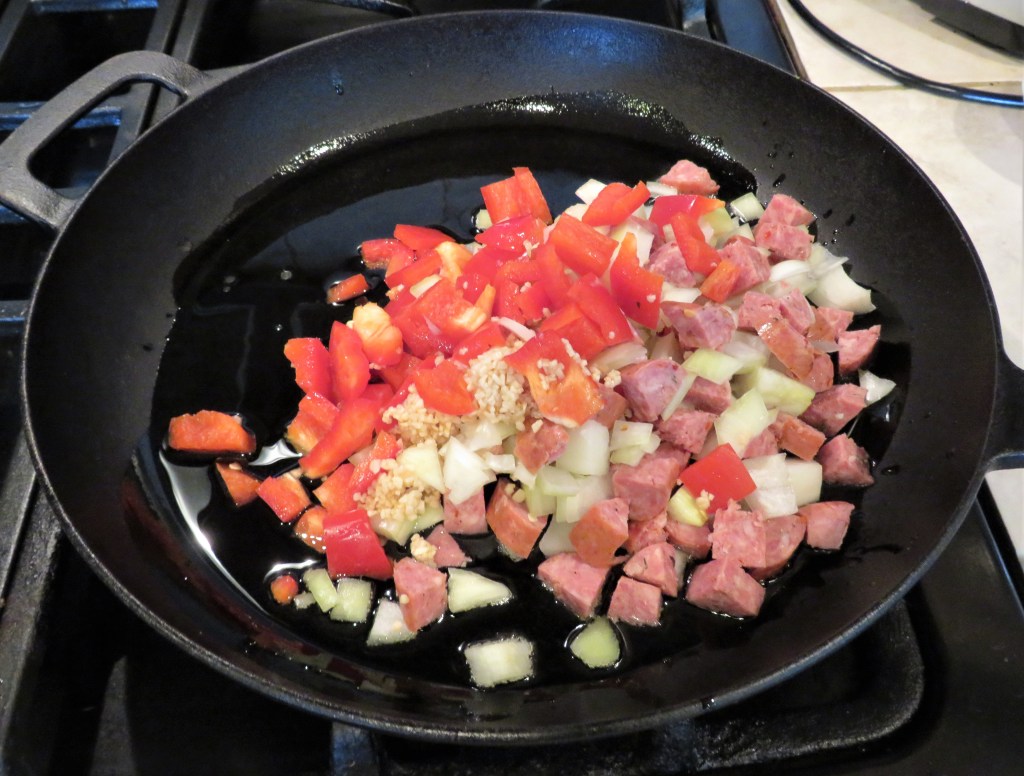
Mix the onions, peppers, and sausage together and set aside.
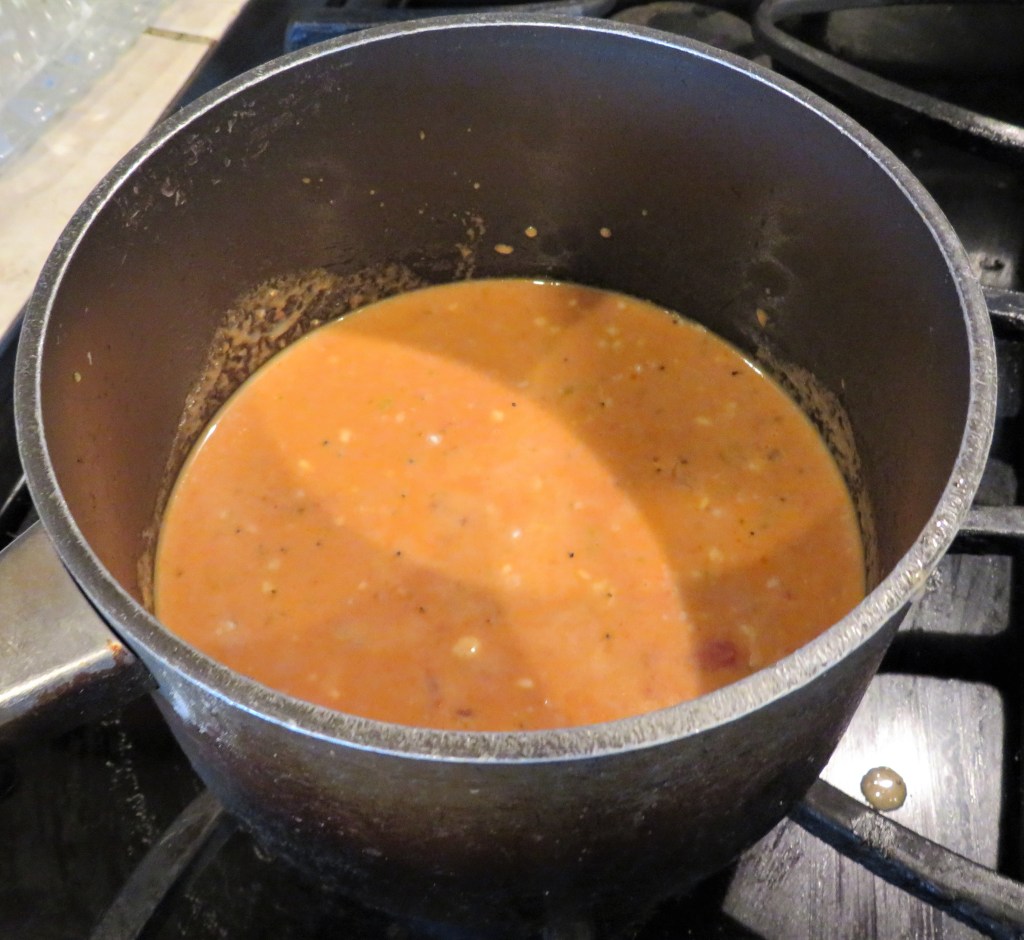
Add the milk, tomato paste or marinara sauce, salt, pepper and flour together in a saucepan.
Preheat the oven to 375* F or 200*C.
Saute the onion and pepper mixture in olive oil for about 7 minutes, or until the peppers and onions are softened and the onions are translucent and the sausage is completely cooked.
Cook the milk mixture over a medium flame and whisk together constantly, bring to a boil and continue to cook for about a minute or until it thickens. Remove from the heat and mix in the sour cream.
Once everything is cooked, combine it all together and mix well.
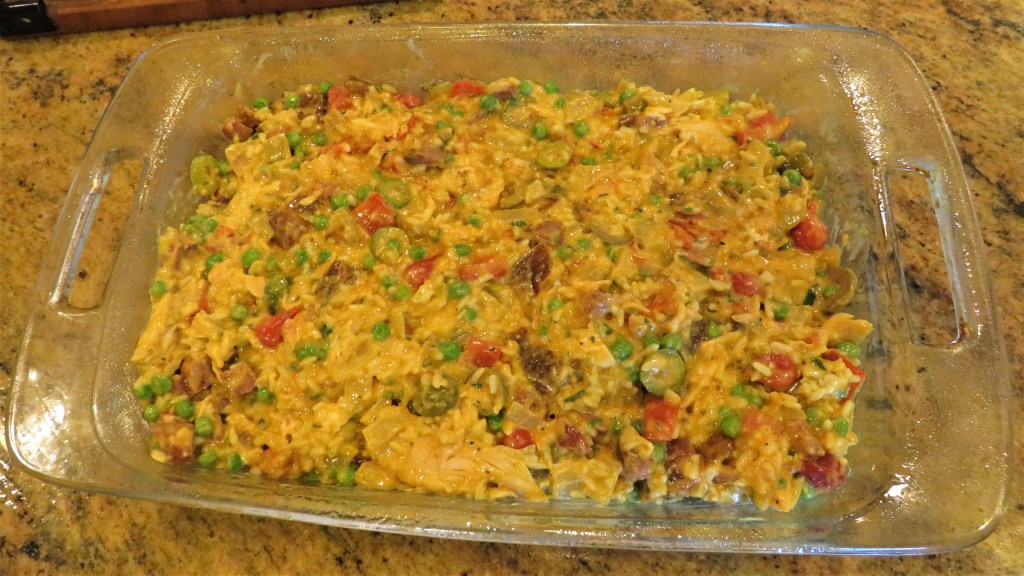
Spray a 9×13 baking sheet with cooking spray, then evenly spread the mixture into the pan. Cover with aluminum foil and bake for about 20-25 minutes, then remove the foil, and continue to bake for an additional 15 minutes or so.
When it is ready, serve it along side your favorite side dishes. My Spanish salad was simple mixed greens with diced tomatoes, hearts of palm and artichoke hearts, with some Cotija cheese on top for Larry and almond slivers for me. I used some of my jalapeno-lime vinaigrette as the dressing too. It’s Salad Weather Again
It was a perfect Spring/Summer kind of meal, especially out on our deck al fresco style. !Desfruitas! 🙂
Enjoy your days and stay safe and stay well Everyone. ‘Til next time.
This is one of my favorite times of the year. Everything is opening up and all the seasonal birds and animals are beginning to come back. I just love it. I saw my firs Double-Crested Cormorant for the season. He was was soaking up the sun and splashing around without a care in the world, just thoroughly enjoying himself.
Look. He’s smiling for the camera.
There are plenty of “firsts” in every day. Enjoy them when you can.
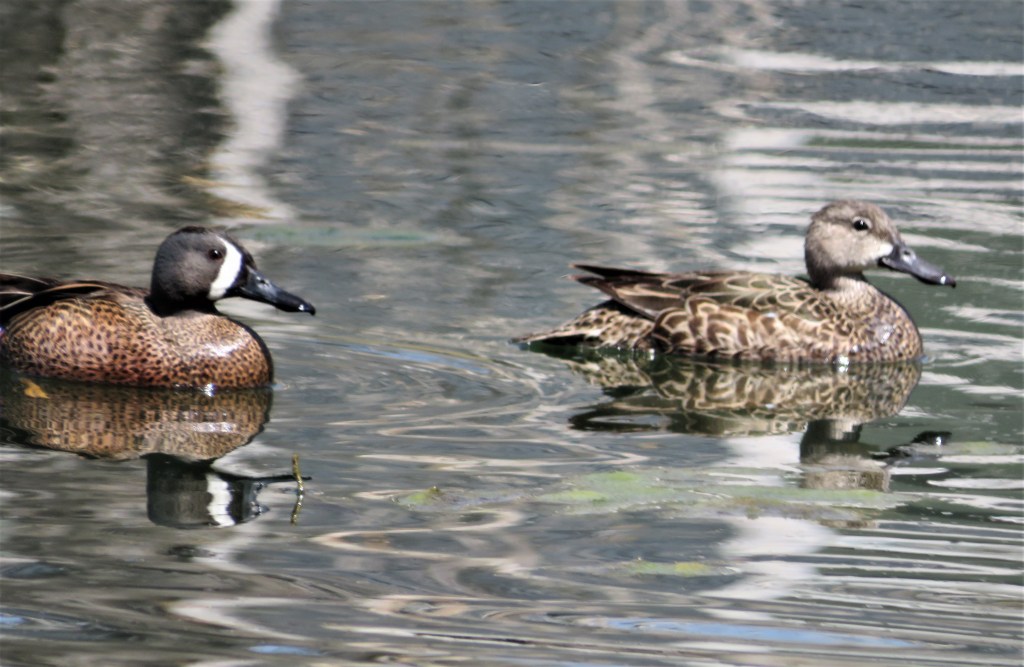
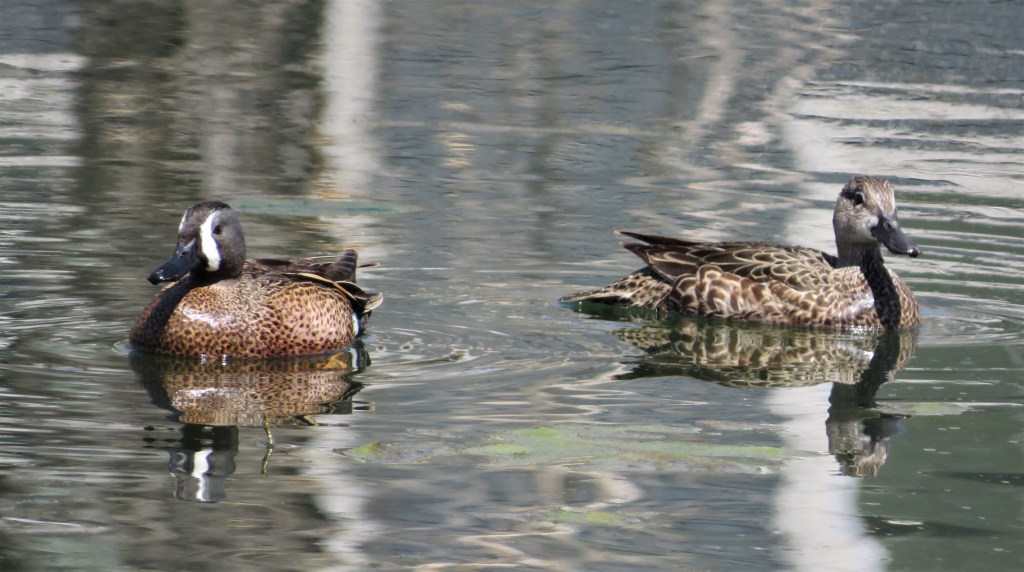
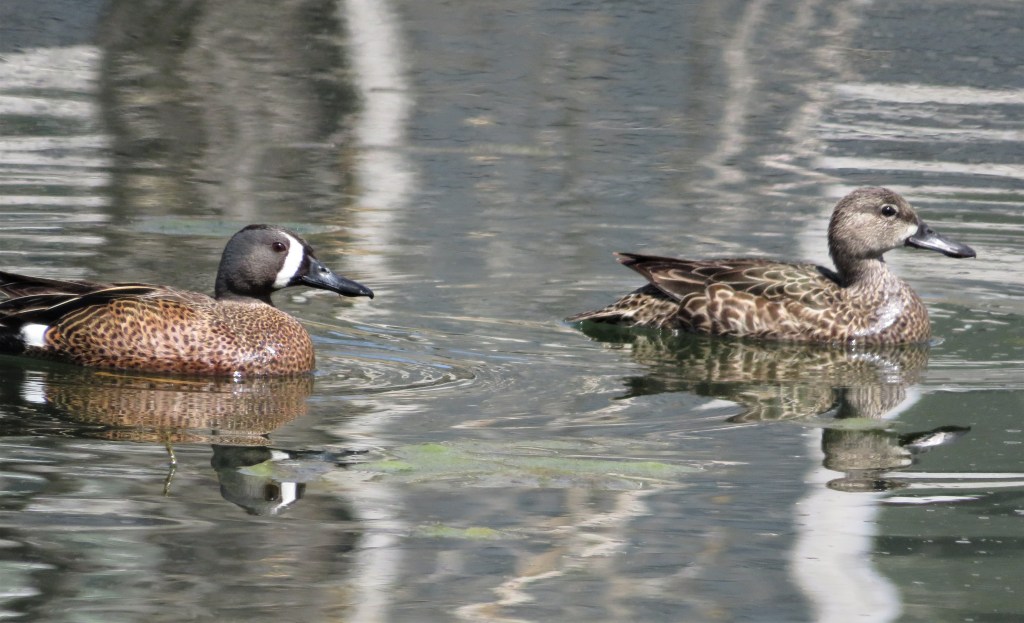
I am meeting more and more new types of ducks all the time, and I love it. Sometimes I have to do a double take, and then when I come back home and edit my pictures, I am so excited, because there is yet another new friend I just met. This time, my new duck and new friends were a pair of Blue-Winged Teals. So not only did I get to see one new duck, but he brought his mate along with him, and I got to meet them both. They are a very handsome couple, don’t you think? 🙂
Life is full of surprises. You just never know what you’re going to see.
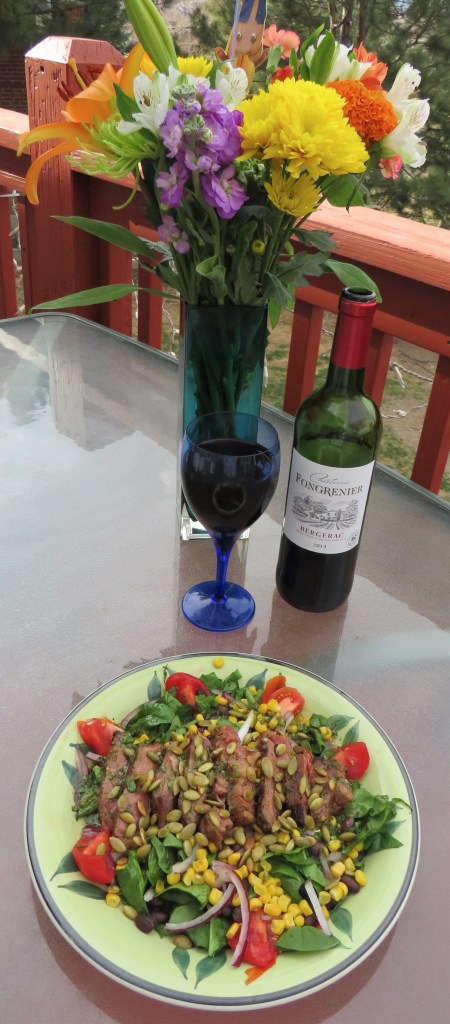
It is once again that time of year when we lighten up as much as possible. The warmer days and bright sunshine call for more activities outside. They also call for lightening things up in the kitchen. No more heavy dishes and rich sauces for the time being. Instead, it is time for more brightly colored salads of all kinds.
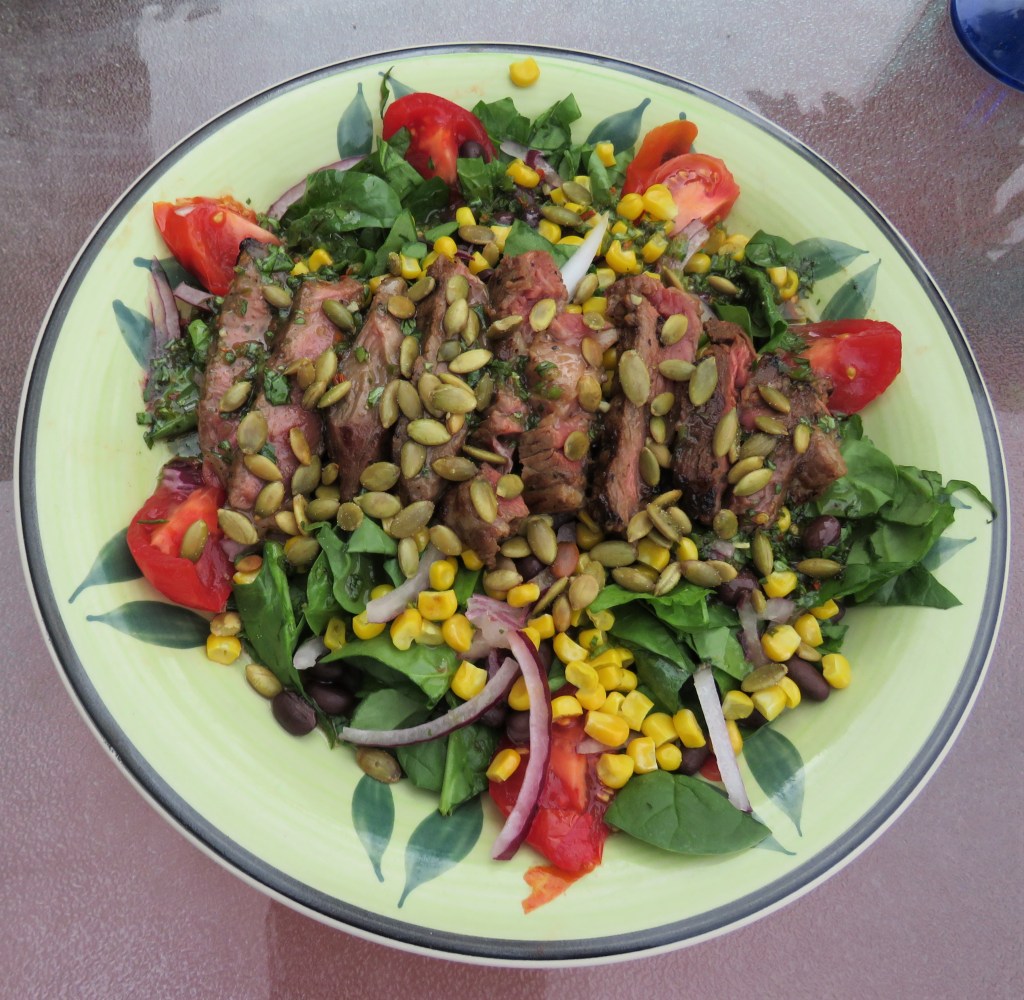
I made yet another Southwestern steak salad that was full of all kinds of healthy colors and fresh goodness. I mention colors because it is a good rule of thumb that the more “colors” your foods contain, the more healthy they are too. The reasoning behind this school of thought is that you are are eating a wide variety of fresh fruits and vegetables. So color up your foods, especially during spring and summer when there are so many fresh fruits and vegetables from which to choose.
I would have added fresh avocado slices too, but I didn’t have any at the time, and I didn’t feel like going to the store just for avocados.
I marinated the steak first in some of my leftover balsamic vinaigrette I had made earlier. I marinated the steak for about 3-4 hours before grilling it up. That made it very tender and flavorful.
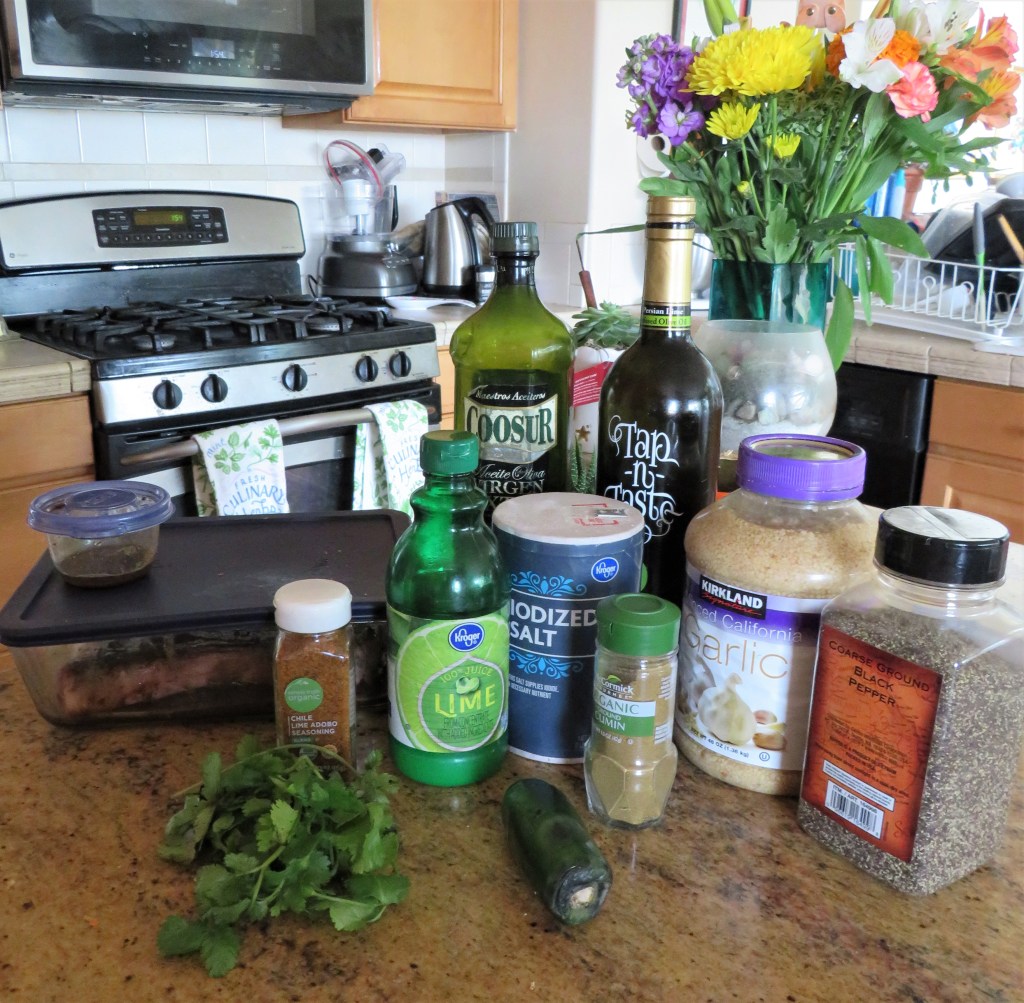
Next, I made a jalapeno-lime vinaigrette for my salad.
Jalapeno-Lime Vinaigrette
1 large jalapeno, minced fine
2 tsp garlic
1 tsp chili lime seasoning
1 tsp cumin
salt & pepper to taste
2 TBSP lime juice
2 TBSP lime olive oil, optional
1/3 cup olive oil
1/4 cup white balsamic vinegar
1-2 TBSP honey
1/4 cup fresh chopped cilantro.
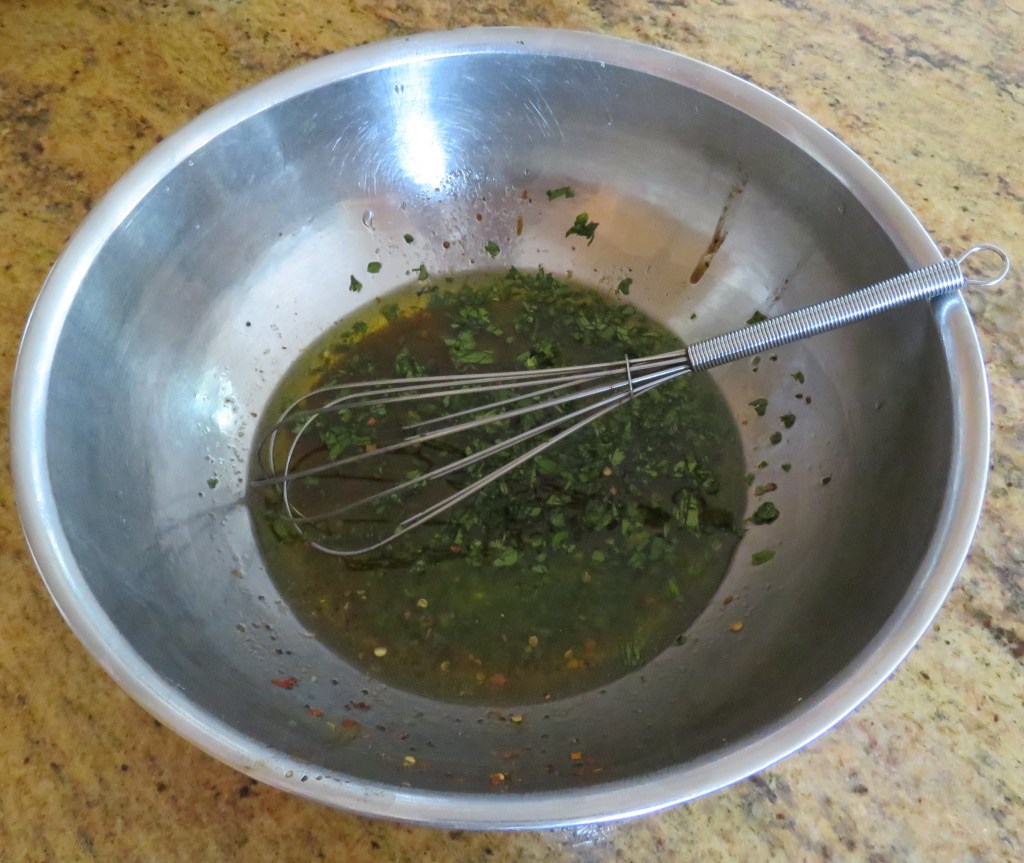
Whisk everything together until well blended and set aside until ready to use.
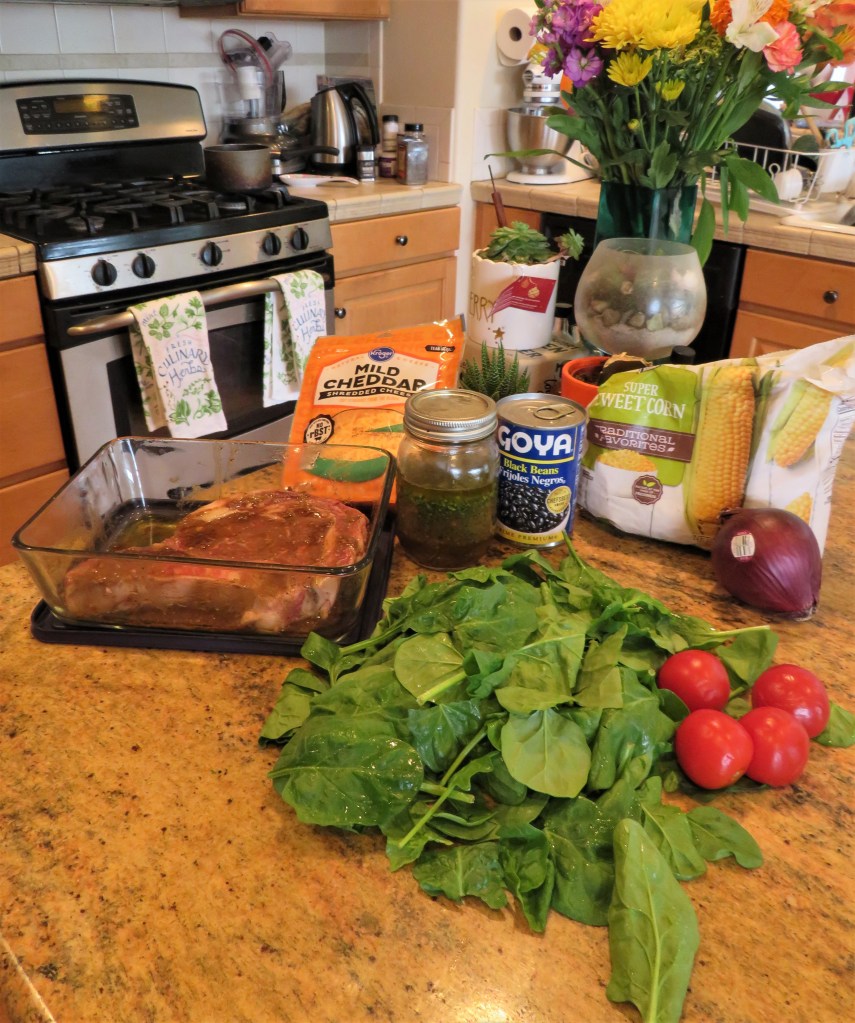
The Salad
Rather than lettuce, this time I chose to put everything on a bed of spinach instead. Larry likes a lot of cheese on his salads, and I don’t like any on mine. This is just a simple salad, filled with simple items. Put together, they were all delicious. I made these salads for two, and didn’t really measure anything. You can use as much or as little as you like, depending on how many people you are making it for.
fresh spinach, stems removed and chopped in a rough cut
black beans, drained and rinsed
frozen corn, completely thawed
red onion, sliced very thin
tomatoes, cut into wedges
cheddar cheese, optional
cooked steak or chicken, sliced into thin strips
jalapeno-lime vinaigrette
toasted pepitas or fried tortilla strips, optional for topping
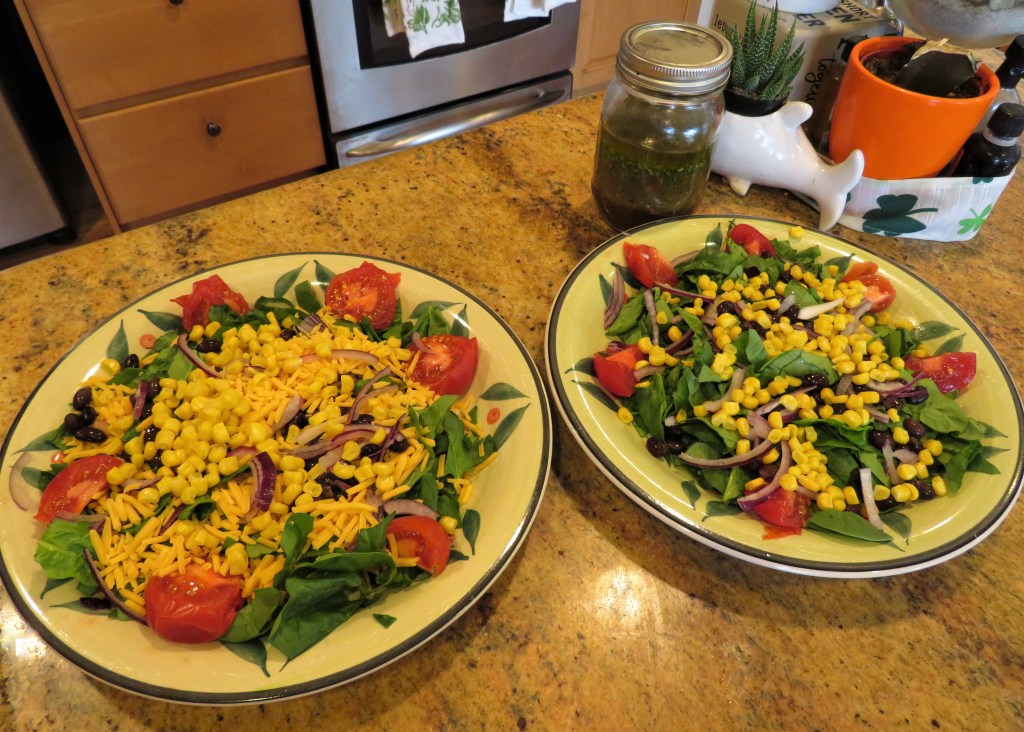
Layer it all up, from the spinach up, finishing with the sliced steak or chicken and your toppings and then drizzle on your dressing. !Delicioso!
This is a perfect summer salad, and is made even more perfect when dining al fresco. It is so colorful and fresh and just captures the essence of summer. You get a little bit of summer in every bite. I served it with a red blend since I was eating steak.
Color up your days and color up your foods. Make life as colorful as you can. Stay safe and stay well everyone. ‘Til next time.
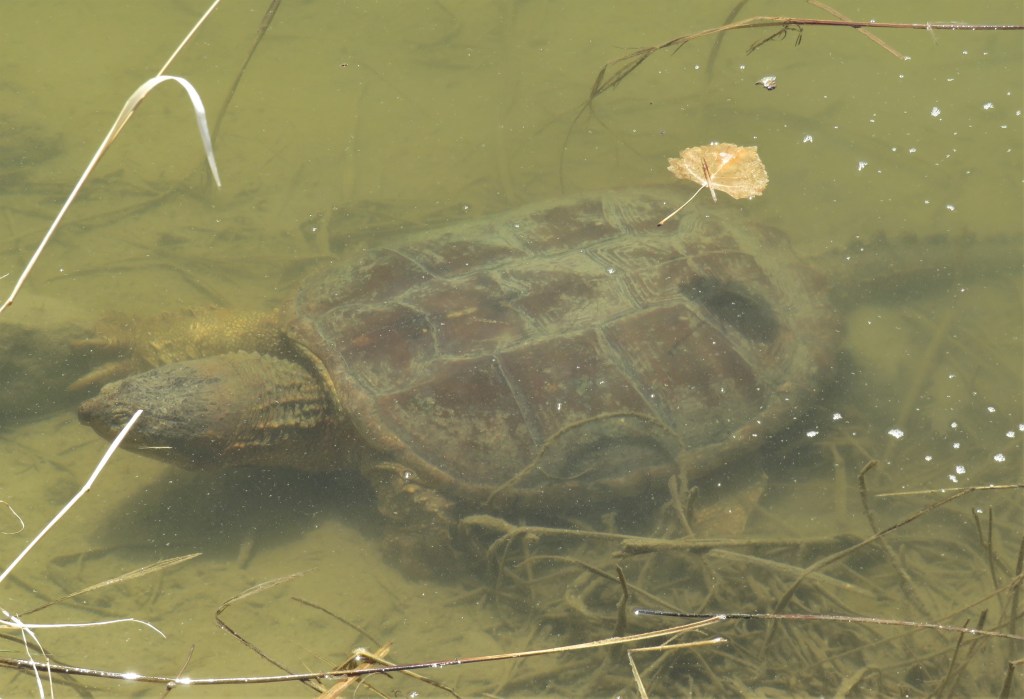
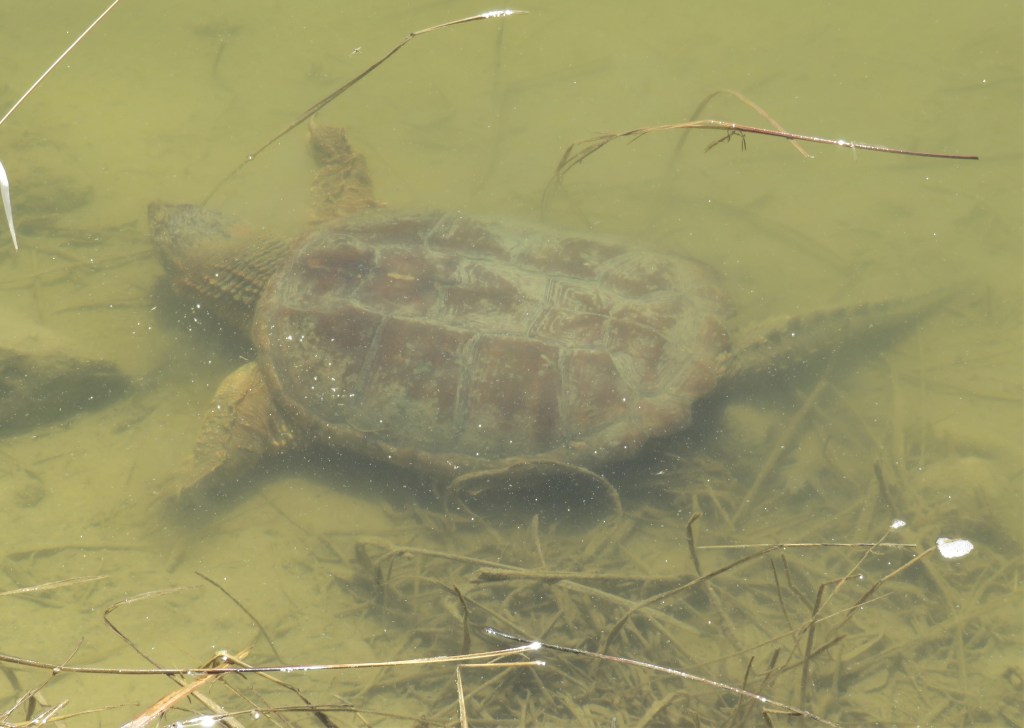
WOW! Today, I hit the jackpot! There was so much to see. I don’t even know where to start or what to share. But since the snapping turtle was one of the first things I saw, I will start by sharing my pictures of him today. He was a large snapping turtle, but by no means, the largest one we have in our ponds or lakes. I would say he was a medium-large turtle. But he was right up at the surface, which allowed me to get some very good shots of him.
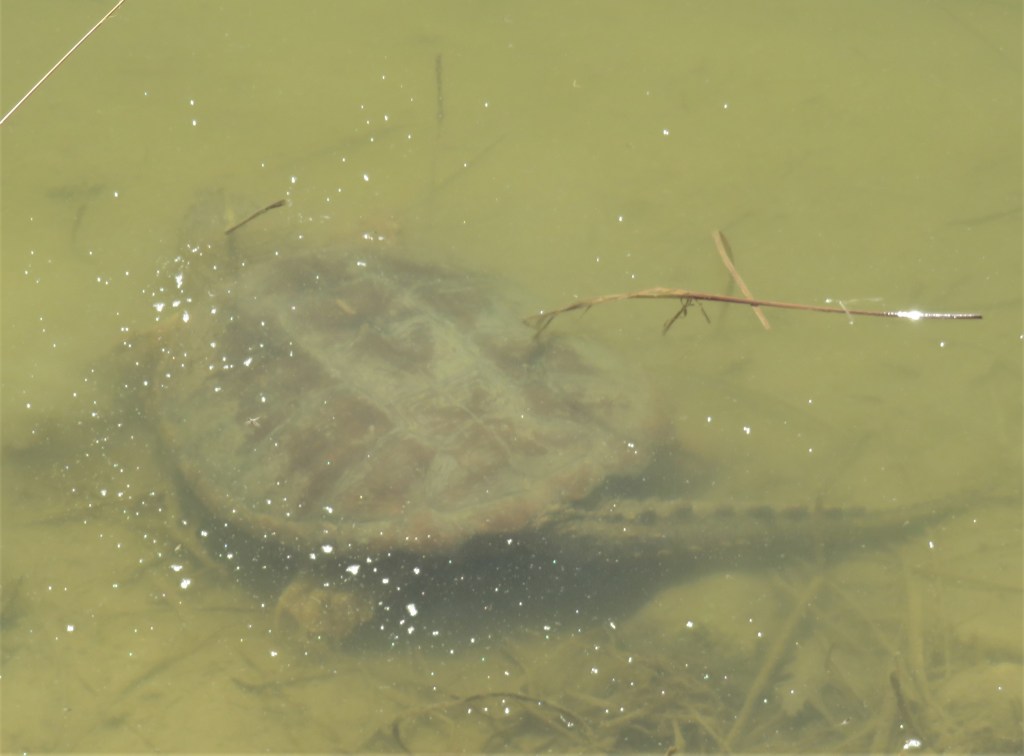
He was starting to get a little uncomfortable being in the spotlight, so he is starting to turn away, to go down to the bottom once again.
At least Mr. Turtle stuck around long enough for me to get some very good, very clear shots of him before leaving. Thank you Mr. turtle.
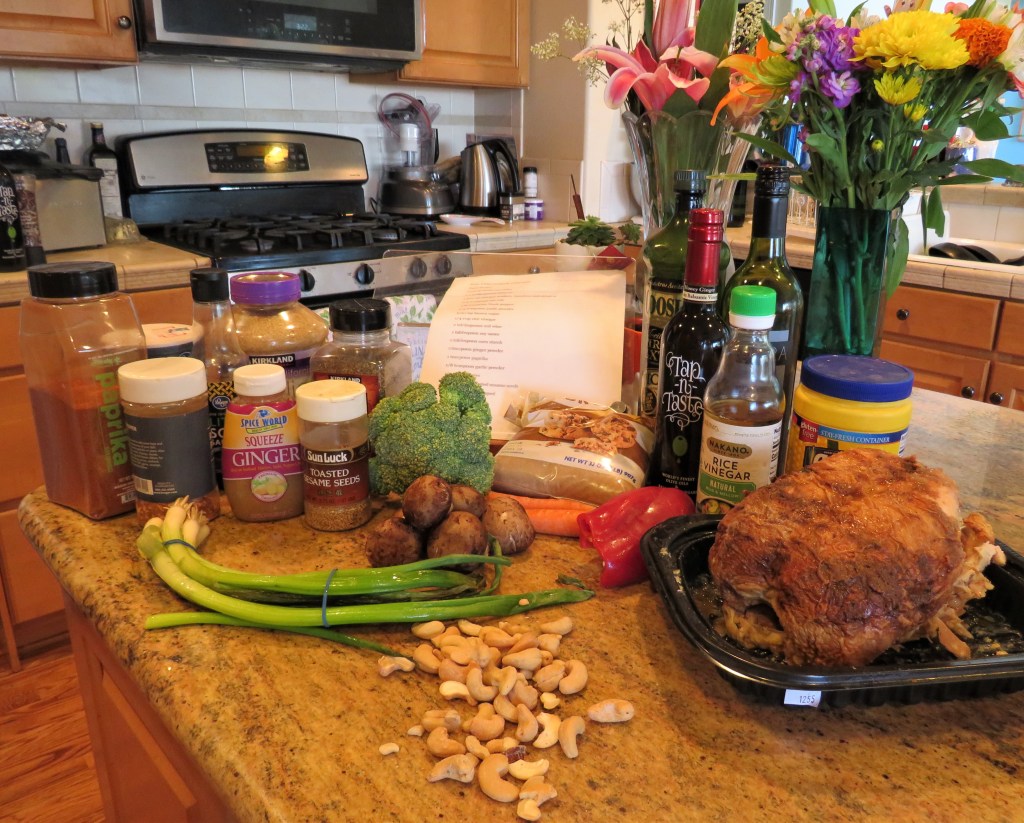
As I have mentioned many times, I find my inspiration for recipes from many different sources. This time, I was inspired by one of our very own again. Gail fromhttp://snapshotsincursive.com/ had posted a recipe for Red Chile Garlic Chicken that just really made my mouth water. I had to try it. Of course, I changed it a bit, but not by much, and I was using my leftover Costco rotisserie chicken rather than cooking the chicken. I also added vegetables to the dish. I did not add the dried red chilies, but instead used red pepper flakes.
Chili Garlic Chicken and Vegetables
1 lb chicken – I used cooked chicken breasts that I added later
The Sauce
1-2 tsp red pepper flakes, or to taste
salt & black pepper to taste
1 TBSP garlic
1 TBSP ginger
3/4 cup packed brown sugar
1/4 cup rice vinegar
2 TBSP red wine
1 TBSP soy sauce
1 tsp paprika
2 TBSP honey ginger balsamic vinegar, optional
1 TBSP cornstarch
Combine everything together and set aside until later.
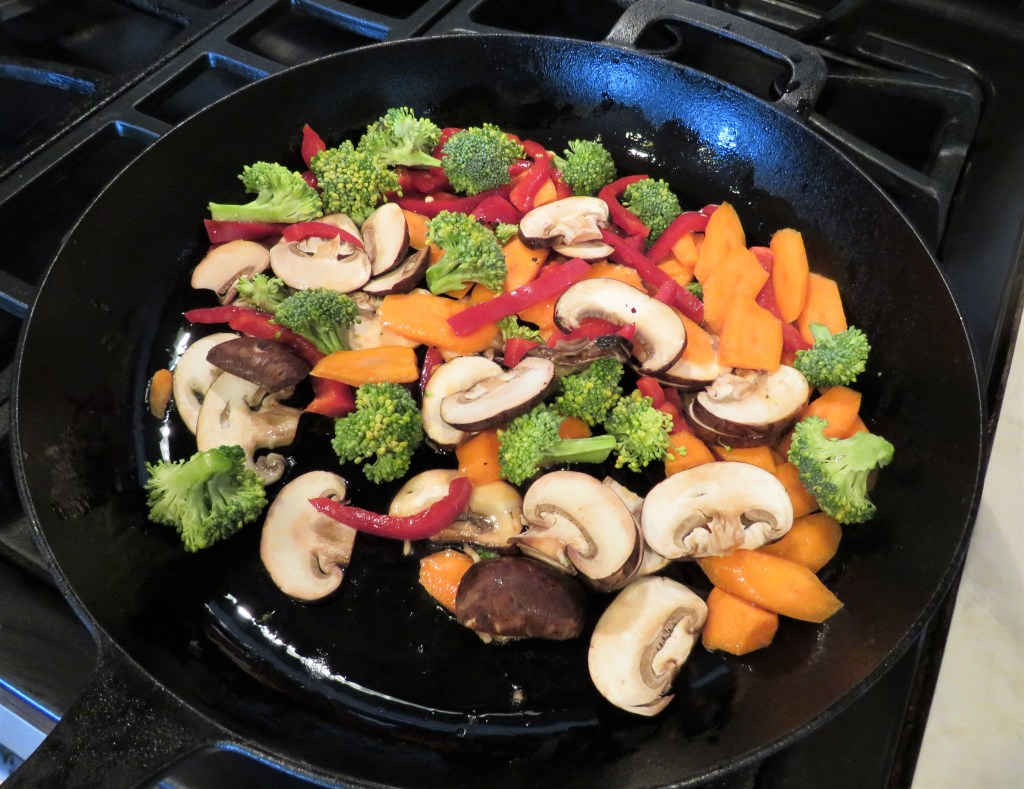
The Vegetables
2 carrots, peeled and sliced Asian style
1 cup broccoli florets
1 cup sliced mushrooms
1/2 red bell pepper, sliced thin
1/3 cup green onions, sliced Asian style
cashews for topping
toasted sesame seeds for topping
olive oil for cooking
Saute all the vegetables together in a hot skillet or wok with the olive oil for about 5-7 minutes, or until mostly tender, but still have a slight crispness to them.
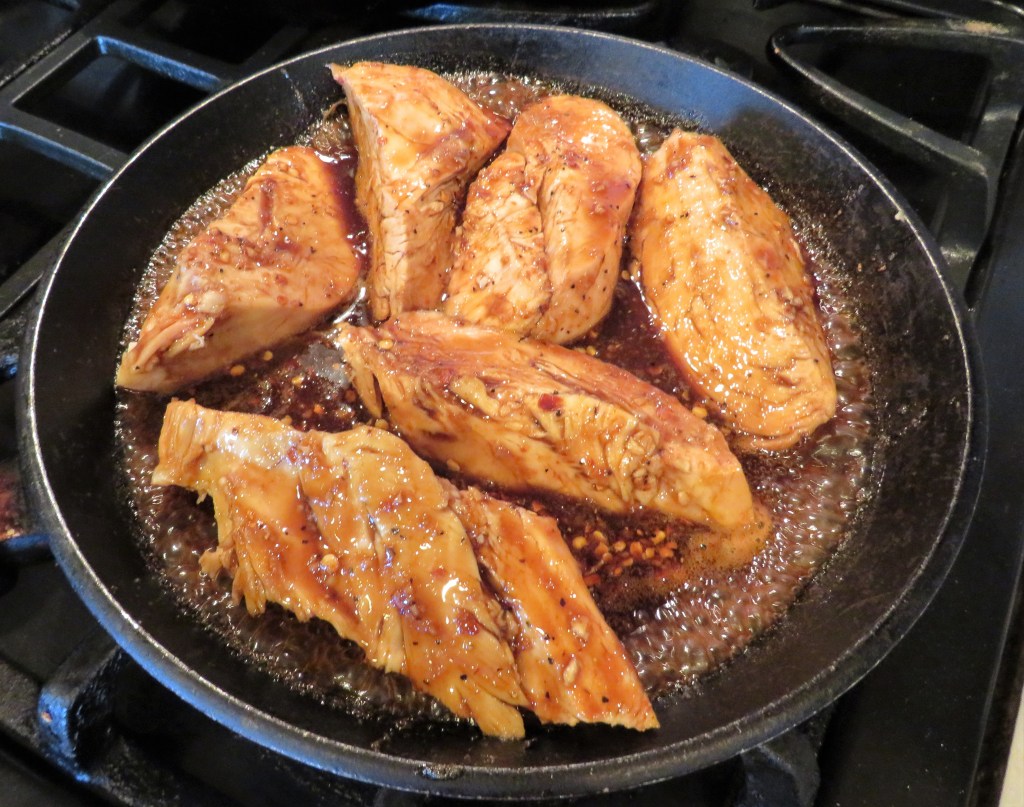
If you are cooking your chicken, cook it in a separate very hot skillet, with more olive oil, and salt & pepper until it browns. My chicken was already cooked, so I skipped this part.
Heat up the sauce and bring to a boil, then reduce the heat to a simmer and continue to cook for about 7-8 minutes, stirring frequently. Add the chicken and cook until it is heated thoroughly.
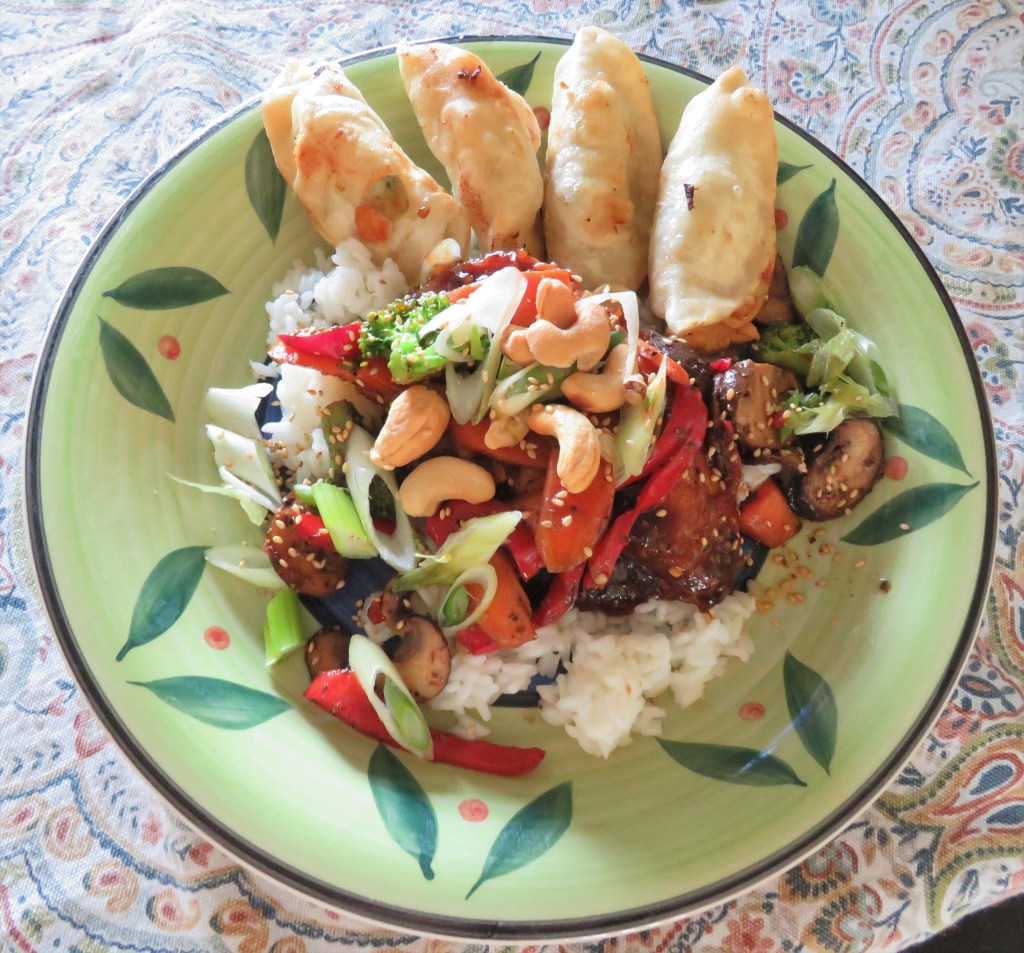
I served it over cooked white rice and added my vegetables on top of the chicken. Then I added the cashews, green onions and toasted sesame seeds on top. I added some potstickers on the side too. Since this is a bold, heavy sauce, with red wine in the sauce, I served it with bold cabernet sauvignon. DELICIOUS!
Thank you Gail for this delicious inspiration. I hope you don’t mind that I personalized it a bit. As you see, there is nothing wrong with tweaking and personalizing recipes to suit your own tastes. In fact, I encourage it. The personal touches are part of what make cooking so much fun. Gail and I both started with the same basic recipe, but we each added our own style and personality, making them completely different. 🙂