I have created this site to help people have fun in the kitchen. I write about enjoying life both in and out of my kitchen. Life is short! Make the most of it and enjoy!
It’s a new year filled with new possibilities. There will always be new things to see and to capture with my camera. That being said, I still have a lot of fun random shots from 2025 that I didn’t get a chance to share, and thought now would be a good time.
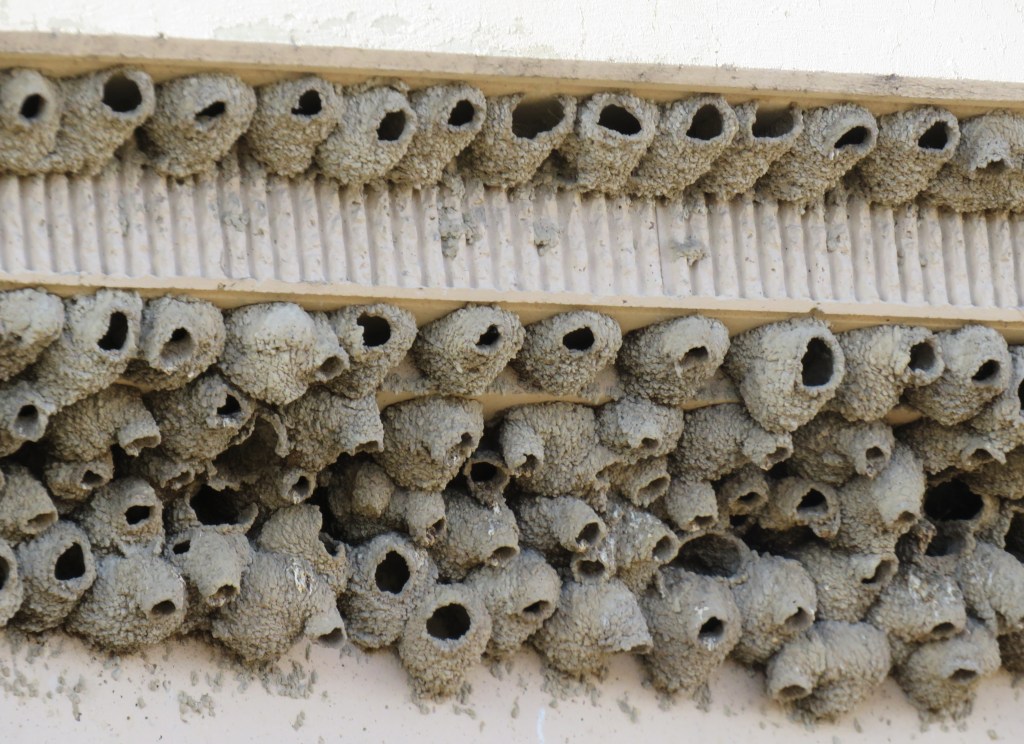
Swallows’ nests under the bridge.
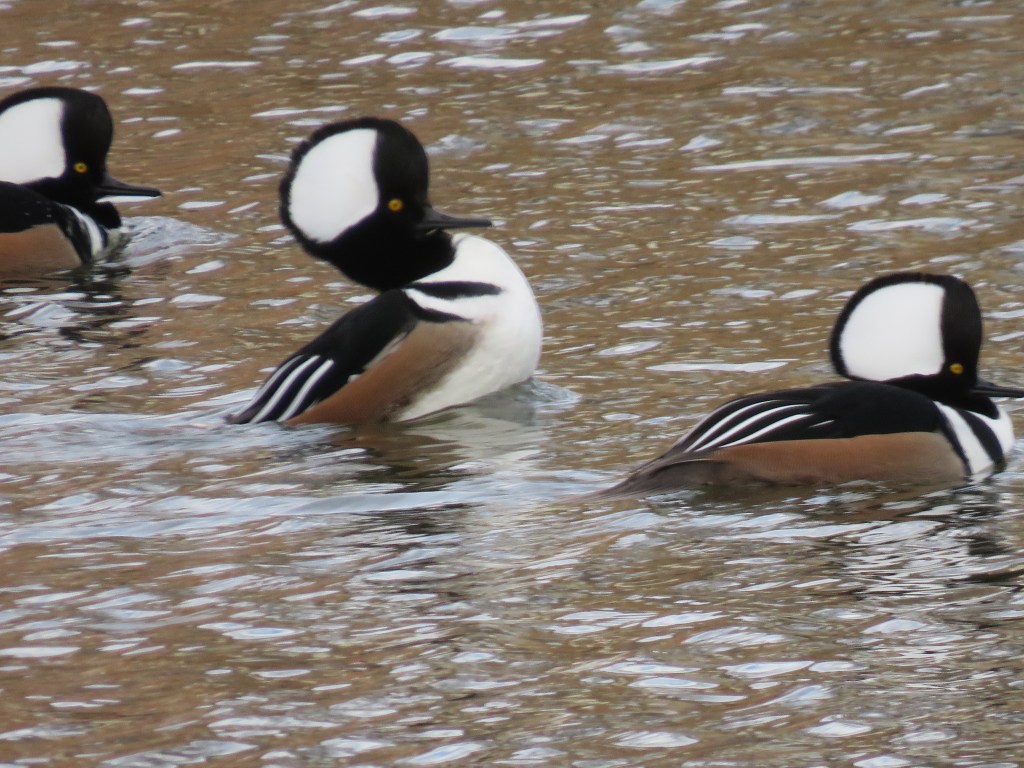
Be-boppin’ male Hooded Mergansers.
Fun on the foot path.
Prairie dogs at play.
Peek-a-b00, I see you.
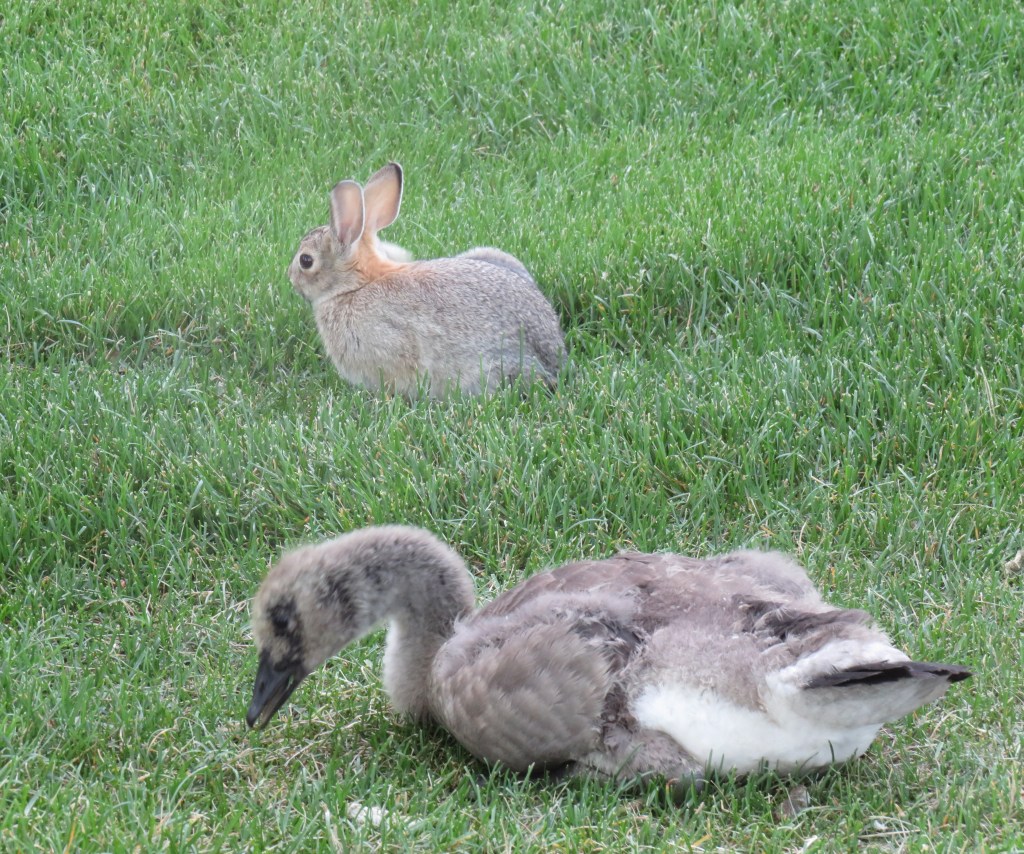
The bunny and the gosling.
The great hunter.
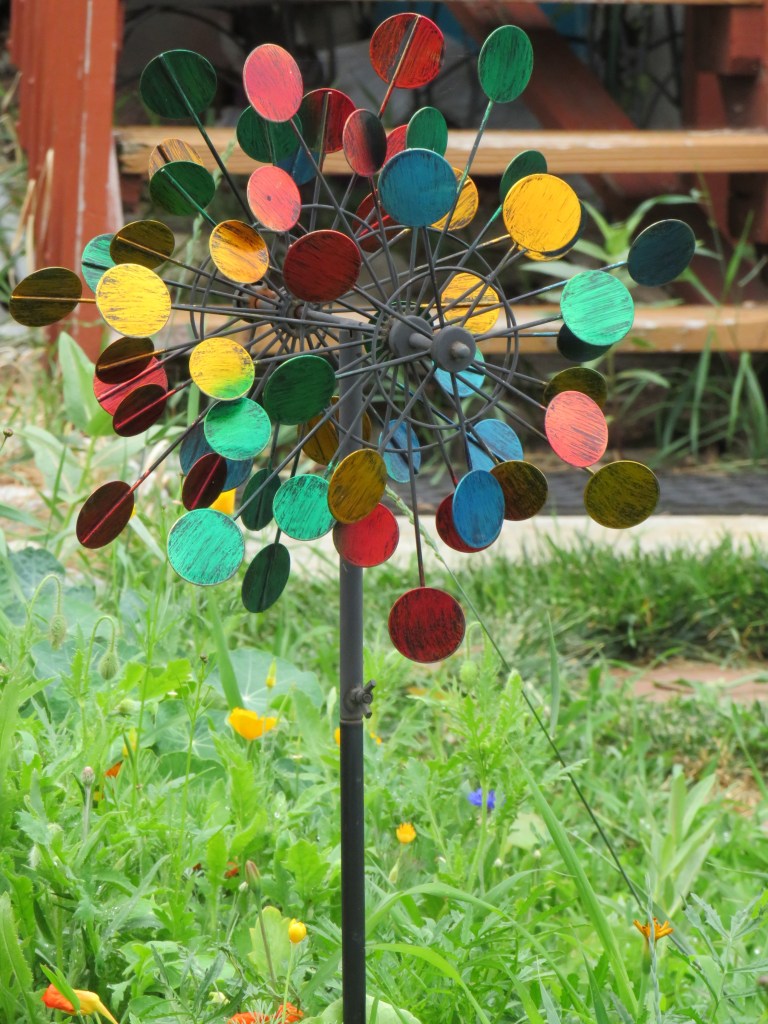
Being whimsical.
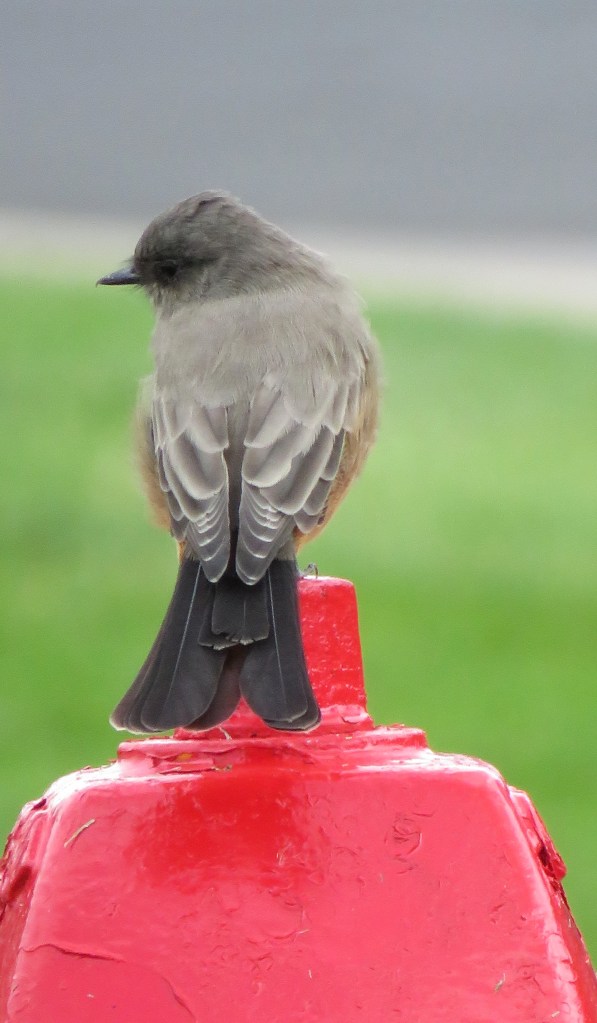
A Says Phoebe on the fire hydrant.
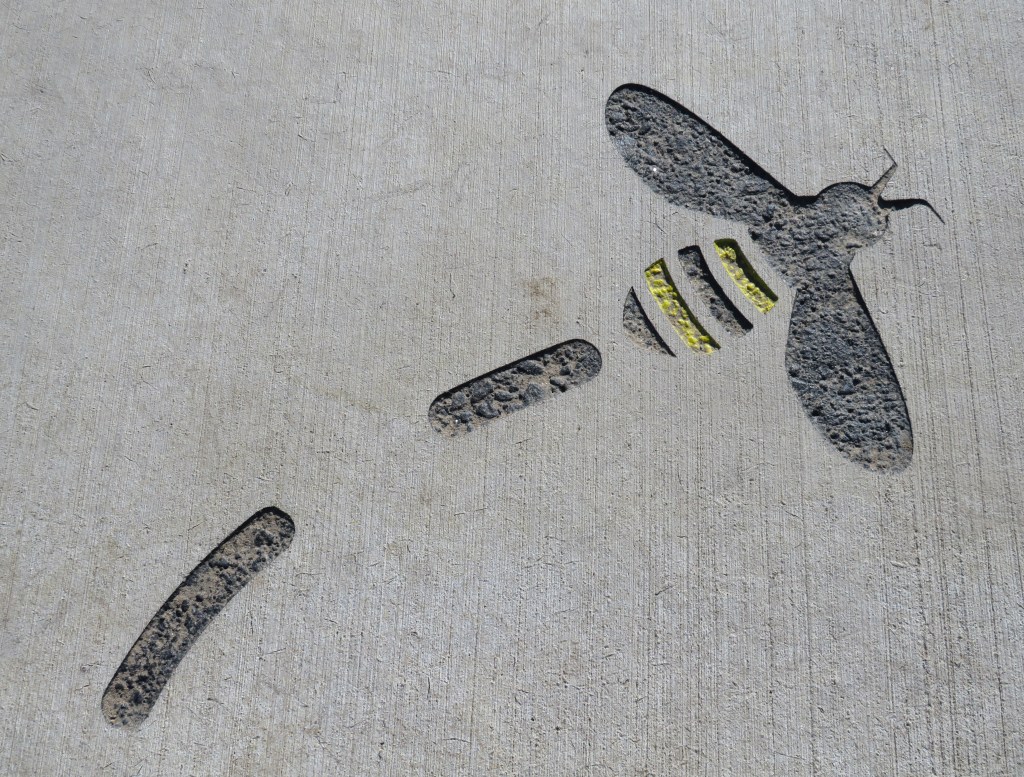
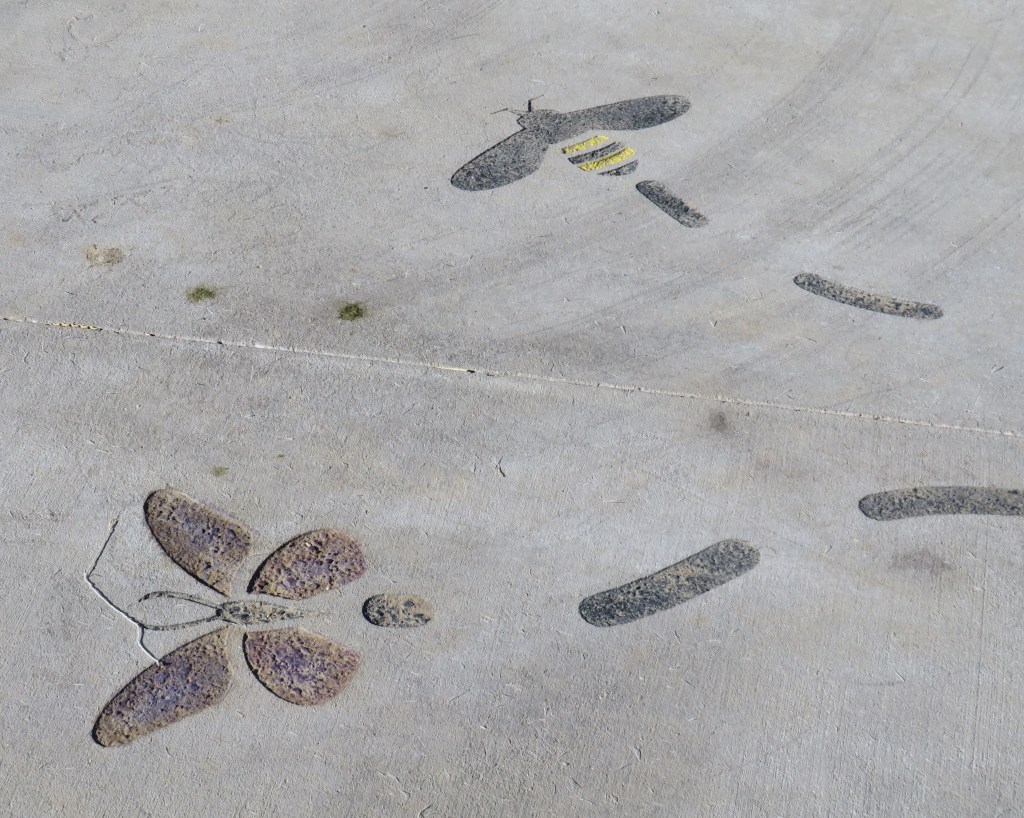
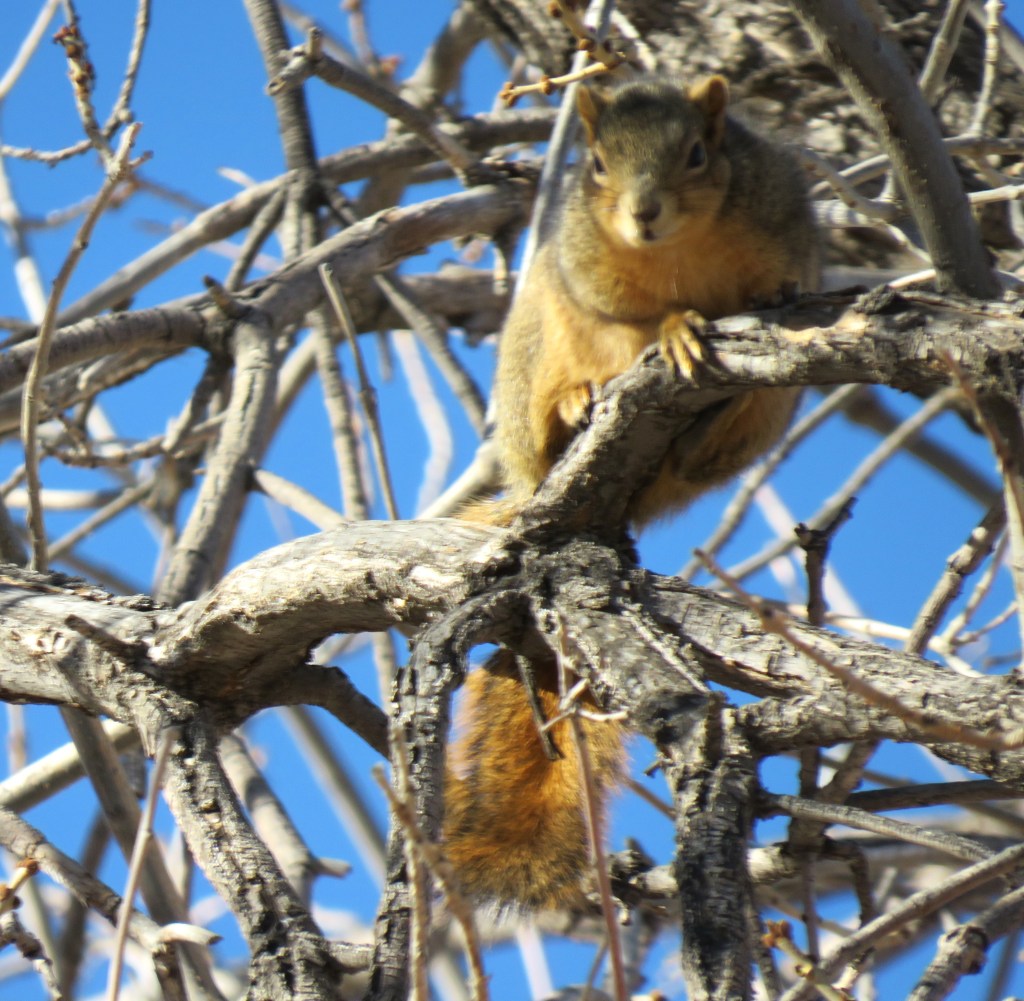
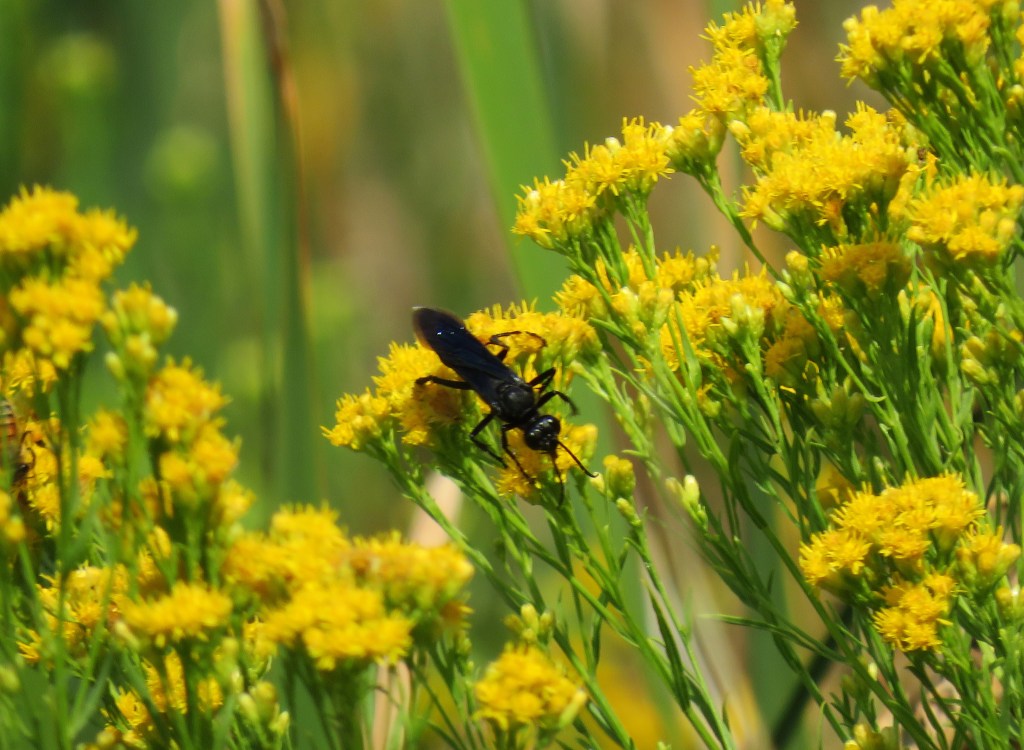
Winged things.
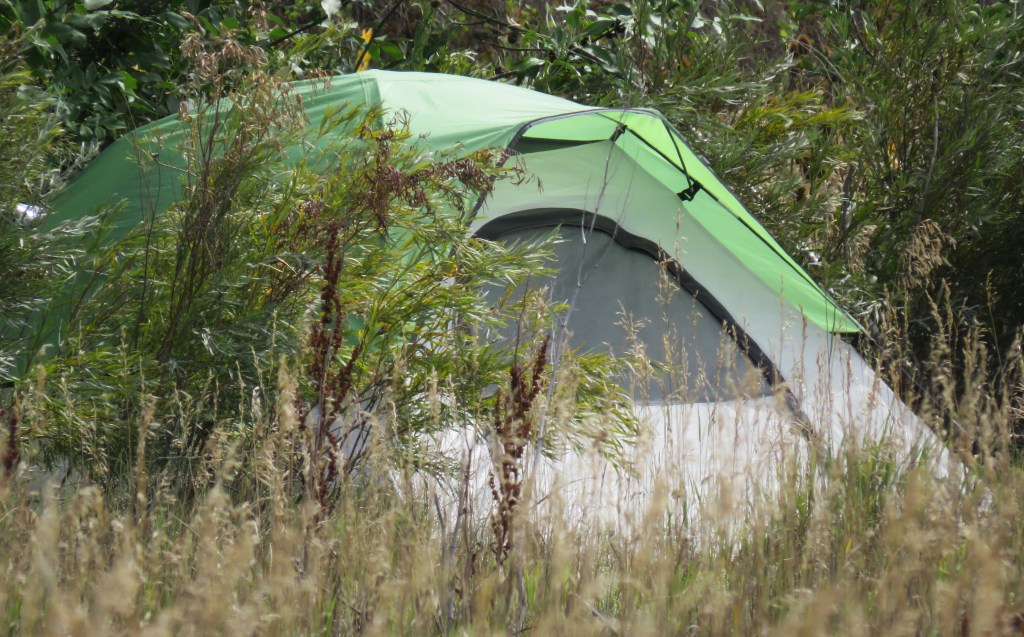
A homeless camp at City Park.
Watching the world go by.
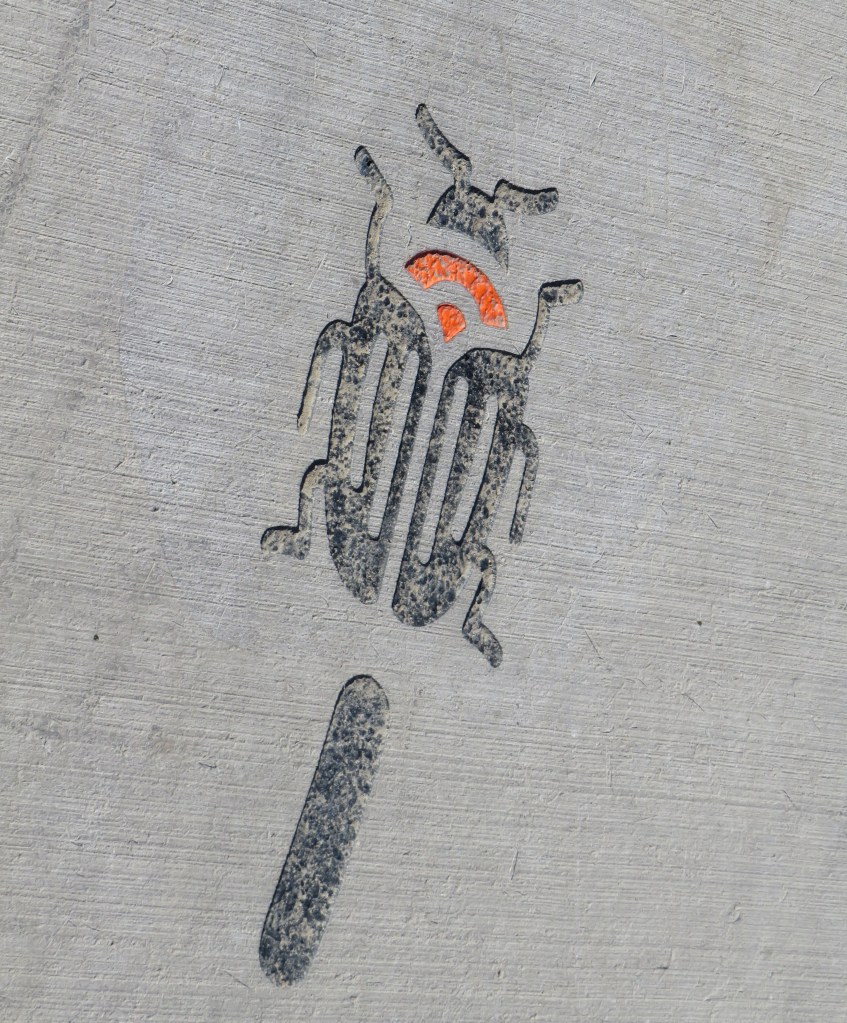
Beetlejuice.
The sign of the Starling.
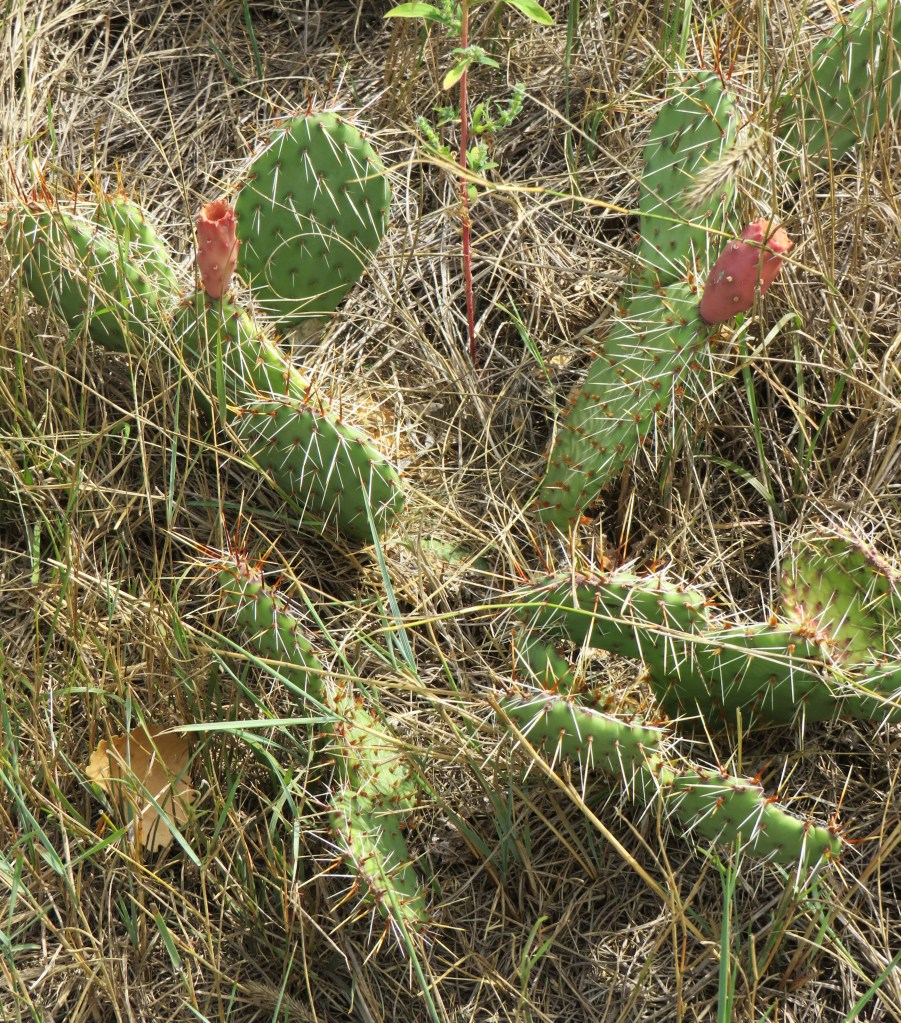
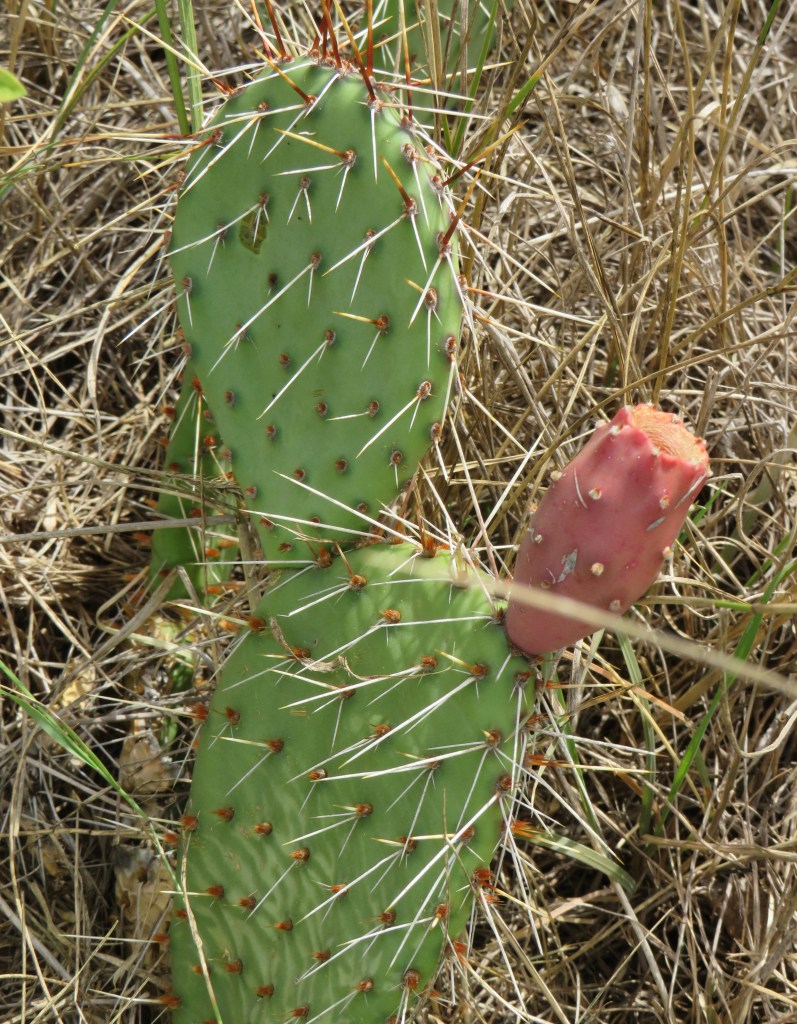
The cactus patch.
Egret in the rocks.
Have a great day and make everyday great. Life is all about having fun. Have fun no matter what you do, and no matter what life throws at you. 🙂
You all know how much I love to use up me leftovers. It is both out necessity, since they have to be used, and I hate throwing away good food, and fun. I make it a game to be creative with my leftovers. Often times, they get recreated and repurposed in the same ways, but many times, they turn into something new, yet just as good. Sometimes even better. 🙂
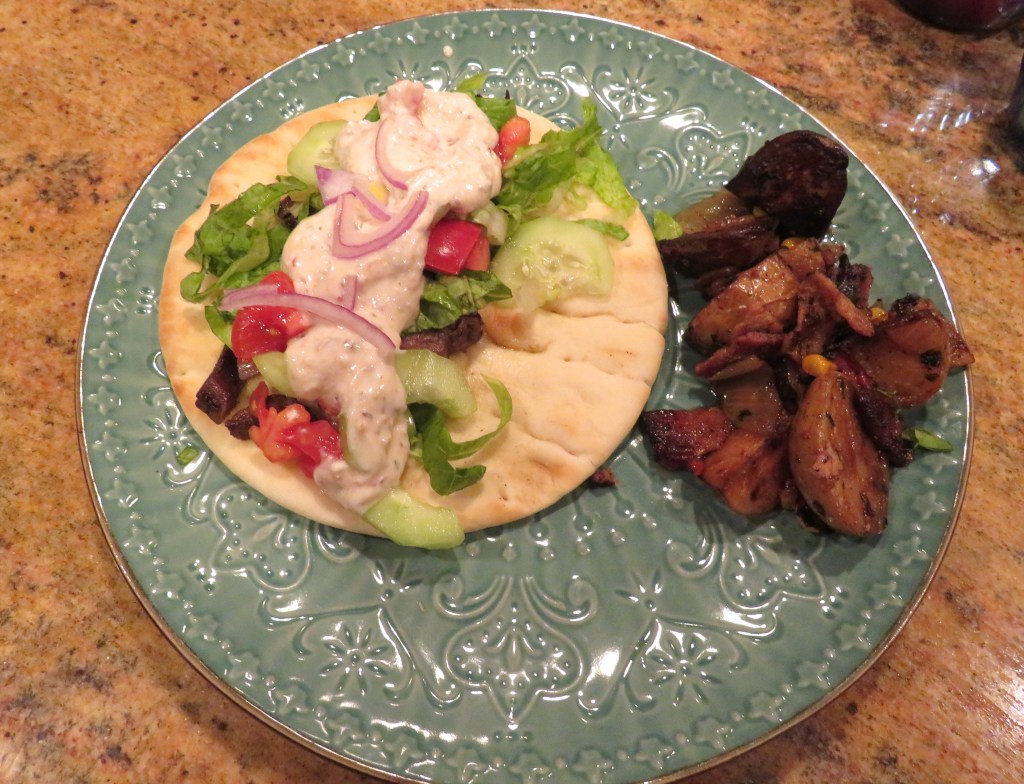
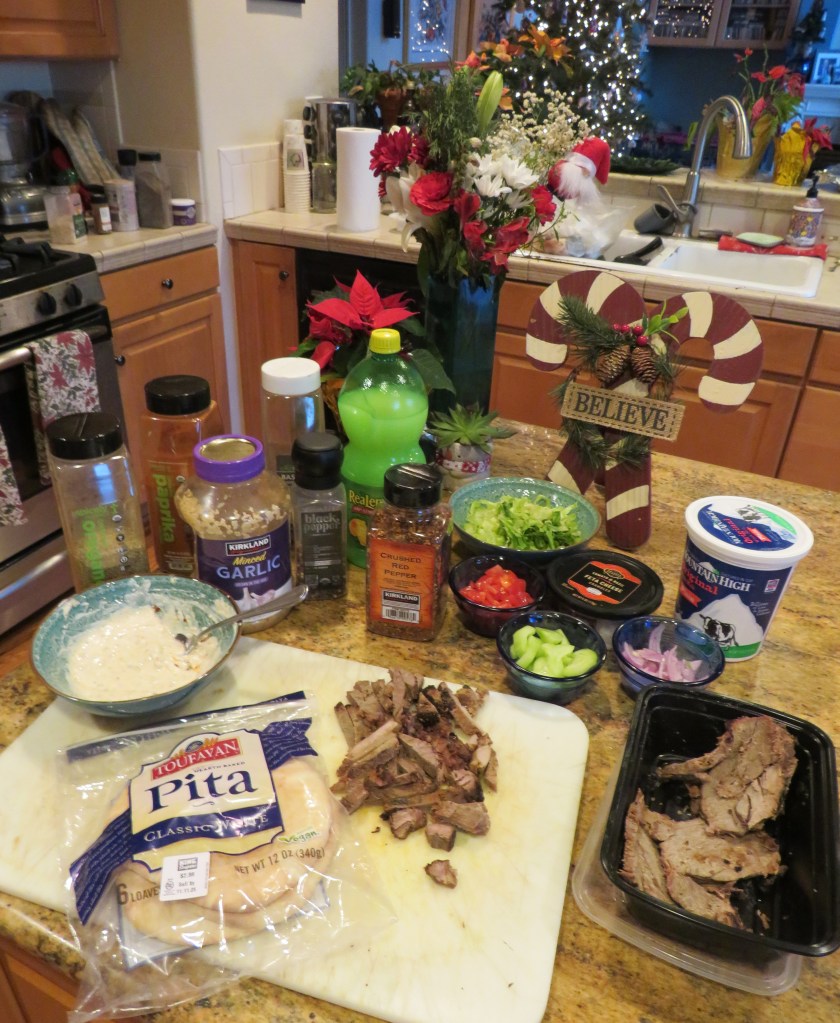
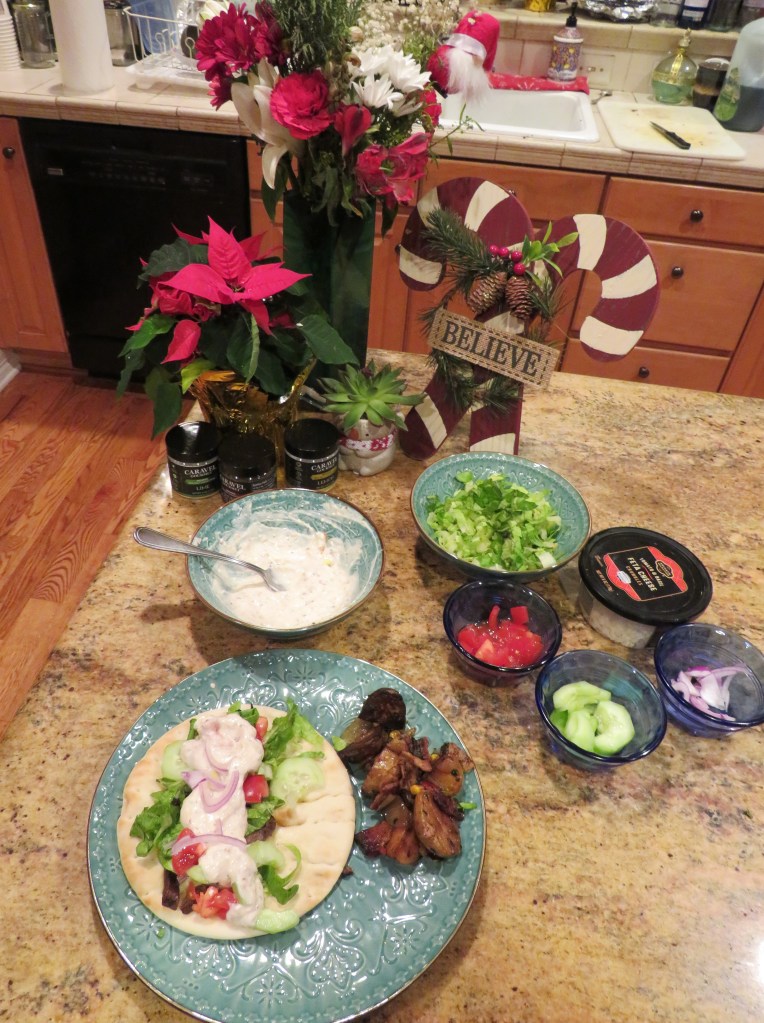
One of the dishes I served for our Christmas Day dinner was lamb. We had a lot of food, and we all wanted to sample everything that was offered, so I had quite a few leftovers too. So the queen came dressed up in her Christmas best and between “the two of us” we recreated once again. We had some lamb and some roast beef leftover, so I cut them both up and turned them into gyros.
Turning lamb and beef into gyros is a simple fix. All I needed to do other than slice it up and re-cook it was to cut up some lettuce, tomatoes, red onions, and cucumbers and then make a tzatziki sauce. Pretty easy-peasy really, yet still delicious. 🙂
Tzatziki is a creamy, tangy Greek sauce or dip made from strained yogurt, cucumbers, garlic, olive oil, and herbs like dill or mint, known for its cool and refreshing flavor. It’s a staple in Mediterranean cuisine, commonly served as a dip with pita bread and vegetables, as a topping for grilled meats like gyros and souvlaki, or as a sauce for various dishes. Of course, since it so popular all across the Mediterranean region, there are many different variations. Not only is tzatziki sauce delicious, but it is very healthy for you too, being both high in protein and low in fat and calories. https://ajeanneinthekitchen.com/2025/08/30/gyro-salad/, https://ajeanneinthekitchen.com/2022/08/23/lamb-gyros/
We eat a lot of lamb, and quite often my leftover lamb gets turned into gyros. We love gyros too apparently. 🙂
In my eyes, throwing away good food is a crime, so don’t be a “criminal”. Instead of throwing those leftovers away, be creative with them. Don’t let them go to waste. Reuse them and repurpose them. If you give yourself the chance, you’ll be amazed at what you can create too. 🙂
Happy New Year. May 2026 be filled with happiness, good health and prosperity for all. ‘Til next time.
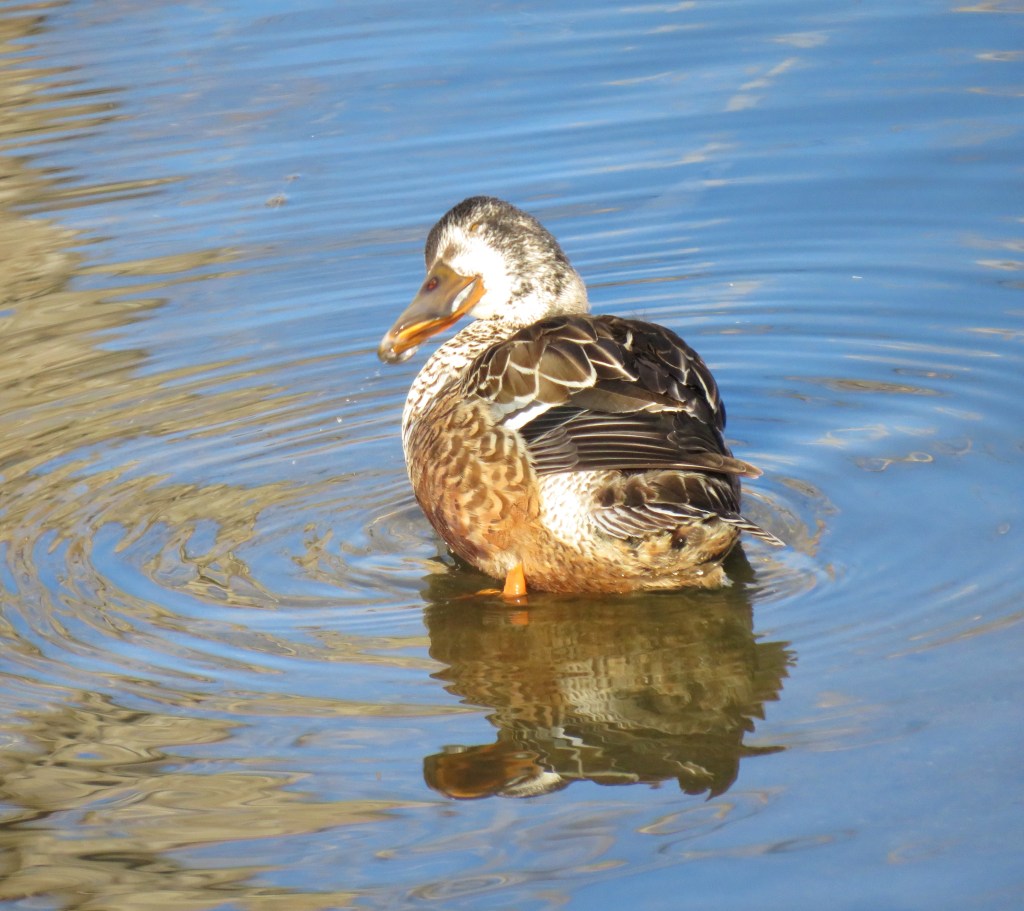
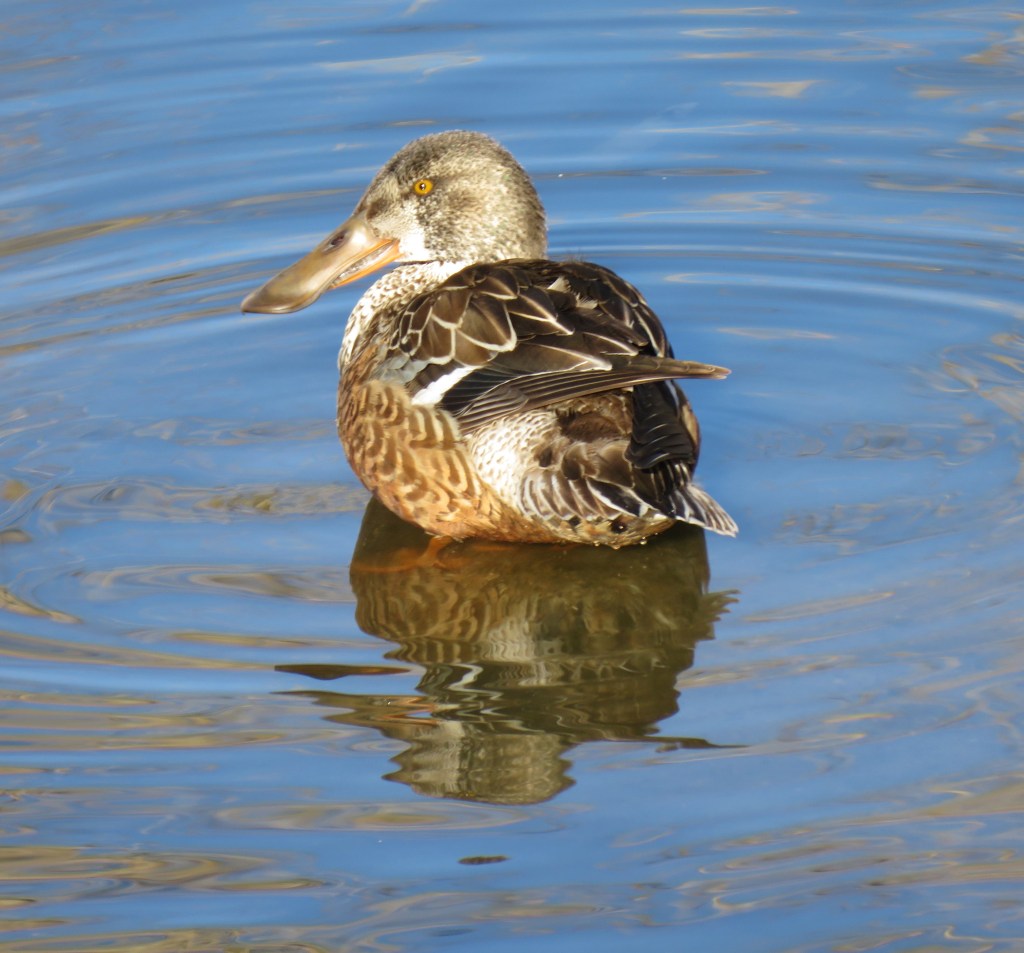
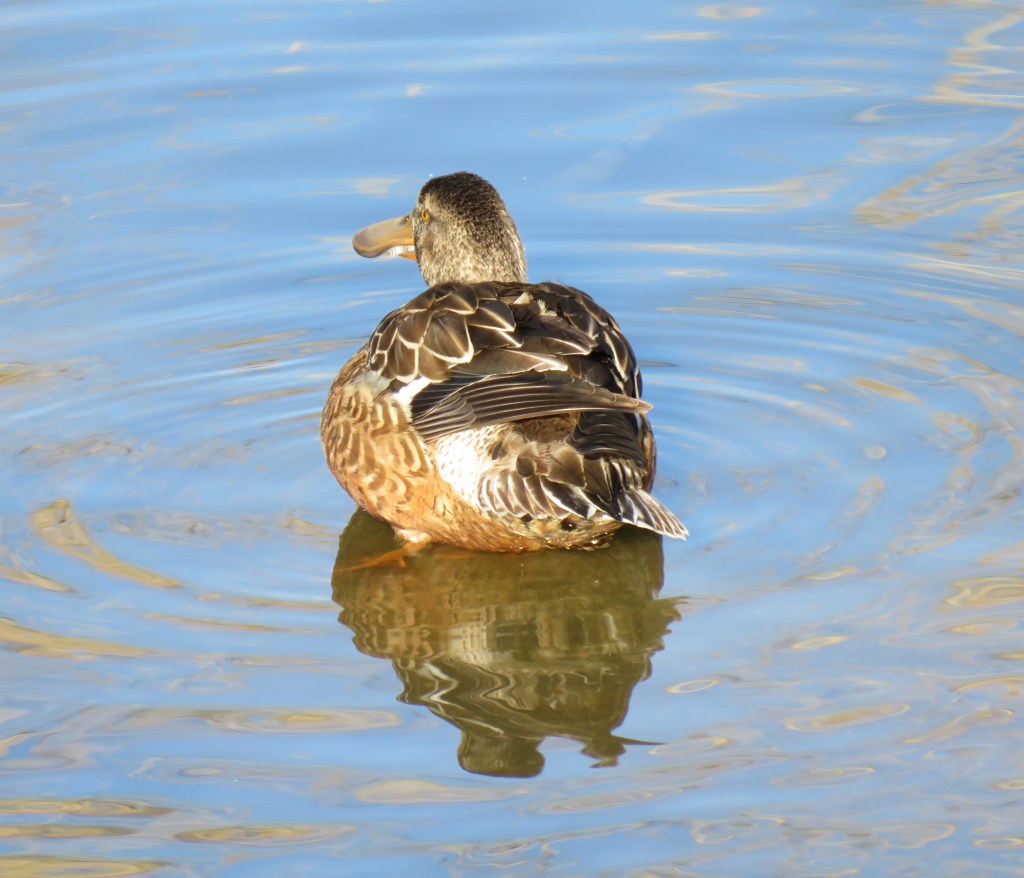
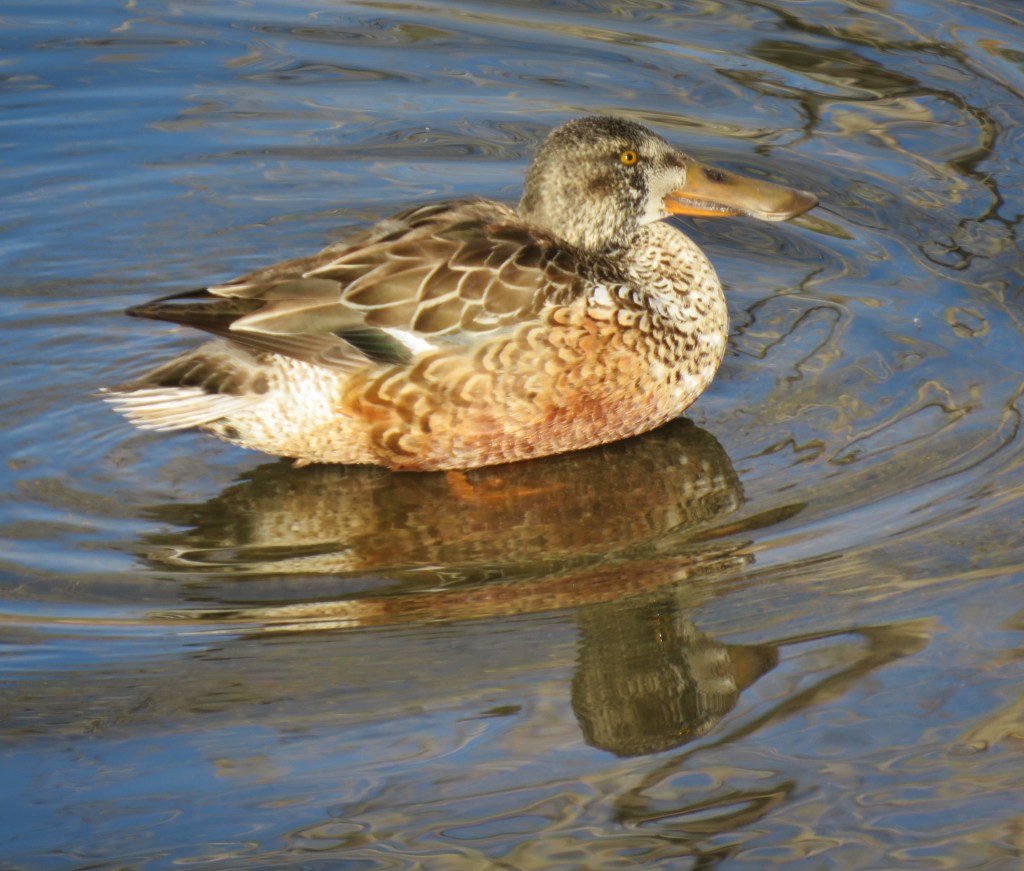
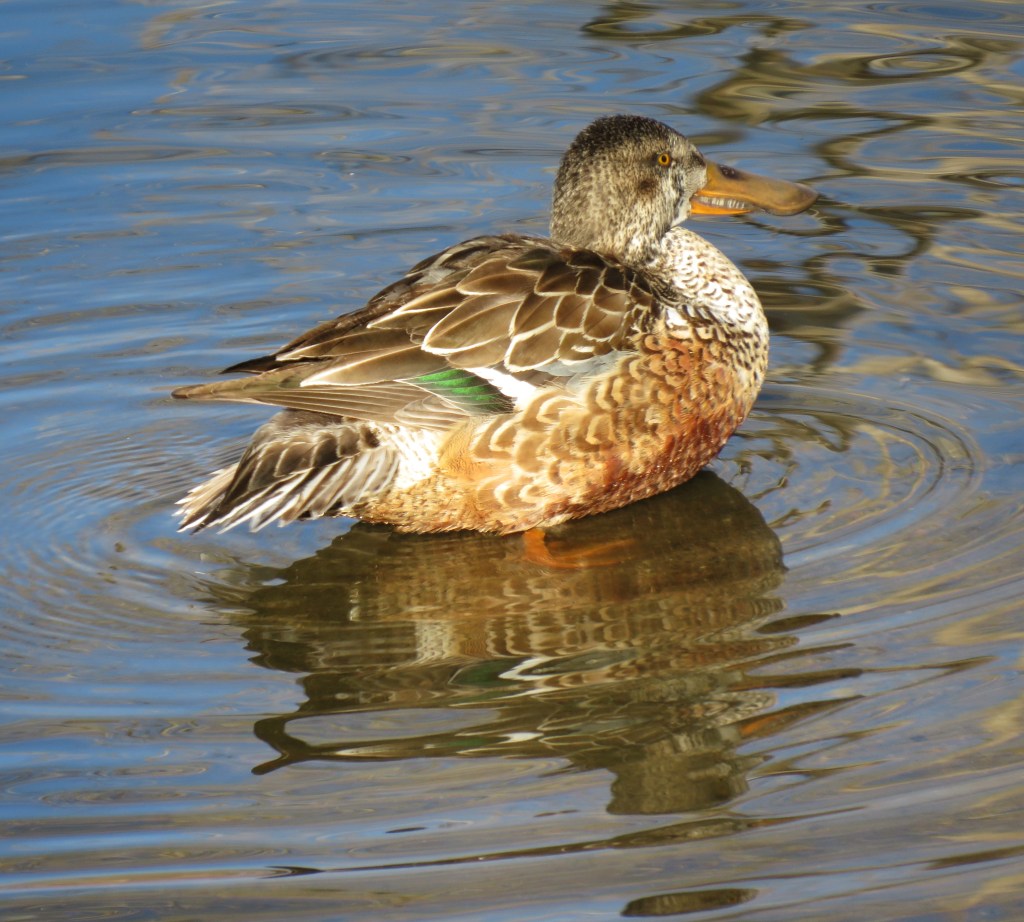
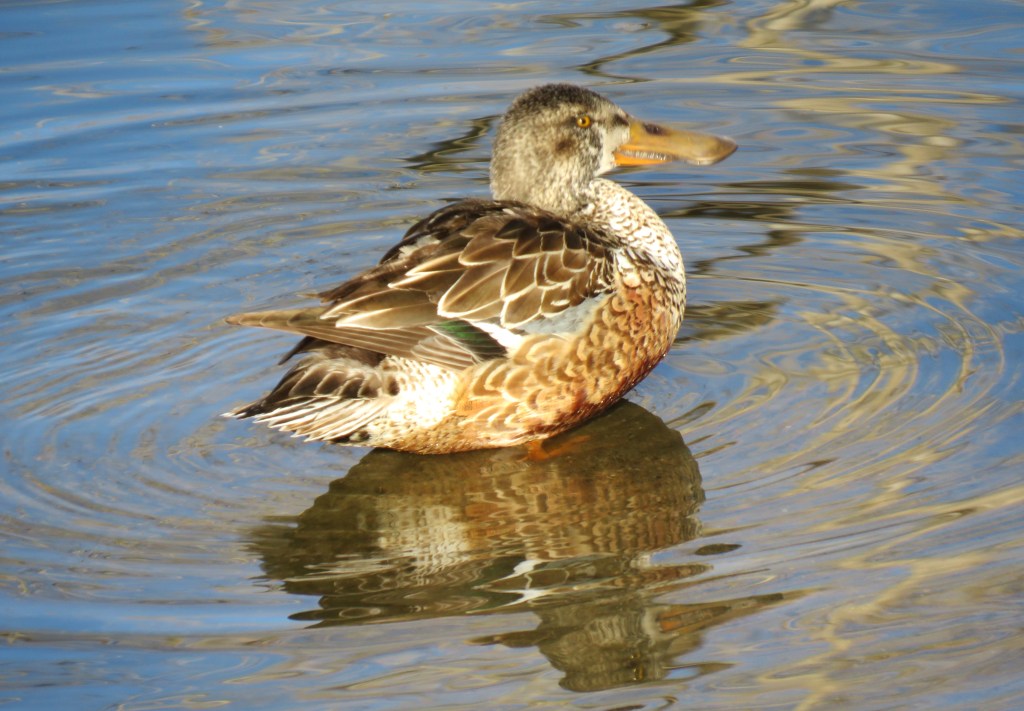
Our lakes are filling up with a lot of Canadian Geese and Cacklings right now, but they are sharing the lakes with others too. I saw one lone female Northern Shoveler out on the lakes, and she looked like she was thoroughly enjoying herself. I swear she was posing for me and smiling at the camera as she was posing. She loved being the center of attention. 🙂
Have a great day and make everyday great. ‘Til next time.
I hope 2026 is treating you all well so far. Here for us, so far so good, albeit we have had a pretty quiet start to the new year.
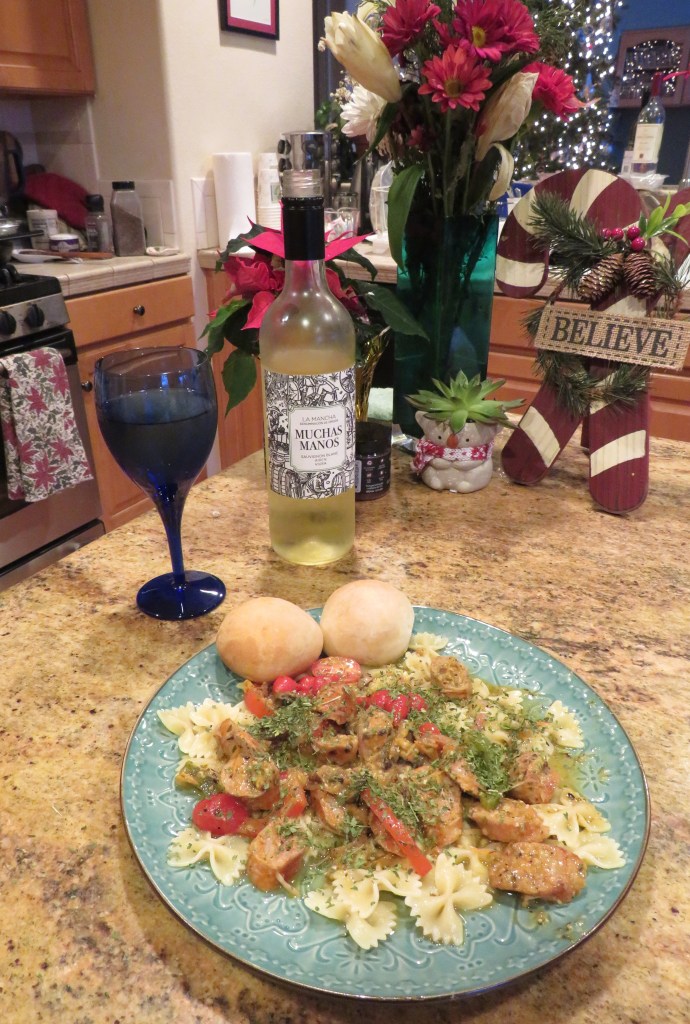
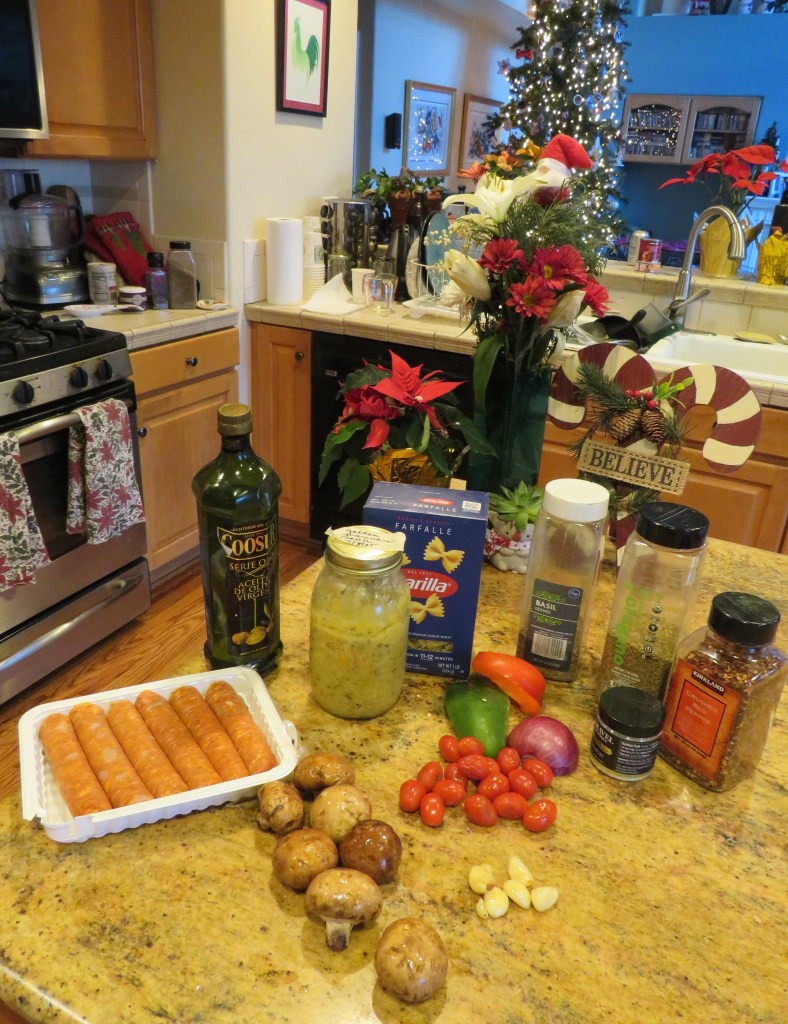
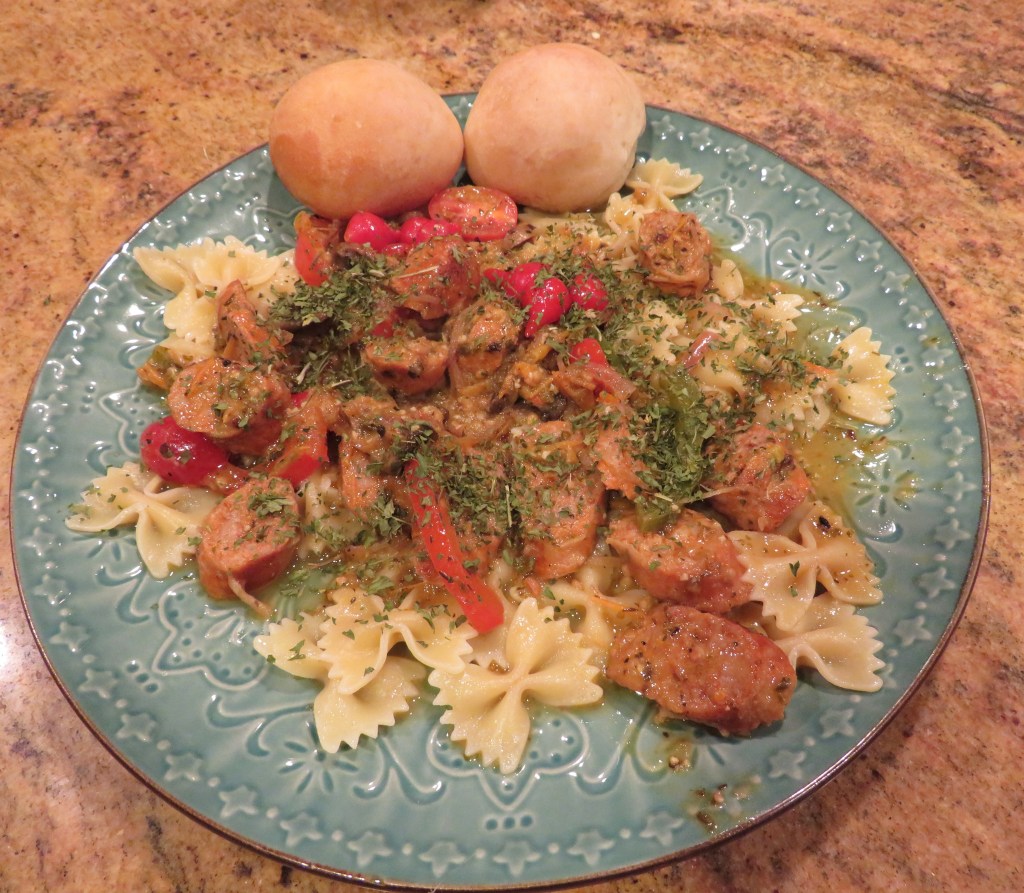
Most of the time, the menu planning stems around whatever Larry takes out of the freezer at the time. I create with what I have. I usually only really “plan” a meal for special occasions or when I am having people over. Very rarely do I actively plan ahead for just the two of us. This time, I was creating something using some hot Italian sausage links. No problem. I can always create something with whatever I have. It’s like cooking from the mystery box. I can always come up with something.
Pasta is always a very forgiving and flexible “tool” to have in the “tool box”. It goes with everything. 🙂
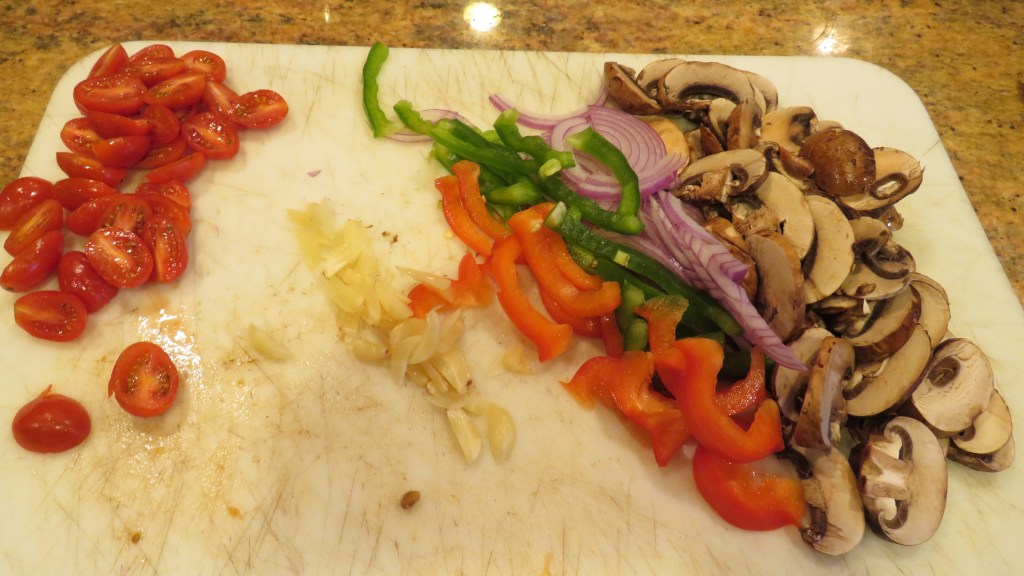
Hot Links & Pasta
Being creative often means using up what you have. If you have little bits of this and little bits of that, use them in a deliciously fun way. See what you can come up with. 🙂
6 Italian hot link sausages, cooked and sliced
1-1 1/2 cups sliced mushrooms
1/4 red onion, sliced very thin
1/2 each red and green bell pepper, sliced thin
4-5 garlic cloves, sliced thin
1 cup grape tomatoes, cut in 1/2
1 TBSP Peruvian sweet peppers, optional
olive oil
1 TBSP lemon olive oil, optional
1 box bowtie or farfelle pasta, cooked
1/2 cup dry white or red wine
1-2 tsp dried basil or 1 TBSP fresh basil, chopped
1-2 tsp dried oregano, or 1 TBSP fresh oregano, chopped
Cook the sausage until cooked enough to be able to slice. When it is done, and cooled enough to work with, slice. Set aside. While the sausage is cooking, prepare the vegetables.
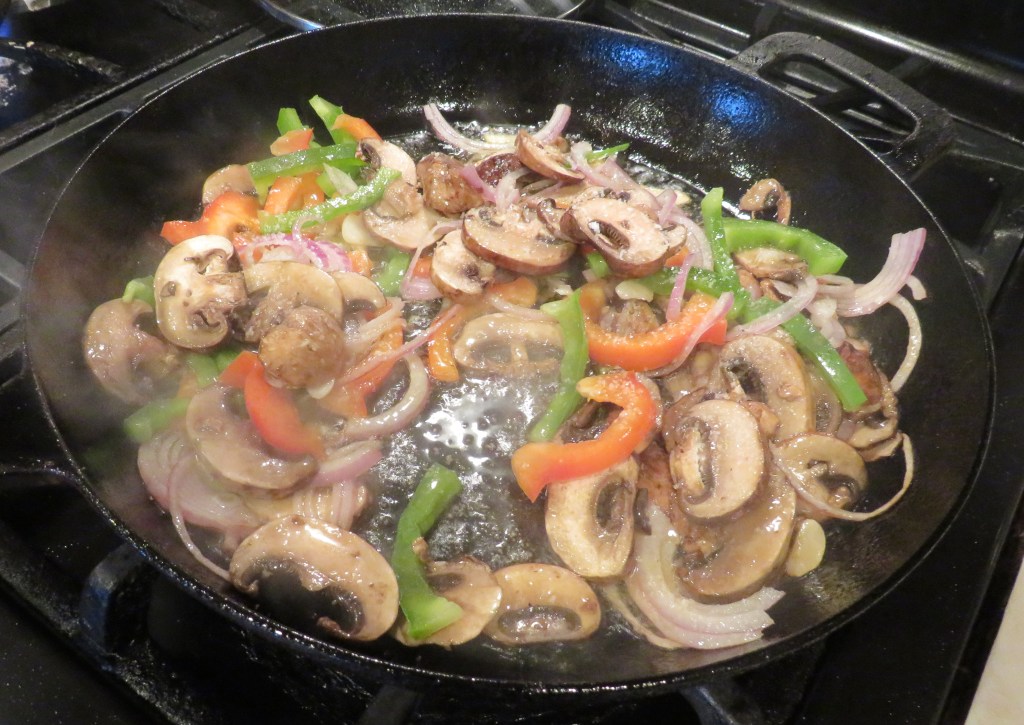
When the sausage is cooked, remove from the pan and set aside. Add a little olive oil and lemon olive oil if using to the same pan, and saute the peppers, onions, mushrooms and garlic.
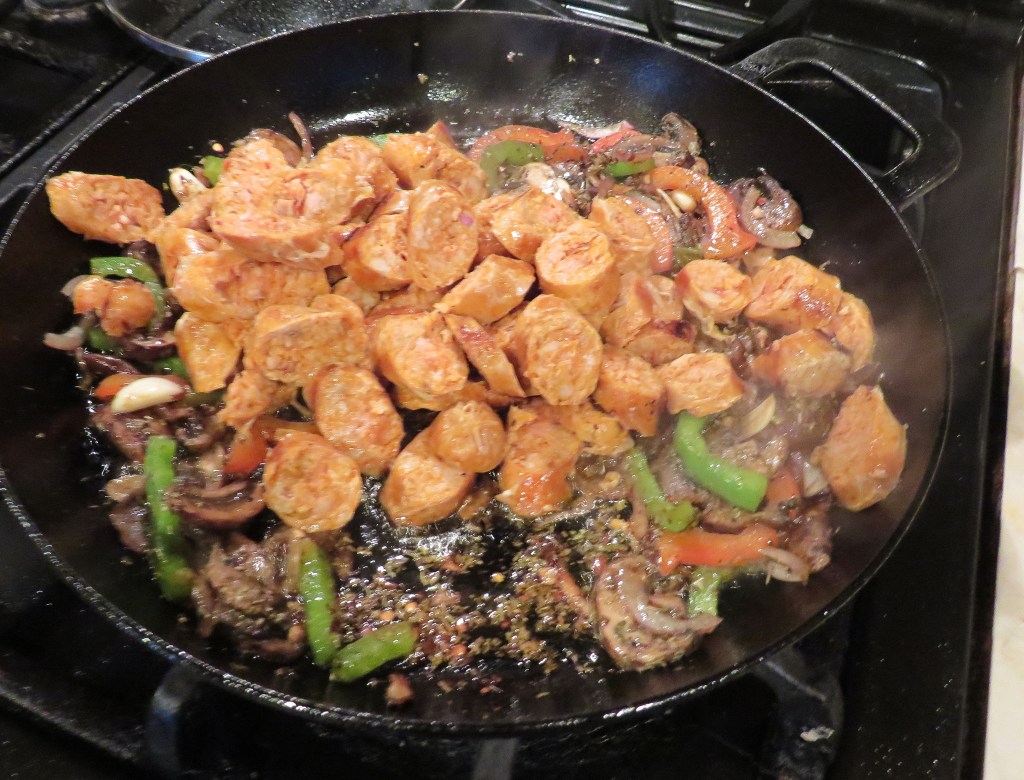
Cook for about 5-7 minutes, stiffing frequently, then add the cooked sausage. Continue to cook for an additional 5 or so minutes, to make sure the sausage is thoroughly cooked.
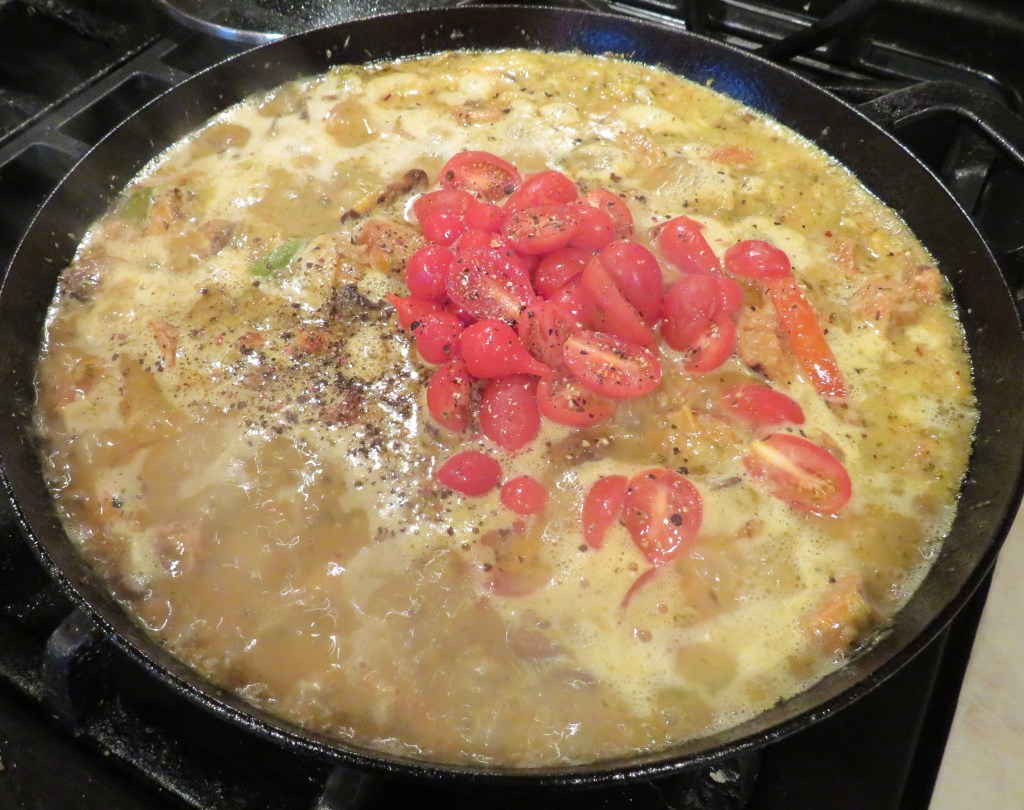
Add the wine and degalze the pan, then add the tomato sauce and seasonings. If you are using a yellow tomato sauce, use and serve with a dry white wine. If you are making it with red tomatoes, use and serve with red wine.
Bring to a boil, then reduce the heat to a simmer and let simmer for about 10-15 minutes, stirring frequently. Add the tomatoes and Peruvian peppers right at the end and mix together thoroughly. Serve over the cooked pasta, and add a little chopped basil and/or cheese on top if you like, and VOILA! Dinner is served.
For the most part, I don’t follow rules when I cook. I make my own rules, and I make them up as I go. Walk on the wild side, and be creative, or as I love to say, it’s OK to play with your food. Play around and have fun. It’s NOT rocket science. 🙂
Happy New Year. May 2026 be filled with happiness, good health and prosperity for all. ‘Til next time.
Traditions are customs or beliefs passed down from generation to generation. By keeping our family traditions alive, we are also building strong bonds that connect us with each generation, from past to present and into the future. They foster a sense of belonging, continuity, and identity, providing positive memories and shared experiences.
As you all know, my mother was from Southeast Texas. Eating black-eyed peas on New Year’s day is not just a Texas tradition, but it is a common practice all throughout the South. I was raised eating black-eyed peas for New Year’s Day, and I have continued doing so ever since. So, yes, we had some black-eyed peas once again this year too. It doesn’t matter how you eat them, just as long as you do. I tend to make mine into a salad with ham and peppers and some kind of a vinaigrette. https://ajeanneinthekitchen.com/2025/01/02/double-good-luck-part-1/ As usual, I made a big batch, so I shared some with Mike and Lauren too. I mean good luck is supposed to be shared with others, right?! 🙂
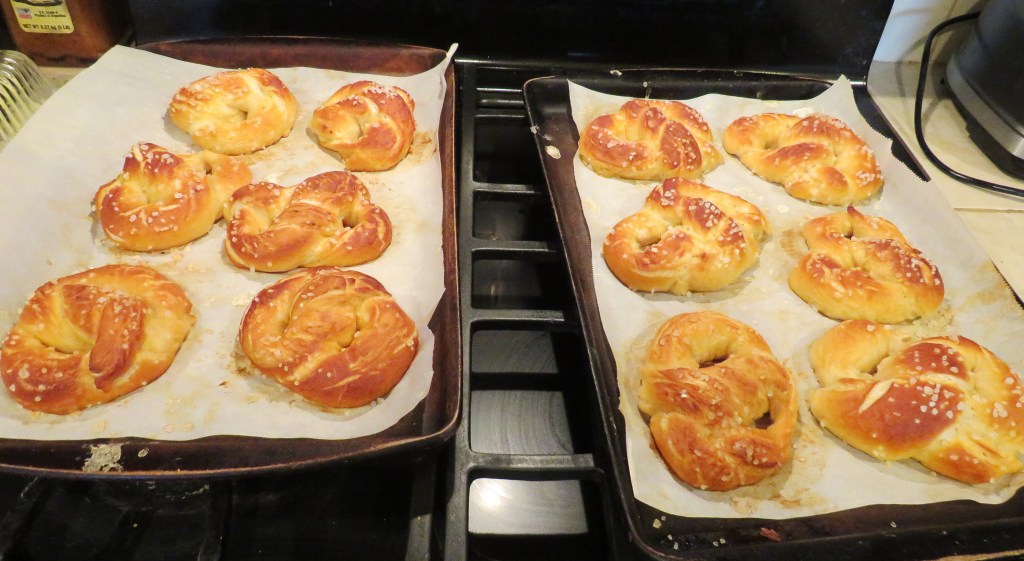
Another New Year’s tradition we keep alive in our house is eating soft German pretzels. https://ajeanneinthekitchen.com/2025/01/03/double-good-luck-part-2/ Larry is 100% German and I have a lot of German blood running through my veins as well. This is a relatively new tradition in our house though. Even though there is a lot of German ancestry in our house (that also means a lot of stubborness), I just found out about this German tradition a few years ago, and Larry’s mom Ollie had never heard of it before I introduced it to her a few years ago. That being said, now that we know about it, we keep it up every year too. I shared some pretzels with Mike and Lauren too. Once again, good luck is only good if shared with others.
We still have plenty left of both, so we should have enough good luck to get us through all of 2026.
Happy New Year everyone. No matter what your family traditions are, keep them alive and share them with both the young and the old. They are part of what makes us who we are. May 2026 be filled with happiness, good health and prosperity for all. Stay safe and stay well. ‘Til next time.
No matter where you live, 2025 is now a thing of the past, and it is 2026. It’s a brand new year filled with brand new possibilities.
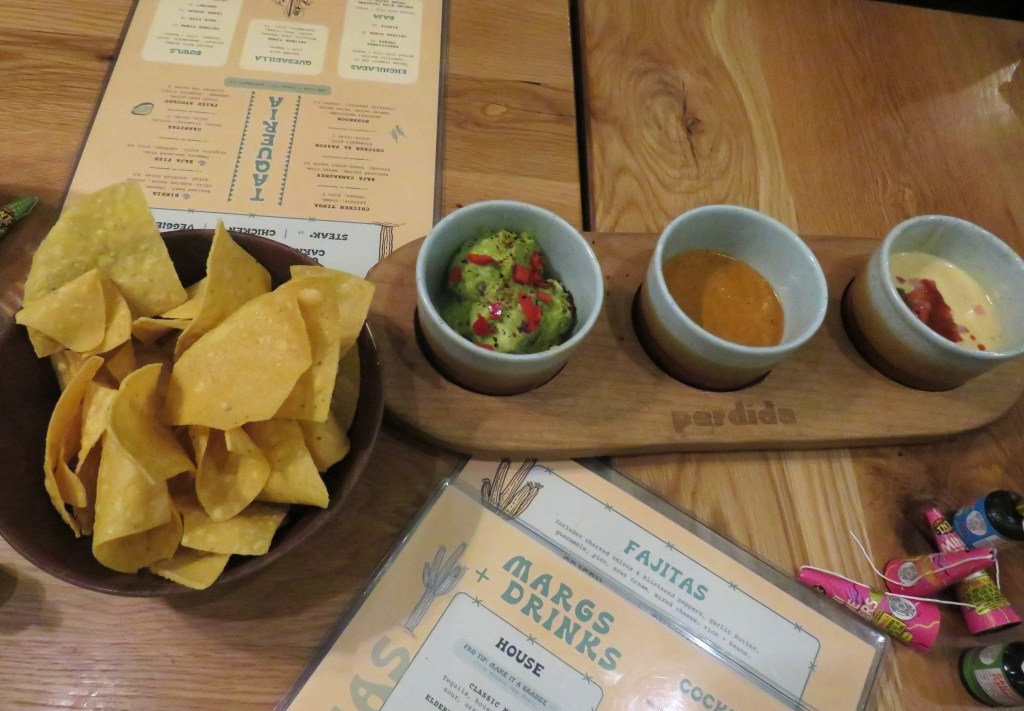
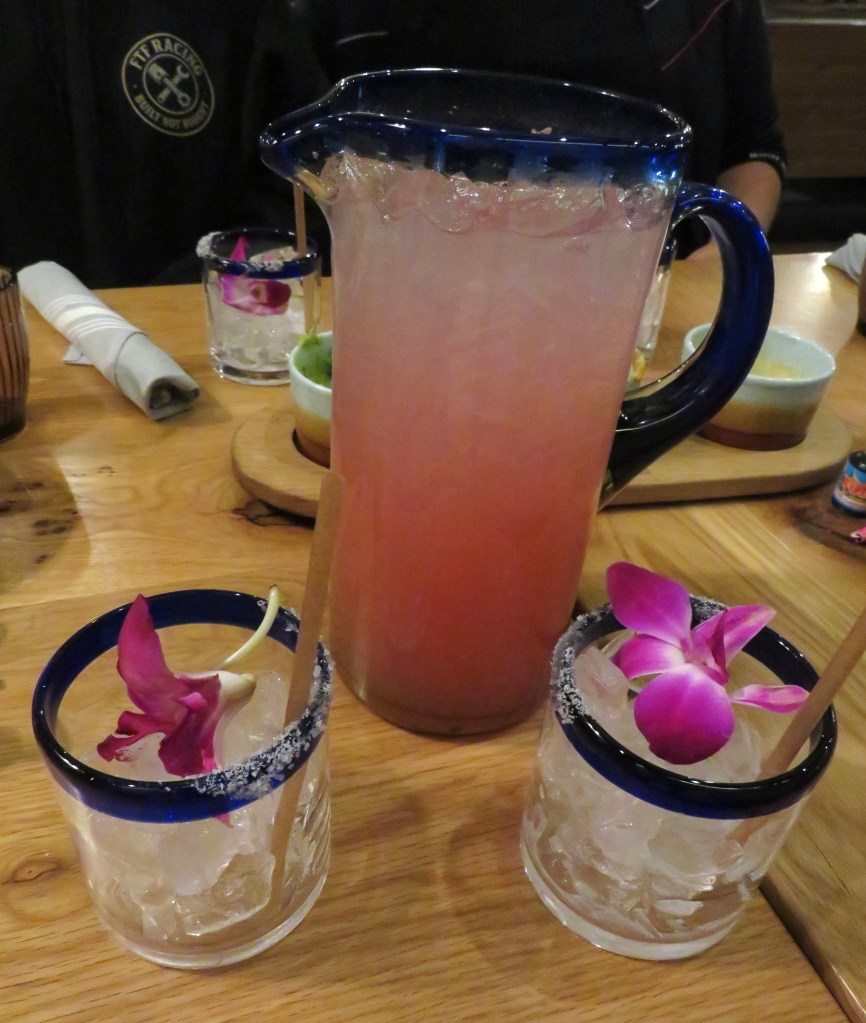
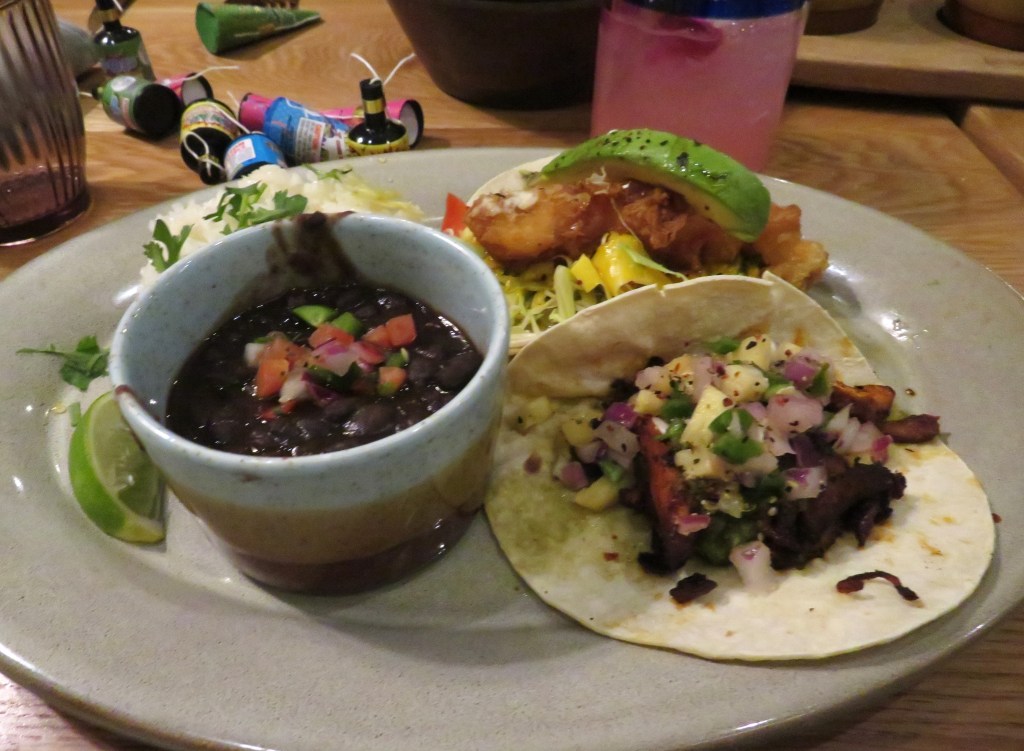
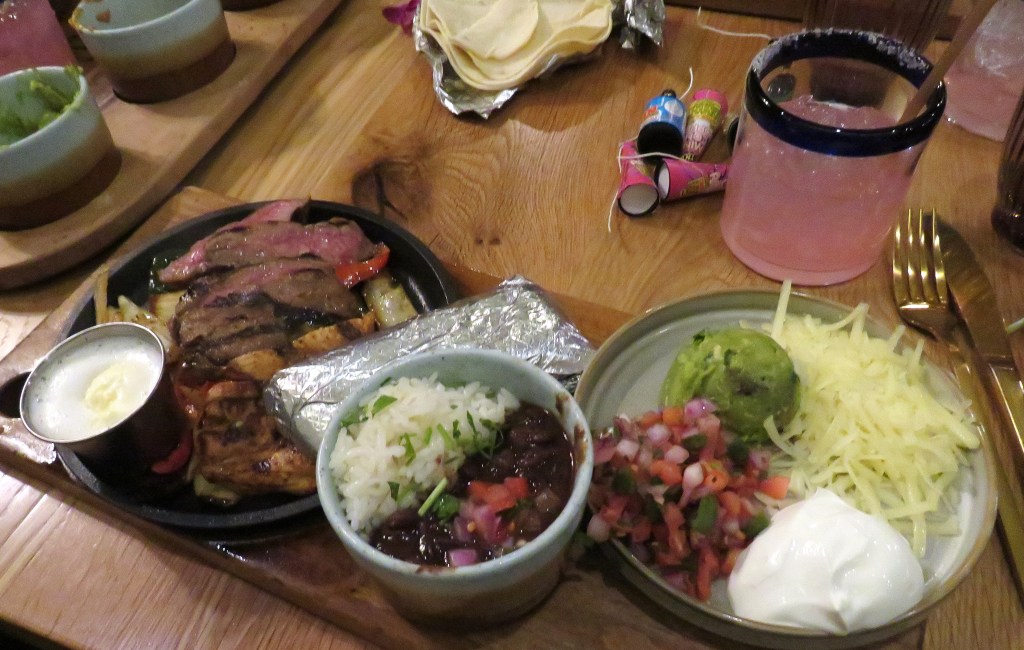
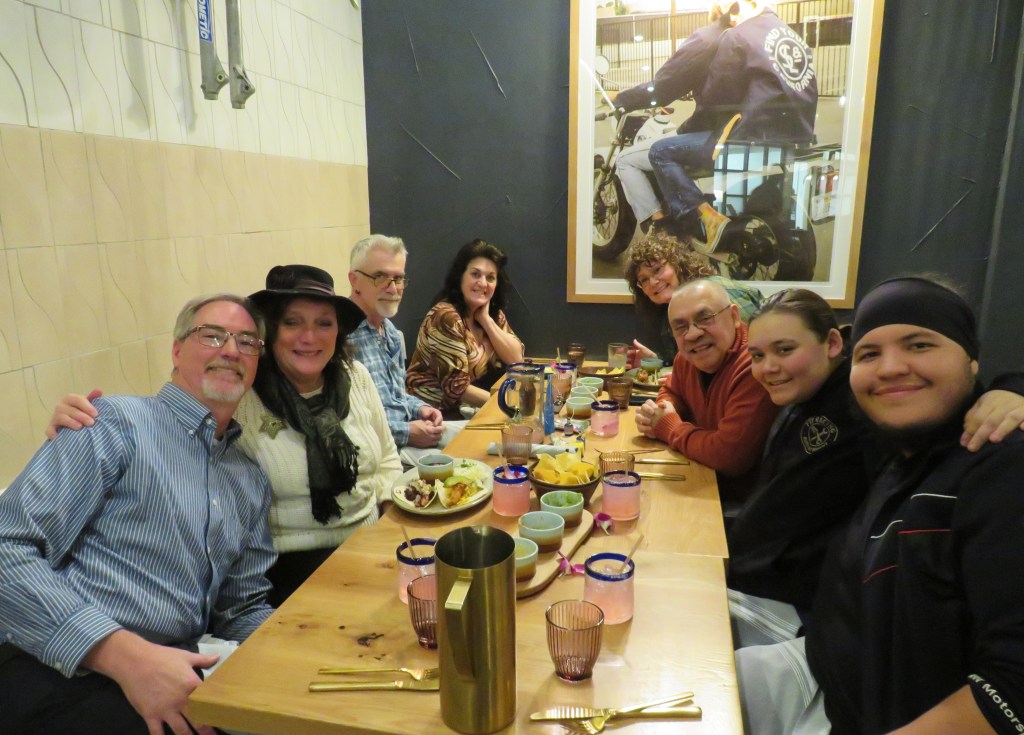
Larry and I celebrated with our friends Mike, Lauren, Wendy, Marc, Zoe and Zoe’s boyfriend Jared last night. We were also celebrating our December birthdays. Larry’s birthday was on 12/10 and Jared’s birthday was 12/27. We had a deliciously fun dinner at Perdita, a local Mexican taco restaurant, based on the casual lifestyle from Cabo San Lucas. We started the table off with some chips, guacamole, Perdita’s special red sauce, and queso and a pitcher of prickly pear margaritas.
We all had either a combination of different tacos or fajitas for dinner. I had one chicken al pastor taco and one shrimp or camarones taco with mango salsa.
Larry ordered steak and chicken fajitas.
Everything was very good and fresh.
After dinner, with very full and satisfied tummies, we all headed back to our house for some fun games and a lot of laughs. Everyone except Larry, Wendy and I all had to work both last night and today, so it was an early night for everyone. Larry and I stayed up ’til midnight though and rang in the new year.
Happy New Year Everyone! Happy 2026! May it be happy, healthy and prosperous for all. ‘Til next time.
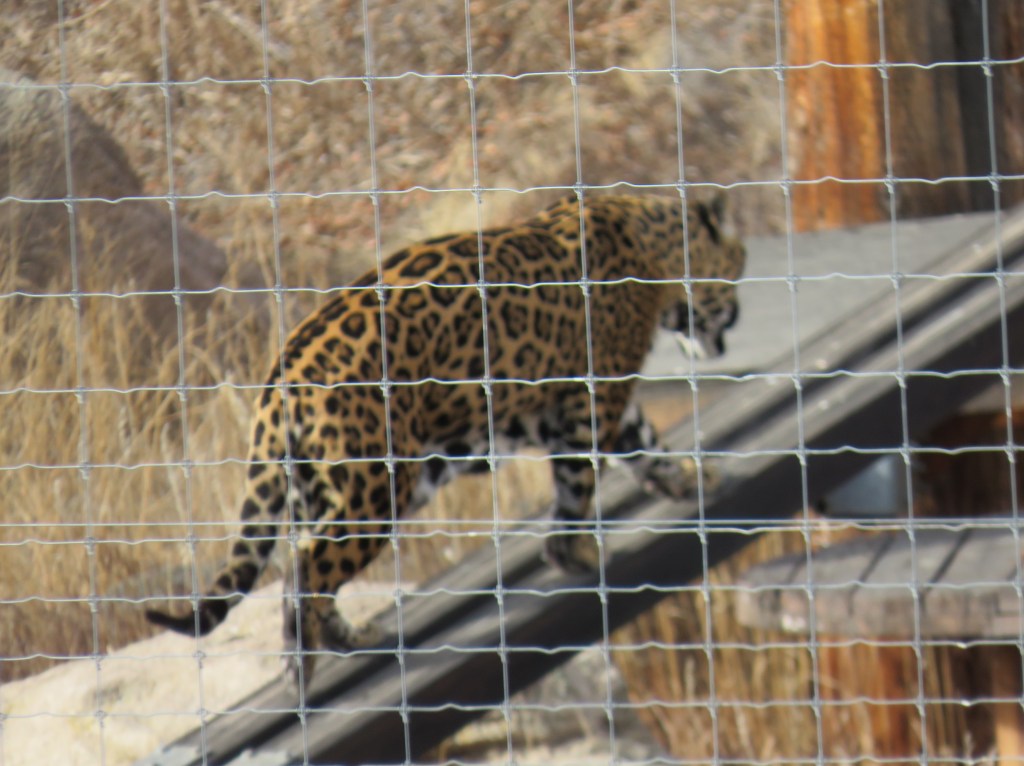
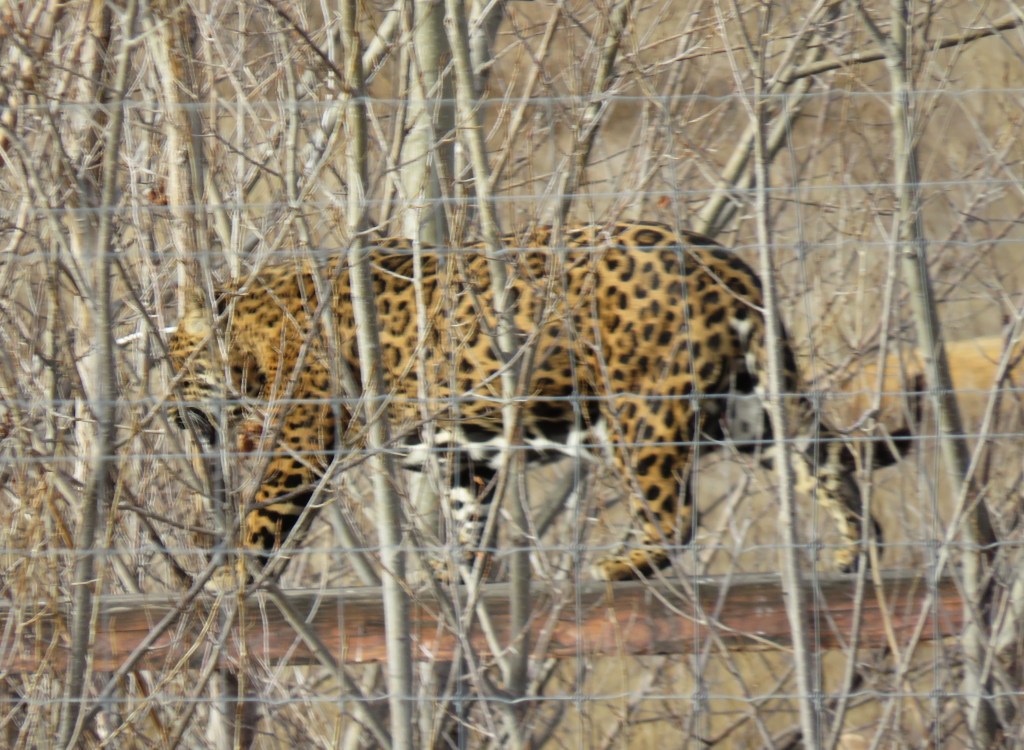
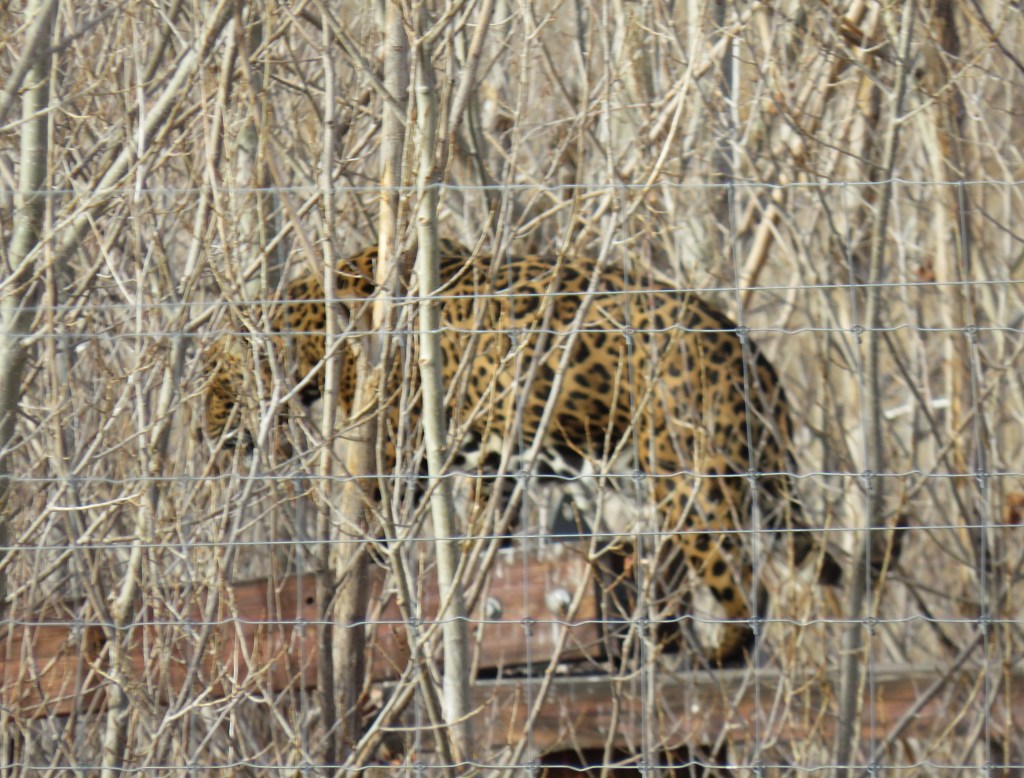
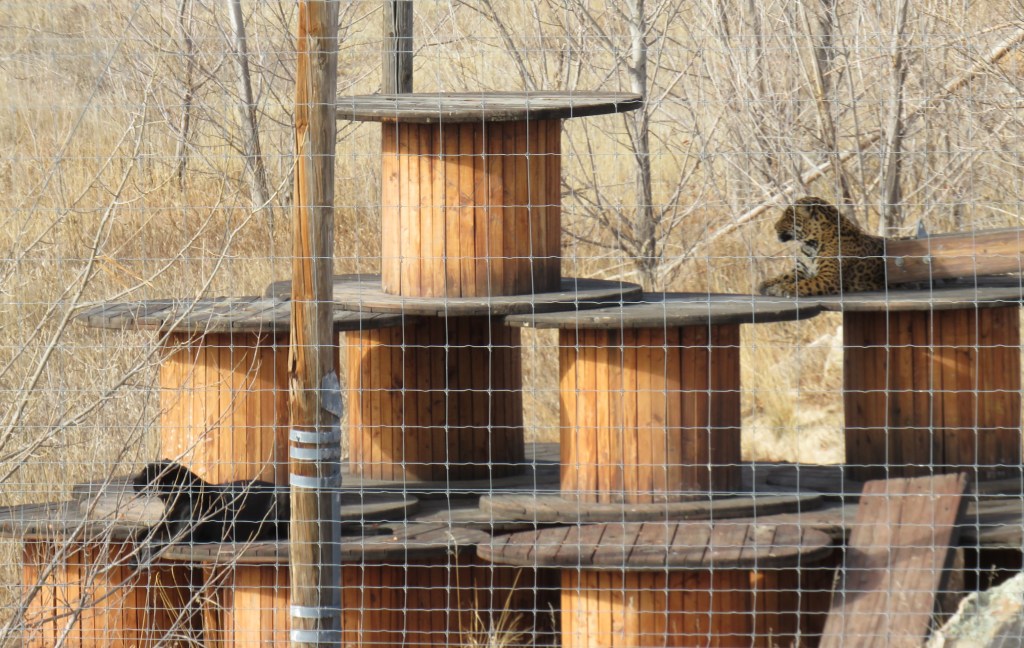
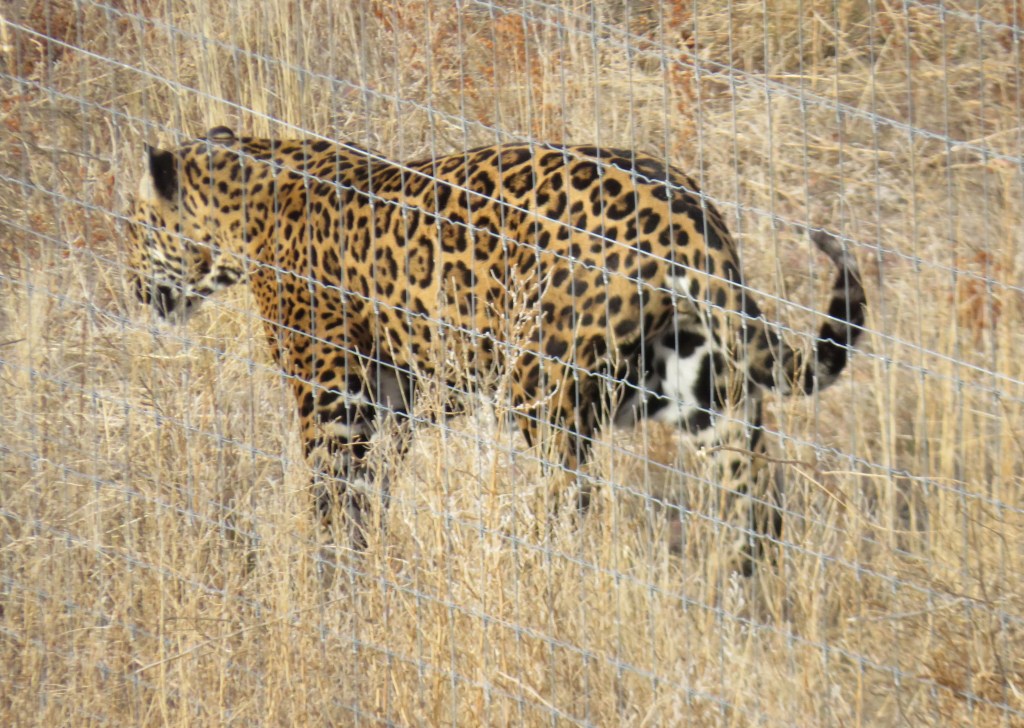
Seeing the leopards is pretty rare when we got to the Wild Animal Sanctuary. The leopards are normally pretty shy and reclusive. But this time, they were out and showing off their spots to all who were there. We we honored to be there to see them, and to see them active too.
Have a great day and make everyday great. Happy New Year. ‘Til next time. See ya next year. 🙂
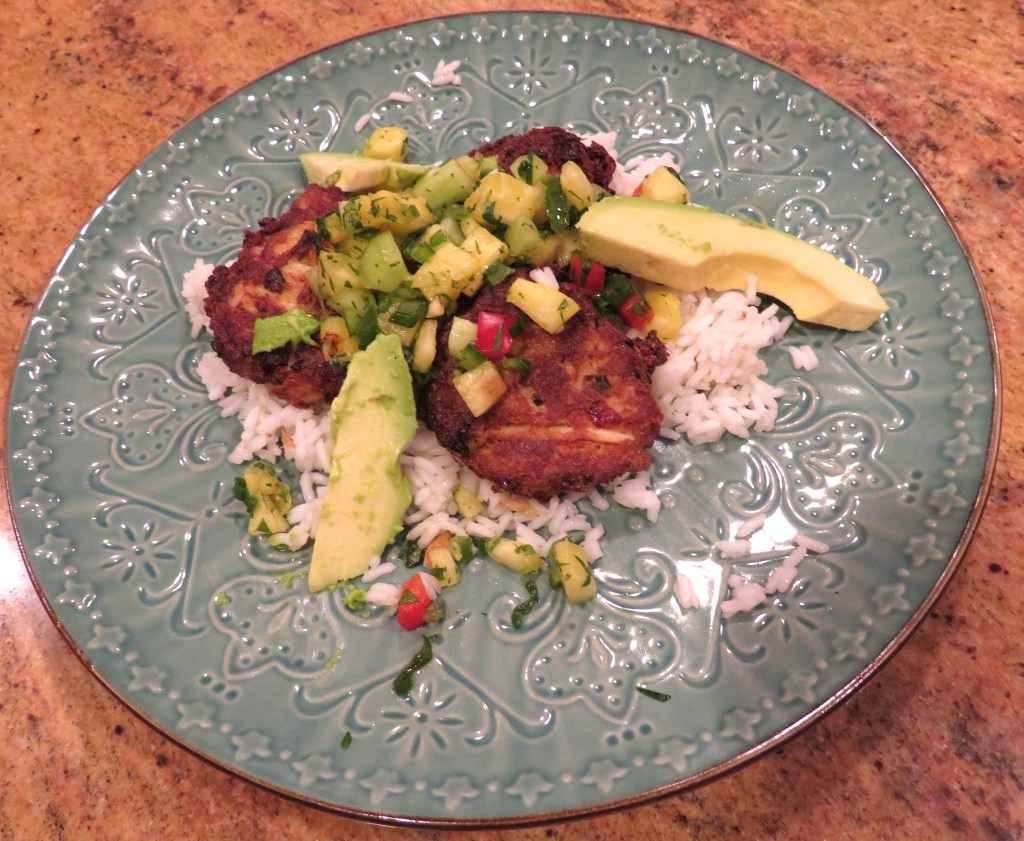
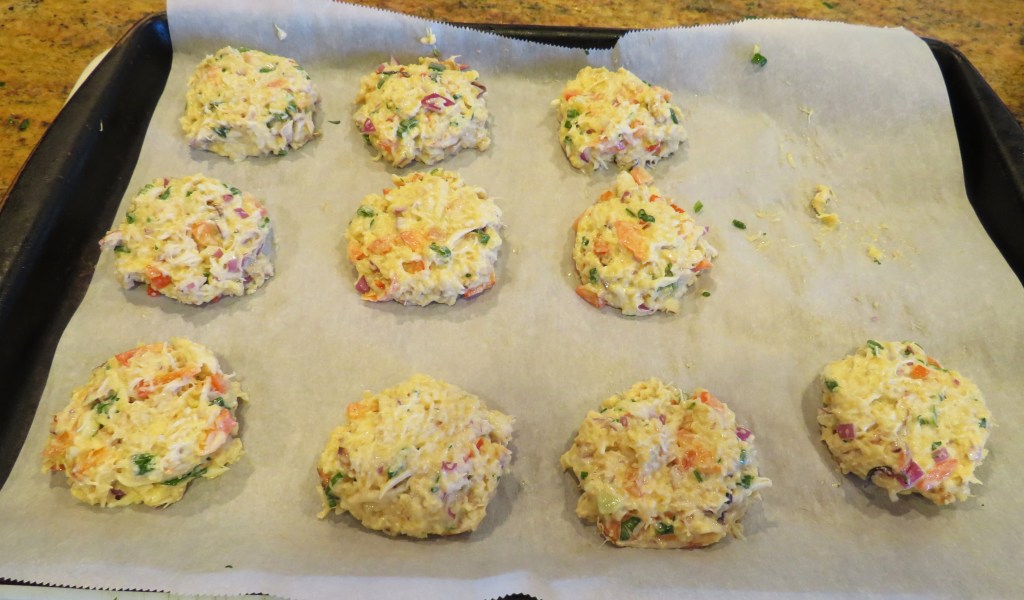
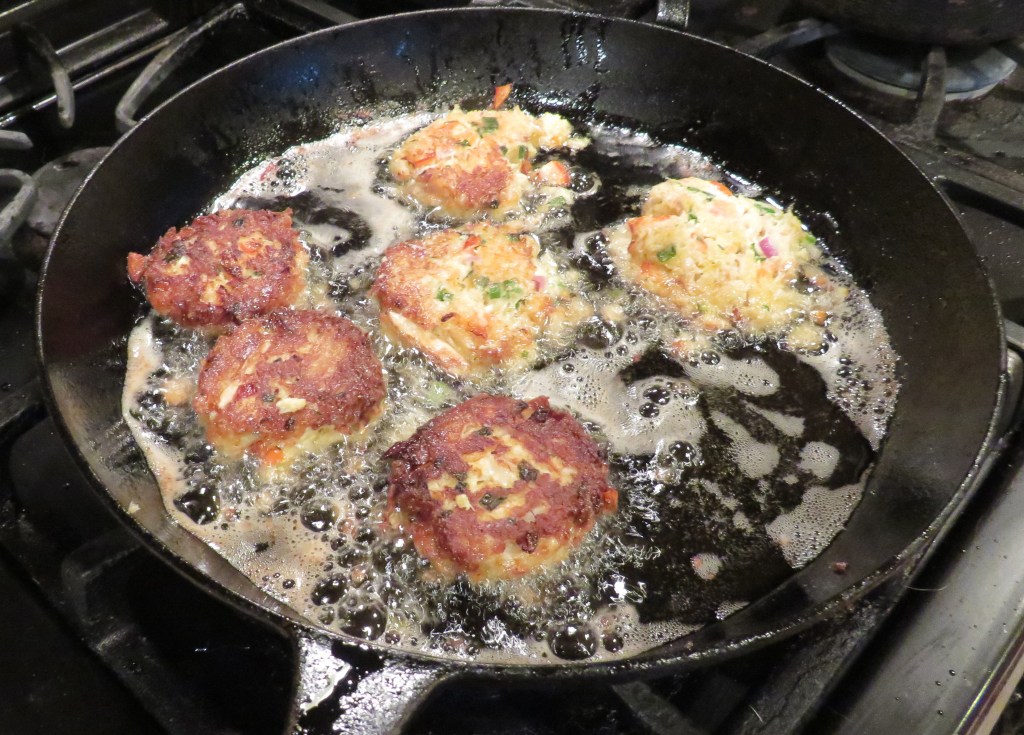
Larry bought a pineapple the other day, and it needed to be cut. So I made a pineapple cucumber salsa with some of it, and then served that over crab cakes. The pineapple was so sweet and juicy. I could have easily eaten the whole thing as I was cutting it up. 🙂
Both the pineapple cucumber salsa and the crab cakes were very easy to make. I made them ahead of time and put them in the refrigerator until it was time to cook the crab cakes.
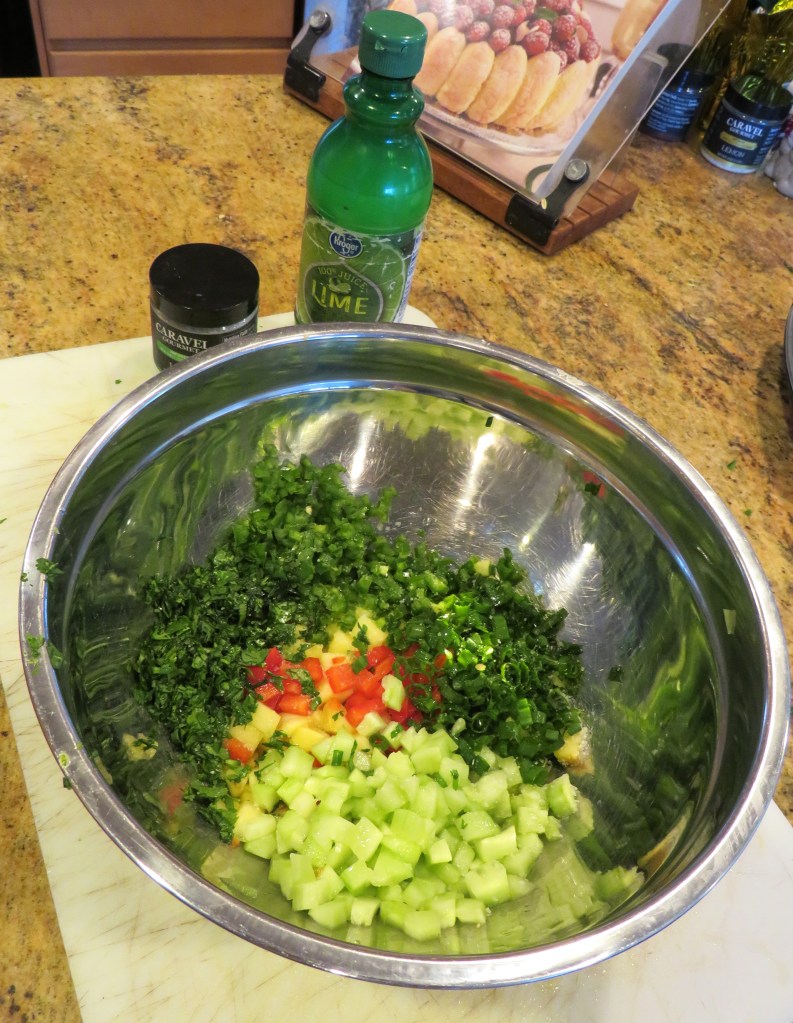
Pineapple Cucumber Salsa
2-2 1/2 cups diced pineapple
1 cucumber, peeled, seeded and diced
1 jalapeno, seeded and diced fine
1/4-1/2 red bell pepper, diced
1/4 cup green onions, sliced very thin
1/4 fresh cilantro, chopped
1-2 TBSP lime juice
salt or infused lime salt to taste – I used my new infused lime salt
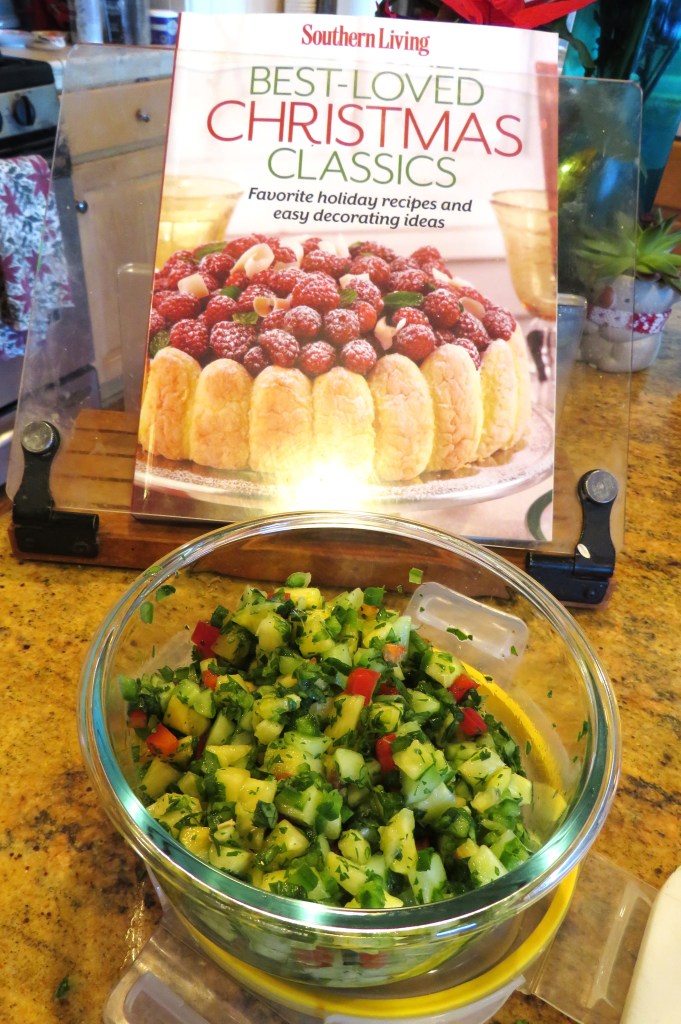
Mix everything together well and refrigerate until ready to use. It goes best with light seafood or chicken dishes, though it would go well with pork too.
The crab cakes were easy to make as well. This particular version is more like Maryland crab cakes, with very little breading. http://Maryland crab cakes
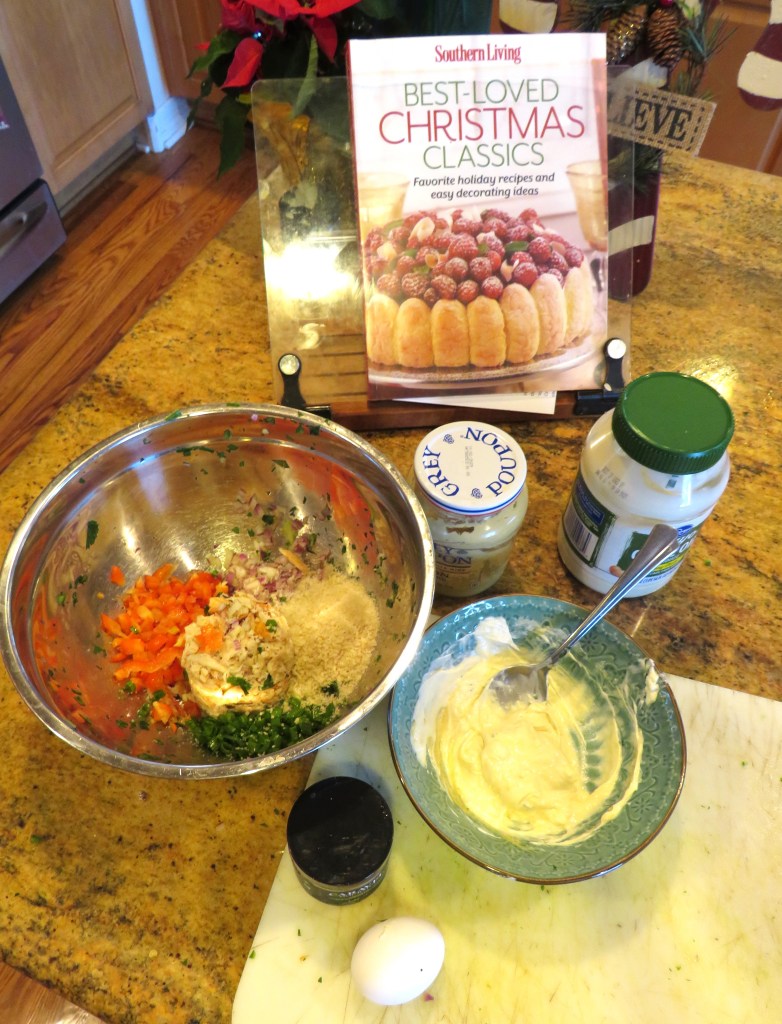
1- 1 1/2 lbs crab meat
1/2 red bell pepper, diced
1/4 cup green onions, sliced thin
1/4 cup red onions, diced fine
1/4 cup Panko bread crumbs
1 egg
1 TBSP Dijon mustard
1/4 cup mayonnaise
salt or lime infused salt to taste
canola or vegetable oil for cooking
Mix all the ingredients together well, and form into balls. Gently press the balls to flatten them out a bit. Place the crab balls onto a baking sheet lined with parchment paper and refrigerate for at least 1 hour before cooking.
When ready to cook, get a large skillet very hot and add about 2-3 TBSP of oil. Get the oil to about 350*F or 180*C and add the crab balls. Do not over crowd the pan. Cook for about 4 minutes per side, or until golden brown, then gently flip over and continue cooking for another 4 minutes.
Serve immediately, while still hot and top with the pineapple cucumber salsa. I added some avocado slices as well and served it over rice to make it more of a light meal than an appetizer.
!Desfruitas! Happy New Year. May 2026 be filled with good health, prosperity and happiness for all. ‘Til next time.
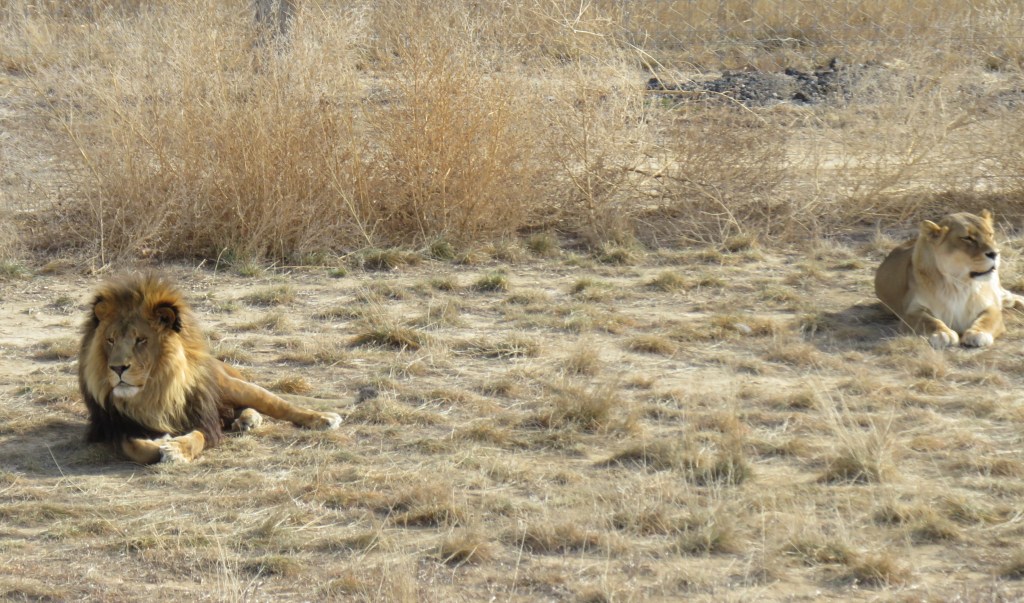
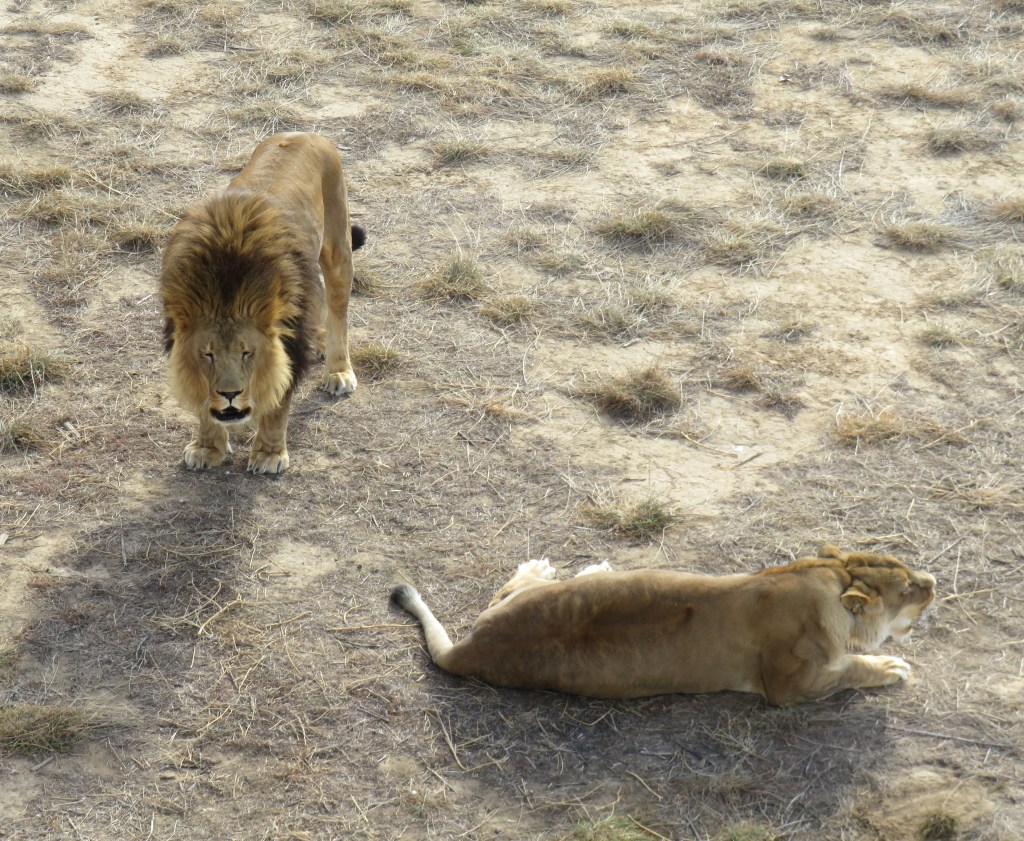
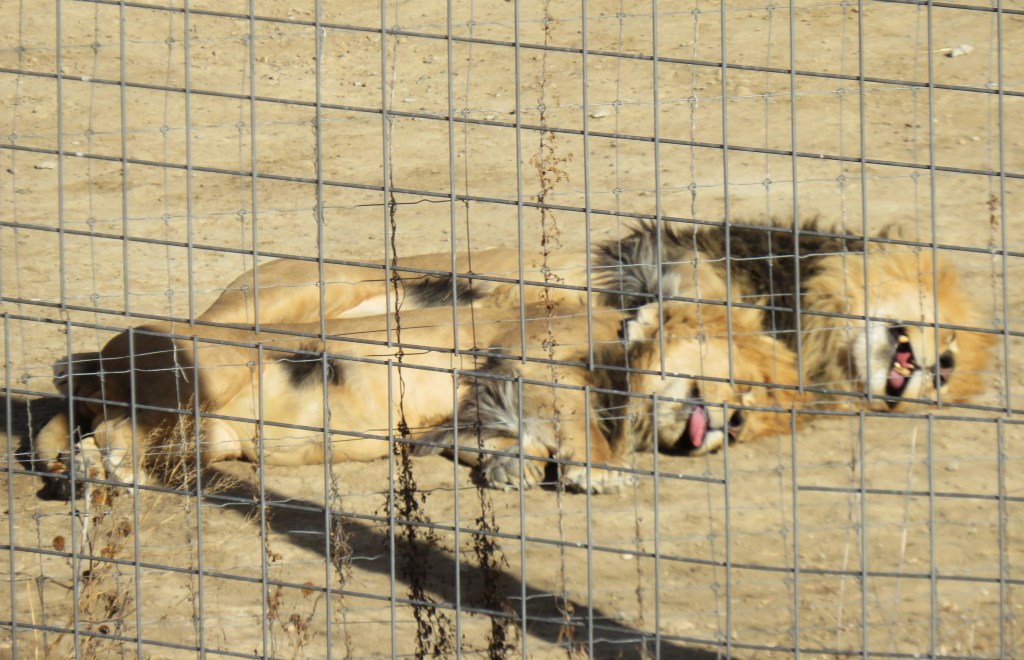
The lions were active and alert the last time we went to the Wild Animal Sanctuary, as were a lot of the other big cats. Some were still napping, others were on watch, and one royal couple were having a royal row. The queen was definitely giving the king a piece of her mind.
We brought a picnic lunch and decided to eat by these lions. All of a sudden they started roaring loudly at each other. The queen was definitely mad about something and the king was trying to defend himself.
Click onto the photo to hear the lions arguing back and forth with each other.
The Lions’ Roar
When we first passed by these two, the other one was up while the white one was napping. On our second pass, going back to the exit, they switched. It was the changing of the guards.
These two are quite comfortable taking a quite break from the girls.
Have a great day and make everyday great. Happy New Year.
We finally got some snow. It’s about time! We did not have a white Christmas, but we did get a good snow a couple of days after. For a little while, everything was blanketed in fresh snow. But per our wacky weather, it melted as soon as the sun started shining. At least we had some for a little while though. We need it, and we need the moisture. I still have some snow in my backyard too. My backyard is north facing, which means the snow lasts longer than in the south facing areas.
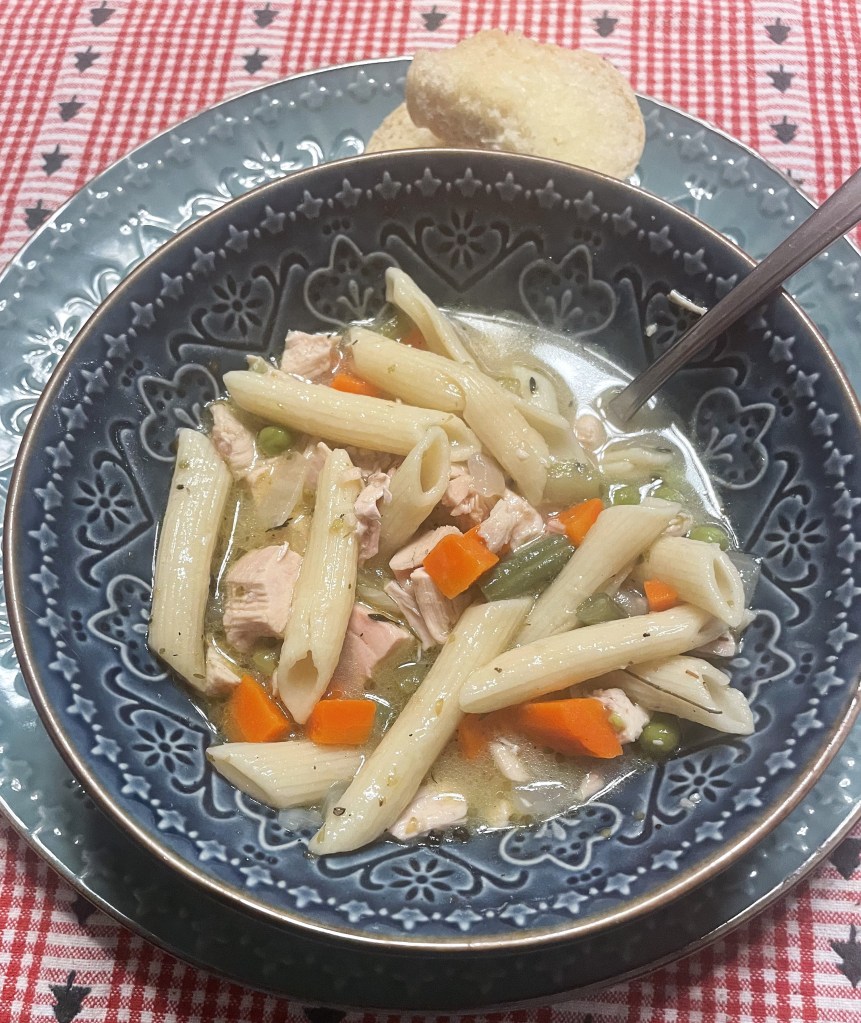
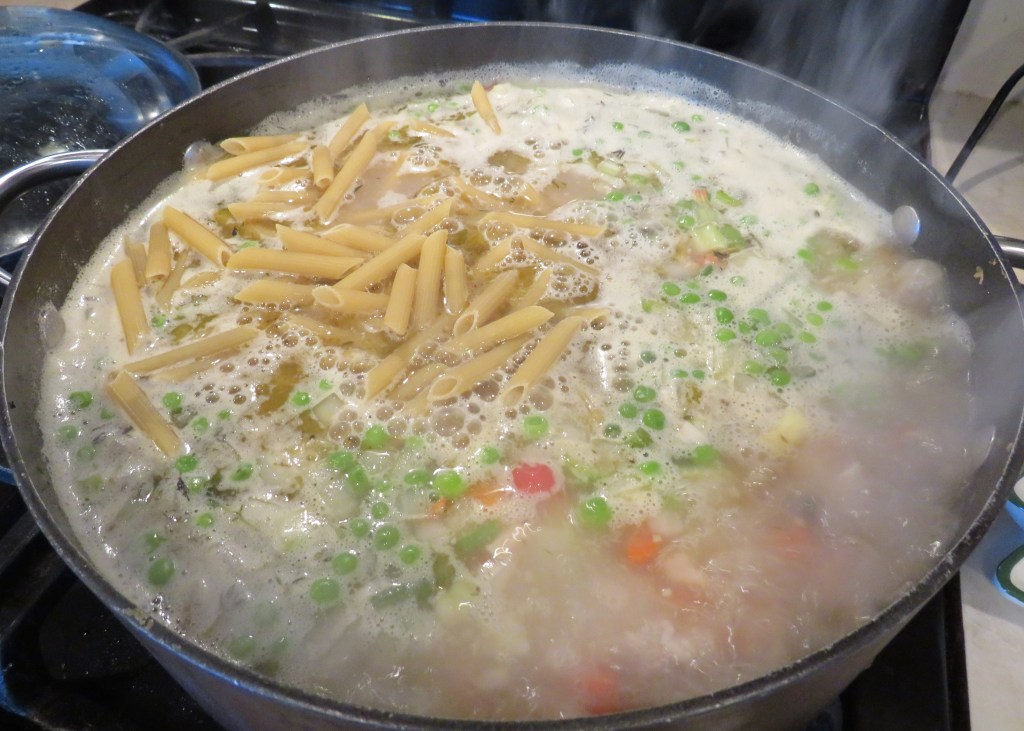
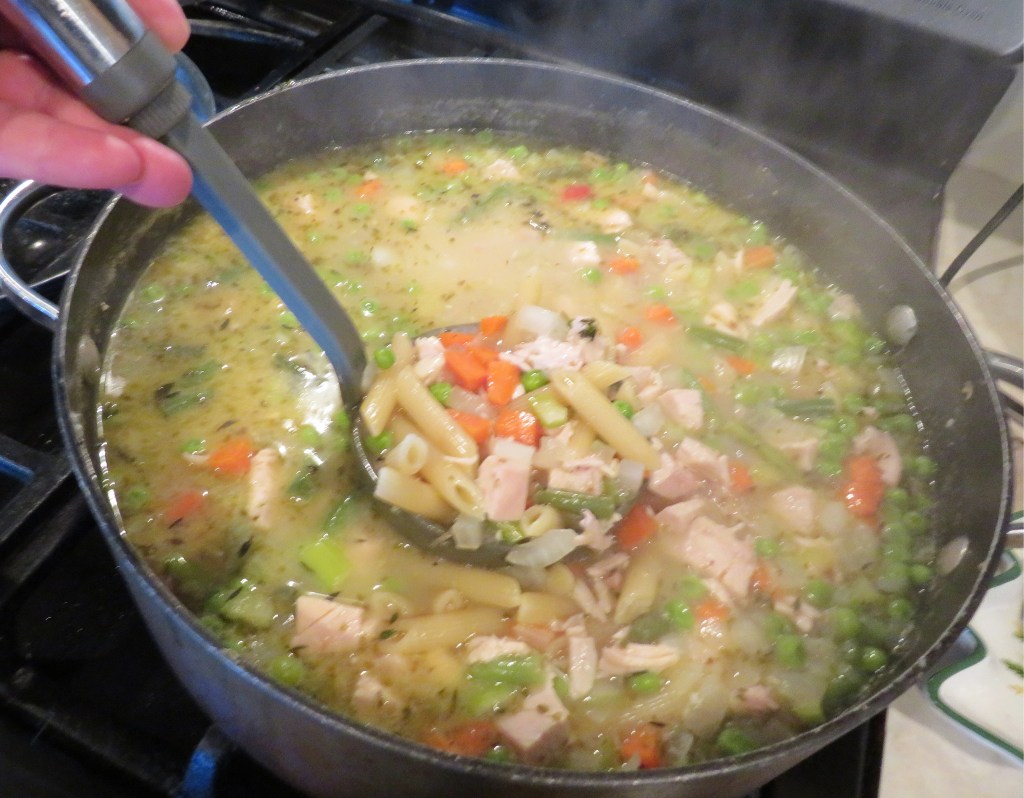
The cold weather means it is also time for some hot soup to warm us up from the inside out. I made a big pot of chicken soup. Chicken Soup Weather I told Larry to pick whatever pasta he wanted and he chose penne. Penne pasta would not have been my first choice, but it worked out fine. The soup just hit the spot too.
Chicken Soup
This soup was just a basic chicken soup. Nothing fancy, just pure, simple goodness.
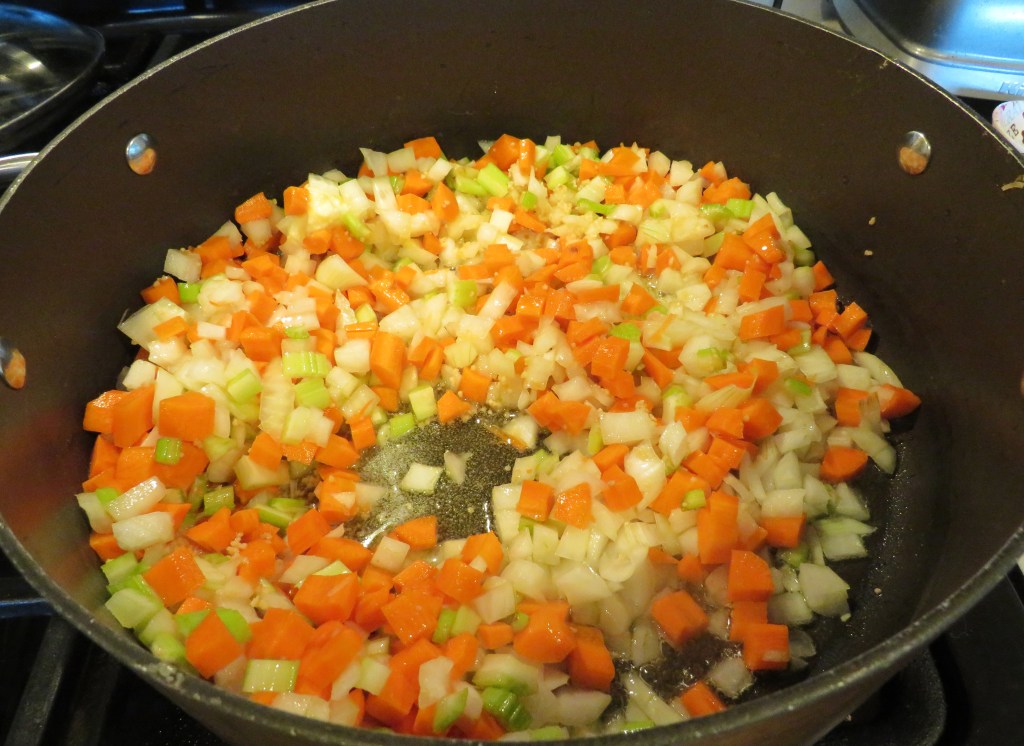
I cooked my carrots, celery and onions for about 5 minutes in hot oil and butter.
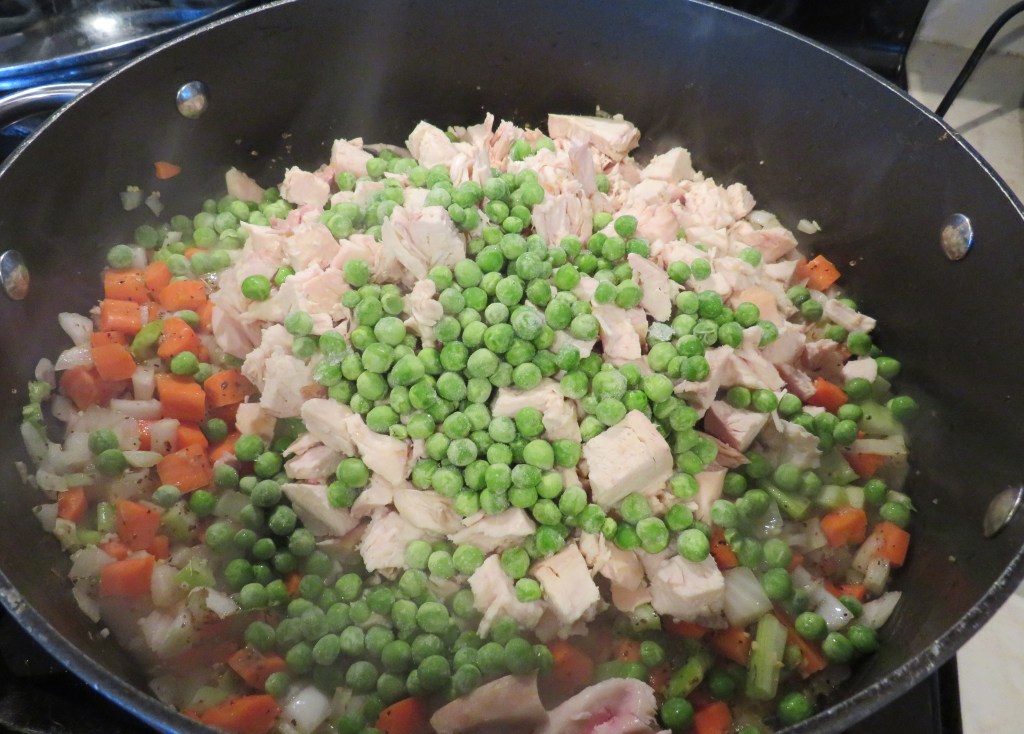
Then I added my cubed chicken, peas, seasonings, and chicken stock.
Once the soup was boiling, I added the pasta, and let it cook until the pasta was cooked, about 8 minutes.
When everything was done, it was time to serve it up and enjoy. Eat it while the soup is still hot. 🙂
Have a great day and make everyday great. Stay safe and stay well. Happy New Year. May 2026 be filled with health, happiness and prosperity for all.